I’m back. It’s been a long, cold winter here in the moderate climate mid-Atlantic region, and the weather has not been cooperative except for one or two isolated days. We finally got a break today, so I took advantage of the clear skies and moderate temps.
Back in December I reported glowingly about Hydrocoat. I am still impressed with it, but have moderated my praise slightly. I prepped the boat for paint today and got to take a good look at existing paint. It was in good shape, for the most part. There were a few chips here and there where my preparation must have been less than good, but it was mostly intact. However, the power-washer guy had originally told me there were two barnacles when he washed it. He was obviously exaggerating, as there were certainly more than two. But there weren’t many. Small clusters port and starboard at the bow, and on the leading edge of the rudder. While the barnacles were long gone from power washing, you could see where they had adhered. So the paint’s pretty good – two years of service with little hard growth.
I decided to repaint the hull and not try for three seasons, as I didn’t want to chance having the paint completely fail mid-season and leave me having to scrape the hull often to finish out the year.
I gave the hull a quick sanding, and I’m glad I did. This really smoothed the hull again, and I discovered that the existing paint coating isn’t very thick. It was fairly easy to sand right through to the old epoxy paint, which looks to be one of the original layers of paint laid down those many years ago. Thin coating is good, as this is an ablative paint, and I don’t want it to build up like it had before I stripped it all off three years ago.
The sanding took about an hour. I was able to remove all of the water marking at the water line, all the collected dried scum where the travel lift straps were, smooth out all the paint and start with a fresh slate. I used my 5 inch random orbital sander connected to the shop vac, wore my respirator. Wish I had a photo of the funny lines on my face from the respirator.
Then I wiped down the hull with water and a sponge, taped the water line, and started to paint. Painting took longer than I expected for some reason. Amazingly, I used less than a gallon of paint. I guess the paint goes quite a bit farther with a smooth hull. There was about a pint of paint left for painting the keel bottom and under the jack stand pads.
Another nice thing about Hydrocoat: When you get home, it washed right off with soap and water. Got it in your hair? Two good shampooings and it’s gone. Try that with solvent-based paint!
Showing posts with label paint. Show all posts
Showing posts with label paint. Show all posts
Friday, May 16, 2014
Hydrocoat Reevaluation and Bottom Paint Renewal
I am convinced that sailors are curious. The most curious make investigations and share the results with the rest of us. Rick over on s/v Cay of Sea is one such - he is trying the newly offered water-based bottom paint Hydrocoat. Here's his report of the current status...


Thursday, December 12, 2013
Closet refurbishing
Out there aboard s/v Jana, Janna tackles refurbishing one of the closets. It's a bigger job than you might expect...
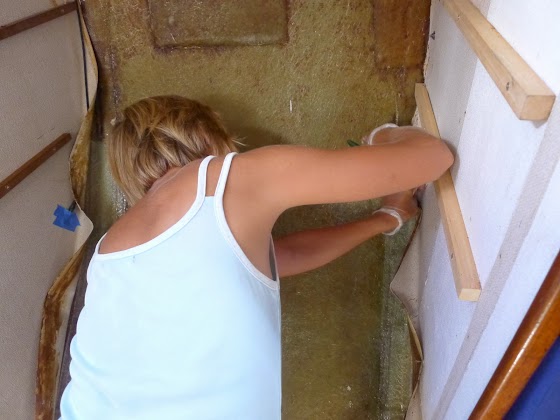
We are back in the working mode, getting up at dawn (round 6 am) and going to bed soon after 9 pm, exhausted but happy. We sleep so soundly these days, that often we don’t even hear the raindrops pounding on our deck. We sand, we glue, we paint and Janna slowly but surely undergoes a cosmetic metamorphosis. It’s amazing what a huge difference a paintbrush and a tin of paint can make.
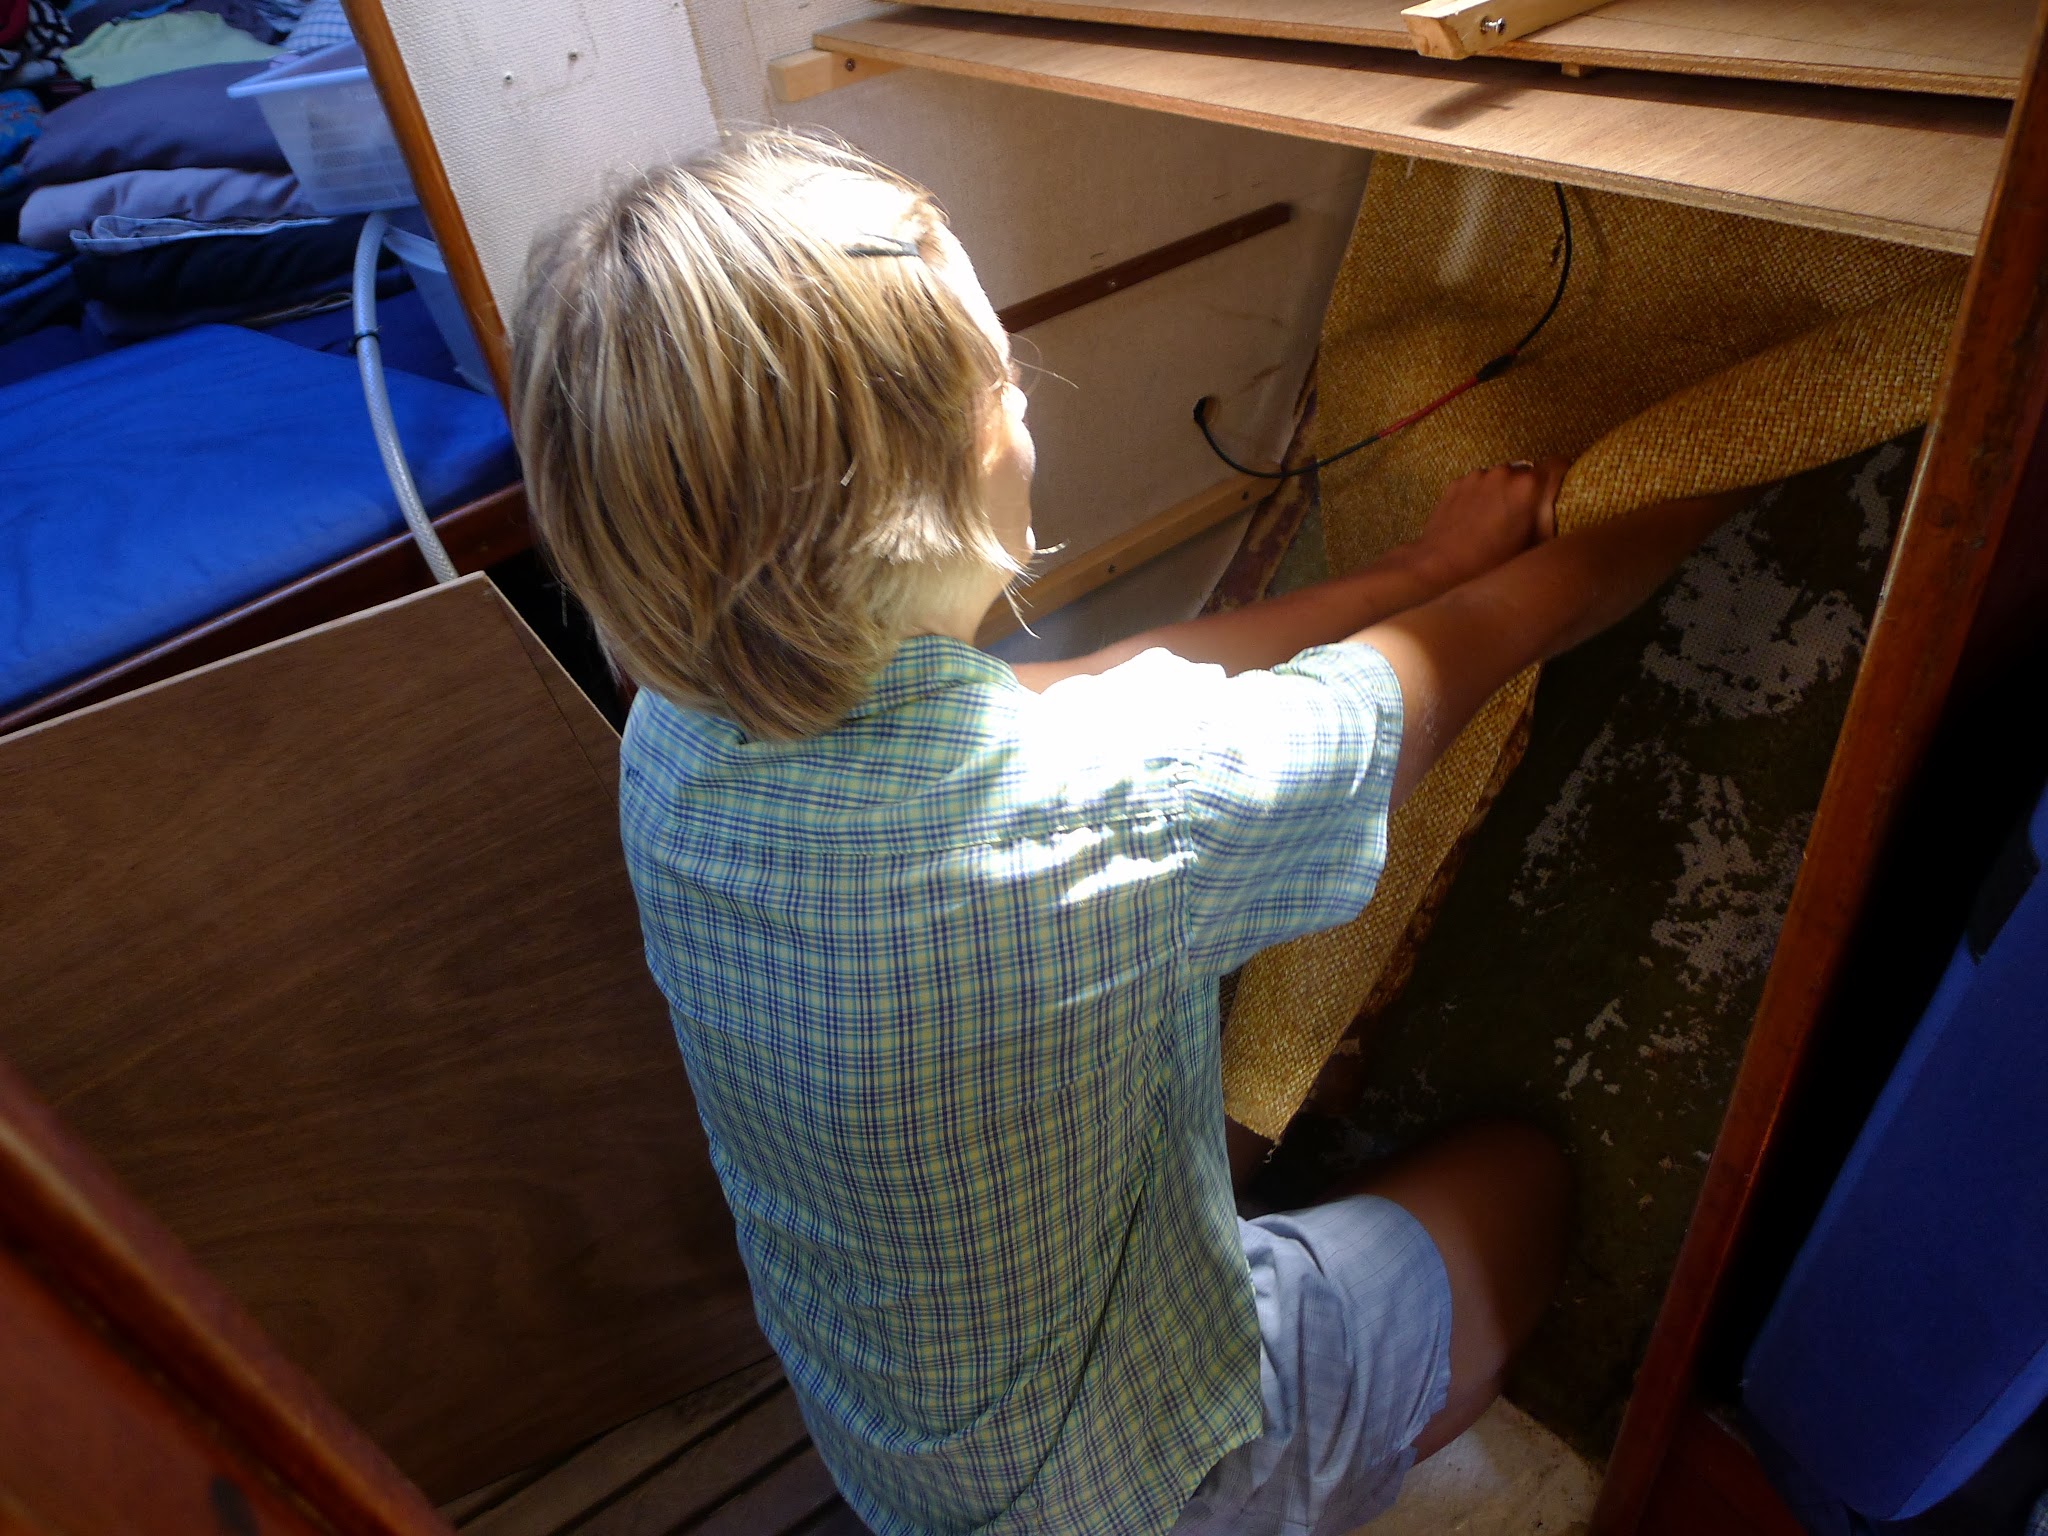
After the successful painting project in the V-berth area, we decided to continue with the “closet”. First of all we moved all our cloths and other stuff stored in the previous head area on the V-berth, disassembled the closet shelves and unscrewed all the other components like handrails, fire extinguisher etc. Sounds easy enough, but only this part took me the whole afternoon.
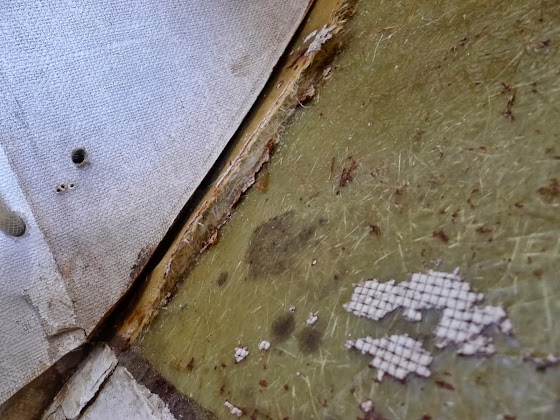
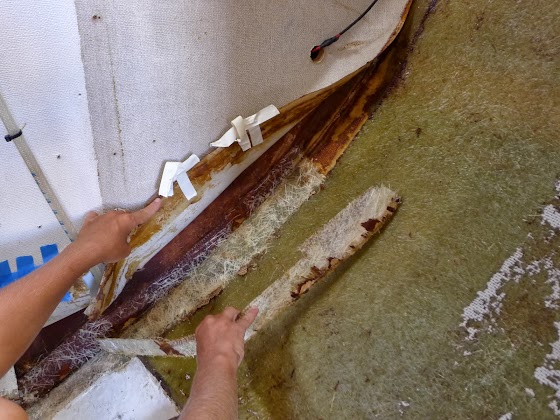
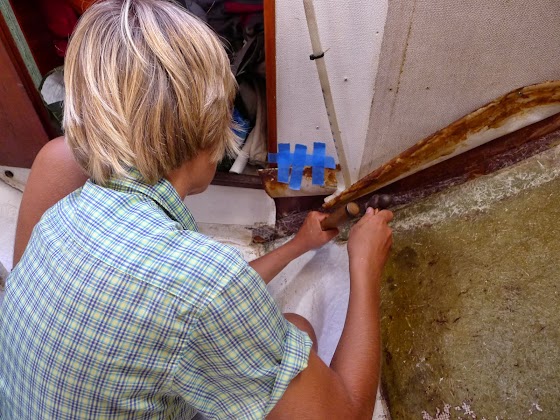
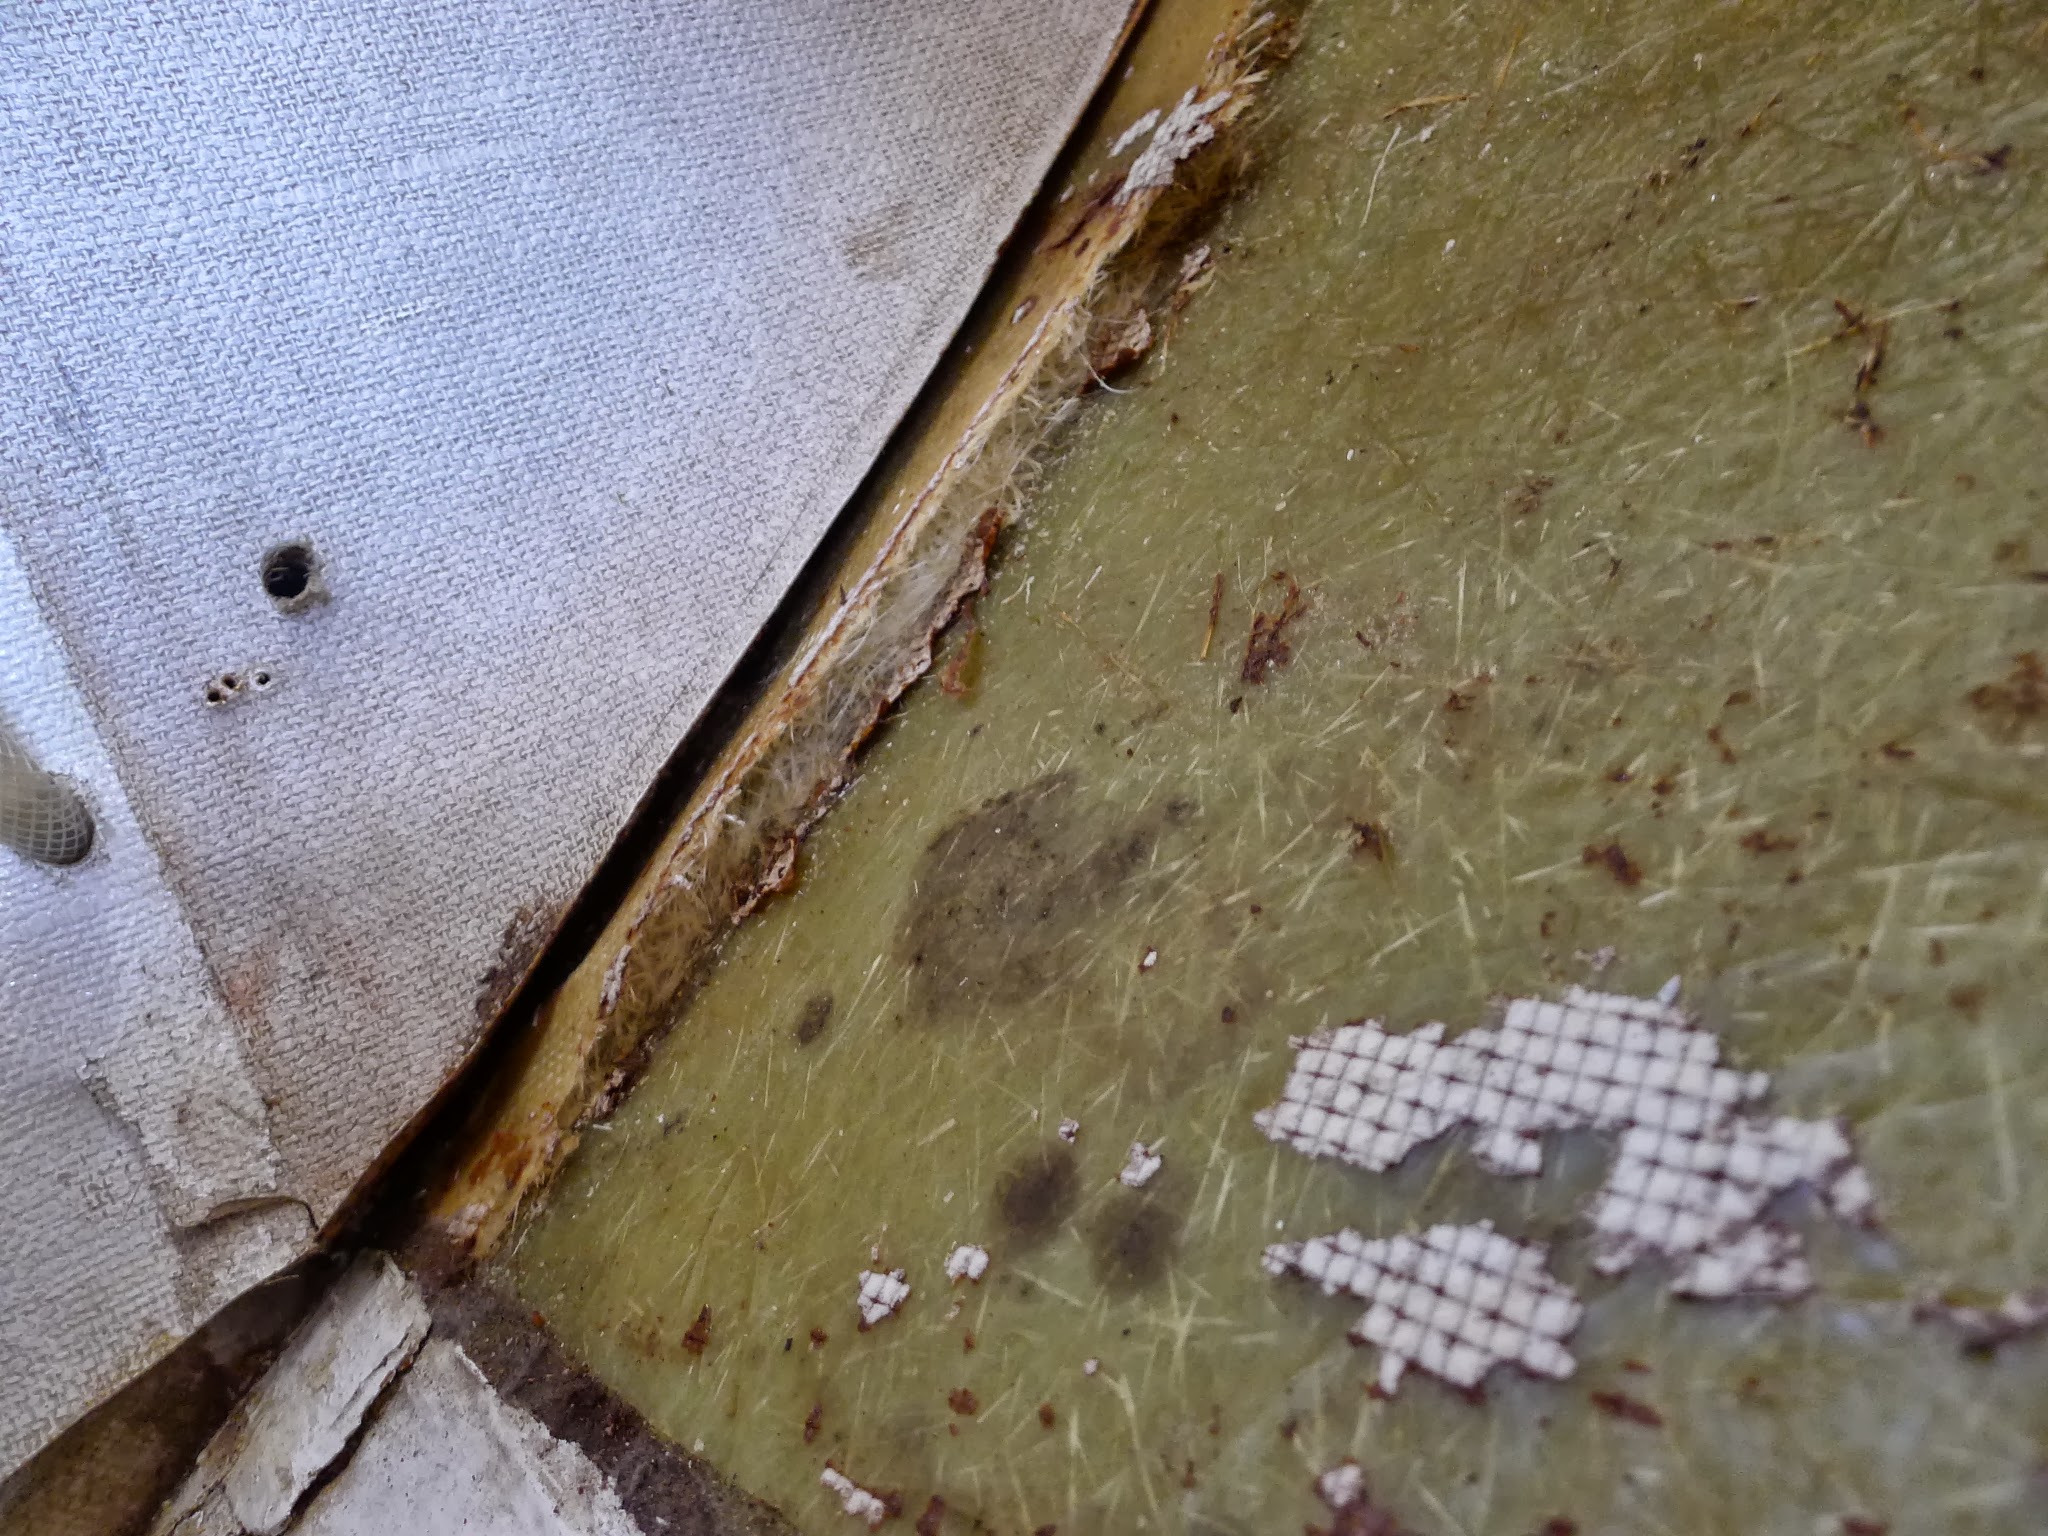
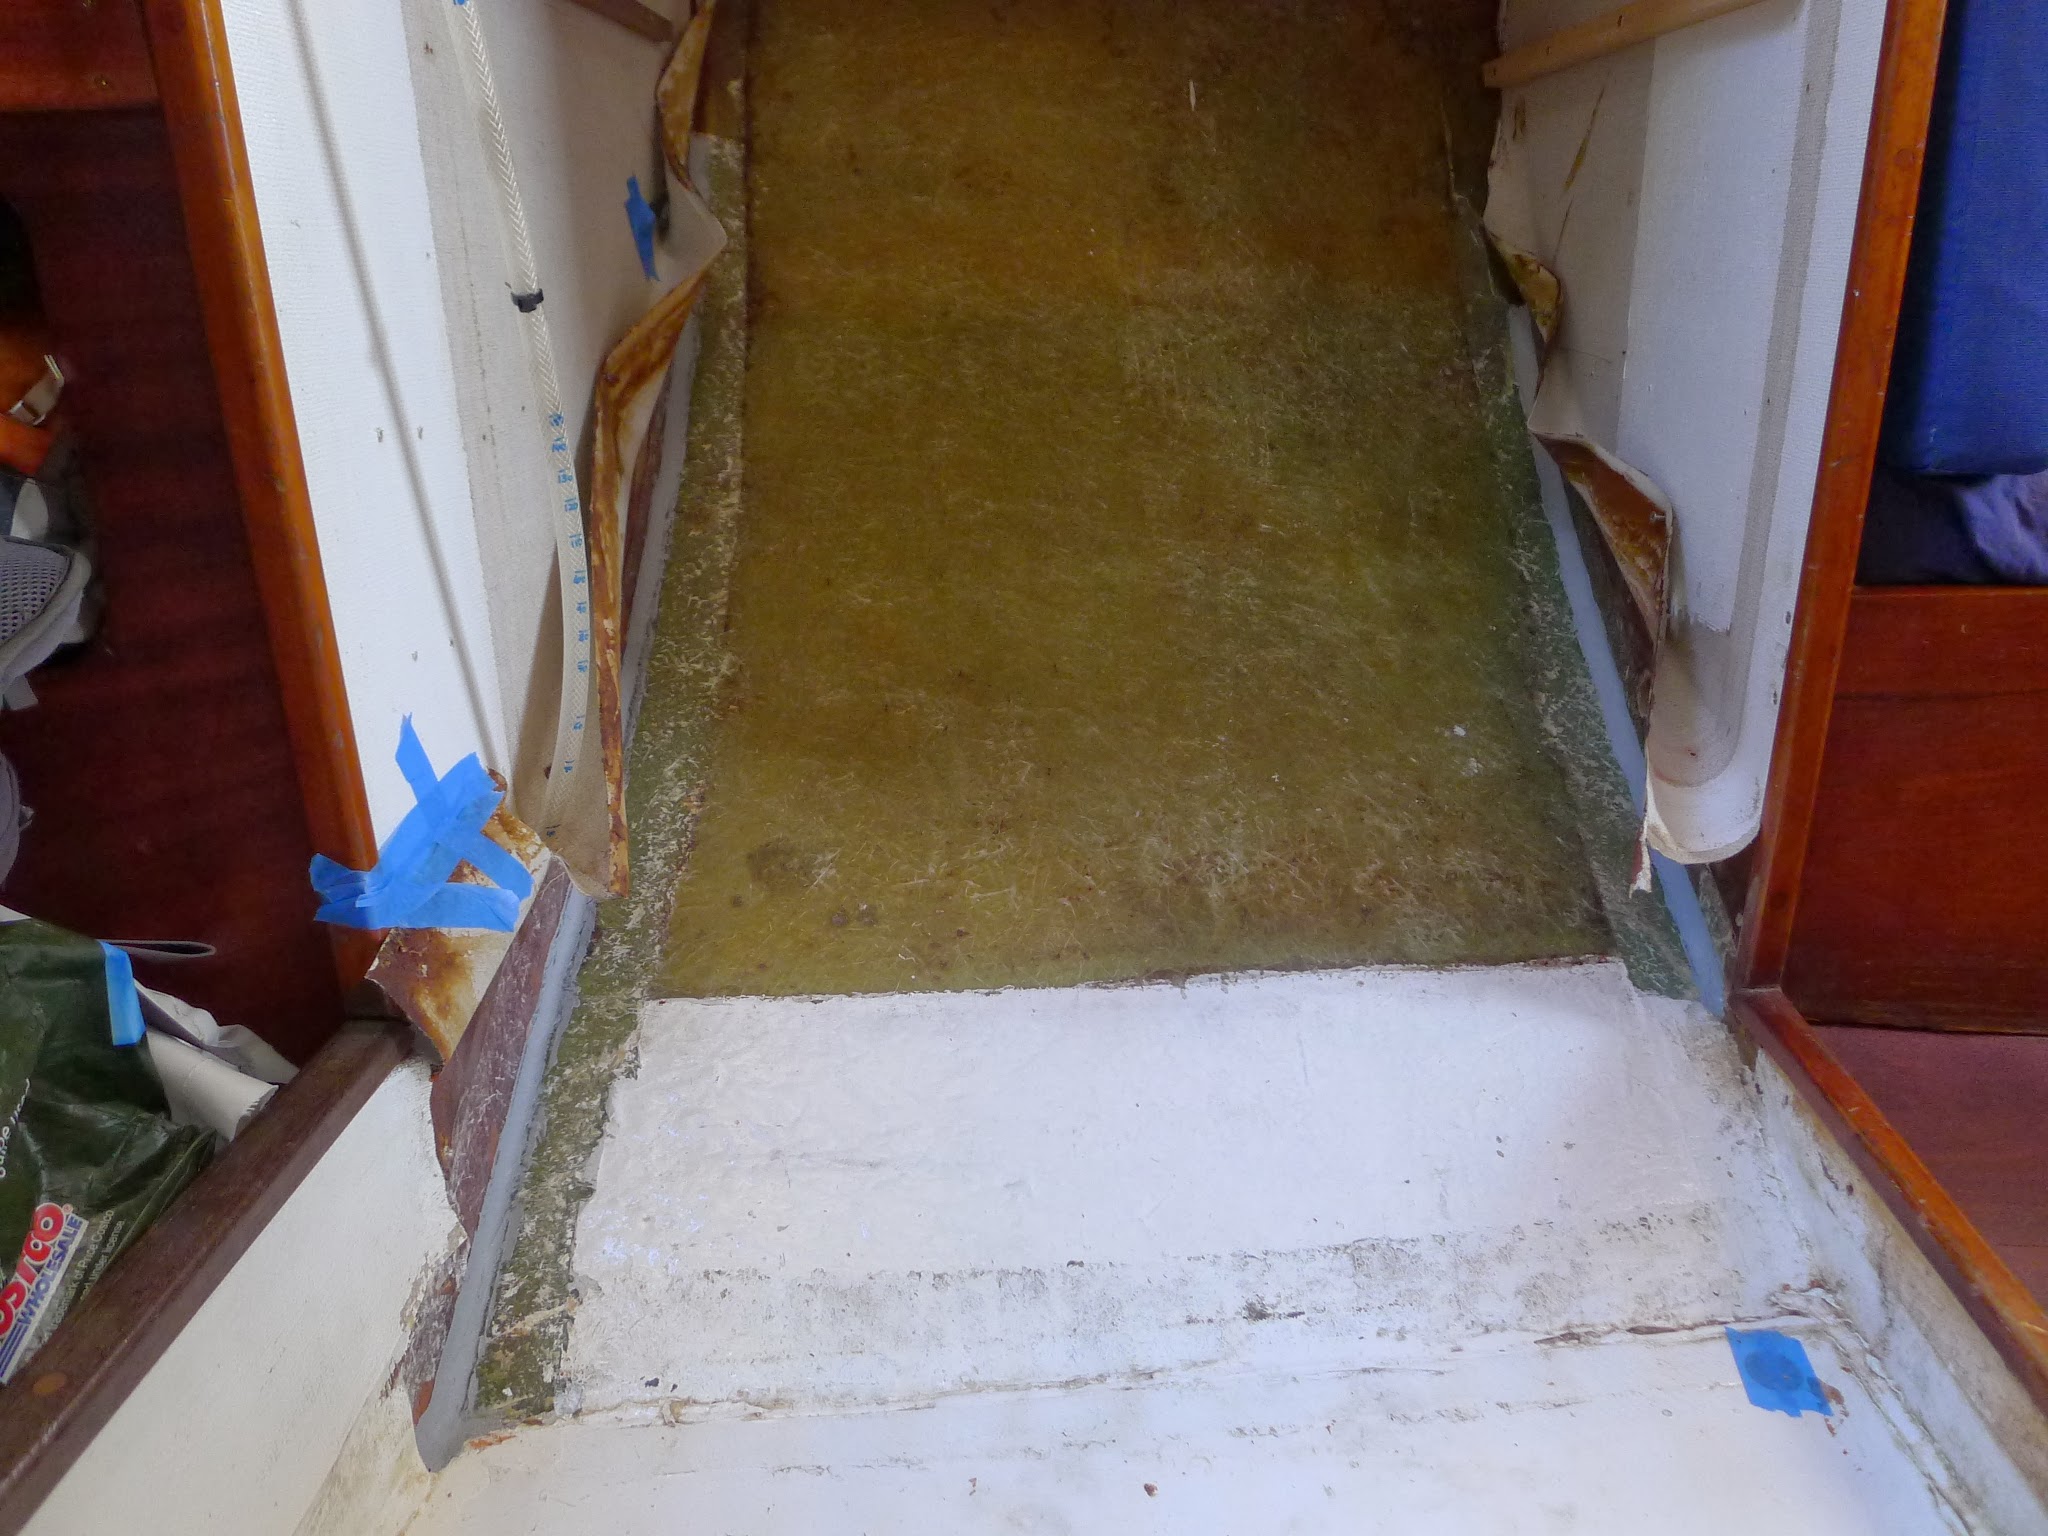
It’s been some time since we noticed that one of the tabbings (fiberglass joints) that bond the fiberglass hull with the wooden bulkheads came unstuck. Since we were about to paint the whole area, we decided now was the right time to repair it. Of course, once we removed all the stuff from the closet, we found out that out of the four tabbings in the closet, we had to replace not one but three of them! So once again out went the chisel and hammer, the old tabbings were removed, everything sanded and just before glassing in the new tabbings, we smoothed the sharp edges by making a fillet with epoxy filler.

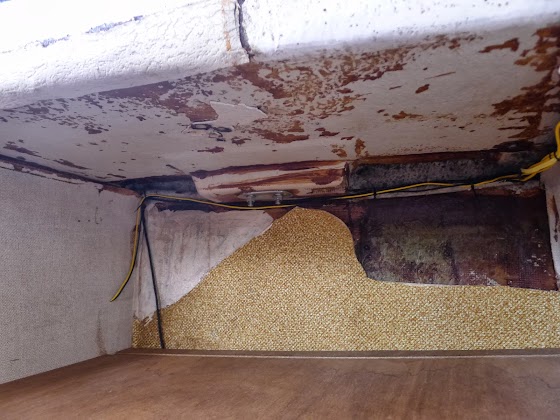
A proper decorating job couldn’t be done without ripping off the rest of the old shabby vinyl wallpaper. As long as it was hidden deep inside the closet and behind the piles of our cloths, we could happily ignore its existence. Yet once we uncovered the filthy stuff, we couldn’t but wonder how on earth did we manage to live with something like this inside our boat for such a long time…

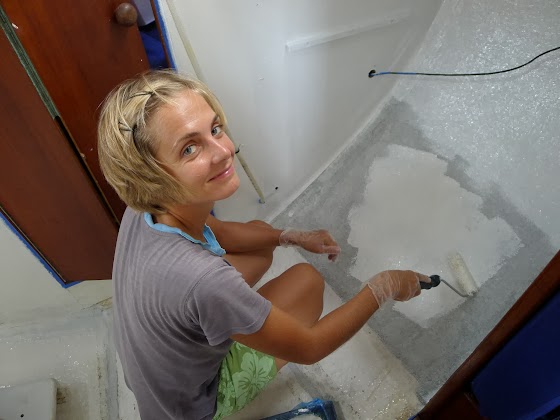
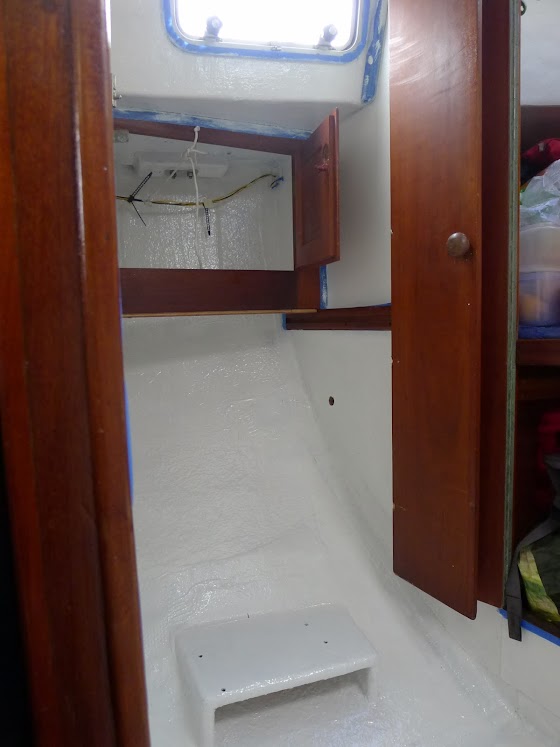
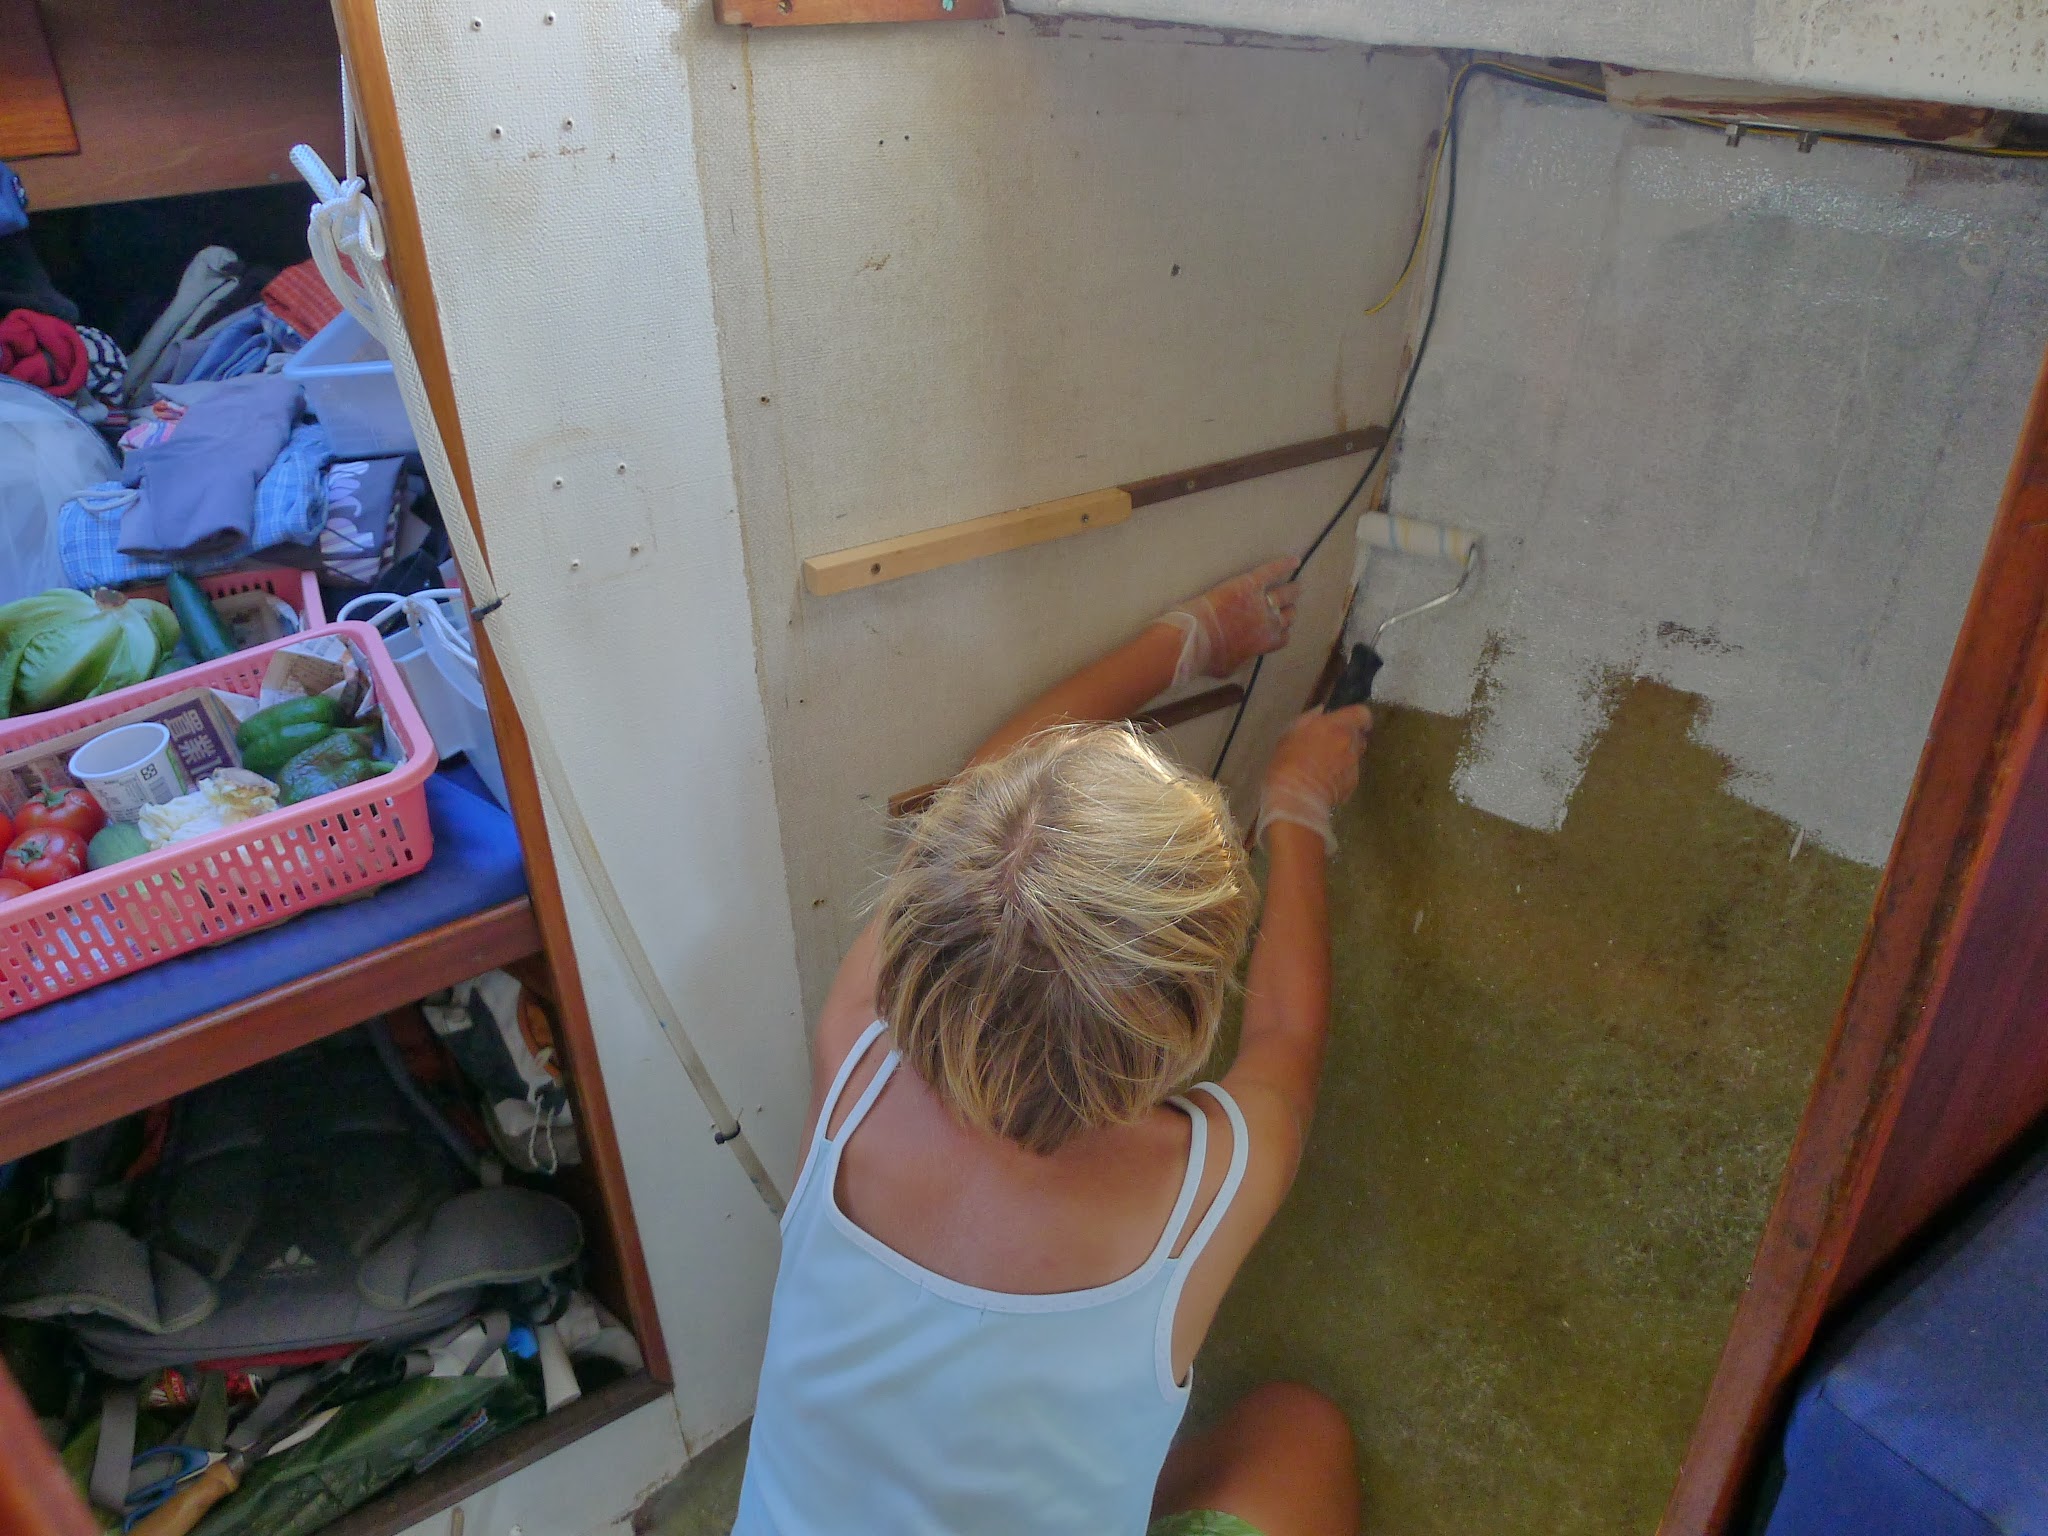
Once the retabbing was done – we used six layers of fiberglass cloth for each tabbing and ended up using almost one liter of epoxy glue – I glued back the wallpaper on the bulkheads that came unstuck or was removed because of the repairs and then I covered the rest of the furniture and wooden bits, wires, portlights etc. with masking tape. After five days of work we were finally ready for painting. Now we must wait till the paint is hard enough so that we can put everything back together.

Last but not least, a quick update regarding our engine mounts. Though it’s been at least three days since they arrived back in Malaysia, they’re still stuck on the peninsula somewhere near Kuala Lumpur. The latest update on the UPS website says: The address is in a remote area and deliveries are not made daily / Delivery rescheduled. We can only guess when exactly will the mounts arrive here…
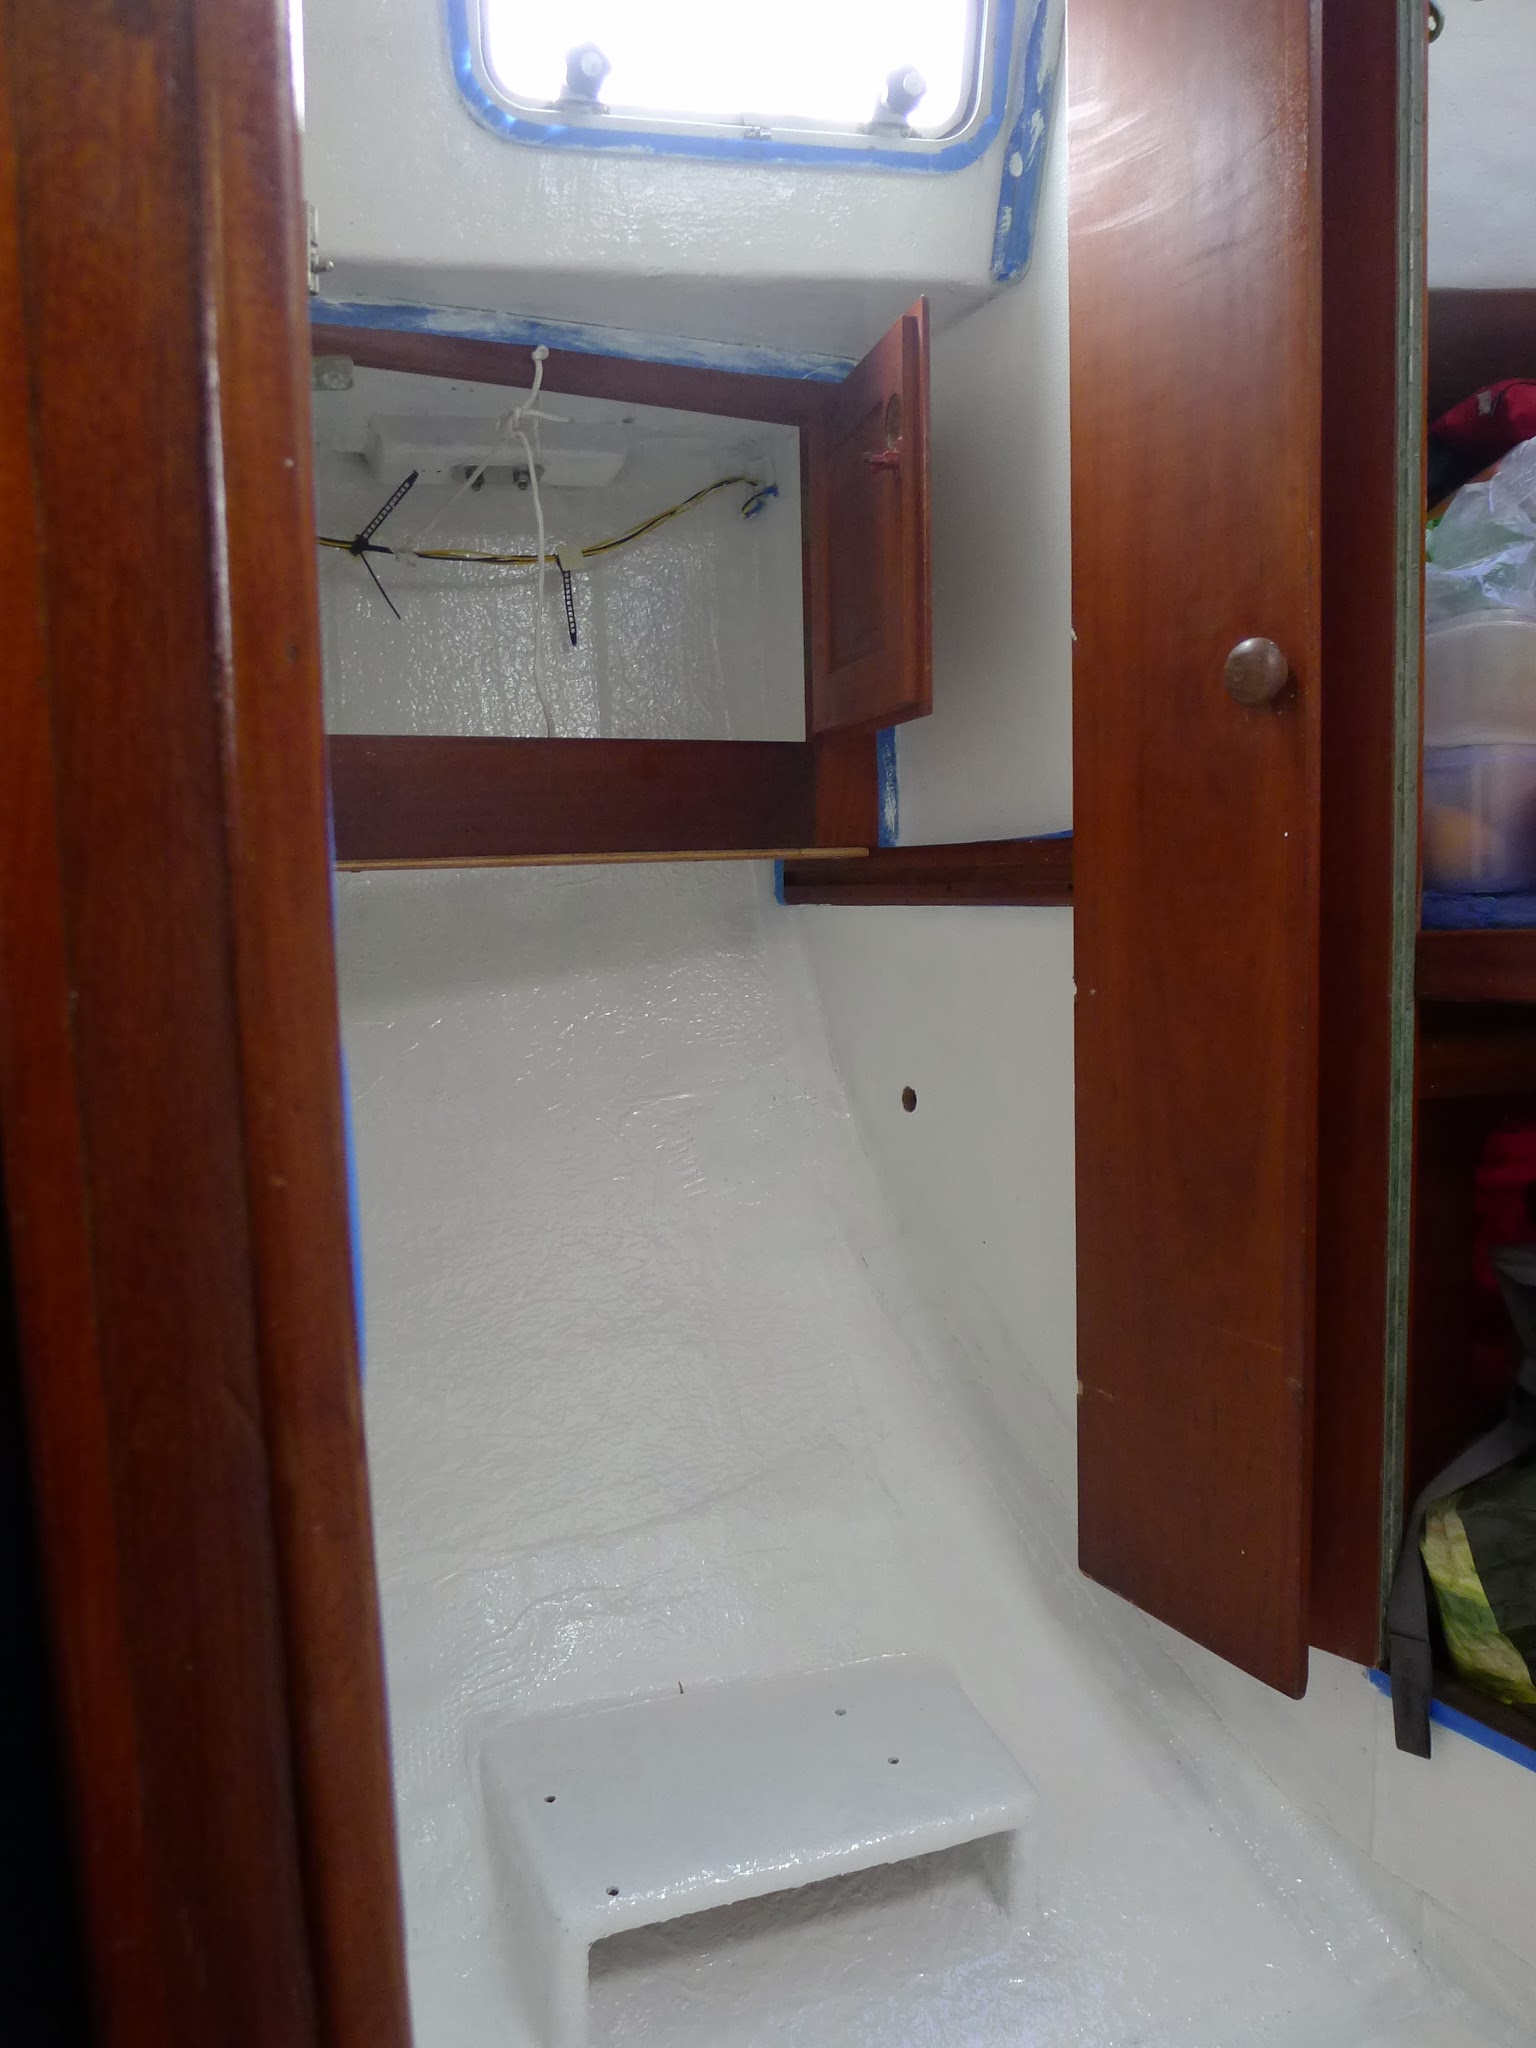
What a contrast! The above photo is actually a tiny part of the already painted ceiling in the closet and still unpainted one in the main saloon. Can’t wait to paint the rest of the boat!


Thursday, November 21, 2013
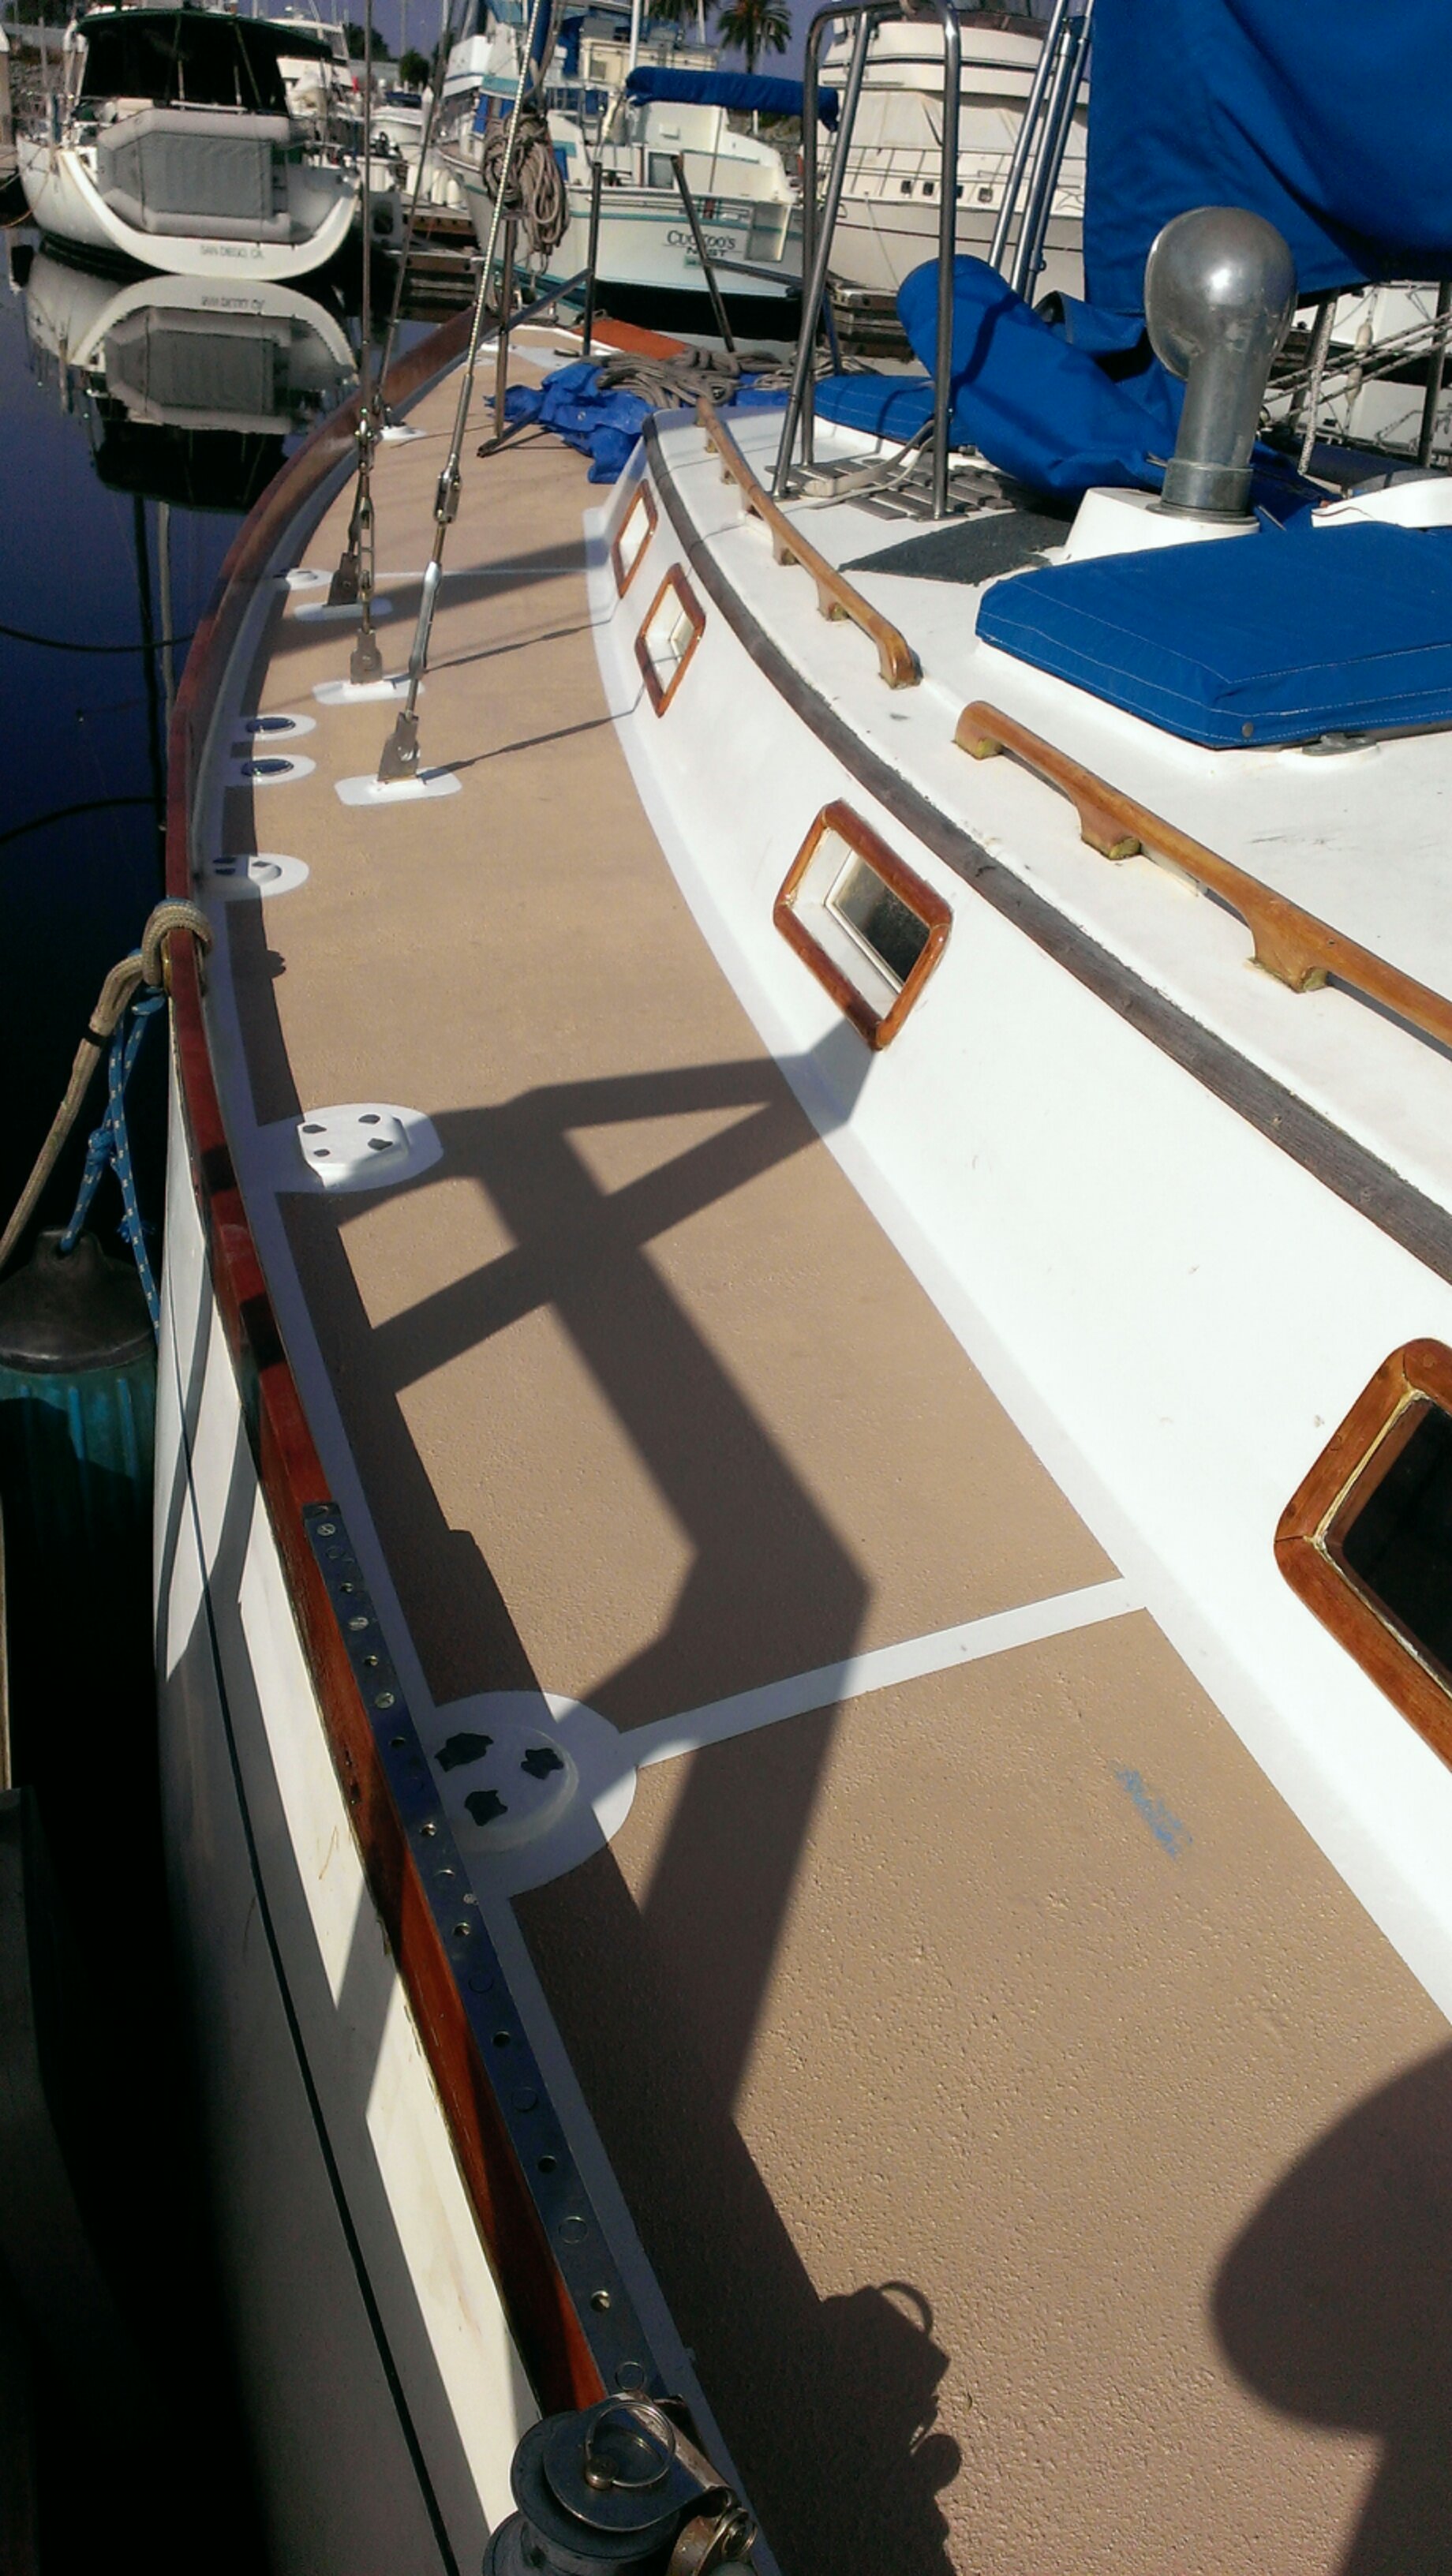
New Nonskid!
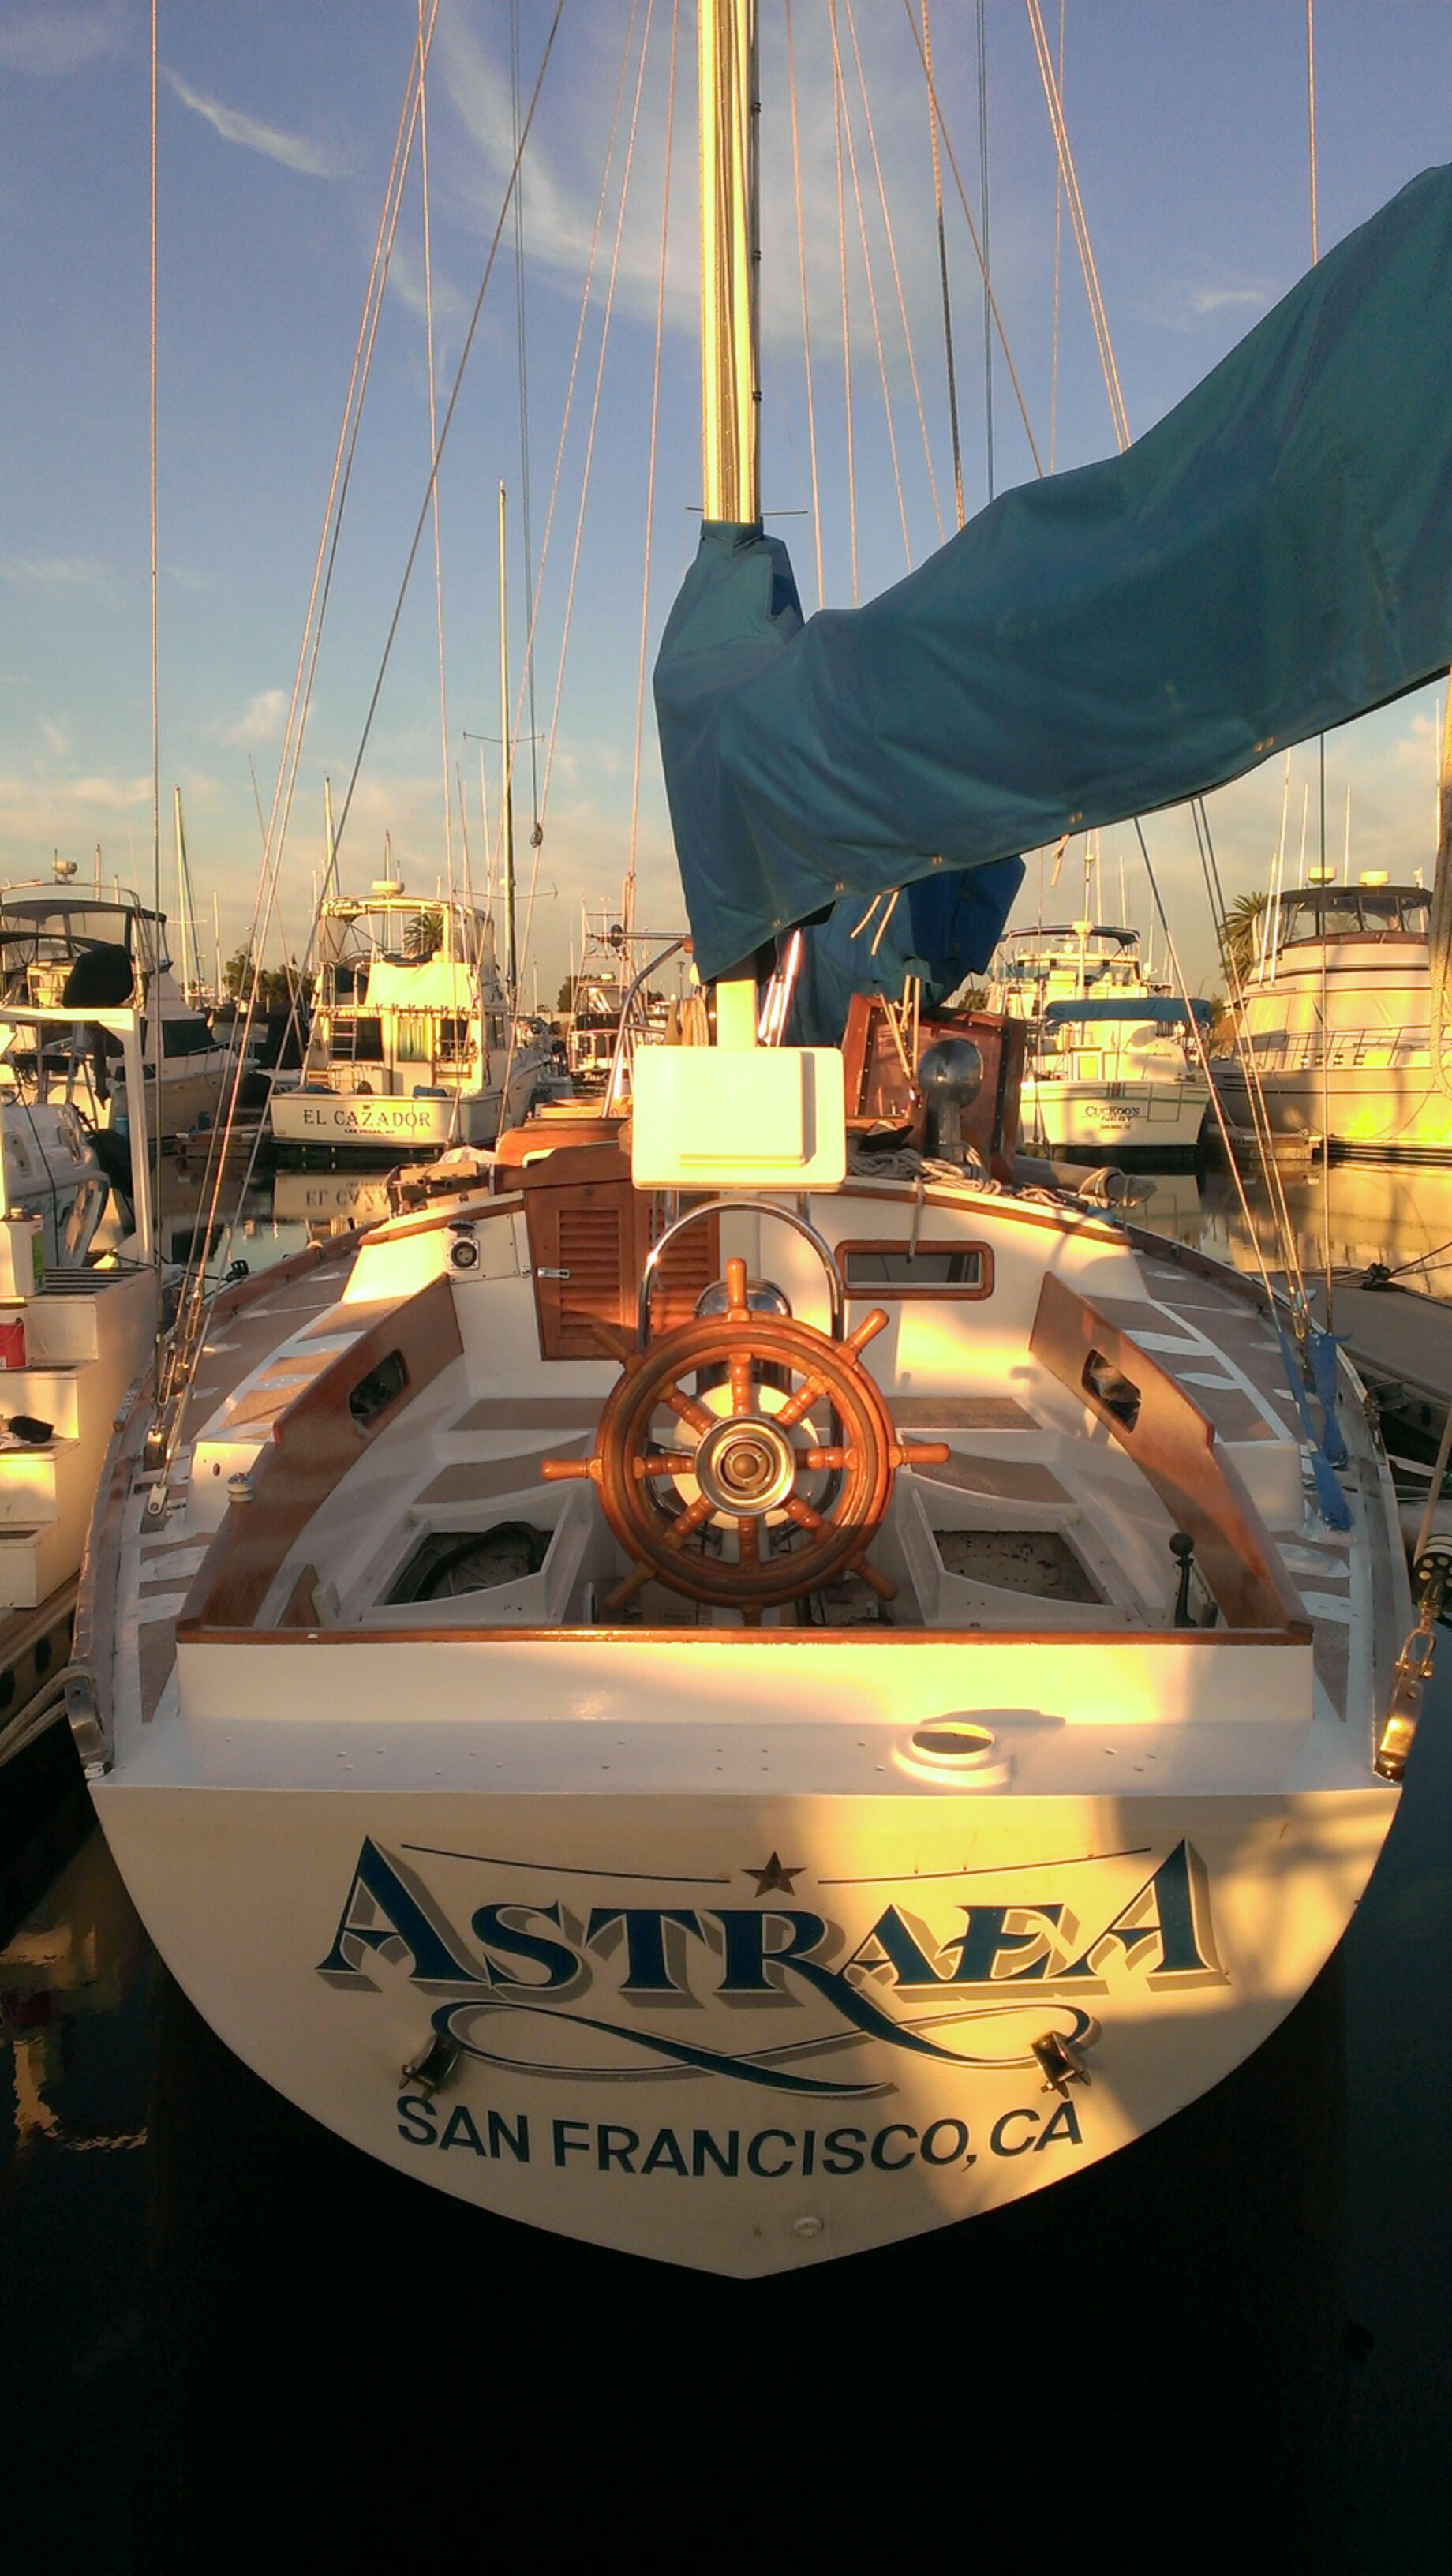
Nate and Natalie aboard their Cheoy Lee 41 s/v Astrea have renewed the non-skid on their deck. It came out great! Here's how they did it:
Astraea finally has a new look. After two coats of Interlux Prekote primer and two coats of Interlux Brightside paint. We did one coat each day. The primer covered the entire deck and the paint went down just around the deck edges. In between coats we sanded with 220 grit and cleaned up with Interlux 333 brushing liquid.
We rolled most of the area and only brushed in the areas behind hardware and corners. We didnt roll and tip because the results from just rolling were really good, there were very few bubbles. While working on the deck preparation and painting we wore clean socks to keep dirt off the decks.
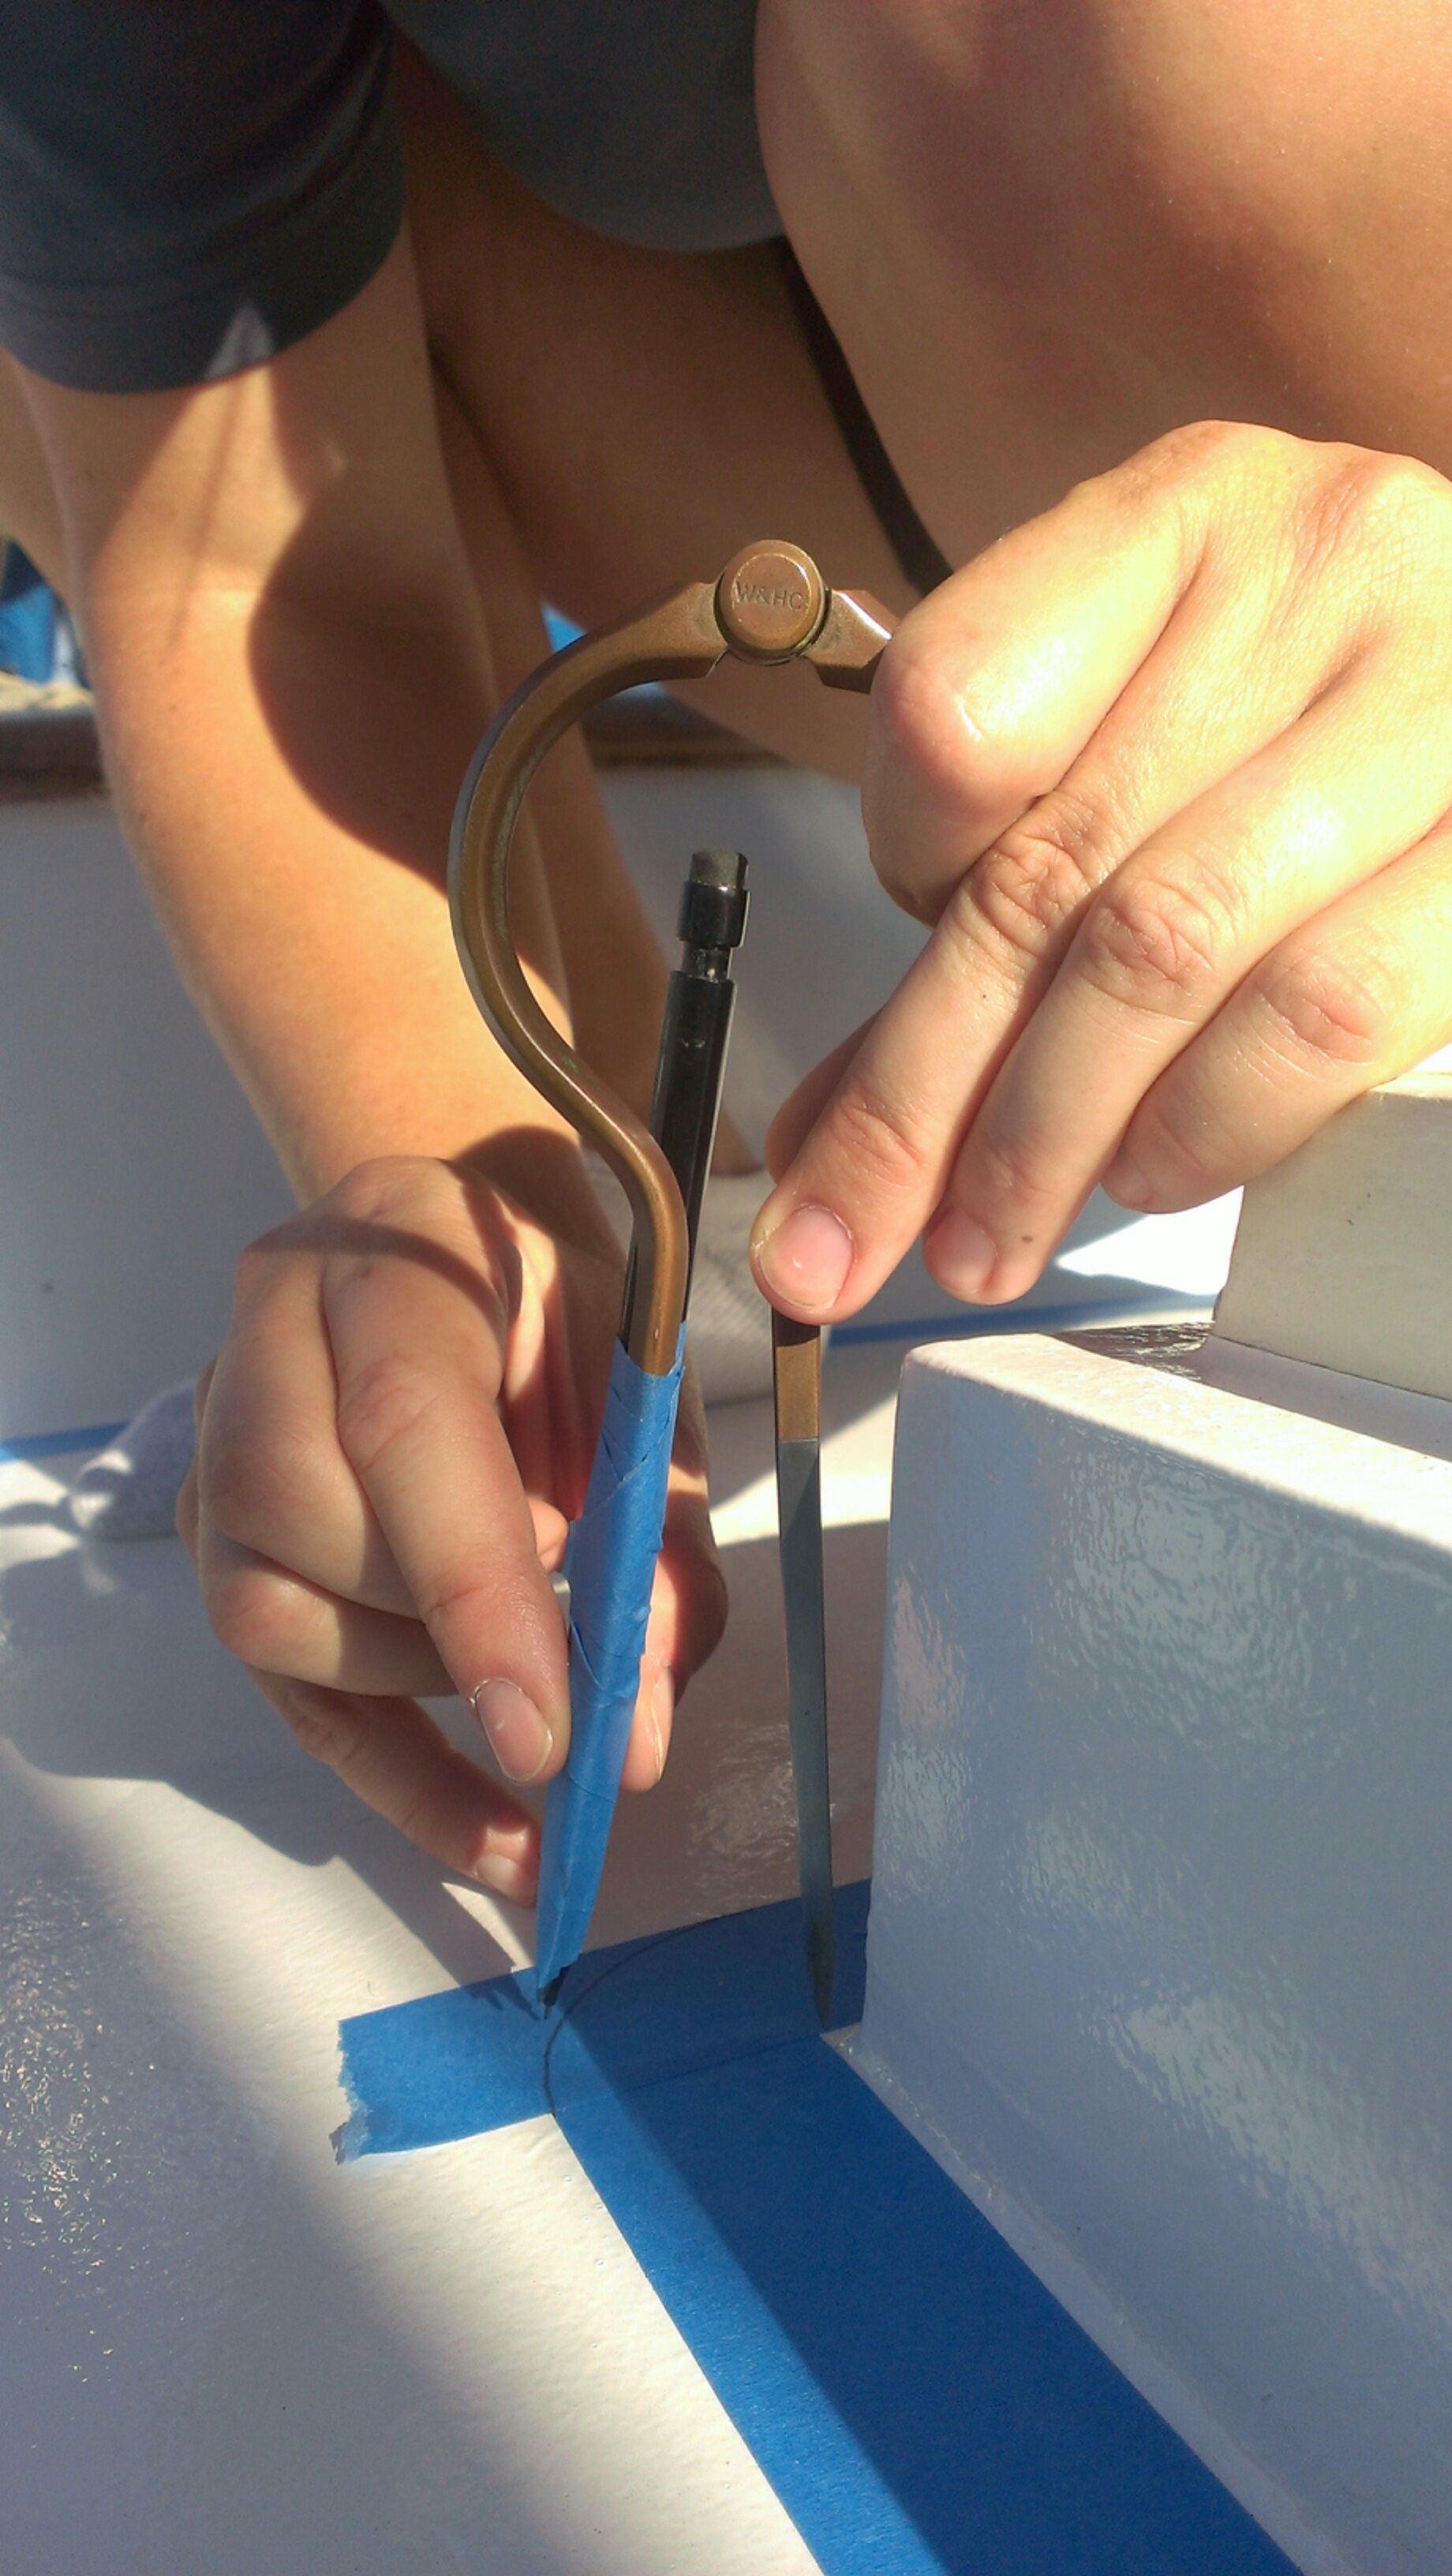
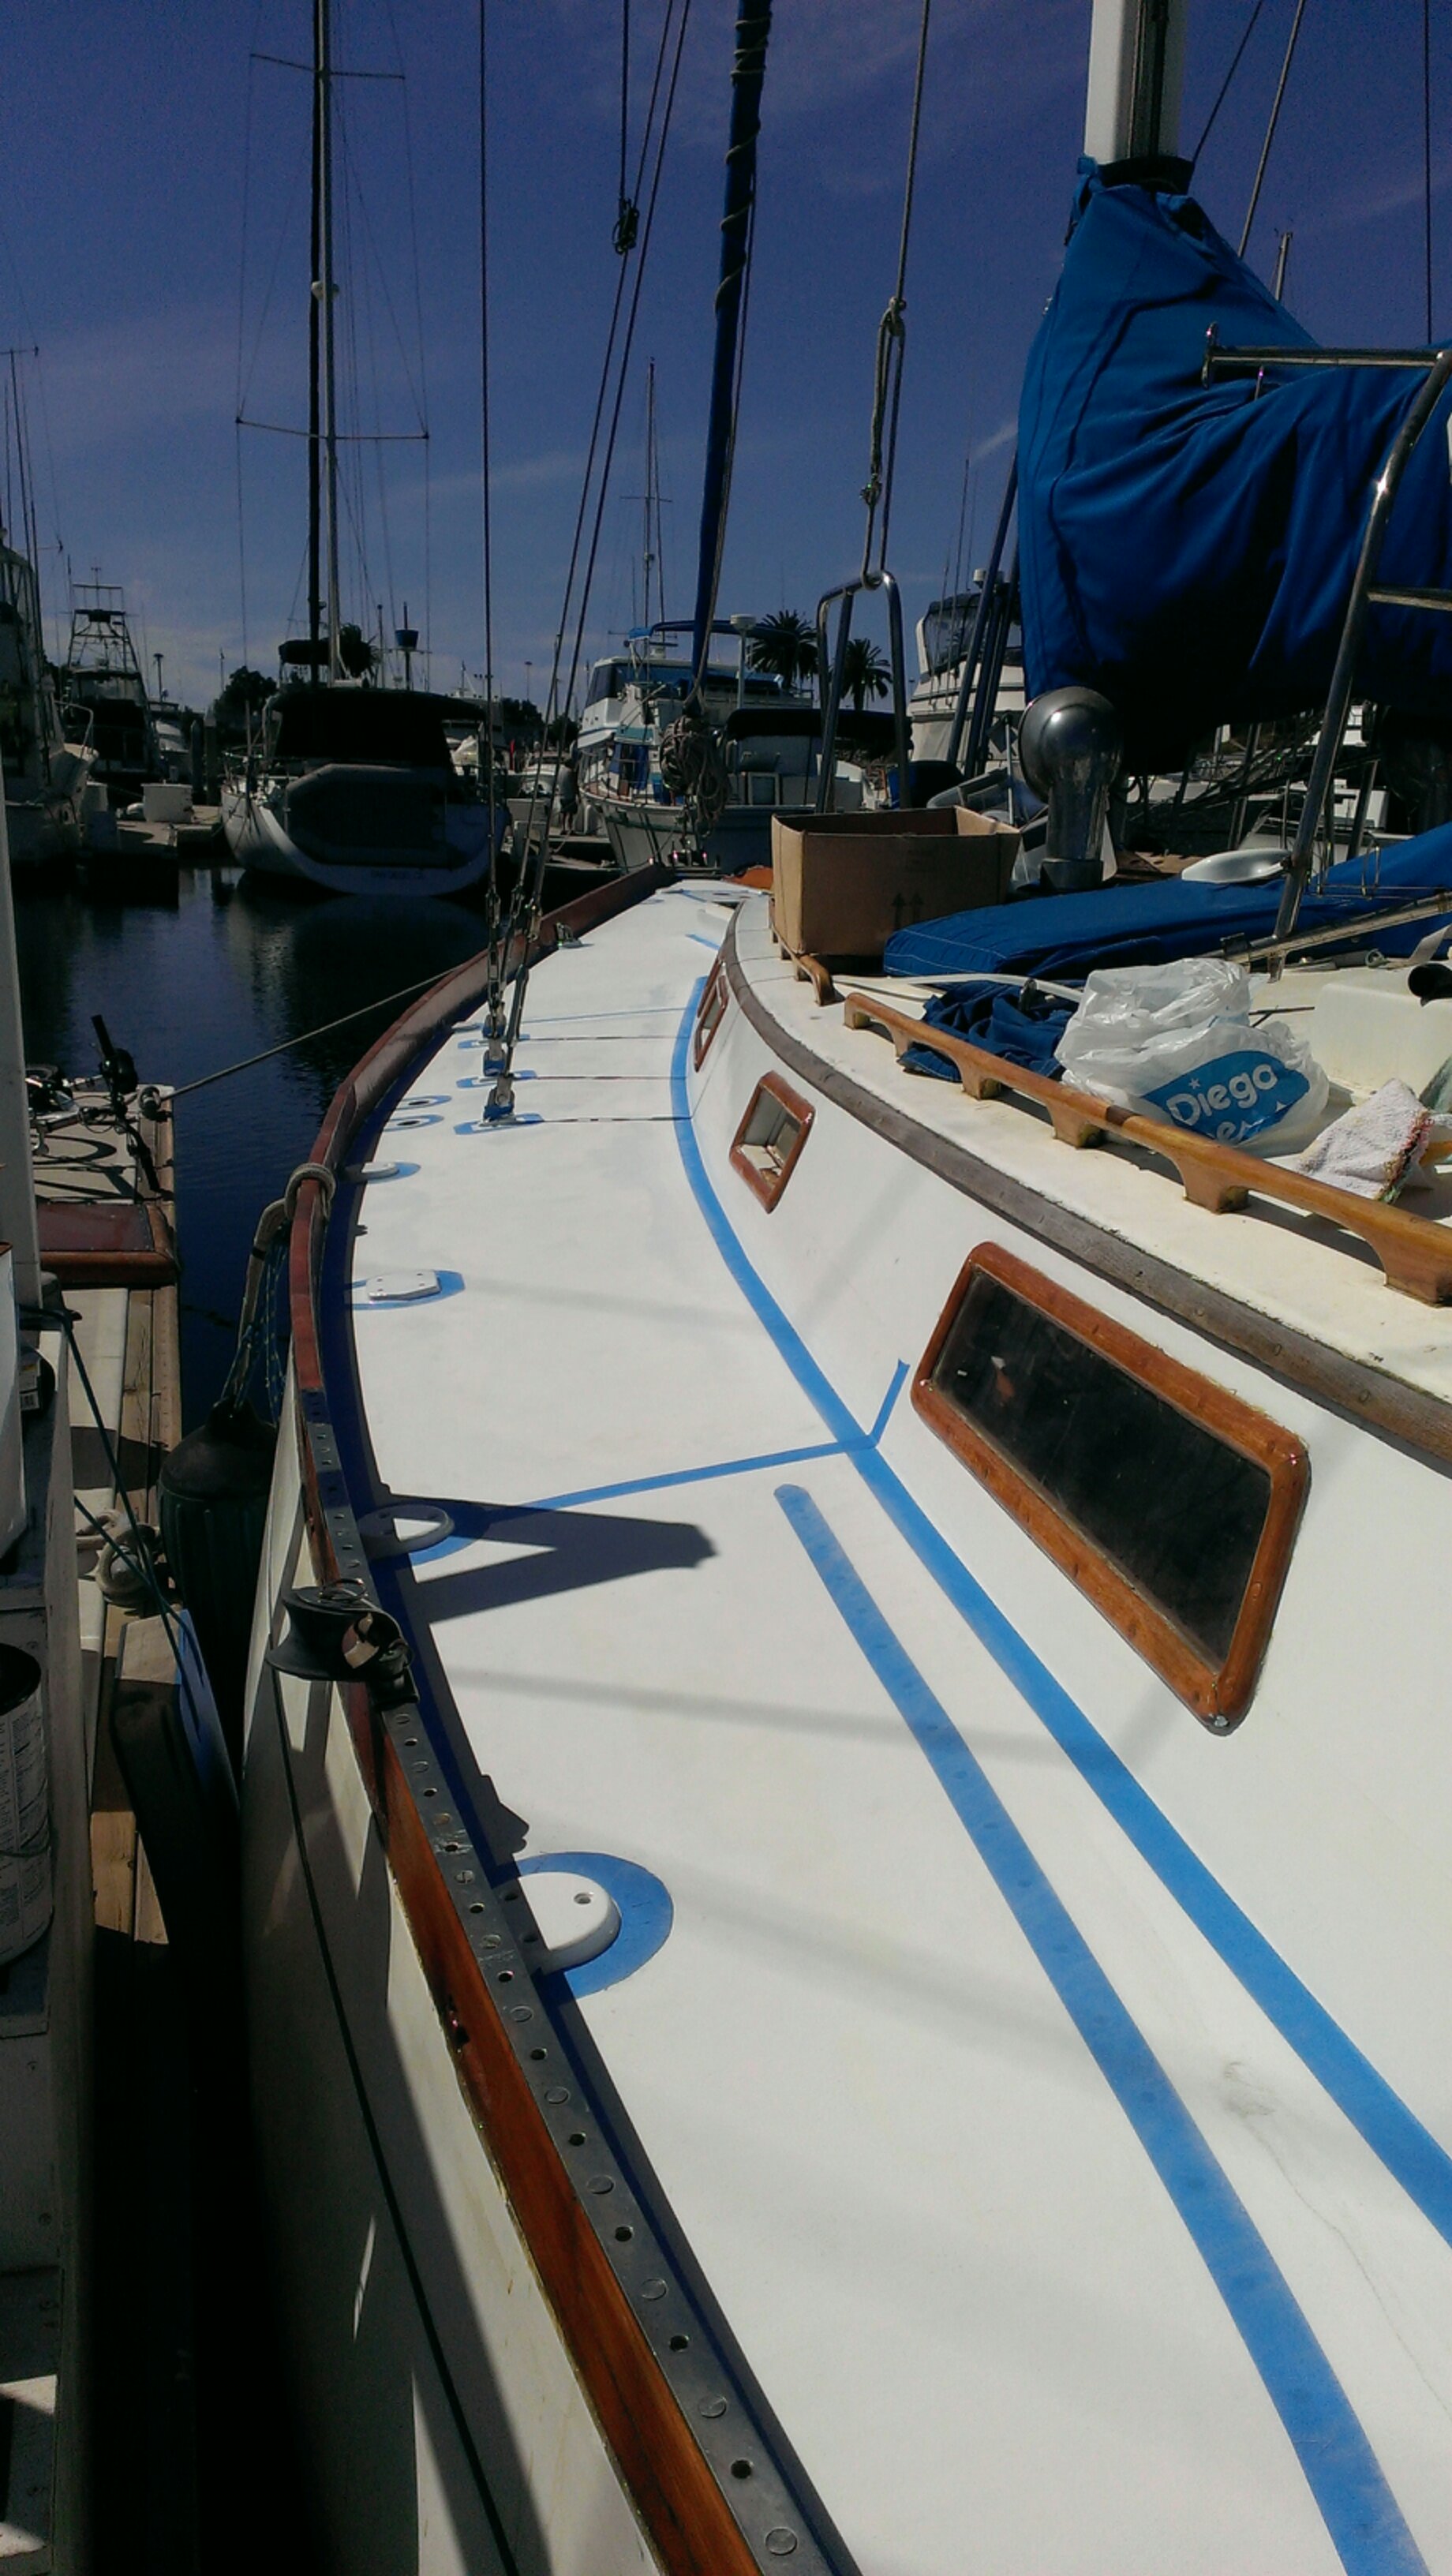
The day after our last coat of paint we taped the area around the deck edges and hardware we didn’t want nonskid to go. It took us about 8 man hours to tape the entire deck. We made all the edges the same width of a roll of blue 3M painters tape. The straight edges were easy to tape, just put the tape against the edge and roll the tape. Natalie used a compass to draw some easy curves, but it didn’t work for everything. She got creative and used kitchen tongs holding a pencil for curves around the deck house and hatches where a compass didn’t work. We over taped and traced the width of a roll of tape then cut away the excess using an exacto knife and peeled up the tape.
Natalie taped and drew the curved lines around hardware
Using a compass to draw a curve on the tape
Natalie using the tongs to hold a pencil and draw a curve
Cutting excess tape from the deck
Side decks with the tape removed
We sanded the deck with 100 grit sandpaper and cleaned up the deck twice with rags wetted with Industrial Maintenance Coating Thinner. The directions for the Durabak nonskid calls for Xylene, but Xylene isn’t available in California. Industrial Maintenance Coating Thinner is OK to use in place of Xylene.
Finally we were ready roll the nonskid! I opened the first can and mixed it up with our electric drill and a paint mixer and poured it in to a paint pan. I did some test rolling on cardboard to get used to rolling the textured material before rolling on the boat. It took about an hour and a half to cover the decks. I took a break and then rolled the second coat.
That night after the Durabak dried for four hours we could walk on the nonskid and peel up the tape from the edges before it fully cured. The tape came up easily if the Durabak wasn’t too thick. We cleaned up areas where the tape tore with an exact knife. We had some issues with the tape pulling up the white paint underneath where it hadn’t dried completely because we applied the paint too thick. We will touch up those areas later when we finish priming and painting the cockpit locker covers.
We’re so excited that this project is almost finished! It’s been a long six months…now on to re-mounting all the hardware.


Thursday, May 31, 2012
DInghy Build (Part Dos)
Kyle from Of Winds and Water gives us Part II of his stitch 'n glue dinghy build... Paint - wild paint:
(Part I of the series is here.)Okay, here we go: the pictures...
Step two thousand, four hundred and ninety seven: Sea trials. Only one thing left to do. Drop it in the water and see if it floats! Luckily, our first sea trials were not only successful from the floating aspect, but we even managed to stay dry! Up and down the canals, one person or two, we tested that Acrux does exactly what she was intended to do. Float, row, and transport us across the anchorage.
And last but not least, here she is resting on her preferred transport spot. Most of the time on the ICW we'll simply tow her behind, ready for quick deployment once we're at our anchorage for the night. But for crossing larger bodies of water, or just for extra security, this is where she'll rest.


Wednesday, March 2, 2011
A fresh coat of paint

Cleaning is useful, but there is nothing like applying a coat of paint. This small space took only a few minutes, and the result is very gratifying - it looks wonderful.
So this has inspired me. It is time to re-do the cabinet interiors, again.
How are yours?
Subscribe to:
Posts (Atom)


