The lesson here is that a sail’s stitching should be repaired before it becomes a tear in the sailcoth.
I just learned that lesson.
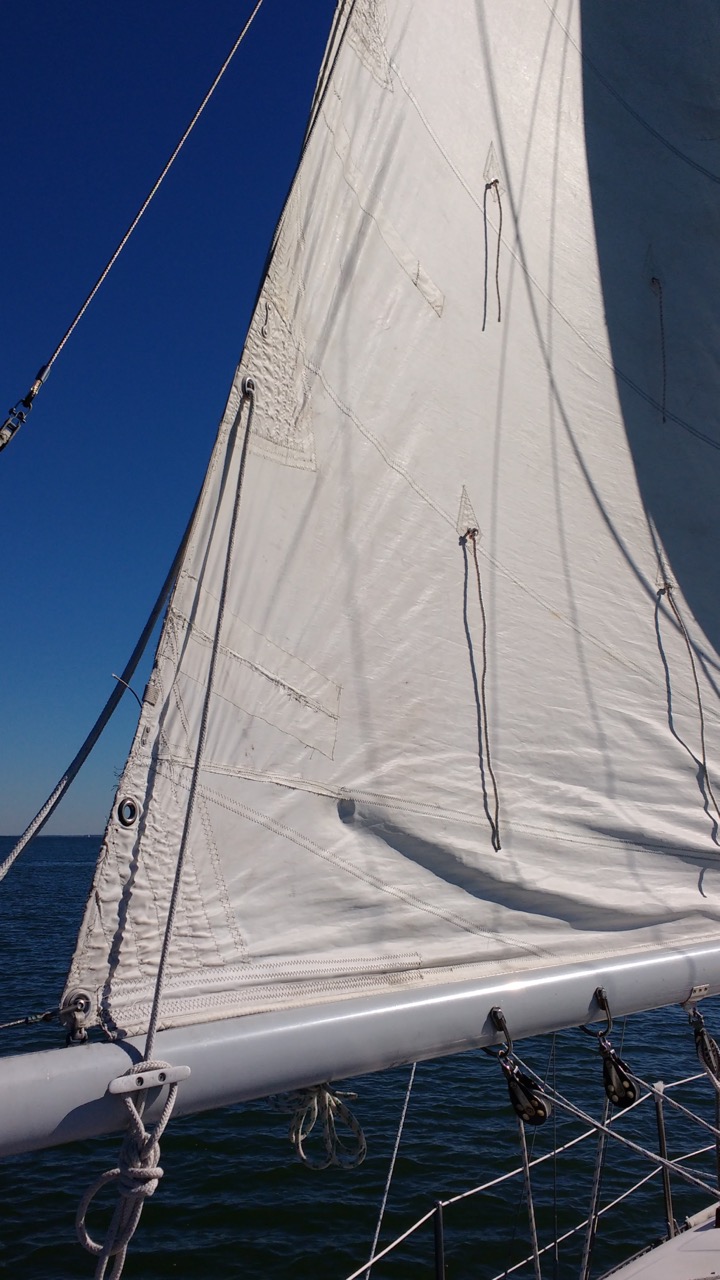
I’ve known for the past few sails that there was a section of stitching near the clew of the main that needed re-sewing. Yeah sure, I’ll get to it. Eventually. During a day-sail last week, eventually became immediately, as the foot of the sail tore out around the broken stitches for a length of about 12 inches. I pulled down to the first reef to finish out the sail, and took the sail down the next day to fix it.
I could have done this by hand with my Speedy Stitcher, but I have access to a marina neighbor’s heavy-duty sewing machine. It was time to give it a try.
Forthunately, I’ve watched my wife sew long enough and asked her enough questions to understand what has to happen with the machine – the concept of the locking stitch, what the bobbin does, what effect the tension knob has, and why a sewing machine is threaded the way it is – so I was able to figure out how to thread and adjust the machine, and how to refill the bobbin with a little trial-and-error.
I cut a patch to sew down over the tear, placed over the carefully positioned section for repairing with the help of double-sided sewing tape, and began to carefully feed it through the machine. Four times! This is a straight-stitch-only machine, so I had to make sure I had sewn down all the edges and fully supported the material surrounding the tear.
In the photo above you can see the patch applied – it’s to the left of the seam opening – through which daylight is pouring! I repaired this open seam, and inspected the rest of the sail as well. I restitched down the entire length of the leach, as much of the stitching was weak or missing, and reenforced a few other places too.
I discovered yesterday that I missed one weakened seam just above the first reef point – and it began to open up in the brisk breeze. I dropped the main as soon as I noticed it (see – I’m learning) and finished out the sail on jib alone. Today, I’ll take a closer look at it. This one may be small enough to repair by hand. If not, I’ll bring the machine down to the boat, simply pull the foot of the sail off the outhaul, and repair it right there on deck.
Finally, during a walk today through another marina in my neighborhood, I came across this beautiful lapstrake dinghy and though you would enjoy a photo of it.
Showing posts with label s/v Cay of Sea. Show all posts
Showing posts with label s/v Cay of Sea. Show all posts
Tuesday, January 3, 2017
Sail Repair
Like most boat owners, Rick over on s/v Cay of Sea is a jack of many trades. Here he is working on his sailmaker badge...


Tuesday, November 15, 2016
Re-bedding One Stanchion
It's getting cold on the East Coast, so here's a post that Rick on s/v Cay of Sea did last summer. Rick always shows excellent attention to detail...
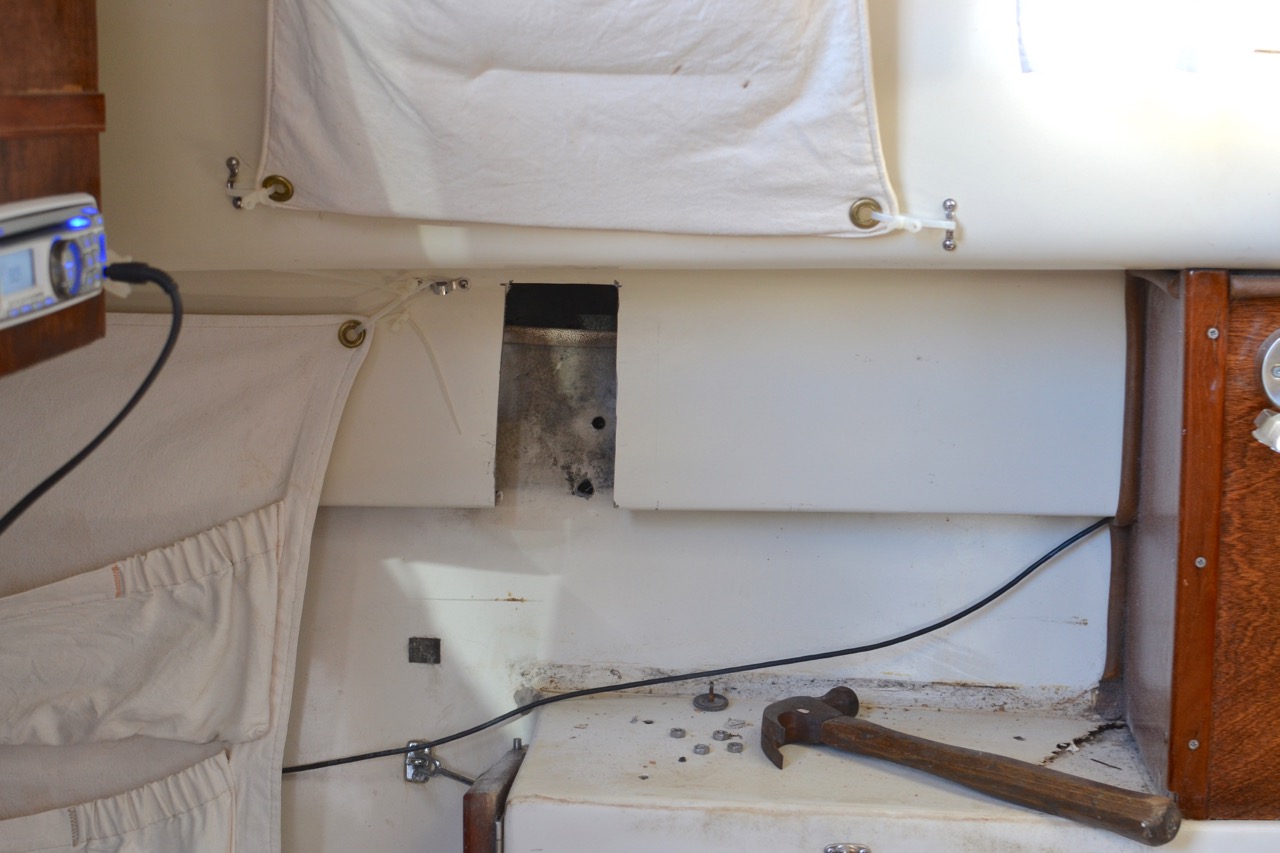
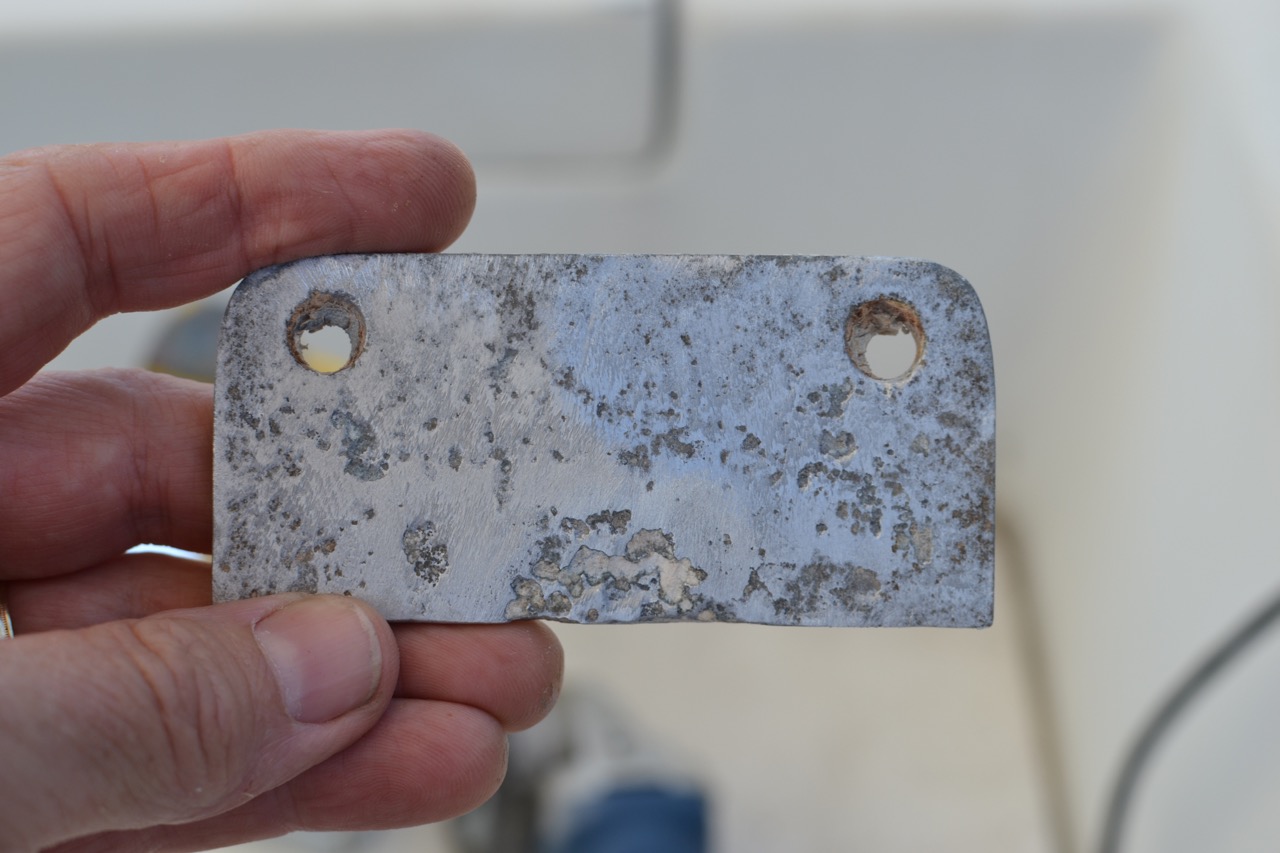
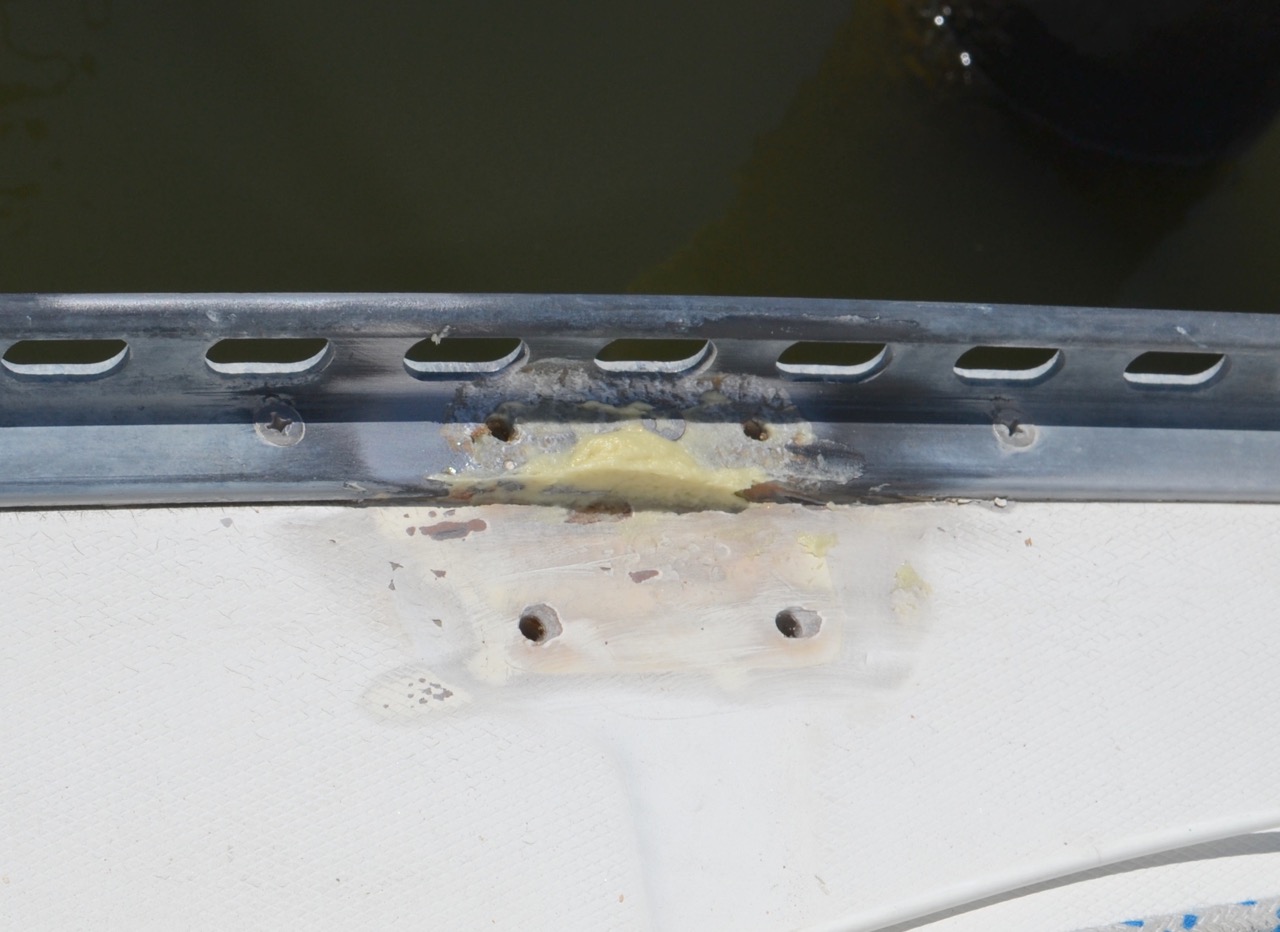
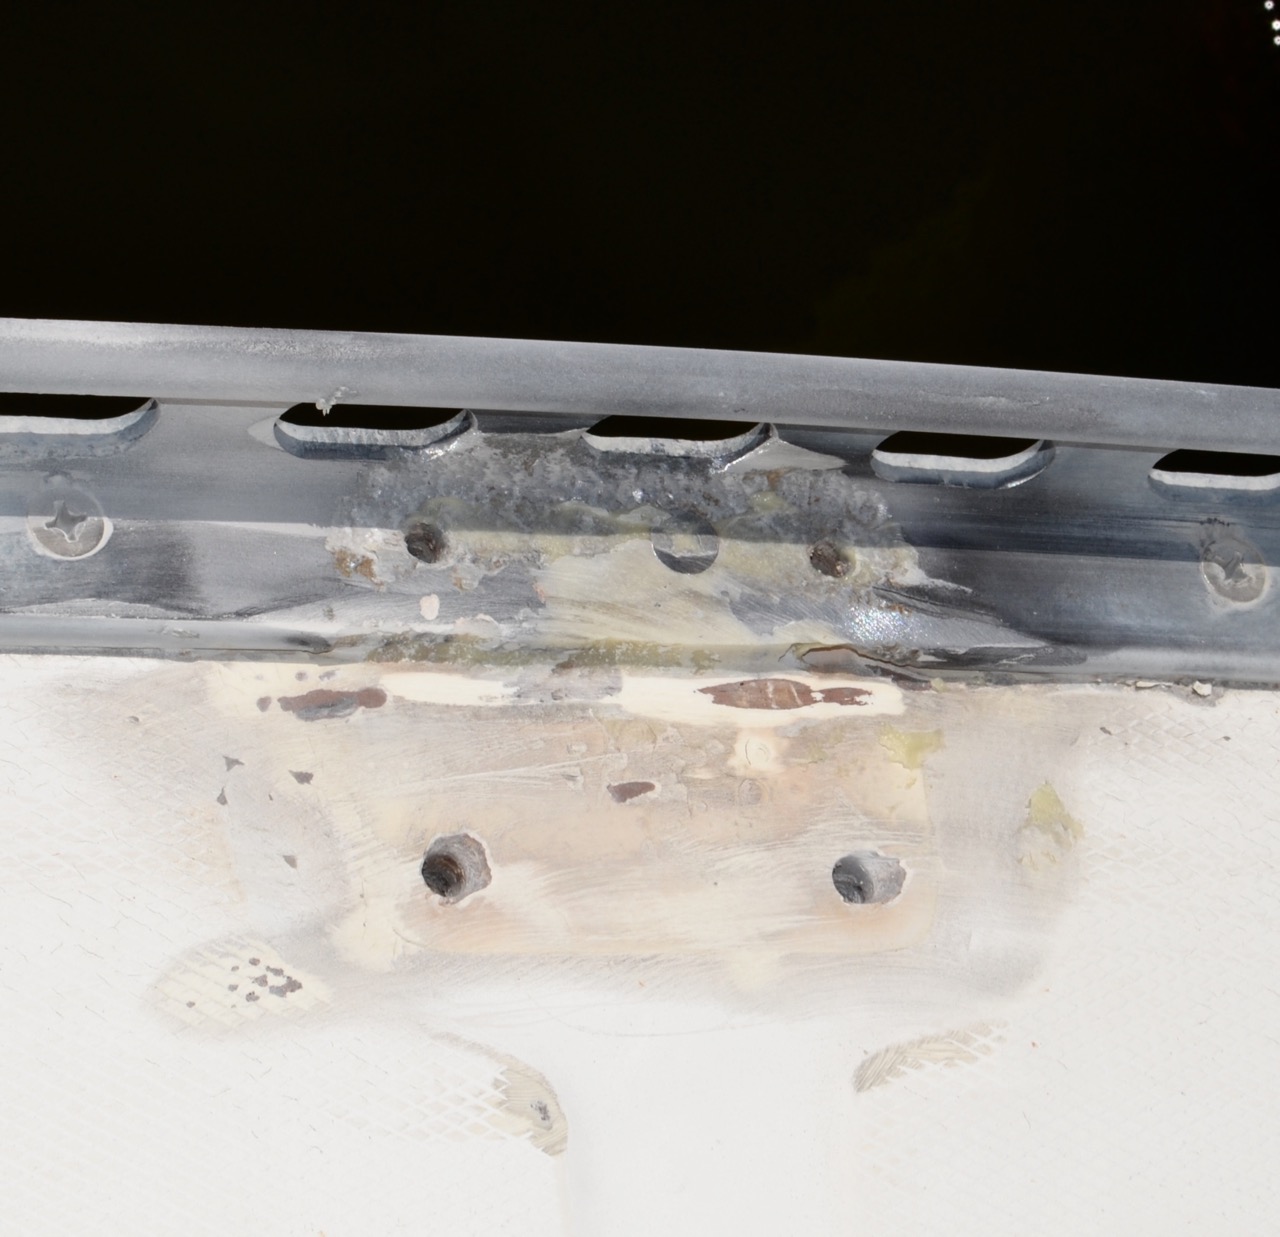
I have been suspecting this particular stanchion as the source for leaks for quite a while. At one point 6 or 7 years ago, when we were in a shallower slip in this same marina, we had a super low tide. The boat grounded out and leaned over against the finger pier and, I think, slightly bent this particular stanchion. I’ve never re bedded any of the stanchions, so this was the original compound underneath. Stanchions are not designed to be pulled on, and certainly not designed to withstand having the weight of the boat push them into a pier, so I believe that is when it began to leak a good bit. It may have leaked some before then.
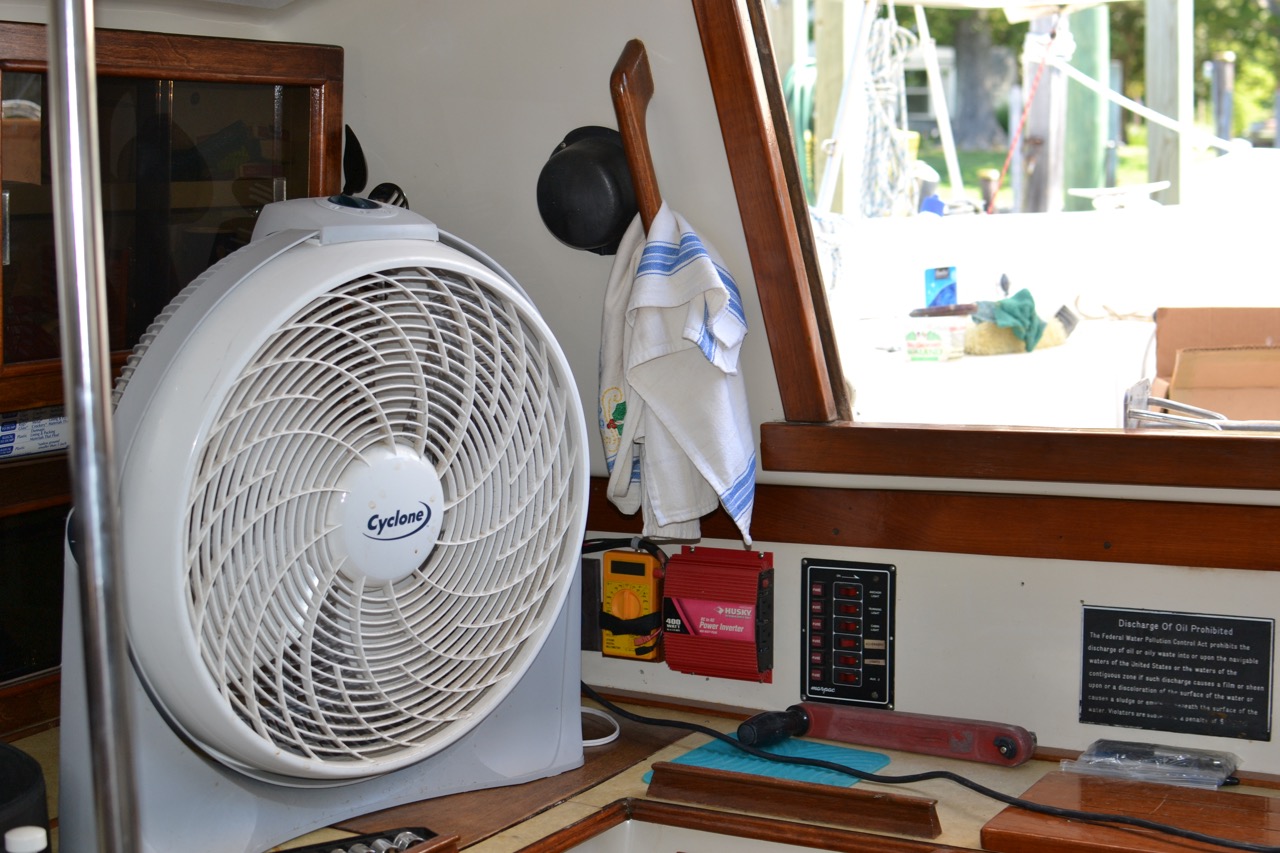
Regardless, I decided that I wasn’t going to hide from the heat today, and ventured down to the boat with my large fan in hand. I set it up on the galley counter, and it made a huge difference in tolerating the heat today. I also put up all my hot-weather canvas and kept as much sun off the boat and myself as possible.

Tuesday, October 27, 2015
Low-Cost Depth Finder
Over aboard s/v Cay of Sea, Rick thinks about depth sounders, and replaces his. He keeps the original transducer tho, making this an easy project.
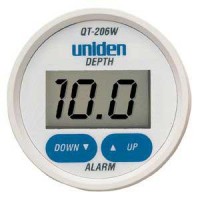
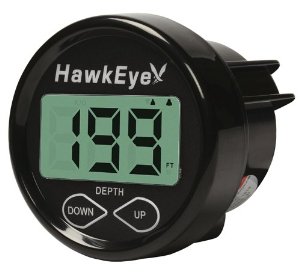
Before our July cruise, I installed the Hawkeye Depth Finder Model #D10D because my previous low-dollar depth finder (Uniden QT 206W) had failed. I’ve had a good opportunity now to compare the performance of both, and can definitely recommend the Hawkeye over the Uniden.
It seems that it is possible to pay up to $500 for a large format “sailboat” depth finder that mounts on the bulkhead. However, the availability of high-dollar stand-alone units is dropping off due to the popularity of consolidated multifunction displays for gps/chart plotter/depth finder/radar displays. And as I’ve looked at the market recently, I’ve noticed what seems to be greater selection among models and makers in the budget depth finder realm. I think makers of marine gear are understanding that the market for high-dollar gear has out priced the budget boaters, and they are now offering more products in the $100-$150 range, which is where I live as well. Don’t mistake this as altruistic behavior on the part of marine gear makers – I’m sure they are more motivated to not leave money on the table by ignoring this large group of boaters.
Regardless, the Uniden model represented a poor value with respect to construction and performance. I had this unit installed on my boat for about four years. After the first year, the display began to suffer from UV and weather-related damage, although it still functioned. The plastic display became frosty, the printed controls lost their readability, having faded in the sun. Finally, the display window cracked, which allowed moisture to enter the unit and make it unserviceable.
Performance-wise, it was inconsistent at best, but I must say that whenever I absolutely needed to know the depth when approaching shoal waters, it gave me the right information. This may in part be due to my choice of installation. I installed the transducer inside the hull without drilling a hole, and I didn’t glue it to the hull with epoxy – rather, I bedded it in a blob of silicone. I am confident this degraded its performance to some degree. It would never give much in formation in waters deeper than 50 feet, and often in choppy conditions it would return error readings, I assume due to the amount of air passing underneath its location just behind the vee-berth, or the inability of the processor to keep up with excessive motion as found in choppy conditions. When that area was ventilated by air bubbles, I feel sure the device had a more difficult time determining depth. Additionally, it featured a gain, or sensitivity adjustment on the back side, which was extraordinarily touchy.
By comparison, the Hawkeye, while still mostly plastic, features a glass screen. While vulnerable to impact damage, it is nearly impervious to effects of UV radiation, which means that the screen will always be readable. Additionally, it comes with a protective cover which will shield the unit from the sun during the many days and weeks when the typical boat is not in use. I did not install the new transducer that was included in the purchase. Instead, I determine through reading the spec sheet, that both Uniden and Hawkeye used the same frequency and wattage transducer. Not installing a transducer spared me a lot of trouble and effort with the installation. I was also curious how the unit would perform with the old transducer.
So at about the same price point (approx. $100 for each) the Hawkeye is a much better value than the Uniden. I feel more confident with this unit on board than I have with any other brand during our ownership of Cay of Sea – and early on, we had a “legacy” Datamarine large-format (read expensive) depth gauge.
Tuesday, September 8, 2015
Glass-Bottomed Dinghy
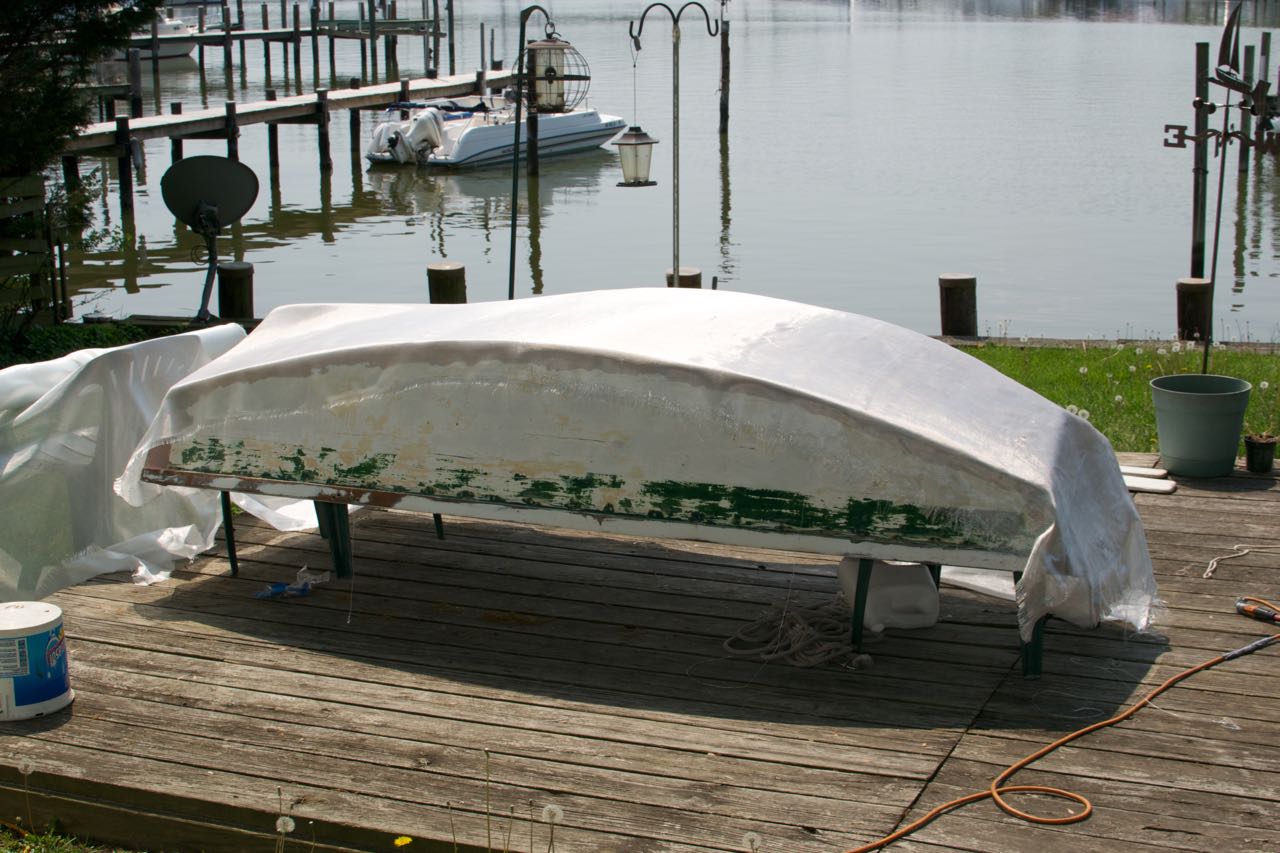
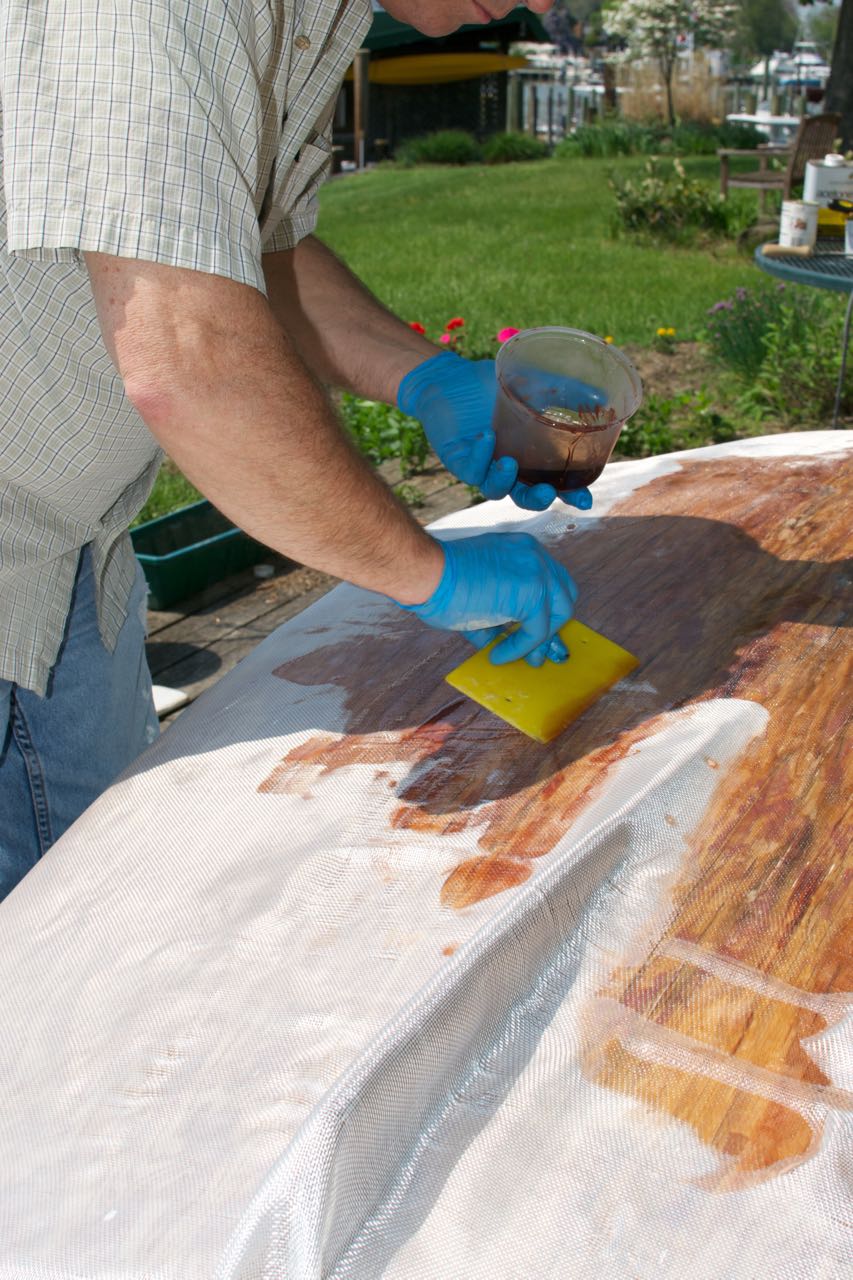
Over on s/v Cay of Sea, Rick and Ruth go to work sheathing their dinghy with fiberglass. Why do this? Well, it is a way to extend the life of a wood dinghy, and the fiberglass takes running up on sand and gravel much better than does wood.
[Editor's note: for those of you that have not worked with epoxy, as it cures a substance is pushed to the surface, called the "amine blush". If this is not removed before anything else is applied, it prevents a bond from being made.]I filled more small splits with peanut butter-consistency epoxy on the bottom today. These are super small splits – just narrow cracks – I forced epoxy into them with a putty knife, filling with cross-grain motion, then scraping up excess with the grain. Had I prepped the bottom for glass and resin, I could have gone directly to sheathing without waiting for resin cure. But I didn’t think it through, and needed to solvent wash the surface first and grind a few patches of cured epoxy. After letting the crack fills cure, I finished the prep.

Draping the glass over the bottom showed me where to trim the excess, and where likely relief cuts were going to be needed: at the keel, in the corners, and a couple of places on the transoms I didn’t anticipate. It’s easy to push the weave of the fabric around while it’s wet, but care has be taken to keep pockets of void from pushing up as a result. Relief cuts are the best way to get the fabric to lay flat.
A large squeegee or putty knife/scraper is the best tool for wetting out on horizontal surfaces. It was a beautiful day – about 70 degrees – but the sun shining on dark surfaces made them warm, and consequently the resin set up pretty quickly. I had ample time to wet out each section, but I still had to move quickly. I spread out the resin and thoroughly saturated the weave, then quickly replenished my resin container. Three pumps each of resin and catalyst provided just the right amount to spread at one time. I used about 20 ounces of resin and catalyst to saturate the whole surface, including transoms.
I switched to a chip brush for the transoms and turn of the bilge, as pouring the resin wasn’t going to work on vertical surfaces. After an hour’s steady work, the entire surface was done and beginning to cure in the sun. I’ll do an additional coat tomorrow (or next time, depending on weather). One more coat will serve to completely fill in the weave pattern of the fabric, and provide a smooth surface. When I removed the boat from its elevated supports, I could readily feel the increased rigidity the glass and epoxy provides. The transoms will get even more rigid when I glass their inside surfaces.


Tuesday, June 16, 2015
Canvas Work – A Break From Dinghy Restoration
Over on s/v Cay of Sea, Rick takes a break from his dinghy refinishing and does a little canvas work:
Sanding fiberglass ranks low on my list of favorite things to do, and I had the “itch” to do something else for a day (pun intended). I had ordered twist button canvas fasteners from Sailrite.com after researching price. I bought six sets (eye, twist fastener, and backing plates) for $.94 each. They were far and away the least expensive place to get them, even with shipping added in (about $6). A set of four would have cost so much more at West Marine ($14 for two sets) and approximately $2.60 each at Defender Marine. If there is any way you can avoid buying anything at West Marine, you should. On average, West marks up their prices at 1/3 above any other place on the web, and often above any other chandlery in town. Their stock in trade is convenience – one-stop shopping (or so they hope). On other items, they simply fleece the customer. There is no reason on earth to charge the sort of prices they do for some products, except that – amazingly – people will buy it anyway to avoid having to plan ahead. Occasionally you can get an item on sale at West that is a reasonably good deal. That’s the only time I really consider buying at West.
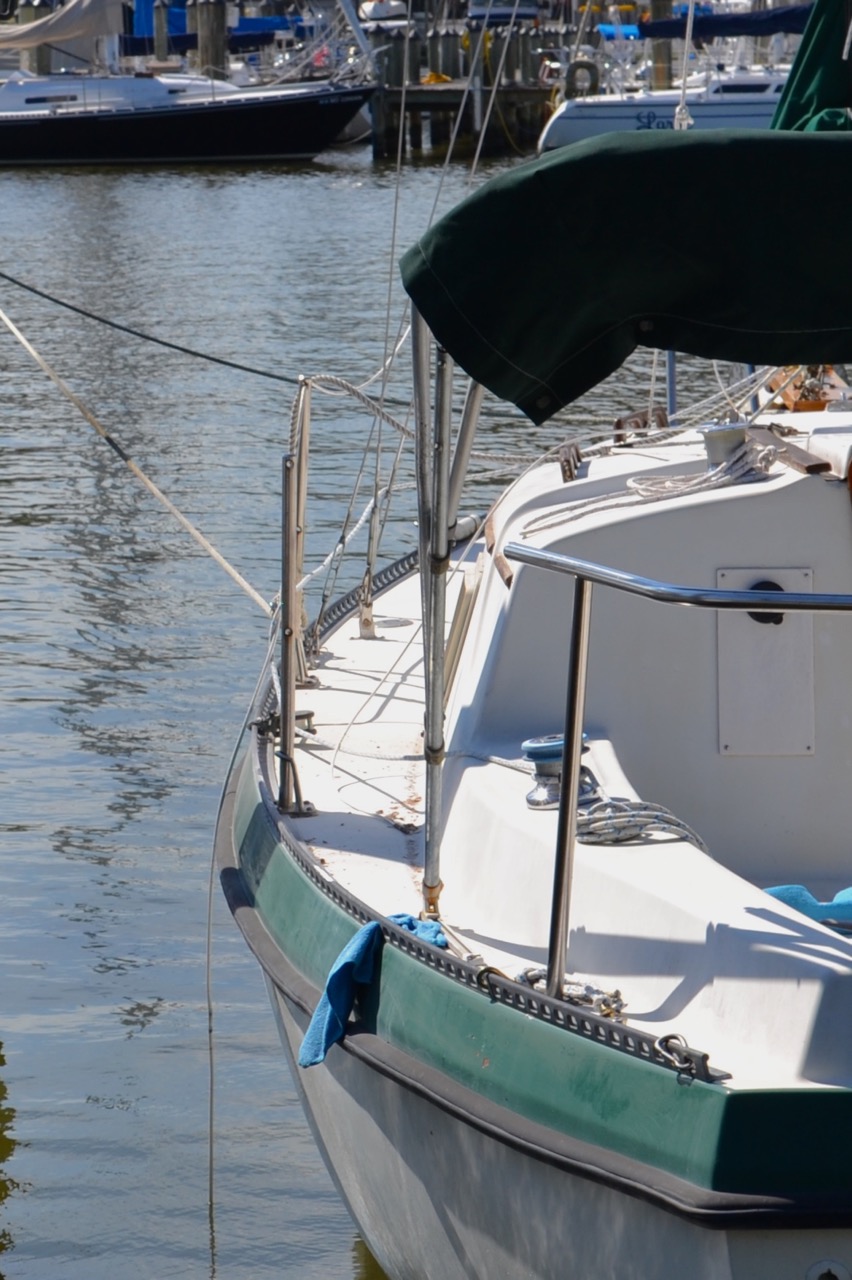
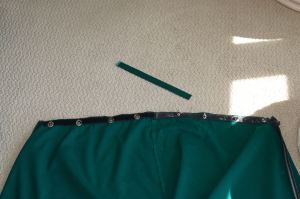
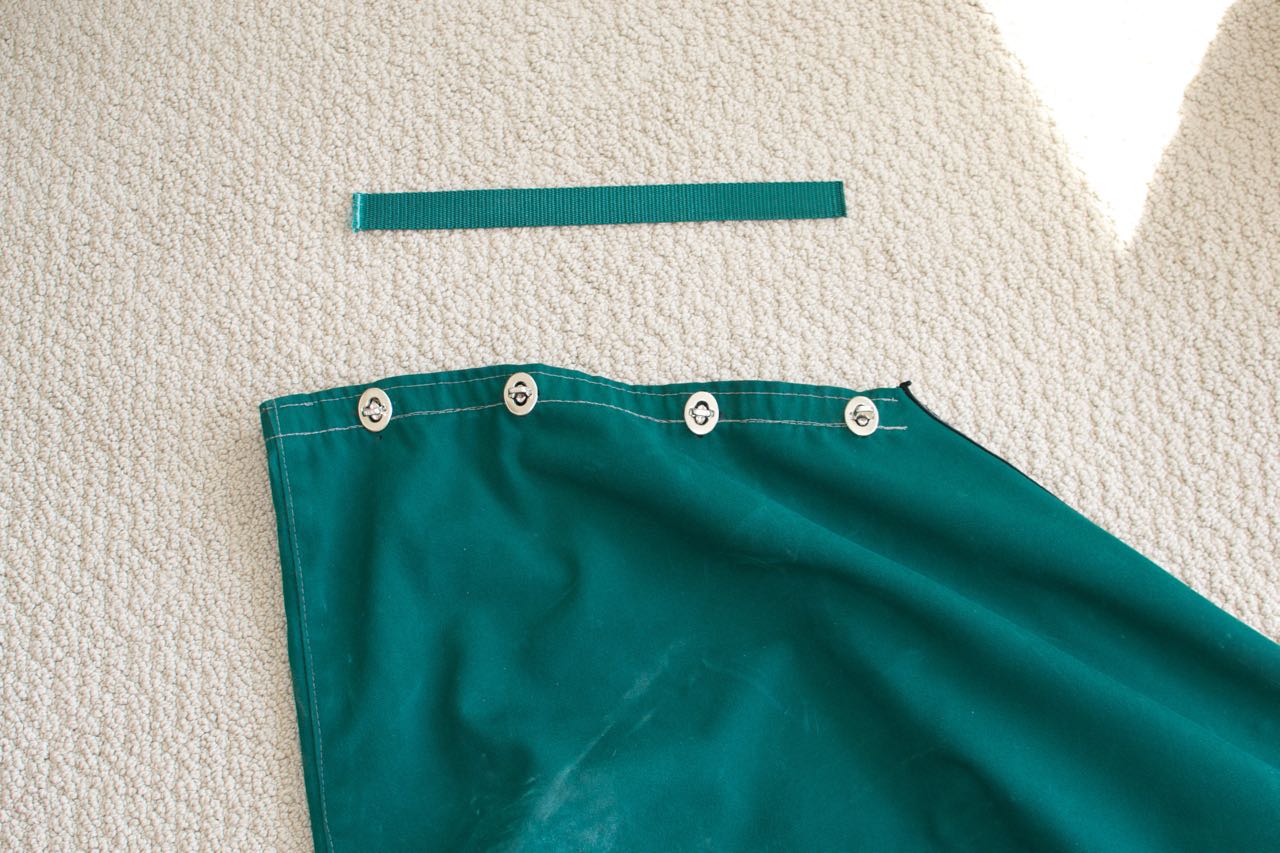
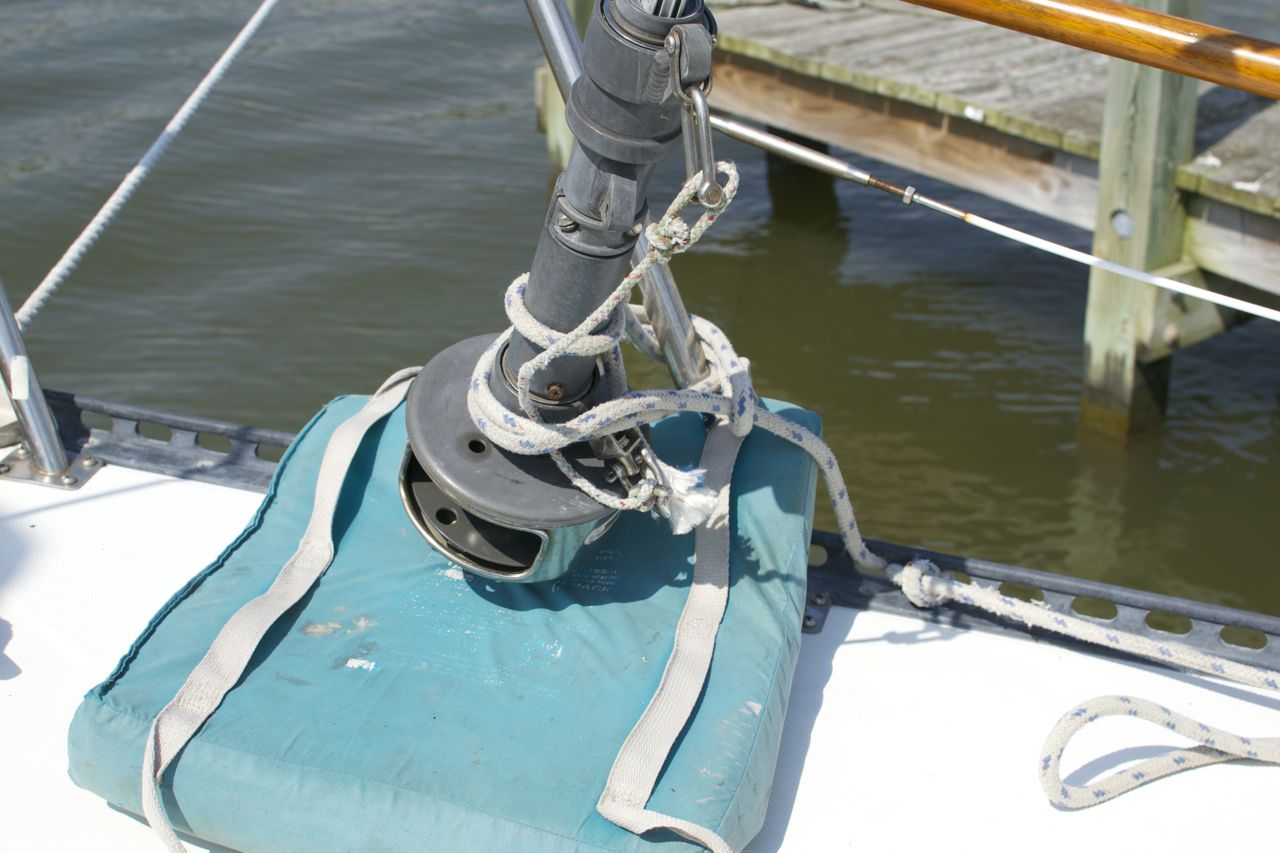
Oh yeah. . . the project! I purchased a used headsail deck bag with my “new” (to me) jib, but it was a bit worn in one area. The aft closure of the bag depended on UV damaged hook-and-loop fasteners. The hook-and-loop tape and had lost most of its grip, and I planned to change the closure method with canvas twist-and-eye sets. I don’t really like snaps – they corrode, can be difficult to operate when they age, and can lose their grip. These twist fasteners are fool-proof, don’t hurt your arthritic hands because they don’t become difficult to operate, etc..
The piece of green webbing above was used to form a loop in the back of the bag for support off the deck.


Tuesday, June 2, 2015
Forestay Built From Scratch
Most sailors regard standing rigging with a kind of religious awe... that only wizards of the fourth class are allowed to make modifications to it. But not Rick aboard s/v Cay of Sea... But it does require attention to detail. Here Rick tackles creation of a new forestay:
Well, not from scratch exactly. I purchased the end terminals and wire and assembled the stay, which is definitely more expensive than having a stay made up by a rigger with swaged terminals. However, as I gradually replace rigging wire, I want to replace each piece with shrouds and stays that I built with Sta-Lok fittings. I want the knowledge and skill required to re-rig without having to hire out work to a rigging shop, and the expensive terminal fittings are reusable.And then there was a follow-up post, where Rick's attention to detail caught a subtle problem. This may be the most important part of this post - taking the time and attention to say, "Hmmm... something doesn't seem quite right." This is where the person in a hurry would have produced a disaster down the line. But not Rick:
I learned some interesting things during a phone call to riggingonly.com. Tom was very helpful and knew all the products, sizes, and orthodoxy like the back of his hand. I had questions for him regarding sizing of eyes and pins, because what I found on my rig didn’t make sense:
Why were they different? Tom suspects that when the boat was built, the rigging contractor didn’t talk to the builder or designer, so there were some missed cues and make-dos. Tom feels like the rig should have been designed with 3/16″ wire – and most of it was – except for the forestay and backstay: these are 1/4″. Apparently 1/4″ wire typically called for larger 7/16″ eyes, but the boat was already built with 3/8″ chainplates. . . so there was a make-do fashioned, and it turned out okay – after all, the rig has stood without mishap for 34 years as designed. Best rigging design, however, matches pinhole with pin size exactly. Why 1/2″ eye at the masthead? Not sure. It didn’t match anything up there (7/16″ toggle and pin). And it turns out that simply using a different toggle to up-size the was the wrong approach too. Not knowing that, I asked about reusing the toggle, but Tom said different wire size required a larger turnbuckle, and a different sized toggle. Not only do the pinholes and pins have to match exactly, so do the toggles for the same reason: point loading or stress risers where the size is mismatched will weaken the ultimate strength of the stay or shroud at the terminal fitting. Instead of the mismatched pins and eyes, I will now have 7/16″ pins and eyes at the mast and stem on new 1/4″ wire.
- 1/2″ eye at the masthead
- 7/16″ stemhead pin hole on bow chainplate with 1/2″ toggle on the old Harken furler (which I did not reinstall)
Assembling the stay was fairly straightforward. I installed the eye fitting on one end of the wire after reading the instructions several times, plus consulting other on-line resources.


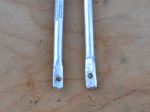
I was dissatisfied with the second fitting I installed. For a reason I couldn’t understand, the stud end of the fitting wouldn’t accept as many threads as the eye fitting had. Here are photos to illustrate:


Tuesday, May 19, 2015
Steaming Lamp/Deck Lamp Guard
Over aboard s/v Cay of Sea, Rick avoids paying the marine tax by fabricating his own guard for his steaming lamp:
Okay, I’ll admit that I don’t know exactly what to call this thing, but I know what I want it to do – what I hope it will do, if it is robust enough to do so. First, some background:
Two years ago my deck lamp was knocked out of the fixture, including the lens (I think), by an errant halyard slap in high winds. Well, that wouldn’t be too bad, except that I had just replaced it. It’s one of those two-pronged halogen 20 watt lamps, and they are sort of pricey. Not only that, but I hate going up the mast. Now I’d have to do it again! There has to be a better system. I imagined at the point, that some sort of cage of rods would be an adequate protection against another halyard slap. I’ve seen them on other boats, but I’ve never seen one advertised for sale, so I have no idea of availability or price. But how hard can it be to make something like that? While the mast is still horizontal and I have time before launch, I thought I would give it a try. I should be able to come up with something.
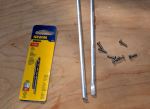
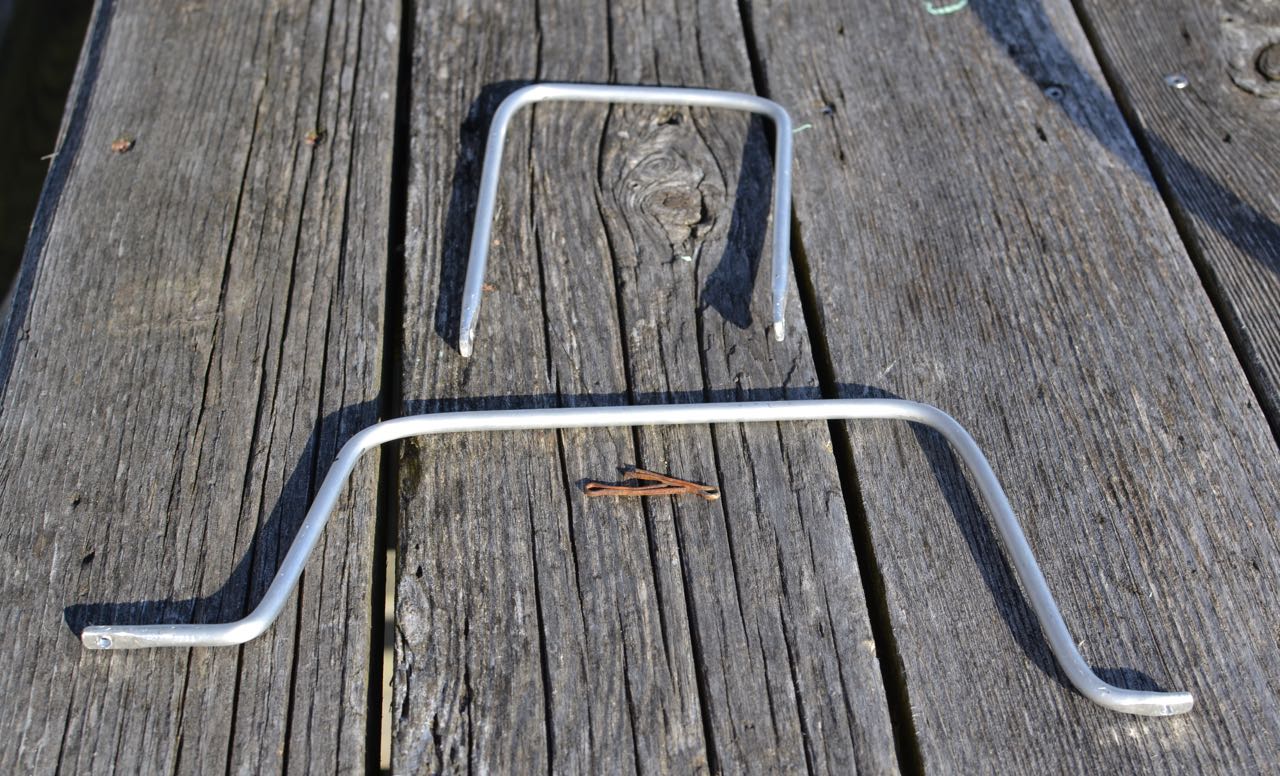
I went to the hardware store today to look for materials, and came home with 36″ of 1/8″ aluminum rod, eight stainless #6 screws, and a drill bit and tap for #6 screws.
Back in the shop I cut the rod in half and flattened the ends of the two pieces with a 3-pound maul against my closed vice, then drilled holes in the ends for the screws. I used a mill file to clean up the sharp edges.
Back at the boat, I estimated the lengths, attachments points, and the approximate locations of the bends. Without a vice on site, I found convenient places to capture one end of the rod while bending the appropriate place against a leverage point. This is what I came up with:
I managed to get one leg of the smaller piece longer than the other. Doesn’t really make a difference. It attached to the mast without complication, but it does bother me that the legs are not exactly the same length. . .
I located the larger piece on the mast first and marked the attachment points. Using a steel punch, I made a small divot point in the mast at each screw hole location to get a clean start with the drill bit. Carefully locating the drill bit, I used significant pressure and slow speed to start the hole (the mast is a curved section, remember? Hard to drill a hole in something like that without having the bit walk all over the place). Each hole started and finished cleanly. I cut threads into each hole with the tap, then ran a screw into it to ensure clean threads. If you never tapped a hole, it’s an interesting process. Everything is extremely low tech, except for the tap itself – which is hardened steel, tapered at the point, with the cutting threads beginning immediately. I use a small adjustable wrench to turn the tap a quarter turn at a time as I guide it into the hole as perfectly perpendicular as possible. It’s helpful to back the tap out a quarter turn after every complete turn or so, to clean the metal debris from the cutting threads.
I marked, drilled, and tapped for the second (port-starboard) piece next, then mounted both pieces with screws well bedded in TefGel. TefGel is a non-conductive corrosion inhibitor, and it allows me to use stainless fasteners into an aluminum mast without threat of galvanic corrosion. Every place I’ve used it on the mast has been completely corrosion-free since I refit the mast eight years ago.
In case you’re wondering, sheet metal screws, or self-tapping screws are an inappropriate fastener for this application. In fact, anything screwed into the mast should be done with machine screws. They have much finer thread than self-tapping screws, and hold much more securely. I like what Don Casey says about sheet metal screws in a mast: “I’ve never seen a sheet metal mast . . . ”
Point taken.
After fitting both pieces, I linked them with a zip tie, reasoning that having them linked together would give them a bit more rigidity (4 attachment points, vs 2).
Here’s the finished product:
Nice rounded features should allow halyards to slide right off and past the light. Cost? About $10, including the drill bit/tap set. We’ll see if it does what I hope it will. Although the rod is quite bend-resistant, the fasteners could be the weak point. As long as they don’t get wobbly, I think it will be fine. They are torqued as tight a I dare and seem quite sturdy, although it may be smart to install lock washers under the fastener heads. Any opinions out there about this?


Tuesday, January 27, 2015
Winterizing A Marine Head
I know it is a little late for this year; this is the result of my policy of not putting up anything here that is less than 30 days old - i want to drive traffic to your site, not take it away. But then for next year...
Rick over on s/v Cay of Sea shows us how he decommissions his head for the winter. This process has the added benefit of making a thorough internal inspection a part of the process:
Rick over on s/v Cay of Sea shows us how he decommissions his head for the winter. This process has the added benefit of making a thorough internal inspection a part of the process:
Warning: Graphic dirty pictures featured in this article
There is no way to eliminate the “disgusting” quotient when talking about toilet disassembly, and the only way to illustrate the process without bringing in yucky images is to use squeaky clean new parts. Well, I don’t have those on hand right now, but I do want to write a timely post, so please bear with me. If yucky toilet parts make you queasy, perhaps you should skip this article.
Last summer, returning from the annual Watkins Rendezvous, we had an unexpected marine head failure (it was practically new) which is chronicled here (about 2/3 through the article). After that experience, I determined that the way to avoid any subsequent failures was to disassemble and rebuild the head yearly, and not leaving propylene glycol (antifreeze) in it. I’ve also stopped using strong cleaning chemicals in it, as these often deteriorate the rubber parts. A mild dish soap solution cleans it fine, and since we flush with fresh drain water from the lavatory, it doesn’t develop the characteristic marine head smell.
Upon disassembly last winter, I determined that the rubber interior parts were nearly new and did not need replacing. As I inspected them this year, I decided to replace them, as they are looking a little worse for wear. I think they are still serviceable and I’ll keep them as spares, but will replace the large flapper valve and the joker with new parts. Similarly, I’ll disassemble the pump and replace the valves and seals.
Today, I simply dismounted the pump assembly, drained the system, and plastic-bagged the old joker and flapper valve. As a bonus to do this in 35-degree weather, the screws that hold the assembly together were easy to remove – surrounding material (plastic) is slightly smaller in the cold, therefore the tension on the fasteners is less. First, I donned latex gloves, then soaked up any remaining water in the toilet with wads of paper towels, dropping them directly into a lined waste basket. Used nearly a roll of paper towels.
I removed the flush water outlet hose first, then disconnected the joker valve housing and removed the joker. Following that, I removed the four screws retaining the pump on the assembly, then drained any remaining water. Finally, I used my heat gun to warm and soften the white sanitation hose for the flush water inlet. This was probably the hardest part, as it was cold and took 5+ minutes to get it pliable enough to work off of the fitting. Here are few photos:
The whole process, including preparation (need to have your supplies and receptacles ready to minimize the mess you make) was about 45 minutes.
Reassembly will take slightly longer.


Tuesday, November 25, 2014
Preparations for Ascending the Mast
Climbing a mast is arguably the most dangerous thing you can do on a boat. Before you take on this task, you should go over the task(s) to be accomplished at altitude and make detailed preparations. Rick on s/v Cay of Sea shows us how:
I installed new deck hardware back in May of this year in preparation for a rigging project. The original idea was to ascend the rig, drop the headstay to the deck, build a new stay then climb the mast again and install it. But there were things to do before I would go up the mast, and one of them was replace the worn out deck hardware through which the line passes.
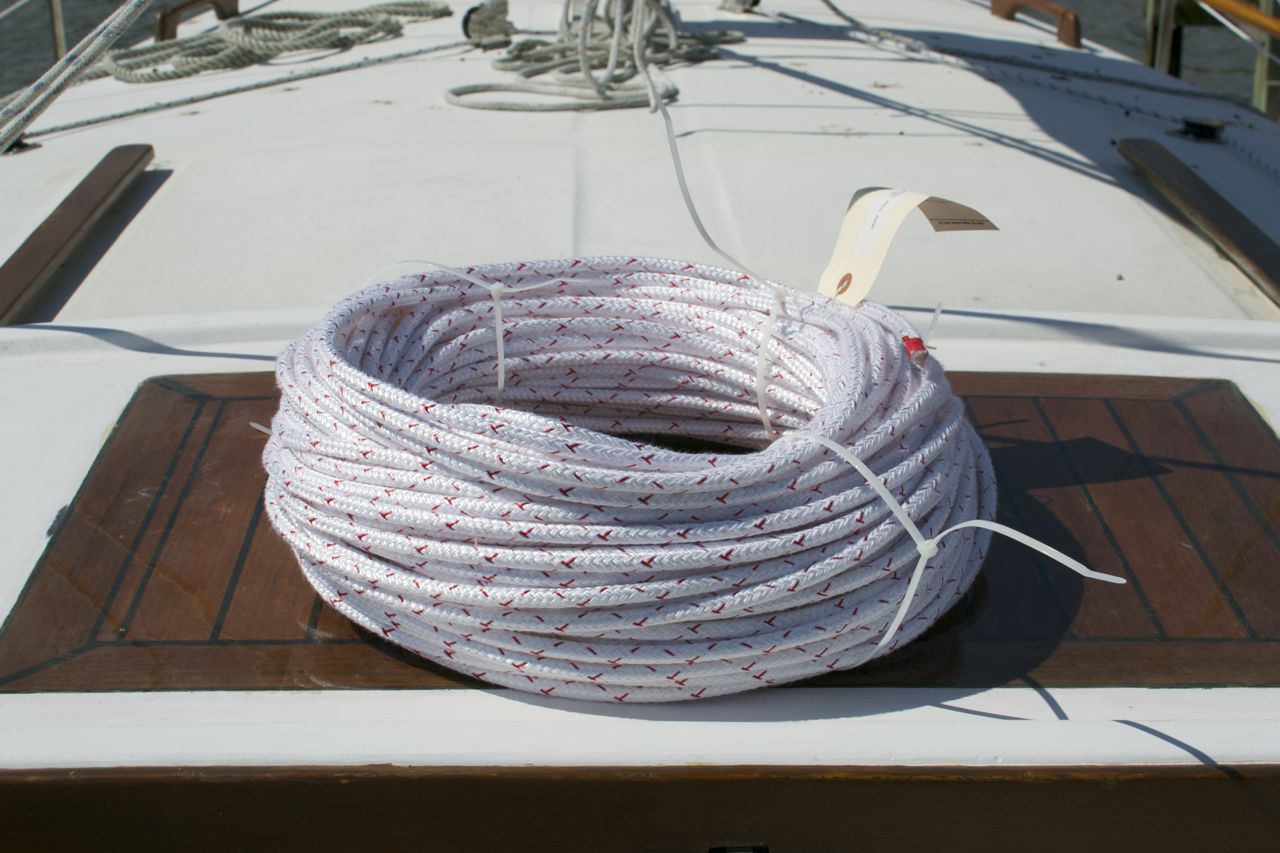
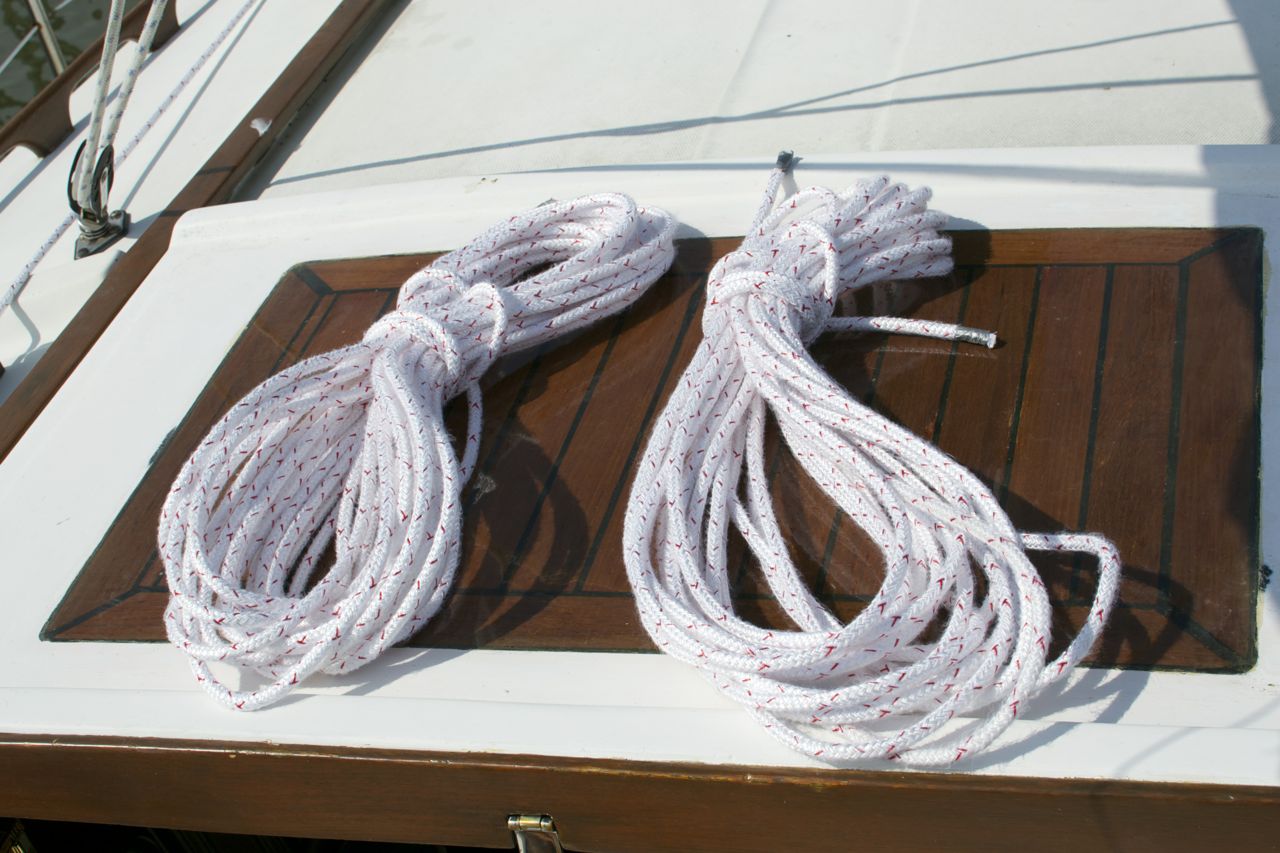
The second item in preparation was to replace the halyards. I researched the ageing characteristics of the StaSet X line that I use for halyards, and it was obvious that the line was plenty strong, even after 7 years’ service, to support my weight. But I wanted a comfort factor that the old line wasn’t going to provide. New line for halyards was called for. The final crippling of my standing rigging as a result of having the steel wire come out of the spreaders kicked me out of procrastination mode, and I ordered the line. About the same time, I noticed an area of chafe where the main halyard passes over the masthead sheave. So it was time to replace halyards, and now I have no guilt over being wimpy about going up the rig with new line.
300 feet of 5/16 Sta Set X.
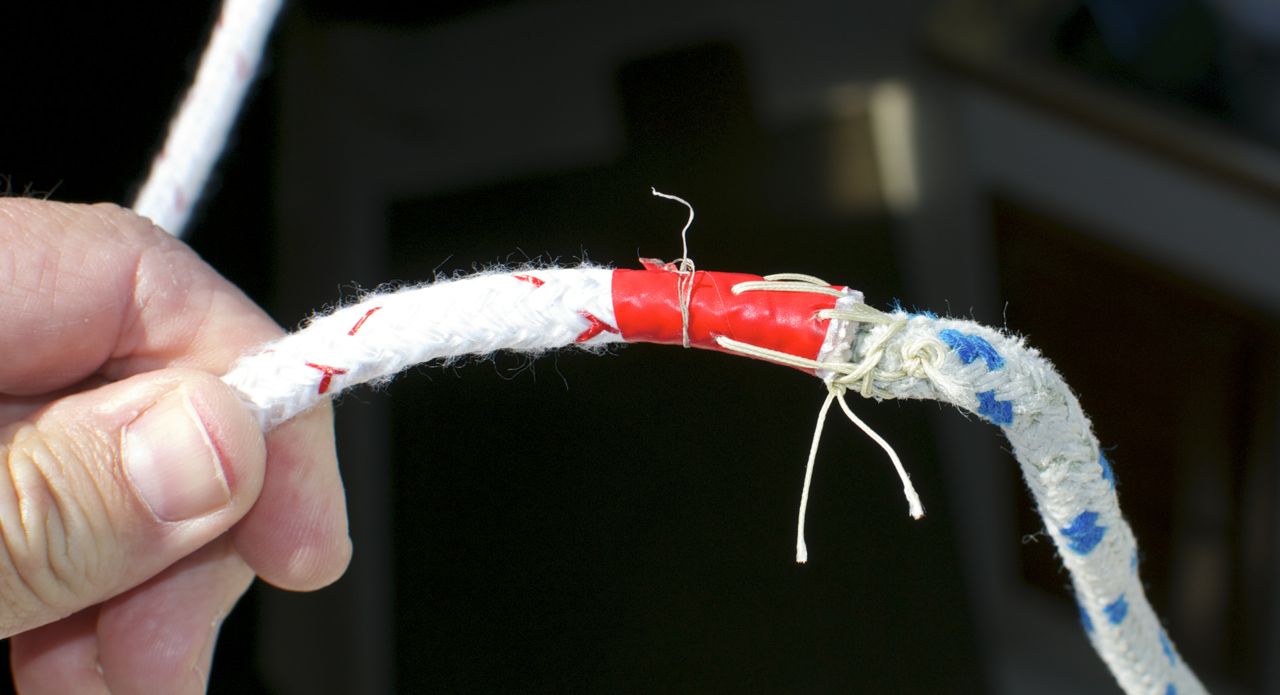
I ran the new line up the mast today. I sewed the new line and old line together at the ends, then covered the seam with duct tape, so it wouldn’t catch in the sheaves at the masthead. When connected and smooth, I simply pulled on the old line until I had new line in my hands.
Tools for installing new halyards: sail repair needle, heavy nylon “squidding line,” and duct tape. A pocket knife is useful too.
Line ends sewn together. This makes a strong attachment that won’t let go. I wouldn’t trust tape alone.
Seam covered with duct tape.
Tomorrow is the day, at least for Part I. I spent an hour today figuring out exactly what I’m going to do up there, organizing supplies, tools, and procedures.
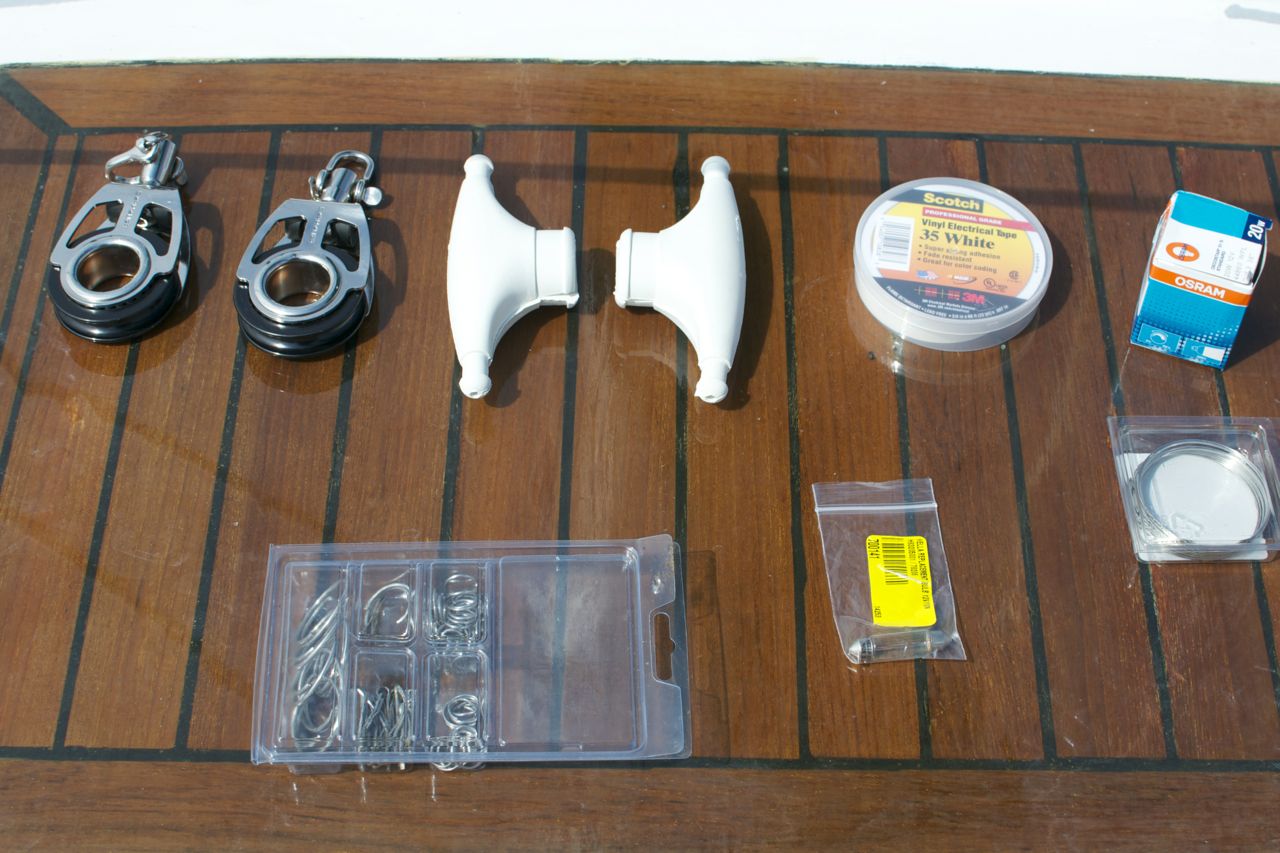
Supplies
Seizing wire, spreader boots, rigging tape, ring and split pins, deck and steaming bulb, 2 halyards, 2 new blocks.
New 70′ halyards. Had to measure 4 times before I started getting the same length of line consistently. Then cut entire length (140′) in half.
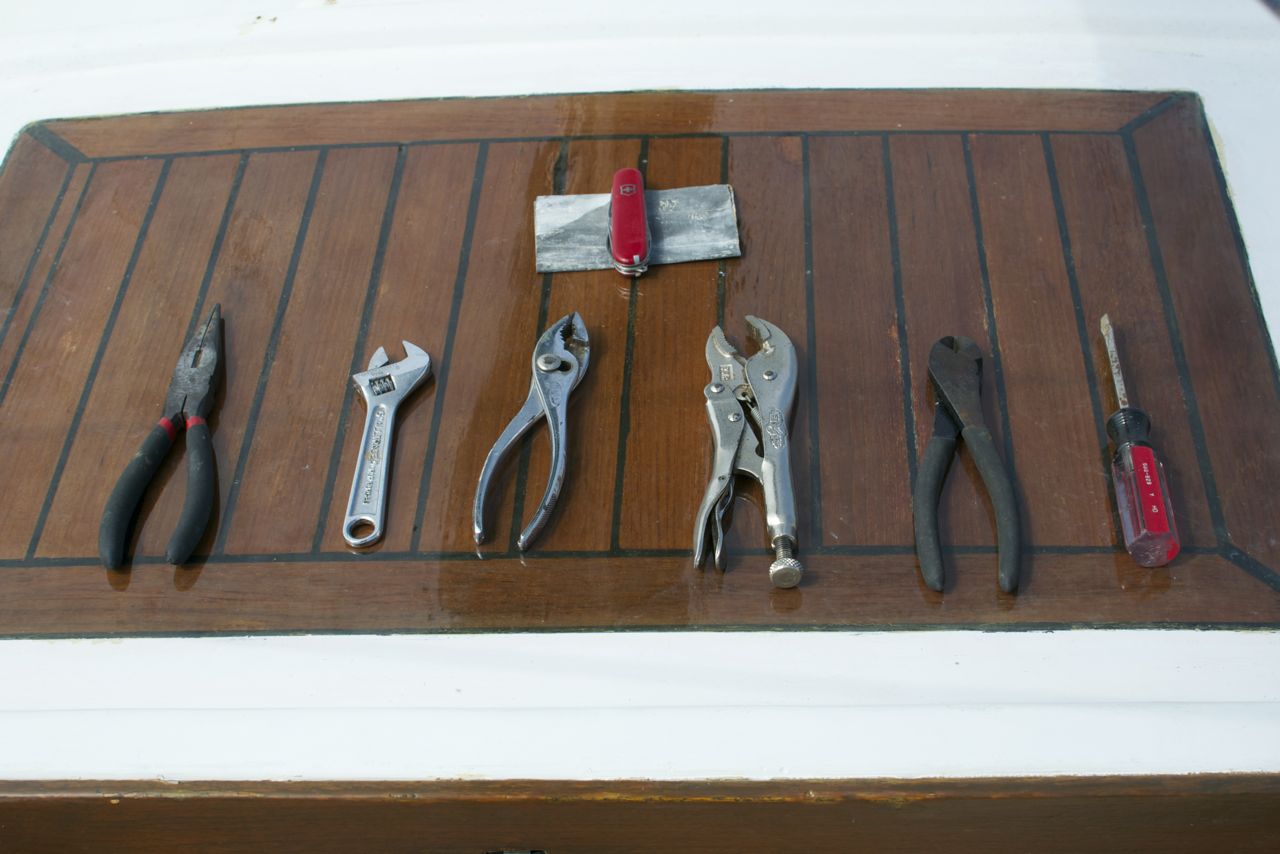
Tools
Essential tools. Piece of material under the pocket knife is emery cloth for polishing 12vdc light contacts.
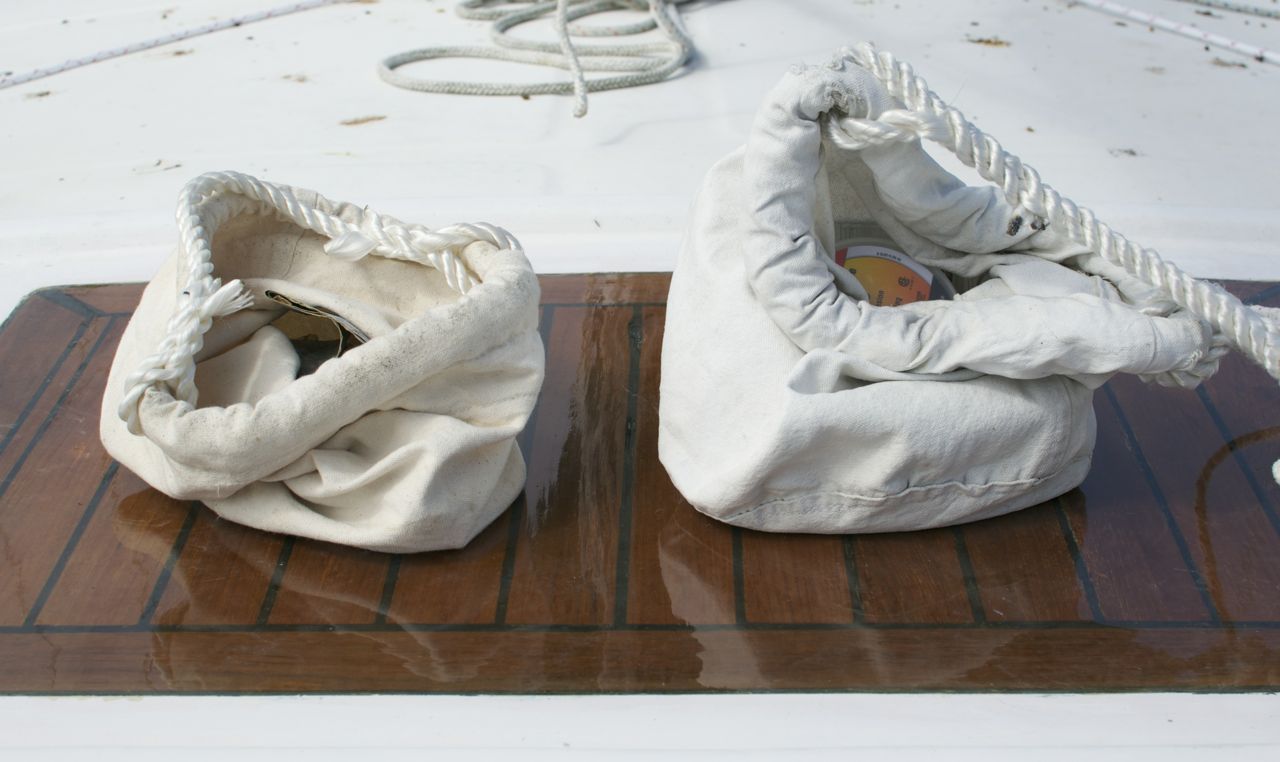
Canvas buckets to the rescue: Tool bag on left, supplies on right.
Order of Work
2. At Steaming/Deck Light
- At spreaders:re-slot cap shrouds and wire/seize in place
- install spreader boots
3. At masthead
- Replace bulbs and test while aloft
4. Descend to spreaders and inspect all fittings.
- Attach new blocks, tape shackles/circular retaining pins
- Rove new line through blocks.
- Use one new line as temporary headstay
- Attach other new halyard to harness as safety line (another deck helper tends this line)
- un-attach old spin halyard
- un-attach furler/headstay and lower to deck
- Check fit of old (original) stay to hardware for match
- pin size conflict at stemhead leaves doubt that masthead hardware matches
- Visually inspect all fittings
Already done
Un-attached furler from stemhead, and secured to rail. Attached old spin halyard to bow pulpit for temporary headstay.
Old furler secured to pulput, removed from stem.
Final Photo – is this where we got the term “poop deck?” Birds have been doing me wrong!


Subscribe to:
Posts (Atom)


