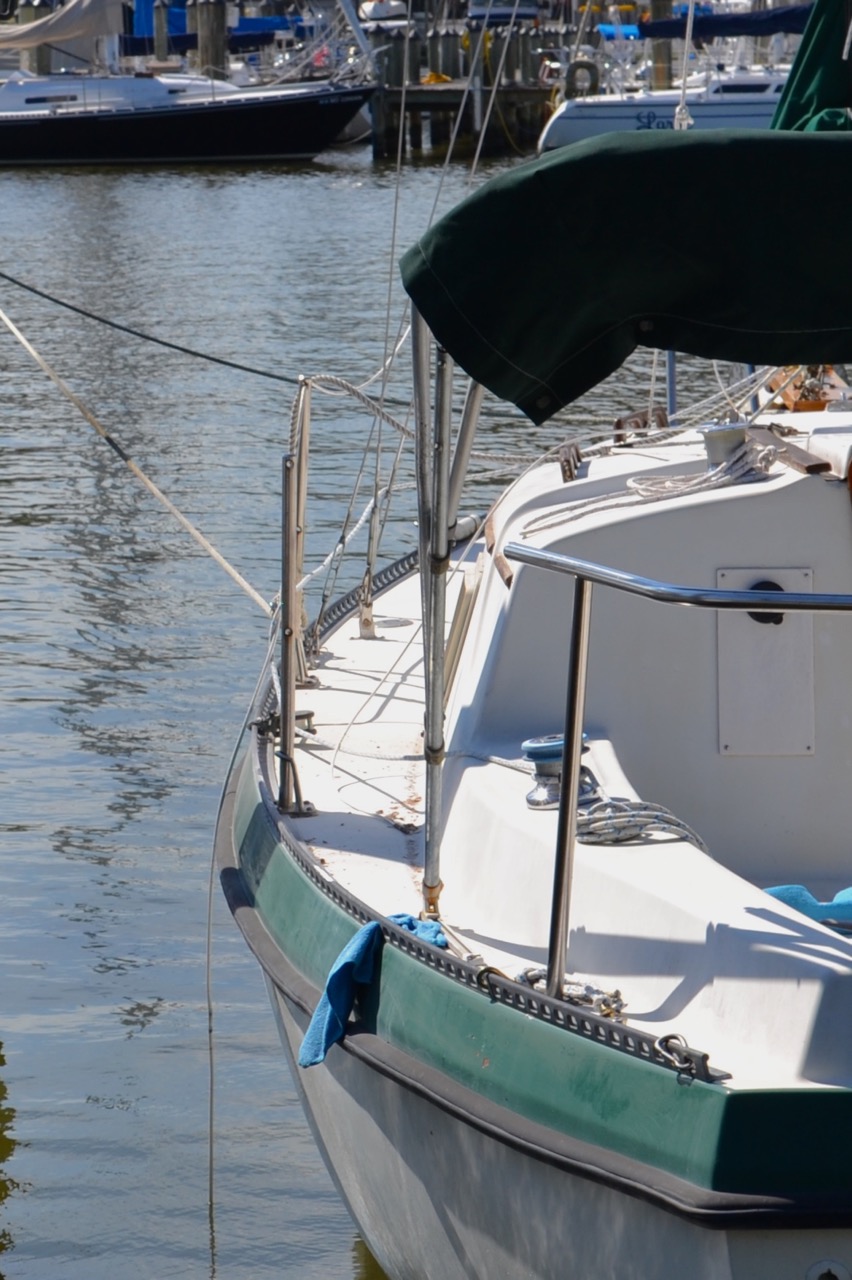
When we bought Galapagos we were kind of enthralled with our Lofrans electric windlass. It’s a love affair that continues to this day and because we love her, we want her to live in a nice place. Long ago we noticed that her locker on the foredeck had seen better days. It looked to me like there was wood rot underneath her foot switches and a couple of times when we pulled up anchor, Mike saw the floor of the locker move a little bit. This gave us pause.
So it came to pass that we decided we better get to it and refurbish that part of the boat. This has been one of those projects that takes much longer than you’d like, simply because there are a lot more parts to it than you think, and because Mike still works for a living. That leaves the weekends. And me.
Mike pulled the windlass off and carried her home to take her apart and make sure all of her parts were shiny and new looking and give her a general going over. He can write about that part soon. The windlass has always worked great and we want to keep it that way considering that pulling up anchor by hand on this boat, even given the hand ‘crank’ we can use, would cost a lot in terms of energy, time, and effort. Whatever needs to be done to keep this windlass in good shape is time and money well spent.
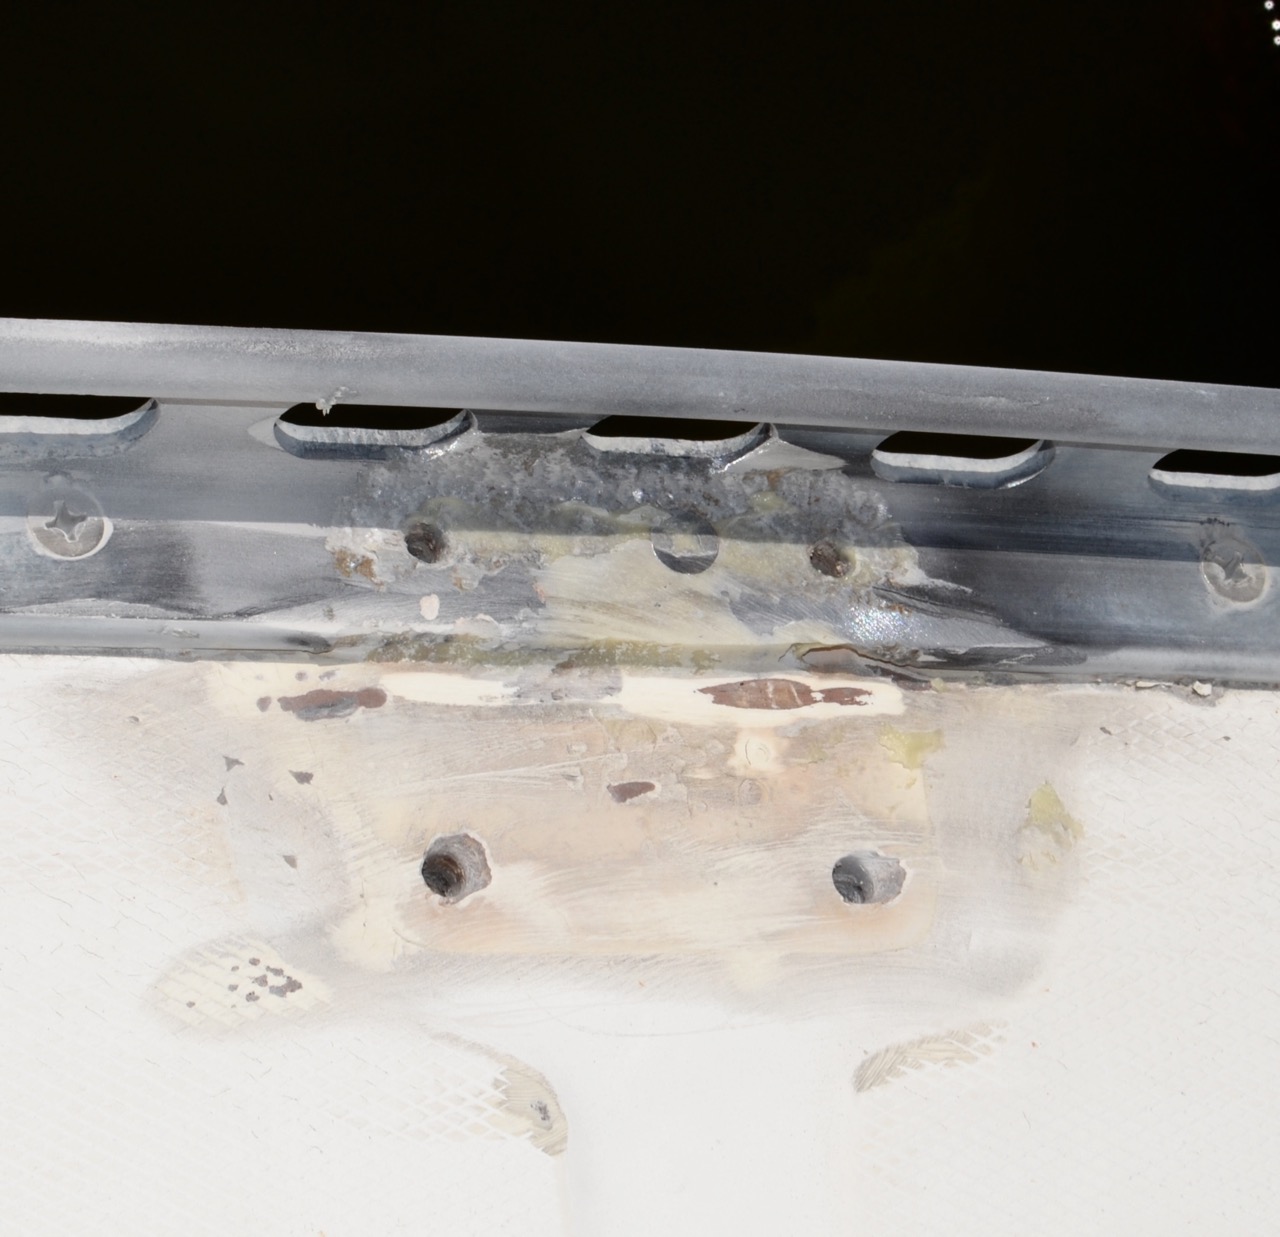
When we examined the wood under the switches it was clear that there was not only rot, but that there was a lot of it. If it were not for the fact that this entire locker is hell for stout, we would have had a bigger job on our hands. The wood in this area is about 10” thick meaning you can have a lot of rot before things start getting serious. That also means that after I removed all the rotted wood, we still had plenty to work with. We decided we did not need to remove the entire floor (thank you, gods of windlass lockers!) and that we could fix the area with a series of epoxies, from the liquid kind that soaks into wood to give it new structure, to the kind you smear on like wood putty.
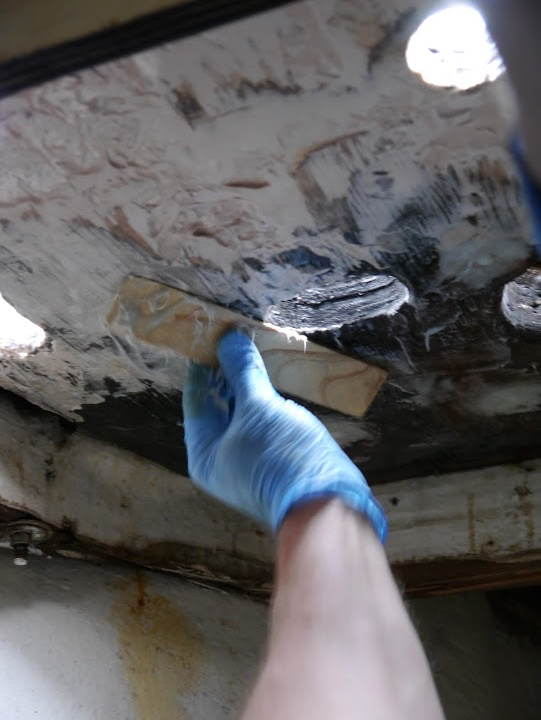
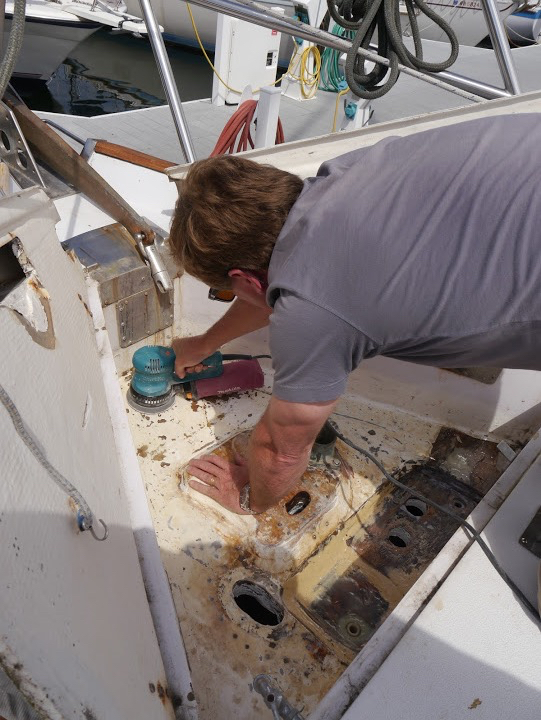
After drilling holes all over the place to make sure we found all the rot, and a good thing we did, too because water came out of some of the holes, we waited as everything dried out in the hot summer sun. Then, over a week or so we mixed batch after batch of System Three End Rot liquid epoxy and their wood putty version called Sculp Wood. When we ran out of the End Rot stuff, we used the straight System Three liquid resin epoxy. We poured the liquid stuff down into the holes and let it seep into the surrounding wood on the topside. When that was cured, we poured in more. We added fiberglass fibers to thicken the paste and troweled it onto the inside of the locker from below, filling in gaps left by the wood we removed. It was a long process that involved a lot of boat yoga, waiting, and sanding in close quarters.
You may be wondering how rot got involved with this windlass locker in the first place. Two reasons became apparent. Let the first reason be a cautionary tale about being sure you are bedding your screws with butyl tape or the equivalent if they are going to be exposed to water. On our two foot switches, the screws holding one switch onto the wood were bedded with something that protected them from water. The screws on the other side were not. So one side had rusty screws, proving that water was ingressing in that area. The wood around that switch was where the rot started and it spread from there. Of course, it’s probably been 20 years or more since those switches were installed. Let’s keep things in perspective here.
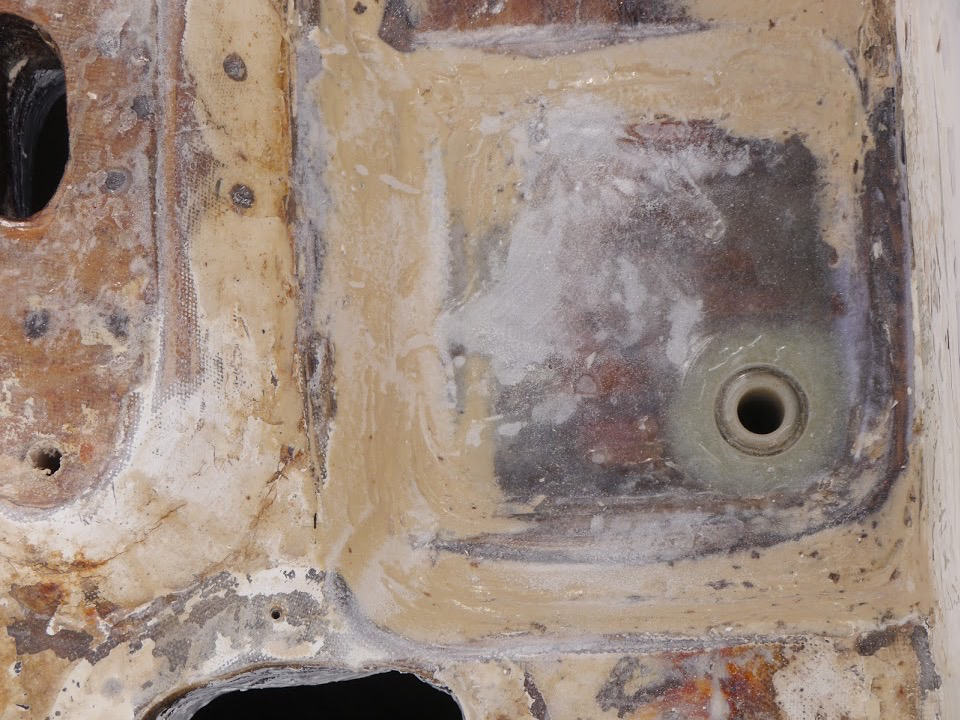
Second, the drainage in this locker was poorly designed in our opinion. I don’t know about you, but I don’t think that drains that are above the level where water stands make sense. Think about it. In your sink, the drain is installed slightly lower than the bottom of the sink. That’s because water runs…..down. Not up. So a drain that stands proud of the surface will never, due to the laws of the physical universe, drain all the water out. Standing water is a bad thing, especially if it is close to electric switches installed with unbedded screws. Voila, rot.
So Mike decided to redesign the drains making them much simpler, and making them drain correctly. You know how when people are married for a long time they start thinking alike? We both came up with the exact same idea independent of each other. When that happens, it’s a go. So instead of reinstalling the drains as they were, he filled in the hole where they would be set, cut off the top of the drain that was too high, then drilled out an area and epoxied the drain directly into the hole. Then he attached the hose. It’s not going anywhere and it drains really well now. Plus with all that epoxy the wood will stay protected long after we’re dead. We are considering this simple solution for some other areas of the boat.
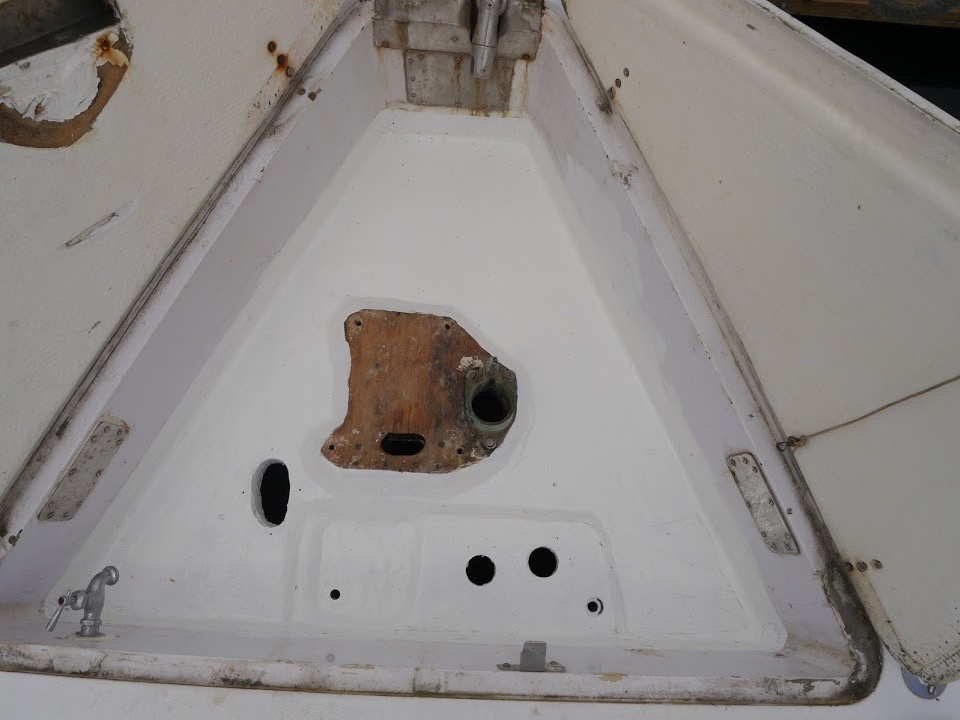
When all the epoxy was cured, he sanded everything smooth on top and on bottom. I followed behind him with two coats of bilgecoat, since this area is protected from UV rays unless the locker is open. Although I didn’t bother with a photo yet, the inside of the locker has a nice smooth ‘ceiling’ now. Our windlass will be much happier in her newly refurbished digs. And we have a locker that will see another 25 years in good shape. Stay tuned for part two, where Mike fills you in on the insides of the windlass. Or something like that.
Showing posts with label deck leaks. Show all posts
Showing posts with label deck leaks. Show all posts
Tuesday, February 28, 2017
Windlass Locker Refit: Epoxy is Your Friend
Rot is insidious. It sneaks in quietly, eating away at the structure of your boat. Mike and Melissa on s/v Galapagos discovered the rot monster eating away at their anchor locker - this is how they defeated it:


Monday, January 9, 2017
Hole In The Boat, V. 2.0. Port Light Rebedding
'Tis the season. At least here in the PNW: rain, rain, and more rain. And over on s/v Rubigale, Dana has found a solution to a problem we have all had at one time or another... a leaking port:
“I’m so happy to have found a leak on my boat!” she says with a big smile. The expressions on others’ faces are astounded, confused, or horrified.
“OK, how about I finally LOCATED a leak on my boat!” The response is definitely more congratulatory, occasionally tinged with a little sadness or jealousy. Rubigale’s starboard side has been plagued with leaks since I bought her in the summer of 2014.
Once the torrential downpours of the Seattle fall appeared, drips ran down the overhang in the salon and puddled on the shelf. One of the three screws that holds in my barometer would cry every time it rained. I started finding things in the starboard aft berth wet, requiring everything to live in a plastic bin.
I thought I had it solved when I replaced one of the larger windows in the salon after I spotted dampness at the corner, and although the leaking seemed to have lessened, it was definitely still there. I tried caulking the toe rail and honestly most anything that looked caulk-able. I had the rigging tuned, and the shroud plates were rebedded in the process.
Still, the insides of cabinets mildewed and were regularly vinegared and bleached. Every time it rained, a pile of boat rags came out to soak the puddles, and on a particularly hard pour, a few pots came out as well. The bilge pump would come on. The dehumidifier got a workout. The headliner remained mysteriously dry.
There was old water staining around the aft-most starboard port light, but all six of them were brand new when I purchased the boat and I assumed that the new ones were the fix for that problem. I began to blame the jib track and the bow hardware, and started to wrap my mind around how to do all of these things, or what it would cost to hire someone to do it.
Everyone knows it rains a lot in Seattle, but it is typically a persistent mist rather than the torrential downpours I remember in Mississippi. Recently, Seattle experienced one of those deluges and I caught the leak from the port light red-handed! I had already rebedded one window, and this was so much smaller and seemed easier. You can probably see where this is going.
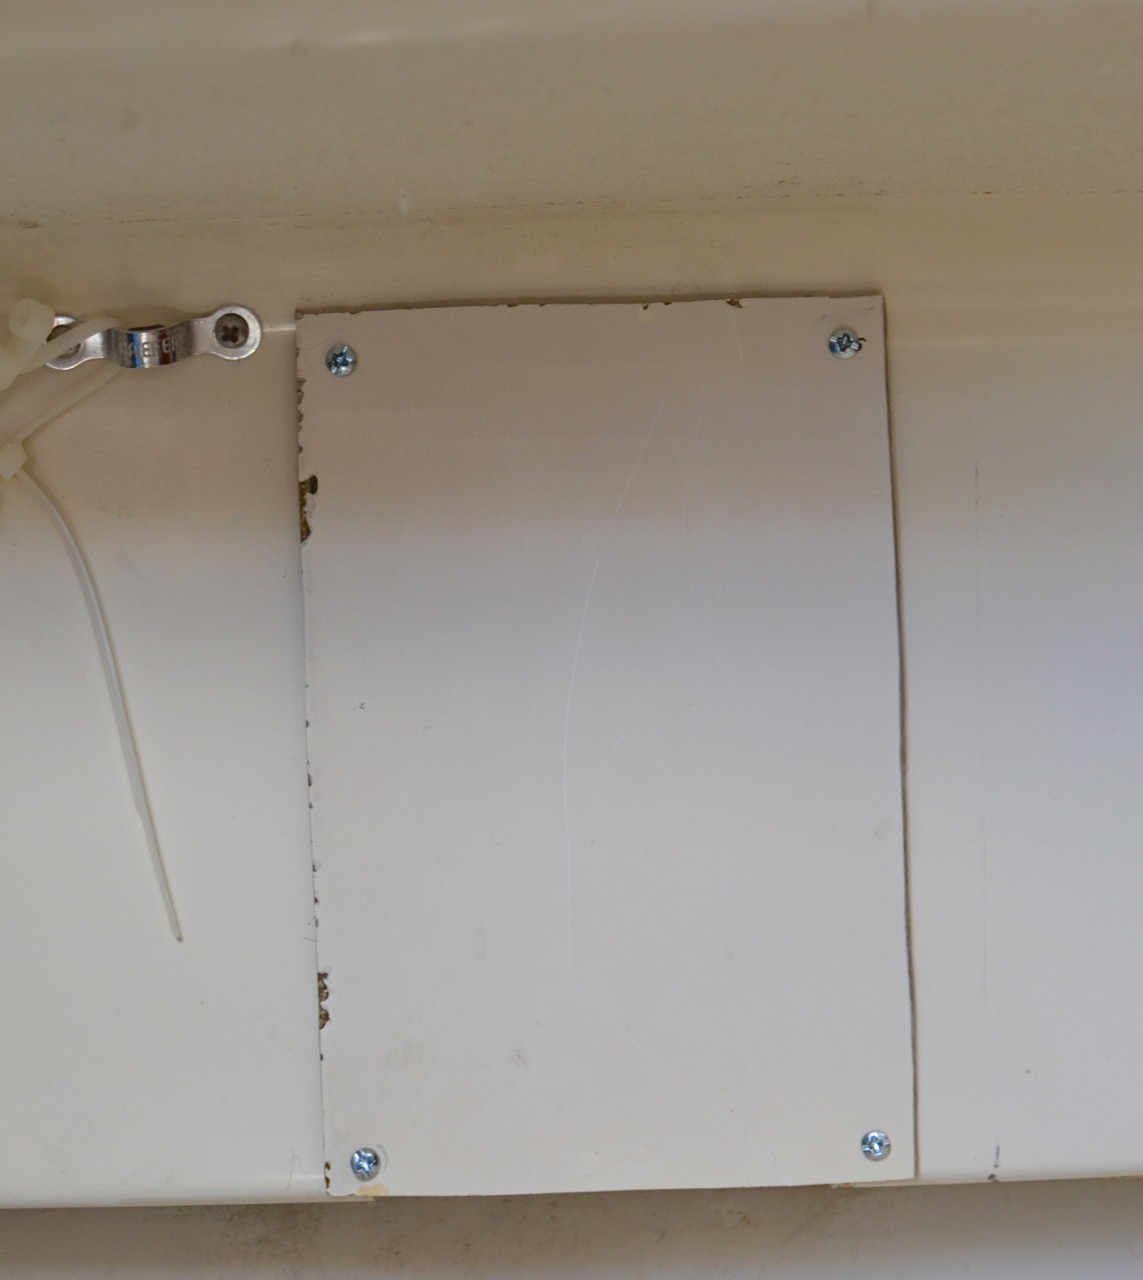
Preparing to Wrestle
This Came off Much Too Easily
Since it was a different type of window, I watched a YouTube video on the process and felt I was ready to go. I unscrewed the inner portion of the port light with it’s spigot and removed it easily. I had expected it to be much more difficult because some veneer is torn away from a couple of the ones in the V-berth, suggesting it was going to be a bear. With the larger window, there had been screws attaching the inside frame to the outside frame to create compression for the sealant. None of that was here. The inside was screwed to the wood and the spigot extended to the outside of the fiberglass where a trim piece was simply adhered with some sort of sealant which was pressed into the gap. The trim piece was also easily (too easily) removed and staining on the underside and on the fiberglass showed where the leak was happening.
Staining Where Water Intrusion Was Occurring
Area Where the Leak Was Damaging the Wood
I’m fortunate to have solid fiberglass, so there was no soggy core. There is a small gap between the fiberglass and the wood walls which was where most of the water had been going. The side of the wood facing the fiberglass was soggy and spongy in the area of the leak. The uncharacteristic 90 degree weather helped it dry out over a day with the assistance of a fan. Meanwhile, I started looking for answers. Why didn’t the screws connect the inside to the outside? How could you achieve a seal without the compression?
It was time to phone a friend. John, who had helped me replace the larger window, came over and looked at it, and agreed that it just didn’t seem correct. We made a field trip to the marine store and described the problem and brought the port light. After tossing around some ideas, a solution was proffered to cut a larger hole in the wood so that the inside section of the window would be directly against the fiberglass! To say I was skeptical, and a little bit horrified was an understatement. I said I’d think about it and picked up the type of sealant that was recommended for plastic.
Through-bolting the Port Light
Sealant Used
It was time for a glass of wine and more research. It’s amazing what you can discover when you read the instructions. There were very clear directions (with pictures) on how to through bolt the window for a solid wall as well as a multi-layered wall like mine. There is 1/4” of fiberglass, 1/4” of space, then 1/4” of veneered plywood on the inside.
The solution was to fill the gap as much as possible with closed cell spray foam to provide some structure for the gap under compression. I dreaded this part because I have had a few experiences with this stuff in old houses that were pretty messy. I made a part list of screws, barrel nuts, mineral spirits and the foam and went shopping.
Closed Cell Foam
Closed Cell Foam in the Gap
The following day the wood seemed dry and I filled the gap with the spray foam. Every time I revisited the opening, more foam had expanded out and had to be cut away, but by the next morning it seemed pretty solid and ready to go. The wood felt dry. Now it was time to drill holes in my boat which scares the living daylights out of me, so I again phoned a friend.
Trim Piece as Template
That Side Hole was a PAIN
Following the recommendations on the company website, we drilled holes through the trim piece and the fiberglass to match those in the wood where the spigot was attached. Due to the placement of one of the shrouds, lining up one of the holes was next to impossible which was remedied by making a slightly bigger hole (giving me slightly more anxiety). The edges of the holes and the main opening were chamfered so they could accommodate more sealant. The product recommended to stick to both plastic and fiberglass was Sudbury Elastomeric Marine Sealant.
table align="center" cellpadding="0" cellspacing="0" class="tr-caption-container" style="margin-left: auto; margin-right: auto; text-align: center;">
Installation Complete!
Once the fiberglass dust was cleaned up and a dry fit done, it was a fairly simple job with two people to get it sealed and the bolts threaded into the barrel head nuts on the inside. I used plenty of sealant, resigning myself to a big clean up, but erring on the side of too much.
I’m very happy to report that after a couple of pretty hard rains, the window, the barometer and the shelf remain dry! There’s still the leak somewhere behind the oven, and I still have 5 more port lights to rebed, but for now, Rubi is drier than she has been in the last two years.
Update August 30, 2016- I am deliriously happy to say that after two crossings of the Strait of Georgia, the starboard side is DRY!


Tuesday, December 20, 2016
DIY Drama - Big Hole in the Boat With a Storm Coming
A while back, Dana aboard s/v Rubigale (good news - s/v NoName is now s/v Rubigale!) had to deal with a problem while looking a storm in the teeth...
Being a boat owner without unlimited funds usually means learning to do many of the repairs yourself. As a brand new boat owner with no experience in this area, I have been chipping away at tackling things I have never done before. I started with my very first oil change, and with instructions, a hand pump and 2 hours, I managed it without incident. A few small woodworking projects and installing blinds ensued, but nothing very exciting.
Since our first big rain, several months after I bought the boat, I have known there were leaks on the starboard side. I usually found them coming from the headliner above the shelf behind the settee. Three stubborn dribbles continued to occur with heavy rain, or water over the bow. Once I even saw water dripping from the screw hole in the barometer which is mounted above the other leaks, making me realize my problem was higher up. I naively applied Captain Tolley’s Creeping Crack Cure to everything I thought suspicious. I re-caulked the toe rail with no effect. I had the mast boot replaced, which stopped the dripping into the head, but the starboard leaks remained. The base plates on the shrouds were re-bedded when the rigging was tuned and I hoped for the best. Just in case, I re-bedded the Charlie Noble, having seen water from there in a windy rainstorm. A scorching dry summer in Seattle didn’t allow me to test the changes for some time.
In early August we finally had some rain. Not the typical plant mister rain, but real rain. The three little rivers on starboard showed up on queue. The barometer cried. The chimney was dry, but it wasn’t a windy day. BUT! a new clue appeared. Drops of water came from one of the screws of the forward starboard aluminum window frame. BINGO!
I had never re-bedded a window before, and I didn’t have the slightest idea what the internal anatomy of a window frame looked like. However, I had a friend that had just done this project on his boat and he emailed me detailed instructions. I bought what I was told was needed, and he even stopped by to make sure it was the same type of frame and prodded me to take the inner frame off to get a better idea.
Not only did it become more clear how the windows were mounted, and that this should be a doable project for me, but it was very clear there was daylight coming through the forward edge of the caulking and it was an obvious leak source. It was also obvious that whoever had cut the hole for the window did not have the steadiest of hands. The cuts were undulating and erratic, and at one point the inner frame barely covered the cut.
My first job was cutting through the bedding compound from the inside, then going outside and trying to lightly pry the frame from the compound and the boat, millimeters at a time with two flathead screwdrivers. The top and forward edge (leaky side) came loose easily. The aft and bottom took forever. I was starting to sense the frame coming out as I could hear the bedding letting go slowly. I had a vision of a small victory dance on the dock with the window in hand.
Then I heard another sound. CRACK might be the sound of victory on some circles (lumberjacks, chiropractors, gladiators), but it was not a good sound for me. Yes, I cracked the glass at the one area that the wood pinched the frame inside. I got the frame out, cleaned it up, cleaned the old compound off the boat, and taped plastic inside and out. It was a weekend, and apparently no glass places were open. The drama was starting, because I was leaving (with the boat) for over a month in 15 days (10 business days), and most glass companies had shorter workdays than I did, so getting the glass there and back would be a challenge. I did research, left messages, called friends, went on rushed lunchtime field trips, only to be told “at least two weeks”.
I was starting to panic, but with some footwork help from my friend John, a place was found that could do the job based on the photos I texted him of the glass and the frame. It happened to be one of the places I called Saturday, but hadn’t yet returned my call. They gave an estimate based on the photos and size, and quoted a twenty four hour turn around. I drove the frame there on Wednesday (my day off), but wasn’t sure how I was going to get it back again in time since they were closed on weekends. John agreed to take possession on Thursday, and the plan was to install Saturday. Then we got the forecast.
The storm was coming early Saturday, and it looked ugly. Rain and 25-35 knots of wind. It was great news for our wildfires, but bad news for a boat with a big old hole. I didn’t think the plastic on the inside and the shower curtain taped on the outside were going to make the grade. I was worried. John came through again and he and Lisa brought the new window around the time I finished work.
The job went faster with three pairs of hands. I grinded a bit off the areas that pinched and re-cleaned the surface. The window was dry fitted and the inside from secured lightly while the outside surface was taped off. The window came back out and the portion of the frame that fits against the hull was given a healthy bead of 3M 4000 UV. As John fitted the frame back in, I started re-attaching the screws on the inside frame loosely until they were all in, then tightening them all a little at a time like putting a tire back on. Finally after the screws were all tight, we got to work scraping off the excess sealant and cleaning any mess with denatured alcohol. Once that was finished, the tape came off, and the job was done.
I awoke at 8am to a text…”how’s the window?” Honestly I was afraid to find out, but the bilge pump hadn’t come on so I figured it couldn’t be too bad. I crawled from the V-berth and inspected the window frame-dry. The three rivers that ran down the wall beneath it-dry. The barometer-weeping like a willow. Oh well, three out of four is pretty good in my opinion. The barometer leak will wait for another day. I have a few leads and a lot of work, but at least I didn’t have a huge hole in my boat during the biggest summer storm in Northwest history!
Photo Credits: Lisa Mize – Sunrise Photography by Lisa


Tuesday, November 15, 2016
Re-bedding One Stanchion
It's getting cold on the East Coast, so here's a post that Rick on s/v Cay of Sea did last summer. Rick always shows excellent attention to detail...
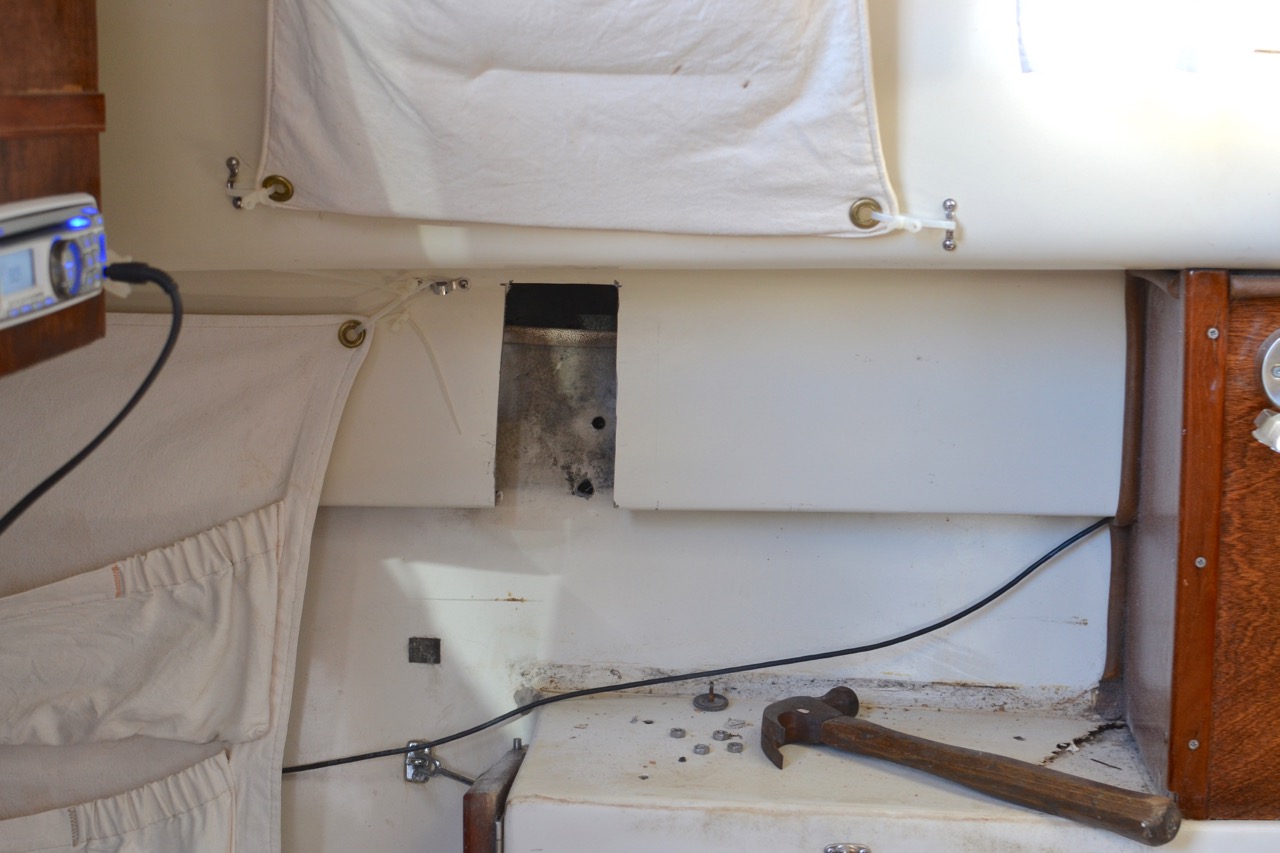
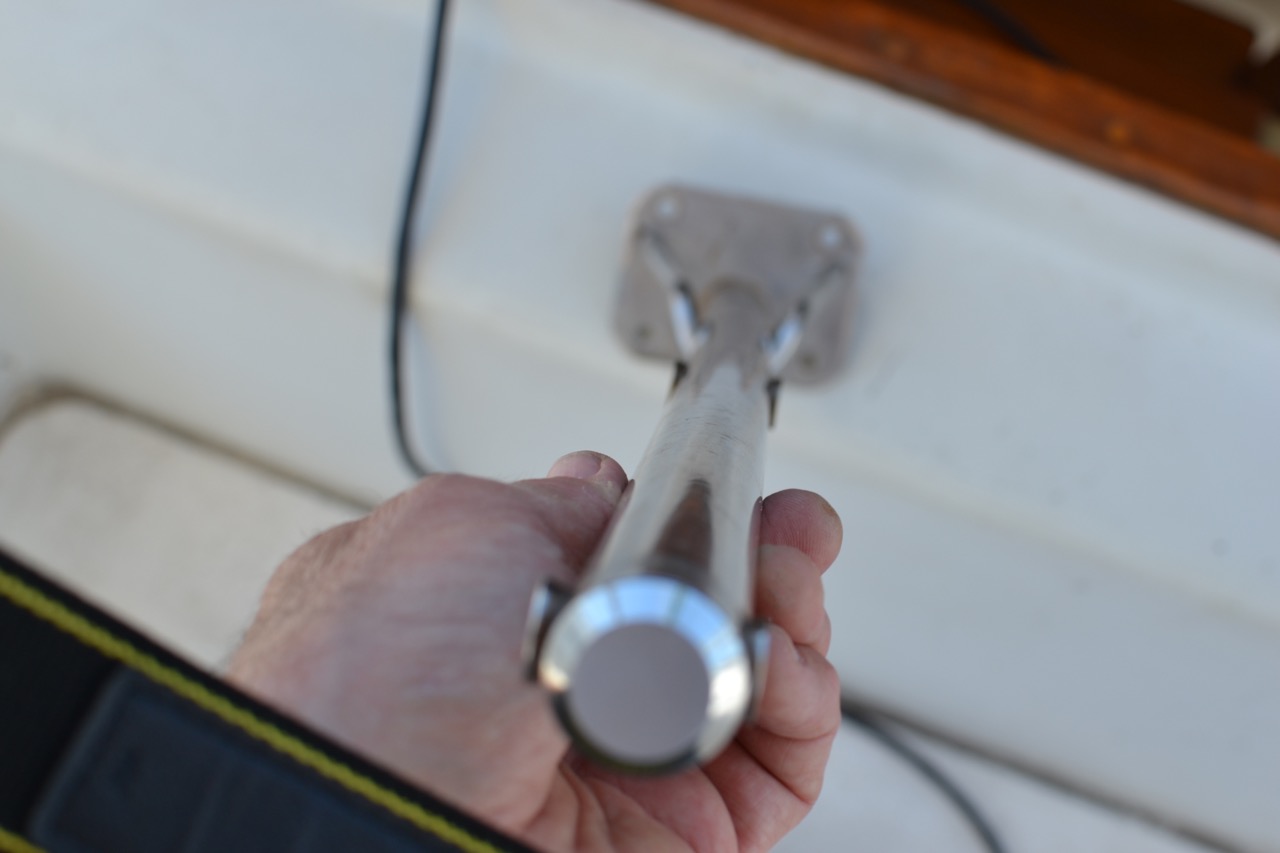
I have been suspecting this particular stanchion as the source for leaks for quite a while. At one point 6 or 7 years ago, when we were in a shallower slip in this same marina, we had a super low tide. The boat grounded out and leaned over against the finger pier and, I think, slightly bent this particular stanchion. I’ve never re bedded any of the stanchions, so this was the original compound underneath. Stanchions are not designed to be pulled on, and certainly not designed to withstand having the weight of the boat push them into a pier, so I believe that is when it began to leak a good bit. It may have leaked some before then.
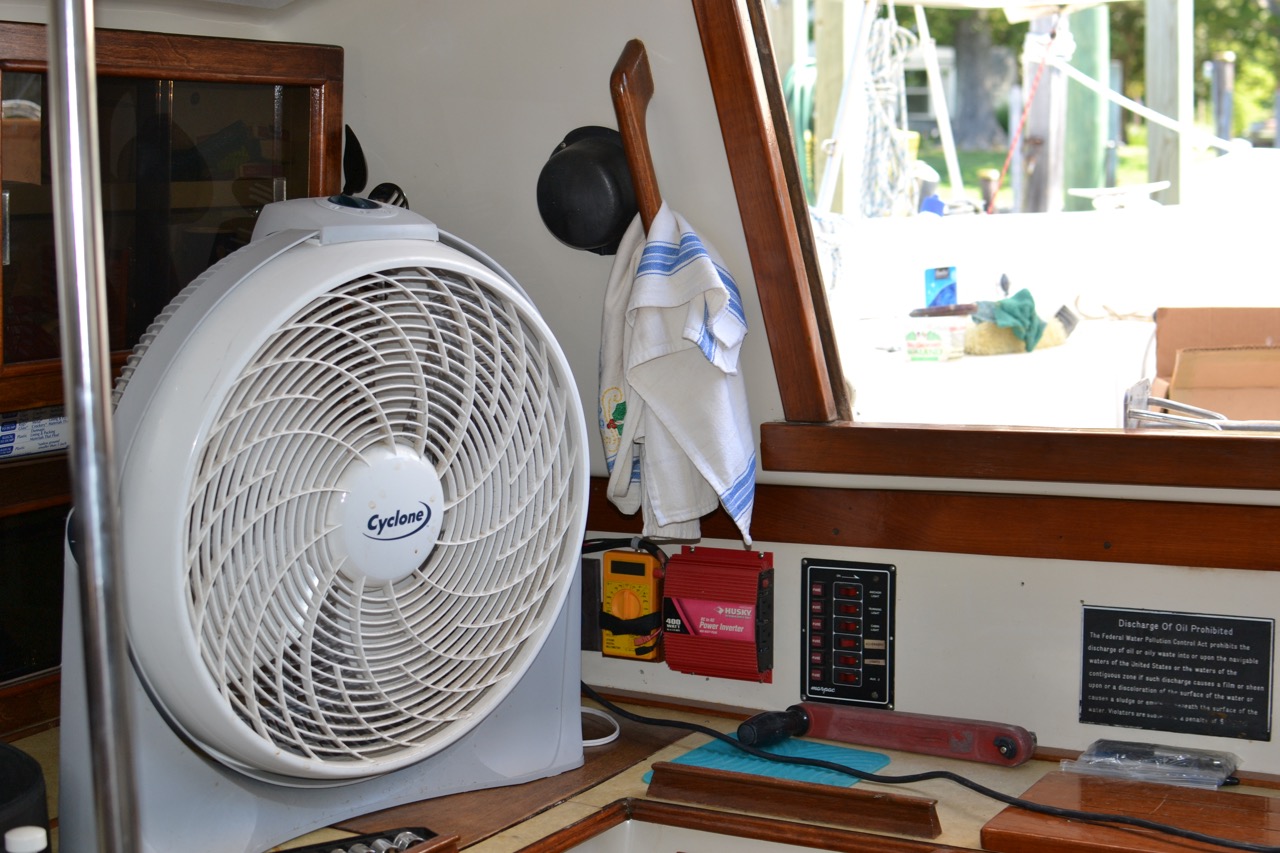
Regardless, I decided that I wasn’t going to hide from the heat today, and ventured down to the boat with my large fan in hand. I set it up on the galley counter, and it made a huge difference in tolerating the heat today. I also put up all my hot-weather canvas and kept as much sun off the boat and myself as possible.

Tuesday, January 14, 2014
Wire chase/conduit through cabin top
Scott had need to run several (heavy) wires on s/v Valkier, from the deck under the dodger into the interior. Not using new-fangled wire glands (he'd have needed a lot of them...), Scott opted for the time-honored solution of a standpipe. Read on...
We needed to run 4-AWG cable from the solar panels on the new hard dodger down below as well as route the cable for a GPS antenna and 12 volt accessory power to under the hard dodger. We decided to use 2 inch PVC pipe with a 180 degree bend in the pipe to keep water out of the boat. The following pictures show the drilled holes and filling of the core and then gluing of the pipe in to the cabin top with epoxy.
We drilled the big hole for the pipe and took the opportunity to fill in with epoxy some bolt holes for hardware that was no longer there
Duct tape worked great for sealing the bottoms of the holes so that epoxy did not leak down below
The shows where epoxy has filled in the core and around the standpipe
Most of excess epoxy cleaned off
Underneath after tape was removed
Eventually after the non skid is put on we will also paint the PVC pipe.
Finished wire conduit. Eventually the deck will be sanded and new non skid will go around and over all holes


Tuesday, November 26, 2013
Installing Stanchion Bases
Please welcome new contributors Ken and Vicky, who live aboard s/v Painkiller! Ken is a prolific writer and so his project write-ups spread across many posts. For his first contribution to Small Boat Projects, we join him as he completes the rebedding of his stanchions. But to get the context, you should also read Part I, and Part II.
So here is Part III:
So here is Part III:
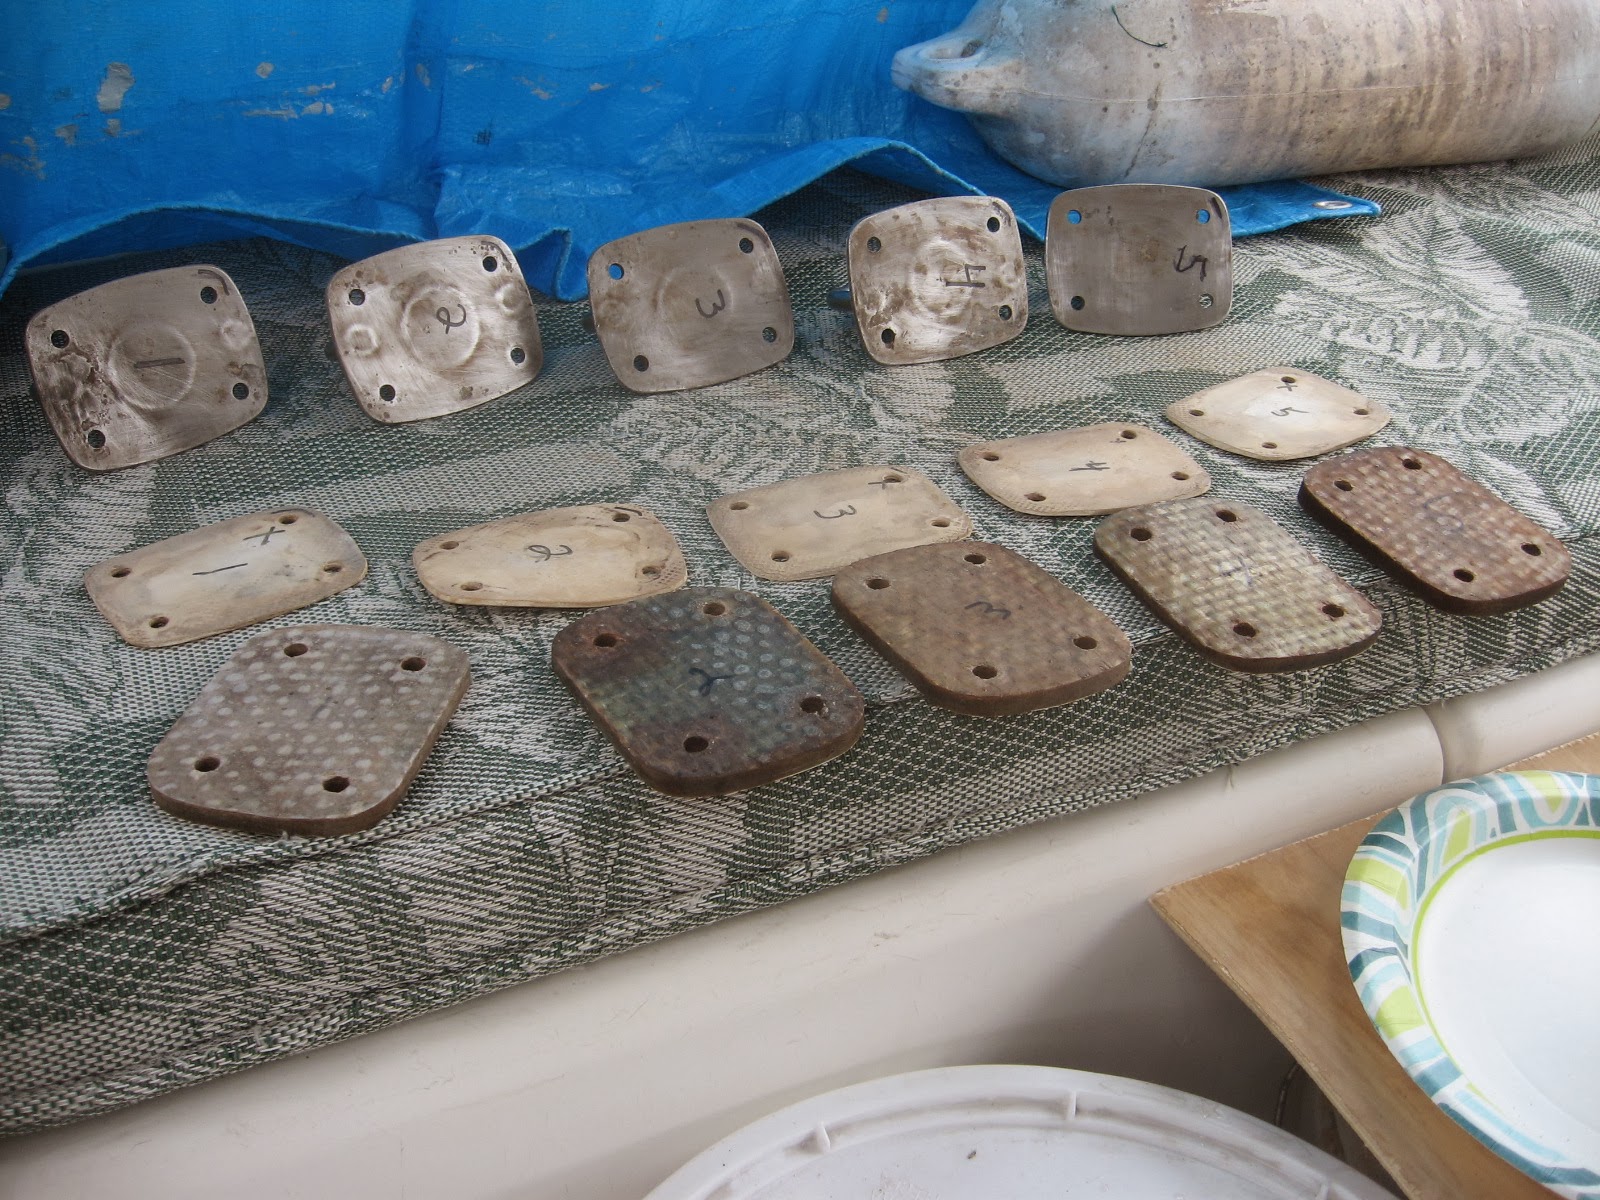
With a full on rainy day, the day after getting the top layer of epoxy on the night before, I was able to prep all the bases and hard rubber pads. Lots of cleaning, sanding, trimming the rubber and keeping all the ducks in a row. Bases, rubber gaskets for deck and the backing plates below decks which were all mostly fine. I see no need for all the extra work and material to replace them now that I have a solid epoxy deck layer above them.
Working with rolls of butyl rubber, which makes it so easy to prep, not to mention the mess factor is so minimal you have to wonder why you haven't done it this way for years. Squirting goop out of a cylinder is always messy, needs masking and wasteful.
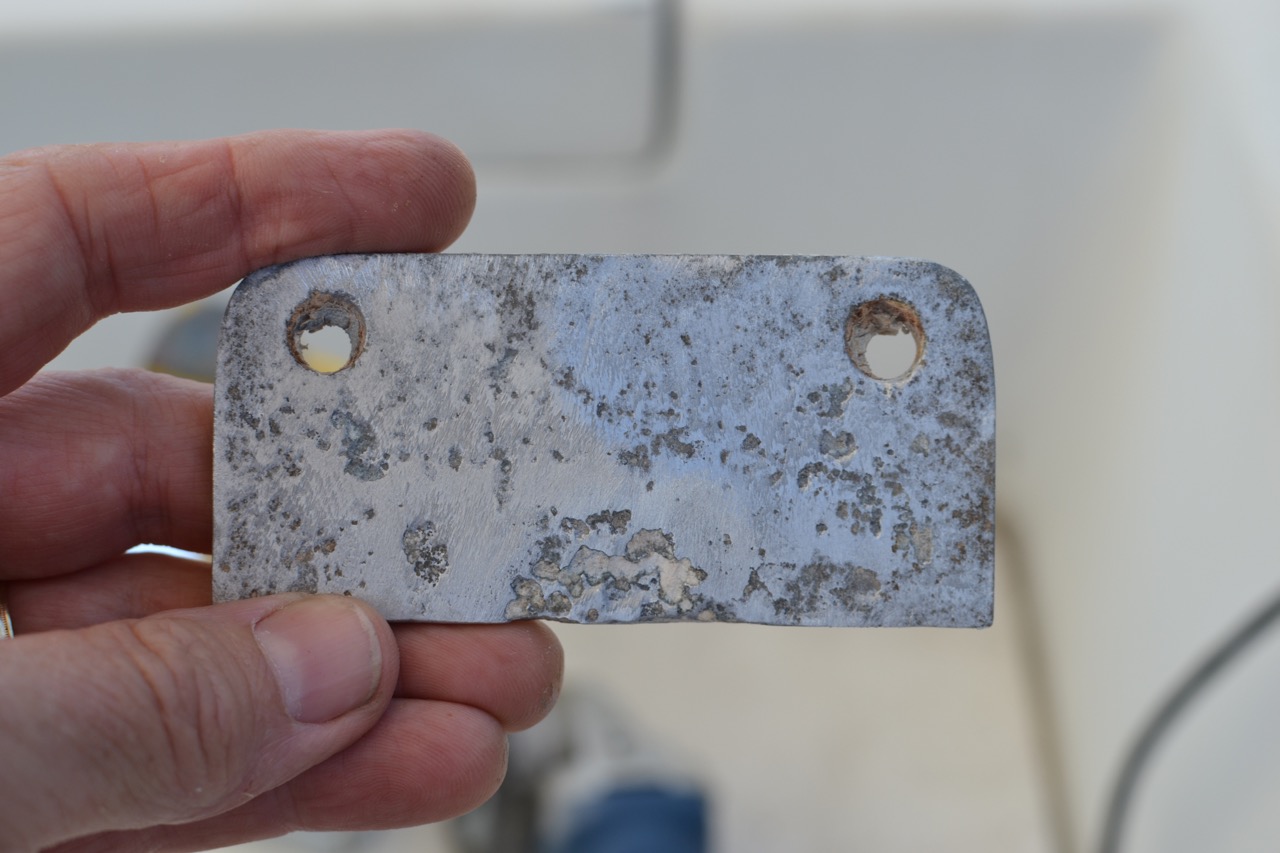
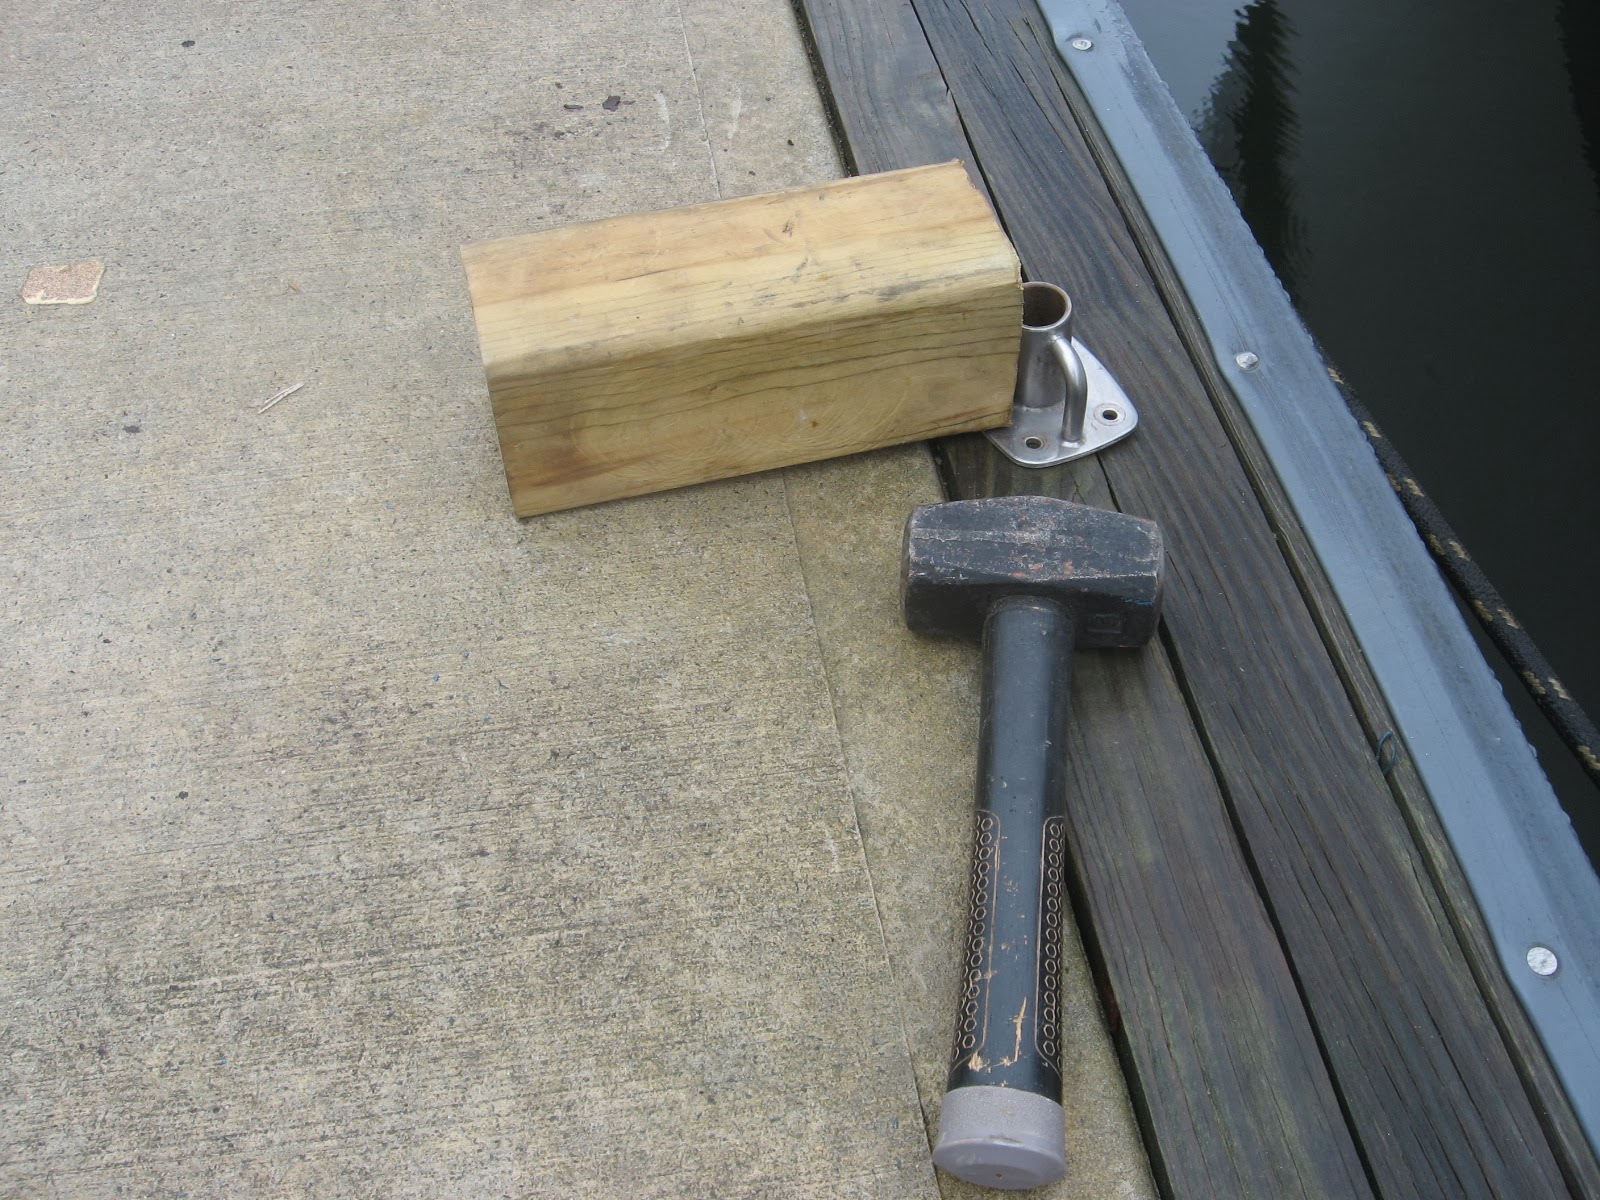
Some of the bases had been bent so with a proper size hammer, some concrete and wood dock I persuaded them to be flat, within reason.
The epoxy was quite proud and needed more sanding than I wanted too, but they came out fine with only a few easily repaired air bubbles.
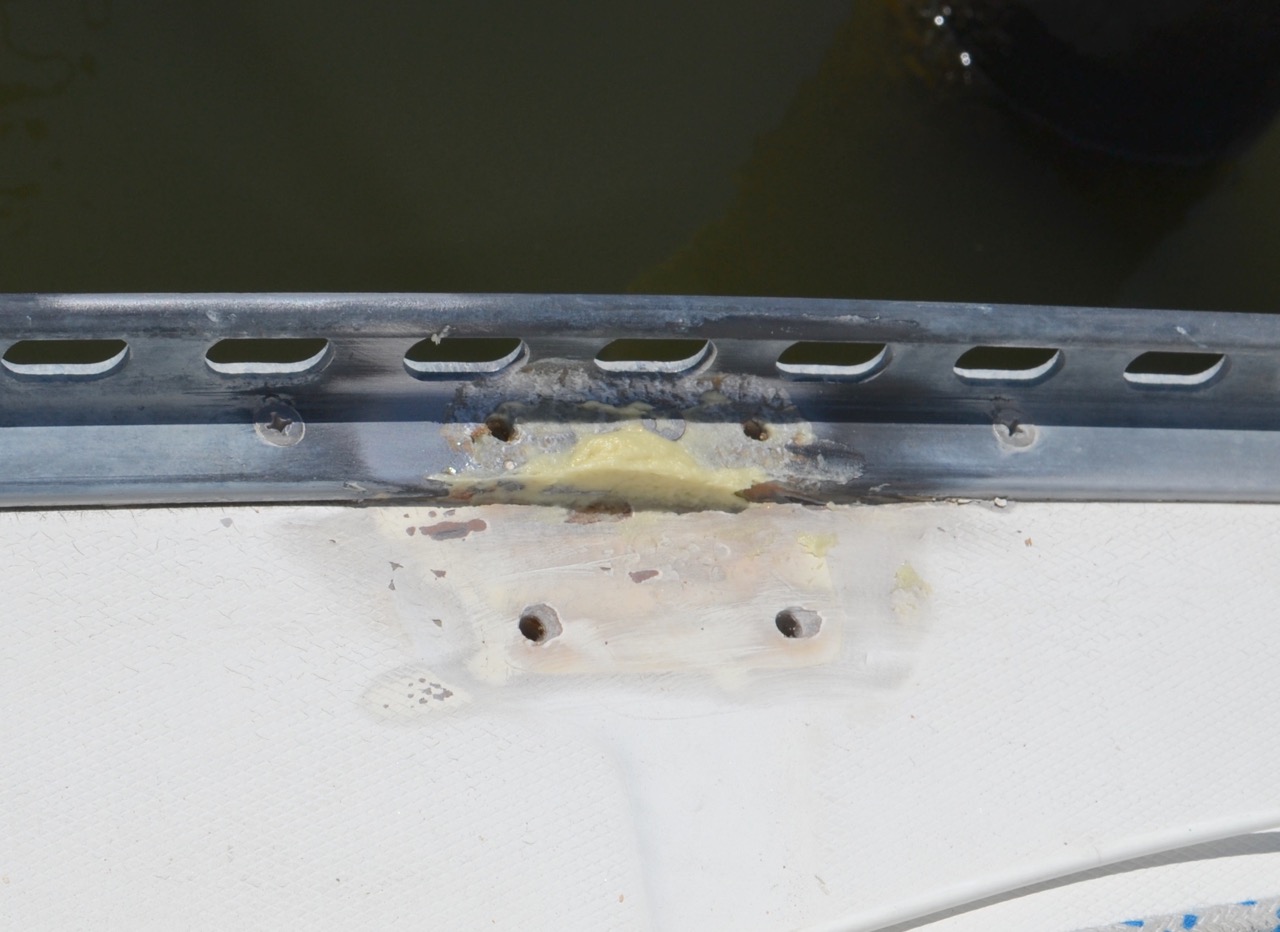
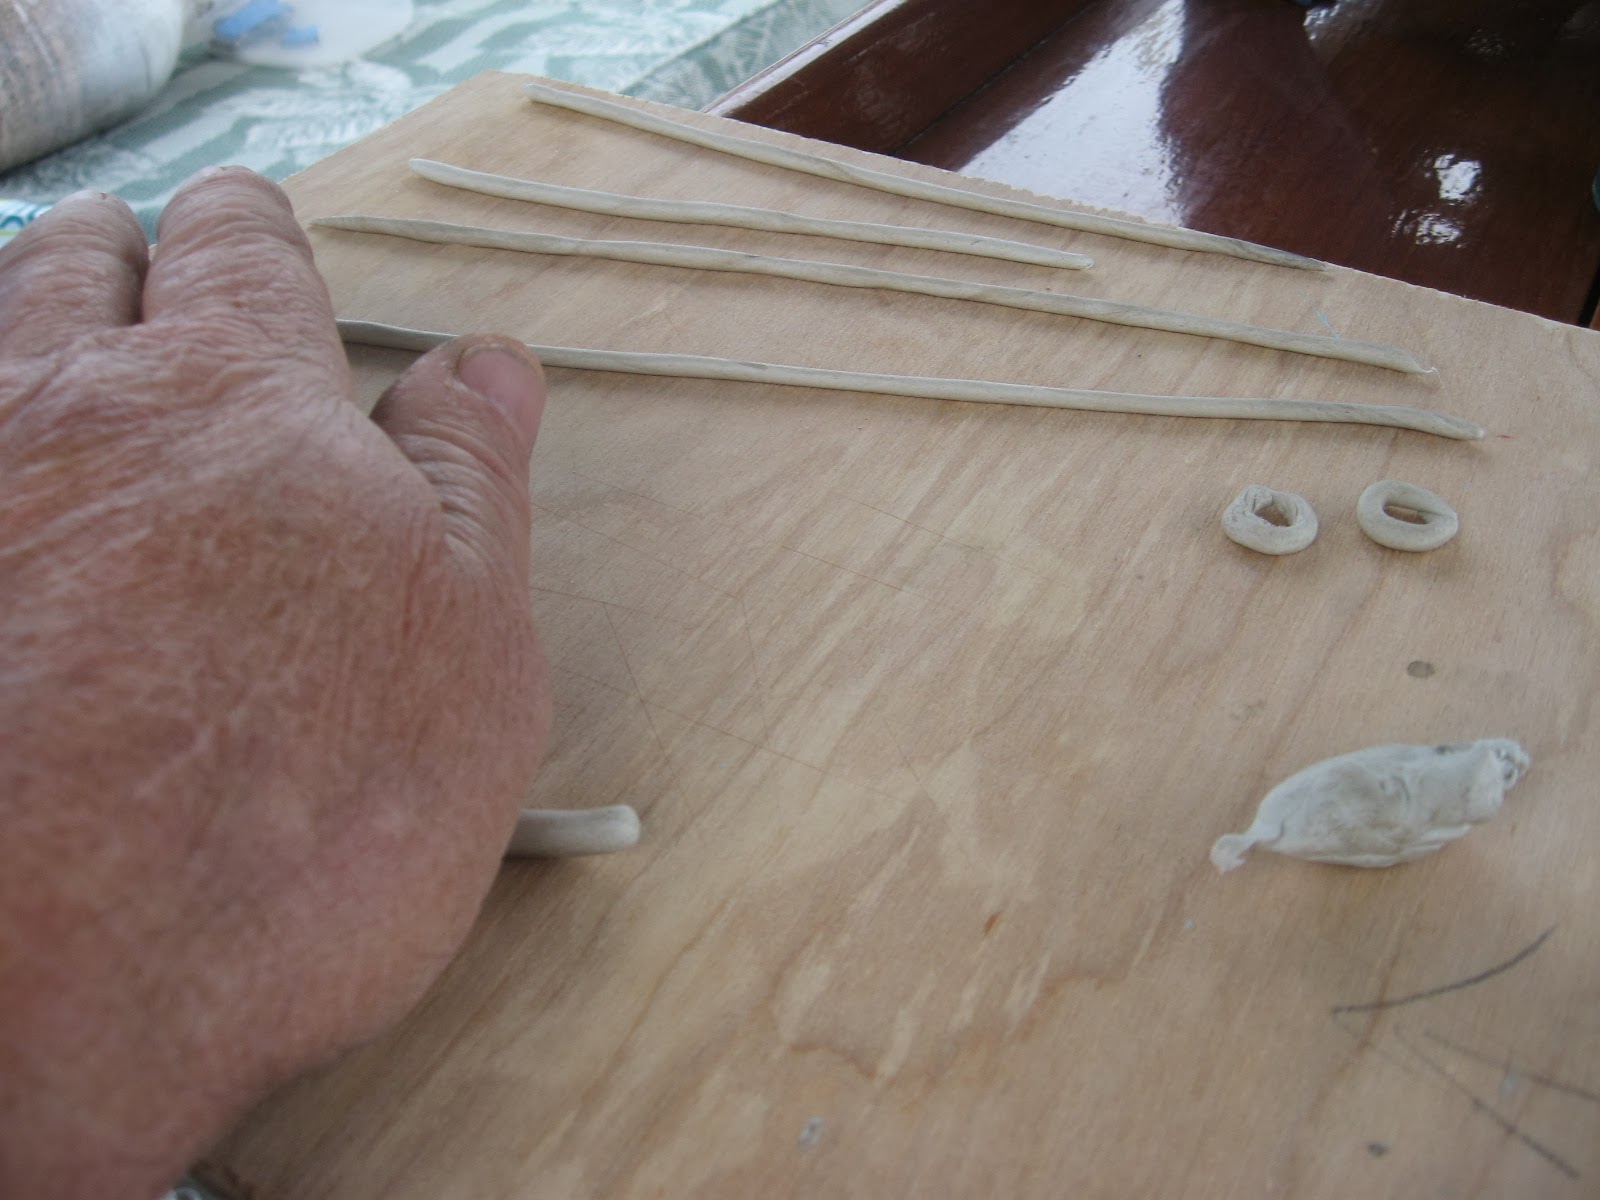
All holes transferred with butyl cheerio's in place...
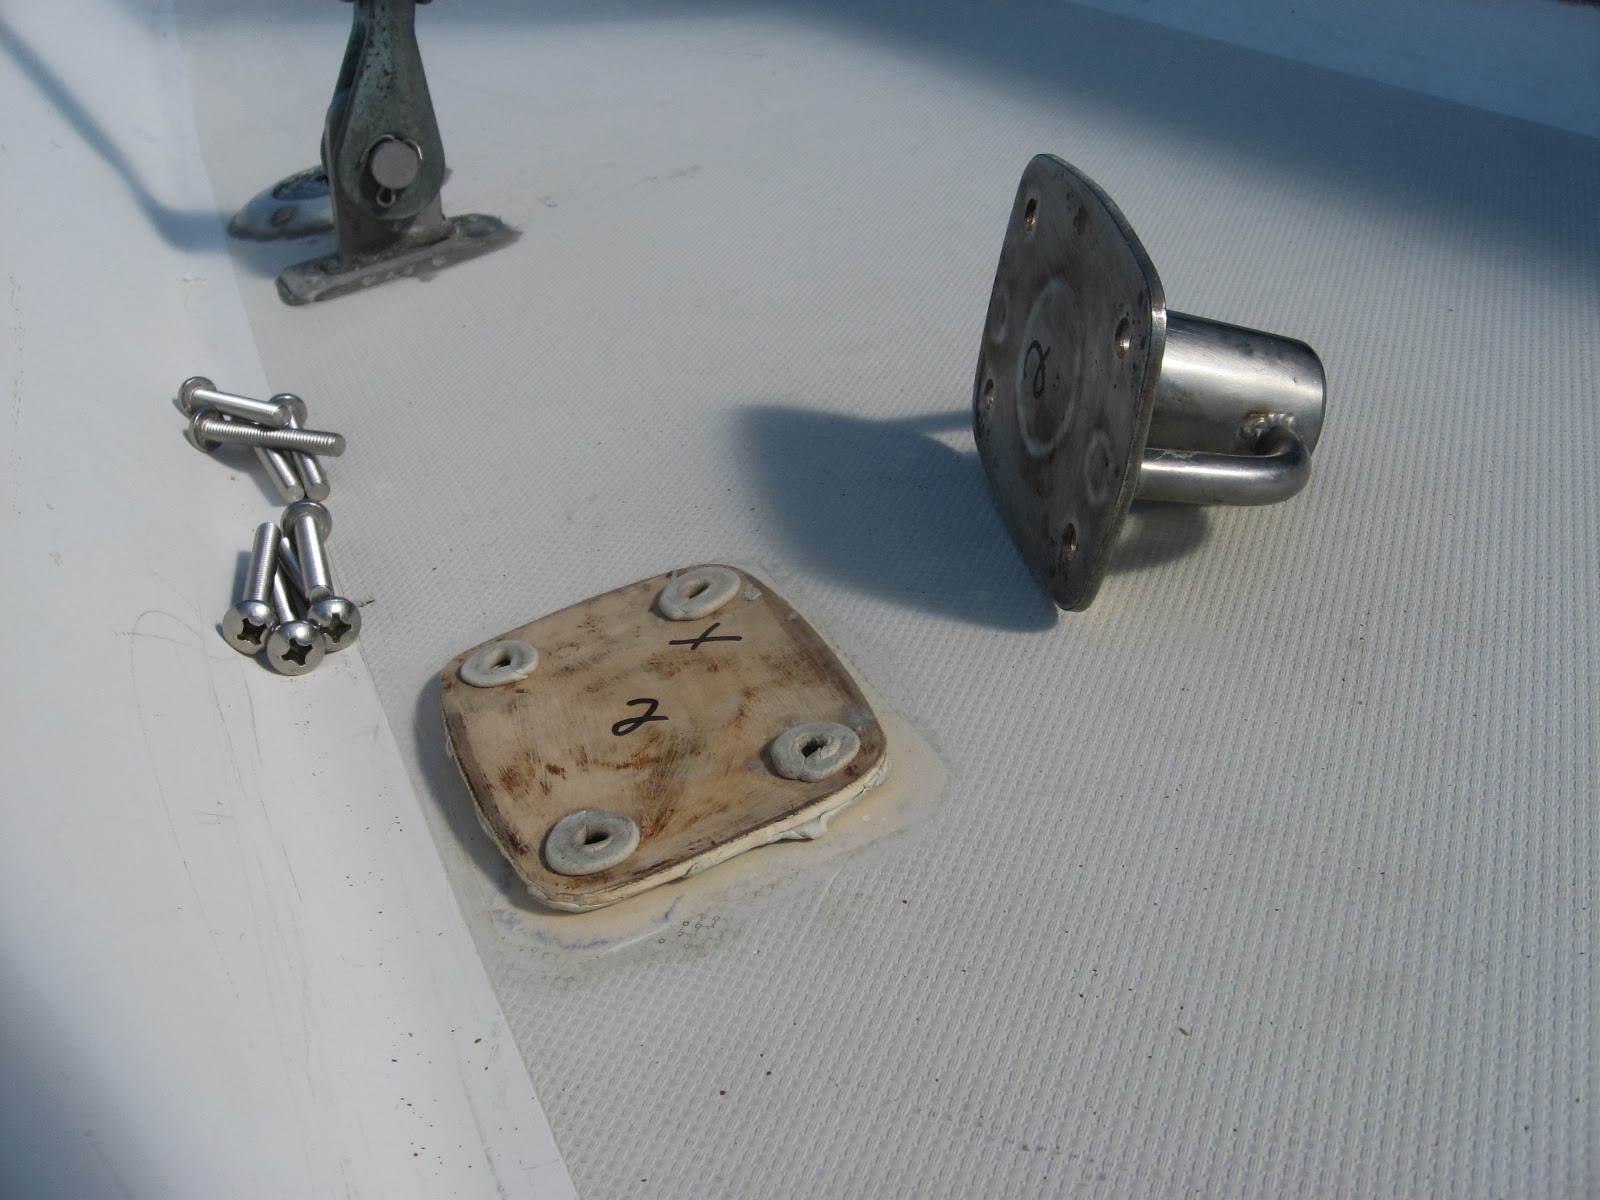
...shiny new bolts started in place to ease locating the backing plate from under the deck...
...backing plate dressed with cherrio's, bolts tightened, all the lockers and wires reassembled...done.
This picture (early morning, dewy, telephotoed from the dry cockpit so it's blurry) shows some of the butyl still squeezing out overnight. In a couple of days we'll give the base a thorough cleaning and eventually touch up paint when we finish bedding all deck hardware.


Subscribe to:
Posts (Atom)


