A year ago last month, I fabricated and installed an anchor platform for Cay of Sea. This took quite a while, because the platform had to accommodate a danforth-style hook – not the easiest anchor to fit to a platform. Also, it was a “custom” fabrication, so there was a great deal of measuring, marking, trimming, fitting, refitting, remarking, designing, redesigning – you get the idea. It was a lot of fussy work, but the result was a great improvement for stowing and handling the ground tackle.
This is the way it looked this spring before the finish failed. Compare with the following images:
Failed Finish
Close-up of failed varnish and darkened grain
So maybe this doesn’t look to alarming to you, but considering that it is made of red oak, taking action is indicated sooner than later. Red oak is a lovely dense, hard wood that is tough. The problem with it is that it is rot-prone. I knew that when I used it to build the platform, but I used it anyway because it was readily available and reasonably cheap. I reasoned that if I kept it protected with epoxy and varnish, it would do fine.And it would have done fine, if I had kept up with it this year. However, I got in a hurry last fall to use it, and only put on 3-4 coats of cheap varnish, promising myself that I would do a better job soon. . . Soon is relative, you know. I should have re-varnished this spring with the good stuff, but I didn’t. Subsequently, here we are in mid-fall, and I’ve got to redo the finish correctly.
I was also dismayed to find out that the fender washers I used weren’t stainless, or were an inferior grade of stainless, and they rusted. I know I chose them from the stainless bin, but sometimes fasteners and hardware gets shifted about. When I reinstall that platform, I’ll be sure to use high quality stainless fender washers.
After removing the platform, I was happy to see that my sealant (Boatlife caulk) did a great job of keeping the water out of the boat and out of the bolt holes. I sealed the deck holes with epoxy last fall, but did not pot the holes and re-drill. I intend to do that while the platform is off too.
So the first step was to remove/strip all the finish off. I used Strypeez paint remover – the really thick stuff, and it did a really good job. It was in the 50s yesterday while I was using it, so it worked a little more slowly, but it did the job.
Strypeez slathered all over
After removing the finish, I used oxalic acid to bleach the dark lines out of the wood, and lighten it over all. Three heaping tablespoons in a quart of hot water made a very strong solution.
I wiped the piece with solvent, then mixed my epoxy resin, and here I may have a glitch. My container of West System resin pulled air with the second pump, and I got an imprecise measure of resin. I pumped in two pumps of catalyst anyway, and hope the ratio is nearly correct. If it isn’t, it won’t cure properly – I’ll know tomorrow morning if it cured. If it didn’t cure, I’ll have to strip it again and re-coat with a properly mixed ratio. Regardless, I’ll need more resin for subsequent coats, so there’s no great loss if I need to take an uncured coat off – just a bit of time.
And, I got a comment on my introductory post requesting a few more photos of the platform, so here they are:
Showing posts with label design. Show all posts
Showing posts with label design. Show all posts
Tuesday, October 23, 2012
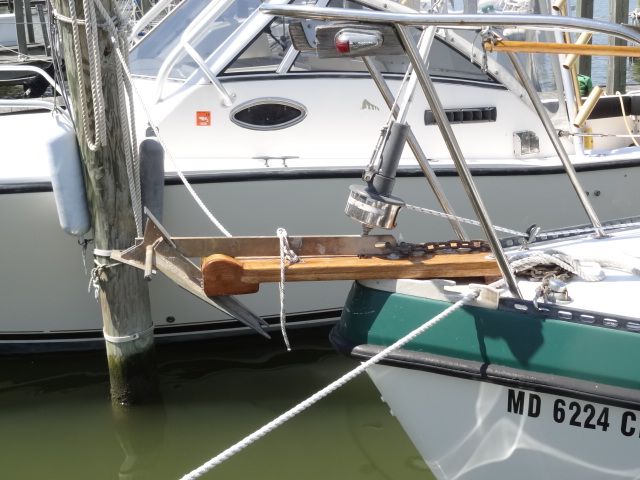
A custom anchor platform
Because of their shape, Danforth anchors are difficult to stow on a "standard" bow roller. Rick dealt with this problem on s/v Cay of Sea by making his own anchor platform, specifically designed to work with the Danforth. Tho the project below does not show the design and construction of the platform directly, I think the pictures give enough detail to allow one to construct their own anchor platform:


Monday, December 19, 2011
DIY Davits
Do you drag your dinghy behind your boat? If you do, you've probably wished for a set of davits, but they are sooo expensive. Brian over at Dock 6 shows us that you can make your own!
My low-buck dinghy needed a place to live. So I had to build some low-buck davits.
Updated:
Have you priced davits lately?
At the bottom end of the scale you have Plastimo davits, which start at $750, and it goes up from there. In keeping with my low-buck theme, i figured i would see if I could build an acceptable and attractive alternative, to carry the low-buck dinghy. The dinghy itself weighs less than 60 lbs., so here's the challenge I set:
Build a pair of davits that would carry 75 lbs each, (for a combined total of 150 lbs) without failing, that would not embarass me when hung off the stern of Whiskeyjack (or her, for that matter,) and that cost less than $100.00.
Here we go.
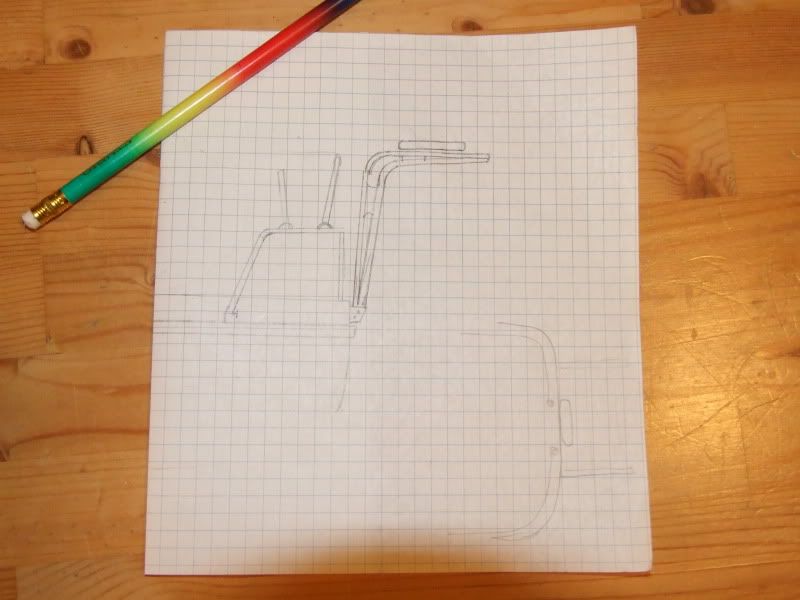
First, I created an artist's rendition of how the davits should, and if all the stars lined up correctly, would look:
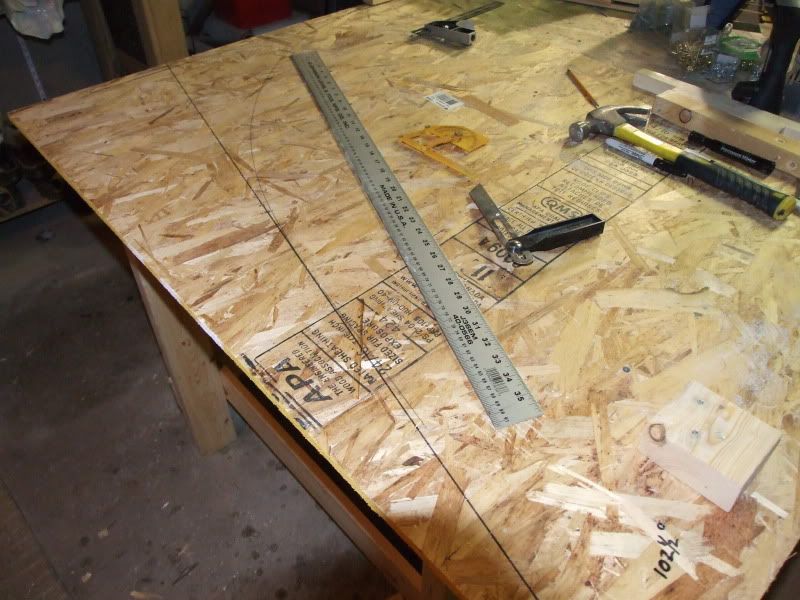
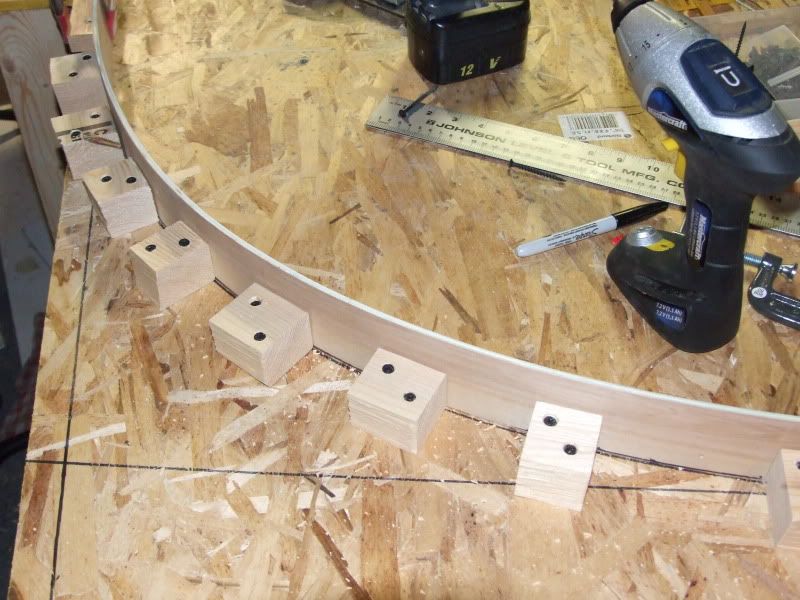
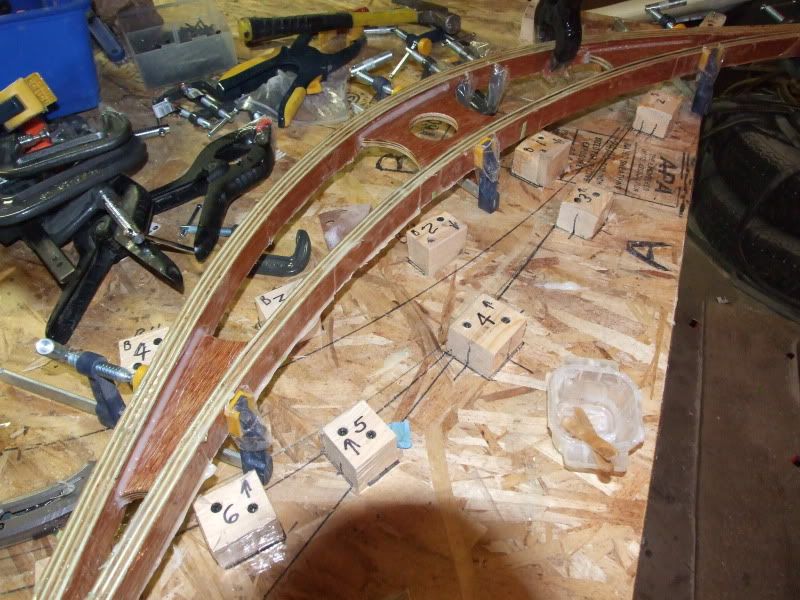
Then I carefully calculated the height and extension of the davits, as well as the angle of the dangle, then guessed at what looked like suitable dimensions. I laid out those dimensions on a layout table. this is where the davits will be born.
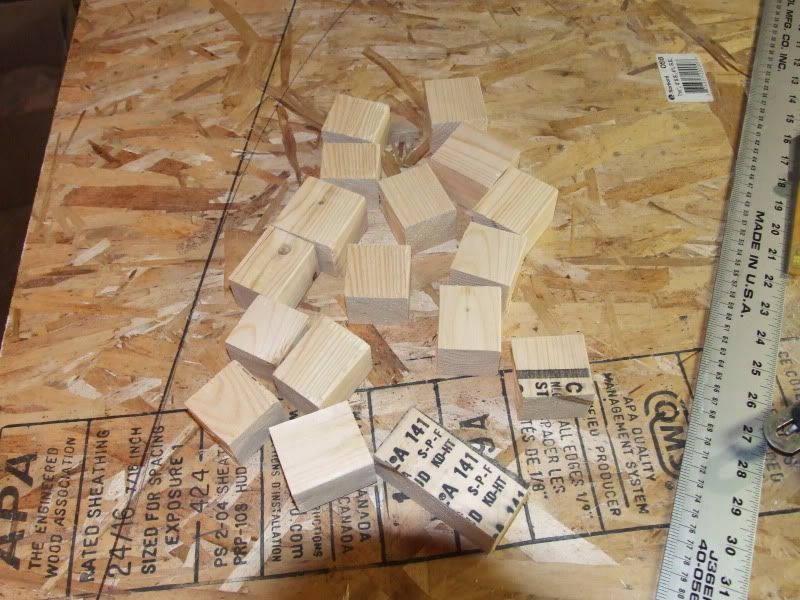
I cut a length of scrap 2x4s into even smaller scraps, then split those even smaller scraps into even more smaller scraps. These will become clamping cleats.
I then bent a batten of the construction material of choice, and traced the curves to establish where to secure the clamping cleats.
At which point I have unavoidably screwed up.
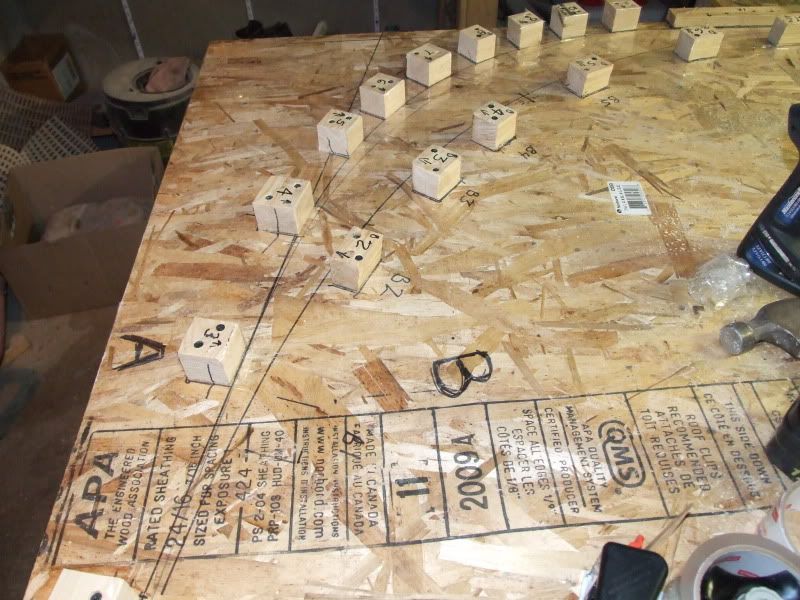
I am going to fab my davits out of my old friend, 1/4" mahogany ply and epoxy and fiberglass. For all intents and purposes, the ply is simply a support system for the epoxy and cloth. Each strip of ply will be buttered with thickened epoxy, and the entire laminate will be covered in fiberglass cloth... which will mean it will be permanently fastened to the layout table beneath it. They may very well end up being very attractive davits, but incredibly useless if permanently bonded to a table in my basement. So, I unfastened all of the cleats I had securely fastened to the table, after carefully labeling each one...
...and then I sealed the table and each cleat with a few layers of clear packing tape. Now, in theory, the davits will simply happily peel free of the table.
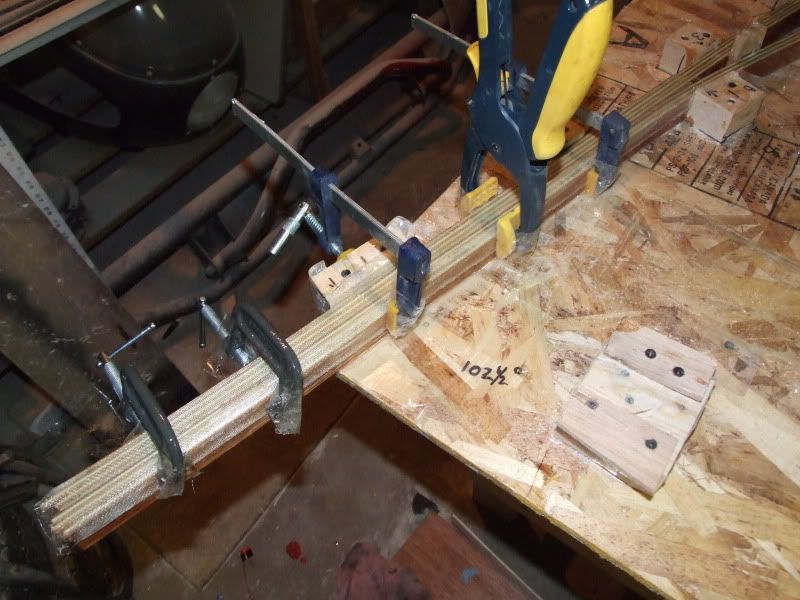
I then fired up my table saw, and ripped 20 1 1/2" strips from a 4/8' sheet. i planed them down so they were all more or less uniform in width, and dry laid the first davit. I trimmed the ends approximately to length, marked each strip for the assembly sequence, then buttered the exposed side with straight epoxy, and the mating surface with thickened epoxy, and got to clamping.
I decided to take advantage of some left over epoxy, and laid a layer of FG cloth wet on wet on the ends of the davit.

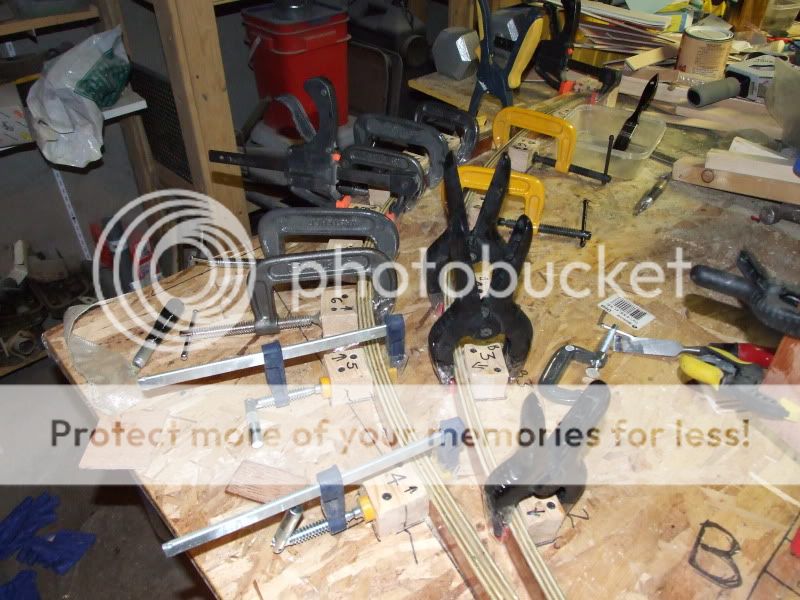
Davit one down. One more to go. Then I get to fab a mounting system.
Gussets cut and filleted into place
Next step is to sheath the plywood with a layer or two of fiberglass cloth, which will add some stiffness and also help spread the load.
Speaking of loads...
Do you really think I am just flying by the seat of my pants, guessing at all this stuff? Do you honestly think that I am not smart enough or organized enough, to have run load and stress projections on the material before I started making sawdust? Honestly, do you really think I am a complete moron, simply crossing my fingers and hoping for the best?
If so, you are absolutely right, which is why I am only building one davit at a time.
Seriously, once I have this one glassed I am going to clamp it in it's installed position and start hanging weights from the end. I THINK, based on some admittedly basic calculations coupled with past experience, that I should be able to hang 75 lbs. without failure. That represents 1.5x the weight of the dinghy, or 3x the weight of the dinghy hanging on the pair of davits, which I THINK should be enough to tolerate some wave and wind stress. If nothing else, I will have a place to hang my solar panels, which is a secondary reason for this project. Yes, there will be two crossbars to tie the davits together and add some lateral stiffness, and provide aforementioned solar panel mounting.
I am going to use a couple of pieces of scrap stainless tube and some stanchion fittings to tie into the stern rail, and the foot of the davits will mount to the transom. I think I will have to fold some stainless sheet into a flanged Ushape for the transom mounts and then through bolt the davit to the plate and through bolt the plate to the transom with backing plates.
STRESS TEST RESULTS are in:
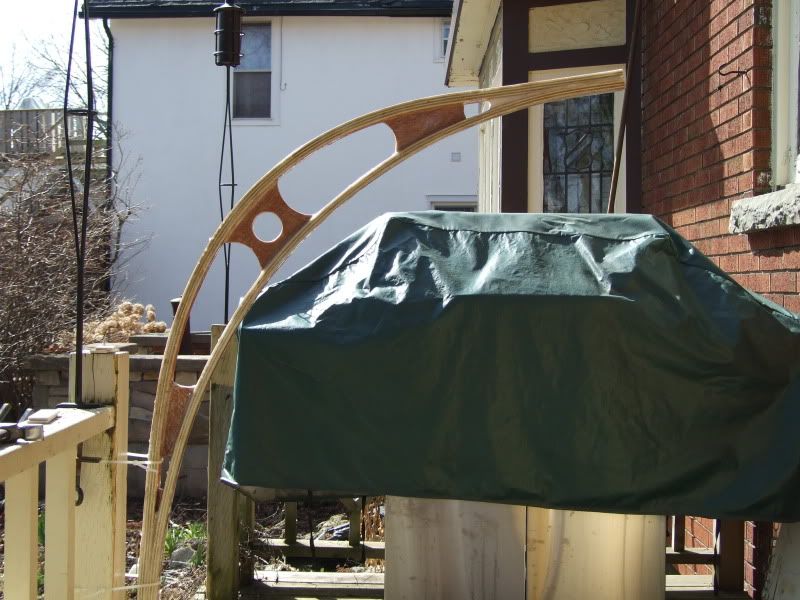
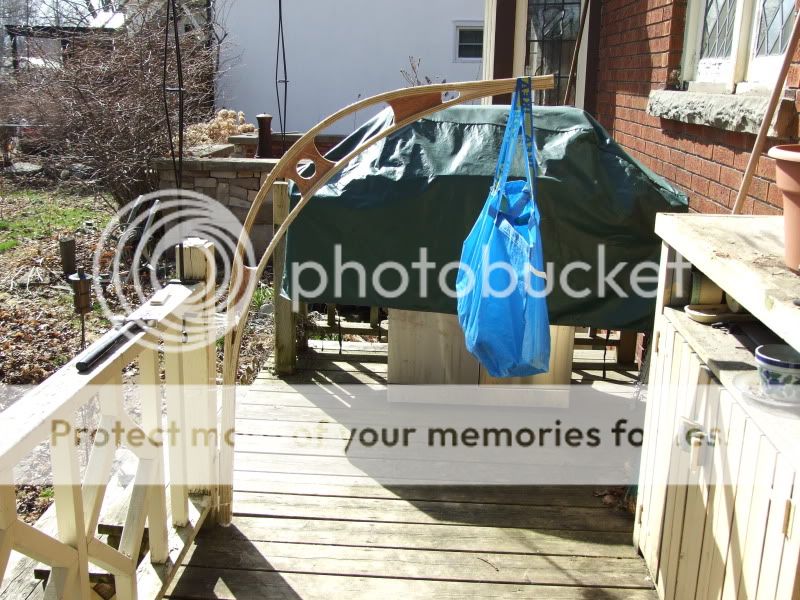
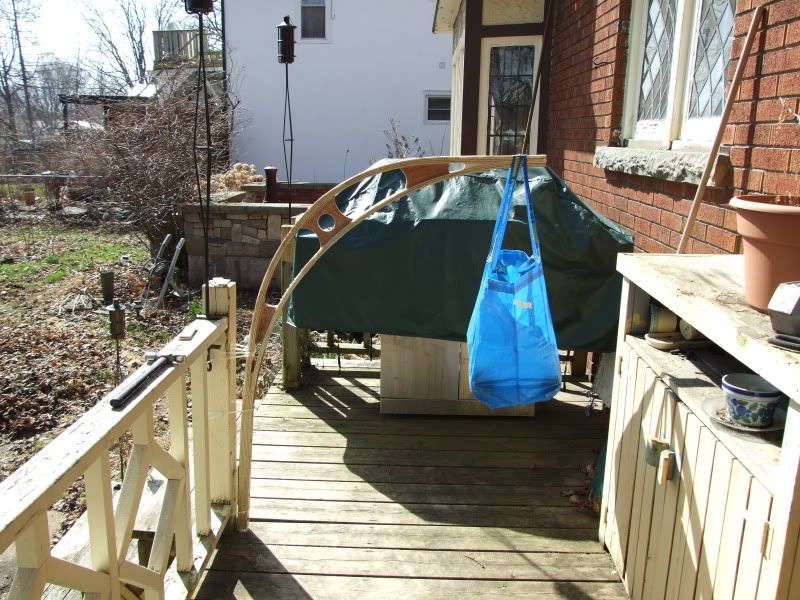
The weather was finally nice enough this week to see if my davits can carry the weight. (Actually,it took me a while to get up the guts to test my own WAG-style of engineering, but cold temps and rainy days make a good excuse.)
I carefully designed and skilfully constructed a cutting edge testing platform, then designed, cast and calibrated weight apparatus, and... I actually just tie-wrapped the davit to be tested to my back deck railing and hammered in a couple of wedges to keep it from moving around.
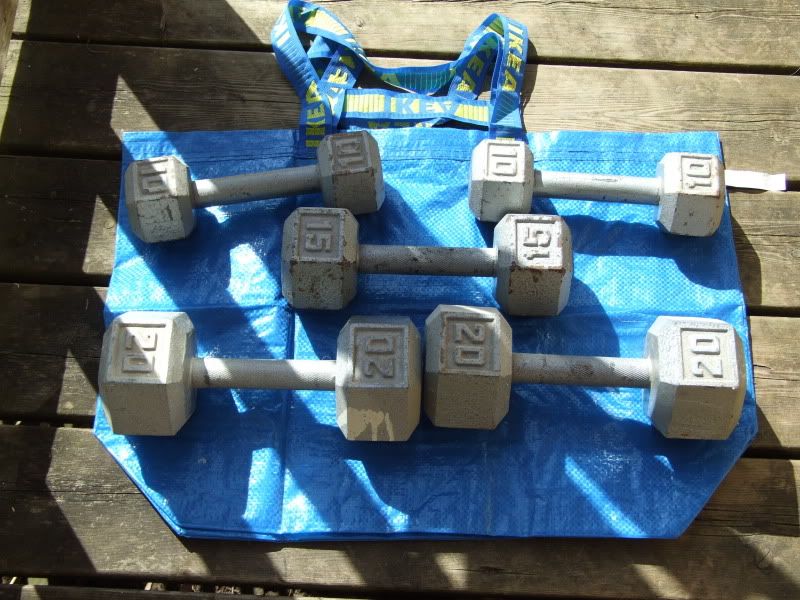
Here's the weight that the davit has to successfully carry:
I decided to start light- here's 20 lbs:
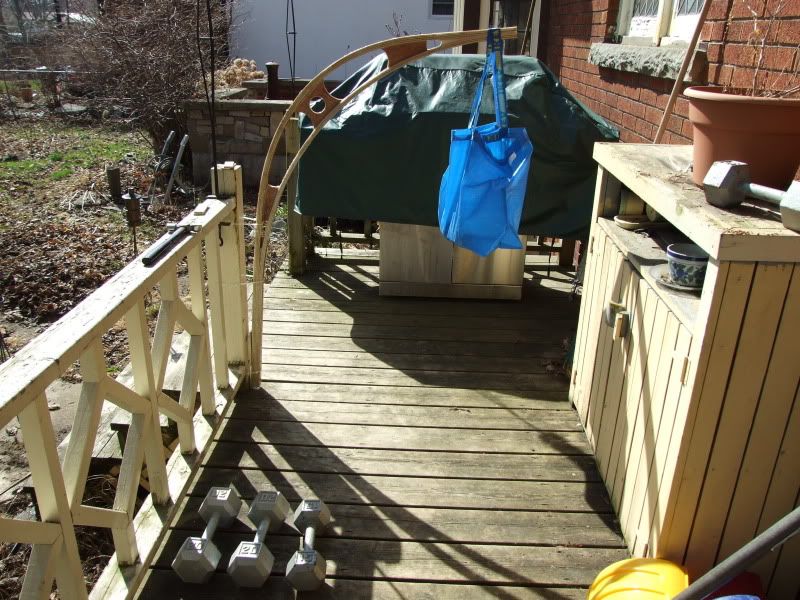
It didn't break, so I stuffed 35 lbs. in the bag. My high-tech mounting system was showing signs of stress so i threw some more tie-wraps at the problem, and no more creaking and stretching sounds.:
No problem. Next I shuffled the barbells around, and went to 60 lbs. Passed with flying colours. So, deep breath, here we go,
75 pounds....
YEAH, BABY!!!
I may add another layer of cloth to the top and bottom surface, just for peace of mind, but I am pleased with the result so far.
Currently I am working to finish up the mounting plates, and I will post pics shortly.
Monday, April 18, 2011
Shop envy
Sure wish I had a shop with a TIG welder and a bunch of stainless scrap like Paul on s/v Solace...
Nice!Those pesky dive tanks are never easily stowed on a sailing vessel and so I decided to have a suitable bracket made up. This one clamps to the lower railing near the stern and secures both bottles with velcro. I used a couple of Bimini clamps and had them welded to the stainless bracket made from scraps of ss left over in the workshop. All welding done with a TIG welder and I did my best to polish the stainless. I'm still learning on that aspect. Neat and tidy. Cost $0.00 but 8hrs of labor. Many thanks to Tim for his help


Friday, December 17, 2010
Better than factory
Please welcome a new contributor, Paul from s/v Solace. Paul was dissatisfied with the original packing gland on the rudder shaft on Solace, and so he engineered an upgrade using modern materials:
Nice work Paul!
The packing gland on the rudder shaft of my Hylas 44 never did prevent water from coming into the boat; with rate of about a drop every 10 seconds, I wanted something drier; like no water ingress.
First I removed the rudder quadrant to access the packing gland flange and cleaned up both the removable flange, (top left in photo below) and the area to be resealed (left).
I obtained a double lipped seal with stainless steel spring for my shaft which was 2.25 inches. Measuring the flange which used to press down on the packing gland, (and now inverting that flange) the sleeve measured three inches. So a seal of 2.25 ID and 3.00 OD would do it. Then I obtained a reinforced hose of 3.00 ID. I used a silicone hose but you could use a good quality rubber hose.
Next, some hose clips and gasket maker and lithium grease. I used a silicone RTV type gasket maker for motor vehicles.
Having removed the packing gland material, I started to assemble my new shaft seal. I only had about 2.75 inches of shaft to work with placing the seal on and the up turned packing gland flange took most of that.
I applied grease down the shaft where the packing gland use to sit and gasket maker to the surface of the flange where the upturned packing gland flange will bolt to.
Grease down shaft &
gasket maker applied
Slid the flange over the shaft and mated the surfaces and secured with the four bolts.
As the bolts tightened the RTV squeesed out and I left this for 24 hours to set.
After the RTV had set, the hose was placed over the flange and I applied grease to the seal and inside the hose, pushing the grease as far down as I could get it. Then I cleaned out the surface area to where the seal would sit. This is going to have some of your favorite sealant applied here for the seal. Without the sealant, the seal will tend to slip out of the hose when pressure is applied to the hose clamp.The lower hose clamp was applied and I used my RTV sealant to the OD side of the seal and the ID of the hose. I slipped in the seal to the hose and applied the hose clamp loosely and left for 24 hrs to set before tightening a little bit more.
Grease applied before seal
Finally, everything was reassembled and the boat placed back in the water. I now have a very dry rudder shaft. Now, if I can just get rid of the rain water that comes down the mast.
Costs; $30 for the seal; $18 for the hose; grease and gasket maker $20. Hose clips I had already.
Paul
Finished product
s/v Solace


Nice work Paul!
Friday, May 21, 2010
Sparkman & Stephens type plans
Sparkman & Stephens build some absolutely gorgeous boats. In doing one of your projects, you've probably not said to yourself, "I wonder how S&S would do this."
But maybe you should have.
This gem is from Craft A Craft:
But maybe you should have.
This gem is from Craft A Craft:
Sparkman & Stephens, a long time maritime design firm, has placed quite a few of what they call "Type Plans" available on their web page. These are small detail plans of various features on boats,say bunk board mounting or sail rigging designs, etc. Looks like there could be some great ideas to use here if you are building or modifying a boat.S&S Type Plans
Over the years we have created a catalogue of typical details which might be found on any yacht which we refer to as "Type Plans". These were delivered to shipyards along with the plans and specification when building a new S&S boat to assist them and to attempt to standardize many of the details that can be found onboard an S&S boat. While many are somewhat outdated we include them here as they are extremely interesting. We hope you enjoy reviewing them.
Subscribe to:
Posts (Atom)


