"But where we are going, Oh it hasn't fully, fully been told..."
-Ruby Velle and the Soulphonics
So, where were we?
Right: Boat is launched, boat is sinking, boat stops sinking, yadda yadda, Karma glides into her slip with no further drama.
With one boat launched successfully, it was on to the rest of the fleet. With a little help from the crew of Boats....
...we got our commuter dinghy, Chameleon, to the marina and into the water.
Then, we tackled Ereni, giving SWMBO's Bluenose a quick and dirty makeover... and a black nose in the process, to cover some of that quick and dirty.
Ereni is due for some serious hull refitting this winter- the brightwork needs to be brightened, the hull needs to have some blisters ground/filled/faired, and then we'll refinish the deck and topsides. But, we think we'll keep the nose treatment, and add some nose art- SWMBO and I agree we both kinda dig the vintage "rat rod' vibe.
Over the two full years we've lived with, and aboard, Karma, we've developed a pretty good idea of our wants and needs, and have fulfilled many of them along the way...
... and created new ones.
Our reefer install has been a well-received luxury, with an unintended consequence - power insecurity.
We have 3 40w solar panels that live on top of our bimini, feeding a single Group 24 house battery and a Group 24 starting battery, also charged by the 35 amp alternator on the inboard diesel. Last season, this system proved sufficient....
... barely.
If the solar panels underperformed for more than a day, some motorsailing was required to top up the batteries. We were careful about energy usage, charging electronics only during the middle of the day, being judicious about illumination, vhf and instrument use, etc. and never really had a power crisis...
But still....
This season, I made the decision to add more power and more power storage. Here's the plan: add another 100w of solar power, in the form of a semi-flexible 100 w panel installed on the dodger, then combine the 2 Group 24 batteries already onboard into a two battery house bank, and add a third Group 24 battery for starting, locating it just aft of the transmission in the engine bay. Next year, we will replace the group 24 house bank with a pair of 230 amp hour 6 volt GC-1 golf cart batteries, if we find that the 160 amp hour capacity of the house bank is not enough We decided to isolate the starting battery from the charging circuit- we opted to install a Xantrex Digital Echo Charge.
To quote the manual:
The Digital echo-charge automatically switches ON and OFF, charging a starter or auxiliary battery without affecting the main house battery bank. The maximum charge current is 15 amps when the starting battery is 1/2 volt to 1 volt DC less than the house battery... When the input voltage is 13.0/25.5 volts DC or higher, echo-charge automatically switches ON. The LED glows a steady green. When the input voltage is lower than 13.0/25.5 volts, the echo-charge automatically switches OFF, and the LED blinks green. The output voltage of echocharge is limited to 14.4/28.8 volts. When it reaches 14.4/28.8 volts, the charge current will decrease, maintaining a float condition."
So, I bought a bunch of obscenely priced cable, less obscenely priced wire, a battery and assorted electrical parts and pieces and tools and stuff and dug in, on the hottest day of the year....
... and everything largely went together better than I expected....
.... once I pretty much gave up on the original plan.
I cut and stripped and crimped new cable to wire the existing batteries in parallel...
...and that is pretty much where the original plan ended.
A "semi-flexible 100w panel installed on the dodger" became a semi-flexible 100w panel mounted on the foredeck. temporarily laying the panel on top of the dodger and measuring output demonstrated that there was just too much shading for the panel to generate anywhere near it's potential output. Because of our boat's design, and our usage, the foredeck gets little traffic, so I decided to see if the "you can even walk on it' claims about semi-flexible panels were true.
The install was pretty straightforward, once I wrapped my head around drilling 3/4" holes in the deck. An hours worth of work saw two of the aforementioned holes drilled, some wires run, and the panel fastened to the deck with, and all fittings sealed with, 3M 4200.
The new panel got a new charge controller, to complement the existing bimini bank charge controllers, then the controller output for both the bimini solar bank and the foredeck solar bank were driven to a distribution block and thence to batteries...
...Which were not happy at all.
Note to self: always check polarity before connecting 100 w panel to new charge controller.
Then check it again.
Then check it again.
I didn't, and wired the panel to the charge controller backward, and didn't realize my error for 48 hours.
I bought a new charge controller, and now the batteries happily charged away... but wouldn't hold a charge. Well, 5 year old lead acid batteries are due for replacement anyway, so "Next year, we will replace the group 24 house bank with a pair of 230 amp hour 6 volt GC-1 golf cart batteries" became "TODAY we will replace the group 24 house bank with a pair of 230 amp hour 6 volt GC-1 golf cart batteries."
(Note to those of you playing along at home: Golf cart batteries are about the same width and length as Group 24 batteries...but about twice the weight. Getting them up onto the boat, then down into the boat, then down further into the battery bay, was an exercise, that in retrospect, would be less danger-filled if one is wearing steel-toed boots, not flip-flops.)
So, new batteries go in, cabling is connected, and power flows! Meanwhile, it becomes apparent that "add a third Group 24 battery for starting, locating it just aft of the transmission in the engine bay." is a non-starter. So, the new batery gets located slightly farther aft, under the aft cabin berth. The Xantrex Echo Charge install was a breeze- the instructions were clear, the manual was well-written, and all of the supplied bits and bobs were of good quality.
Was it worth it?
Yep.
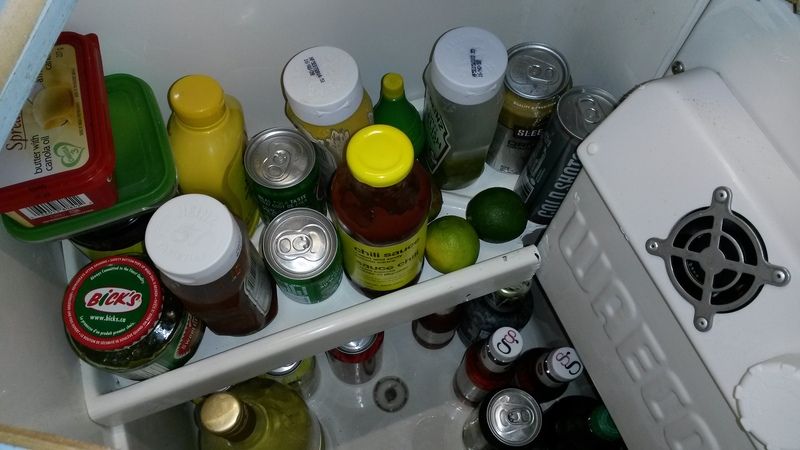
We now generate more power than we can use and store most days, and have had no problem keeping ahead of our loads even during our very hot July, when our refrigerator was running much more often than it's typical 30% duty cycle.
As we have realized the need for more power, we also have been grappling with our need for more space. the S2 8.0C is a cleverly designed boat, pulling 26 feet of accomodations out of a 26 foot LOA hull... but that means that on-deck and cockpit storage is non-existent. Coaming pockets would be a big help for line management- sheets would no longer be all over the cockpit benches and underass, an uncomfortable proposition during a crash tack. I did some measuring, found a pair of fire extinguisher pockets in the clearance rack at a local chandlery, and a little mahogany and varnish and cutting larger holes in our boat and screws later...
Our cockpit is slightly more organized.
Also seen in the above picture, behind the compact sportsdawg, you can kinda spy that scrap mahogany was also used to craft risers, to raise the height of the bimini slightly.
Below, little has changed, other than cushions that are 1" thicker and comfier, and new Low-Buck back cushions and throw pillows have been added:
We lucked out at our local grocery store (I shit you not- the grocery store) and found outdoor furniture cushions and pillows in the right colours, and amazingly, the right size, for half price.
Life is good, and more comfortable than ever...and the sailing's not too bad either.
Thanks for having a read. Pass the word- Please "Talk the Dock!"
Showing posts with label Dock 6. Show all posts
Showing posts with label Dock 6. Show all posts
Tuesday, October 25, 2016
Solar Power, And More
We haven't heard much from Brian over at Dock Six. But he's been busy...


Tuesday, May 24, 2016
Good Enough
Over at Dock Six, Brian holds forth with a little philosophy, philosophy that I must confess strikes a chord with me:
A fleet of beveraged sailors congregating to celebrate sundown (and we had some great ones last season:
),
inevitably leads to discussion deep into the dark hours. One such confab meandered through the usual "Cruising versus Racing", "Tiller versus Wheel", "Power versus Sail", "Rum versus Rye", "Dock 6 versus Dock 5" debates to a topic which we discovered is a lot more nuanced:
"Correct versus Incorrect Gear and Installation."
or, "When is Good Enough, Good Enough?"
One thing all in attendance agreed on:
The answer, as it so often is, is...
..."It depends."
Except when it doesn't.
Electrical/electronical stuff is kinda fussy about how it is connected, for example. Get yer positives and yer negatives backversed and all the smoke comes out of the wires and you're left pondering how to lie on the warranty claim for your new, but now dead, chartsounderhaildar thingy.
Same thing with wrapping jibsheets around the winch- it only works one way, clockwise, dumbass!
On BOTH sides of the boat!
(At least 8 of you out there just air-wrapped an invisible winch to see if I was right... after you first pointed your finger in front of you like a pistol and then rotated it in the air, lefty-loosey and then righty-tighty, to remind yourself what "clockwise" meant.)
(( You KNOW you did. Don't even try.))
Restringing 6:1 mainsheet tackle takes at least two tries because nobody ever gets the sheave order right the first time and nobody bothers to take "before" pictures before unstringing the old sheet from the blocks... and, of course, it only works one way.
Adjusting the valve clearance on your engine, and flushing the head are other examples of "one way only" systems, gear and procedures.
Most of the other stuff on your boat?
Not so much.
Which is kinda reassuring.
When I am not sailing, and boatbuilding and boatpart building and wordsmithing, I am a gearhead.
But not as gearheady as I used to be.
Back in the day, BB (the era Before Boats), I was a die-hard 24/7 VW freak. Since I was 16, I owned 'em, fixed 'em, bought 'em, built 'em, sold 'em, lived 'em, and, sometimes, in 'em. At last count I had owned 47.3 of them.
The .3 is still in the backyard of Stately Jones Manor.
(NOT the backyard of SJM, but at times, it was close.)
I've laid hands on some of the rarest of the rare,
...and rubbed elbows with some of the coolest of the cool.
At the top of my "I Shit You Not" Stories list, I helped a bunch of local Canadian high school kids build a race car that ran in the 2005 Baja 1000:
As the old NASCAR joke goes, I wasn't involved, I was committed. (Look it up.)
Occasionally my wheeled obsession met my keeled obsession. Little known fact: my first dinghy , Chirp , built back in 2009, was sized to fit inside my VW Vanagon Syncro.
Confession: I haven't wrenched on a VW in 5 years.
What happened?
I discovered the "good enough" freedom of boats, and realized the math worked.
See here's the deal:
Old VWs are not just collectible, they are appreciating. Like crazy. Like, a -$5000 -price -tag -on- a- rusty- dented -non-running- project- bus- that- needs -everything -is -a -steal kind of crazy.
The shit got serious. And when the shit gets serious, you gotta get serious about the shit- an incorrect part, an ill-fitting aftermarket panel, a wheel with the wrong date stamp, is a step backward. A perfectly serviceable, but incorrect, $100 aftermarket muffler might cut the value of your pride and joy by $150.
And there are plenty of enthusiasts who will happily let you know, at every show and swap meet you attend with your incorrect ride.
As the value of the vehicles rose, the price of original and good aftermarket parts rose accordingly, stretching my always tight fun budget.
Meanwhile, in Old Boat World, or at least the part of it I discovered and happily reside in, nobody gives a shit about whether there are period correct bolts holding the stanchions to decks that are covered with unscuffed original non-skid. Having peeling decals on the air filter will not hurt the value of my boat at all.
Owning a floating summer home that will likely not appreciate in value, but will just as likely not depreciate much either, is kinda liberating.
I was spending more time messing around with boats, and less time in the garage. Finally, I had to face the fiscal reality:
My fun budget can support messing around with boats, or messing around with cars. Not both.
For now.
So, back to the original question. What was the consensus that our confab reached that night?
When is good enough, good enough?
We came up with the "Good Enough" rule of thumb: Every part, part replacement and modification on-board must answer "Yes" to three questions-
- Does it work?
- Is it safe?
- Is it durable?
That's a standard I can meet.
Thanks for stopping by. Feel free to "Talk the Dock" and pass the word.


Tuesday, April 5, 2016
Easy! It's A Kit!
Over at Dock Six, Brian decides to upgrade from an icebox aboard s/v Karma to a refrigeration unit. And it's a kit! Easy, right?
"You want paradise..."
-Foreigner
First, a little personal history:
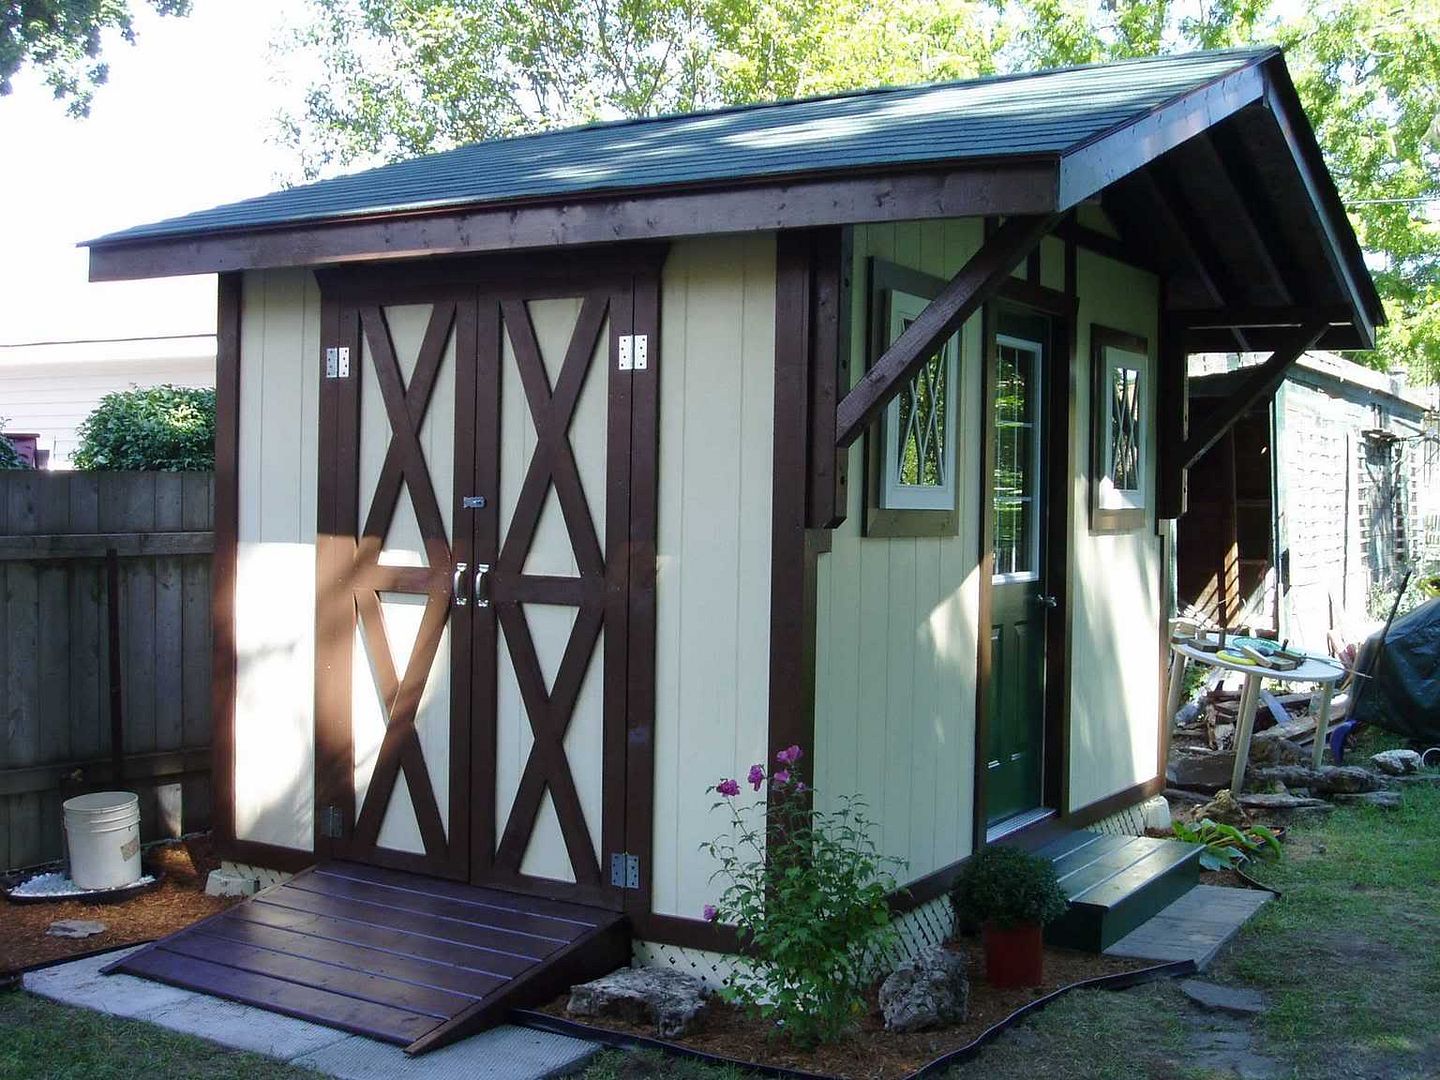
A decade ago, in the era PB (Pre-Boat), SWMBO and I (okay, mostly SWMBO) decided that we needed to replace the shed in the backyard of Stately Jones Manor. The shed was...
... less than stately.
Hell, it was less than intact and decidedly unsafe. Although uitilized as shelter for our underused and oft-neglected lawn and garden equipment, that equipment was now doing double duty holding up the shedding shed.
Clearly, we had to do something.
We knew we didn't want an aluminum panel -and-channel nuts-and-bolts utilitarian box. We wanted a stately wood shed that would be an attractive addition to our backyard, not just a holds-our-crap blight. We also knew we didn't have the ambition or the skill set to build a shed from scratch, and didn't have the ready cash to buy a pre-fabricated shed, or hire a crew to build one for us.
So, we procrastinated and pondered, as the existing shed grew ever less square and vertical and closer to the ground.
Perusing the sale flyers in our local free throw-away newspaper, we discovered a local lumberyard had attractive affordable, stick-built shed kits available.
A shed KIT! Perfect!
I built model kits as a kid, I had assembled damn near a houseful of IKEA furniture, I could definitely build a shed from a kit!
We went to the yard, picked a design we liked from their catalogue, and were assured that our shed kit would be delivered in time for the weekend.
Perfect! We can have this thing assembled before Monday!
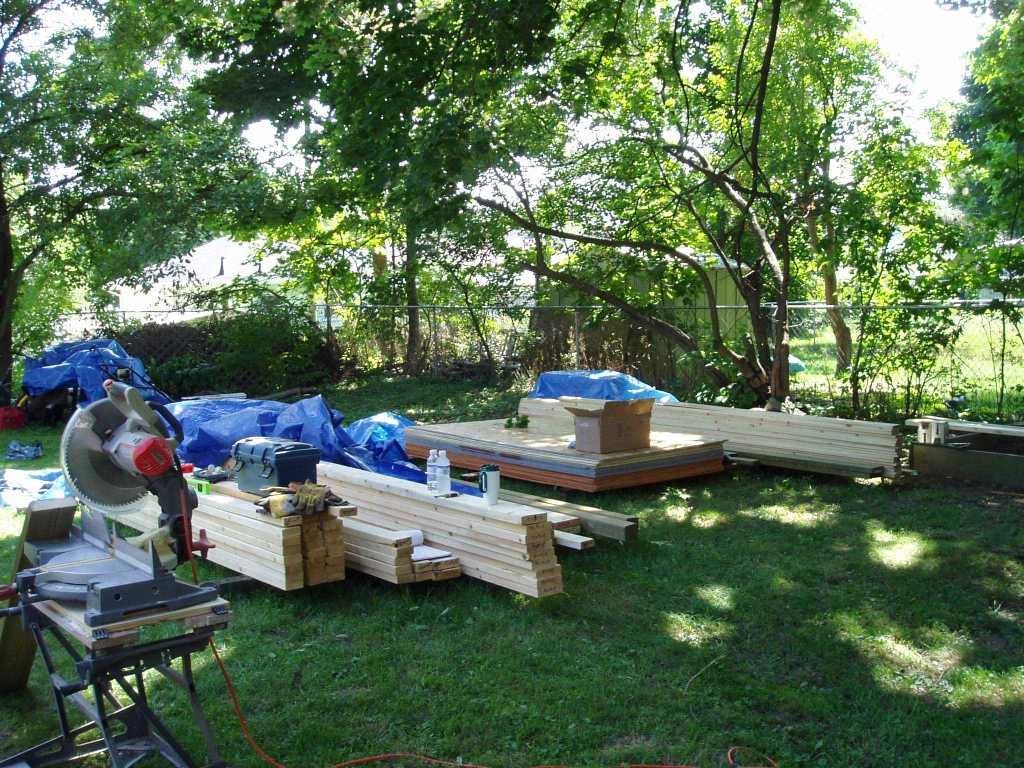
Friday, as promised, a truck from the lumberyard pulls up, and deposits our shed kit in the driveway of SJM.
The "kit" consisted of a big pile of lumber, three bundles of shingles,a bag of nails and screws and hardware, a door, and 2 pages of poorly photocopied plans.
"Kit", my ass.
We got it done, and it still does it's job ten years on, but it took a lot longer than a weekend, and it took more manpower than SWMBO and I.
This project taught us some skills, and taught us that we could do it
Ever since, however, I have been dubious of the ease of assembly of any DIY "kit."
Flash forward to the summer of 2015:
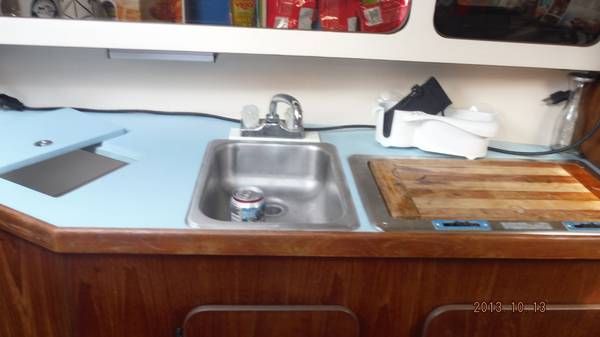
Karma, like Whiskeyjack before her, has an icebox. For 8 seasons, we schlepped bins and blocks of ice down the Dock, and dealt with the daily ritual of emptying catchbottles of meltwater. Iceboxes are simple systems, and do a more than adequate job of keeping food and beverages cold. It was a good system on Whiskeyjack that gave us no reason to complain.
On Karma?
Not so much.
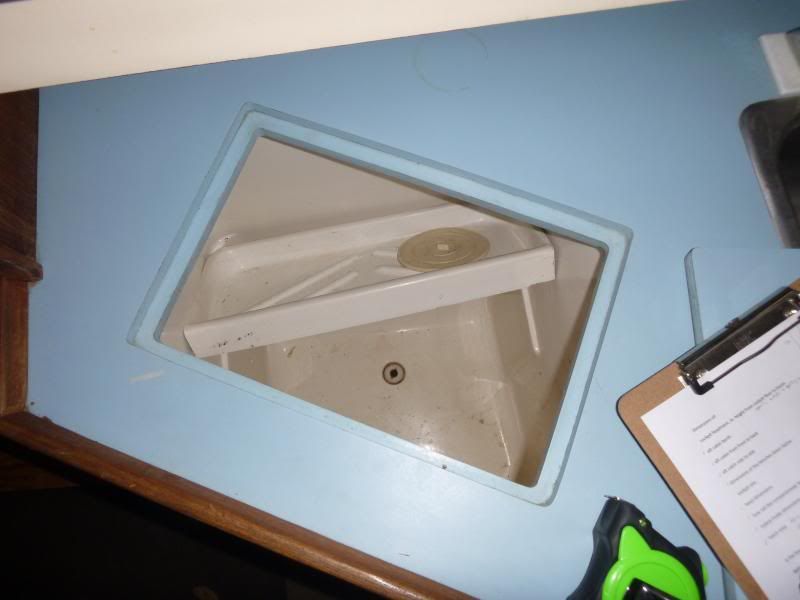
First, Karma's icebox is oddly, trapezoidally, shaped.
This meant that the bins that we used to hold iceblocks and contain meltwater on Whiskeyjack didn't fit. Not an insurmountable issue, it simply means that ice blocks have to be loaded into the icebox naked, and rather than meltwater being caught in a bin, is allowed to drain from the icebox...
.... into the (shallow) bilge. Not ideal.
At the beginning of this season, i redirected the drain into a catchbottle, which required emptying daily. Again, not an insurmountable issue, but one more daily chore, albeit not onerous... unless you're away from the boat for more than a day in which case the catchbottle no longer catches and overflows onto the carpeted sole.
Again, not ideal.
Lastly, the shape of the icebox limited iceblock placement, which in turn limited food and beverage capacity.
Yet again, not ideal.
So, refrigeration became a topic of discussion. Said discussion boiled down to:
Will it fit?
Will it work?
Can we afford it?
Will it fit? Good question. An S2 8.0C is a roomy boat with lots of storage, but just as the icebox is weirdly shaped , so are many of the lockers and bins.
Lots of research and measuring told me that installing a typical refrigeration system's compressor and condensor and stuff wasn't going to be simple or easy.
Measuring inside the icebox, and comparing cold plate sizes online, our options were limited.
Will it work? Good question. Regular Readers know that we are off the grid on the Dock- no water, no shorepower. Our electrical needs are supplied by our solar panels- so, anything electrical that we add to our boathome has to work within the restrictions of the available battery and charging capacity.
Can we afford it? Good question. Tallying the costs, we were looking at an expenditure of anywhere from $1200 to $2200. Ouch. This would be our first four-figure boat project in, like, ever.
So, after pondering, we realized that we didn't think it would fit, weren't sure if it would work, and didn't figure we could afford it.
Then I discovered the Dometic/Waeco/Adler-Barbour Coolmatic Cooling Conversion Kit.
Note that last word.
It's dreaded kit status notwithstanding, it seemed to tick all of our boxes-
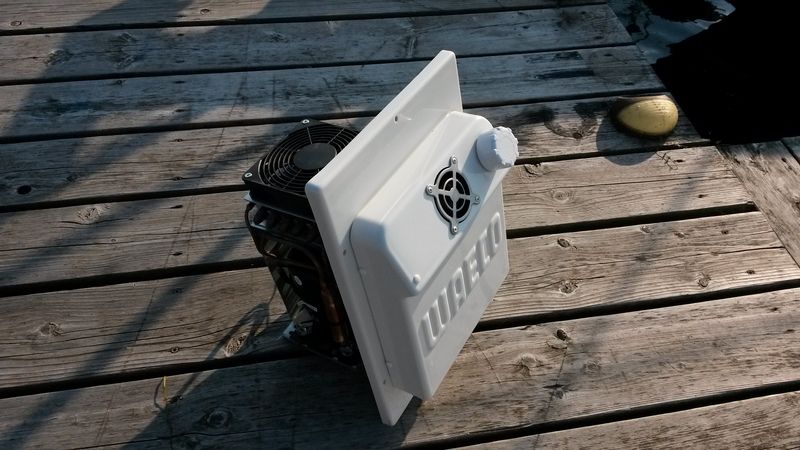
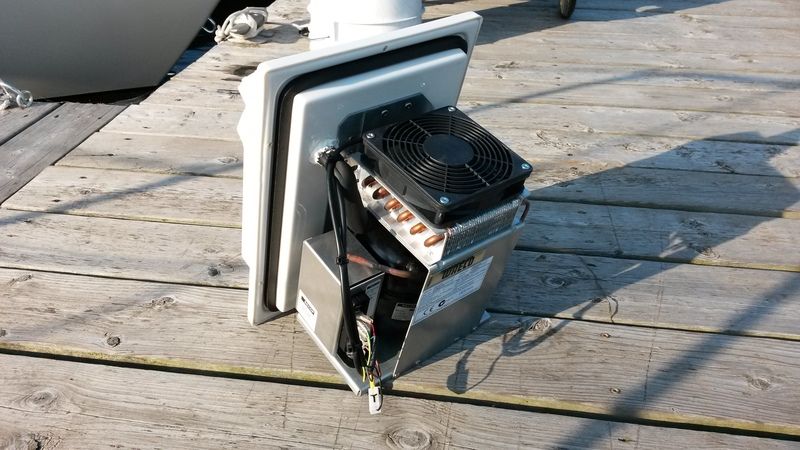
Dimensionally, it fit- instead of being a internal evaporator/external compressor/condenser set up, the Coolmatic is an all-in-one unit measuring about 10" x 12". Cut a hole in the side of the icebox, screw the unit in place, run some wires, done.
That "about" becomes important later.
It wasn't too taxing for our electrical system either- the advertised draw was 4 amps, with a 20-30% duty cycle. In theory, that means it draws less than 1.5 amps per hour, and this would be the largest constant draw on the boat- our lighting is all LED, and the only other energy use is charging electronics. so our 120 watts of solar delivering an average of 60 amps/day should keep us ahead of the charging curve.
It's not a cheap system, but at $799 (on sale), even with tax it didn't break the psychological 4 figure barrier.
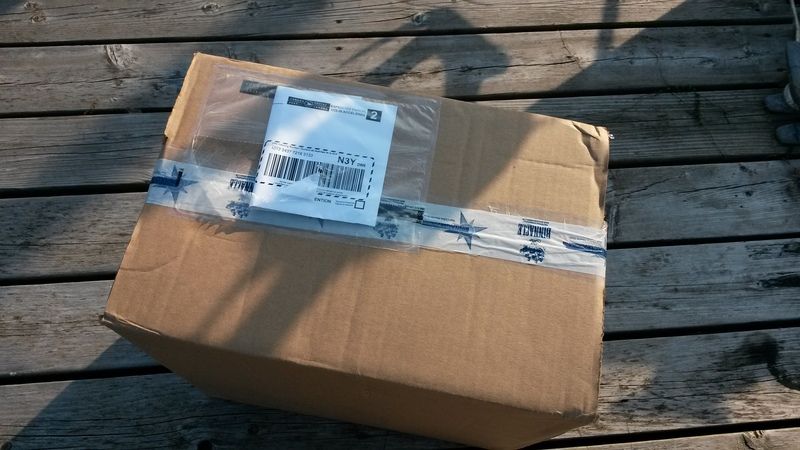
So, we pulled the trigger, and ordered one up from our friends at Binnacle.com .
4 days later, a day earlier than promised, a box showed up.
Once unwrapped, our kit is revealed;
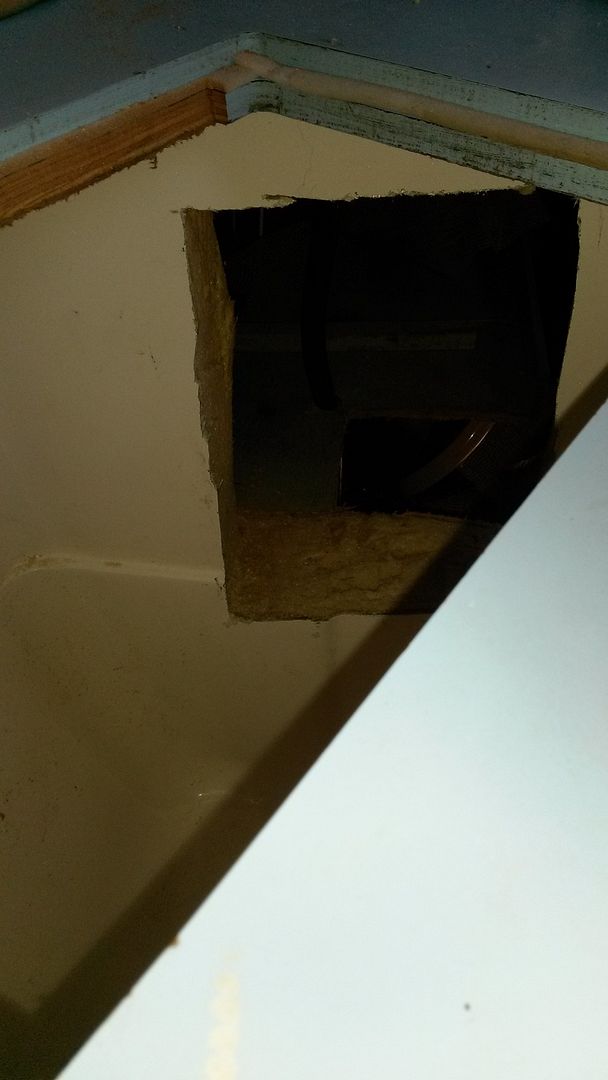
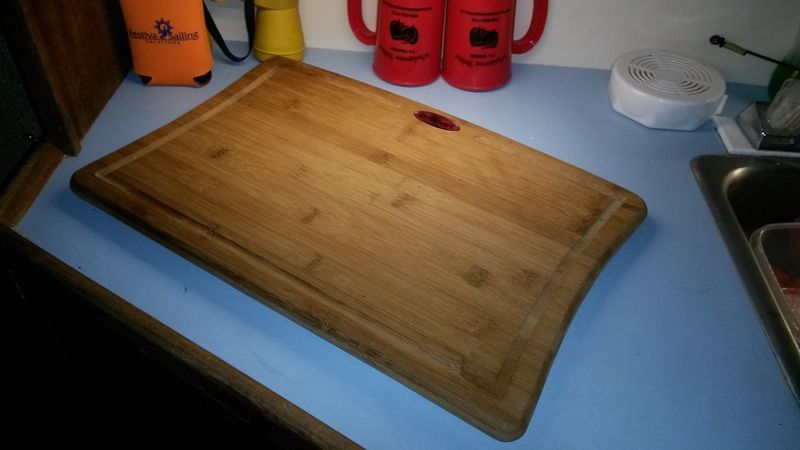
Okay, looks pretty much plug-and-play.Here's the plan:1. Measure and mark the cutout in the side of the icebox.2. Drill pilot hole.3. Cut out panel with jigsaw4. fit cooling unit into hole.5. Screw into place.6. Wire into distribution panel.7. Enjoy cold beverage.I figured it would be an hour's work, tops.SWMBO and I emptied the icebox of contents, transferring said contents to a cooler brought aboard expressly for this purpose, and I embarked on step 1.Jones's 4th Law of Boatwork- no plan ever survives past step 1 unchanged.My initial plan, based on the measurements I had taken before buying this kit, and the measurements quoted in all of the manufacturer's literature, was to install the unit on the aft side of the icebox. Now, with my new Coolmatic in hand, I discover that the aft wall of the icebox was 1/4" too narrow.Well, shit.Okay, so I need to mount it on the forward side of the icebox, and hopefully it will clear the sink and still have decent ventilation around the fan and cooling fins.So, I careful trace the cut-out, according to the template included in the installation instructions, drill my pilot hole, and discover that the forward wall of the icebox is 4" thick...and my drill bit is 3 1/2" long.Well, double shit.Did I mention that I decided to jump into this endeavour during the hottest week of the summer?At this point I am 2 hours in and soaked in sweat. Time to call it a day.Day 2, I cut out the inner wall of the icebox, gouge out all of the insulation ( this icebox has about 3" of insulation), then get out the sawzall and carve out a hole in the panel between the icebox and the sink cabinet.I gently slide the Coolmatic into the icebox...... and it doesn't fit through the icebox opening.SHIIIITTTTTT!!!!!!!!!!Okay, new Step 4(a)- out comes the jigsaw, the ice box opening is enlarged (which means the icebox lid will no longer fit. Son of a ....)Now the Coolmatic will slide into the icebox....... but not slide into the freshly cut hole.I am beyond profanity at this point.So, Step 4(b)- test fit, retrim, test fit, re-trim, test fit, retrim, testfit, retrim, testfit retrim, testfitretrimtestfitretrimtestfitretrimtestfit... it FINALLY fits.I am now 6 hours total into this job, in 90 degree heat. Look up "masochist" in the dictionary- See that picture? That's not me, that's some other poor sap, because I was still installing a FUCKING REFRIGERATION "KIT"!!!Once the "kit" was installed, the rest was relatively straightforward- screw the reefer unit into place, seal it up with some caulking, trim the icebox shelf to fit and reinstall, clean everything up (again), wire it up, and put everything that came out of the icebox back into the icebox......Then build a new icebox lid. I repurposed a cutting board, added some styrofoam insulation to the underside and some foam weatherstripping, and called it done.From start to finish, I had 9 hours into the job, over 3 days.(To be fair, Dockneighbour Frank bought the same unit after seeing ours, and he DID get his installed on his O'day in under an hour. Having a uniform sized icebox with a big lid and easy access makes a ton of timesaving difference.)But, the end result is worth it.This unit is quiet. It is quieter than the fridge in our kitchen at SJM. Power consumption seems to be in line with specs. In the spring I will rework the lid/opening flange to get a better seal, and add some more foam board to the lid for better insulation. The contents of our reefer (can't call it an icebox any more) are kept acceptably cool, with the dial set to 4, but adding a little insulation and improving the seal can't hurt.I'd do it again. we now have more room in our chillybox, no more lugging ice, and no catchbottles to drain daily.The economics are subjective, and a bit of a toss-up. In the short term, it doesn't make sense, from a cost-savings standpoint. A block of ice would last three days in our icebox on average, and if there were serious perishables onboard, we would load in two blocks at a time. At $3/block, call it $150/season. Over 10 years, however, assuming the cost of ice doesn't rise or drop, that's $1500 that we don't have to spend on ice, by spending $800 (plus tax) on a refrigeration "kit" So, long-term, it makes sense.It also means that, while our current electrical system is keeping up, I am now considering adding a second house battery and another solar panel, just in case.But, that's another project, for another day.
Tuesday, March 24, 2015
Low-Buck Arts & Crafts
It may be officially Spring, but large portions of North America still lie in the icy grip of Global Warming. What's a sailor to do? Brian of Dock Six takes on some projects...
"In the meadow, we can build a snowman..."
-Felix Bernard
...... or not.
As I write this, the temperature outside has nosedived to around -23 celsius.
I am not nearly masochistic enough to calculate the windchill.
If one is a skier, skater, ice fisherman, snowmobiler, snowboarder or snowshoer, one might enjoy freely frolicking in this frozen frontier.
I, however, am none of the above.
I am a sailor.
And I am NOT going outside into this fucking frozen freakshow unless I absolutely have to.
Luckily, I have a punchlist of off-season boat work to keep me occupied until the lake ceases to be a solid mass entirely, and utterly, incapable of floating a boat.
Doing something with our wobbly and plain saloon table was near the top of the "Boat projects that can be accomplished from the comfort of SJM" list.
I've got some ideas for this project, boldly going where I had never gone before, but first: a warm-up project, an aft cabin amuse-bouche if you will:
Fixing the TV wall.
The previous owners installed a small flat screen TV- its removal prior to sale has left an ugly blight in an otherwise very pleasant aft cabin.
SWMBO and I ruminated over this disfigurement throughout the season, and finally came up with an idea:
A piece of scrap luan, some wood glue, and a cheap spreader to quickly, evenly and economically spread the adhesive....
Then, trim a chart to size...
Apply the chart to the very sticky board....
Slather more glue on top, recalling skills vaguely remembered from elementary school art class decoupage projects. While waiting for all that glue to dry, construct a frame from scrap mahogany trim...
Assemble and varnish......
...and install (right side up) when the weather warms up.
Right, so, feeling cocky, I got back to that saloon table....
My initial thought was that we needed a larger table that would tie into the stripper pole, er, compression post. Upon further measuring and headscratching I realized that bigger is not better in this case. Enlarging the table would make our current expansive and inviting recroom feel like a cramped and cluttered cell, with a table that would be difficult to move around and would prevent the locker door under the stove from opening fully.
So, the table can get no bigger.
Okay.
It does, however need to be more stable, so I lengthened the collar underneath, that fits over the post. Now, no wobble.
But, there is a crapload of winter left, and it is a rather plain table, so I might as well try to figure out marquetry.
Marquetry, as defined by the OED: "Inlaid work made from small pieces of coloured wood or other materials, used for the decoration of furniture."
So, a supply run to Lee Valley Tools was in order. I needed glue, veneer.... that was pretty much it.
I still managed to spend damn near $200.
It's that kind of store.
I bought a "box of veneer" which was exactly as described- a pizza box full of very thin sheets of a variety of different woods:
Like, 80-100 square feet of the stuff.
The table in question is about 3 square feet.
I quickly cobbled together a low-buck veneer cutting jig- a piece of scrap ply for a bed, some aluminum angle and scraps of luan trimmed to create 90 degree, 45 degree and 22.5 degree guides to simplify the math...
... and discovered the tricks to cutting very thin, very brittle pieces of wood... after destroying a bunch of very thin, very brittle pieces of wood.
Luckily, I had a lot of it.
After marking the center on the table, and the half way polints on all four sides, I laid out a simple geometric design, and proceeded to cut and tape and glue and clamp and swear my way to an end result;
It still needs some sanding and a few more coats of varnish, but I'm not completely embarassed by the end result.
And I still have a crapload of veneer left over.
And a crapload of winter.
I rummaged through the scrap pile and did some sketching and came up with a plan for a simple cockpit table. A little ply, some reclaimed teak trim from DonorBoat, and the basics are done:
the rough work is done, now it's just a matter of mortising and installing the hinges, final sanding, and finishing. I'm saving that until next weekend.
It looks like there's still lots of winter left.
Thanks for checking in, and don't forget to "Talk the Dock!"


Subscribe to:
Posts (Atom)


