As I continue to work on my book on "Faster Cruising" I found myself feeling like the cobbler with no shoes for his children; I don't always follow my own advise, even when I know I'm right. In the book I argue that cruising boats are often lack the rigging and hardware needed to make basic trim adjustments quickly and easily, as though cruisers don't care about efficient sailing or understand the fine points. I care, but I have to admit my cruising cat doesn't have the quick access to fine trim that my performance cat had. I aim to fix that.
Case in point. My PDQ 32 came with a good boom and internal reefing, but the main outhaul was secured to an undersized cleat . To tension it under load, you take the tail to a mast-mounted winch, wrap the line under the cleat, and lift the line sharply when taking the line off the winch in an attempt to minimize slippage before that first wrap is on the cleat. Boy scout at best.
A few days ago I removed the undersized cleat (closely spaced holes on the seam) and I tapped four new holes to secure a proper jammer. Now I can ease the outhaul in a blink and tighten with a winch in control.
The smaller line is for the lazy jacks.
Why a double jammer? The few times I have found myself sailing with three reefs (winds gusting to over 30 knots) I found I needed a better way to winch the clew down. The tack is easily secured with a loop through the reefing tack and under the gooseneck, but there is no internal rigging for a 3rd reef. Thus, I tie a bowline around the boom under the reef clew (like the other reefs), go up through the reefing clew, and back to a snap shackle-equipped snatch block at the main outhaul. From there the reefing line is threaded through this new jammer, allowing a mast mounted winch to tension the clew outhaul.
The only challenge is to remember to thread the reefing clew while hoisting.
[The jammer came courtesy of freecycle--it patiently awaited re-purposing for several years in one of my might-need bins. Whooppee!]
Showing posts with label scrounge. Show all posts
Showing posts with label scrounge. Show all posts
Tuesday, November 21, 2017
Outhaul Jammer
I'm working thru my backlog - this is an old post from Drew at Sail Delmarva - so old in fact that he has sold this boat and gotten a new one since this was posted. And the book he mentions has already been published - I recommend it and several others he has published. You can find them in his bookstore.


Tuesday, April 11, 2017
Cockpit Cushion Toppers
Aboard s/v Galapagos, Melissa finds a wonderful use for something that would have been simply discarded. She also has significant puzzling skills:
Regular readers will recall that we recently had new mattresses made for our aft cabin. Part of that remodel was the purchase of some rather expensive latex foam toppers for the berths. These came at a cost of $570 for the space. That’s not an insignificant cost, even though it was completely worth every single penny. As every boat owner knows, boat beds do not come in regular sizes like your earthbound beds. Therefore, in order to get what you need, you frequently have to cut to fit. And you know what that means. That’s right. That means extra material. Extra EXPENSIVE material!
When we picked up our new mattresses we were blessed to receive all of the extra pieces of latex foam, neatly stuffed down into large plastic bags. I was going to toss them, but being the cheap and easy boat trick queen, I just couldn’t bring myself to do it. I don’t like to throw away perfectly good materials that I might put to use. So I kept them and waited for an idea to pop into my head. And it did.
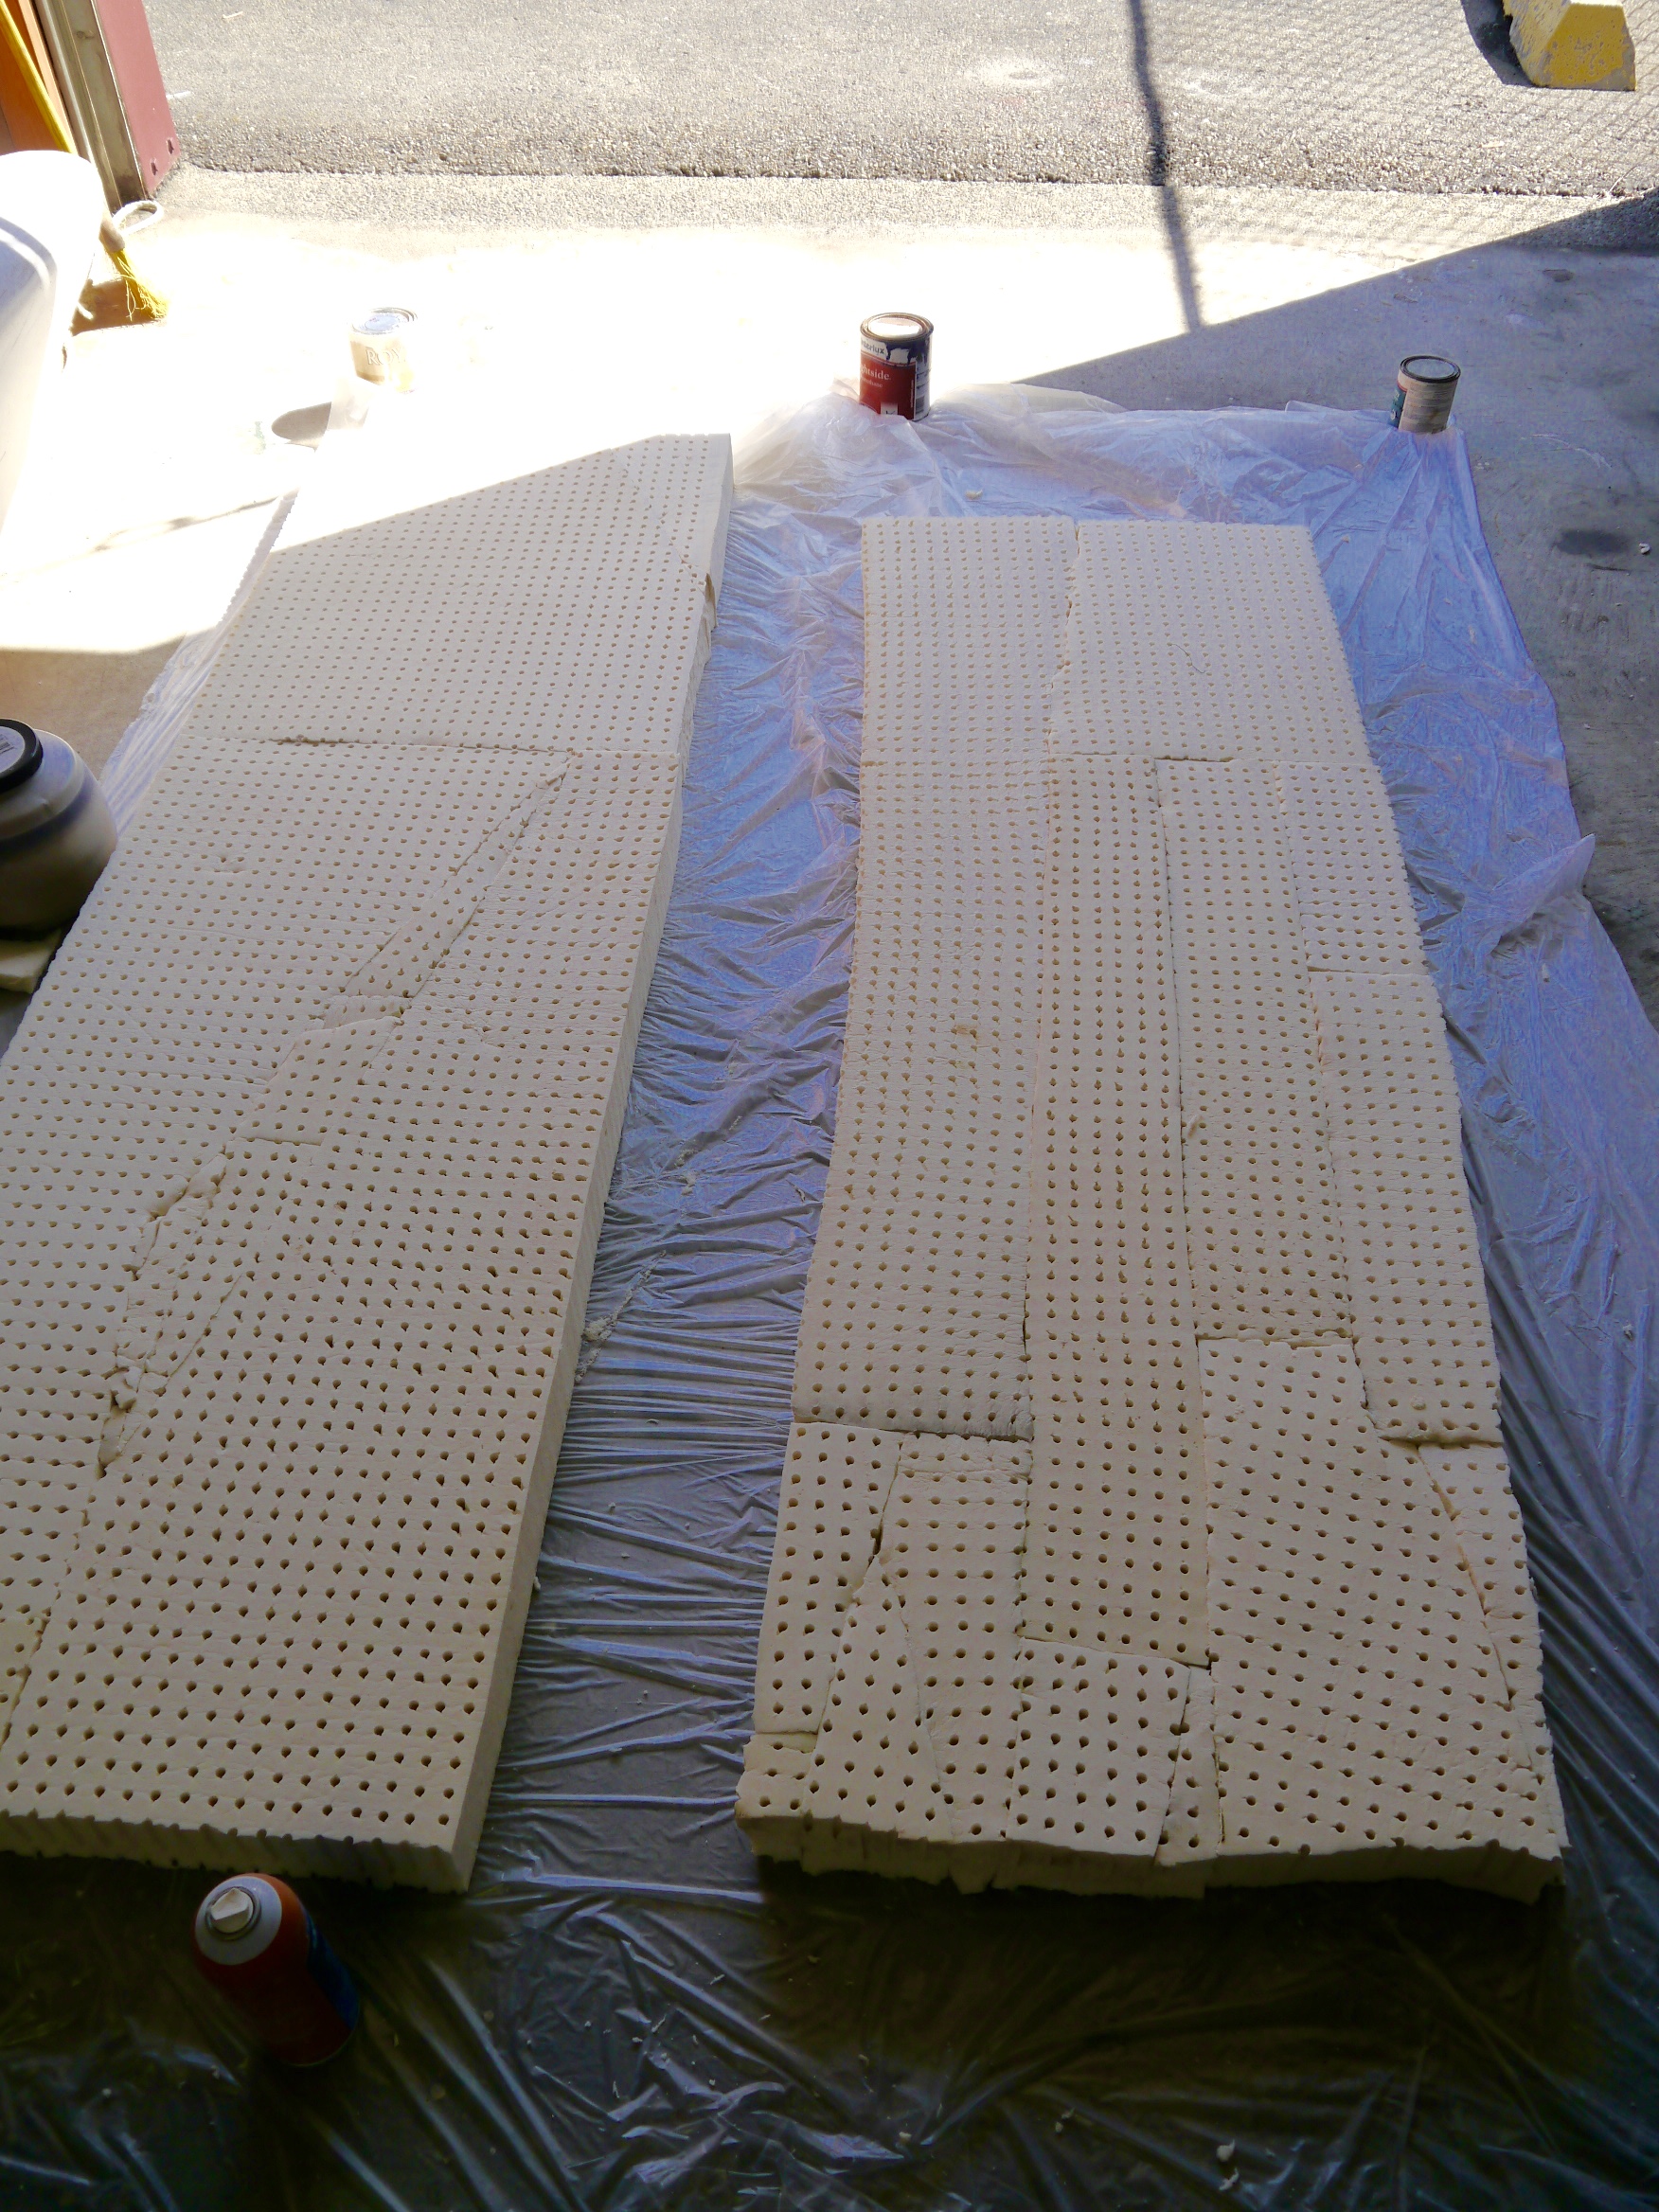
Galapagos has a great cockpit. We love it. But one of the things that I’ve wanted to improve is the napability of the two longest sides. They are long enough to lie down on (one of the absolute requirements for us in a boat, being the famous sleepers that we are), but the hard Bottomsider-style cushions that came with the boat are dead uncomfortable. I decided to see if I had enough latex foam to make cushion toppers for them.
After measuring the sides, I lay the foam pieces out on some plastic up in our workshop/storage space at the marina. Supplied with Elmer’s spray glue and a healthy love of puzzles, I began piecing the foam together to make the long, thin rectangles required. I glued the seams as firmly as possible and then let them sit for a day to cure. Although I had the garage door open for all the gluing, I cannot swear that I didn’t lose a few brain cells to that spray. Do make sure you have good ventilation with that stuff. I trimmed the uneven ends with large scissors, making several cuts from the top down. Sure, I have an electric knife, the tool of choice for this job. It’s at home. Not at the marina. Scissors worked just fine. We’re not building the Parthenon here.
As I did with the new cushions in the v-berth and aft cabin, I decided I wanted to protect these with that PUL fabric I used to keep water from soaking into the foam. This also makes coverings easy to take off and put back on. Once again, I used the handy 40% off coupon Hobby Lobby has each week.
My only concern here is that there really are a lot of glued seams on these. It is possible that the glue will not hold up in the heat of Mexico and beyond. If that happens, though, I will still have all the other materials all set up to pop the latex out and replace it with foam all in one piece. The PUL fabric has a lot of stretch to it so it can be pulled tightly around the latex. It supports the seams in the foam as well as making the whole thing waterproof. The extra support makes it less likely that we’ll experience a total fail just from moving the cushions around.
To ‘upholster’ these, I wanted outdoor canvas that was water and UV resistant. Since it’s fall, this is a good time to look for summer fabric in the clearance section of Joanne Fabrics. I made a beeline for the clearance bin and found some perfect yellow canvas for $3.50/yard. Done! I actually bought extra of this because I liked it and it was such an excellent price. Retail on this canvas is $29.99/yard. As if I would ever pay that much.
The sewing was straight forward; not exactly my favorite kind of sewing but at least with this project my machine doesn’t protest. I cut two rectangles, some sides, then sewed them together.
These are just the ticket in the cockpit for sitting or laying around at anchor. While underway they can be stored along the sides in the v-berth, or even in the aft cabin, just tucked under the shelf, which will hold them in place. They are a cheap and cheerful addition to the comforts of home on board Galapagos.
Cost Breakdown:
Total cost: $48.20 plus tax. Win!
- Latex foam – 0 because it was leftover from another project, destined to be thrown out
- PUL fabric – 4 yards, 40% off – $31.20
- Yellow Canvas – 4 yards at $3.50/yd – $14.00
- Yellow thread – $3.00


Thursday, January 22, 2015
Rusty Hinge Replacement
This post originally appeared on Windborne in Puget Sound
You may remember that one of the early projects we did on Eolian was to rebuild the refrigerator, from the hull out. As a part of that project, I discarded the original door and replaced it with one that I got at the old Doc Freeman's for $10 because the decor panel was damaged. I replaced that panel with a sheet of black Plexiglas (thanks Clear Cut Plastics), and remounted it on the original hardware.
Perhaps that was a mistake - reusing the old hinges. But at that time I did not know the marine supply business in Seattle nearly as well as I do now. The reason that this was an issue is that the old hinges were very rusty. I cleaned them up as best as I could, but they were always ugly, even to this day.
The ugliness finally got to me, and I sought out new hinges. Well, it turns out that I almost waited too long. Tho the refrigerator is a complete custom built-in, the door (and hinges) were from a Norcold unit. I thought that all I would have to do is order new hinges from Norcold.
BZZZZT!
Not a chance. That door and those hinges have been out of production for a long long time, and nobody had any left in stock - not even Fisheries.
But, as it turns out, one of the businesses in Ballard sells Norcold: Sure Marine. Sure Marine is one of those great places, a little off the beaten path, at the very, very end of 28th street in Ballard. No, they had no hinges in stock, but Graham found a set of used ones in near-perfect condition in the back somewhere. Woo HOO!
One of the last remaining vestiges of Malolo is now gone.
You may remember that one of the early projects we did on Eolian was to rebuild the refrigerator, from the hull out. As a part of that project, I discarded the original door and replaced it with one that I got at the old Doc Freeman's for $10 because the decor panel was damaged. I replaced that panel with a sheet of black Plexiglas (thanks Clear Cut Plastics), and remounted it on the original hardware.
Perhaps that was a mistake - reusing the old hinges. But at that time I did not know the marine supply business in Seattle nearly as well as I do now. The reason that this was an issue is that the old hinges were very rusty. I cleaned them up as best as I could, but they were always ugly, even to this day.
 |
| Ewww... |
BZZZZT!
Not a chance. That door and those hinges have been out of production for a long long time, and nobody had any left in stock - not even Fisheries.
But, as it turns out, one of the businesses in Ballard sells Norcold: Sure Marine. Sure Marine is one of those great places, a little off the beaten path, at the very, very end of 28th street in Ballard. No, they had no hinges in stock, but Graham found a set of used ones in near-perfect condition in the back somewhere. Woo HOO!
 |
| (Almost) new and shiny! |
One of the last remaining vestiges of Malolo is now gone.
Tuesday, January 13, 2015
Creating the Right Tool for the Job
My father encouraged me to always use the right tool for the job. But what do you do when there is no such tool? Well, then you make one. At least that's what Jeff on s/v Pilgrim does.
(Jeff and Anne are completely reconstructing Pilgrim, virtually from the hull out - most of their work is far too extensive to include here, but I encourage you to visit their website to see it.)
(Jeff and Anne are completely reconstructing Pilgrim, virtually from the hull out - most of their work is far too extensive to include here, but I encourage you to visit their website to see it.)
Any wrench large enough to fit the packing nut on Pilgrim’s possessed a handle too long to fit into the tight confines of the hull.
Looking down the rudder shaft at the packing nut.
Deep gouges along the upper edge of the nut indicated a hammer and cold chisel were used to tighten the nut. Curiously no such evidence of similarly brutal tactics use to loosen the nut are evident. Could it be that Pilgrim’s rudder packing is original?
Rather than attack the nut with hammer and chisel, I elected to create the proper tool for the job.
Creating a plywood template of the ideal tool for the job.
Using 1/8” luan plywood and some trial and error I created a pattern for the ideal M382 rudder post packing nut wrench. Once satisfied with the design, I transferred the pattern to a fresh piece of plywood
Transferring the rough, initial template to a fresh piece of plywood.
A query around the commercial fishing fleet portion of the boat yard yielded a free piece of sufficiently sized 3/8” steel.
Next stop Lindow’s Machine Shop on Hwy 70 outside of Beaufort, NC. Yup that is right... a straight up plug for Lindow’s. Fred Lindow, owner and sole employee, has many years of personal experience on sailboats. He does excellent work at reasonable prices. Fred transferred the template to the metal, and then used a band saw to cut out the wrench.
Wrench clamped in vice while I clean up the rough edges with a file.
Back at the boat yard, I cleaned up the sharp edges with a file and applied a few coats of red paint.
Ready to remove the nut.
Now possessing the right tool for the job it is time to remove the packing nut.
Happiness is having the right tools for the job.
The short wrench handle and awkward body position limited the torque I could physically apply to the nut. Ultimately removing the nut did require striking the handle of the wrench with a mallet -far preferable to further damaging the nut with blows from a cold chisel.
Removing the old packing material.
Using a combination of picks and a small flat screw driver, I excavated decaying, flax packing from the nut. Based on the condition of the packing material I would not be surprised if it is from the original 1979 construction. I have little doubt it was leaking when submerged.
Close up of gouges along the upper edge of Pilgrim's rudder packing nut.
A few minutes with the bench grinder’s wire wheel and the packing nut cleaned up nicely. Despite the deep gouges along the upper edge, I do believe it remains serviceable.
Next step is to lift the boat high enough for the rudder post to clear the hull. Hmm – I wonder how much that rudder weighs?
Our Rudder Repairs and Modifications Photo Album contains additional images and notes from this ongoing project.


Wednesday, November 19, 2014
IKEA stuff for Boats?
To do any fun cooking aboard, you need to have at least a basic assortment of kitchen tools (See? This is a manly post - it's about tools!). And more to the point, you must find a way to store them. And there's the rub - there's never enough space for all your tools. Aboard s/v Dulcinea, John found a solution, at IKEA of all places:
Dollar conscious IKEA Bling!
I have always had this annoying problem in the Galley... I had spatulas, serving spoon, Pasta Rake and so on, but they were just too big to fit in the Drawer. So I stowed them under the stove, but that wasn't working out too well either. they were hard to get to under there, and they seemed to always slide out onto the sole (floor) on a good starboard heel. I was also bothered by all the wasted space behind the stove... at least 8 to 10 inches of usable space...
Enter IKEA. When he found out I had never been to this superstore before, My Brother in law took it upon himself to hijack me on the way back from Bellevue to take a look-see..... Wow, they had a LOT of cool stuff there. I saw a closet organizer I really wanted, but it was too big and too much ($1500) to consider purchasing that day... but they did have something for Dulcinea that might ease my Galley Woes....
OK... I know what you are thinking.... what the .....? a towel bar? well it is a bar, but it is for the Galley.... just the thing to organize my utensils that won't fit in the drawer.... watch closely!
Now this is a very simple install... 4 small screws hold the bar in place. But.... NOTHING is simple on a Boat... First, I had to remove the stove so I could install this baby. I didn't want to completely disconnect the gas line or power, so I sat it on the sole...
the small space the stove fits into... with the stove on the floor in front
Next I had to put myself in the "Backwards cramming into impossibly small space" Boat Yoga pose, to awkwardly drill into the counter, and then put screws in to anchor the bar in place
My torso crammed into the small space
The only place for my legs was on top of the stove and the Galley Counter...
Then, while in this really uncomfortable position, somehow measure, drill holes into but not through the counter, then screw in some small S/S Screws to hold the bar in place. I was originally going to mount this to the back (really the port side), but why drill any more holes into the sides of your boat than you have to?
Now it was time for the Test... I also bought S hooks with the bar, as well as a little cup that hangs on the bar. I put them on and hung some stuff... looks pretty good!
about an hour later, the bar is secured
The test hang....
Finally, I had to consider that this is a Sail Boat, that, when underway with the sails up, will not stay level. I didn't want all that stuff banging around back there, or falling off when in a steep heel, so I found a use for some really small Bungee cords I had laying around....
.... And a Bungee cord shall secure them....
Now, to put the stove back and see how it all fits...
all stored away... in some previously unused space!
My Initial impressions are that this will work well! I will let you know more after I try it out on some extended trips...OH! and the best part of this whole thing was the price! I got the Bar, the hooks and the hanging cup, all for about 5 bucks! with tax! And Dulcinea gets some IKEA bling!


Tuesday, October 21, 2014
Low-Buck Projectapalooza
Over at Dock 6, Brian has experienced those two best days of boat ownership:
- The day he sold his boat
- The day he bought his new boat
"Yes, I'm workin' all the time..."
-Rush
The stages of New/Old Boat ownership:
Stage 1. Admiration stage- admire how much roomier (or prettier or shinier or faster or just plain better your New/Old Boat is than your Old/Old Boat.)
Stage 2. Installation stage- Start installing stuff. Begins approximately 7 minutes after the onset of Stage 1.Stage 2 never, ever stops.
If you have bought the right boat, the first stage never stops, either.
Having lived with and aboard NextBoat for almost 3 months, much Low-Buckness, and some Mid-Buckness, has ensued.
For those of you still following along, (thanks!) you know the story. For those who just stumbled into this meandering morass of a blog, here’s the short version:We owned a boat, wanted a slightly bigger boat, found a bigger boat, bought a bigger boat, sold the slightly smaller boat…
Now we are pouring money and time and effort into the slightly bigger boat.
And enjoying every minute of it.
The upside of NextBoat is that she had been well maintained by two previous owners. The downside is that there were few upgrades, and some gear that we consider necessities was missing entirely. Like, oh….
A compass.
Didn’t have one.
Apparently, never had one since new- the binnacle was as smooth and unblemished as a baby’s transom.
We'll come back to that later.
So, after peering into the purse and seeing the present paucity of pennies, (prolonging our perpetual pondering of whether we are presently poverty stricken or penurious,) providence presently allowed us to press the button on a plenitude of purchases, provided by the profits of this profligate’s penmanship.
In other words, I got paid for some scribbles. Cool.
So, with cash in hand, we got all Bugs Bunny and Road Runner on the boat.(Okay, come on, I can’t be the only one who remembers the theme to the “Bugs Bunny and Road Runner Hour”? Come on, sing it with me, “….On with the show, this is it…”)
er...
*turns the Obscure Weirdness dial down to 7*
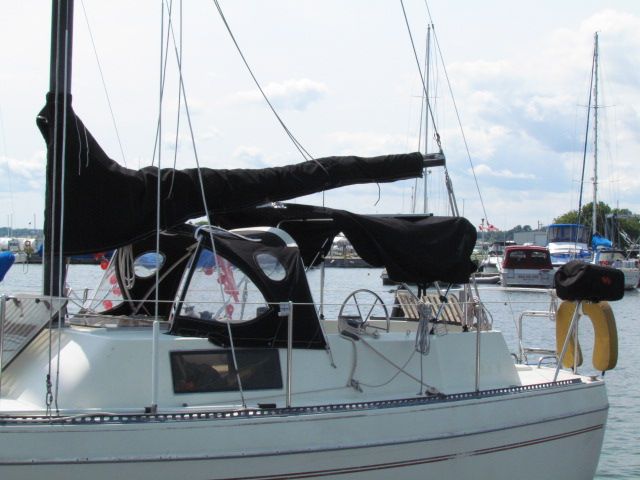
A flurry of mouseclicks and credit card approvals and straight-up hand-to- hand cash transfers later, we had a whole bunch of new stuff to stuff aboard our new ride.SWMBO is a ginger, and with a redhead’s propensity to burst into flames upon exposure to sunlight, she immediately noted that NextBoat lacked cockpit canvas of any sort. A shadeless boat with a redhead aboard is an unhappy boat for all aboard. Luckily, a beaten and battered and unused-by-the-previous-owners dodger was included in the purchase.
It needed help.
Canadian Canvas Works underpromised and overdelivered, restitching the entire top in less than 48 hours.
The skipper of Cyclone sold us a languishing bimini from his currently-for-sale S2 8.0A, and with a little cutting and sweating we soon had a comfortable cockpit.
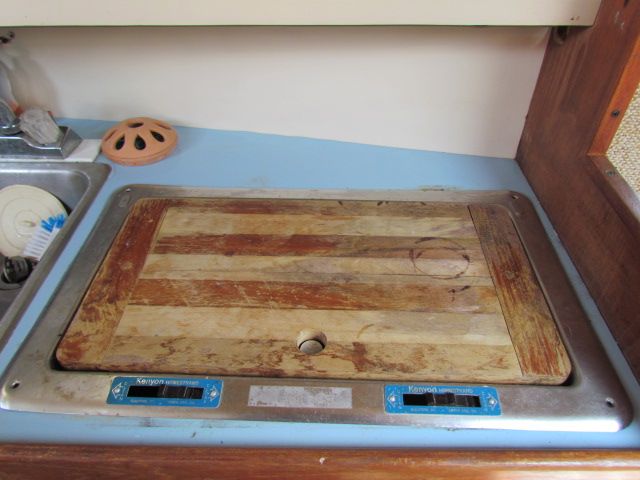
The stove that came with the boat had to go. Kenyon Homestrand pressurized alcohol stoves may have worked just fine when new, but 30+ years later….
… not so much.
The scary quotient, however, had increased considerably.
After following the less-than-simple lighting instructions, ( Pump tank of flammable fuel, tunr burner valve to introduce flammmable fuel to burner, close burner valve, light flammable fuel, let it burn out, then reopen valve and relight ) we inevitably faced a *WOOF* of ignition, resulting in burners with flames that had only one setting- Total Conflagration.
Seriously, the few attempts at using this DeathBlaster stove to create Two Burner Tastiness resulted in singed entrees trailing the faint odor of burnt eyebrows.
A quick click to Binnacle.com got us a great deal on a Cookmate non-pressurized alcohol stove. Under $250, including shipping.
Installation took less than a half hour, and the result is incredibly satisfactory.
Great temperature control, easy to light, and the burner capacity is measured in weeks, not hours. 6 weeks of regular use have borne out the value of this investment.
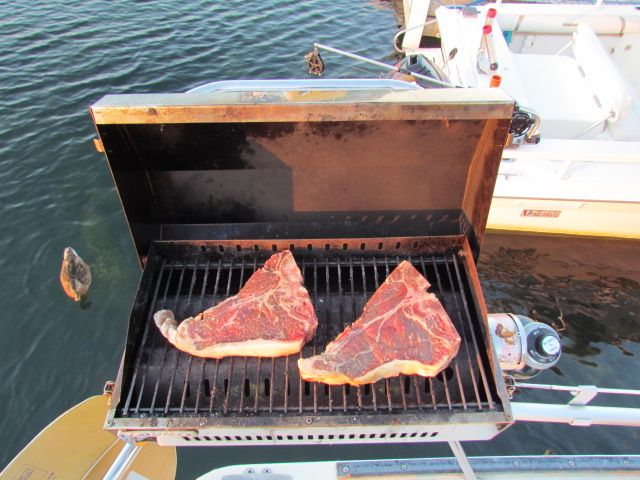
Further, we have upped the culinary ante by permanently installing the Kuuma Stow-n Go propane grille we bought during our first season aboard Whiskeyjack, but rarely used.
We have used this grille more this season than in the past 6 seasons combined.
Which means we are using more propane.
Which presents another challenge: Storage.
The one drawback to this center cockpit layout is that it eliminates all cockpit storage- no lockers, or lazarettes or cubbies on deck at all. I had no desire to store 1 lb. propane cylinders in the cabin, so a solution was required.
A quick trip to Home Hardware netted 2 feet of 6" PVC pipe, an end cap, a cleanout, and a couple of hose clamps. Less than $25 later, we were able to store 3 propane bottles on deck safely.
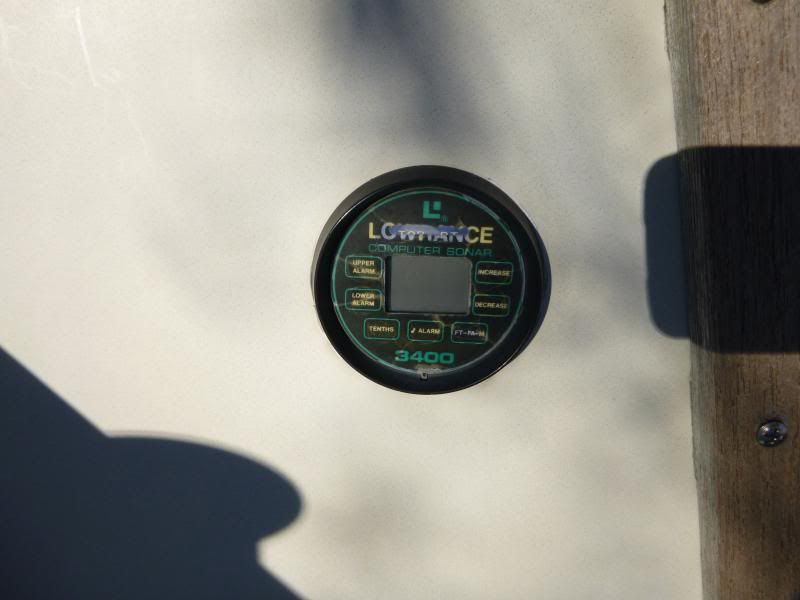
So, back to that no-compass thing: The existing cockpit instrumentation on NextBoat consisted of an inoperable Lowrance depth gauge.
That’s it.
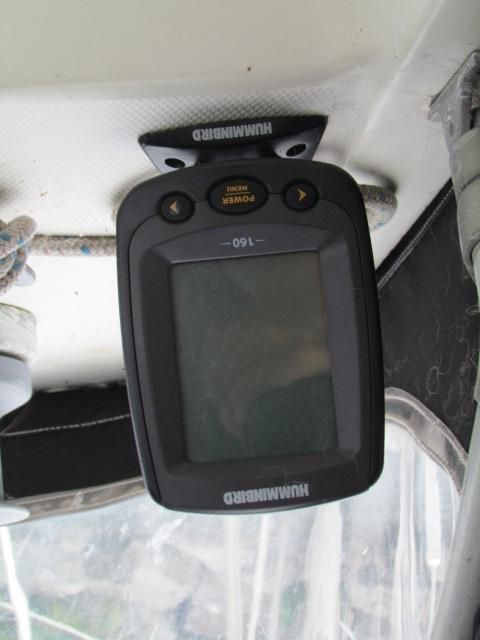
A quick trip to Dovercraft Marine netted us a Humminbird 160 fishfinder for $80. Some headscratching on where to locate the transducer and how to route the cables and roughly an hour or so of sweating and drilling and and wiring later, we not only had depth display, but water temperature as well.
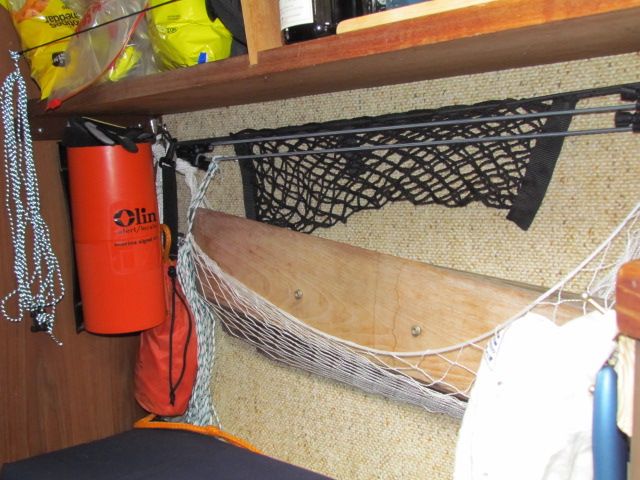
Back to that absence- of -cockpit- storage issue:
I picked up a couple of these mesh map pockets a half decade ago, and finally got around to using one! Very handy for books, sunscreen, sunglasses, all the stuff that would otherwise end up in the way.
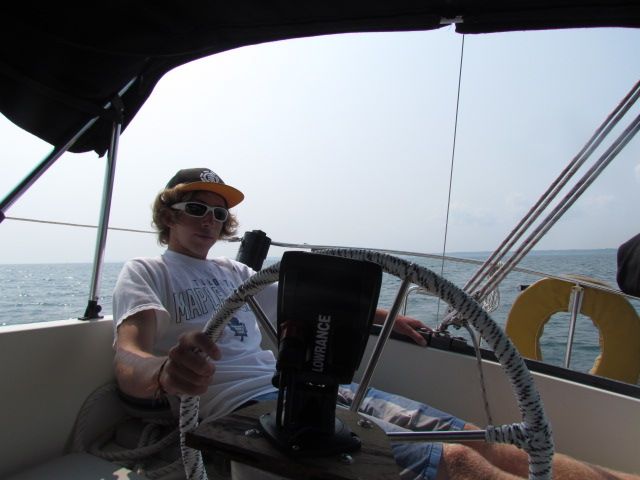
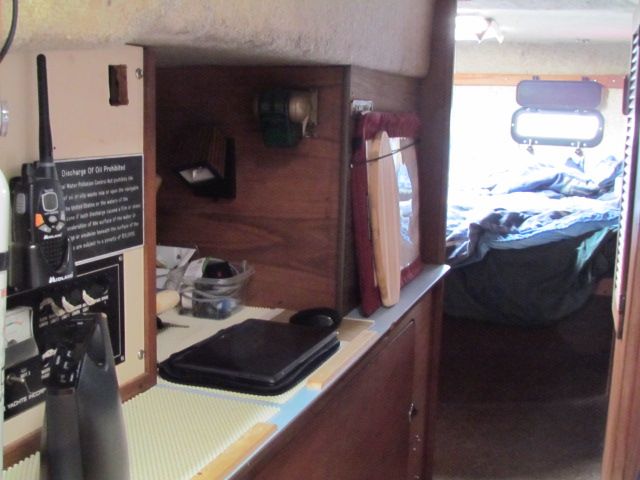
With depth out of the way, time to deal with the compass issue. I opted to go with a small handheld compass as a backup to a small Lowrance chartplotter at the helm, from Radioworld.
I LOVE these things. Lowrance "Gold" plotters include a 2 gig Navionics chart card, and the plotter we had on Whiskeyjack never let us down. The seated helm position on NextBoat makes the 4"ish screen size practical, and, though small, the screen is easy to read, the controls are intuitive and the menus easy to understand. The included mount swivels and tilts, making it viewable from anywhere in the cockpit....
...even if you are a slacker teenager, as Jordan demonstrates:
$250 well spent.
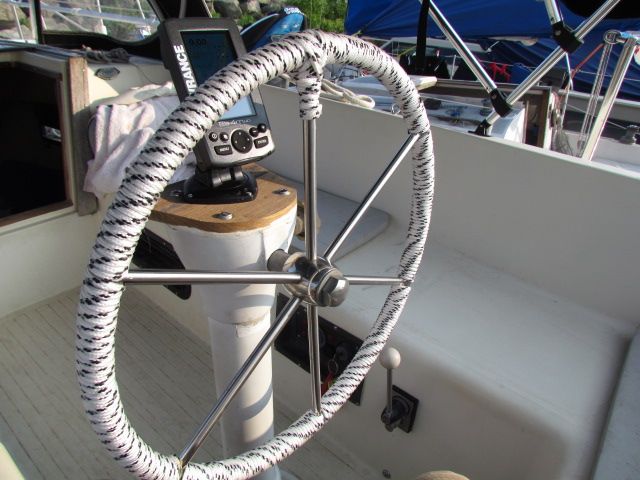
$3 worth of 1/4" line and an hour or so of time dressed up the wheel...
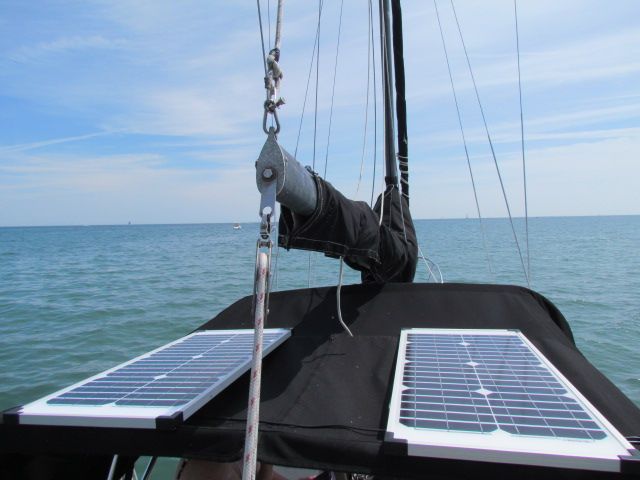
All of this new electrical gear requires improved electrical charging management- Two $99 40 watt solar panel/ 7 amp charge controller kits from Canadian Tire were installed to charge the battery bank. When docked, or flat water motoring, the panels live on the bimini-
When the wind picks up, they migrate to the aft deck. An upcoming project is to sew pockets into the bimini to secure these lightweight panels up there full time.
Down below, hammocks were hung and bungies were strung and non-skid mats were laid to keep everything that has a place, in it's place.
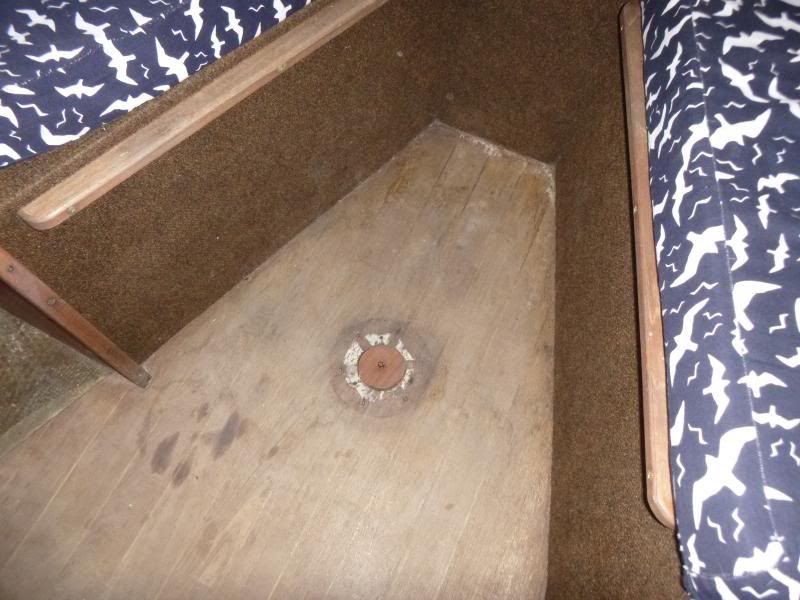
The settee-berth did not have a table, although there was one installed at some point in the past:
A while back some of the stuff that James was clearing out of his boat shed ended up in my boat shed. Among the assortment of stuff was a table base and post. a little plywood and edgebanding later, we now have a salon table:
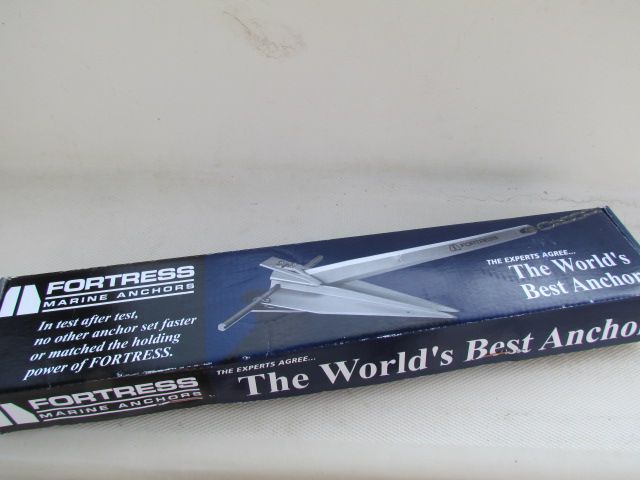
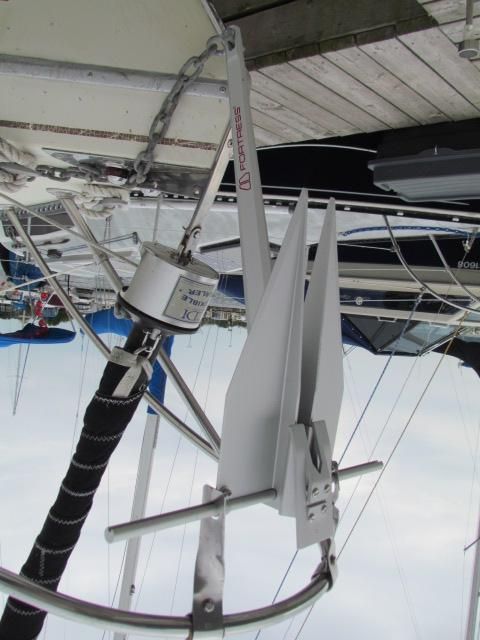
We managed to bend the shank on the anchor that came with NextBoat, and decided this was an opportunity to reduce weight on the bow and make anchoring a less strenuous task for the crew on the foredeck, by replacing the current steel anchor with an aluminum Fortress anchor....
...which requires assembly.
slightly larger flukes, slightly longer shank, half the weight of the previous anchor should make anchor launching and retrieving easier.
We'll let you know how it goes.
Last but not least, a quick little project with a big "why didn't they do this from the factory?" factor:
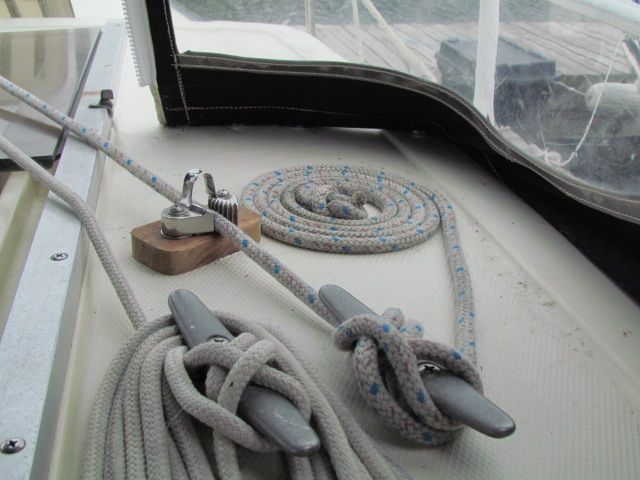
There are no clutches on the cabin top, and the only cleats are horn cleats...
which leave much to be desired when it comes to tying off halyards. You get a couple of wraps on the winch to get a full pull on the mainsail halyard, only to lose tension when you try to secure the halyard around the cleat, leaving you with a baggy sail.
We installed a cam cleat ahead of the horn cleat. No more baggy sails for us!
We also ran the mainsail reefing line to the coachroof, enabling us to reef the main without having to leave the cockpit.
Finally, we made life easier for the mutts. We carpeted the companionway ladder, to make it easier for them to climb/descend.
Ellie demonstrates that she now has ample room to run around.
Lots more projects ahead, lots more work to do, but, she's getting there.
She is becoming a home.
"Talk the Dock!"


Subscribe to:
Posts (Atom)


