The day we got Astraea the engine started right up. Then after having her for about eight months the engine started being hard to start. We thought it was a problem with the batteries not delivering enough current, and they were seven years old, so I replaced them. Well, that didn’t make the engine start any easier. Each time we went to use the engine for the first time that day it would take 2 or three long cranks to start the engine. Our engine starting procedure went something like this:
Back in December at Southwestern Yacht Club I got lucky troubleshooting when Gary from Sea Rover II came over to help. He had a clamp on ammeter that we used to check the starter current and the current through the glow plugs. We used a voltmeter to read good voltage at the rail that connects the glow plugs, but when activated there was no current drawn, indicating that the heating element in the glow plug burnt up and was and open, not allowing electricity to flow through and register as Amps.
- Open the floor boards and turn off the raw water supply so we wouldn’t flood the engine.
- Hold preheat for 10 seconds and then crank the engine for 20-30 seconds, knowing that it wouldn’t start.
- Put the batteries on “Combined” and pray the engine would start when we would crank it for 20-30 seconds. Sometimes it would, but usually it wouldn’t.
- Crank the engine one more time for 20-30 seconds and it would either start, or we’d pull out the generator and charge the batteries.
- Once the engine started, rush down and open the seacock for the raw water supply to allow cooling water through the engine.
- Check for water discharge at the stern and see that the batteries are charging.
- Sigh a sigh of relief and/or have a beer.
The day before we left San Diego I went and bought 4 new glow plugs from A to Z Marine near Shelter Island, but didn’t install them until a few weeks ago because I didn’t want to screw the engine up worse during our long cruise down the coast. I now regret not having replaced the glow plugs sooner because it was really easy.
To replace the glow plugs all I had to do was remove the rail that connects them, then back the glow plugs out and replace them and tighten like a spark plug. The most important part of the prep work was ensuring that the engine was clean to prevent anything from falling in the cylinders while working.
The glow plugs are just a bit different, if you look at the old plug there are 7 threads that were engaged in the engine. When I replaced it the new plug only went down 4 turns before it got tight. After removing and inspecting the new plug, I saw that the middle of the plug below the threads is longer on the new plug. About 4 threads are needed to engage to have the plug seat entirely.
After replacing all four plugs we just push the preheat button for about 5 seconds, then crank the engine for about a second and it fires right up! No more sweating if the engine won’t start! Natalie said she was getting an ulcer with the stress of whether or not the engine would start. Now she can worry about other things.
Showing posts with label s/v Astraea. Show all posts
Showing posts with label s/v Astraea. Show all posts
Tuesday, March 10, 2015
Westerbeke 44B Glow Plug Replacement
We sailors like to pretend that we are not power boaters. But almost all of us are. And when that motor doesn't do what it is supposed to do, we are filled with anxiety. Nate and Natalie living aboard s/v Astraea got to the bottom of their engine difficulty, and found it was a straightforward problem:


Tuesday, September 23, 2014
Better Toy Storage
Aboard s/v Astraea Nate and Natalie found a great way to stow their son's toys. Not only is this a good solution for parents sailing with kids, but this would be sure to find other uses aboard as well. Read on...
We changed the way we store Sully’s toys board. They were held in boxes that would slide when the boat heeled and got in the way. Now we have two elastic nets full of toys. They’re called EZNets and are 15″ x 28″ and we bought them on amazon.com.
Sully likes his easy to access toys


Thursday, July 31, 2014
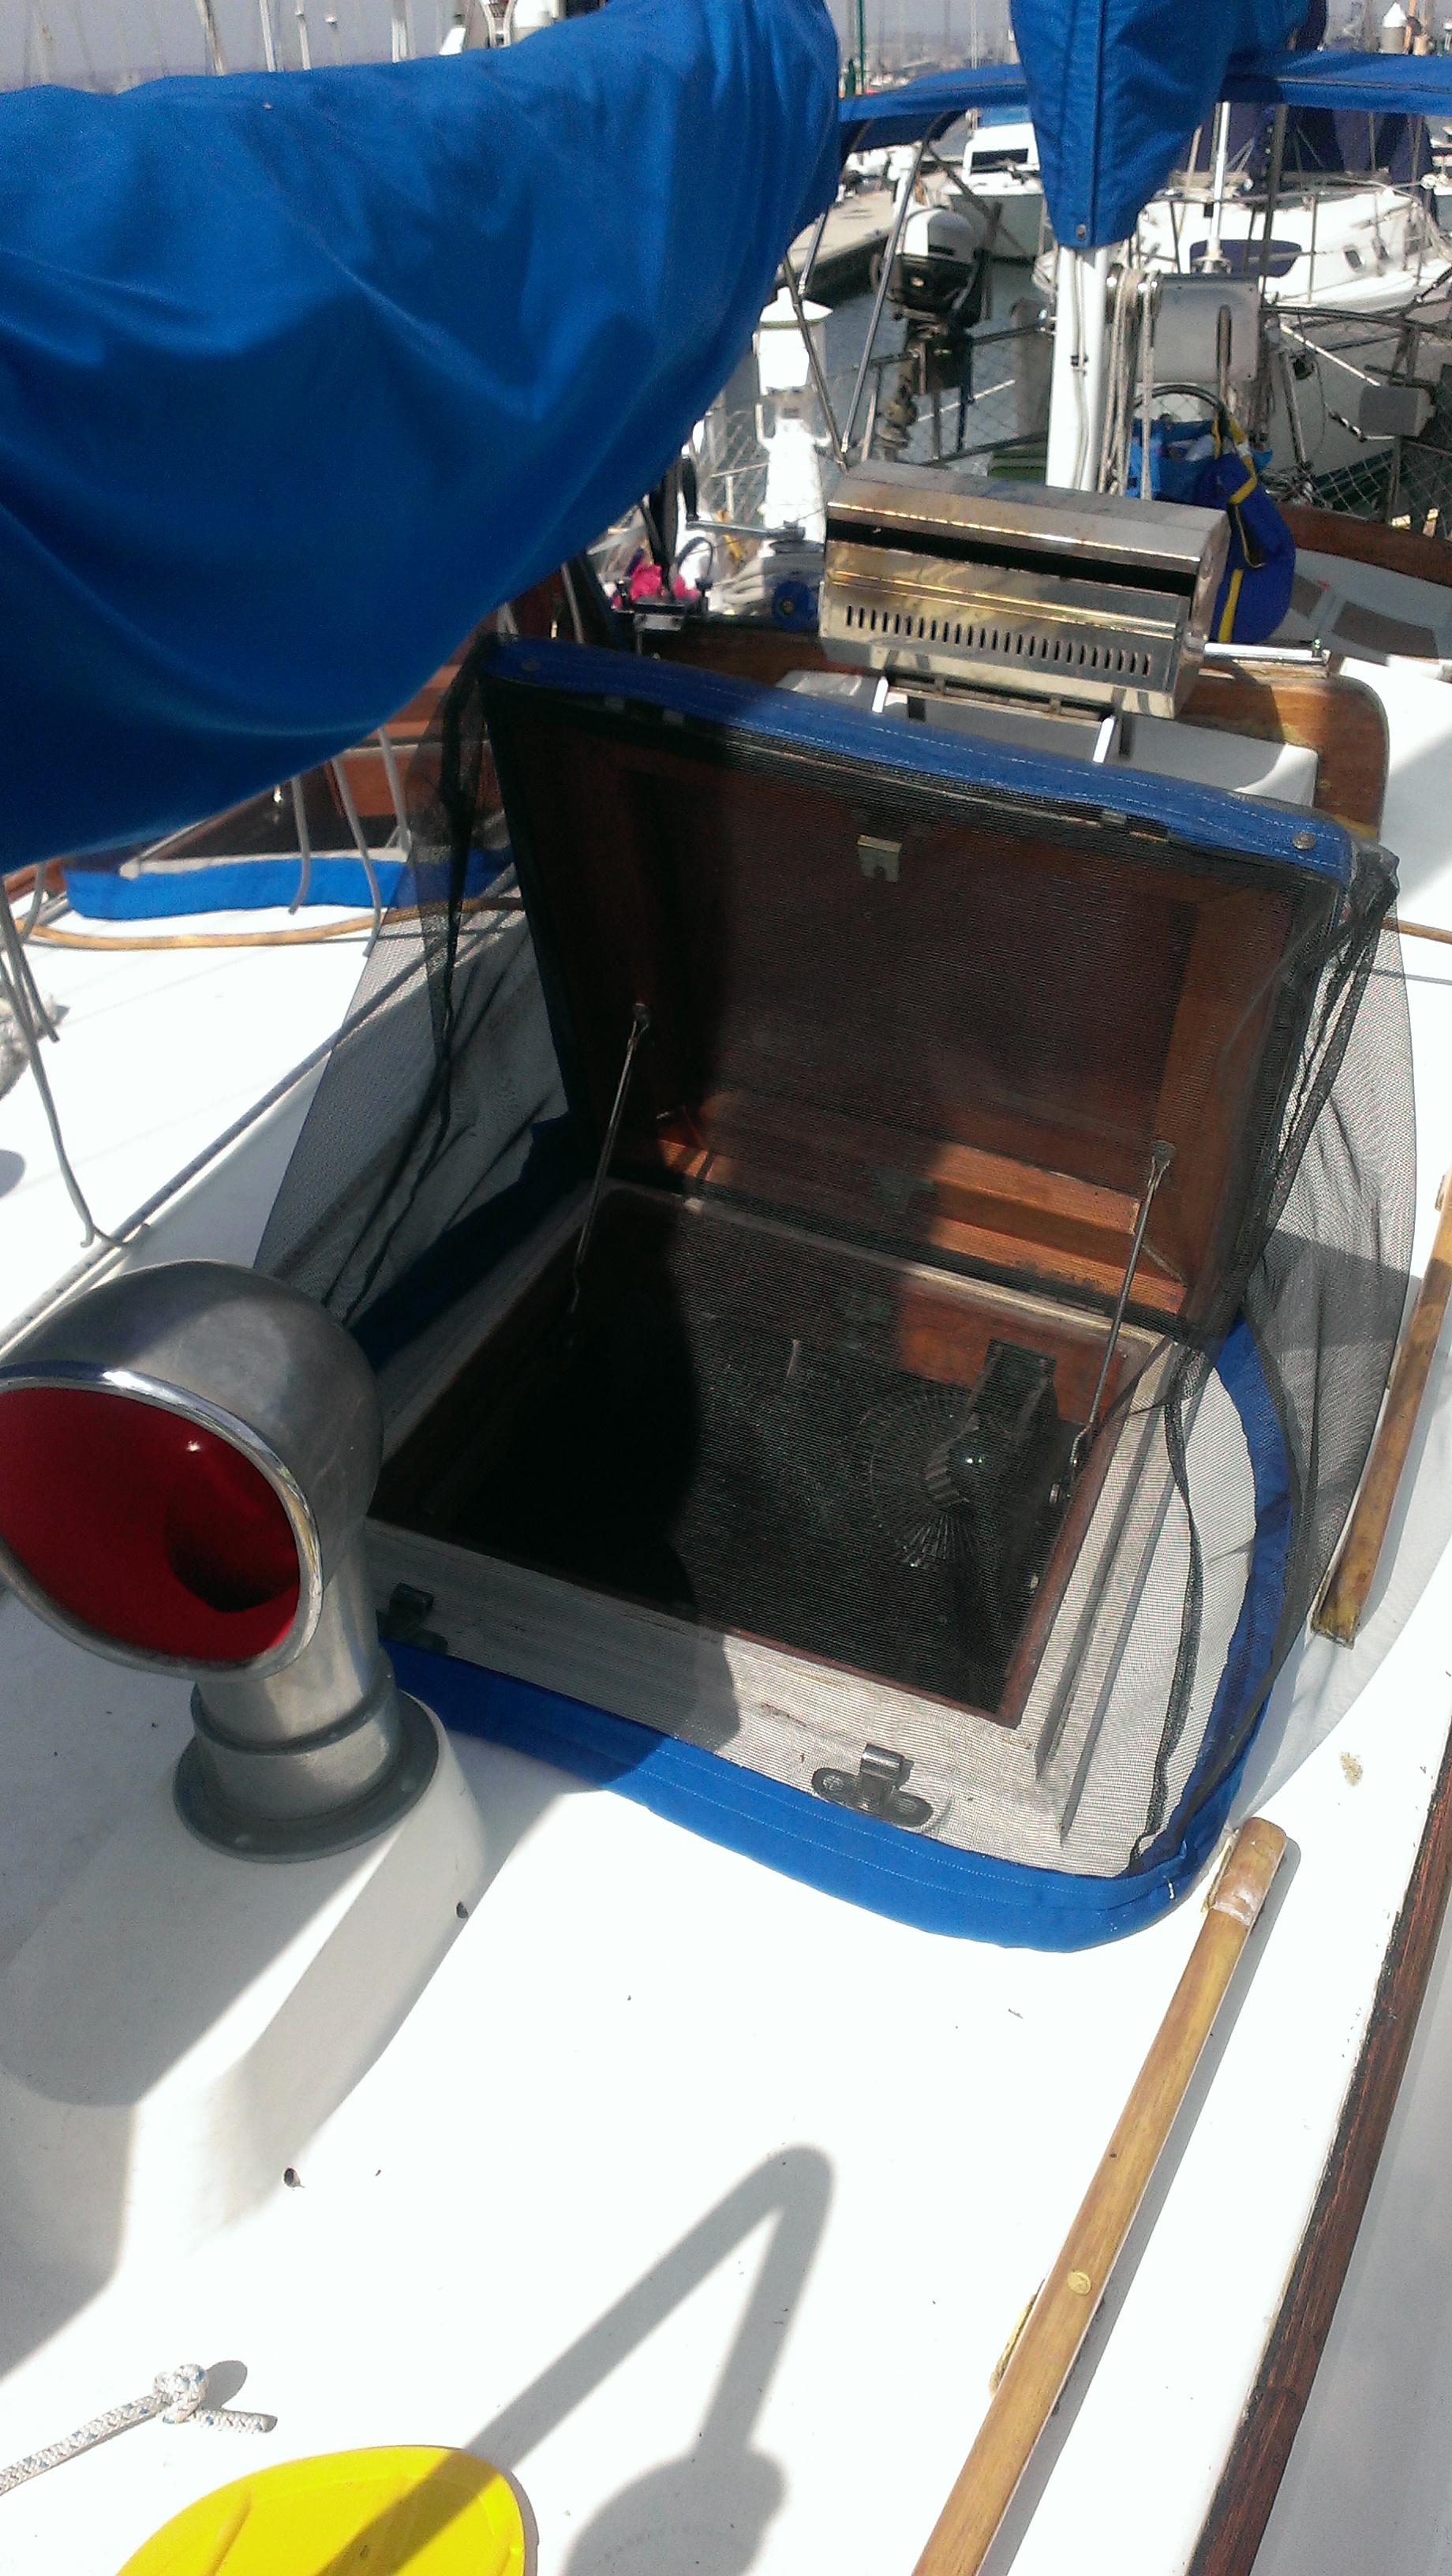
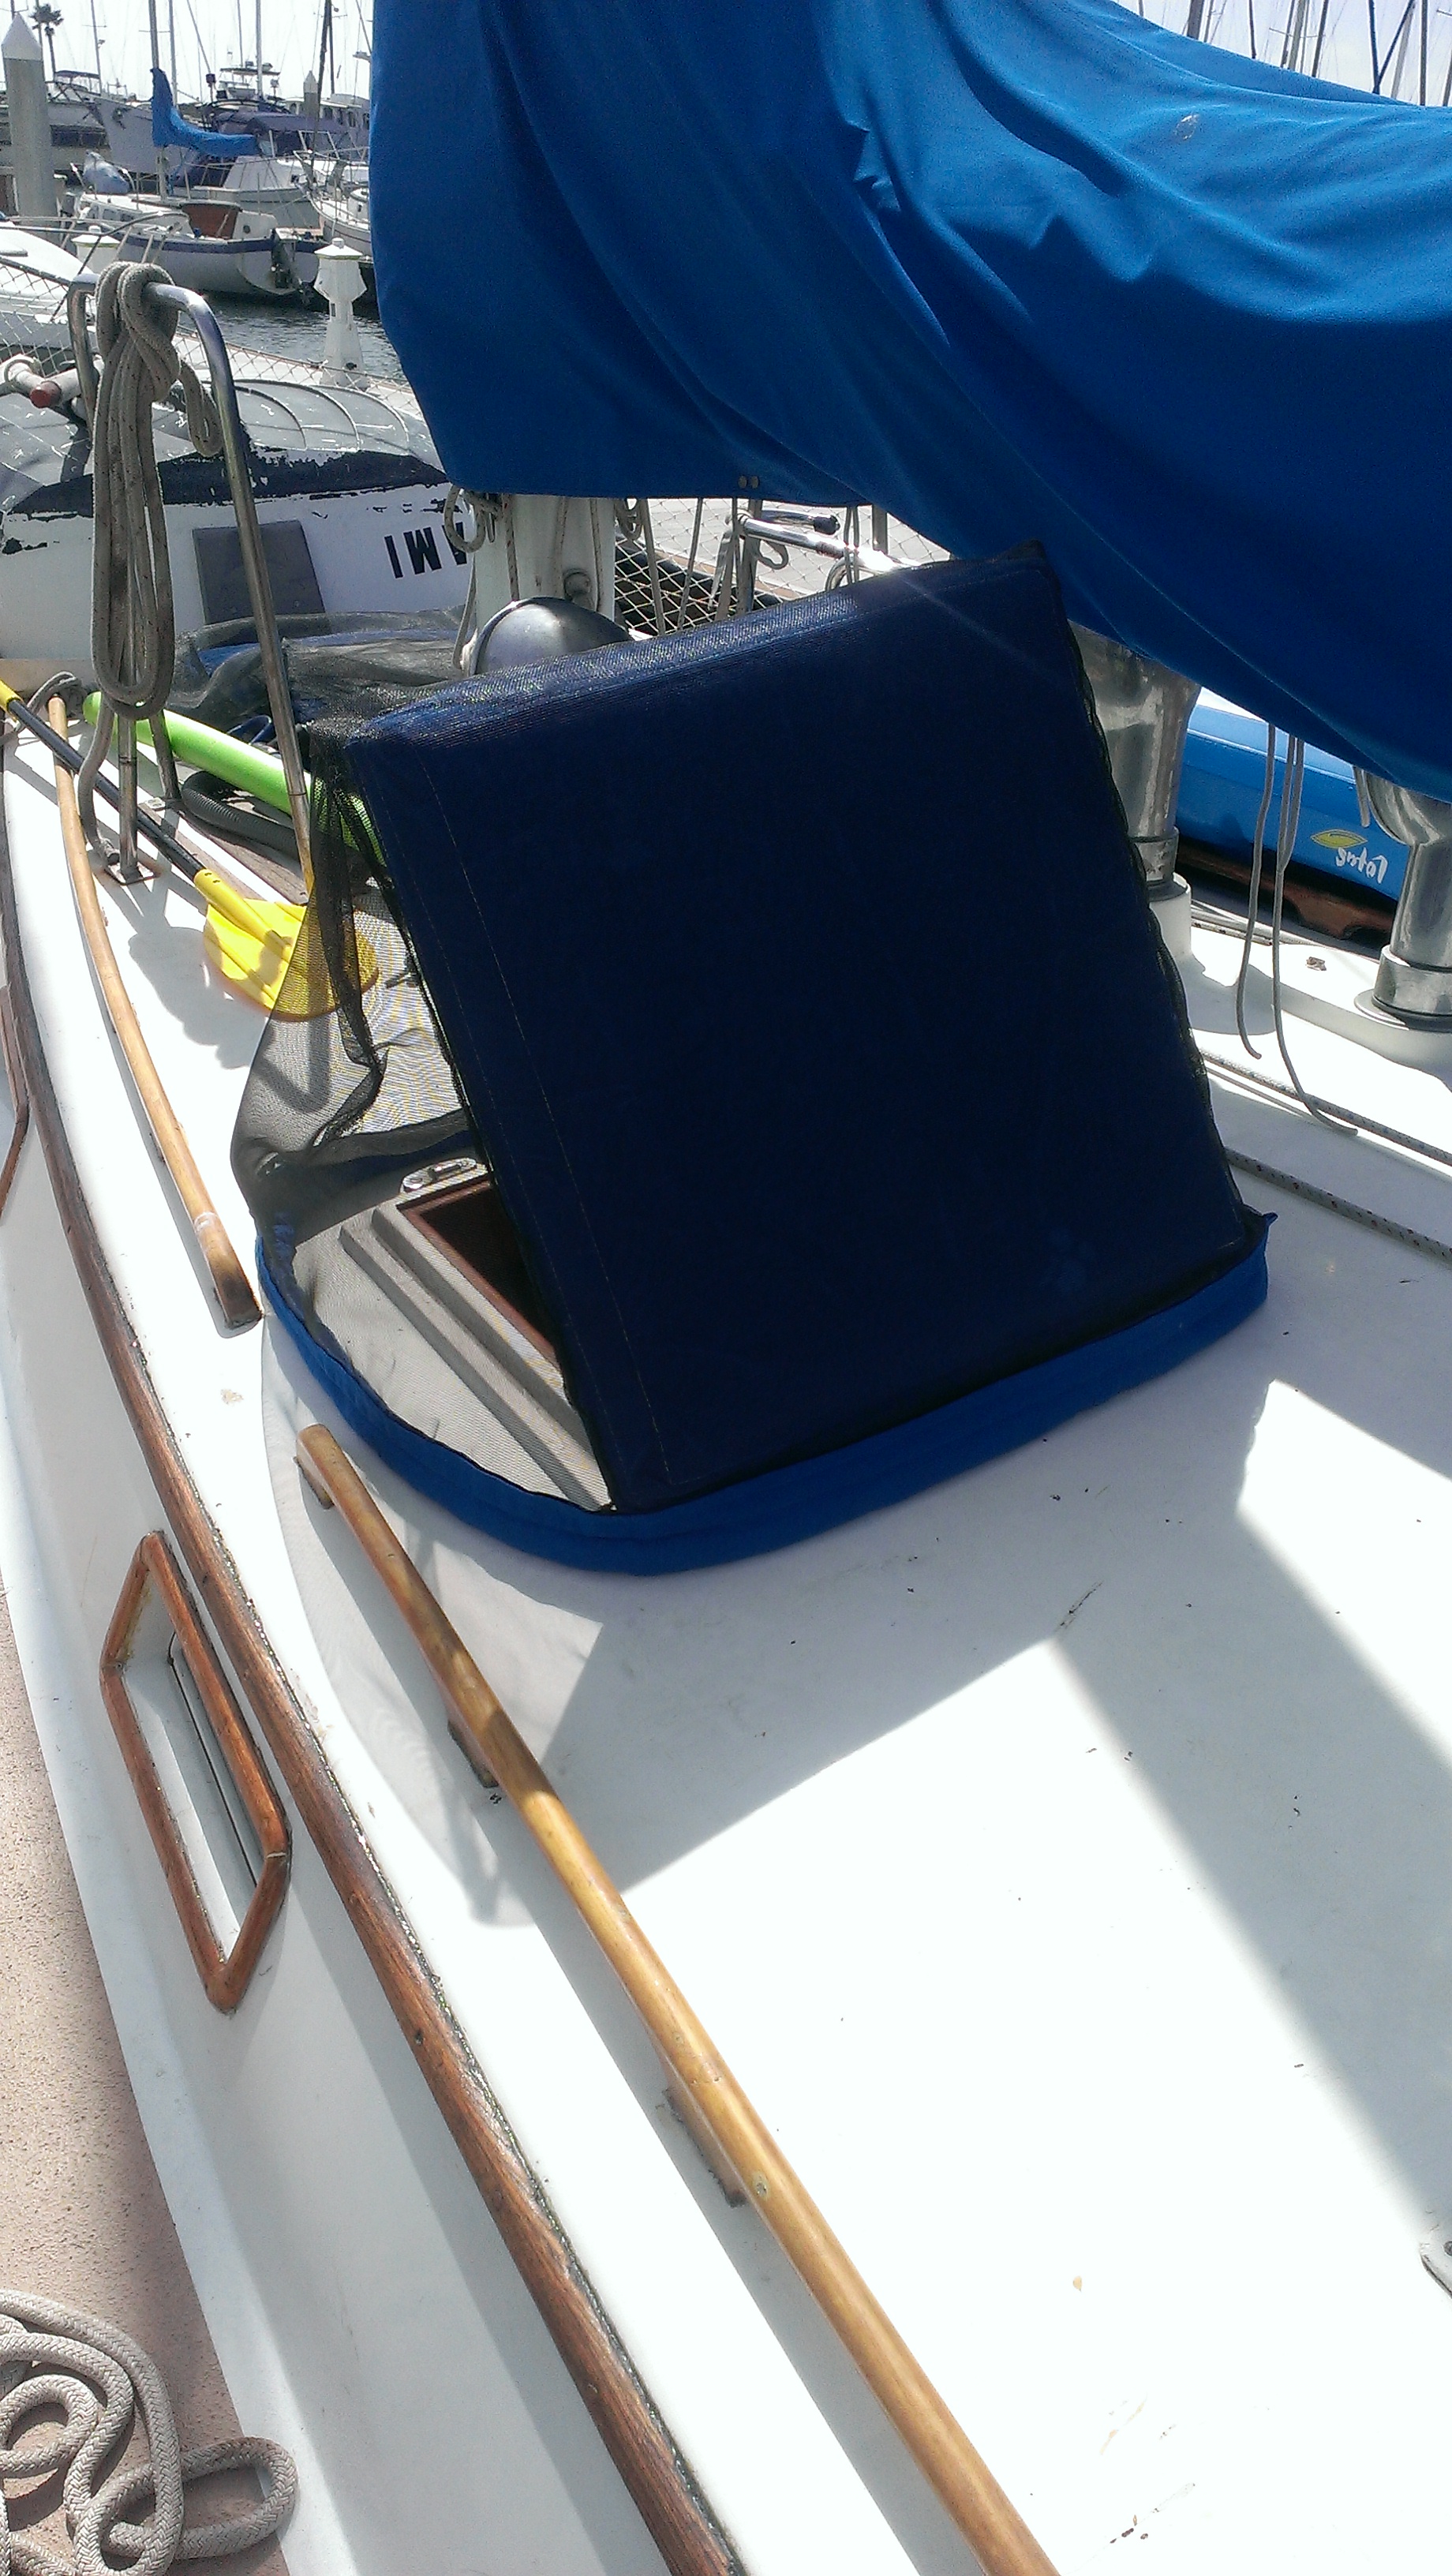
Homemade Hatch Cover Screens
Facing a fly problem, Nate and Natalie aboard s/v Astrea sewed up their own custom-fitted hatch screens:
When we moved the boat to Fiddlers Cove Marina we had an instant fly problem. They came from nowhere. We’d been talking about gettting or making hatch covers before we moved and found them to be very expensive from West Marine so Natalie decided to make them herself.
We bought fiberglass screen material from Home Depot and had some leftover Sunbrella from when the sail covers were made. The pattern was pretty basic, just two triangles for the sides of the hatches and then a rectangle to cover the front and back. The bottom was made from Sunbrella and filled with rocks. We could have used lead shot, but decided against that because of toxicity.
After Natalie made 3 hatch cover screens a friend asked for a price for Natalie to make some for him so we searched online and found the old WestMarine hatch covers still cost almost $90, and that there’s a new competitor that only costs only $30-$40 for their largest size. Had we known that there was a lower priced offering we’d have just bought the $30 hatch covers.
Tuesday, January 7, 2014
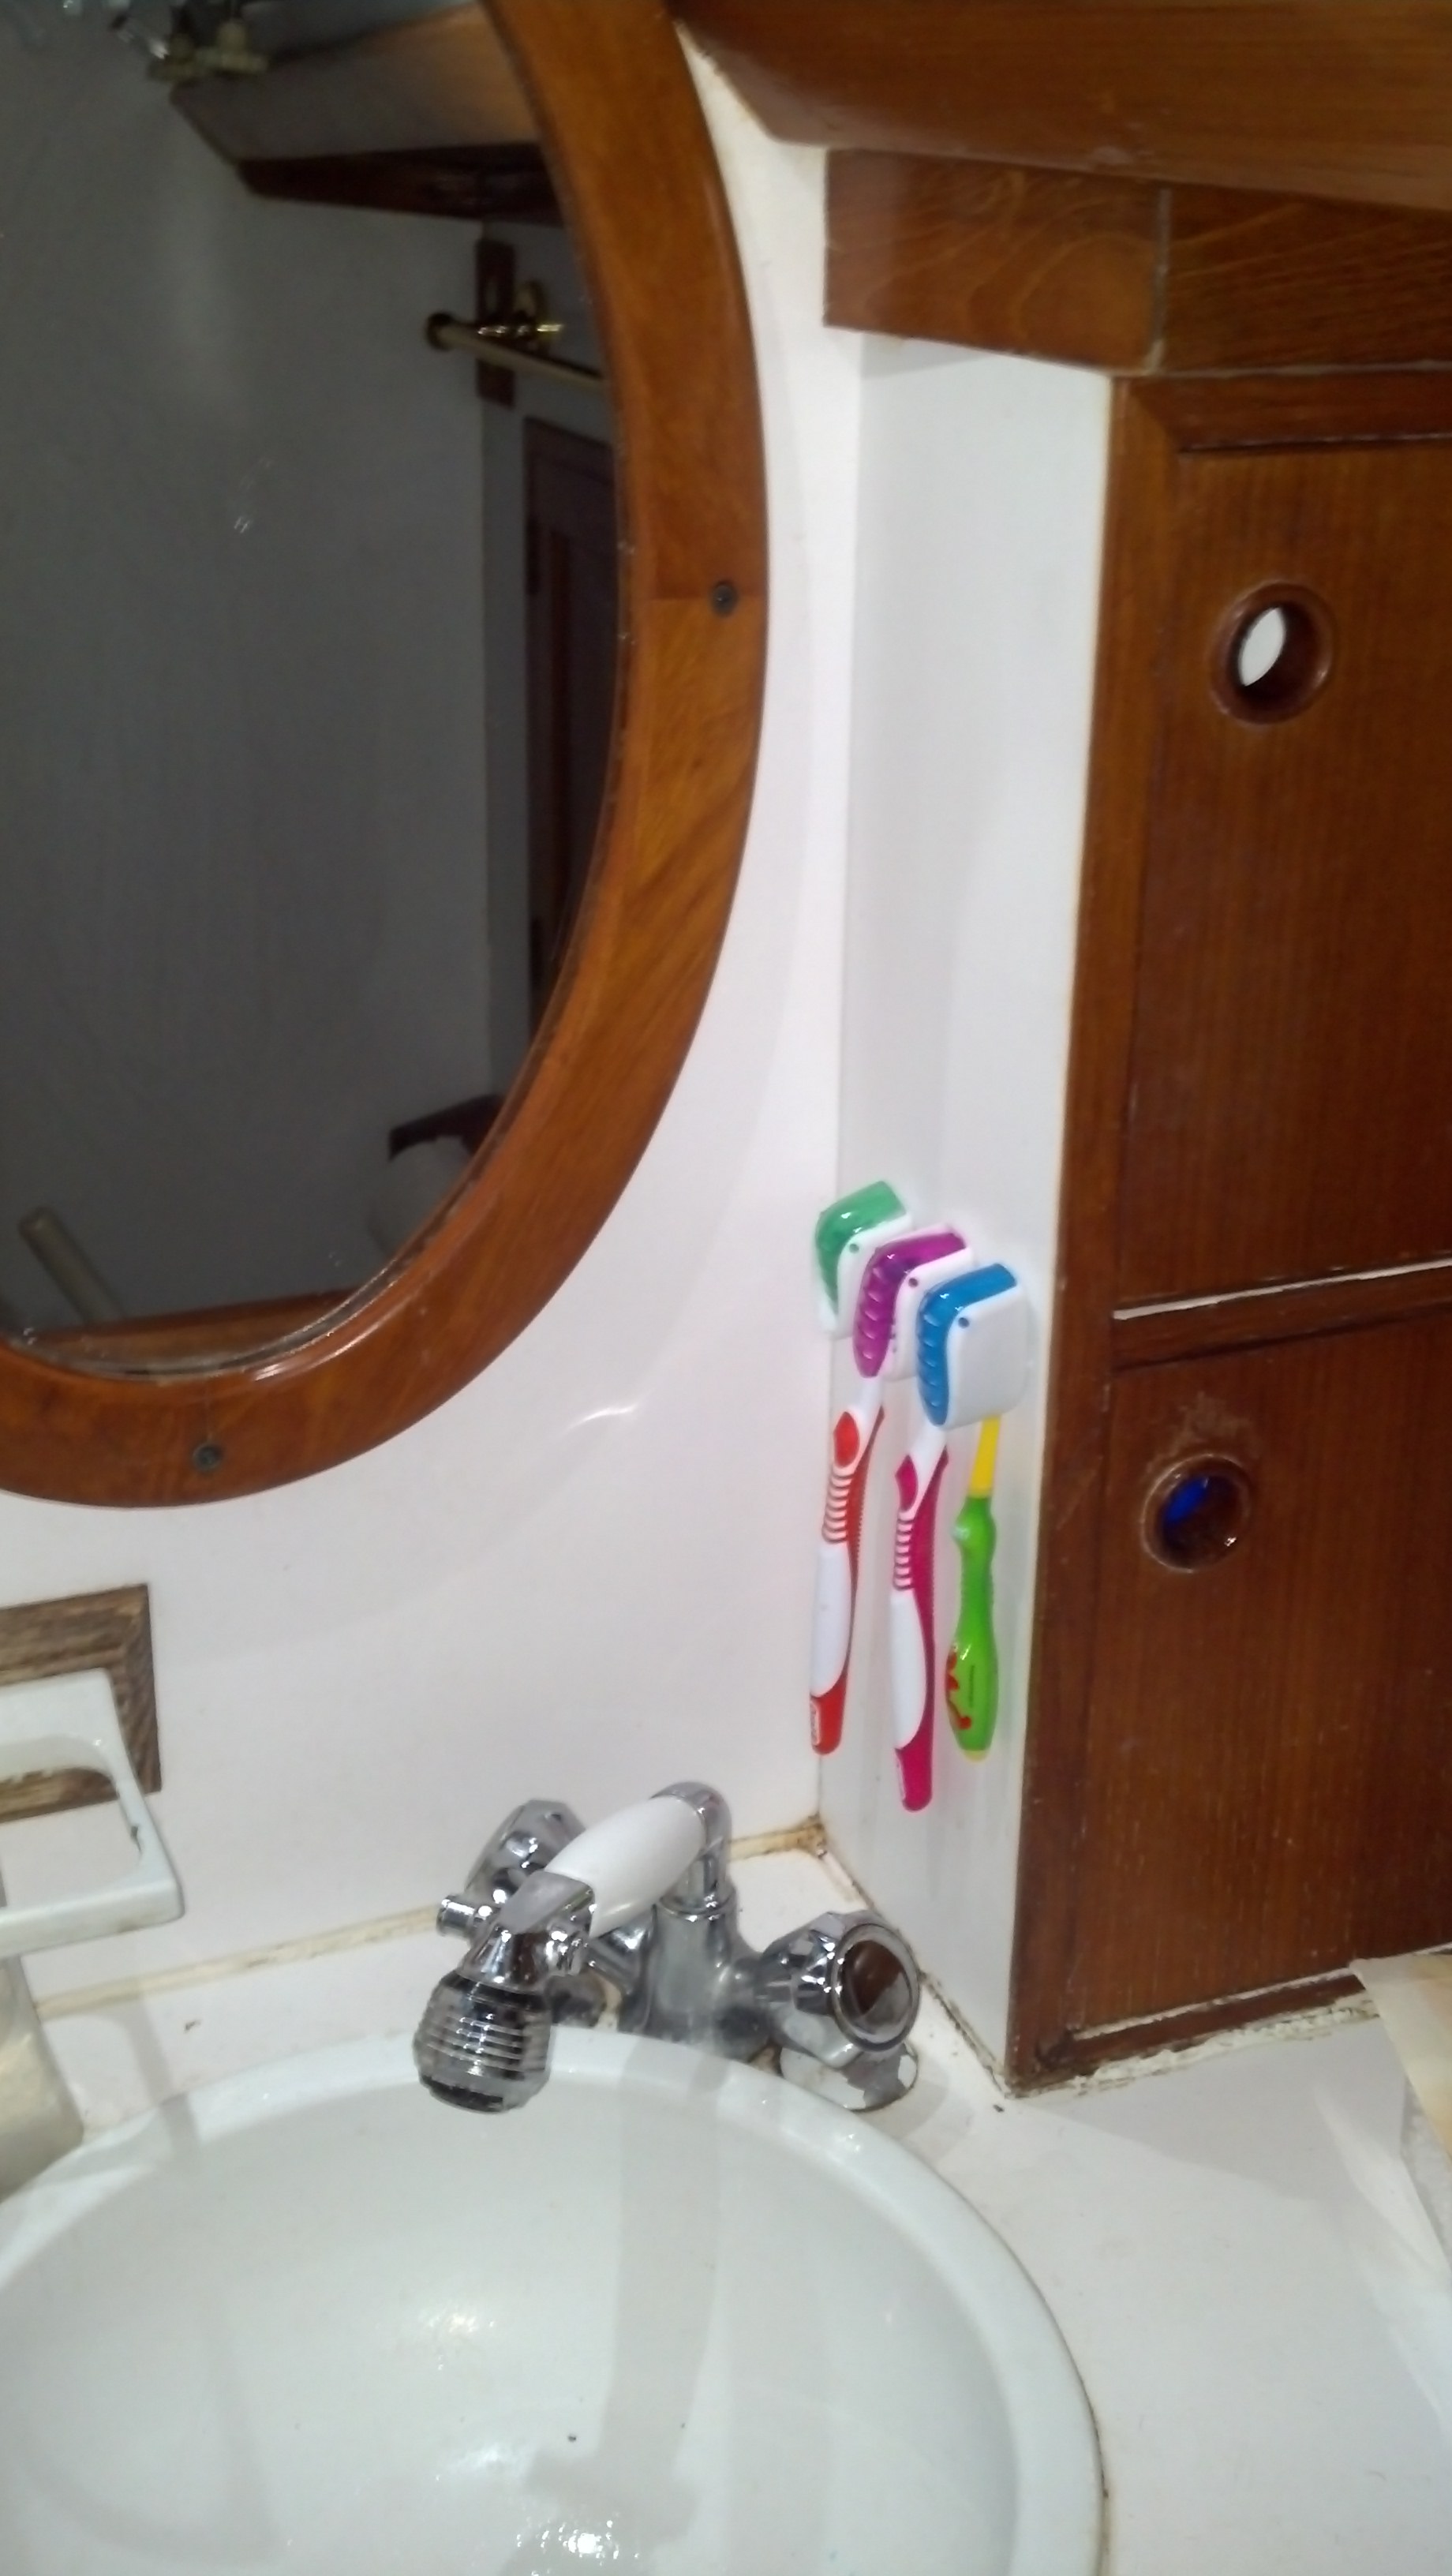
Simple Boat Projects
On board s/v Astraea, Nate shows us that it is sometimes the simplest projects that make life aboard easier (and he even includes a link back to this blog!):
The decks are almost wrapped up, but that’s not the project I’m talking about today. Today I’m talking about a small boat project that makes life easier aboard and took just a few minutes to complete. Heck, the hardest part was getting my tools out!
We’ve been using suction cup toothbrush holders for a while. Occasionally they’d fall off the bulkhead in the head and fall in to the sink in port and I think they’ll fall off in any kind of heavy seas. I removed the suction cup that was holding them to the wall and screwed the toothbrush holders on to the cabinet next to the sink where there were two preexisting holes. Sully’s little toothbrush is above the faucets so we can still use them easily. An easy project that made life aboard better!

Thursday, November 21, 2013
New Nonskid!
Nate and Natalie aboard their Cheoy Lee 41 s/v Astrea have renewed the non-skid on their deck. It came out great! Here's how they did it:
Astraea finally has a new look. After two coats of Interlux Prekote primer and two coats of Interlux Brightside paint. We did one coat each day. The primer covered the entire deck and the paint went down just around the deck edges. In between coats we sanded with 220 grit and cleaned up with Interlux 333 brushing liquid.
We rolled most of the area and only brushed in the areas behind hardware and corners. We didnt roll and tip because the results from just rolling were really good, there were very few bubbles. While working on the deck preparation and painting we wore clean socks to keep dirt off the decks.
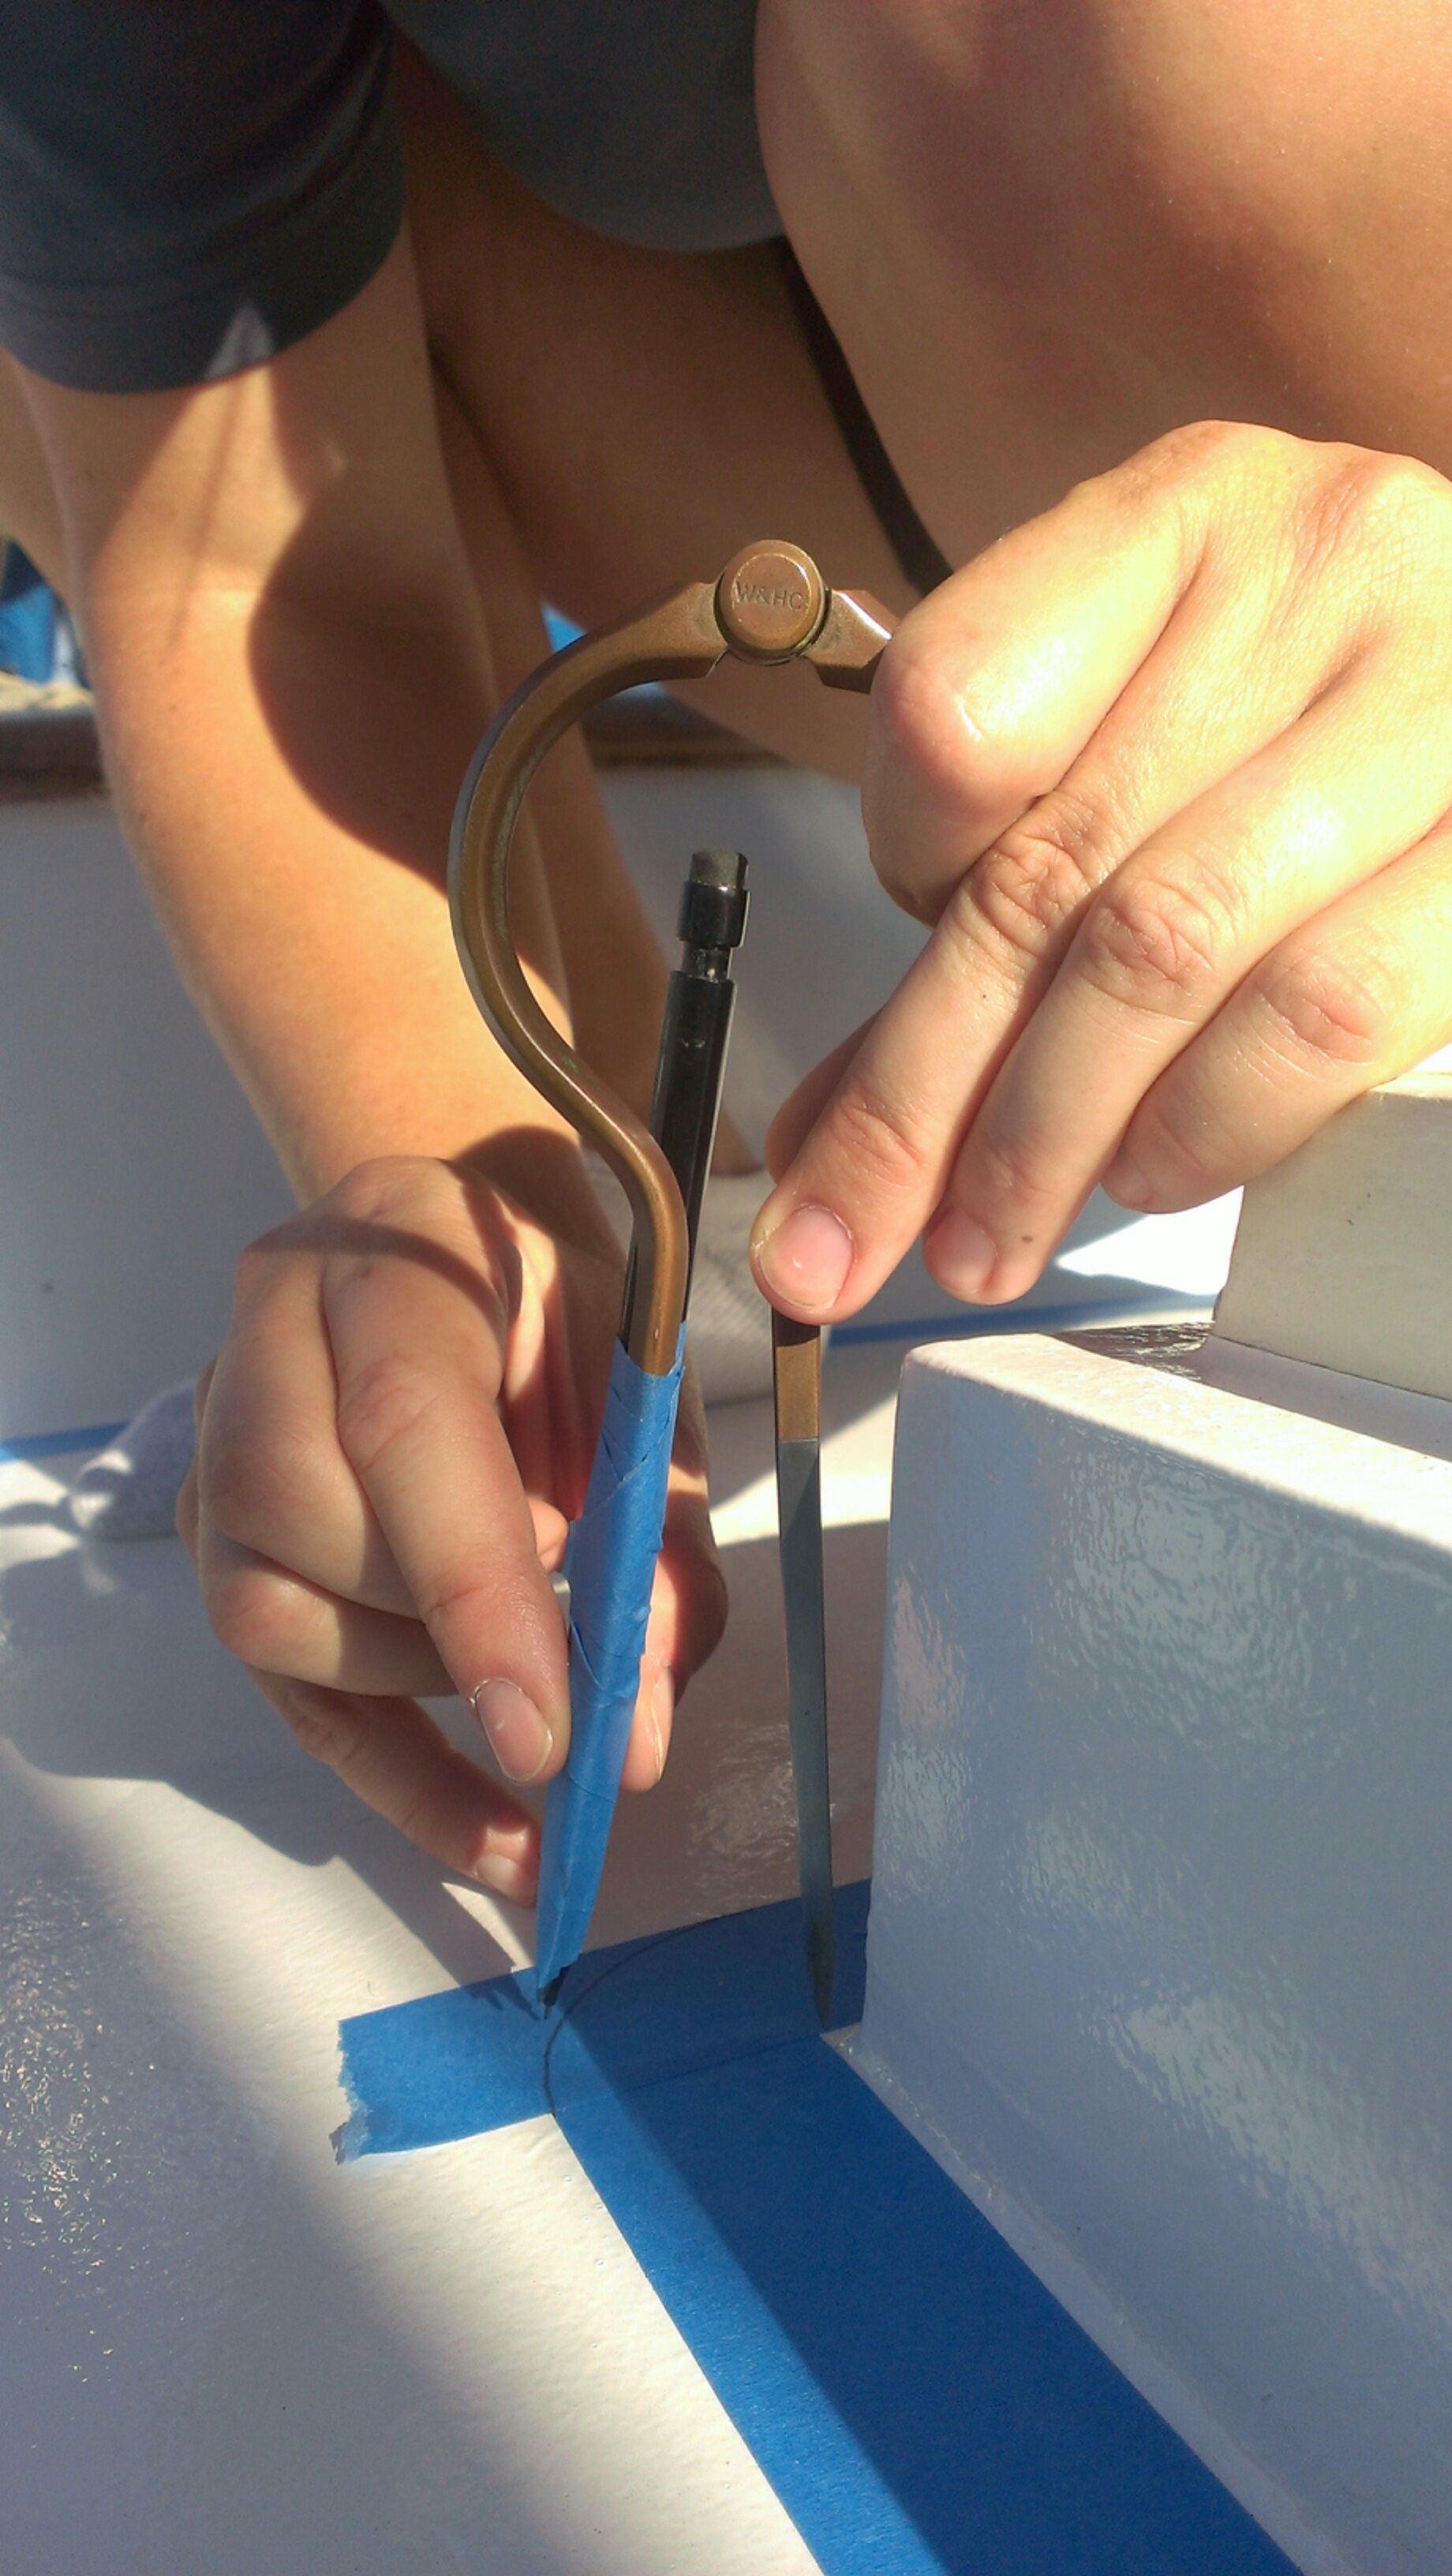
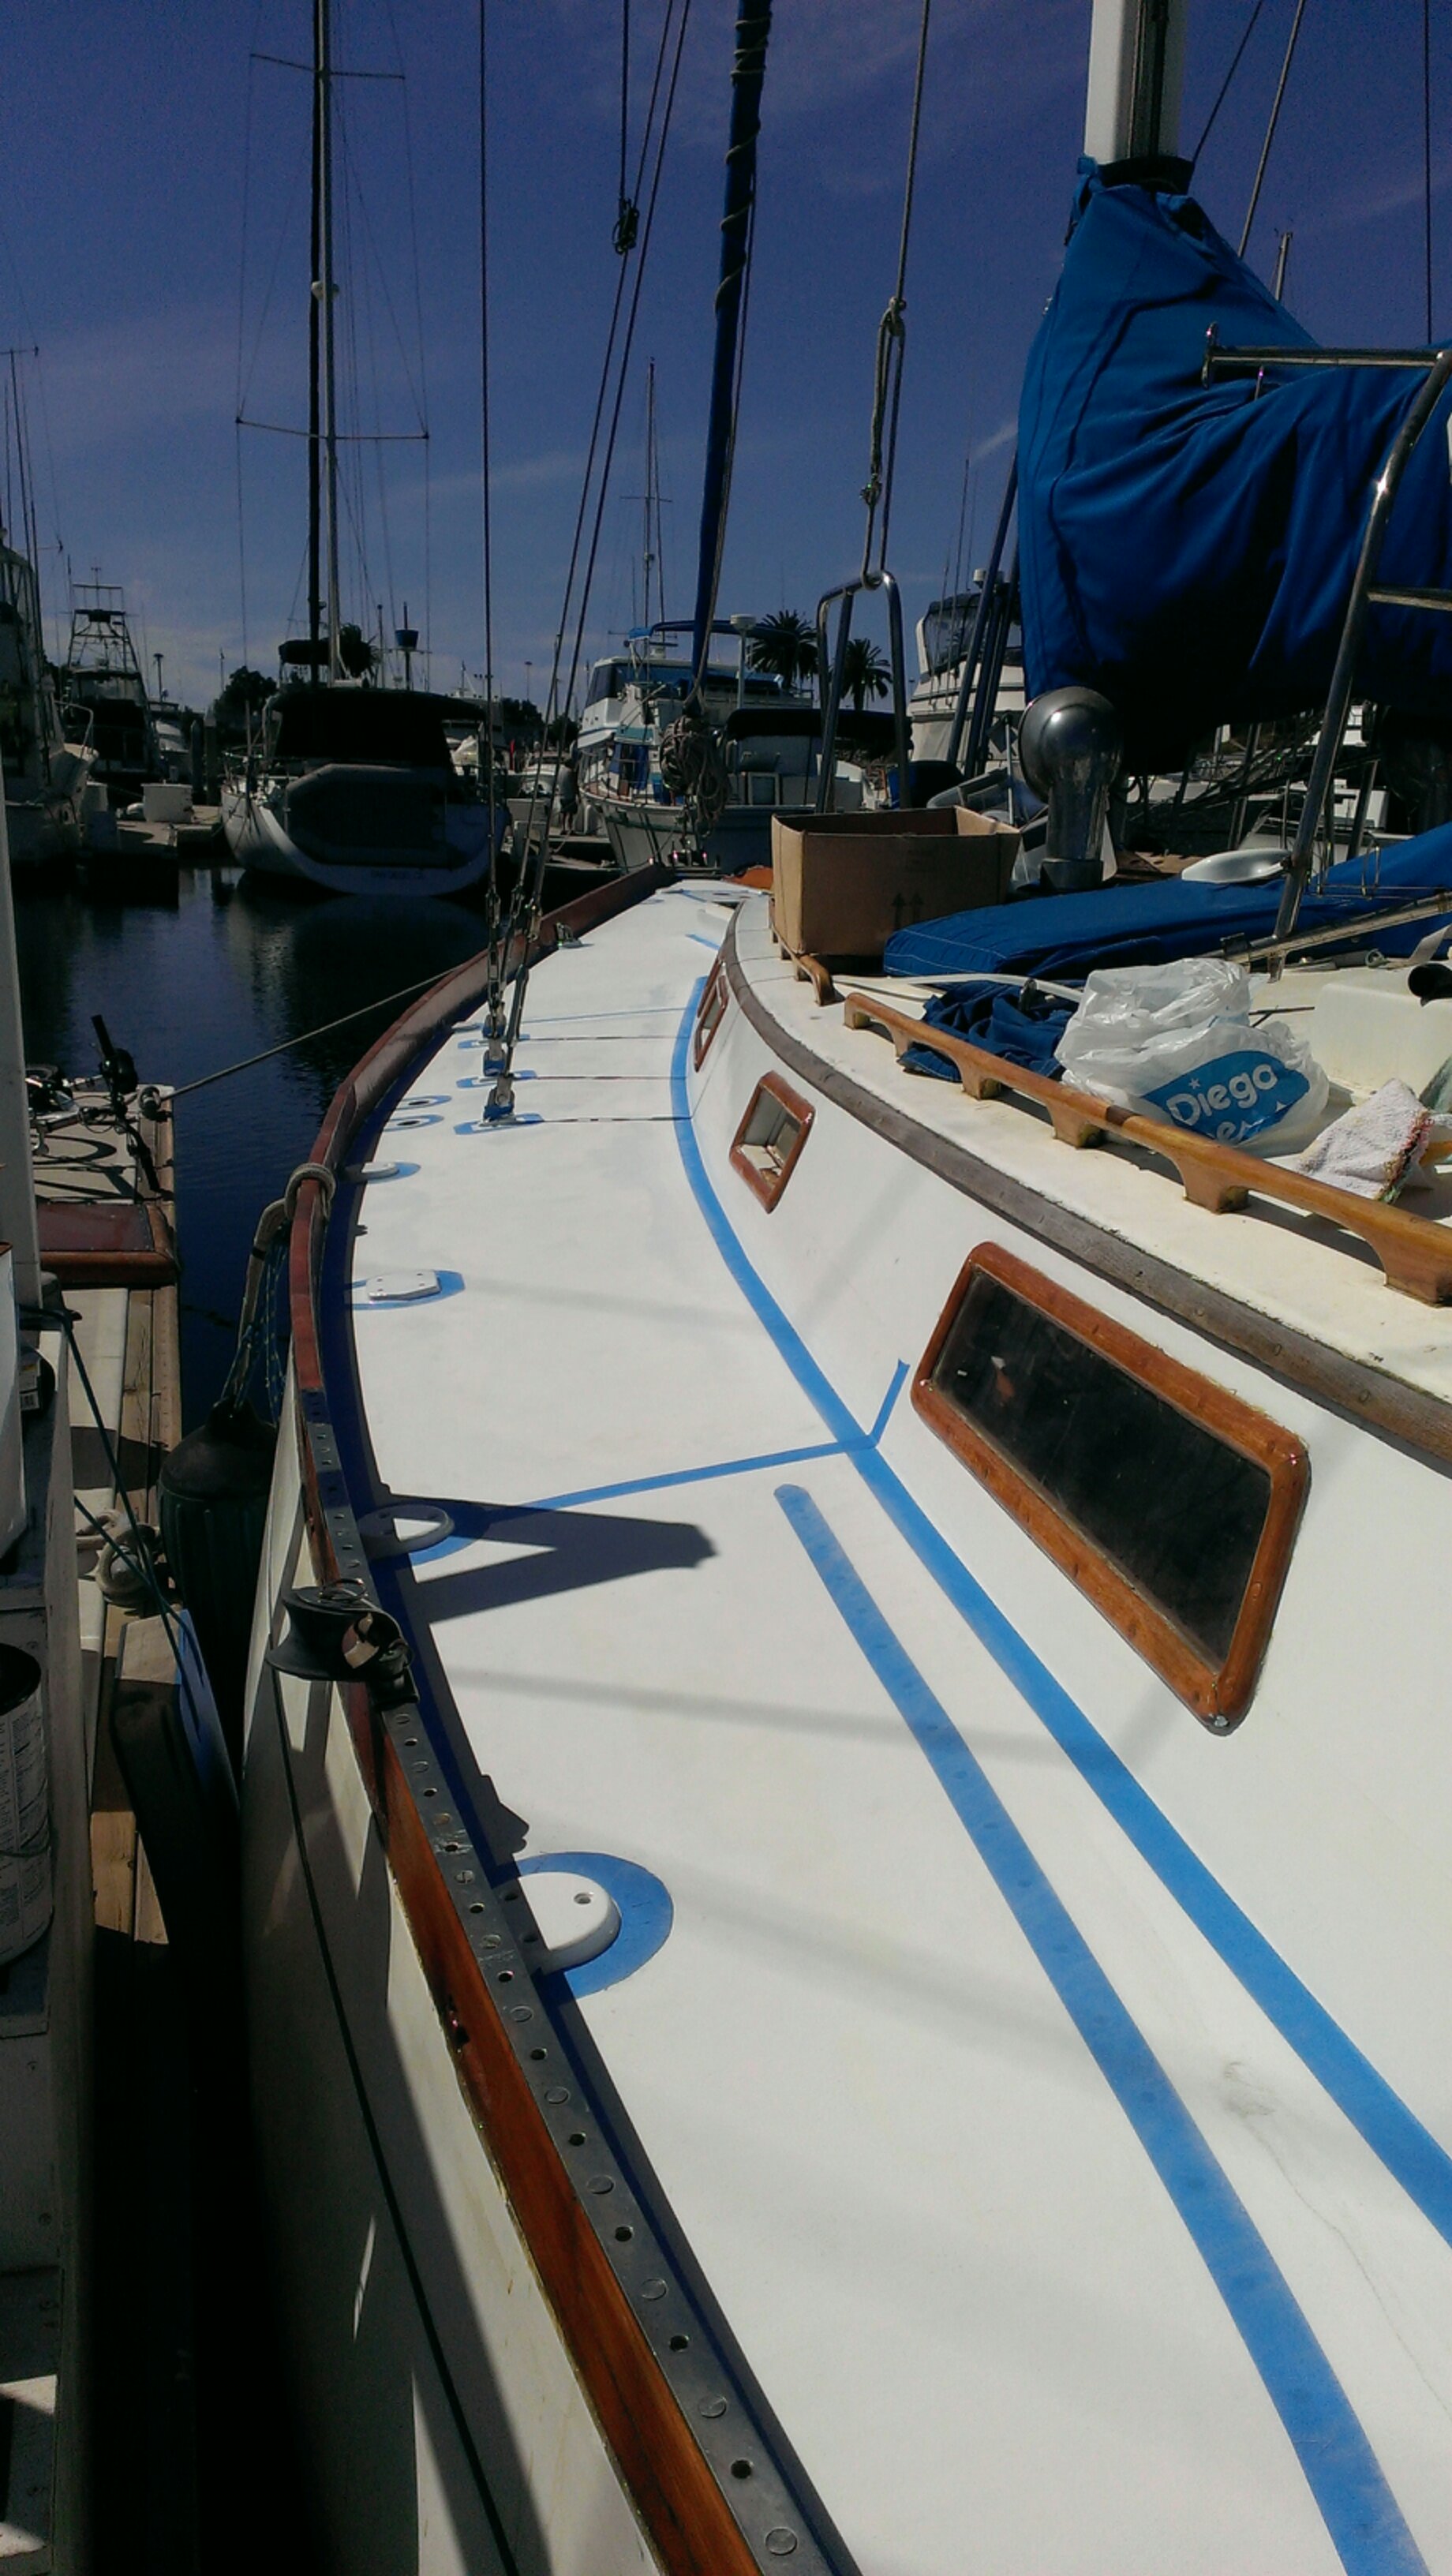
The day after our last coat of paint we taped the area around the deck edges and hardware we didn’t want nonskid to go. It took us about 8 man hours to tape the entire deck. We made all the edges the same width of a roll of blue 3M painters tape. The straight edges were easy to tape, just put the tape against the edge and roll the tape. Natalie used a compass to draw some easy curves, but it didn’t work for everything. She got creative and used kitchen tongs holding a pencil for curves around the deck house and hatches where a compass didn’t work. We over taped and traced the width of a roll of tape then cut away the excess using an exacto knife and peeled up the tape.
Natalie taped and drew the curved lines around hardware
Using a compass to draw a curve on the tape
Natalie using the tongs to hold a pencil and draw a curve
Cutting excess tape from the deck
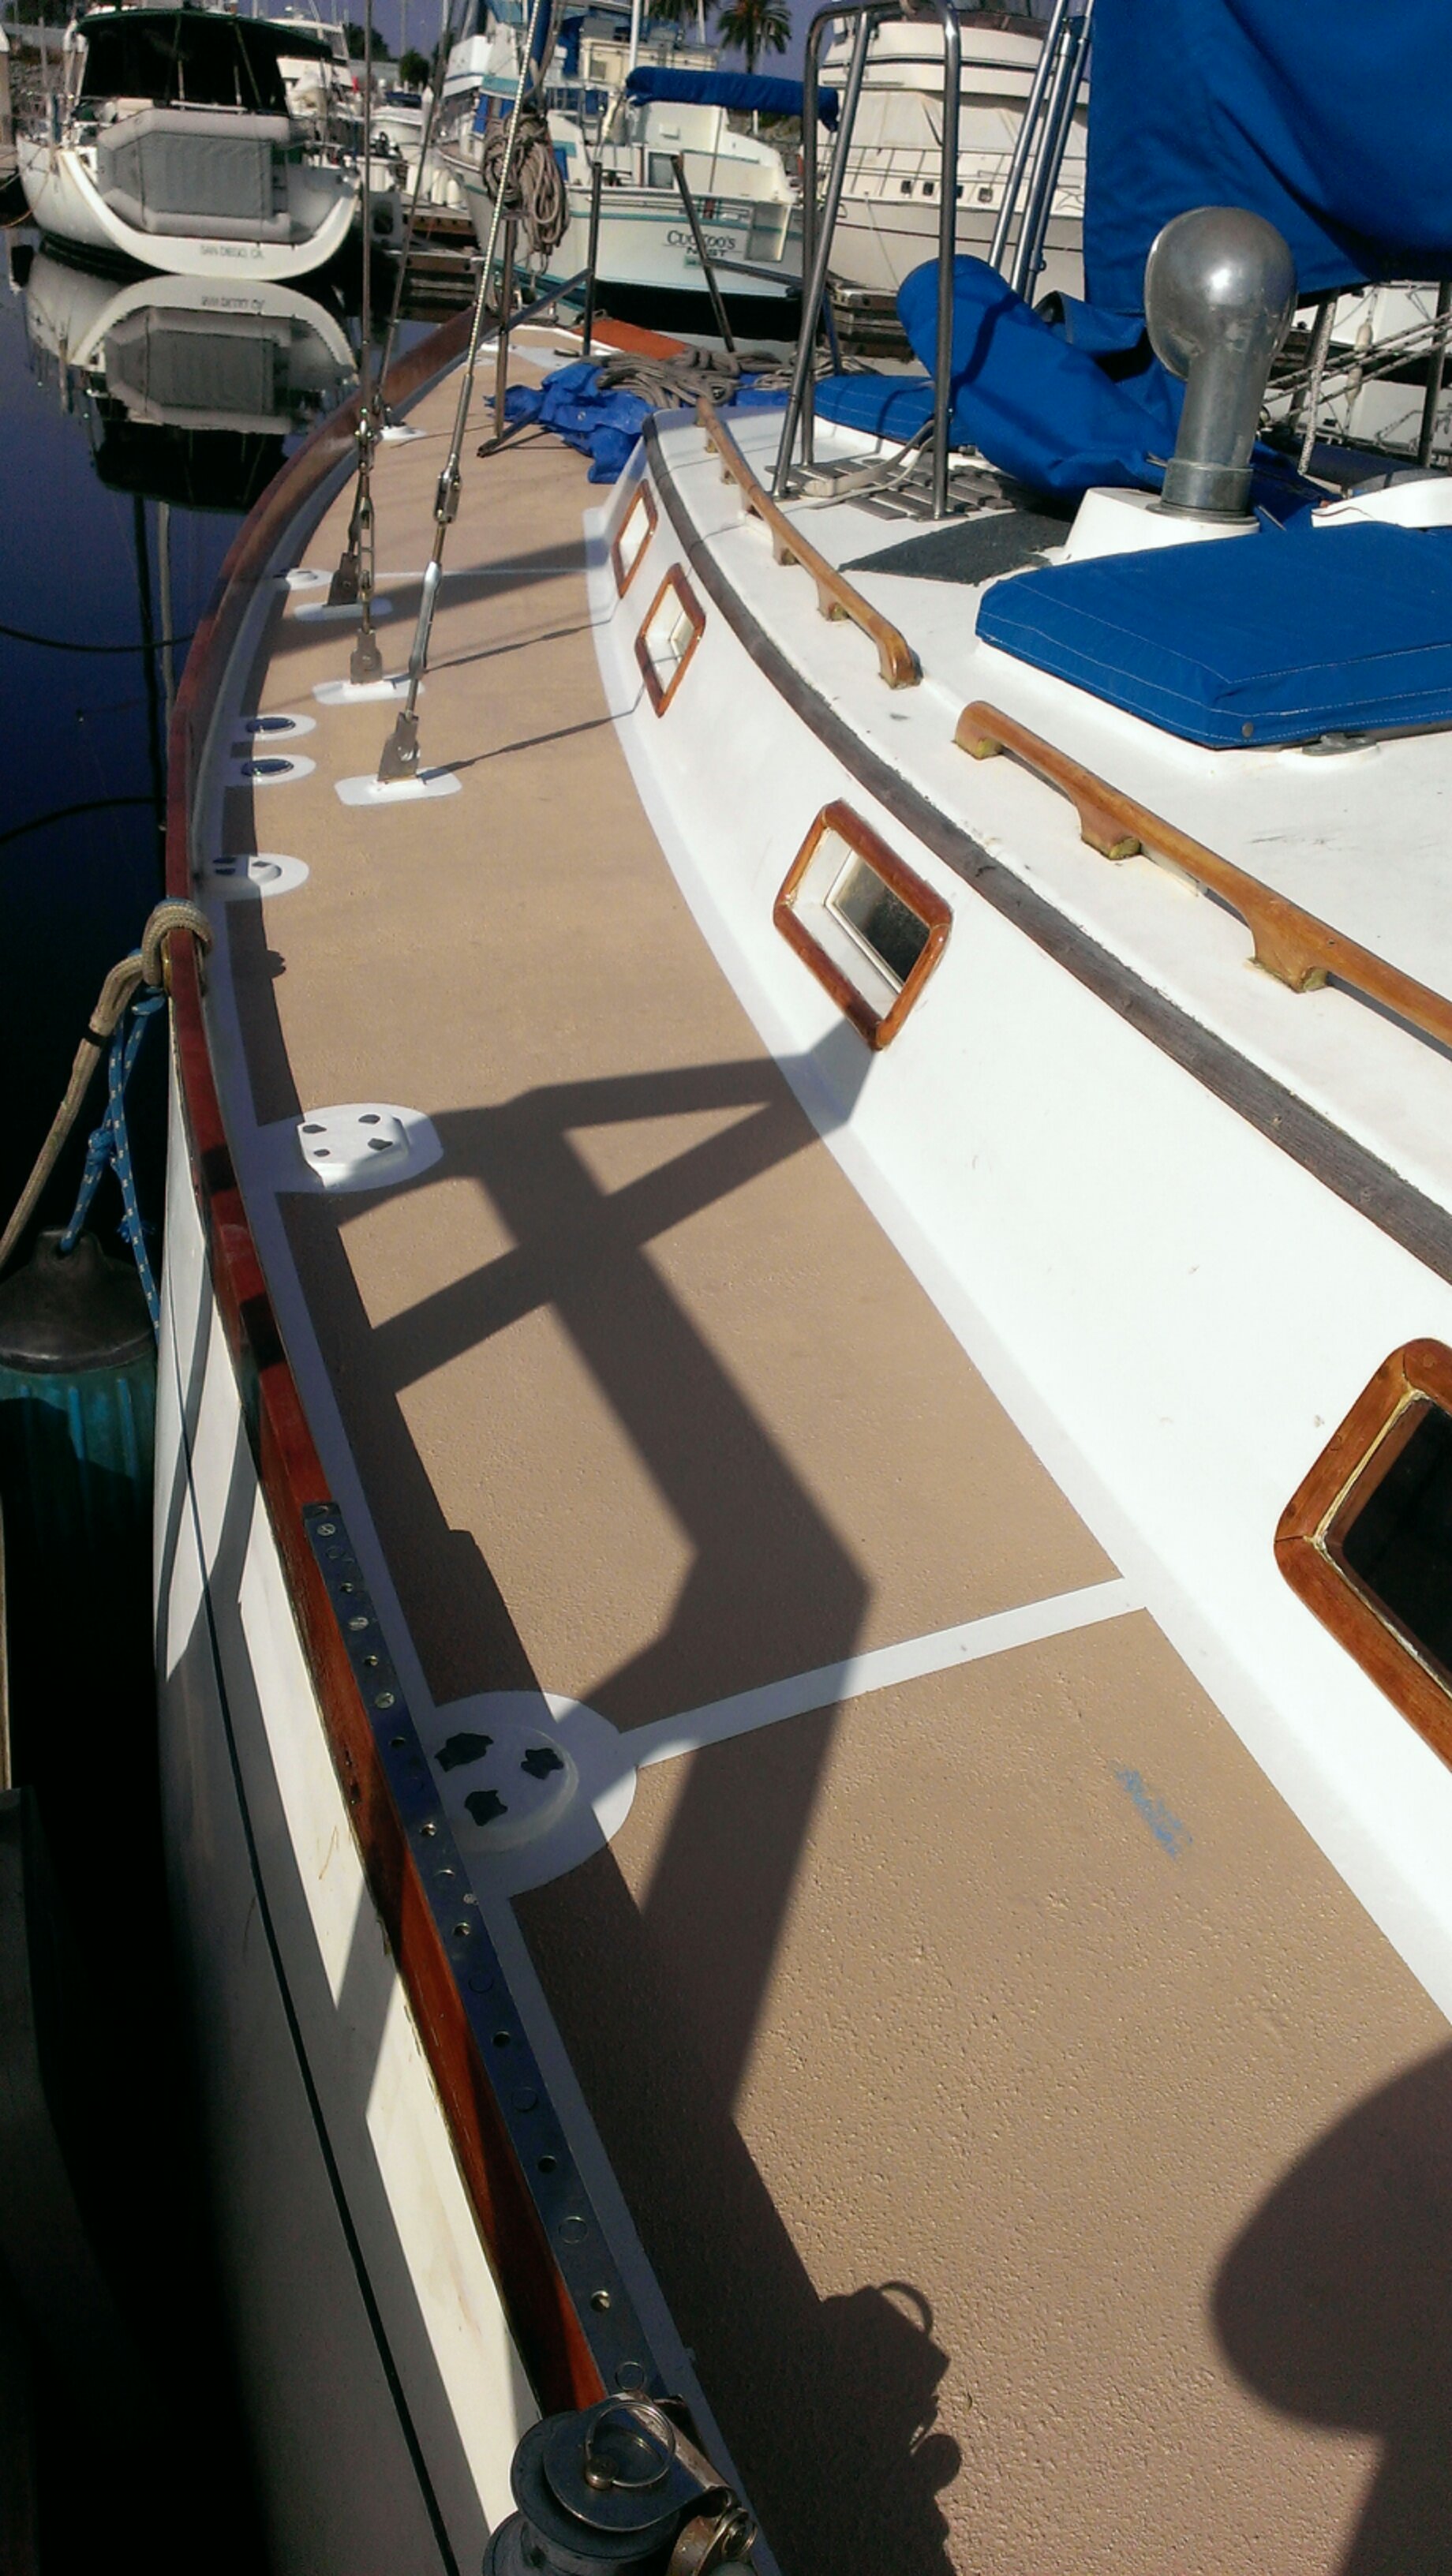
Side decks with the tape removed
We sanded the deck with 100 grit sandpaper and cleaned up the deck twice with rags wetted with Industrial Maintenance Coating Thinner. The directions for the Durabak nonskid calls for Xylene, but Xylene isn’t available in California. Industrial Maintenance Coating Thinner is OK to use in place of Xylene.
Finally we were ready roll the nonskid! I opened the first can and mixed it up with our electric drill and a paint mixer and poured it in to a paint pan. I did some test rolling on cardboard to get used to rolling the textured material before rolling on the boat. It took about an hour and a half to cover the decks. I took a break and then rolled the second coat.
That night after the Durabak dried for four hours we could walk on the nonskid and peel up the tape from the edges before it fully cured. The tape came up easily if the Durabak wasn’t too thick. We cleaned up areas where the tape tore with an exact knife. We had some issues with the tape pulling up the white paint underneath where it hadn’t dried completely because we applied the paint too thick. We will touch up those areas later when we finish priming and painting the cockpit locker covers.
We’re so excited that this project is almost finished! It’s been a long six months…now on to re-mounting all the hardware.


Tuesday, April 16, 2013
Adding NMEA GPS Location to a VHF Radio
Over on s/v Astrea, Nate introduces his VHF to his GPS...
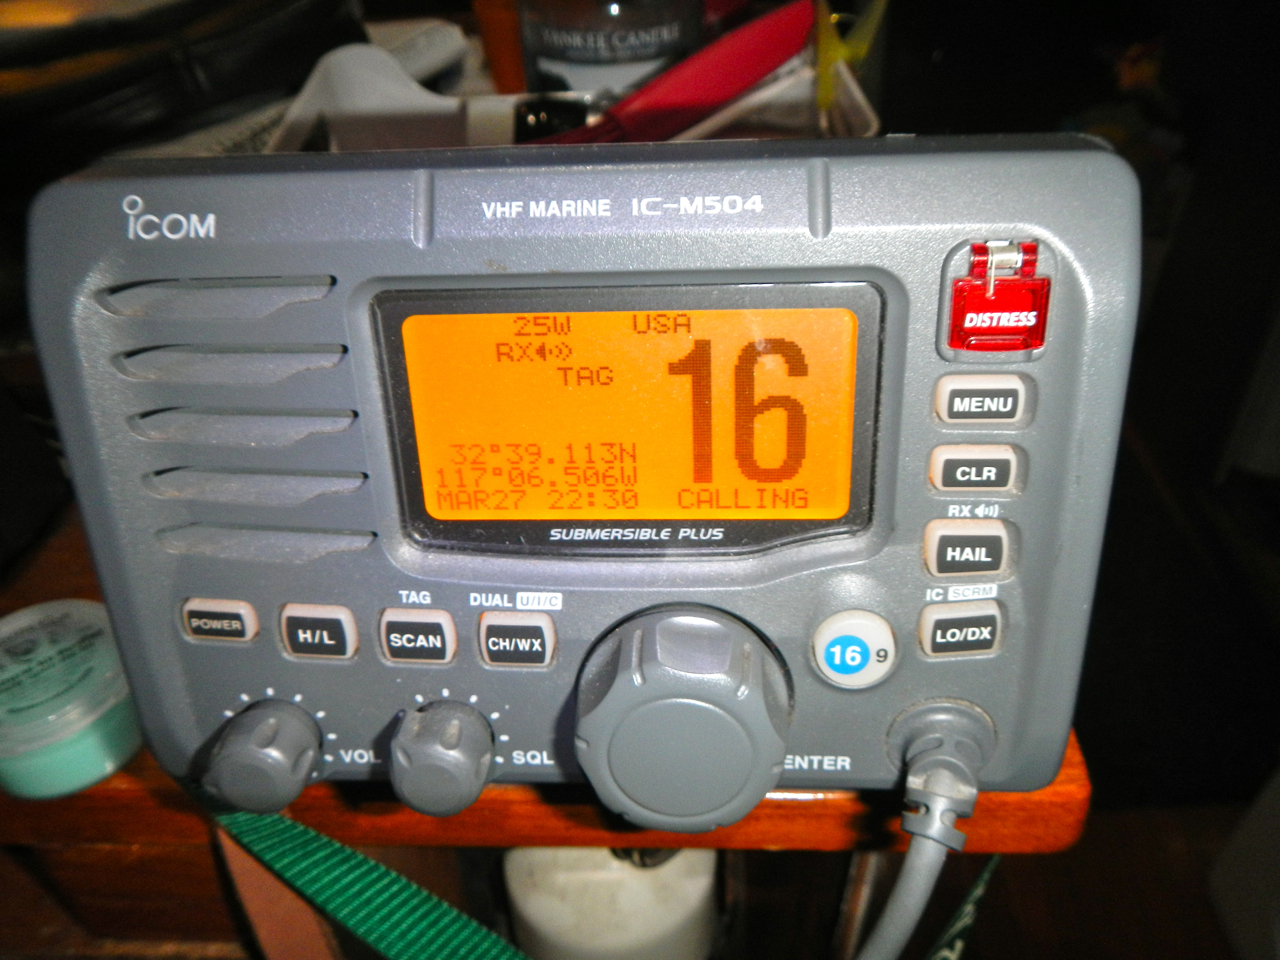
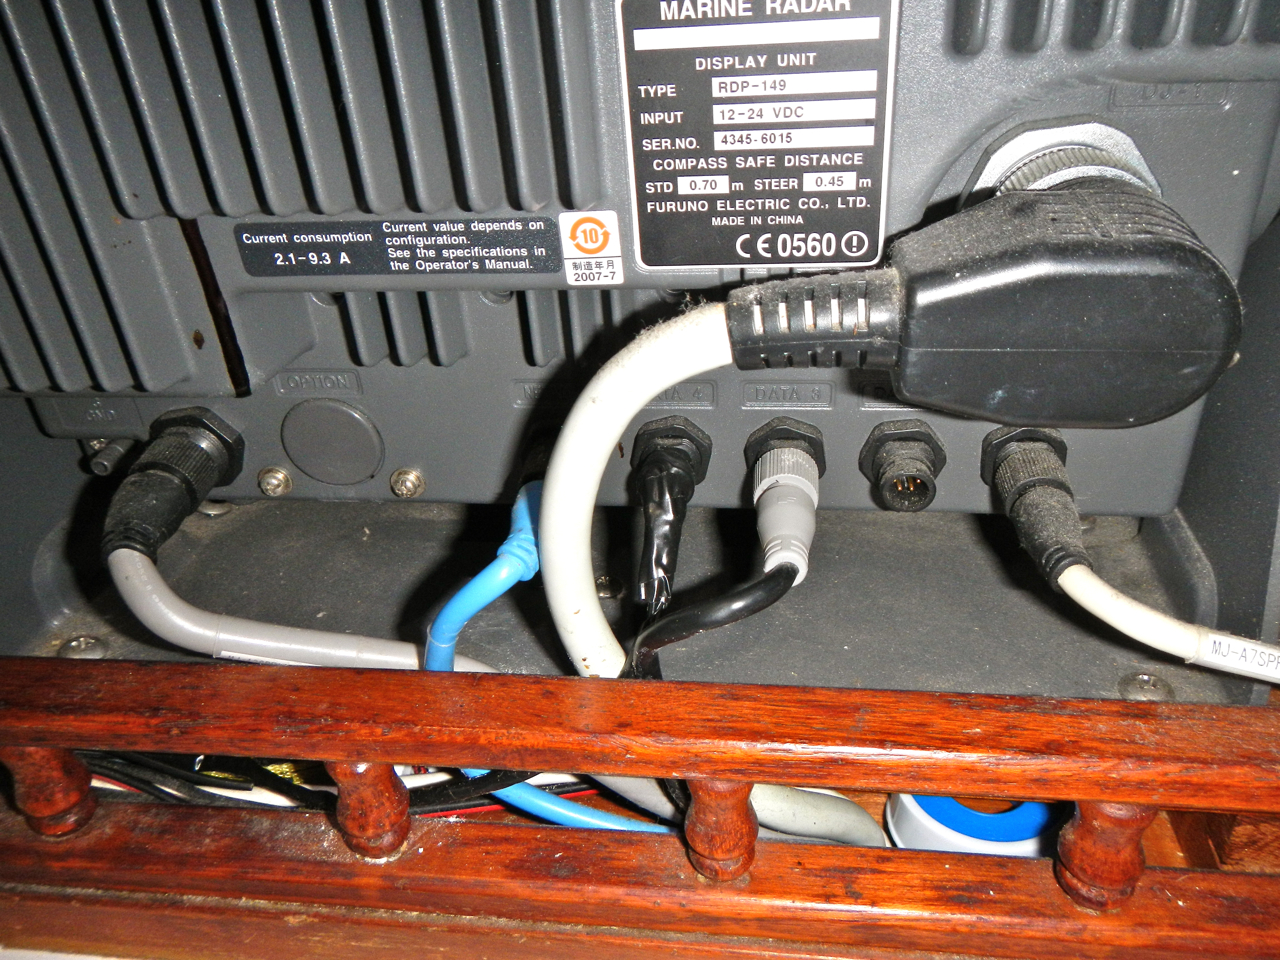
It all started when I turned on the Furuno RDP-149 NavNet VX2 chartplotter and Icom 504 VHF radio for the first time. I noticed the radio said “No Position No Time” and it was right next to the chartplotter that gets its position and time from its GPS antenna. I want our location to be inputted in to VHF radio so if I need to press the distress button an automatic call can go out to the Coast Guard and our position will be automatically transmitted. It’s also nice that our position will be displayed on the radio so it’s easy to tell buddy boats where we are, or for a less emergent situation like a Securite or Pan Pan call.[Editor's note: See also this guide to NMEA wiring published by Paul over on Boat Projects, especially if you have both NMEA 2000 and NMEA 0183 devices.]
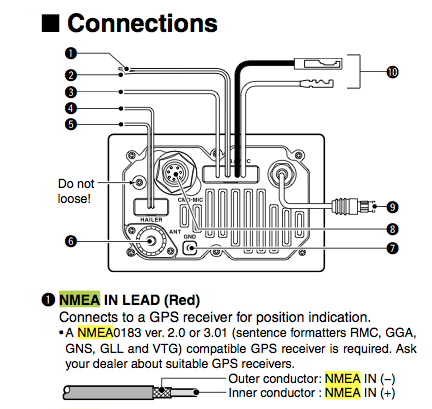
So, a little about making the right connections. There’s a protocol called NMEA that allows maritime electronics to communicate. All you have to do is figure out how to set up and connect the equipment and it should work. I read the manuals and did a quick internet search and found that it’s easy to connect my radio and chartplotter together using two wires so the chartplotter can feed the radio time and position data.
I downloaded the chartplotter manual and VHF manual from the manufacturer’s websites.
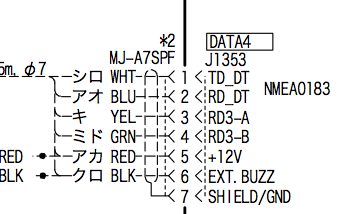
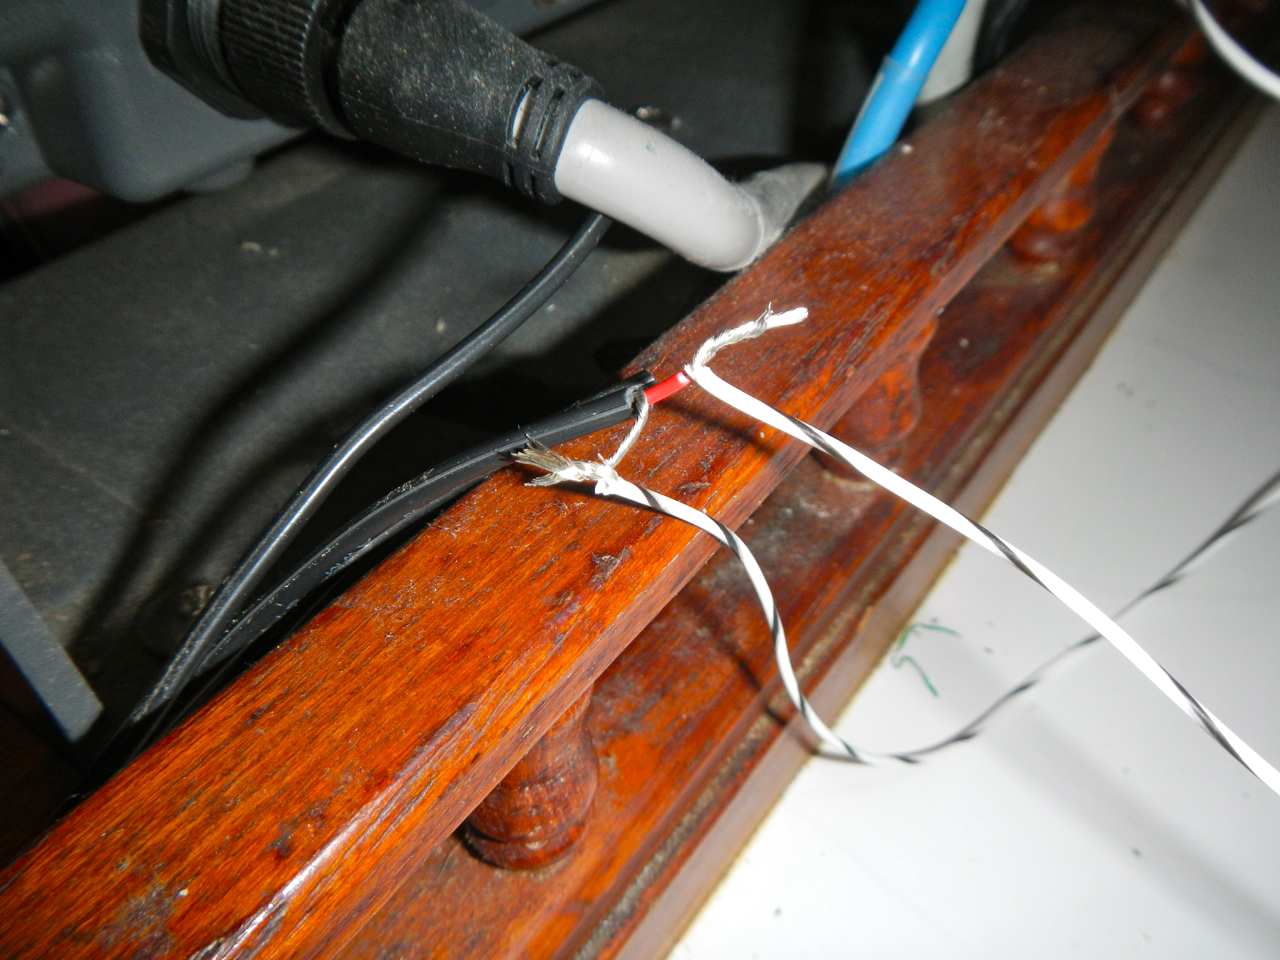
NMEA works like a momma bird and a baby bird (feeding data instead of regurgitated worms). For my setup the momma bird is the chartplotter feeding (transmitting) data to the VHF radio which eats (receives) the data. I used the chartplotter’s TD_DT connection on pin1 of the Data4 jack to transmit the data to the inner conductor of the NMEA IN lead on the VHF. The only tricky part was fining out what “NMEA IN (-)” on the VHF should be connected to on the chartplotter. I guessed that it should connect to the SHIELD/GND and it worked. As soon as I touched the wires the GPS position and time were instantly transmitted to the radio!
I soldered the connections and put heat shrink on my custom wiring to make it professional. The leads are secure in the back of the chartplotter so I won’t buy the $65 Furuno cable. If this installation was outside or in a splash zone I’d buy the waterproof Furuno cable, but it’s far enough under the companionway I’m not concerned about water intrusion.
radio all covered up and ready for daily use
After reading more in the Icom manual now I want to connect an AIS to provide ship position information on the chartplotter. All in all the project took me an evening on the boat after Sully went to sleep.

Thursday, March 14, 2013
Hi-gain Wi-Fi
Nate installs a bazillion dB gain WiFi system on s/v Astraea :
Last August I purchased and installed a Wi-Fi system aboard Astraea called Wi-Fi for Boats. It’s a kit made by a cruiser computer guy that includes everything you need to get long-range Wi-Fi aboard your boat. I bought the system and tested it by installing it on the stern rail of Astraea.
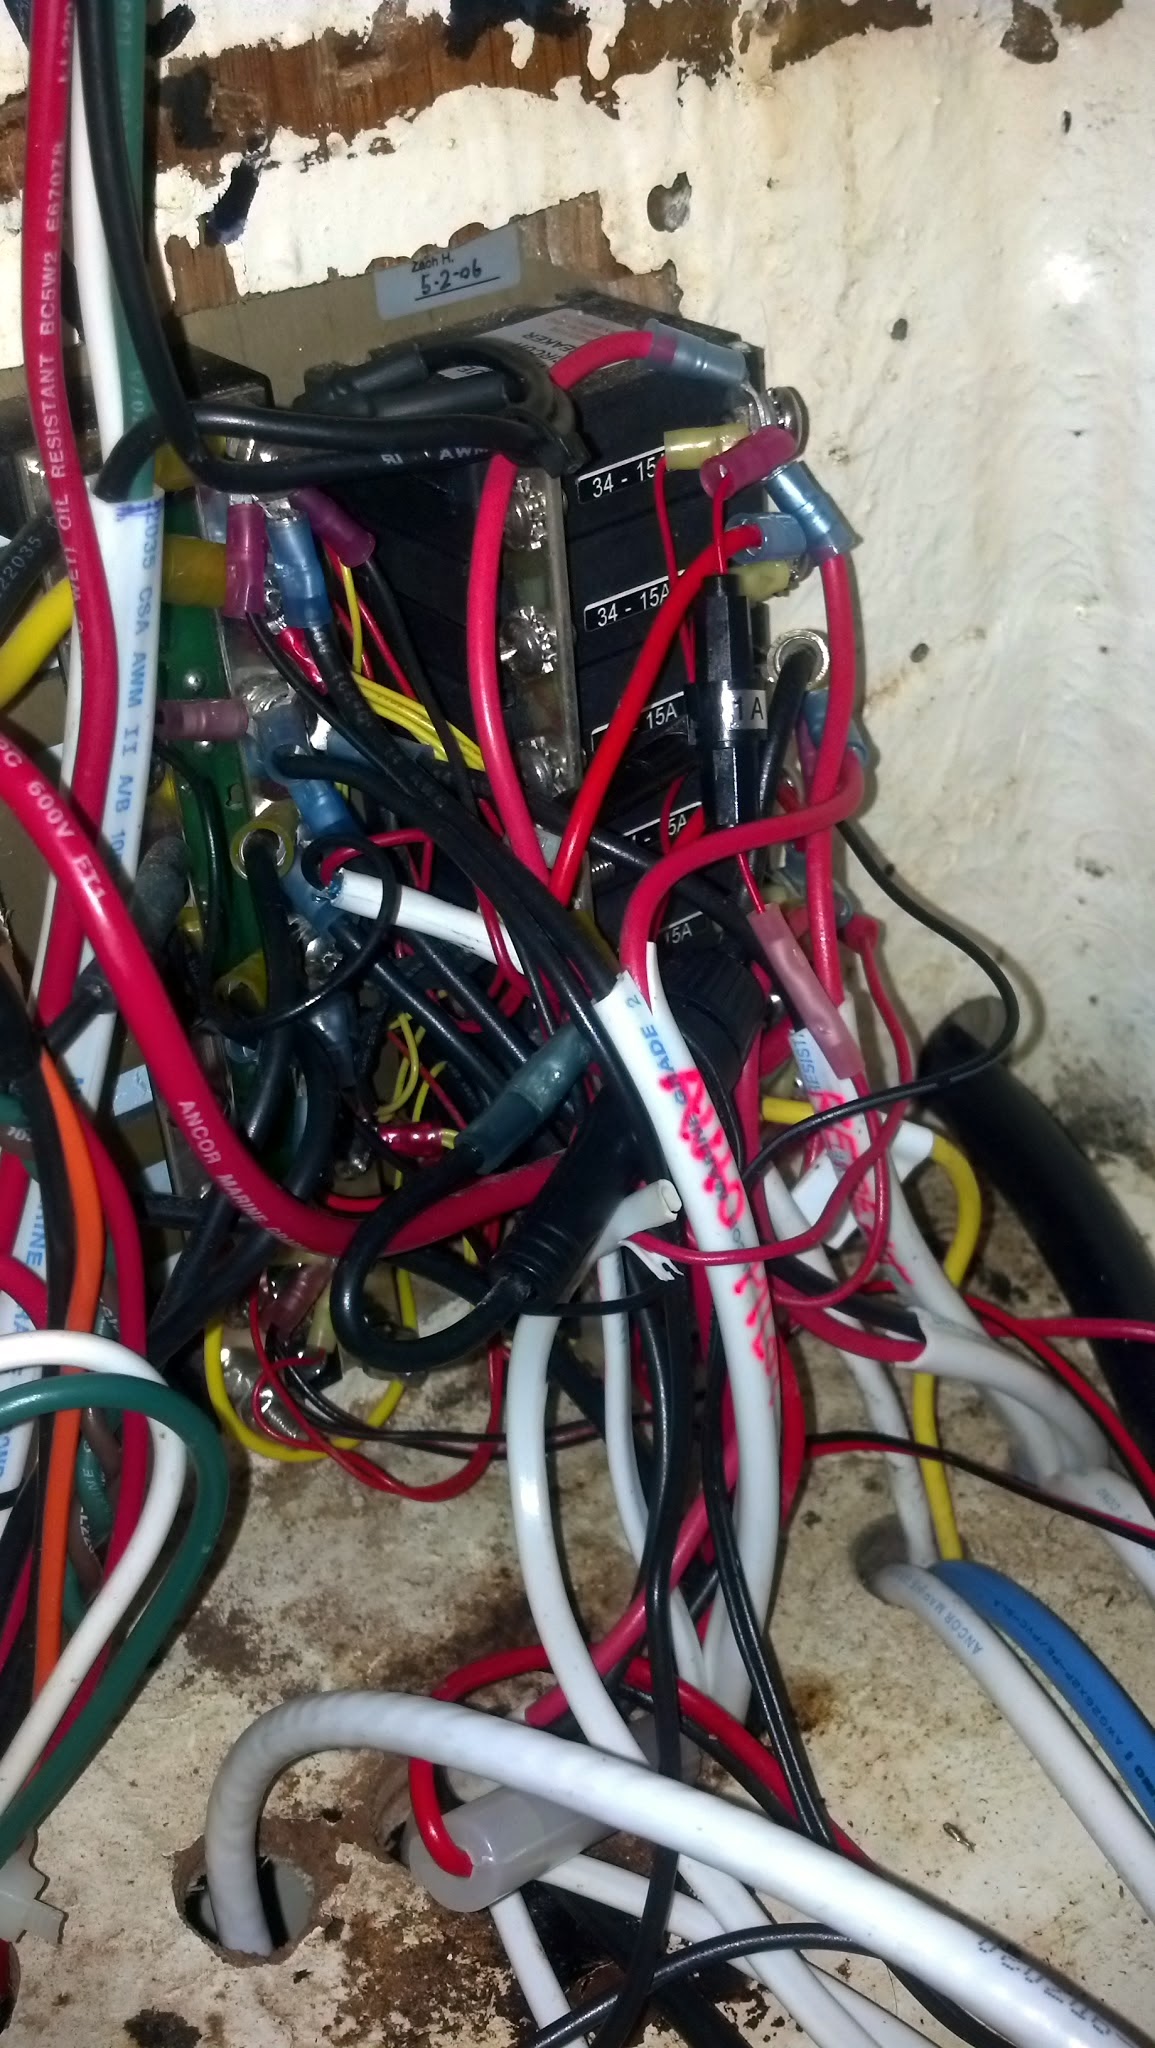
The system is pretty simple for a computer geek/boat nerd like me to install. All I had to do was wire in an extra circuit breaker in to my existing panel and plug everything in. The hardest part was running the wiring through the boat that goes to the external antenna.
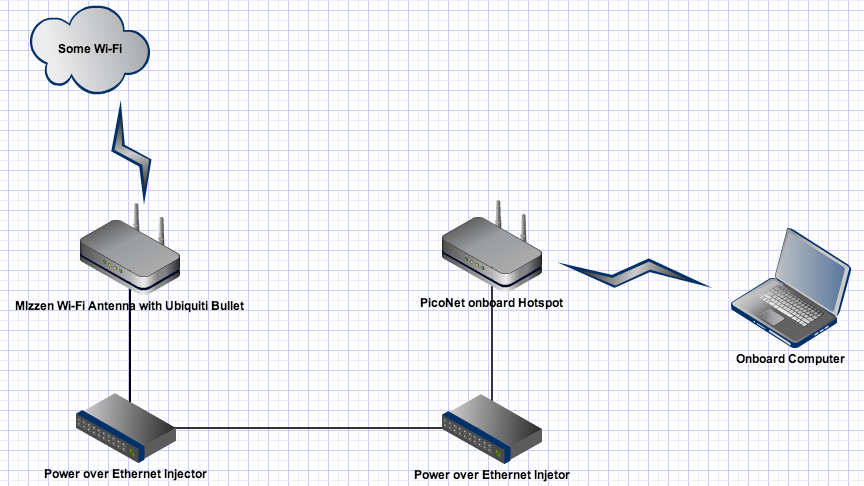
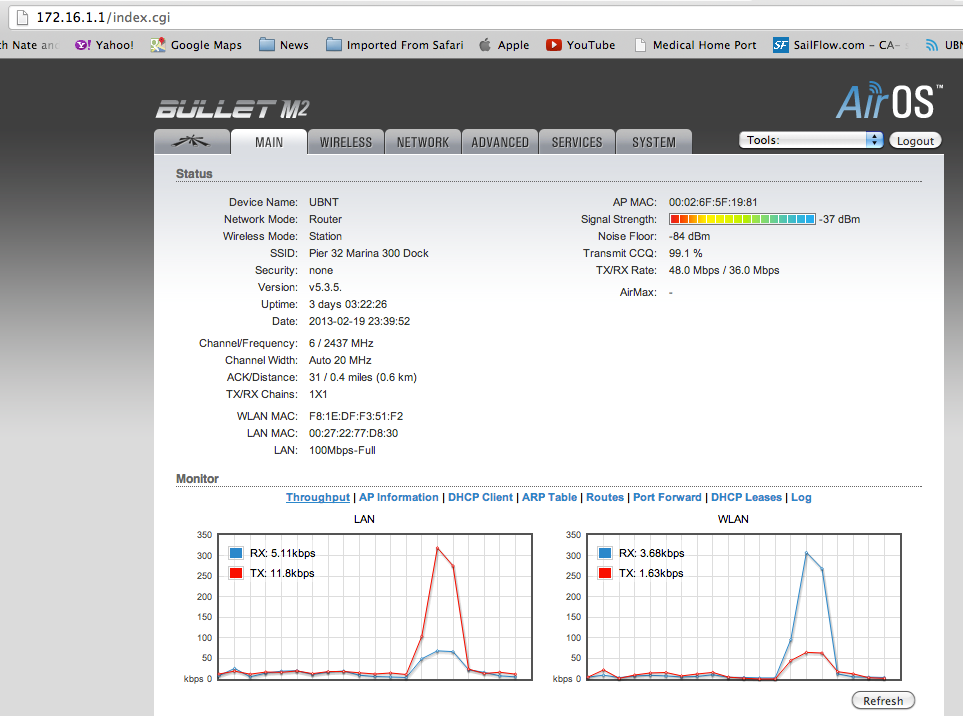
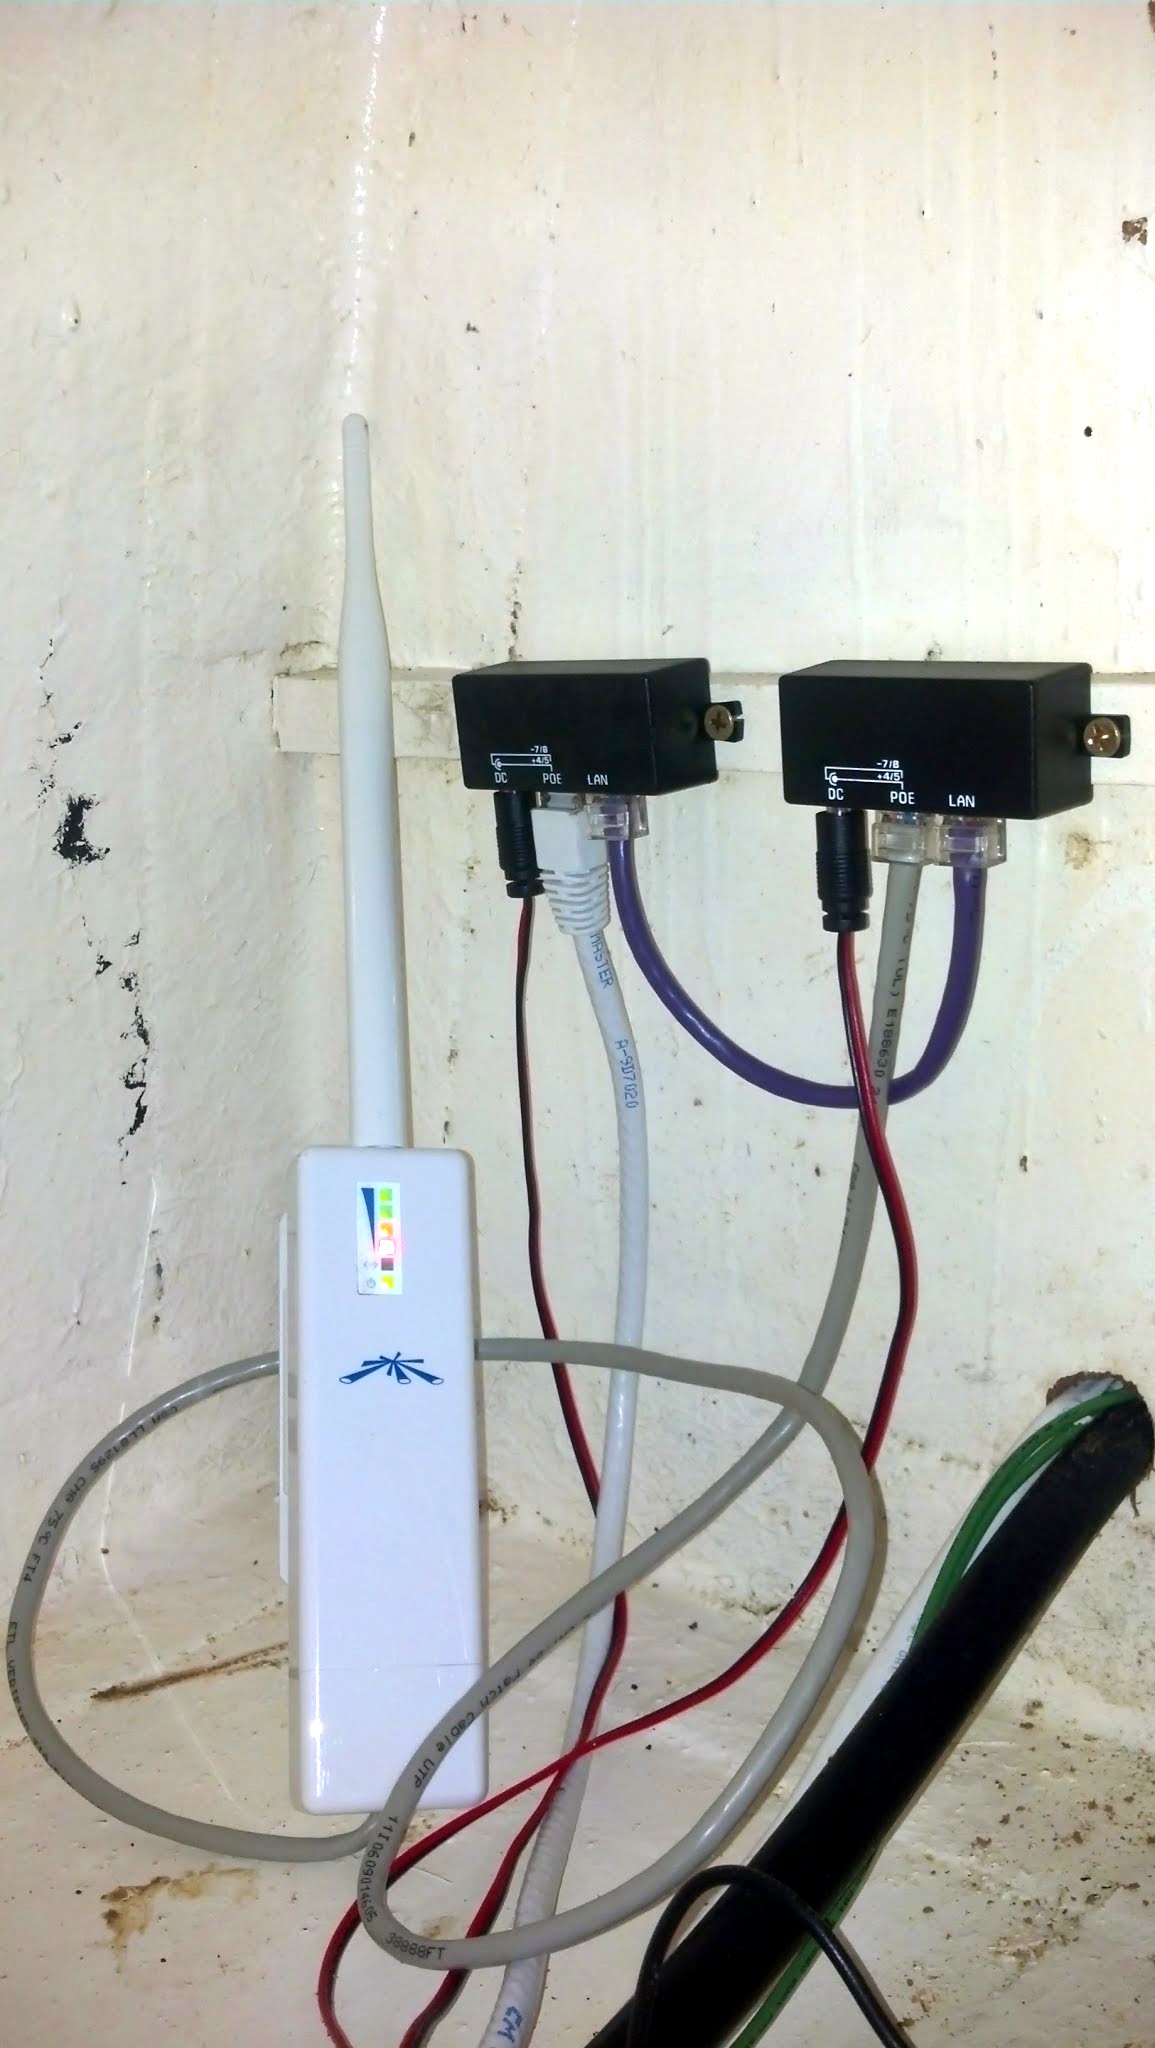
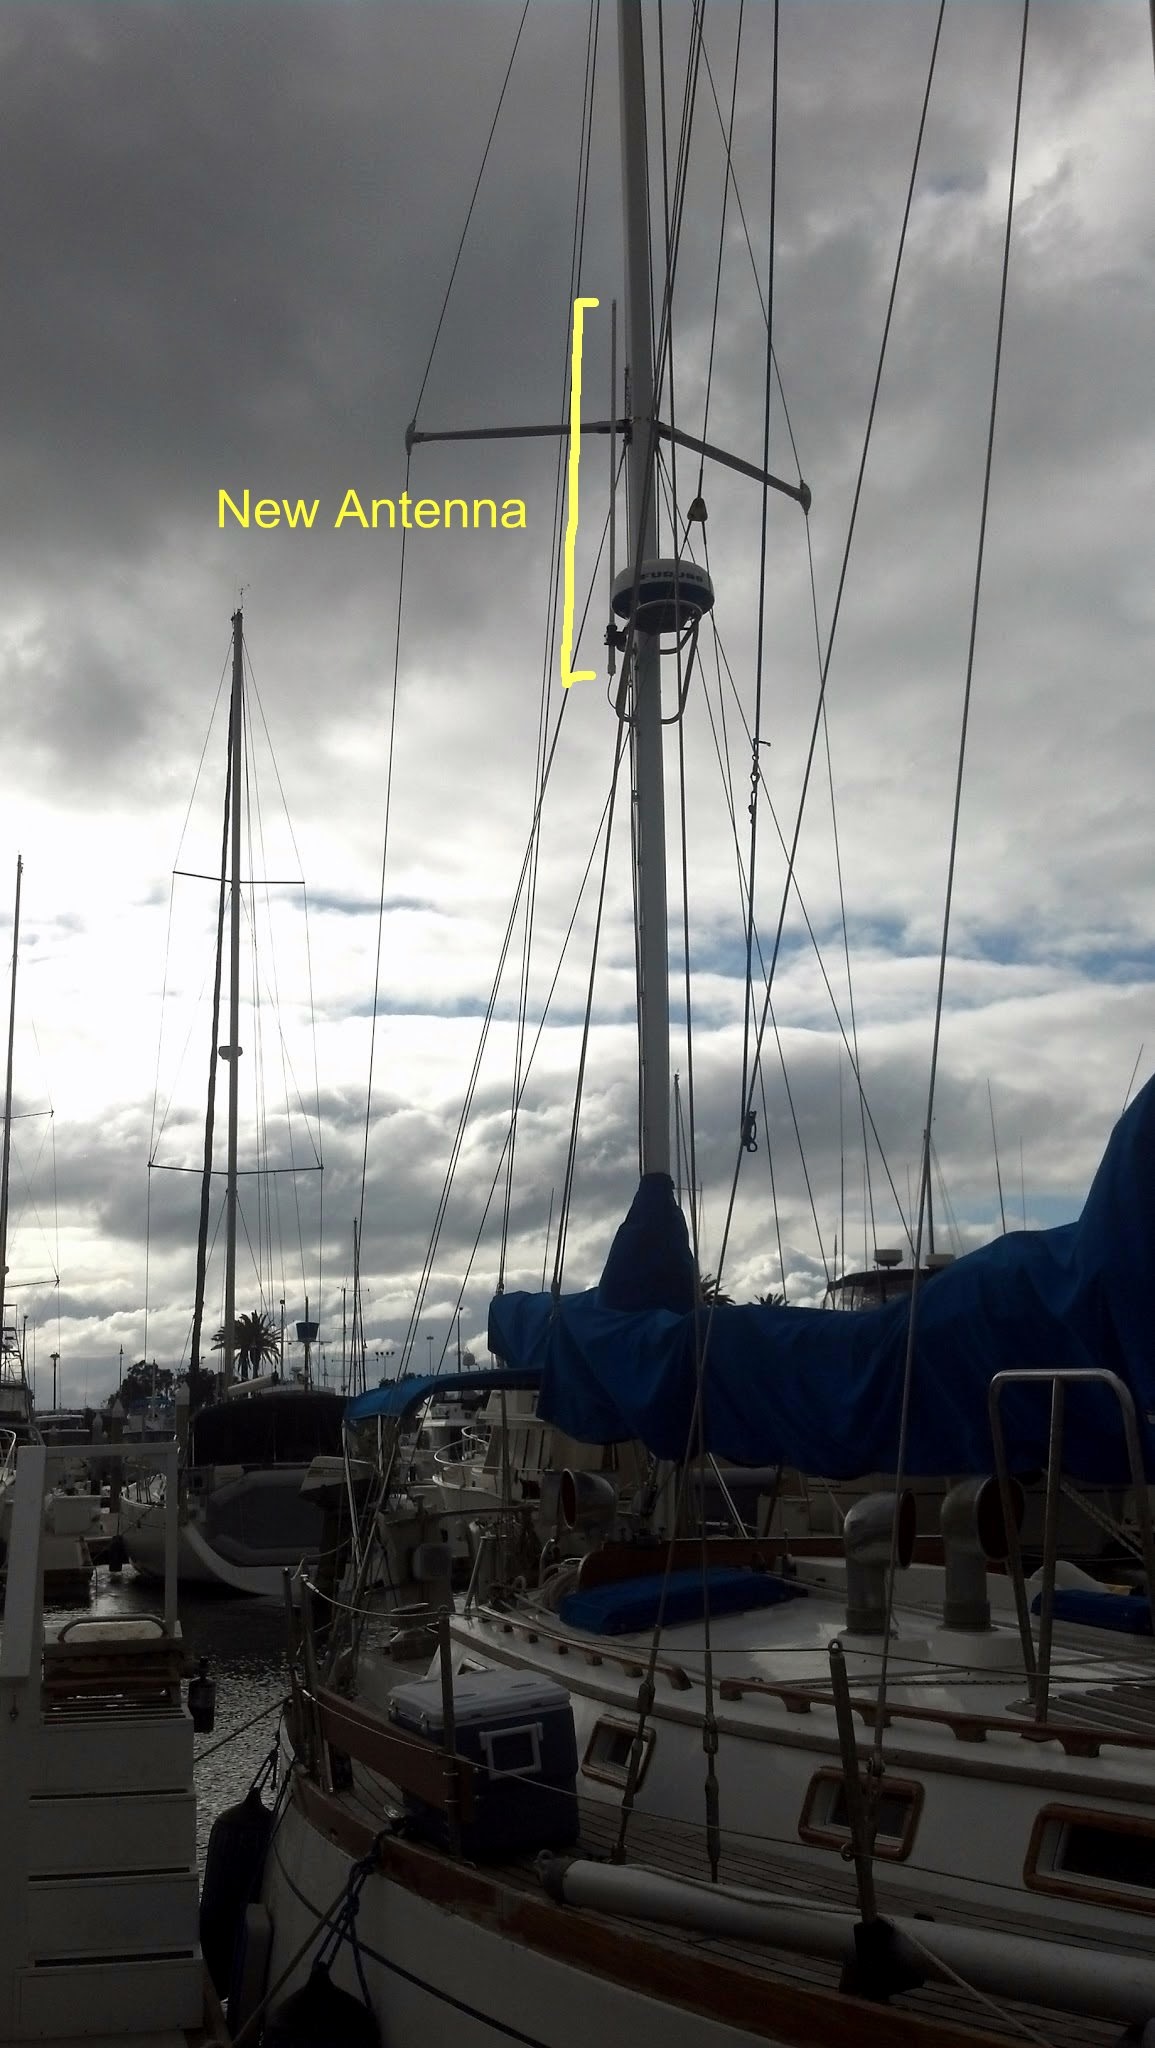
Here’s how it works. The Wi-Fi adapter on the mizzen mast communicates with a shore side station using it’s high gain antenna. That adapter is connected to a Power over Ethernet Injector bridge down in the cabin. The other Power over Ethernet Injector is connected to a PicoNet onboard hotspot that I connect my laptop to to blog about boating awesomeness.
I rerouted the cable through the cockpit sole near the mizzen mast. I connected everything back together to test the system still worked, then went aloft and attached the antenna to the radar arch. The plan is to not use the radar when the Wi-Fi is in use, just in case it overpowers the little Wi-Fi system on the mast since they’re located so close together. The Furuno radar operates at 900MHz and shouldn’t interfere with the 2.4GHz Wi-Fi, but I don’t want to tempt fate and blow one or the other up, so we’ll only use one at a time.
If anyone in the San Diego area is looking to get a great Wi-Fi system installed I highly recommend Wi-Fi for boats. Dalton recently upgraded the system to use a different antenna to take advantage of the latest generation of Wi-Fi. The kit is DIY friendly, but if you need help installing yours I’d be glad to help, for a reasonable fee.

Thursday, February 21, 2013
Replacing the Holding Tank Vent Thru Hull
Over on s/v Astraea, Nate tackles the problem of getting adequate holding tank ventilation.
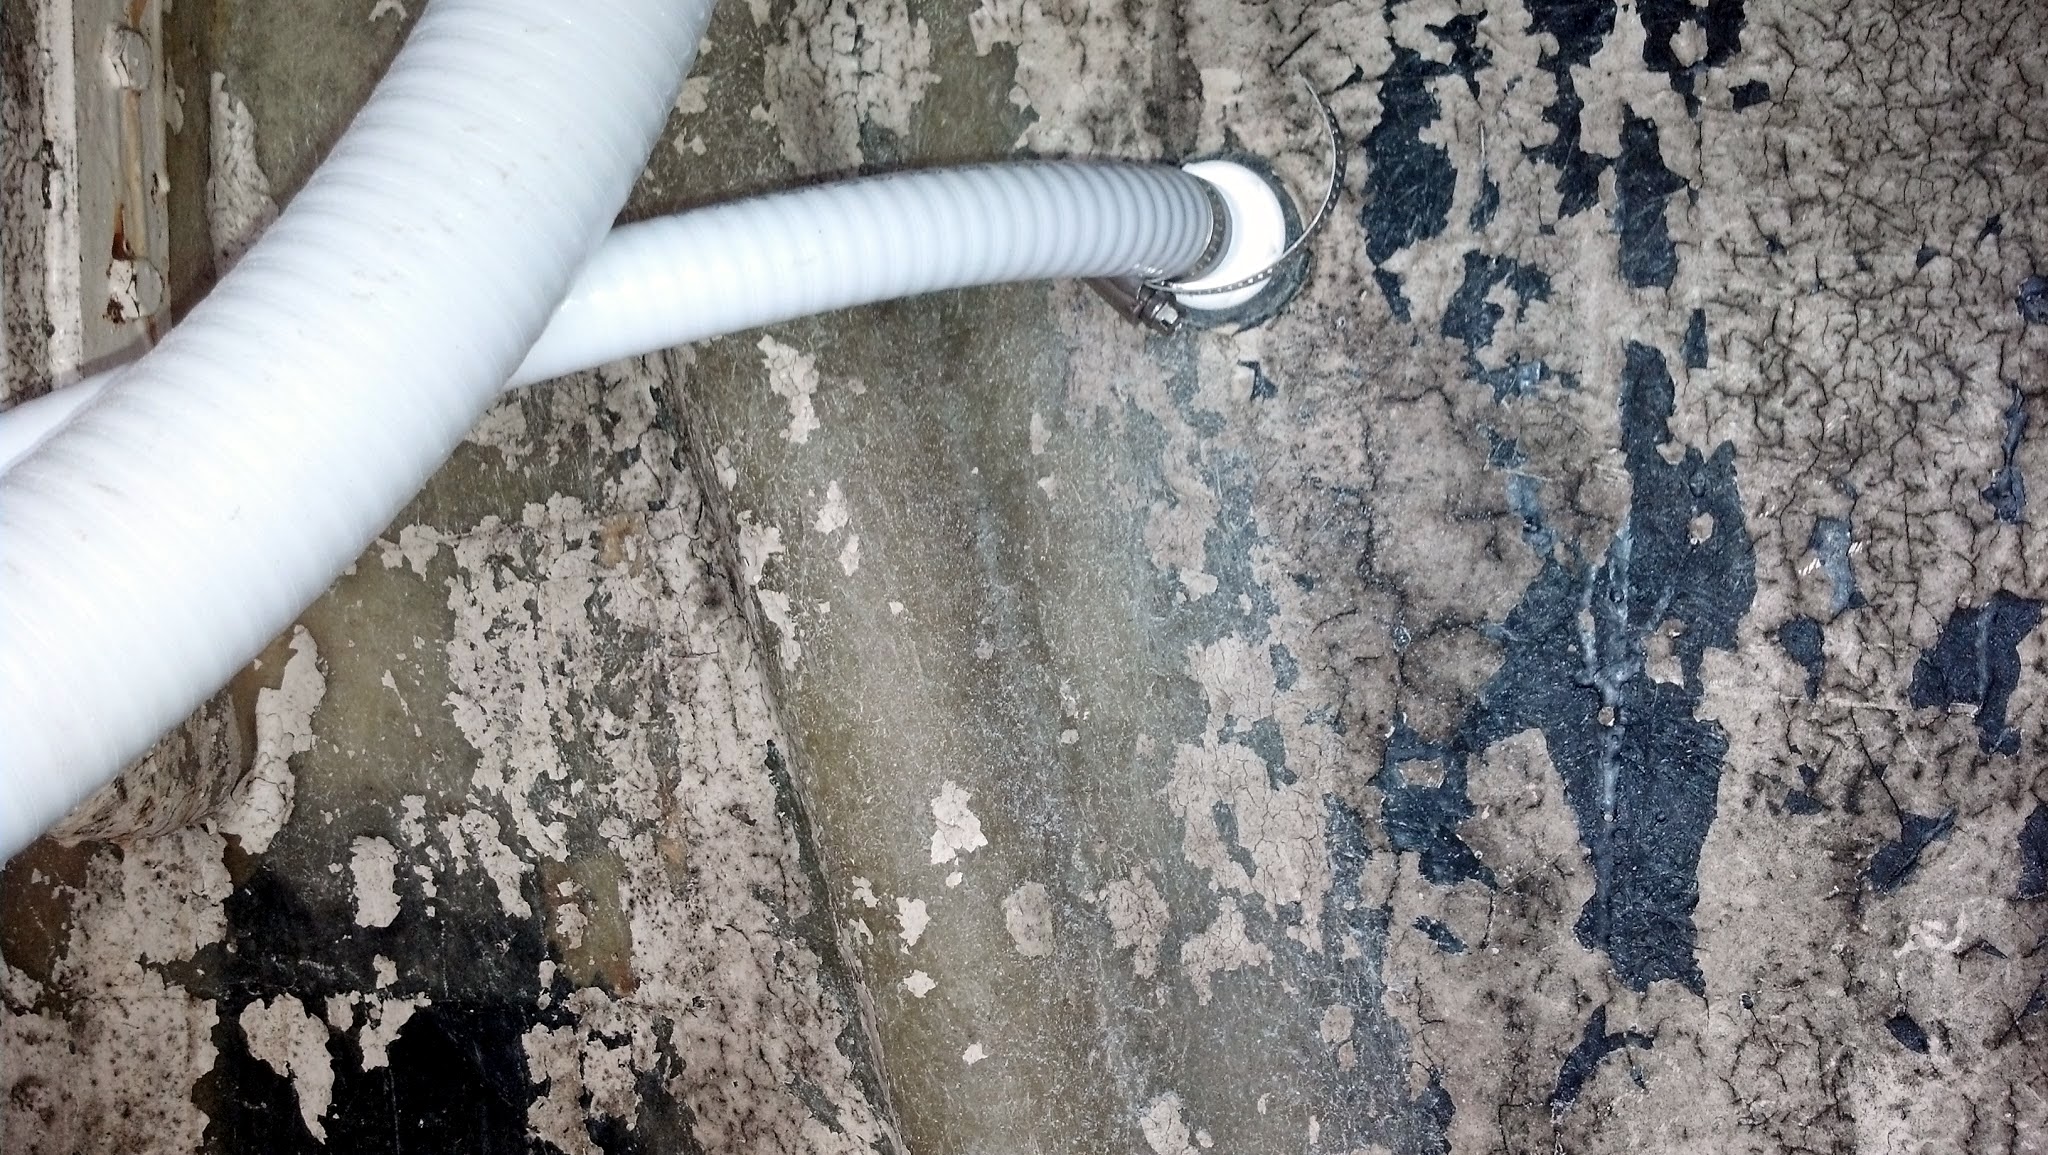
Last year I replaced the holding tank. I kept the original vent through deck fitting, but installed a 3/4 inch hose from the tank to a 3/8 inch hose and then coupled that to a woefully small through hull. A larger diameter vent hose helps promote oxygen flow in the holding tank encouraging aerobic bacteria to flourish. Aerobic bacteria break down the waste, but don’t put off a foul odor. There’s plenty more information about holding tanks at The West Advisor and from Peggie Hall’s book How to Remove Boat Odors.
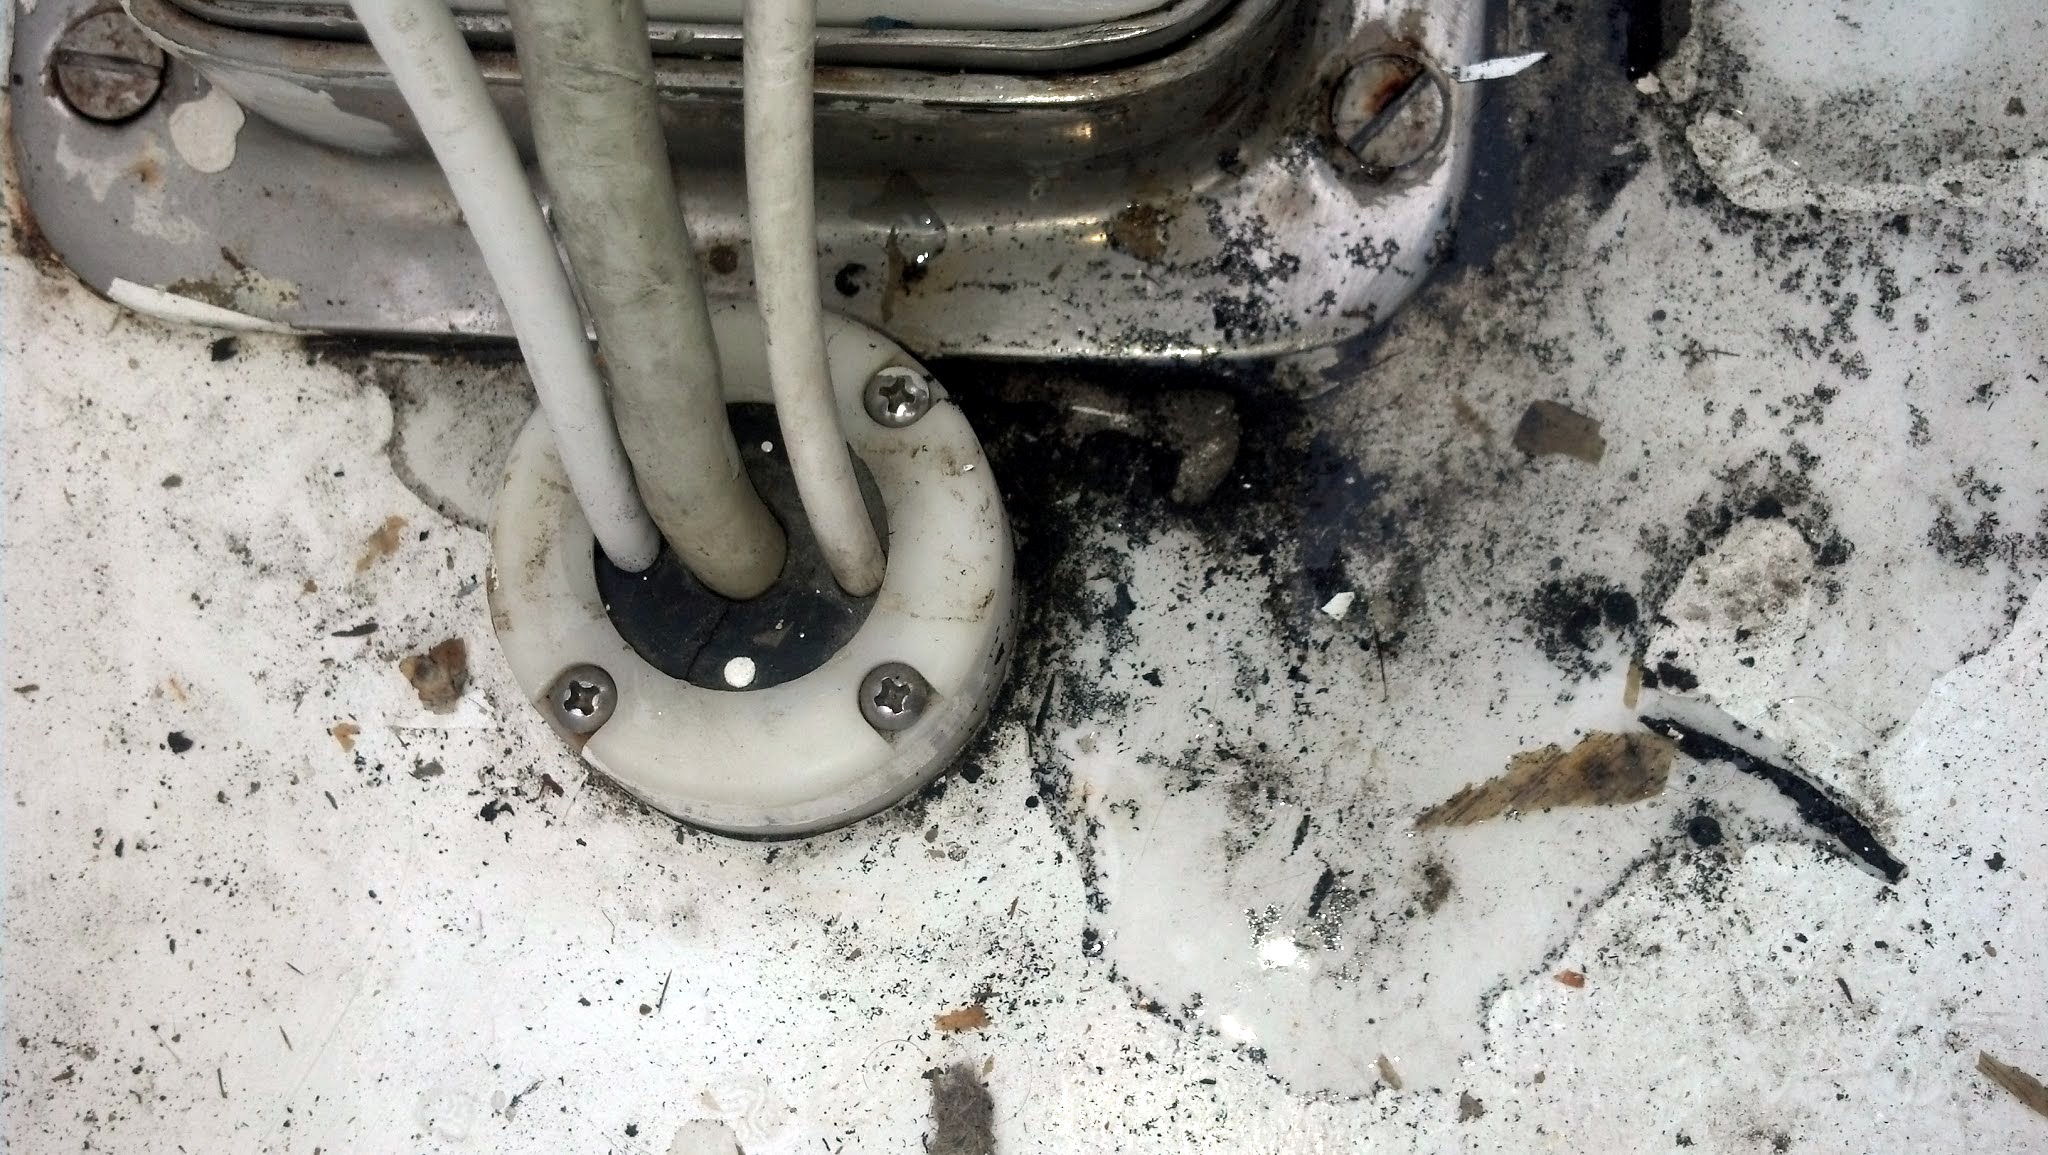
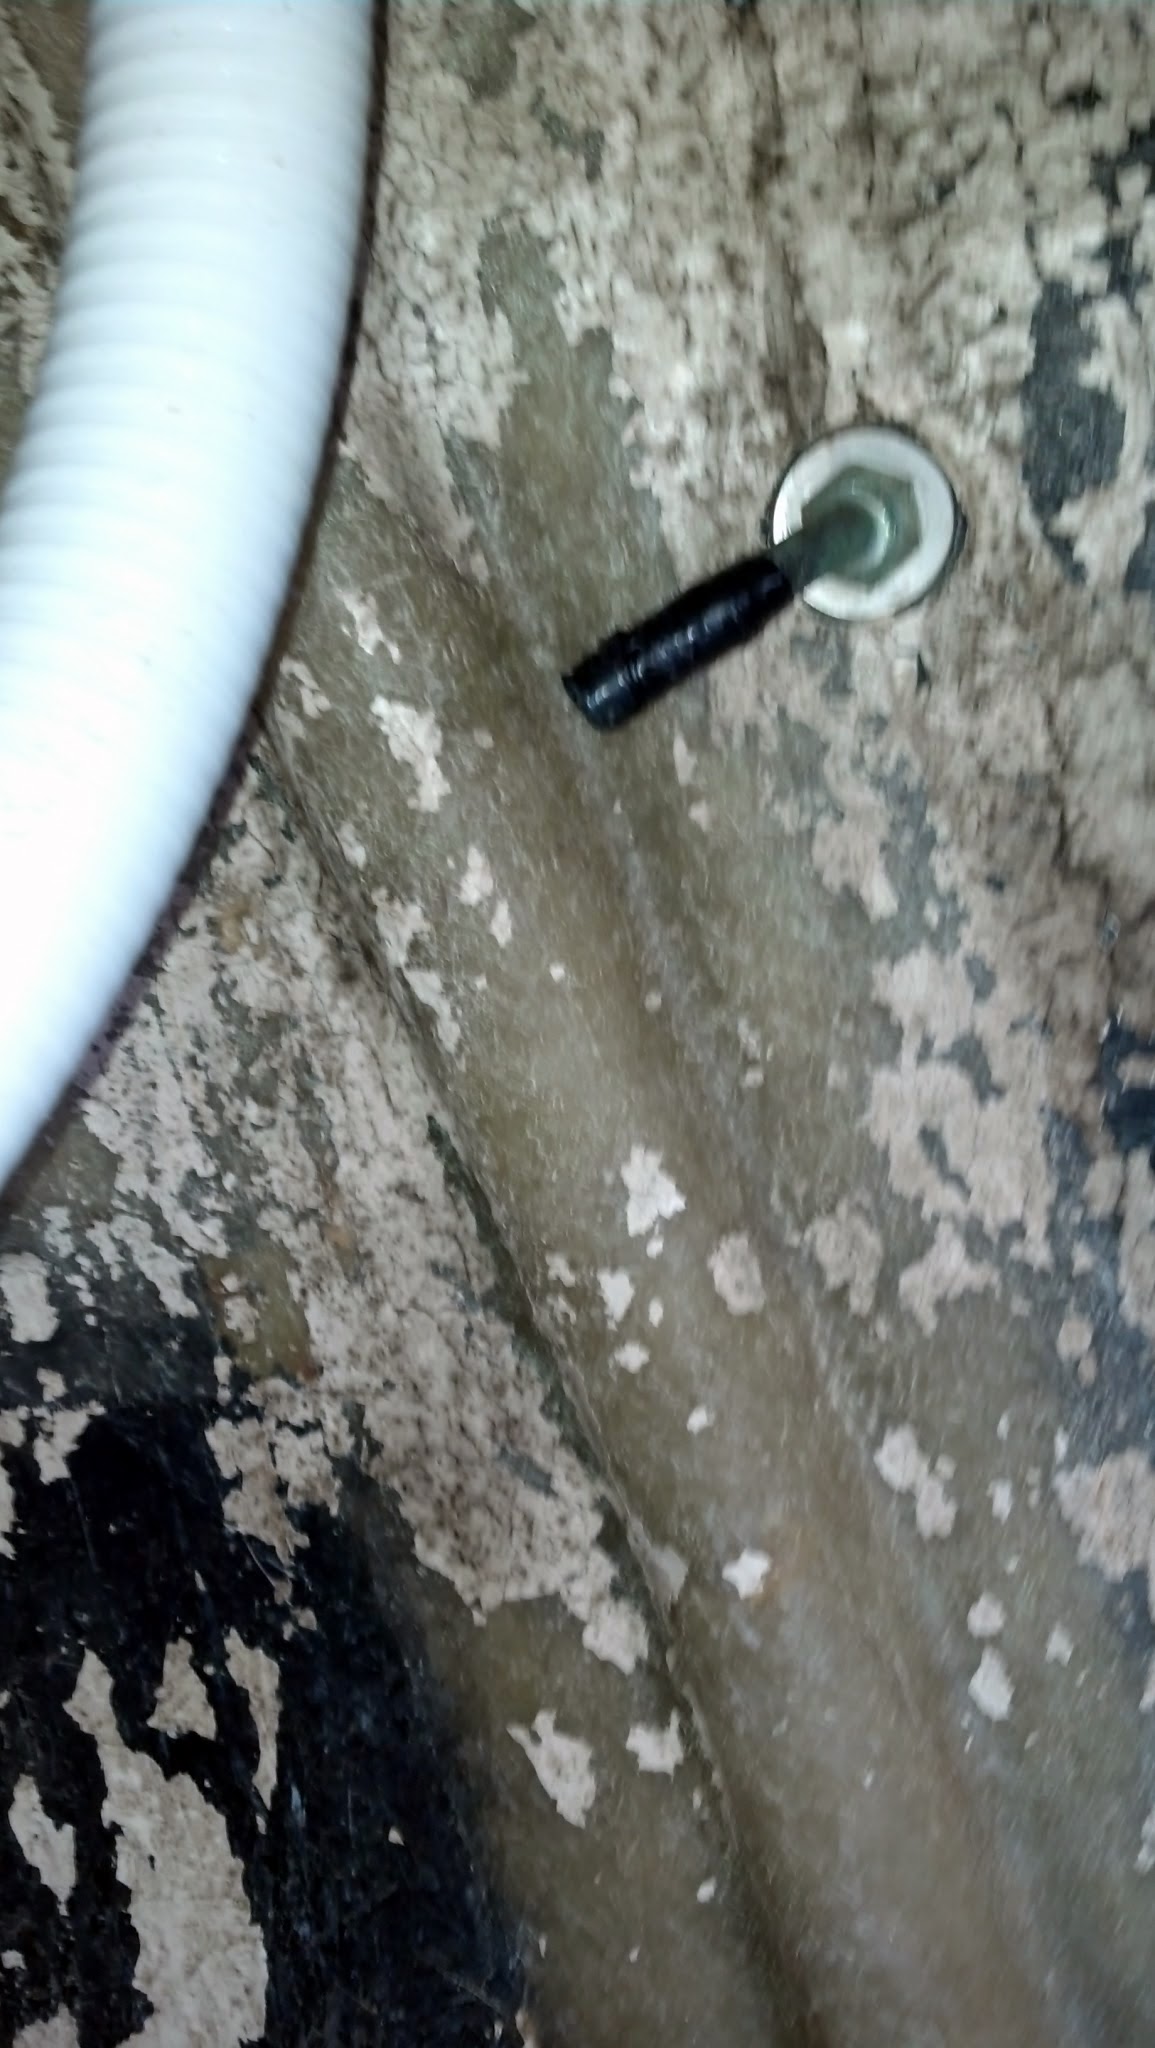
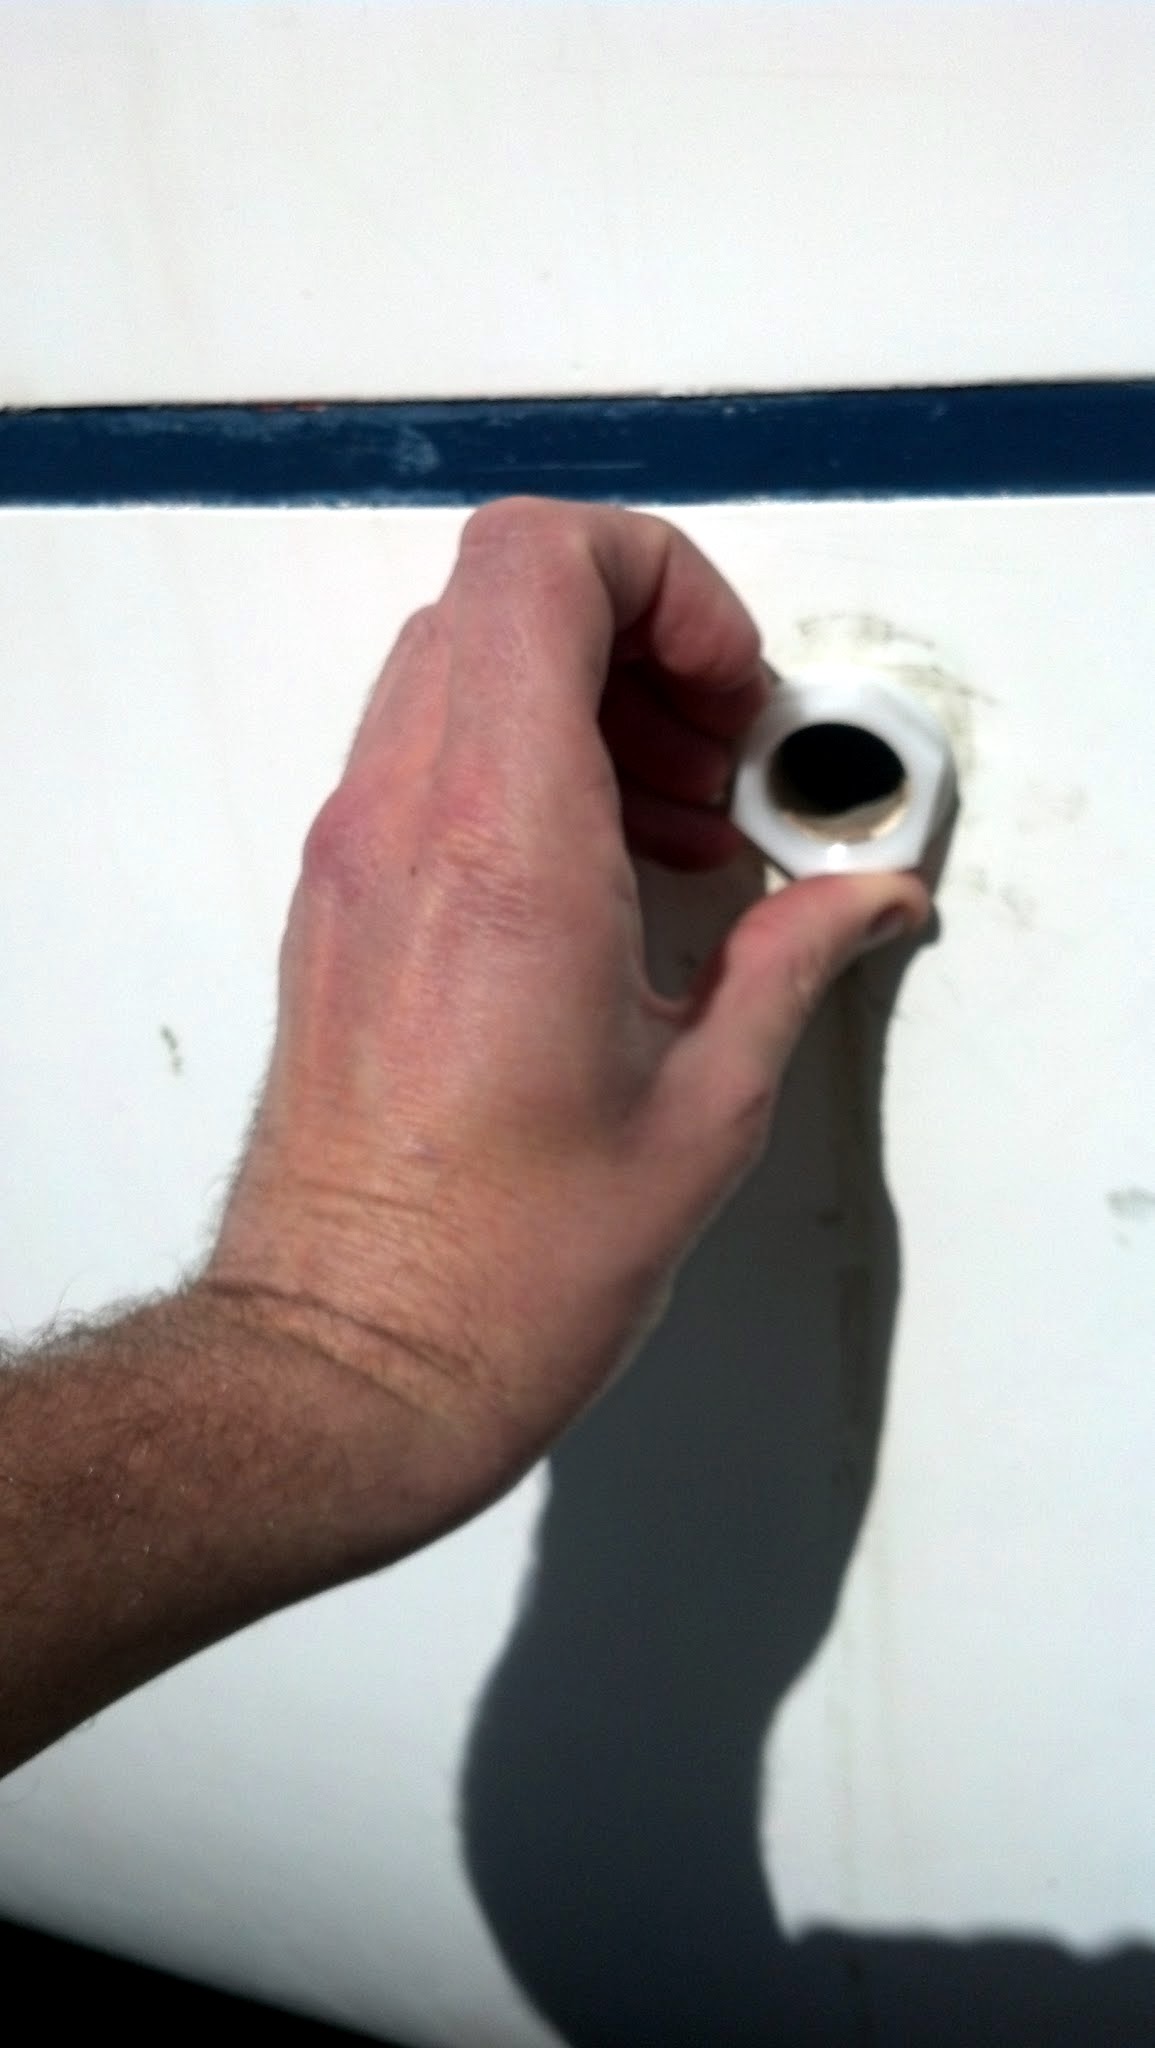
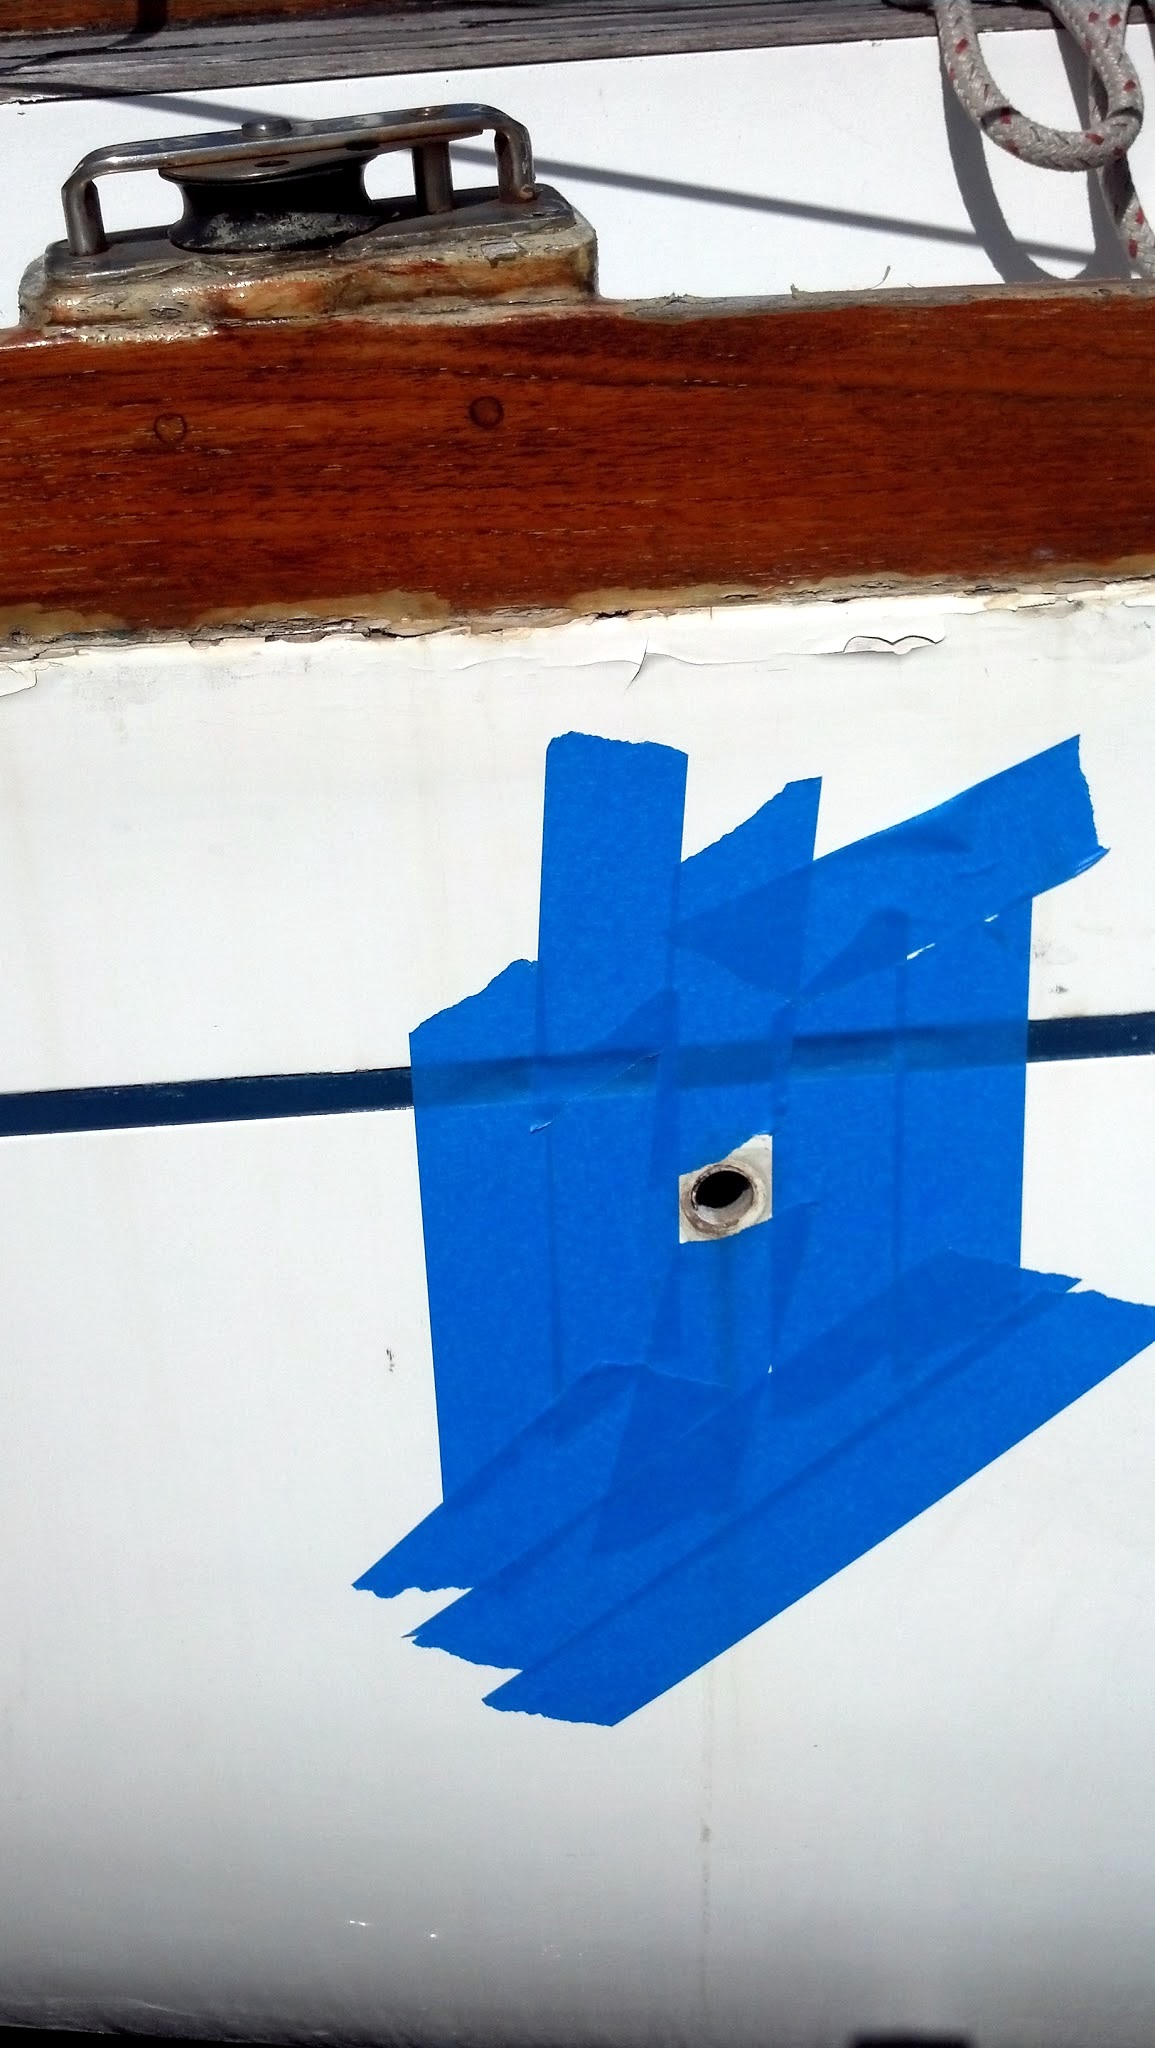
What I did today was remove the old through hull fitting and replace it with a 3/4 inch fitting to match the hose size and encourage as much air as possible to get to the tank.
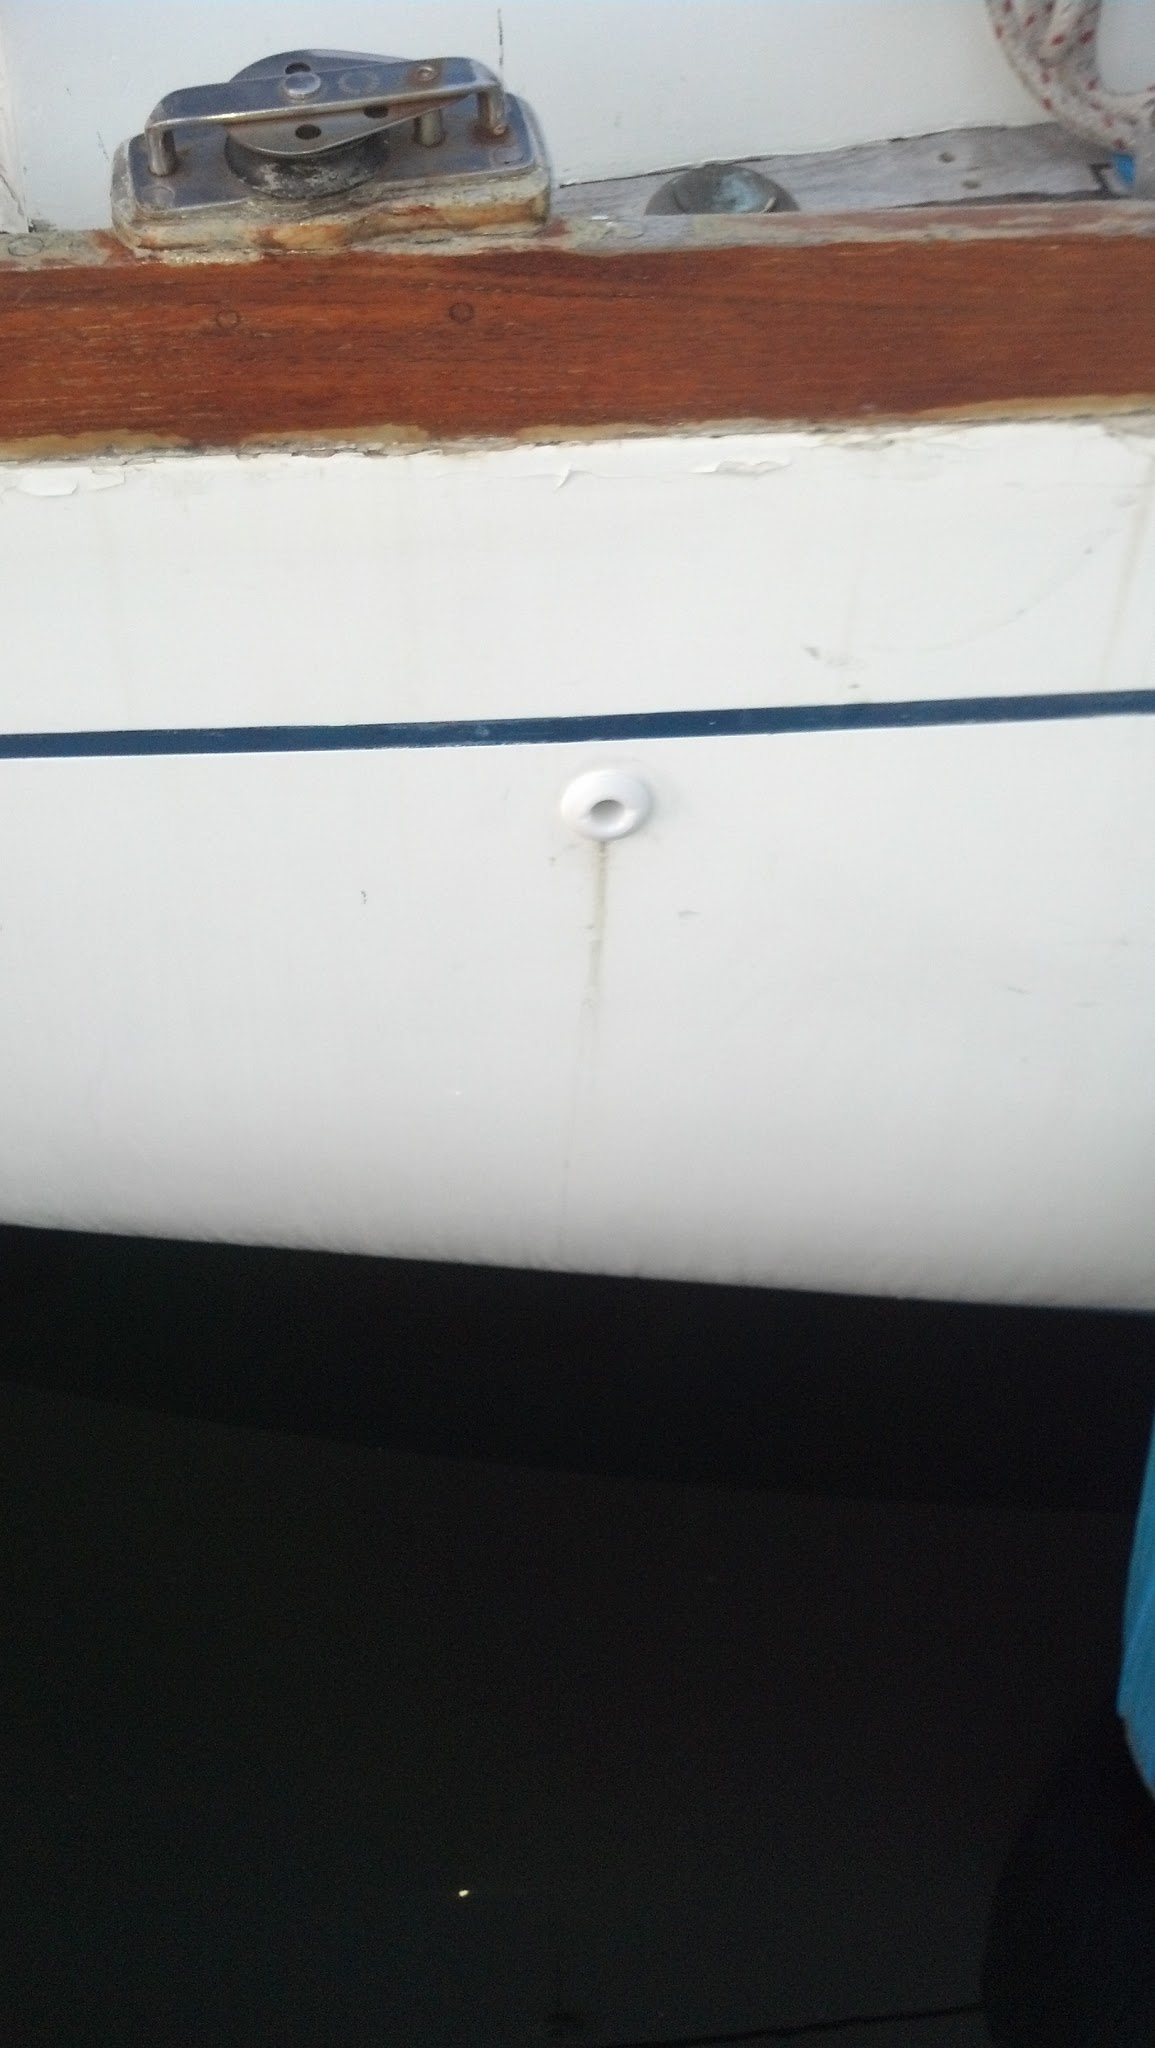
Then I applied some 3M 5200 around the inside of the lip and slid the through hull in to place. Next I cleaned up the excess 5200. I also need to scrub off the stain on the side of the boat from the old through hull corroding. I chose 3M 5200 sealant because the fitting is above the waterline but could be submerged on a starboard tack.
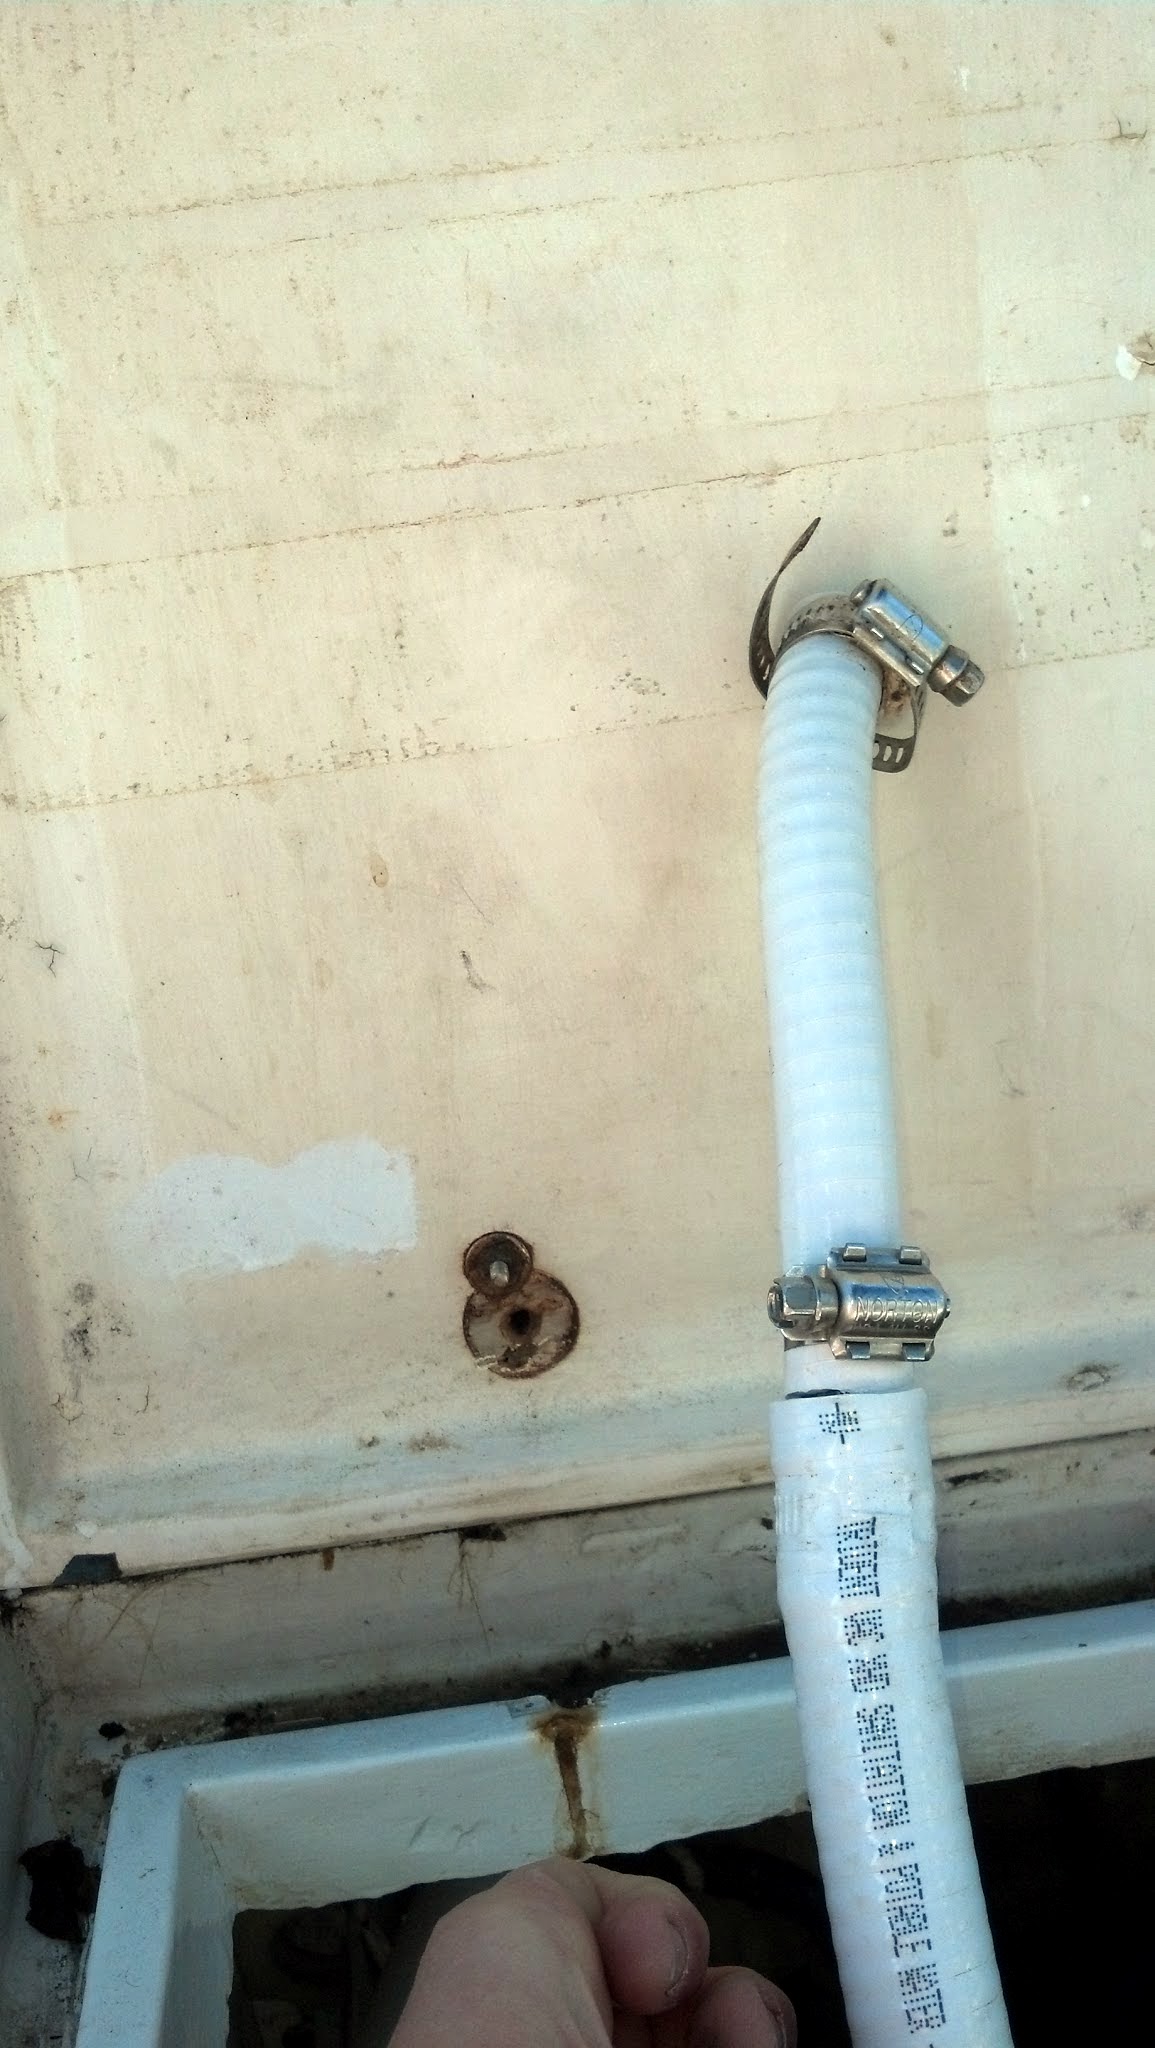
The last part was connecting the vent line hose with a hose clamp.
Hopefully this new vent through hull will make the holding tank less stinky. We’ll have to flush and see.

Thursday, January 10, 2013
Repairing wood trim
Over on s/v Astraea, Nate shows us how he properly does a little repair work. The critical items which might be omitted by novices are the use of alcohol to remove the teak oils from the surface of the wood, and the use of the polysulphide to seal the back of the piece:
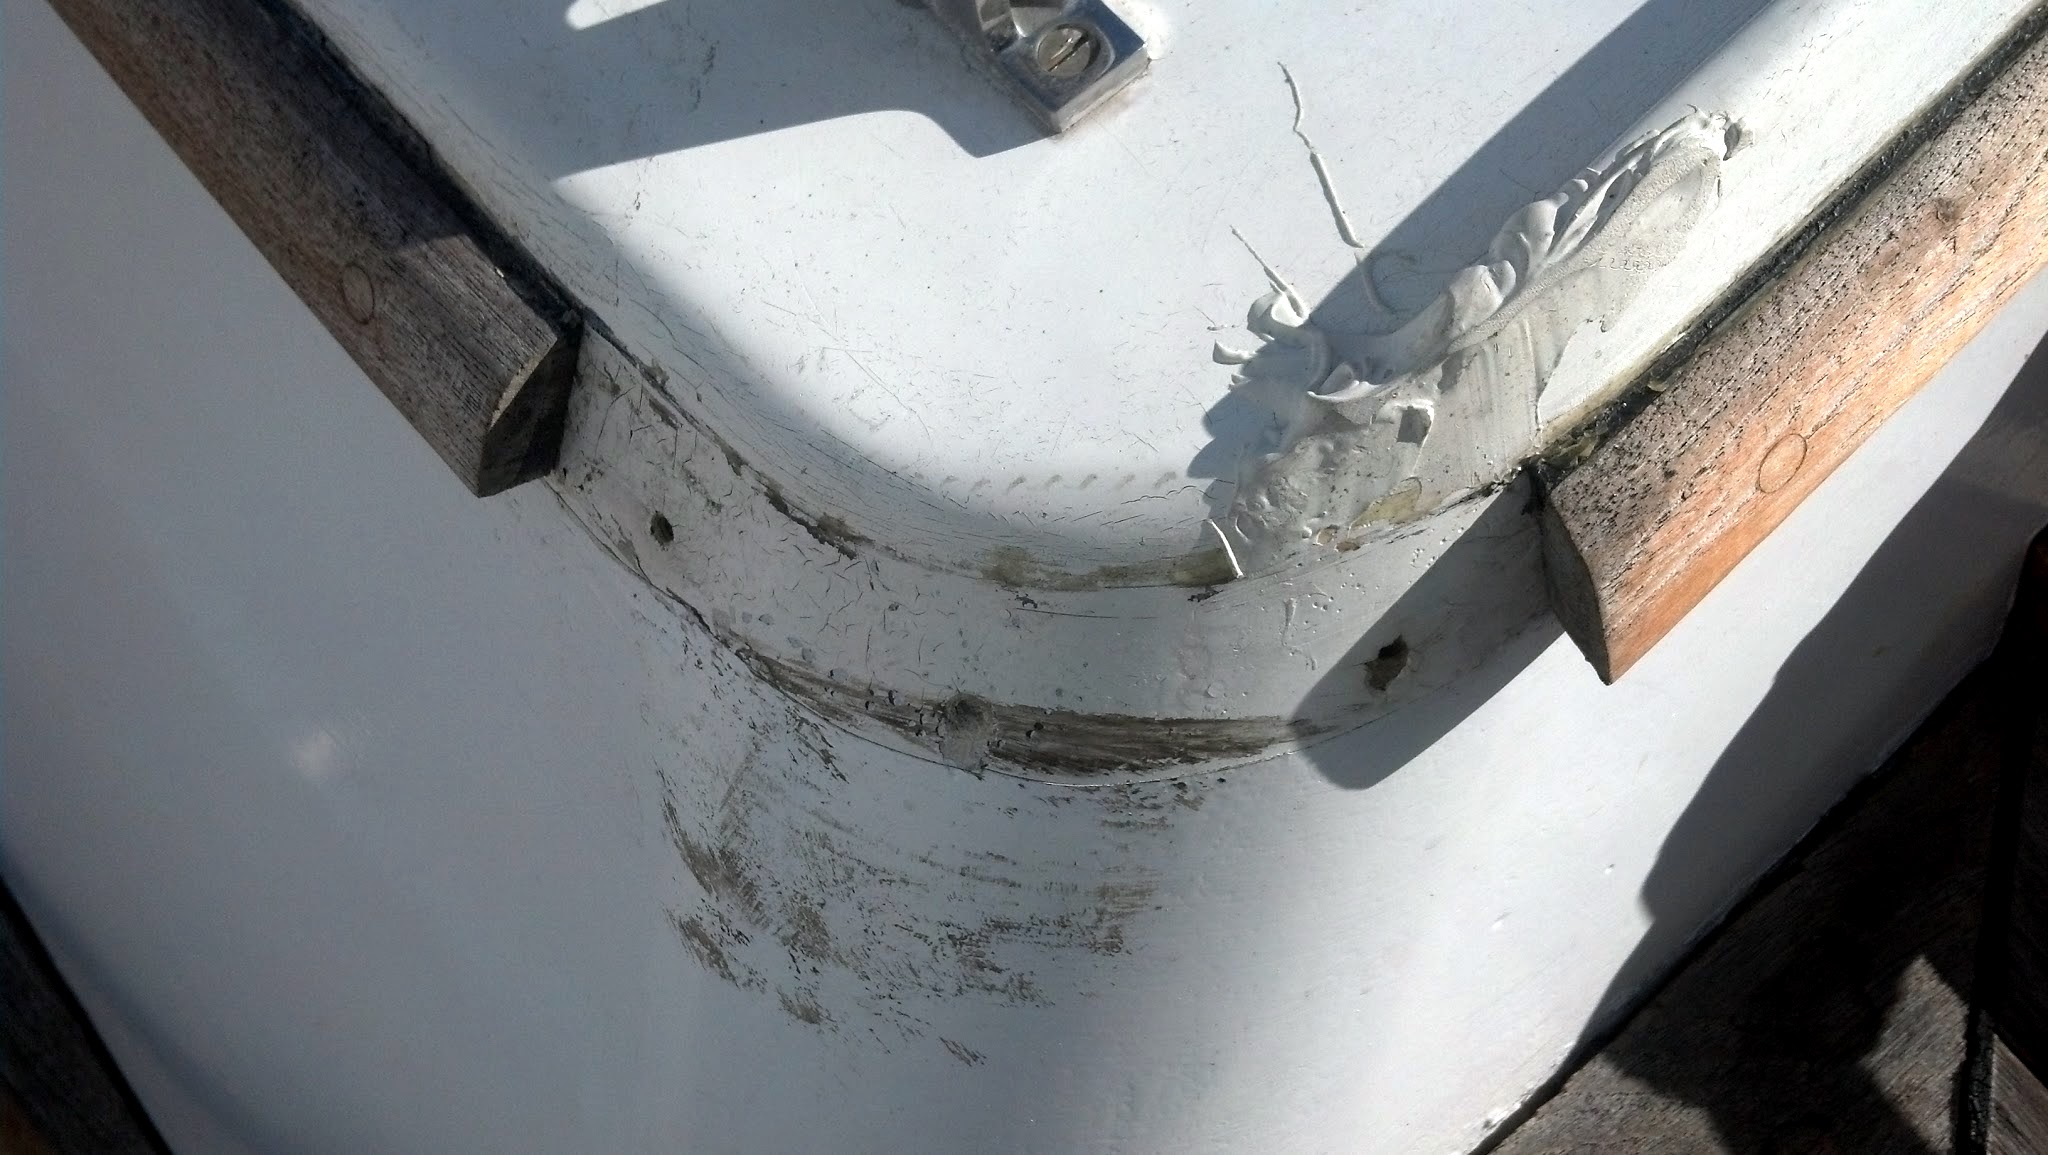
There’s a corner of trim that I’ve been putting off replacing. I broke it off a long time ago when I removed the holding tank.
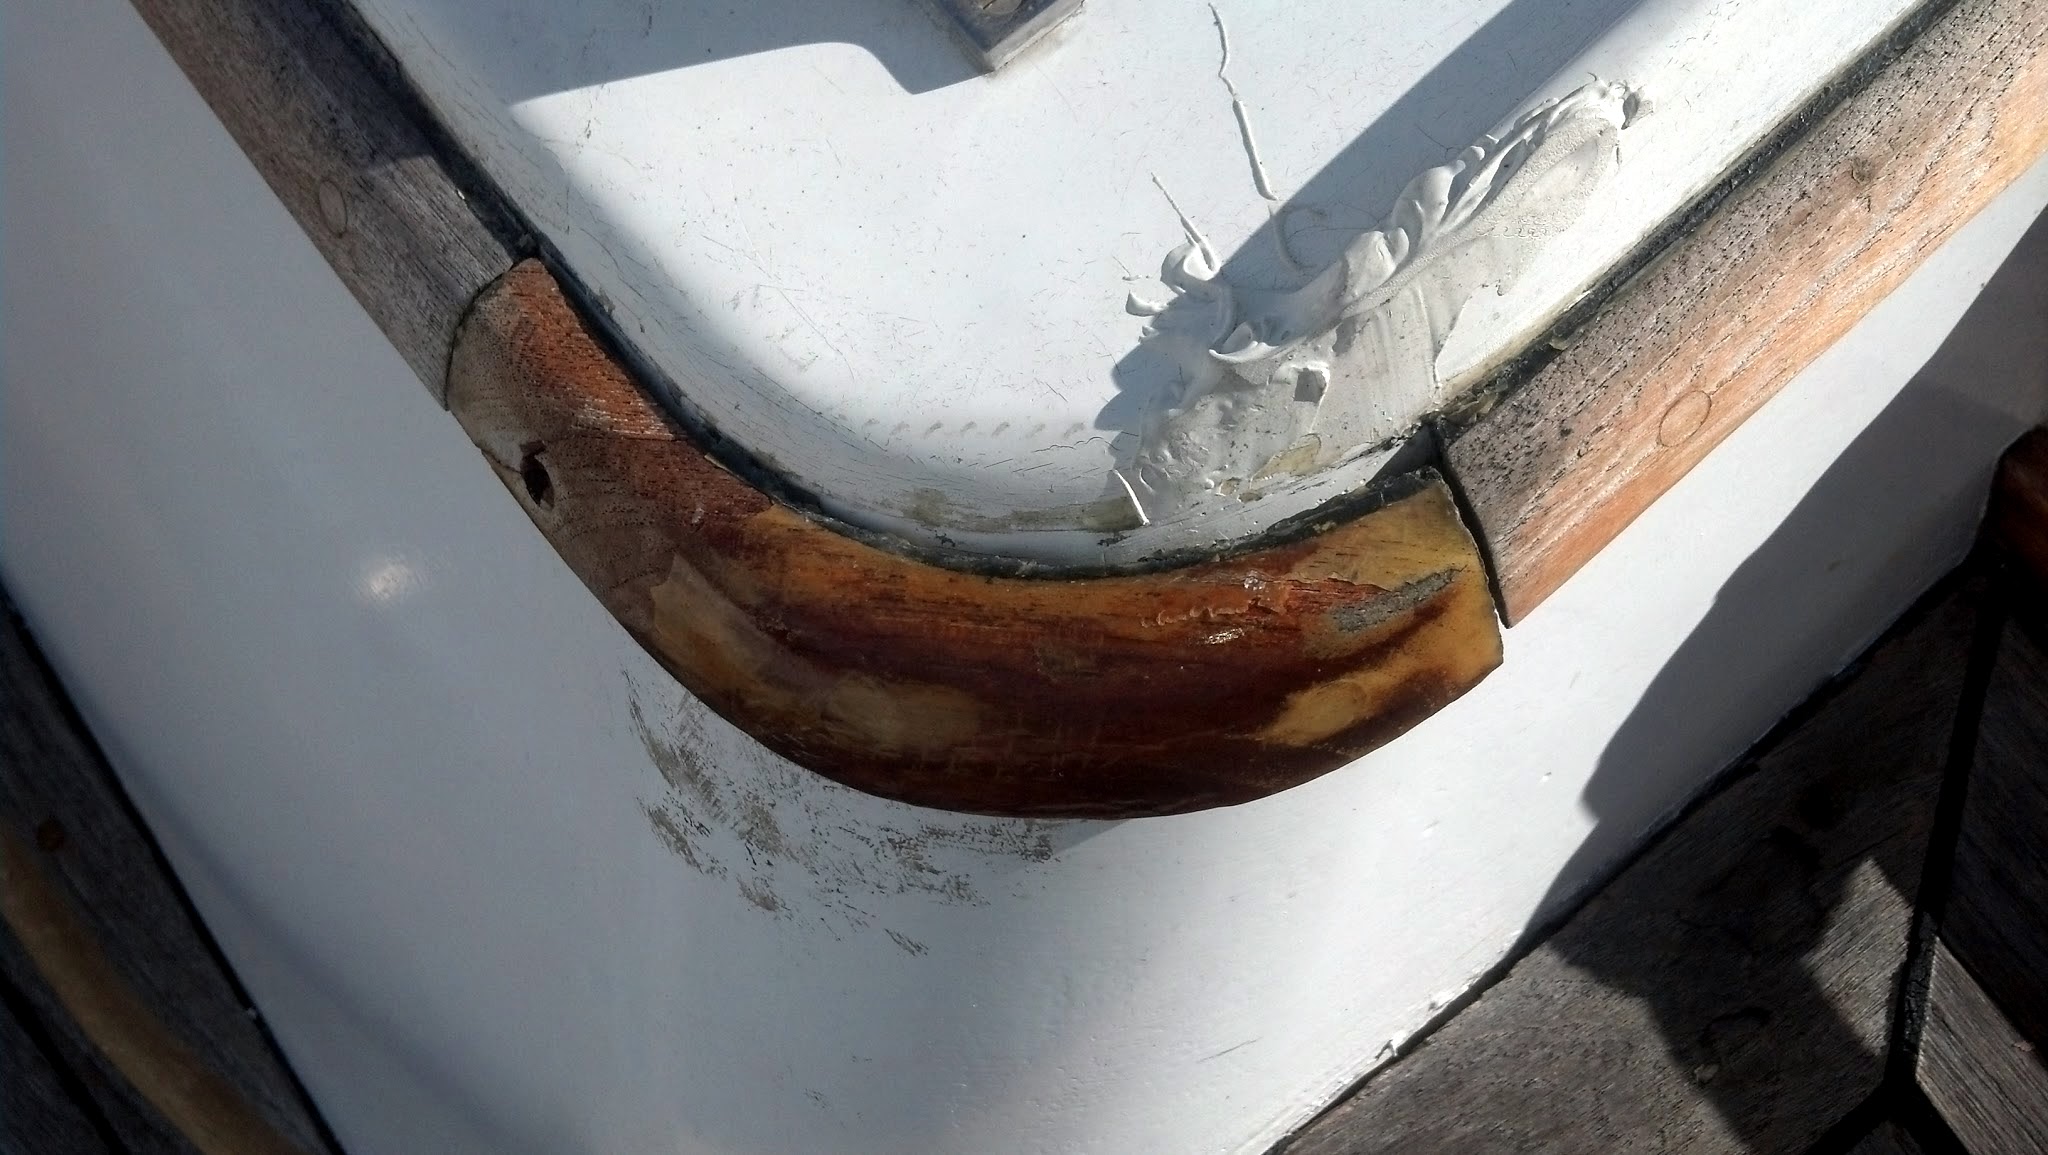
First I rough fit the piece to get an idea of how it goes in and to see if there was any other collateral damage. I found that the screws that held it in had sheared off so I had to drill them out to make it fit properly.
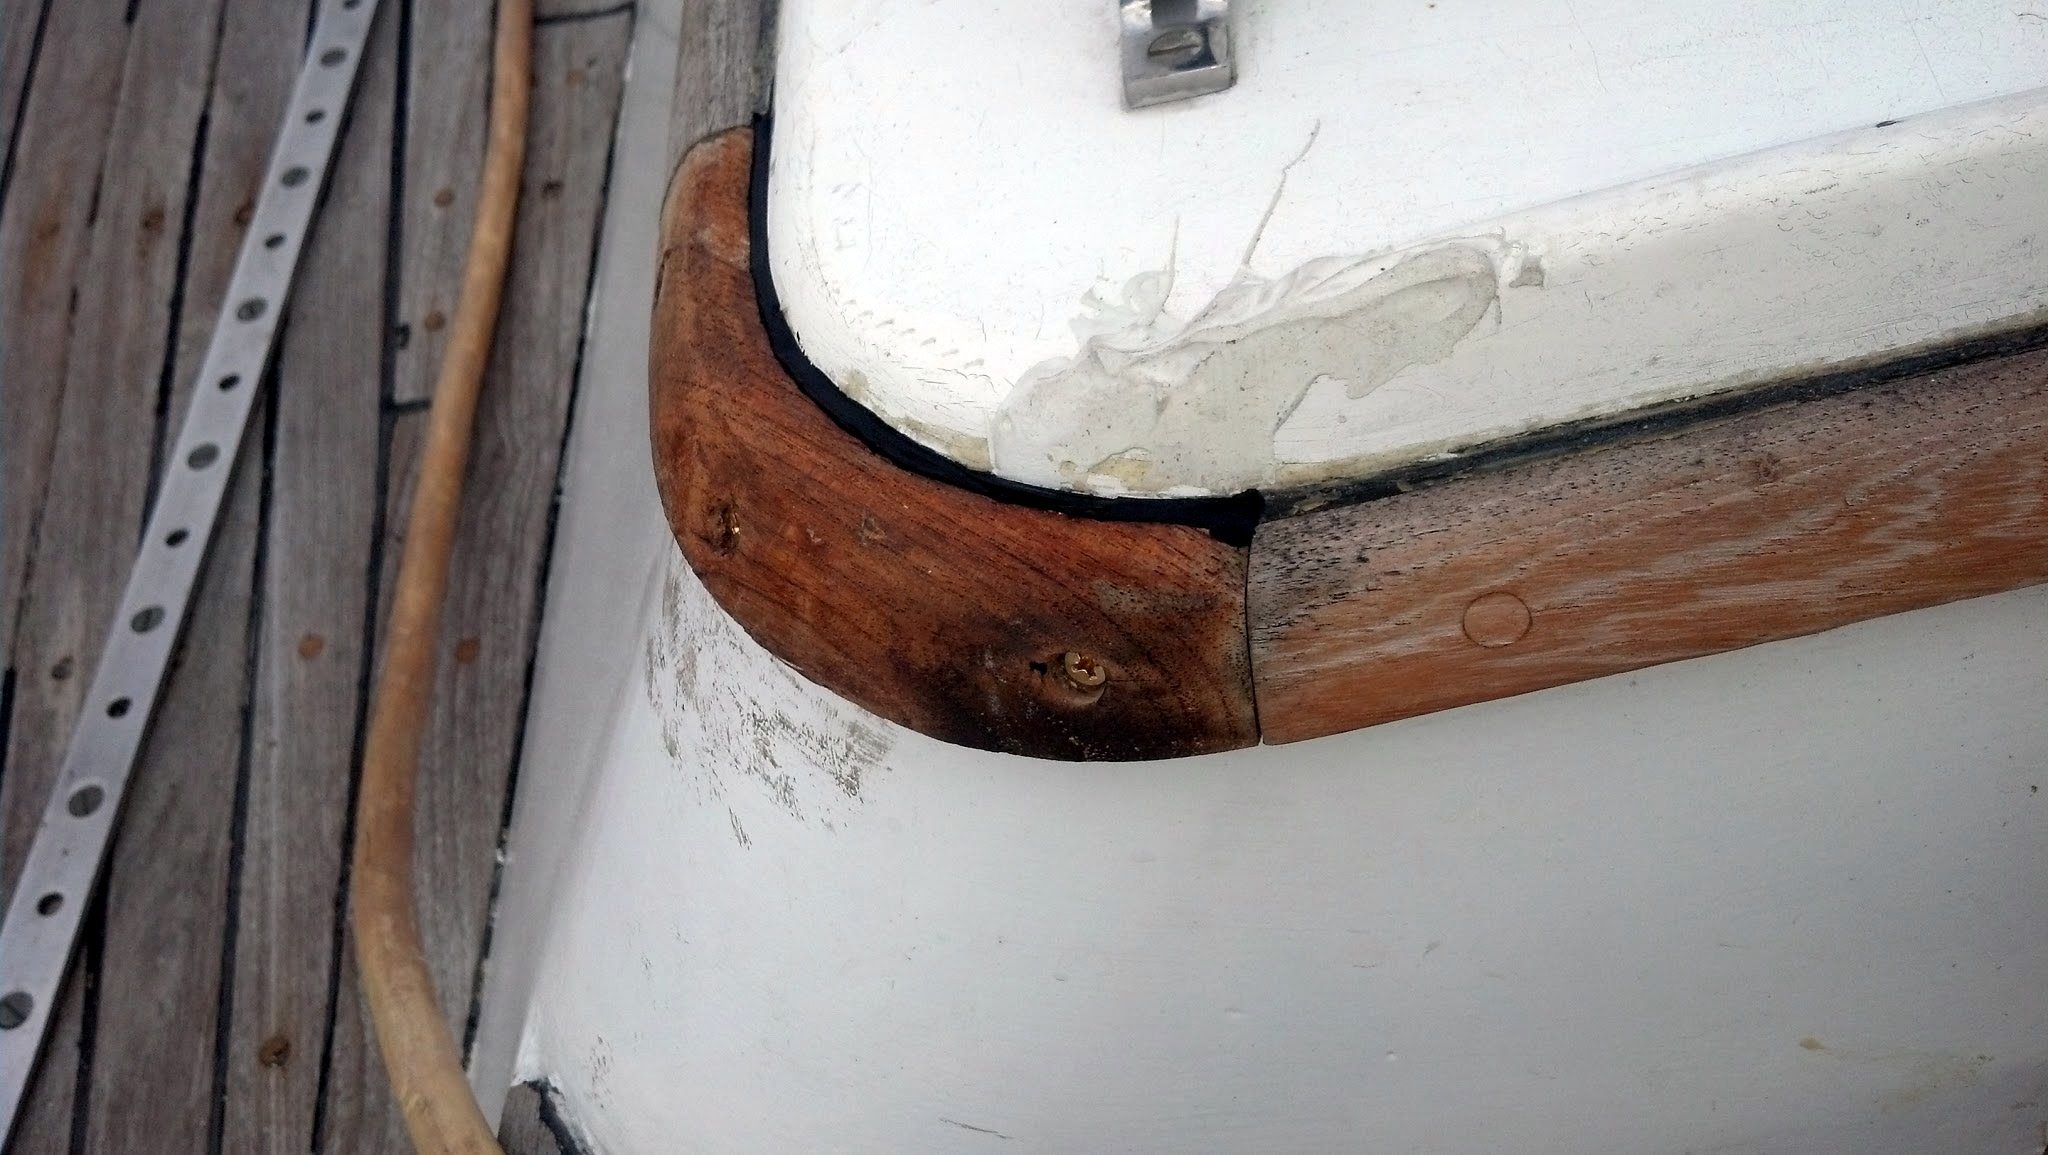
Then I stripped the old varnish off with a heat gun and scraper. I then sanded the inside and outside and cleaned it with isopropyl alcohol. After the alcohol evaporated I put teak deck sealer on the inside of the edge piece and screwed it on to the cabin. Next I taped across the top edge of the wood and cabin and applied teak deck sealer over the top edge to keep water from penetrating between the wood and the cabin.
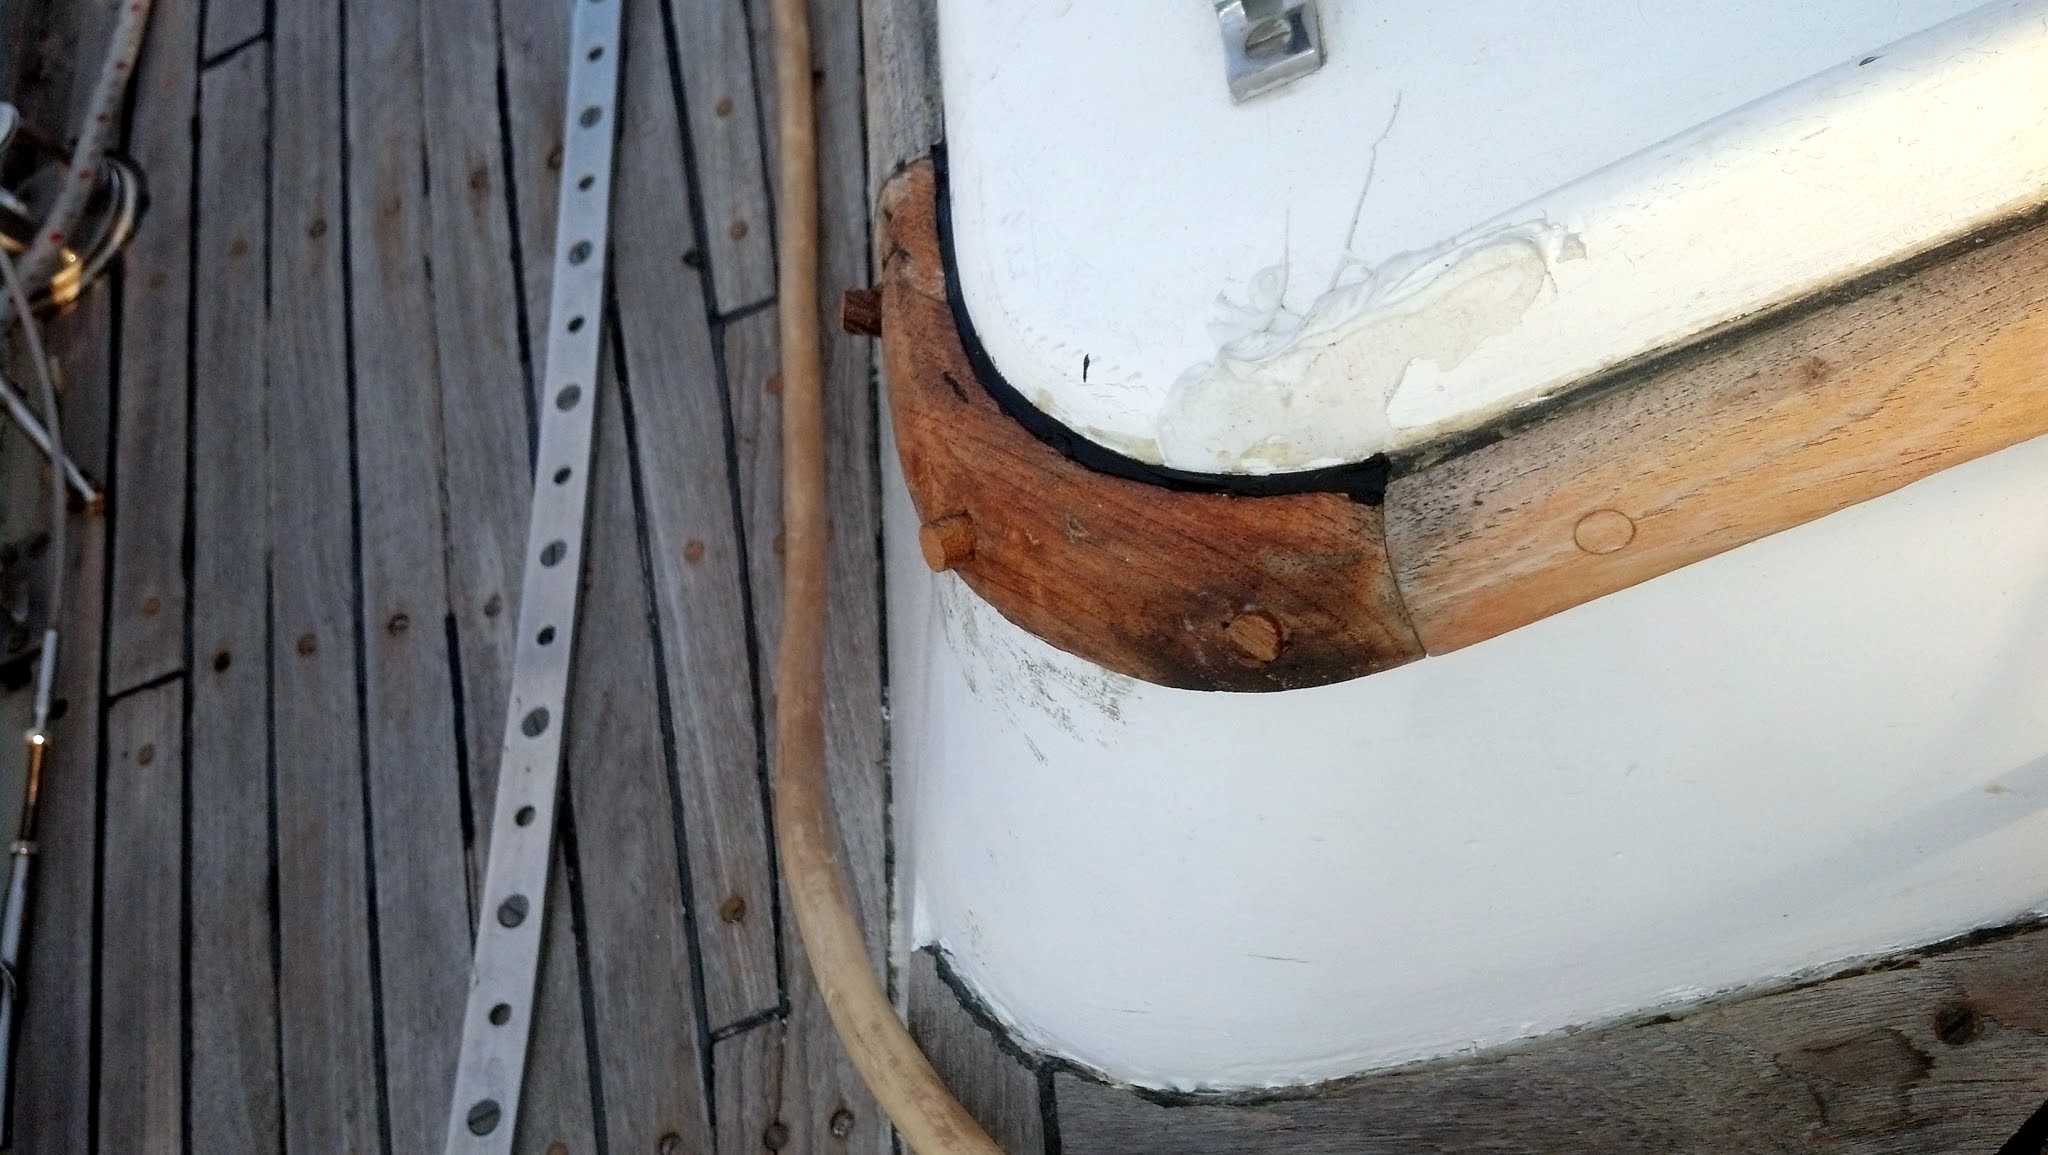
Finally, I put glue on 3/8″ teak plugs and gently tapped them in over the screw holes. When it comes time to varnish I’ll use a chisel to cut the plugs off and then will sand it fair with the rest of the wood.
The entire project took only two hours. I don’t know why I put it off for so long!
Tuesday, November 6, 2012
New cabin lights
Please welcome new contributors Nate and Natalie aboard s/v Astraea! We join them mid-refit of their Cheoy Lee 41 - there have been a lot of projects there, but most have been too major to qualify as "small" boat projects. But this one is a perfect fit...
A few weeks ago I added two new lights inside the cabin. One is centerline above the salon between the head and galley, and the other is on the aft port side over the top loading freezer in the galley. I bought the two new lights at the San Diego Marine Exchange and installed them in a day.
The lights are seven inches in diameter and need a 1/2 inch thick mounting base to keep the lights off the overhead and allow for flush mounting when the headliner is installed. I cut two new eight inch square bases out of 1/2 inch thick StarBoard, a sturdy plastic board I had left over from the wet exhaust project. There is an inch wide gap cut in one side to the middle to conceal the wiring.
The terminal block is installed on the white StarBoard base with the teak light mounting
It took a full day’s work to cut the bases and install all the wiring. Having the new lights really brightens up the interior. Because they’re LED, I can have all the cabin lights on and use less electricity than one of the old incandescent bulbs!


Subscribe to:
Posts (Atom)


