Thursday, September 26, 2013

Cockpit canvas repair

Sewing cockpit canvas is a study in topology, both in the macro sense, where concern is that the pieces will fit together properly, but also in the micro sense, at the edges where all the various finishing techniques all come together, in a rush of parallel planning.  It is not simple.


I spent last weekend becoming acquainted with our new LSZ-1, repairing our cockpit enclosure.  In the 10 years since it was installed, exposure and the Sun's UV have caused damage:
  • Virtually all the thread exposed on horizontal surfaces has failed
  • Any zipper that the Sun can see has deteriorated to the point where teeth are missing
  • Shrinkage.  Because of the way things fit together, it is difficult to tell, but I think it is the vinyl which has shrunk.  In any case, gaps of as much as an inch now existed at the zippers holding the side curtains together.
To deal with the horizontal shrinkage, I installed new zippers on the side curtains at the original locations, accumulating all the shrinkage compensation into the last zipper, at the front edge.  Because of the gap, the zipper could no longer be attached directly to the edge of the side curtain - an extension was needed.  I made the extension flap wide enough to not only relay the zipper attachment point out, but also to provide a flap which covers the zipper to protect it from sun exposure.  Finally, because this zipper is slanted, I put the extension flap on the side that would shed rain - if I had put it on the other side it would have scooped rain into the zipper.

 The center cover needed to be extended too, to compensate for shrinkage in the vertical direction.  Rather than tacking on an extension and then having to remount the Common Sense fasteners, I determined that the easiest way to do this was to simply cut off the lower edge containing the fasteners, leaving myself enough seam allowance to attach an extension, and then add the extension above it.


I needed about an inch of extension, but I thought this would look awkward, so I made the extension 2.5" (plus seam allowances), more or less mirroring the size of the cut-off margin.

After attaching the extension using a flat-felled seam (directed upward, to shed rain), I re-assembled the  extended lower margin piece to the side curtain via the Common Sense fasteners to get a fine-tuned mark of where to trim the center cover.  Then I made another up-turned flat-felled seam to make the final assembly.

I don't think I am ready to create sections from whole cloth yet, but I am learning.  And the LSZ-1 has already paid for itself.

Tuesday, September 24, 2013

Dinghy Dalliance Digest

Today, in his inimitable style, Brian talks to us about dinghies and philosophy from Dock Six...
          "Everybody's got a story..."
                      -Amanda Marshall


          If you can click past the endless played-out cat memes, genealogy sites, facebook, and you don't get sucked into YouTube for hours on end, you discover that there are actually some interesting places to visit out there in the WorldWideWeb.  Like one I stumbled over recently, Humans of New York .

        The concept is genius.  It's nothing more, and nothing less, than stripped-down photojournalism:  One man, one city, one camera, one subject, one interview, one question, one story, repeat. Every day.

        One interview struck home with me last week.
 "I’m a philosophy professor."

                          
"If you could give one piece of advice to a large group of people, what would it be?"
"Never make an exception of yourself."
"What does that mean?"
"People like to make exceptions of themselves. They hold other people to moral codes that they aren’t willing to follow themselves. For example, people tend to think that if they tell a lie, it’s because it was absolutely necessary. But if someone else tells a lie, it means they’re dishonest. So never make an exception of yourself. If you're a thief, don't complain about being robbed.


       Guilty.

       I have made an exception of myself.

       Boat projects, even small boat projects, are usually labour-intensive.  Because I have done a bunch of them, and because I am more than happy to share my opinion (solicited or otherwise), fellow boaters occasionally ask how to do something...
    ...before I am able to tell them how to do it anyway.

     Usually, halfway through explaining, for example, that the only way to finish brightwork is a  multi-coat repeatedly sanded varnish schedule, the enquirer interjects, "Isn't there an easier, cheaper, quicker way to do it?"

     Which earns my standard response, "If you haven't got the time or money to do it right, when will you have the time and money to do it again?"


      My inflatable adventures over the last couple of seasons demonstrate how I have made myself an exception.

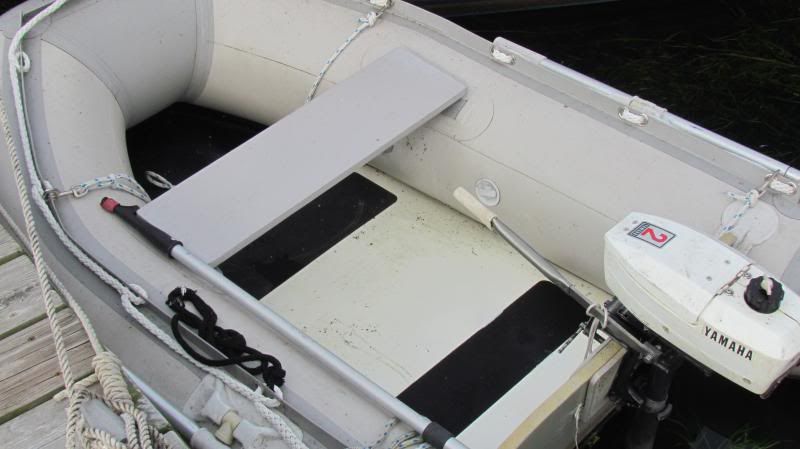
      Last year, Quack  needed a floor.  So, I quickly laminated some ply, slapped some epoxy on the exposed on all the surfaces, sloshed some varnish over it, screwed it in place, and, as the french say, Vwuh-Lah, I had me a new floor.


      Five months later, I needed another new floor:


   So, I spent the time and the money to do it...again.

    I figured out that part of the issue was that the floor was screwed into place, an issue created because I was determined to work with scraps on hand.  For Floor 2.0, I decided to make a full floor that would be freefloating, heldp in place by the tubes.  So I measured, and cut, and sheathed it in fiberglass cloth and wetted it out and filled it...


.....and sealed the edges with thickened epoxy and sanded it, and then painted it and painted it and painted it again, applied a couple of big swaths of grip-tape and I had...


   ...a durable and practical floor.

   Next item on the punchlist was a tiller extension for Quack's doughty little outboard.


 I repurposed a piece of scrap aluminum tube, formed the ends to fit the flat stock tiller, drilled and riveted the new extension into place, and ...


     It works great, and allows stand-up piloting, very nice when one has a load of dogs and water jugs.


   So, one dinghy, two projects, two successes.  What of the newest member of the growing fleet?


     This demonic deflating dinghy is proving to be my Moriarty.

     Look at her up there!  Plump. Firm. Ready for action, no?

     Hours later:


Not Honk's fault, really.  I have no one and no boat to blame for my making an exception of myself.

 See, I found the leak.
 And I patched it.
With a patch that was too small.
Unable to withstand the pressure, the patch leaked.
So, I patched the patch.
The patched patch leaked.
So I slathered it in sealant and covered it in duct tape for a few hours and pulled off the tape and...
...It leaked.


So I tore off the patch over the patch and then tore off the original patch and sanded and cleaned and repatched...
...and instead of waiting the necessary 24 hours for the patch to fully cure and harden, I reinflated to full pressure after 6 hours.

   And it leaked.

    So I deflated the offending chamber, slathered sealant on, covered it in duct tape, let it cure for 24 hours, uncovered it, reinflated and ...


    It looks like hell and it leaks, albeit more slowly.

    The patch is still too small, and the adhesive area inadequate.

     (Small and inadequate- welcome to the story of my life.)

     Tomorrow I will have to make the time and find the money to do it again.  

     This time, it is obvious I need to pull the "Zodiac" label off the tube, as the leak is actually a previously patched puncture just off the lower right corner of the label that was inadequately patched originally.   With a bigger patch, a properly prepared surface, the  patch firmly affixed to the tube with no air bubbles, longer cure time for the adhesive, and no inflation until fully cured,  I expect that I will have an inflatable that remains inflated.

    Hopefully.


    So, have I learned anything from being exceptional?

    Yep.

     I am not special.  I don't get any luckier than anyone else.  If there aren't shortcuts for anyone else, I don't have a Thruway either.

     And I guarandamntee I will be tempted, repeatedly, in the future to make an exception of myself.

     Once in a while, I will likely give in.

     You'll probably hear about it.

Tuesday, September 17, 2013

Could it be this easy?

Not available for purchase yet, but Puri has submitted it to the 2013 IDEA Design Awards competition.


Its a water bottle that can purify fresh water and desalinate sea water.  Just put in some contaminated/salt water, and pump.  Its a RO desalinator in a water bottle!

If/when this makes it to the market, this will end up aboard many salt water-based boats, and in every ditch bag and life raft.

(And a tip of the hat to Boat Projects, where I first saw this.)

Thursday, September 12, 2013

Operations Locker: Complete

And today, thru the modern miracle of the InterTubes, we get to zoom ahead in time to see the completion of Rick's Operation Locker on s/v Cay of Sea.  I encourage you to use this link to follow the entire project from start to finish.  Meanwhile, here are the final steps:
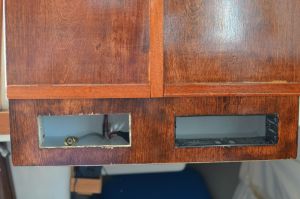
This is always the exciting part for me.  How does it look, fit, work with the rest of the interior?  Did I calculate right?  Did I blend the stain correctly to match the other woodwork.  Will it solve problems or create them?  Does it do what I hoped it would?  The only way to know is to install and use it.  But sometimes the installation can be a challenge.

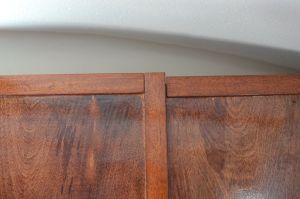
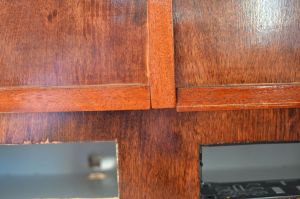
I visited my local hardware store for fasteners of sufficient size.  Then offering up the cabinet to the designated space, I marked, drilled, straightened – all those things we need to do for installation.  I was a little concerned that the cabinet squared up to the space correctly, and looked visually straight and level.  Then after installing the fasteners, I was satisfied with the all of that.  In fact, I was elated.  Until I took a closer look, and discovered that somehow, the doors had managed to get uneven in the way they meet together.

How did that happen?  I know I built it square, and went to pains to get the details correct.
How did that happen? I know I built it square, and went to pains to get the details correct.

Shouldn't be too surprised that the doors don't meet at the bottom if they don't meet at the top.
Shouldn’t be too surprised that the doors don’t meet at the bottom if they don’t meet at the top.

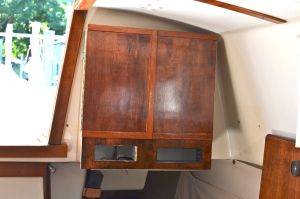
Where did I go wrong?  Well, as I thought about it, I realized that the right-hand side of the cabinet (port side of the boat, actually) is hindered from lying flat and true to the bulkhead by the curvature of the overhead.  I had trimmed that corner of the locker, but not nearly enough.  As I backed out a few mounting screws from the port side, I discovered that I could put the locker back into square by pulling out the bottom corner on the port side.  What I needed then, was a shim behind that corner.  I rummaged through my scrap box for a couple of appropriately dimensioned scraps, and made the adjustment with them.  After that, longer fasteners were required (I moved that corner away from the bulkhead more than half an inch) so after another trip to the hardware store, I secured the locker permanently to the bulkhead, and now it looks like this:

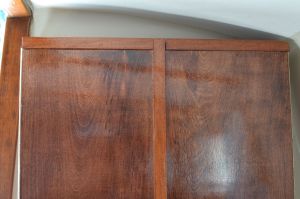
Doors meet square again.  See the curvature on the right of the photo?  It keeps that corner of the locker from laying flat against the bulkhead.
Doors meet square again. See the overhead curvature on the right of the photo? It keeps that corner of the locker from laying flat against the bulkhead.

. . . and the doors meet squarely at the bottom too.

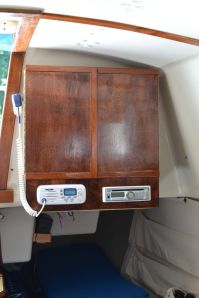
So the next step is to install the radios.  Straightforward with the VHF.  I ran the wires and antenna cable into the cabinet.  No problems.  The AM/FM/CD player was another story.  Nothing difficult about the mechanical or electrical connections – I just didn’t understand  how to connect it all.  It’s been 20 years since I installed a radio like this, and I didn’t realize that the memory wire must be wired. Not wanting to have a constant draw of millivolts to the radio, I didn’t connect it directly to the battery. In fact, I didn’t connect it to anything.  I didn’t realize that the radio wouldn’t power up without having it connected.  I thought it was faulty.  My slip neighbor plugged it into his wire harness (he has a similar radio) and of course it fired right up.  As we talked about it, he mentioned that he wires the direct battery wire (memory wire) with the regular power wire.  Ah, now I get it.  So I’ll try again tomorrow.  Anyway, final photos of the locker installed follow:

DSC_2695

DSC_2696

I’ll post Interior photos of the shelves with gear stowed after radio installation is successful.


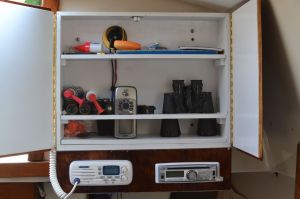
Short post on this, just a photo really.  I wanted to show you the “populated” inside of the locker.  It’s already messy!  Not really, but it could benefit from a couple of hooks for keys and a pencil/pen rack, which is just a block of wood drilled with 5-6 holes to hold writing tools, screwed to one of the doors on the inside.

And here’s the photo:

Inside view
Inside view

Next little project is to mount my multimeter/volt meter bracket and wire it into the electrical system.  This link will take you to the previous post that relates to it.

Tuesday, September 10, 2013

The “Operations” Locker

Over on s/v Cay of Sea, Rick has begun a project to create a storage location for items commonly used while under way.  Tho this qualifies as a "small" boat project, Rick has done an outstanding job of documenting the many decisions needed for it and the construction progress.  In fact, he created a total of 8 posts detailing the process - too many to incorporate here.  I encourage you to use the link above and follow the project in detail.  Meanwhile, here is the beginning:
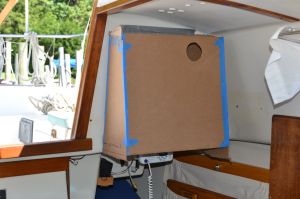
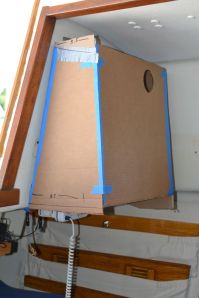
As I pursue my ideal of “a place for everything, and everything in its place” I’ve finally addressed the need for a navigation, or operations locker.  This locker will contain most of what is needed to pilot the ship.  While chart stowage needs to be addressed separately, the little bits and pieces of piloting tools need to be contained much better than they have been.  Accordingly, I set out to pattern and build a locker for these things:  hand-held GPS, hand-bearing compass, pencils and pens, log book, binoculars, dividers, parallel rules, ship’s documents, engine keys, and VHF radio.  I began with cardboard. . .

Design is complicated by the forward-sloping companionway bulkhead.

This first mock up was too big.  It overwhelmed the saloon.
This first mock-up was too big. It overwhelmed the saloon.

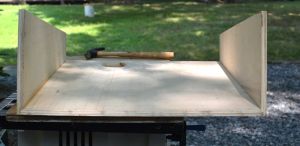
I spent a good while debating if I should follow the curve of the bulkhead on the port side, or just build a rectangular shape.  As I got into the project, I’m glad I chose the rectangular shape.  It’s complicated enough trying to get a front face that is perpendicular, rather than sloping forward like the bulkhead.

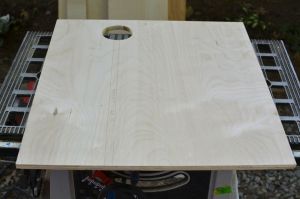
The back piece
The back piece

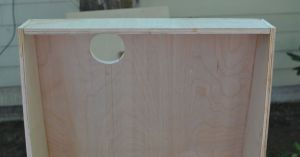
The back is pictured above.  I know, there are similar holes in the front of the mock-up – I was just recycling cardboard at that point.  The hole is in the back to accommodate the depth sounder head. The chase for cabling is marked on the board in pencil.

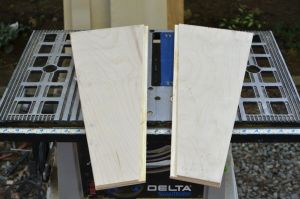
Attempting to do a neat job, I’ve cut rabbets in the side pieces to hide the end grain of the birch ply.

One must pay attention carefully in order to cut the rabbets on the correct side of the piece.  I managed to do it right this time.
One must pay attention carefully in order to cut the rabbets on the correct side of the piece. I managed to do it right this time.

End shot of the rabbets.
End shot of the rabbets after attaching to back

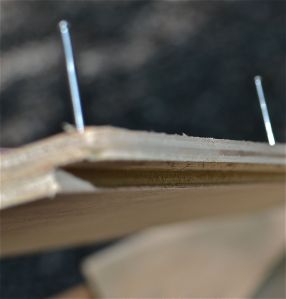
Here's a fuzzy photo showing finish nails set into pre-drilled holes in preparation to glue the sides onto the back.
Here’s a fuzzy photo showing finish nails set into pre-drilled holes in preparation to glue the sides onto the back.

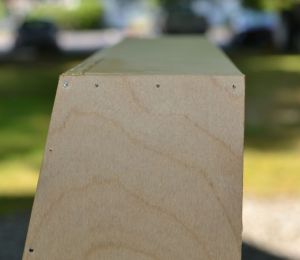
The top and bottom edges of the back piece we beveled to achieve the angle required to have the top and bottom pieces parallel to the deck - not sloped.
The top and bottom edges of the back piece were beveled to achieve the angle required to have the top and bottom pieces parallel to the deck – not sloped.

The beveling was difficult, due to the fact that my tools don’t do this easily.  I think there was a way to do this with a plane, but I’ve never tried to plane the end grain of plywood.  It didn’t seem like the best way to proceed.  This bevel was cut with a hand-held circular saw.  If I built more than one locker like this, I would know to do the initial cuts at the correct angle of bevel, and avoid recutting to achieve the bevel. However, unless I completely make a mess of this locker, it will be a one-off sort of project.  I’ll know next time I build something that requires a bevel. . .

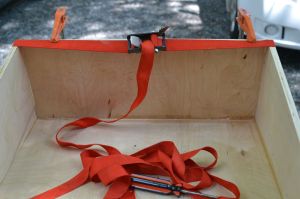
Adding the bottom.
Adding the bottom.

I cut two pieces for the bottom, and completely missed the dimensions the first time.  The photo above represents the second (successful) attempt.  It’s always best to cut the dimensions a bit large, then trim to fit.  I learned that just yesterday!  This piece was glued and clamped – no nails due to the 1/4″ dimension of this piece.

Top fitted
Top fitted

Again, hiding the end-grain of the plywood.

I cut and fitted the top.  Several times.  Just couldn’t seem to pay attention to my measurements. Anyway, I finally got it right.  I’ll set all the nail heads on the sides and fill them before applying a finish.

Thursday, September 5, 2013

Making and Installing the Large Cabin Windows

It has been gratifying and awe-inspiring watching Erick learn and work on s/v Windsong.  This window replacement project showcases his yeoman-like attention to detail and the skills he has developed.  Erick, when you finish with Windsong, and if you are ever in the Pacific Northwest, I'd hire you in a moment!

[Ed. note:  This definitely does not qualify as a small boat project.]
AT LAST…the big windows are FINALLY in!  This is a huge step for me, as this particular project was much more involved than I ever expected it to be, and was a crucial step to sealing up the boat.  Windows, ports, portlights, deadlights…they have many names; but for now I will just refer to these as windows.

Long time readers of the blog will know that I’ve pondered the question long ago what I will be doing with the large cabin windows.  The original ones were very thin acrylic with cheap plastic frames and barely sealed in.  They leaked, they cracked, they were overall unsuited for offshore work as I’ve read a few accounts of DE38 windows breaking easily under the pressure of waves.  These windows needed an upgrade for safety as much as appearance.  I pondered the choices for replacing the windows long ago here: http://www.thequestforwindandwaves.com/?p=227

Since then I have pondered further, and after much research I finally settled on the materials and the method for installing.  In the end I decided to make my own windows out of tinted cast acrylic, installed using a fastener-less method with Dow Corning 795.  I won’t re-write what has already been written on the subject, so I will just link you to the most important pieces I found that summarizes the research:
  1. Maine Sail (link), renown guru of all things sailboats summarizes the choices between lexan and acrylic (plexiglass), the various sealants and methods of installing including the recommendation for not using fasteners.  here: http://www.sailnet.com/forums/1000233-post16.html
  2. This is an article that many people reference for installing fastener-less windows, aka “Sexy Windows” (click here for original Cruisers Forum discussion).  The author originally uses heavy duty 2-sided tape for the installation, but in his notes at the bottom he mentions the current trend of not using the tape, just the sealant: http://www.thecoastalpassage.com/windows.html
  3. This is a great article someone pointed me to that details the method of installing the windows using temporary screws to affix them while the sealant dries.  I followed these instructions with a few minor variations.  I detail some of my installation variations in the picture captions below.  http://distributionbizwiz.wordpress.com/2007/09/12/hints-for-replacing-sealing-acrylic-boat-windows/
Using those three links as the basis (and much more forum and article research), I went ahead with creating my windows.  Unfortunately, this project was a great example of how order of operations creates big problems.  For example, before any windows could be installed, I needed to settle how I will be rebuilding the cabin liner because otherwise I wouldn’t be able to trace out the window openings.  That process itself was a huge project because I had no idea how I planned on doing the cabin liner, so I had to make a lot of final decisions in the process.  I will write that process up once I am further down the line on it, but will preview it below in the pictures.

At last these windows are sealed up, and a lot of progress can now be made inside the boat.  The boat interior was practically outside and exposed to the weather since those windows are so huge.  Now I can finally keep the interior clean for projects that require it, and am no longer at the mercy of the weather to work inside the boat.

As with my last few posts, below are a bunch of pictures with the story in the captions.

Original windows. Cheap plastic frames,
very thin acrylic, leaked badly.

Removal of original windows.
Had to chip away at the frames with a chisel.

Window removed.
Old headliner staples and mess left in the core.

The core was exposed behind the old windows.
I removed about a half inch of the core and
filled up with thickened epoxy to seal the edges.

This is a window opening template made from some hard board.
This was made by just pressing the 2′ x 4′ board up
against the window and tracing from the outside.

To make the templates for the windows themselves,
I used the window opening template,
and sketched 1-3/4″ outside of the opening line
to create the window over-lap.

Here is the window opening template,
and the window template.
This shows how the window would sit over the opening.

Tracing the window template onto the acrylic.

Tracing the window template onto the acrylic.

Cutting the acrylic,
making sure I am well outside of the
template line to avoid any chips or dips into the line.

Rough cut finished

You can see here the rough cut,
and how I kept outside to avoid screwing up the lines.
<


Using my orbital sander with an 80 grit sheet,
I shaped the windows down to the template lines to
create nice and neat shapes. I felt much more
comfortable shaping the windows this way than
trying to keep a good line using the jig saw.
Plus, the jig saw will chip occasionally due to my
lack of technique, being careful to remain outside
the lines and shape afterwards helped with that.

Clean lines after sanding.

Finished window cut out

Clean window edge after sanding. I eventually used a
block to sand the edges down even cleaner with 150 grit.

Before windows can be installed, I needed to
dry-fit my headliner replacement. I am using
tongue and groove bead-board to replace
the liner with hard panels that can be removed
as needed. Here is a dry fit before cutting out windows.

Paneling in place with windows cut out.
Would have been very hard to trace out
those windows if they were in place!

Window all masked off ready to be installed.
Notice the set screws that will be used to
hold the window in place while the 795 cures.

I used a cut of small hose as the 1/4″ spacers.
As mentioned in the articles I posted above,
windows this big need a gap and large sealant bed
as they will expand/contract with heat.
If the gap is too thin, it will shear off the window or cabin.

While I ended up using Dow Corning 795 as my sealant,
I had originally purchased a bunch of Sikaflex 295 UV
and primer to use for the windows.
After more research, the Dow 795 was the dominant
recommended product, plus it was about 1/3 of the cost
of the Sika 295. I returned all of my Sika for a big refund,
but I had already opened the $75 can of primer to use
on the hatches. The articles above recommend that you
paint the acrylic on the edges that will overlap so to create
a uniform, black coating. The biggest weakness I found
in this fastener-less method was that the bond is only as
good as the paint on the hull or the acrylic. To
overcome this, I used the Sika primer on the acrylic
because it etches on chemically and creates a very
permanent bond better than any paint.
I let the primer dry completely, then gave it a very good
sanding to ensure good adhesion with the Dow 795.
I think this stuff will be much, much stronger than
any paint I could use.

Dry fit of windows.

Masked outside of window

As previously mentioned, the weakest part of this
installation method is that the bond is only as good as
the paint on the hull. In order to get around this weakness,
I sanded off all paint so the bond is directly to the gel-coat.

Massive bead of Dow 795 all around the window

Window screwed in, with finish bead around outside
of the edges. After screwing in, I had to do some touch-up
filling of sealant where it didn’t squirt out the sides.
I also added a thick bead outside the edges to shape
into a rounded off edge. The edges were difficult
and they didn’t come out perfect, but definitely
good enough for my first try at this.

After a day’s cure, I removed the screws and filled up
the holes with sealant.

Screws out, holes filled, making ready to be removed.

Finished!
I was ecstatic seeing them for the first time.
More beautiful than I had imagined they would be.
You can barely see the screw holes.

Port side finished windows

Super dark on the outside,
plenty of good view from the inside.
Window here on the right, no window on the left.

Clean bead of sealant on the inside.

View from the ground

Finally, no more tarp on half of the boat!


Related Posts Plugin for WordPress, Blogger...