Now that the boat is back in the water, it's time to start taking care of some projects that I've wanted to do for a while now. The first project is an upgrade of the interior lights to LED.
I'm finally getting around to completing the conversion of our interior lights from incadescent bulbs to LED bulbs. Of course, this would have been a great project to have completed before we left for the trip, when saving amps would have been useful. Oh well, better late than never... :-)
The first task was to source the replacement bulbs. Primarily I just use google as my main research tool, but the Dr LED site (http://doctorled.com) is a great site with a lot of information on LED lamp replacement.
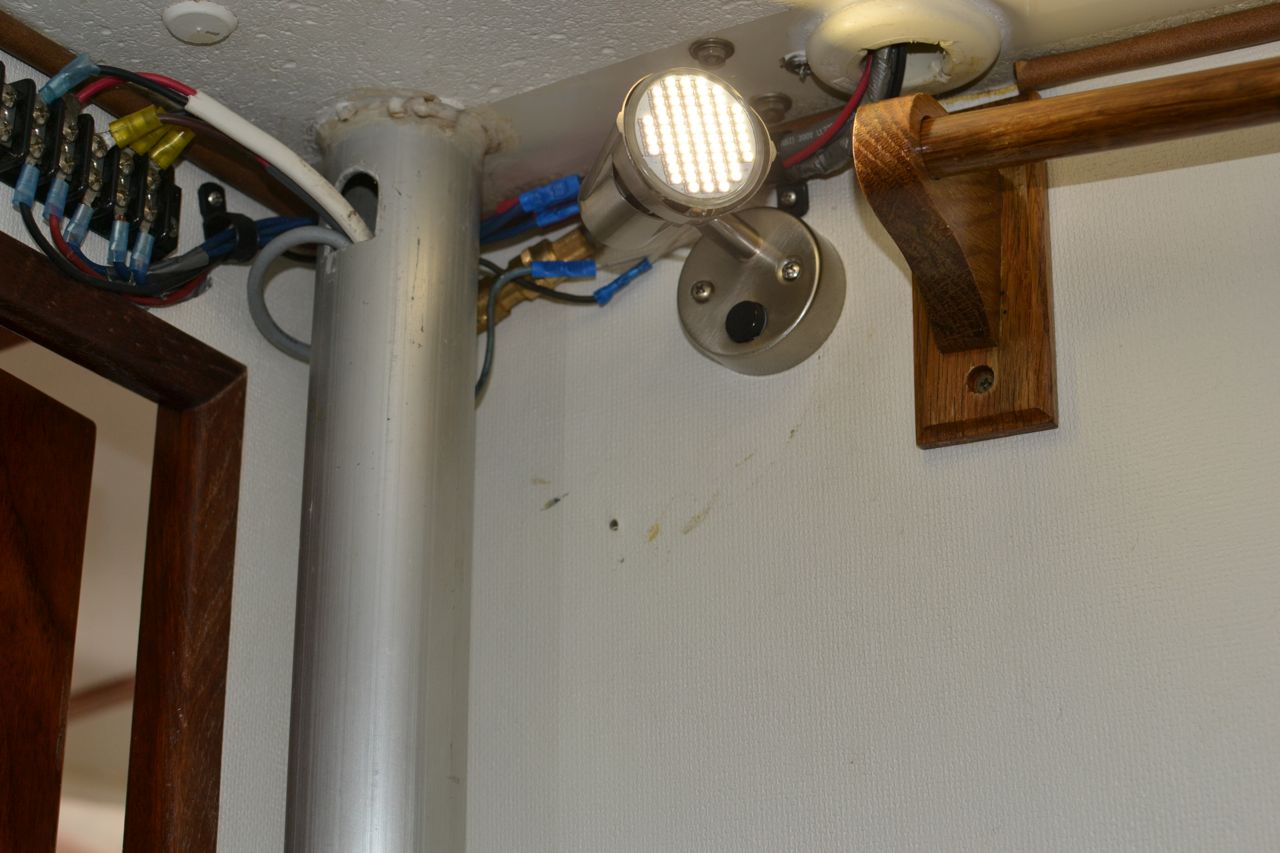
Most of the lighting (two double light fixtures in the salon, one double in the galley and two singles in the head) on the boat use a bulb with a model number of 1141 and a base of ba15s. I found a number of different LED bulbs that would work as a replacement for the 1141 bulbs, but I chose the following from amazon;
http://www.amazon.ca/gp/product/B00DDOSNH2?psc=1&redirect=true&ref_=oh_aui_detailpage_o00_s00
Part of the reason I chose these bulbs was the price ($5.00 per bulb is pretty good), but also because of the colour.
When you look at LED lighing, you'll see references to 'cool', 'warm', etc. This refers to the colour of the light given off by the bulbs. Here's a good link that illustrates this;
http://www.seesmartled.com/kb/choosing_color_temperature/
We previously had two LED bulbs in the salon, one in each light fixture, so we were able to run low current with our lights. These bulbs were quite blue though ('cool' white colour according to the colour temperature) and we didn't find they did that good a job providing usable lighting. I decided to change to 'warm' white colour for the replacements.
The new bulbs in one of the salon fixtures
A nice 'warm' white colour
After replacing all the bulbs it was time to do a current usage test to see just how much of a difference LED lights can make.
Everything turned off
Current usage of the incandescent bulb
Current usage of the LED bulb
As you can see, the LED bulbs are a great deal more efficient than the incandescent.
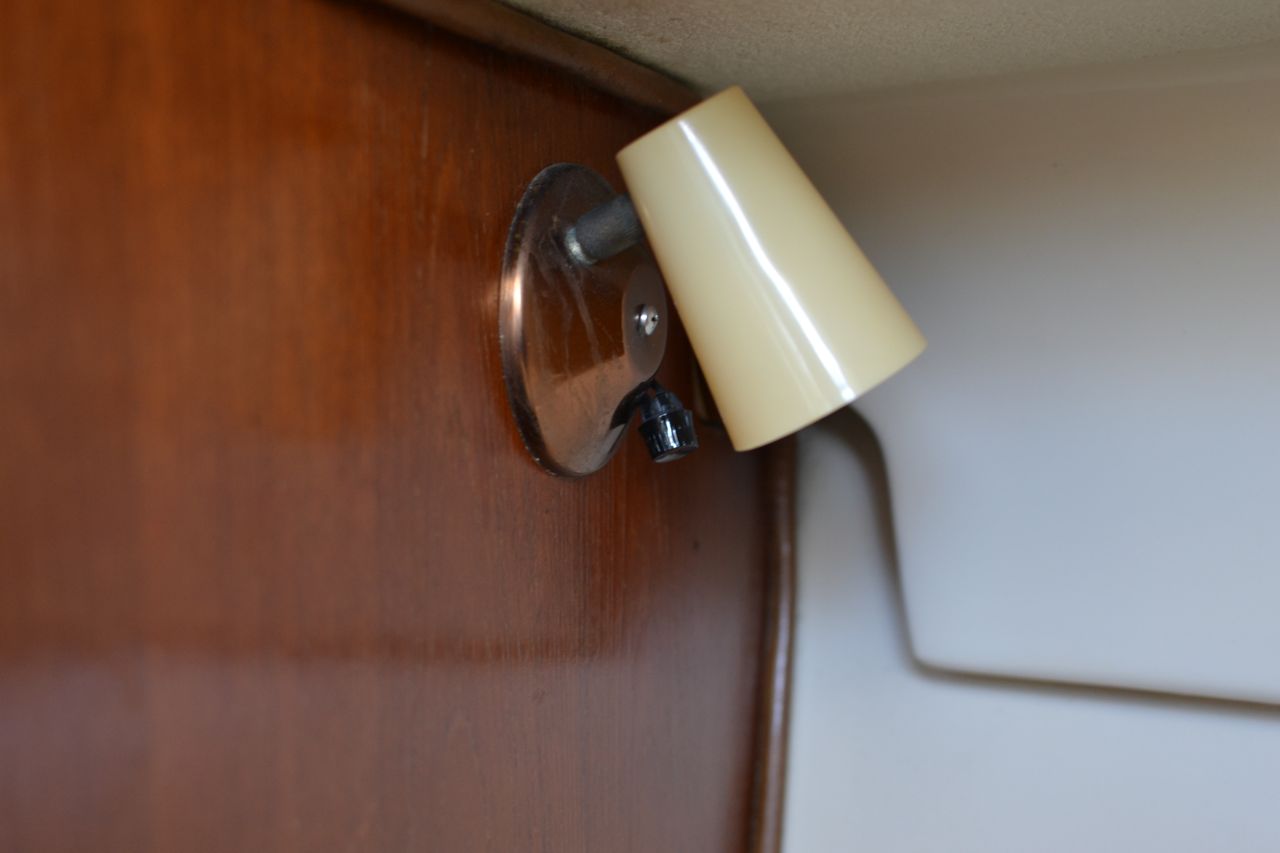
I still have a couple other lights to replace the bulbs in. We have two reading lights in the stateroom, and a couple side lamps on either side of the couch in the salon. They have a different bulb, with a screw in base known as an Edison E26 or E27. I've yet to pick a replacement LED bulb for these yet, but now that I see the other LED bulbs I picked up I have a reference for what the colour looks like.
Showing posts with label lighting. Show all posts
Showing posts with label lighting. Show all posts
Wednesday, August 19, 2015
LED Light Upgrade Project
It seems that converting your interior lights from incandescent to LED is becoming a popular project, and why not? Here, Rick and DAR of m/v September Dream show us theirs...


Wednesday, April 22, 2015
Indoor Projects
Onboard s/v Aletheia Nate & Jenn each take on a project to make life aboard better!
Here are pictures of two small boat projects we've completed (or began) since inception. All you need is looking for something to do or feeling a need for success to get going.
While Eric & Amanda were visiting, Eric and Nate installed this LED rope lighting under the galley cabinets. It was already on board and wasn't doing any good sitting in a dark hole. It actually adds a great deal of light while cooking or as mood-lighting. The dimmer is a nice touch too!
A dimmer for extra galley lighting
Tiny LED lights give a nice ambiance
Yesterday, I finally felt motivated to pull out some fabric I've had for some time intending to make a closet curtain to cover up clothing, foul weather gear, computers, etc. There used to be a big ole' heavy wooden door where there is now nothing. We removed the door in Freeport, ME. It's a very simple rectangular piece of fabric, but not being much of a sewer, the thought hemming and hand-sewing the 25"x 58" borders sounded like a lot of work for ME. But as Aunt Bev told me, what do you think they did before sewing machines?! Good point. Also, with the fabric staring at me, I thought today is the day. I've hemmed the borders and will sew the edges within the next 1-2 days and assemble with onboard resources of eye screws and bungee. It will also add a bit of color to all the dark wood.
Hemming the edges
Current visual Completed look to follow...
A closet curtain in progress
Cheers,
Jenn


Friday, August 22, 2014
Project update: Valances
This post originally appeared on Windborne in Puget Sound
Work continues on the valances.
I bought a white-finished particle board shelf and cut it into strips. Then each valance got one of the strips glued to the back, using Gorilla Glue (because of its tremendous gap-filling property), held back from the top of the valance by 3/8" to make room for the LED strip lites. The strip serves as a stiffener, as a means to retard warpage of the relatively thin valance panels, and finally as a lite reflector for the LEDs, directing their lite back toward the cabin side and upward.
And then I ran a 1/4" rounding-over router bit along the edges, sanded, and varnished the panels:

Unfortunately, because of the size of my workspace, I can only deal with the valances from one side at a time.
 These are from the starboard side; the port side will have to be completed another time. And then there will be the wiring of the LEDs...
Work continues on the valances.
I bought a white-finished particle board shelf and cut it into strips. Then each valance got one of the strips glued to the back, using Gorilla Glue (because of its tremendous gap-filling property), held back from the top of the valance by 3/8" to make room for the LED strip lites. The strip serves as a stiffener, as a means to retard warpage of the relatively thin valance panels, and finally as a lite reflector for the LEDs, directing their lite back toward the cabin side and upward.
 |
| Back side of a valance panel, top edge to the bottom of the picture |
Unfortunately, because of the size of my workspace, I can only deal with the valances from one side at a time.

Thursday, July 3, 2014
Invisibility, covered
This post originally appeared on Windborne in Puget Sound

It's funny, isn't it? How if you look at something long enough, it becomes invisible. Even if it is surpassingly ugly, you eventually cease to see it.
Eolian's blinds are a case in point. Having blinds is a neat idea - even neater, these were custom made for the windows. And the installer made a good materials choice, with plastic louvers instead of metal ones. But unfortunately he did a pretty poor job aesthetically. Covering the blinds with valances has been on the list since, well since we got Eolian.
First, it was necessary to procure the materials for the valances: six pieces of teak, 4' x 4" x 1/2". Then there was a lot of thinking. I had two conflicting design criteria:

Next, I epoxied blocks to the backs of the valances. Then I drilled pilot holes up thru the blocks and into the mount points. Screws hold the valances in place - accessible but not visible. (Note: when gluing teak, always wipe it down carefully ahead of time with acetone to remove the waxy teak oils from the surface.)
Next, at the nav station wire chase. The wire chase was (amazingly) exactly the right height for the valences, so I just overlapped them with it. The valence is held in place with a pair of L-shaped brass corner reinforcements, one each at the top and bottom, screwed into the side of the wire chase and the back of the valence:
Just barely visible in the photo is the saw cut I made in the wire chase cover panel - this was necessary to allow the cover panel to be removed without having to remove the valances. With the cut 1/2" up behind the valances, it is invisible but allows the cover to be slid down and then removed. (The wire chase was the very first carpentry project I did on Eolian, way back in 1998.)
At the over-sink cabinet I was less fortunate - I was not able to find flat corner reinforcements in brass, so I had to settle for stainless, which is much harder to work with. By cutting and bending, I laboriously fabricated these little brackets with the tools I had onboard:

They work like this to support the valances with screws driven up into the bottom of the cabinet:

So here's what it looks like with everything up:


I still need to take the valances down and route the edges, sand, and varnish them. And while they are down, they'll get a 2" wide strip of 1/2" white MDF attached to the back for stiffening. And then the pièce de résistance: warm white LED strip lites will go on top of the MDF to create some indirect mood lighting:

It's funny, isn't it? How if you look at something long enough, it becomes invisible. Even if it is surpassingly ugly, you eventually cease to see it.
Eolian's blinds are a case in point. Having blinds is a neat idea - even neater, these were custom made for the windows. And the installer made a good materials choice, with plastic louvers instead of metal ones. But unfortunately he did a pretty poor job aesthetically. Covering the blinds with valances has been on the list since, well since we got Eolian.
First, it was necessary to procure the materials for the valances: six pieces of teak, 4' x 4" x 1/2". Then there was a lot of thinking. I had two conflicting design criteria:
- There should be no visible screws
- The valances should be removable for full access to the blinds and windows
- Where the valances met the over-sink cabinet
- Where the valances met the wire chase coming up from the nav station
- Where the valance terminates against the wall behind the nav station
- Everywhere else
Next, I epoxied blocks to the backs of the valances. Then I drilled pilot holes up thru the blocks and into the mount points. Screws hold the valances in place - accessible but not visible. (Note: when gluing teak, always wipe it down carefully ahead of time with acetone to remove the waxy teak oils from the surface.)
 |
| Invisible mounting #1 |
Next, at the nav station wire chase. The wire chase was (amazingly) exactly the right height for the valences, so I just overlapped them with it. The valence is held in place with a pair of L-shaped brass corner reinforcements, one each at the top and bottom, screwed into the side of the wire chase and the back of the valence:
 |
| Invisible mounting #2 |
Just barely visible in the photo is the saw cut I made in the wire chase cover panel - this was necessary to allow the cover panel to be removed without having to remove the valances. With the cut 1/2" up behind the valances, it is invisible but allows the cover to be slid down and then removed. (The wire chase was the very first carpentry project I did on Eolian, way back in 1998.)
At the over-sink cabinet I was less fortunate - I was not able to find flat corner reinforcements in brass, so I had to settle for stainless, which is much harder to work with. By cutting and bending, I laboriously fabricated these little brackets with the tools I had onboard:
They work like this to support the valances with screws driven up into the bottom of the cabinet:
 |
| (Almost) invisible mounting #3 |
So here's what it looks like with everything up:
I still need to take the valances down and route the edges, sand, and varnish them. And while they are down, they'll get a 2" wide strip of 1/2" white MDF attached to the back for stiffening. And then the pièce de résistance: warm white LED strip lites will go on top of the MDF to create some indirect mood lighting:
Tuesday, December 17, 2013
It’s the little things
Steve and Lulu living aboard s/v Siempre Sabado have made some small changes that have big results. As Steve says, sometimes it is the little things that make all the difference...
We made a couple of minor changes as a result of our trip to the States that have resulted in an improved quality of life aboard Siempre Sabado.
Things have always been a wee bit dark and cave-like down below thanks to inadequate lighting. The original lighting was all incandescent and used very inefficient automobile tail-light bulbs. These were borderline bright enough but used way too much of our precious battery power. I eventually changed most of the bulbs to LED but continued to use the original fixtures. The brightness of the LEDs was largely dependent on when (meaning the year) we bought them. The first ones seemed pretty bright but cost a ridiculous amount of money. As time went by LEDs got brighter and cheaper but, since they’re designed to last just about forever, it was hard to replace the old ones that were still working. However, the difficulty in seeing things down below finally got the better of my cheap-osity and we decided to spring for new fixtures.
I’d always read really good things about the Alpenglow line of lights but had always been put off by their price which seemed a wee bit dear to me. However, if we were going to put out substantial money for lights it would be nice to be able to see when we were done and also to have lights with a good reputation rather than something cheaper that may end up breaking. I was particularly attracted to their line of 9-watt LED dual-power lights with night vision. The light has a low power and high power main light as well as a dual power red light for nighttime. I bit down hard on the bullet and placed an order for three of them.
The pain of the initial purchase price has passed and we are now basking in the soft glow of our new lights that are actually bright enough that we seldom use the high power setting.
This one’s over the table. We have another over the stove/sink, about 4′ away. We can definitely see what we’re doing now.
Underway, it’s best to use red lights to maintain night vision when going below for something. We had one red light over the nav desk before but it was pretty anemic. Now we have two dual-power red lights in the main cabin as well as another in the head.
The real magic has been in the head. This has always been a dark cave. Really hard to see anything. Not anymore:
High beam red
Low beam red – Just right for those middle of the night visits when you just woke up.
On the downside, we can now clearly see all of our flaws.
Another minor improvement involves dishwashing or, more accurately, dish drying. When we’re not underway, we tend to let dishes air-dry as they seem to end up a lot dryer than when we towel-dry them. Hurting for counter space, we put a cutting board on top of the stove, spread out a towel and then get really creative about piling dishes up. This works OK but it would be nice to be able to pile more dishes up and still maintain some free airflow around them. We’ve seen and used various folding drying racks over the years, mostly in our campers but none of them really filled the bill. They never seem to deliver the goods in that they don’t actually hold very many dishes.
Before we headed north this year, I scoured the internet looking for some sort of rack that might actually satisfy us. I think we’ve found it although, sad to say, I don’t remember where I actually ordered it from.
It folds down small enough to stow behind the stove:
When unfolded, it presents a lot of drying/stacking space on a very stable platform.
And, you can really stack the stuff up. In this photo we haven’t even begun to use all the space available. For instance, all those fingers along the top can hold glasses and cups.
I realize that writing about items like lights and dish racks is pretty freakin’ mundane but these are the kinds of little things that make life on a tiny little boat bearable.


Thursday, October 31, 2013
New LED Fixtures And Lights Installed
Over at s/v Cay of Sea, Rick has renewed his light fixtures with new LED-based ones, and gained a significant improvement in power consumption...
It was a tremendous relief to get the old, mismatched fixtures off the boat. They’ve bothered me for years, but I wasn’t going to pay the very high price for new fixtures and LED bulbs. I knew if I waited long enough, LED technology would become more reasonably priced.
Four different light fixture styles on the boat. Now we’re down to two.
I will install a couple of the old fixtures in the engine compartment for convenience.
After some slight hesitation, I removed the round fixture in the head. It is a festoon bulb, and gives off a lot of light. And heat. Meaning, of course, that it burns through electricity at a tremendous rate. The new bulbs are rated at 3.12 watts (each). That’s .26 amps. Not much, and not much heat either. And for 3.12 watts per lamp, I get this kind of light output:
It’s too bright to look at.
It’s going to take some getting used to not seeing that big round fixture in the head. Looks like I’ve got some cleaning and touch-up to do on the paint where it was mounted.
The light quality tends to be a bit harsh, especially if there are two or three lamps lit at once. However, there is no lack of bright. I think that’s good – far better than dim. So with four of these lit at once, I’m using 1 amp. That’s a phenomenal amount of light for that little power.
I made the electrical connections with butt connectors, as you can see in the above photo, except for the first lamp, which unaccountably was wired with spade connectors. I saved my self a couple of crimps, and used the existing female connectors, installing spades and then shrink tubing on the lamp wires.
Just this one lamp had spade connectors. Can’t figure out why, and I don’t remember doing it. Maybe a previous owner did it.
Now I have a confession to make. I’ve never told this to anyone. . . I make my crimp connections with vice grips. I know, I know. I’m supposed to use ratcheting crimpers (the more expensive, the better). But I discovered a few years ago that vice grips do this really well. I mean, really well. The crimps don’t pull out. You can get the crimp almost completely flat with successive adjustments of the locking mechanism. So, I already have vice grips, but I don’t have the expensive ratchet crimpers.
Oh, one cool thing I discovered about this brand of light fixture, is that it is not polarity sensitive. The bulbs work regardless, which surprises me. LEDs are typically polarity sensitive, so I guess there is circuitry either in the bulb or fixture that accommodates reversed polarity and allows them to light up anyway.


Tuesday, September 3, 2013
Light (For) Reading
Over oaboard s/v Cay of Sea, Rick is upgrading his aging interior lighting fixtures...
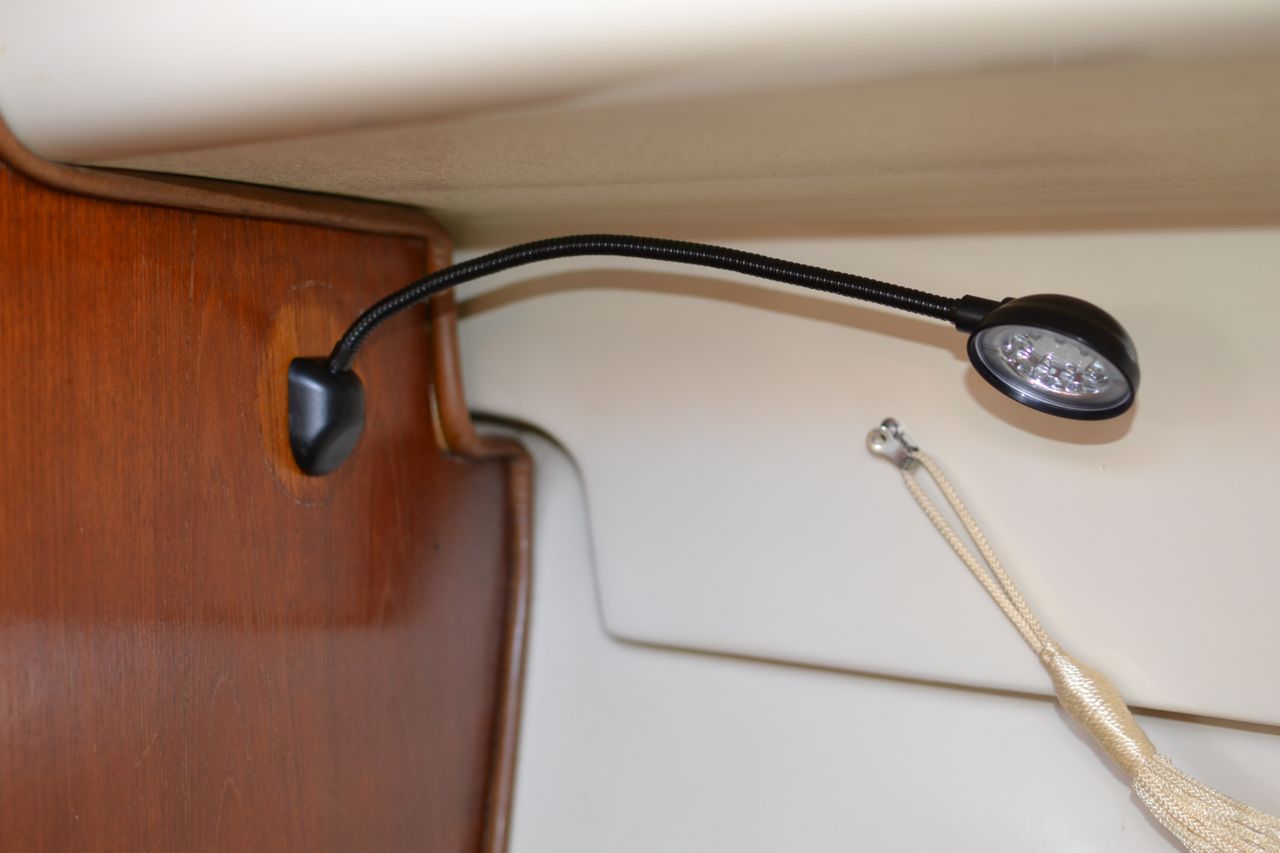
Our 32 year-old cabin lights are gradually falling prey to old age and cheap manufacturing. Until today, there were four remaining of the original 6 lights. One had been replaced before we bought the boat, and I replace another at some point during our ownership. Although I’m not compulsive about having all the fittings match, it seems to make sense to replace this whole batch with something more up-to-date and energy-efficient. I’ve ordered all new lights with LED elements in them, and also ordered two flex-arm reading lamps, which I installed in the V-berth today.
Prior to today, there was one light in the v-berth (on Ruth’s side) and it wasn’t positioned in a way that made for easy reading. There was no light on my side of the berth. I have always used a flashlight. This is okay, but it doesn’t stay put if I move at all – it rolls around and shines in places where I’m not reading. Due to the ineffective positioning of the existing light, Ruth also used a flashlight to read.
The new lights have bendy necks that are 12 inches long and can pivot every which-way. They made so much more sense than the old short-necked original light. Now we can shine the light on our reading and have it stay where our eyes are looking.
Flex-Arm Reading Light
Installation was straightforward. On Ruth’s side, there was already a hole in the bulk through which the wires fed. I drilled three holes and screw-mounted the fixture over the original installation location.
Old lamp. Cracked and yellowed shade,
intermittent switch, restricted aim.
New lamp installed
And it works. My side of the berth wasn’t quite as easy. I had to splice into the light circuit from the light forward of the clothes locker, then fish the wire through to the berth. Not hard, just needed to develop the right technique with the right tools. Drilled mounting holes and mounted the fixture. Here, the location had a small challenge in that it will share space with the dinghy’s spars and sail. I repositioned the dinghy gear slightly and secured them a little better. This provided enough room to mount the light.
The dinghy gear is held in place with strap eyes
and small stuff. Reorienting the spars and
retying the lines made room for the light.
Add caption After a bit of contorting and suffering with elbows, hands and line-of-sight issues, I managed to secure all the wire supported and hidden. I trimmed off the wire tie tails, and flipped on the light circuit for one last look at my handy work. The port-side light no longer worked. . . Upon rechecking the connections, I discovered that I had neatly cut the positive wire at the same time I trimmed the wire tie. This is my life. This is the way I do things. So I cut off the remainder of the connection, unscrewed the wire tie and cut it off, attached another butt connector to the positive side, and wrestled again to secure the new wire tie with a screw, then carefully trimmed the new wire tie. I checked the light, and it works again. Sigh. . .
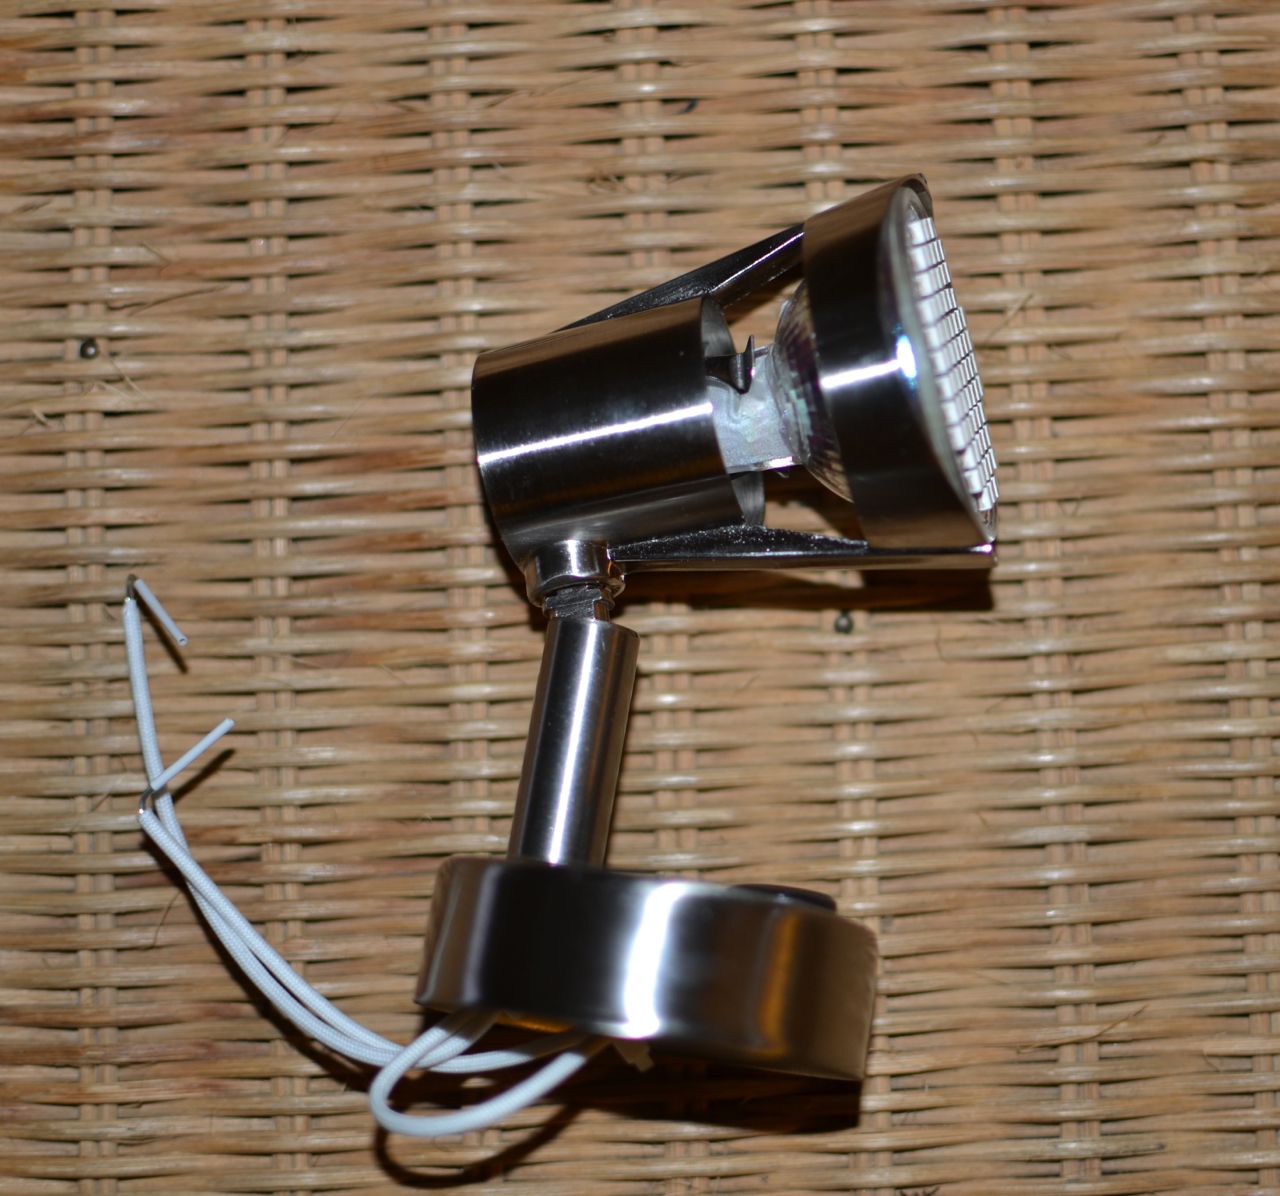
I also received the new cabin lamps (just a few minutes ago, actually) and have inspected them. I’m impressed. These are not high-dollar fixtures, but feature a “satin chrome,” finish and seem pretty robust. The lamps are wired with tinned wire – a “marine-use” feature. They are made by GoWISE. The information on the box indicates that they operate on 8-30 volts – which seems like a pretty wide range of voltage to me. Hopefully, the range will be sufficiently flexible to accommodate the 12.4 – 14.4 volts of a boat system. I’ll start installing them in the next day or two.
This photo reminds me of a Pixar film character.
So we’ll see how they do. The flex-arm lamps were $24 each, shipped together (shipping charge was steep, at $20). I found them with this eBay vendor: Alliance Coach-RV sales and service. I doubt we will use the reading lights while under power – with the engine running the voltage is right around 14.4 volts. Automotive-style LEDs aren’t typically very flexible with regards to voltage fluctuations, so hopefully using them with the engine not running will allow them to last without the failure that is attributed to voltage levels that are too high.
The cabin lights were $49 for three – I ordered two sets. Shipping was a little more reasonable at $15, and the eBay vendor is Bovilles.


Thursday, December 13, 2012
Low-Buck Lighting Review: Old School Edition
Over at Dock Six, Brian does a study of traditional, really traditional cabin lighting. And not surprisingly, Brian does it low-buck style...
As prodigious as we are with rum consumption, we are as miserly with electrical power aboard Whiskeyjack.
We light the cabin with battery powered LED lighting which consumes a relatively small amount of power compared to traditional Edison-style bulbs, but LED lights have drawbacks not considered when we installed them.
For example, insects like them.
A lot.
In fact, a lot of little bugs like LED lights a lot.
(Yes, we have screened hatches, but that only keeps insects out that are already out when the hatches are closed- those insects that are in when the doors close remain in, swarming around the lights. It's sort of like a dance club at last call.... in reverse.)
The ambiance factor, or lack thereof, with most LED lighting is also not inconsiderable. The LED lights aboard bounce off the fiberglass overhead and fore and aft bulkheads, casting a dental-office style glare, hardly inducing one to curl up with the latest copy of Good Old Boat.
There are certainly alternative colour LED bulbs, in warmer and fuzzier hues, but retrofitting all of the panel-wired fixtures below deck is not an inconsiderable expense, and a project filled with trepidation. What if the bulbs we feel are bright yet warm, clear yet cozy in the store/at the show/ in the display/whatever feel different in the confines of our cabin? Most vendors have a "no return" policy on electrical stock, bulbs included, so I envision ending up with hundreds of dollars of perfectly good yet completely unacceptable lightbulbs occupying valuableboozespares stowage real estate.
And there is still going to be the infuriating infernal interior insect infestation in orbit around the aforementioned illumination.
So, it was time to suss out some alternatives.
image courtesy of amazon.com
Candles cast a warm glow, but lend little illumination, as evidenced by the small votive candle in the cockpit below. An advantage over fixed-site lighting, however, is the convenience of being able to move light from deck to Dock to cabin to cockpit. More flexibility in lighting means less lighting required on board, and less storage space dedicated to redundant illumination.
It got me thinking, though. Why not try going old school? We decided to explore the world of lanterns.
Traditional ship's lanterns....
... seem to fall into two categories:
Is there an alternative?
- More expensive than electrical light, more elegant, well built and provide adequate light, and
- More expensive than electrical light, more elegant, really poorly built and provide inadequate light
We decided to find out.
Low-buck style.
Here's the parameters:
Go.
- Non-electric light suitable for reading/working in the cabin.
- Portable- usable in cockpit, cabin, on deck or on Dock.
- Unattractive to insects
- Under $25.
First stop, Canadian Tire , where, for nearabout $17, I purchased a World Famous hurricane lantern, not exactly as shown, below.
When I purchased the lantern, it had a "World Famous" label attached to the chimney, which peeled off and fluttered to the floor when the lantern was removed from it's cellophane wrapping. The lackadaisical label was an accurate indicator of the quality of the lantern to which it was formerly attached. The price was cheap, and the product lived up to the price. Included was a business card-sized slip of paper with filling and lighting instructions printed in smudgy 6 point type. The lantern itself is about 12" tall, with a base diameter of about 5". The fit and finish appeared sloppy, an impression which was dramatically reinforced later.
Next, we paid a visit to our good friends at Lee Valley Tools and traded $19.95 for a Dietz "No. 80" hurricane lamp.
Wow. What a difference $3 makes. The Dietz lantern came in an honest-to-goodness box with the globe wrapped for protection. Included were lighting and cleaning instructions, wick trimming info and a short but succinct trouble-shooting guide. Compared to the World Famous lantern, No. 80 felt huge, standing 15" high with an 8" wide footprint. Fit and finish was better than expected, with decent plating on the burner, bails, globe plate and tank cap.
Price winner: World Famous
First Impression winner: Dietz No. 80
With the contestants chosen, it was time to get them ready for use. Both lanterns are kerosene fueled, so after a perusal of the filling directions, the lanterns were placed on the table and loaded with kerosene...
...sonofabitch!!!!!...
The World Famous lantern's instruction slip included the cryptic phrase "Do not fill tank more than half" There was no explanation for this fortune-cookieish bit of advice, and also no instruction on how one determines when the lantern is half full- there are no "fill to here" markings, and the small fill port is completely obscured by the spout of the kerosene container providing sustenance, so trying to eyeball the level doesn't work. So, in typical Dock Six fashion, I guessed.
And overshot the mark.
I discovered this fact when keroseneleakedSTREAMED out of the tank, not from the fill port, but from the tank itself. It turns out the tank has a large hole where each of the legs that hold the chimney are attached. I cleaned up the kerosene from the table top, aired out the cabin and turned to fueling No. 80.
Which was accomplished in an incident-free fashion.
Fueling Winner: Dietz No.80
With the candidates ready for action, it was time for the illumination elimination round. Time to introduce the incumbent to the festivities, the $2 LED lamp that hangs over the table, affectionately known as the " UFO Light"
Here's UFO in action:
Here is how a copy of Good Old Boat looks under the light cast by UFO. Lots of illumination, but lots of glare as well.
That is the current cabin lighting standard aboard. Let's see how our competitors compare.
With some fiddling, with both hands as the globe refused to stay raised thanks to the poor fit of the lifting bail, World Famous was persuaded to light, and with further fiddling, encouraged not to smoke (at least not until it's 18 years old and/or no longer resides in our house).
Illumination was provided, but, like every other aspect of this lamp, it was disappointing.
One can see that there is a magazine in front of them, one can discern that there are photos, one can read the title, but beyond that, gathering information from the page is a struggle. Illumination was spotty, with shadows and flickers
I briefly suspended the test to trim the flickering wick and wash the soot off the globe, hoping to increase the output.
The result?
Um, yeah.... no.
Right then, let's see what No. 80 brings to the table.
Definitely easier to light, requiring only one hand. Lift the globe, lock the bail, set the wick, strike a match, trim the wick, lower the globe, done.
The result?
Usable illumination. Warmer, brighter, over a larger area with no shadows or flickering. Not nearly as bright as UFO but easier on the eyes and bug-free!
Illumination winner: Dietz No. 80
Further testing in the cockpit on our last sail of the season earned compliments from Jack and Melanie on how well No.80 lit the cockpit, with none of the breeze induced flickering and relighting as was often the case with citronella candles, and no wax on the cockpit sole.
I think we might have a winner, with some improvement to the plan. A second lantern is needed to fully light the cabin, and lighting the v-berth with a lantern this size isn't gonna work, so there is no choice in retaining some LED lighting.
The "cozy" factor is not to be underestimated, however, and the consistent response is how much "nicer" the lantern light feels compared to the electric alternative.
We're gonna give it a long term test next season, and we'll let you know how it goes.


Subscribe to:
Posts (Atom)


