A reader wrote into Practical Sailor that his LifeSling had basically fallen apart, the result of UV exposure. The blue webbing straps tore under hand pressure (a write up in PS will certainly be forthcoming). The age was uncertain (probably more than 20 years) and I believe it may have been stored upside down, since the straps should be on the bottom, completely protected from UV.
But the other issue is that the LifeSling cases are notoriously UV sensitive, or rather parts of them are. I bet the failed LifeSling was in a failed cover. The coated polyester itself is pretty durable, but the stitching goes and all of the Velcro fastenings go at about year 5-10, depending on the latitude and whether it sits on the rail year-round, like mine does.
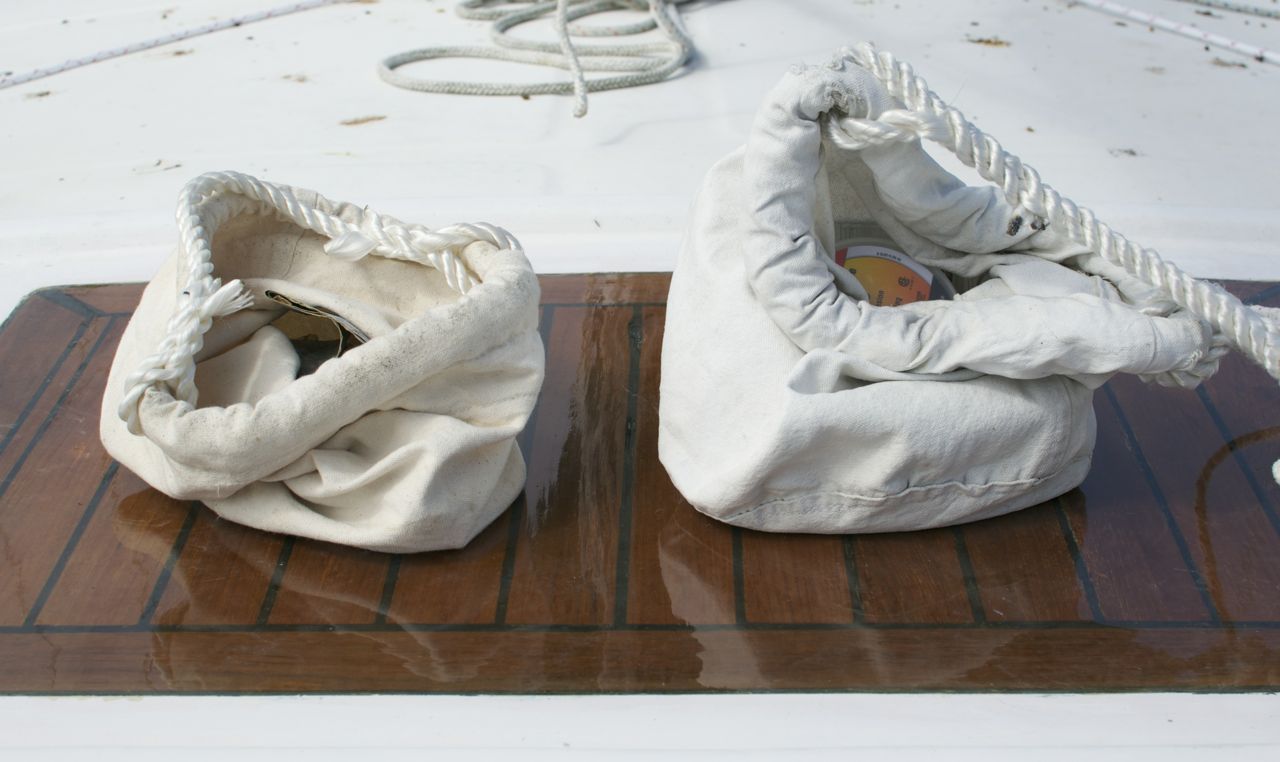
Packing. Packed according to the instructions, all of the critical parts are well protected. The line (VERY vulnerable is in a tube in the center, with the sling over it; triple protection. After 19 years, mine is still pristine. The tail of the rope that attached to the stanchion base is covered with webbing. Although the webbing is sunburned, the rope is fine.
I cut a section open to look. Note that there are a few failed strands on the lower left, where sun must have peaked in. Polypropylene is touchy stuff.
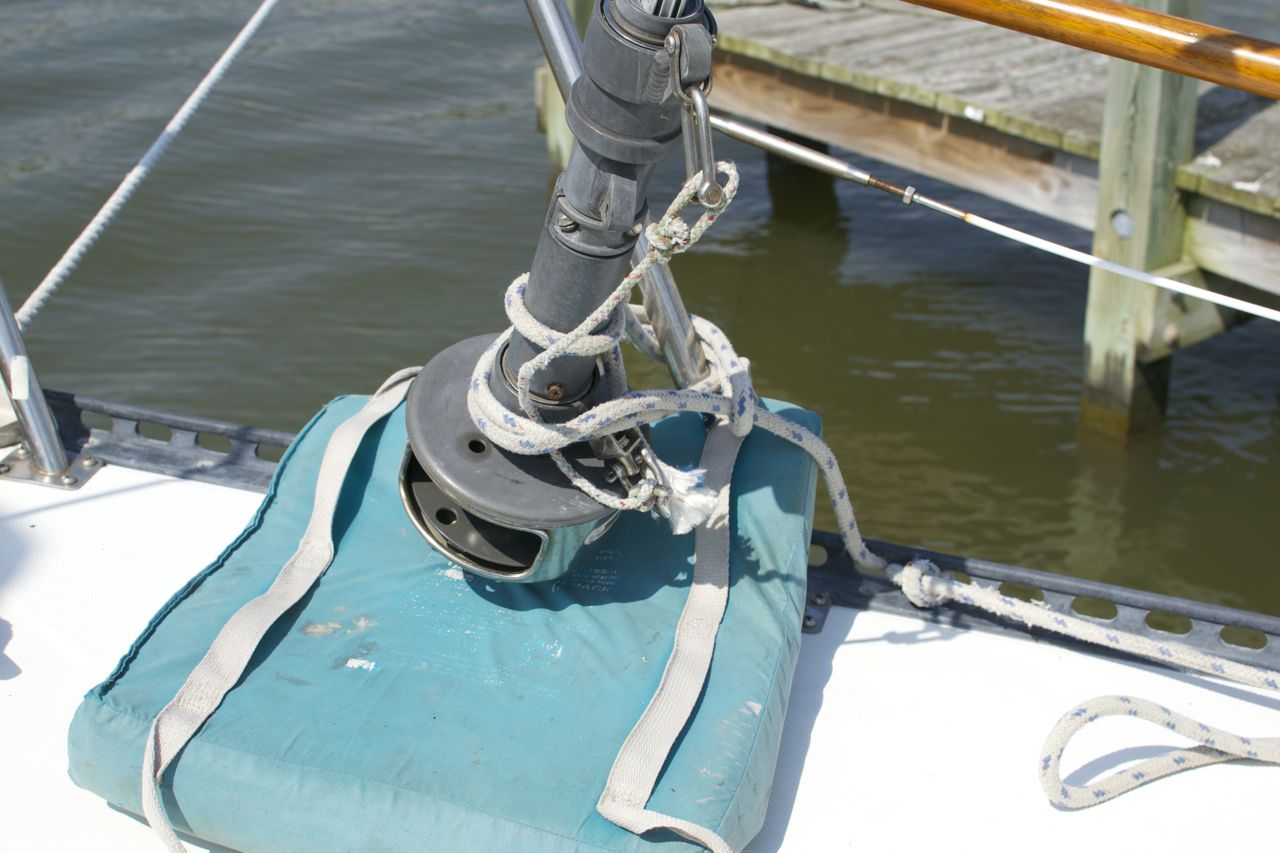
Velcro Top Closure. I dislike the UV vulnerability of Velcro, so I replaced it with a tubular webbing and pin system, something like a door hinge. Just pull the red flag. This endured for 10 years without damage, so I left it alone this time. Durable, secure, and fast.
Velcro Ties. Really, a stupid application, when a knot will do better and last forever. Again, the Velcro fails in 5-10 years, I cut the remaining stitches, attached a 2" x 4" webbing strip on the inside with Sikaflex, a 4" circle of Sunbrella on the outside with Sikaflex, and punched a pair of holes. I was going to install grometts, but the laminate was too thick, about 1/8", so I simply threaded webbing.
Stitiching. Some of the seams had gone at 10 years, where they rubbed on the rail. I hemstitched them 10 years ago using whipping twine, and they are still fine.
Paint. I had some white vinyl inflatable paint left over, so after a good TSP scrubbing I painted the whole thing to provide some sunscreen (I masked off the instructions--that section seemed OK and has no seams or stress points). I have used Kilz primer plus house paint on projects like this before, through, so don't run out and by special paint.
I will 20 minutes work I should get another 10 years from the cover. Since the initial cover needed repairs at 10 years, I'm OK with that.
Showing posts with label safety. Show all posts
Showing posts with label safety. Show all posts
Tuesday, August 9, 2016
Renovating a LifeSling
Once again, Drew over at Sail Delmarva tackles a safety issue with his usual verve:


Tuesday, October 6, 2015
Jacklines
Drew from Sail Delmarva is with us today, with some insightful comments on jacklines:
Vertical Jacklines
Who says they all need to be on the deck? I installed a pair of vertical lines to deflect the genoa sheets away from the mast-mounted halyard winches (one on each side), around which they loved to foul during tacks. They are anchored to strong points and the line is 1/4-inch Dyneema, selected because I had it and it was non-stretch. At first I was concerned that the deflectors would be in the way, but I soon realized that they were handy holds and clipping points when working at the mast, much better than clipping to the mast base. I can even lean on the tether in rough weather, allowing for better 2-hand work.
Jackline and Lifelines
It is often said that using the lifelines as handholds is a bad habit. While there is truth to this on a monohull (the leverage on the stanchion bases is cruel when hauling to one side from the deck of a leaner), I disagree for catamarans. The difference is that cats do not heel and that most of the motion is vertical (it doesn't show in pictures, but cat sailors know they get light on their feet when pitching up wind). Additionally, my jacklines are relatively high at the beam, since they are secured to the hard top. Thus, the safest way to traverse the side decks between the hard top and the tramp is to hold the lifeline in one hand, the jackline in the other, and pull up. Not to the side, not push down, but pull straight up such that your feet are held firmly on the deck. There is little bending stress on the stanchions because the load is vertical, and the support is steady rather than surging roughly as the boat moves. Intuitive to a lifelong climber, something may lubbers and sailors have to be shown.
Probably just a catamaran thing.


Tuesday, May 19, 2015
Steaming Lamp/Deck Lamp Guard
Over aboard s/v Cay of Sea, Rick avoids paying the marine tax by fabricating his own guard for his steaming lamp:
Okay, I’ll admit that I don’t know exactly what to call this thing, but I know what I want it to do – what I hope it will do, if it is robust enough to do so. First, some background:
Two years ago my deck lamp was knocked out of the fixture, including the lens (I think), by an errant halyard slap in high winds. Well, that wouldn’t be too bad, except that I had just replaced it. It’s one of those two-pronged halogen 20 watt lamps, and they are sort of pricey. Not only that, but I hate going up the mast. Now I’d have to do it again! There has to be a better system. I imagined at the point, that some sort of cage of rods would be an adequate protection against another halyard slap. I’ve seen them on other boats, but I’ve never seen one advertised for sale, so I have no idea of availability or price. But how hard can it be to make something like that? While the mast is still horizontal and I have time before launch, I thought I would give it a try. I should be able to come up with something.
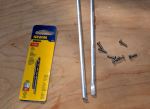
I went to the hardware store today to look for materials, and came home with 36″ of 1/8″ aluminum rod, eight stainless #6 screws, and a drill bit and tap for #6 screws.
Back in the shop I cut the rod in half and flattened the ends of the two pieces with a 3-pound maul against my closed vice, then drilled holes in the ends for the screws. I used a mill file to clean up the sharp edges.
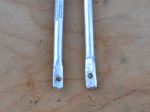
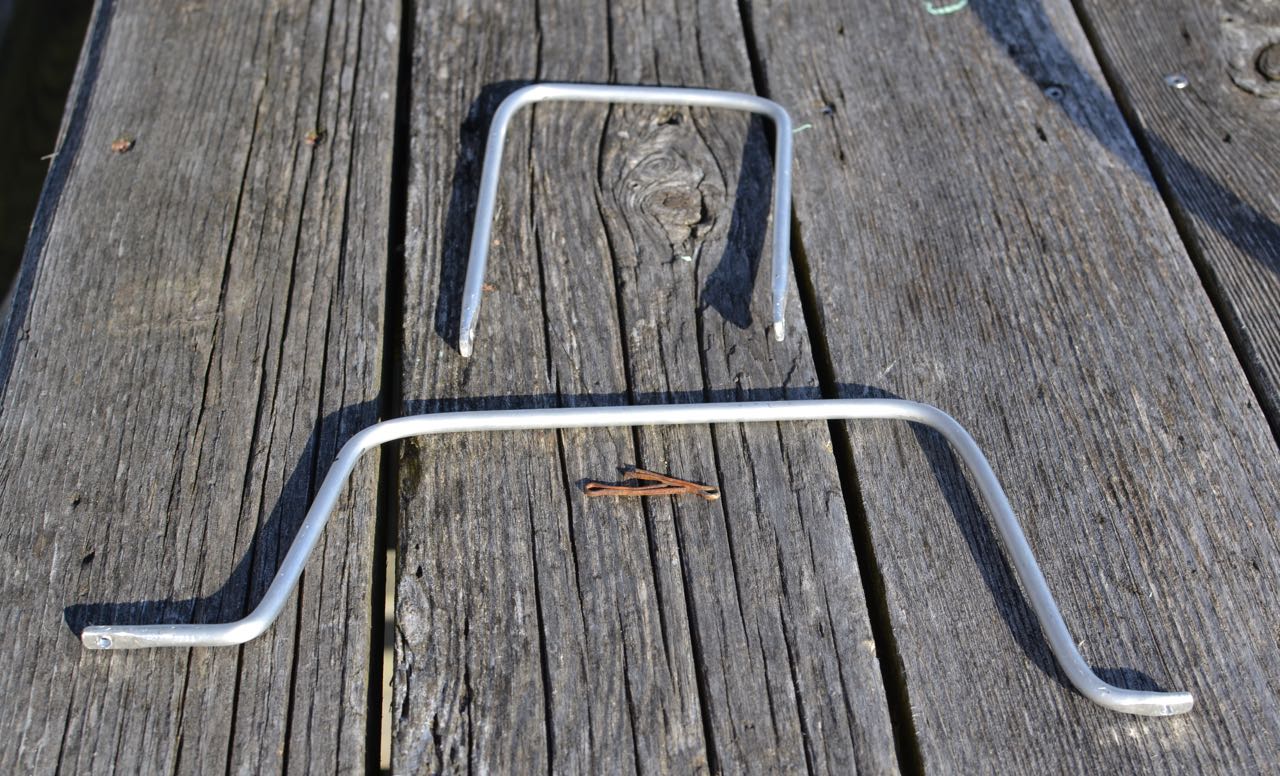
Back at the boat, I estimated the lengths, attachments points, and the approximate locations of the bends. Without a vice on site, I found convenient places to capture one end of the rod while bending the appropriate place against a leverage point. This is what I came up with:
I managed to get one leg of the smaller piece longer than the other. Doesn’t really make a difference. It attached to the mast without complication, but it does bother me that the legs are not exactly the same length. . .
I located the larger piece on the mast first and marked the attachment points. Using a steel punch, I made a small divot point in the mast at each screw hole location to get a clean start with the drill bit. Carefully locating the drill bit, I used significant pressure and slow speed to start the hole (the mast is a curved section, remember? Hard to drill a hole in something like that without having the bit walk all over the place). Each hole started and finished cleanly. I cut threads into each hole with the tap, then ran a screw into it to ensure clean threads. If you never tapped a hole, it’s an interesting process. Everything is extremely low tech, except for the tap itself – which is hardened steel, tapered at the point, with the cutting threads beginning immediately. I use a small adjustable wrench to turn the tap a quarter turn at a time as I guide it into the hole as perfectly perpendicular as possible. It’s helpful to back the tap out a quarter turn after every complete turn or so, to clean the metal debris from the cutting threads.
I marked, drilled, and tapped for the second (port-starboard) piece next, then mounted both pieces with screws well bedded in TefGel. TefGel is a non-conductive corrosion inhibitor, and it allows me to use stainless fasteners into an aluminum mast without threat of galvanic corrosion. Every place I’ve used it on the mast has been completely corrosion-free since I refit the mast eight years ago.
In case you’re wondering, sheet metal screws, or self-tapping screws are an inappropriate fastener for this application. In fact, anything screwed into the mast should be done with machine screws. They have much finer thread than self-tapping screws, and hold much more securely. I like what Don Casey says about sheet metal screws in a mast: “I’ve never seen a sheet metal mast . . . ”
Point taken.
After fitting both pieces, I linked them with a zip tie, reasoning that having them linked together would give them a bit more rigidity (4 attachment points, vs 2).
Here’s the finished product:
Nice rounded features should allow halyards to slide right off and past the light. Cost? About $10, including the drill bit/tap set. We’ll see if it does what I hope it will. Although the rod is quite bend-resistant, the fasteners could be the weak point. As long as they don’t get wobbly, I think it will be fine. They are torqued as tight a I dare and seem quite sturdy, although it may be smart to install lock washers under the fastener heads. Any opinions out there about this?


Thursday, February 5, 2015
Dry Suit. The Ulimate in Foul Weather and Survival Gear?
Now here is a great idea from Drew over at Sail Delmarva - It might not keep you warm enough in the Bering Sea, but then how many of us are sailing there? And as Drew points out, the safety gear you are wearing beats the heck out of the best safety gear in the world stored in a locker...
Better than a Survival suit? That is the question Practical Sailor Blog asked this month. Conventional survival suits are so ungainly that sailing is impossible and they are not donned until the boat is headed down, often too late. A dry suit, on the other hand, offers the same or better agility and livability than conventional foul weather gear, with complete cold water protection (except for the head and hands). Since it can be worn while sailing, it offers protection you are more likely to have on.
But that isn't why I bought mine. Kayaking is one of my favorite activities, and once the water temperature drops below 60F, it become more and more difficult to dress safely. While I have never capsized (other than white water) on open water, there is always a hypothermia risk. Additionally, I think the dry suit will make reboarding from the water easier, because you avoid heavy, soaked clothing. Instead, you gain significant all-over buoyancy.
A favorite feature, and one that makes this suit (Ocean Rodeo Ignite) particularly suitable for sailors, is the standby mode. The pants are supported by suspenders and fit well, with attached socks. As shown in the above photo, the pants can be pulled up and the jacket zipped without put the head through the neck seal and zipping in, giving great ventilation. Converting to full seal takes only moments.
There are wrist seal, lotsa pockets, and a fly. The fabric is like a heavy duty 3-ply Gore Tex and seem very durable. The entry zipper is across the shoulders and doable alone (many drysuits require help). They are cut for athletic builds; if you've been hitting the pasta a bit too much, have very large shoulders, or shoulder mobility problems, go up a size; I am near the upper limit of height and weight for the medium (5'8" x 165#) and the fit was spot-on with my typical cool weather dress (long johns, fleece pants, shirt plus fleece sweater). With 2 thin fleece layers, 32F water is pretty tolerable (but the fit through the shoulders is more snug), and I've even done a little bottom cleaning like that. However, I strongly recommend trying the suit with the layers you intend to wear. Fortunately, getting out is easier than getting in, so you won't get stuck!
Note on trimming seals: the wrist and neck seals on dry suits tend to be one-size-fits-all, which is to say they are probably too tight unless you are built like a stick. In fact, over tight neck seals can inhibit blood flow to the head, which is bad. I found the wrist seals fine, but the neck seal was miserable. Trim one ring at a time with very sharp scissors, leaving no jagged areas that could stat tears, until the seal is snug but acceptable, your adam's apple can move, and blood flow seems normal. Divers keep them tighter than kayakers and sailors should. Seals are replaceable, but with care last a long time.
And when you peel it off... You're dry!

Tuesday, November 25, 2014
Preparations for Ascending the Mast
Climbing a mast is arguably the most dangerous thing you can do on a boat. Before you take on this task, you should go over the task(s) to be accomplished at altitude and make detailed preparations. Rick on s/v Cay of Sea shows us how:
I installed new deck hardware back in May of this year in preparation for a rigging project. The original idea was to ascend the rig, drop the headstay to the deck, build a new stay then climb the mast again and install it. But there were things to do before I would go up the mast, and one of them was replace the worn out deck hardware through which the line passes.
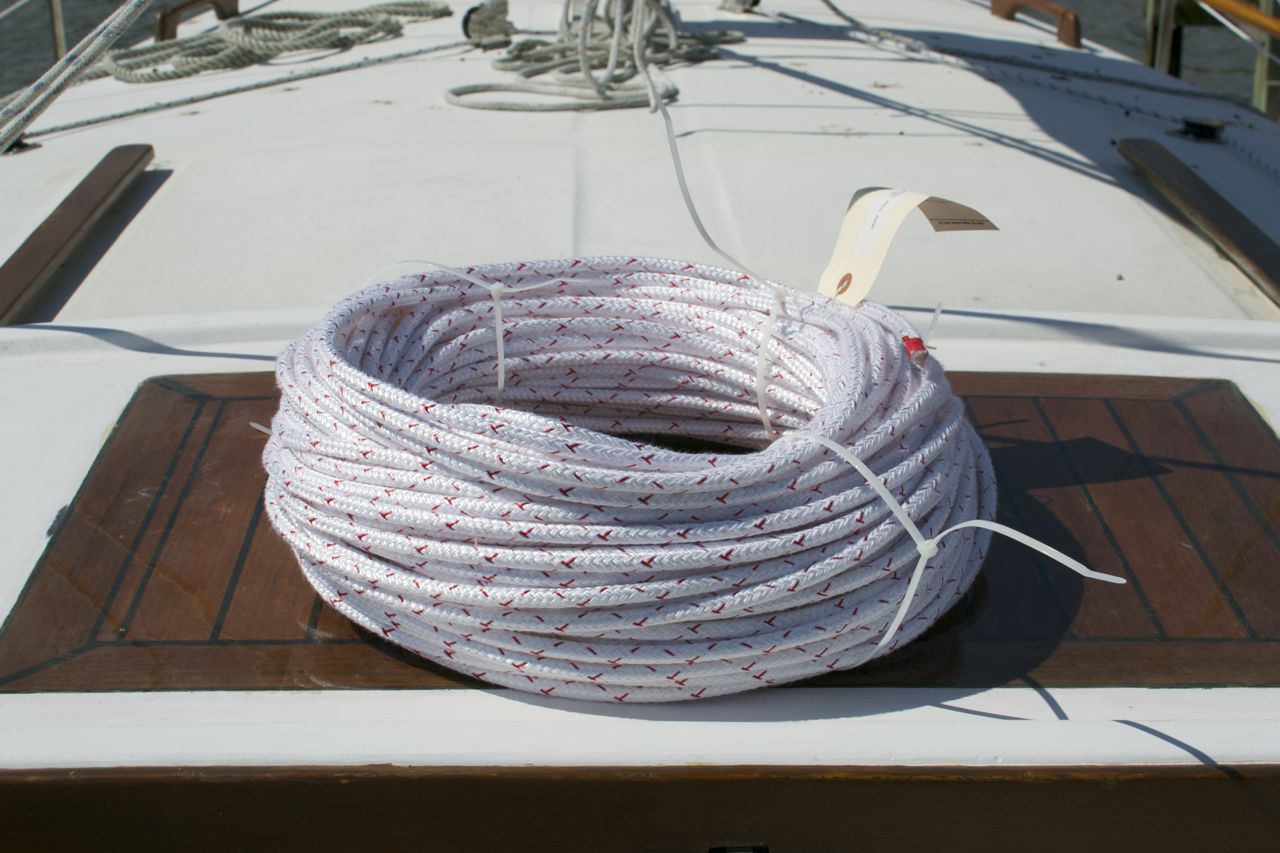
The second item in preparation was to replace the halyards. I researched the ageing characteristics of the StaSet X line that I use for halyards, and it was obvious that the line was plenty strong, even after 7 years’ service, to support my weight. But I wanted a comfort factor that the old line wasn’t going to provide. New line for halyards was called for. The final crippling of my standing rigging as a result of having the steel wire come out of the spreaders kicked me out of procrastination mode, and I ordered the line. About the same time, I noticed an area of chafe where the main halyard passes over the masthead sheave. So it was time to replace halyards, and now I have no guilt over being wimpy about going up the rig with new line.
300 feet of 5/16 Sta Set X.
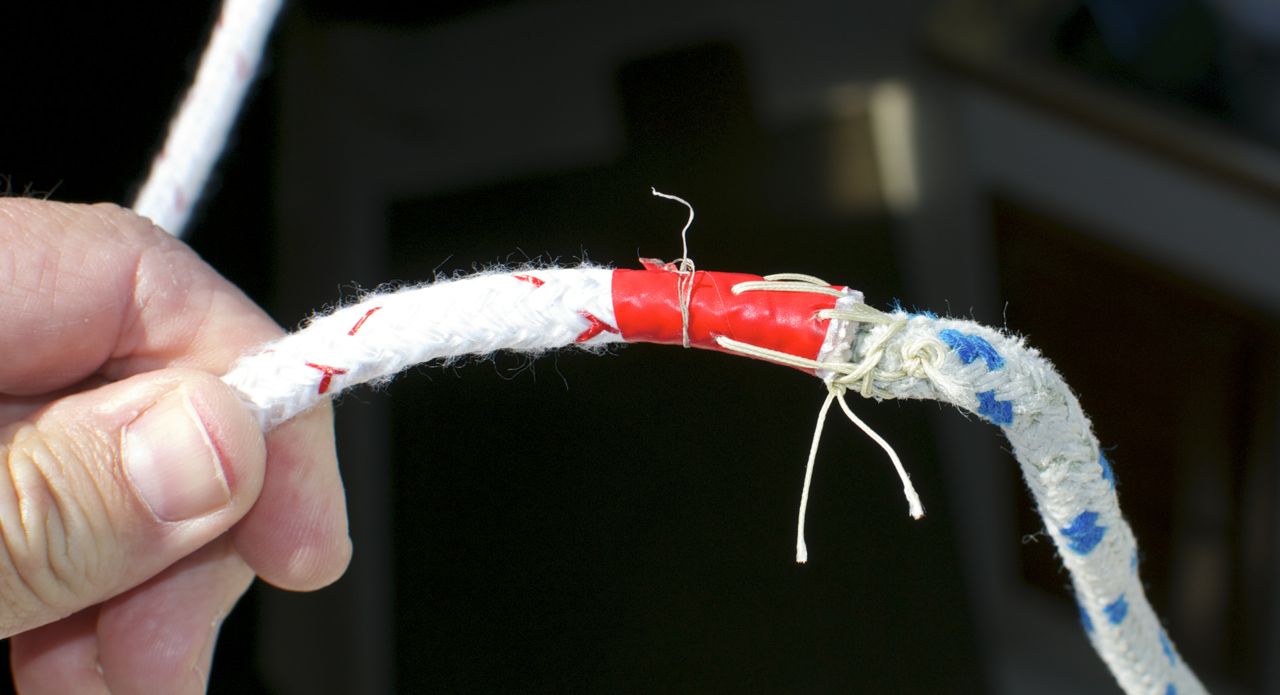
I ran the new line up the mast today. I sewed the new line and old line together at the ends, then covered the seam with duct tape, so it wouldn’t catch in the sheaves at the masthead. When connected and smooth, I simply pulled on the old line until I had new line in my hands.
Tools for installing new halyards: sail repair needle, heavy nylon “squidding line,” and duct tape. A pocket knife is useful too.
Line ends sewn together. This makes a strong attachment that won’t let go. I wouldn’t trust tape alone.
Seam covered with duct tape.
Tomorrow is the day, at least for Part I. I spent an hour today figuring out exactly what I’m going to do up there, organizing supplies, tools, and procedures.
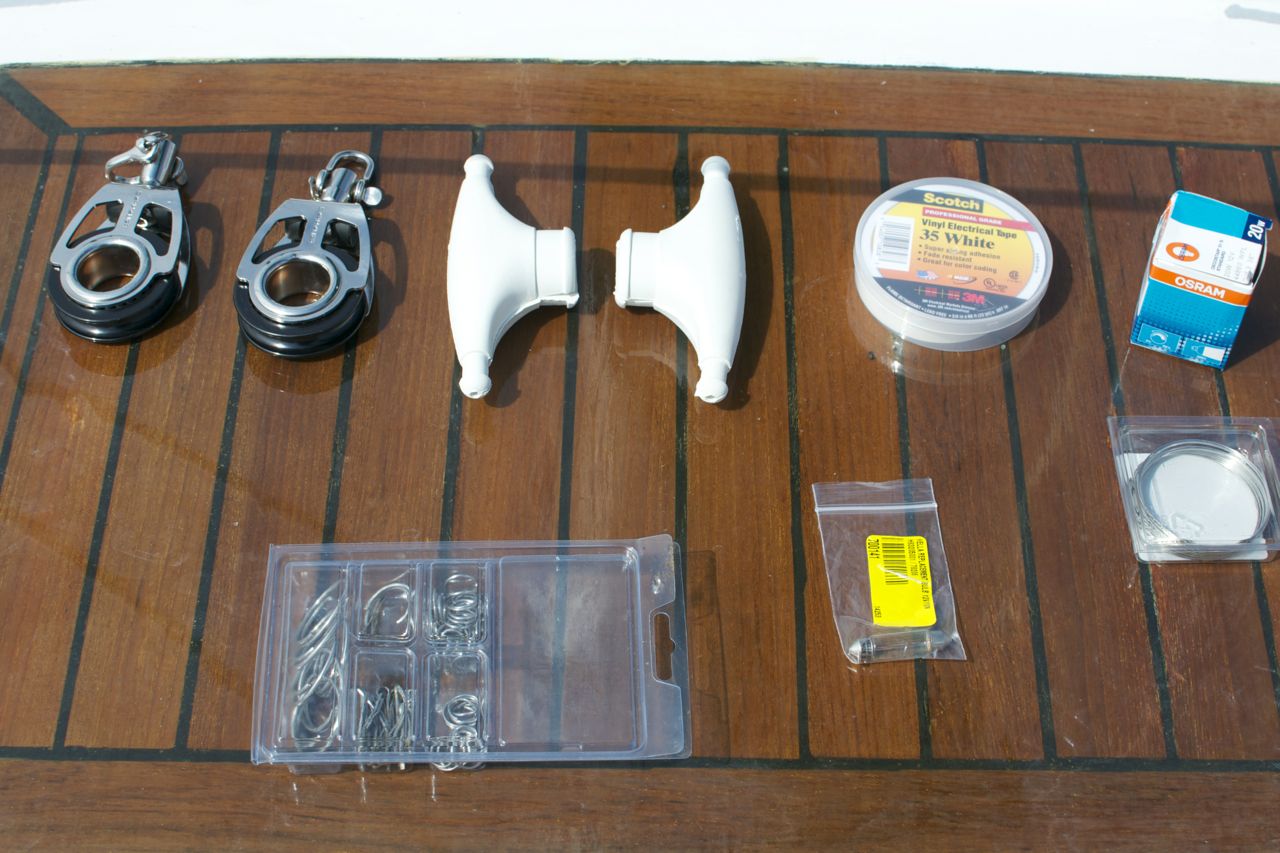
Supplies
Seizing wire, spreader boots, rigging tape, ring and split pins, deck and steaming bulb, 2 halyards, 2 new blocks.
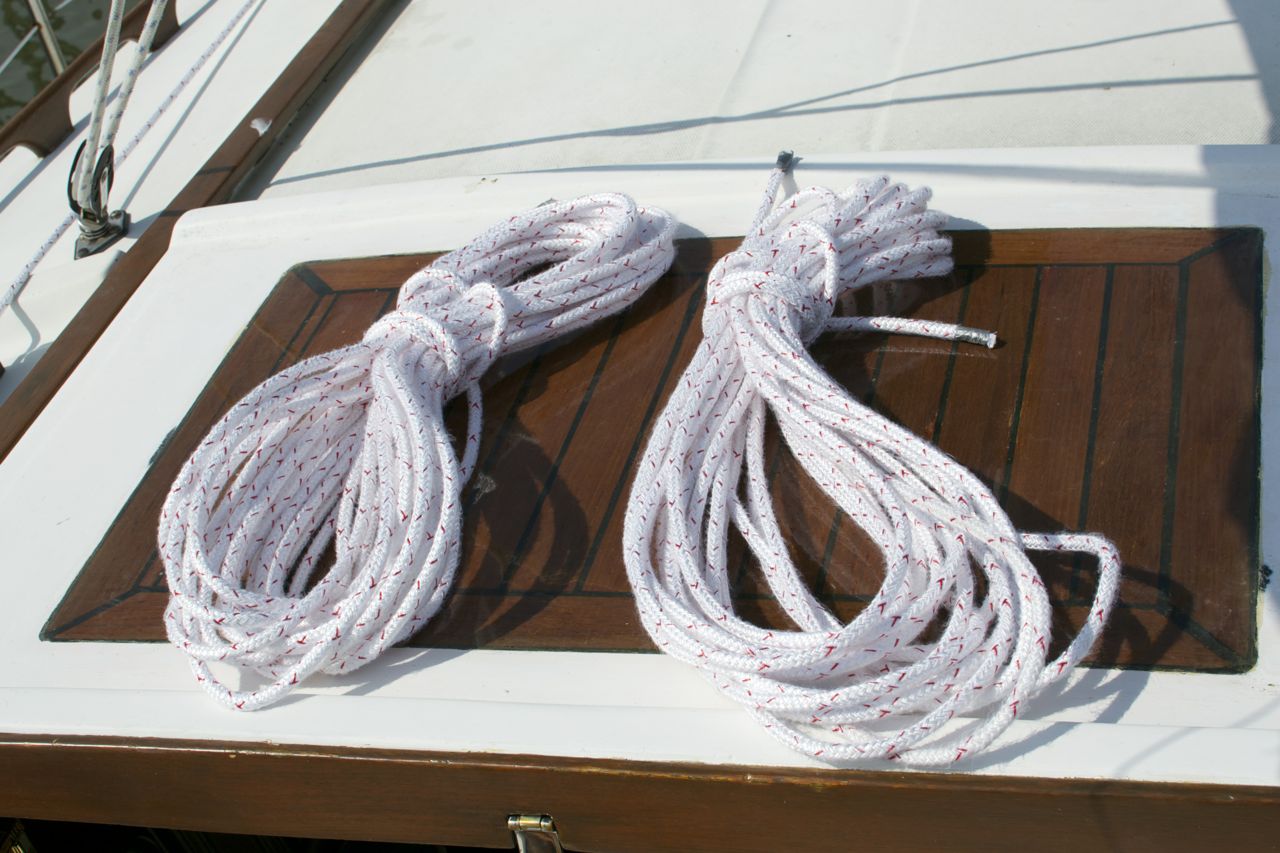
New 70′ halyards. Had to measure 4 times before I started getting the same length of line consistently. Then cut entire length (140′) in half.
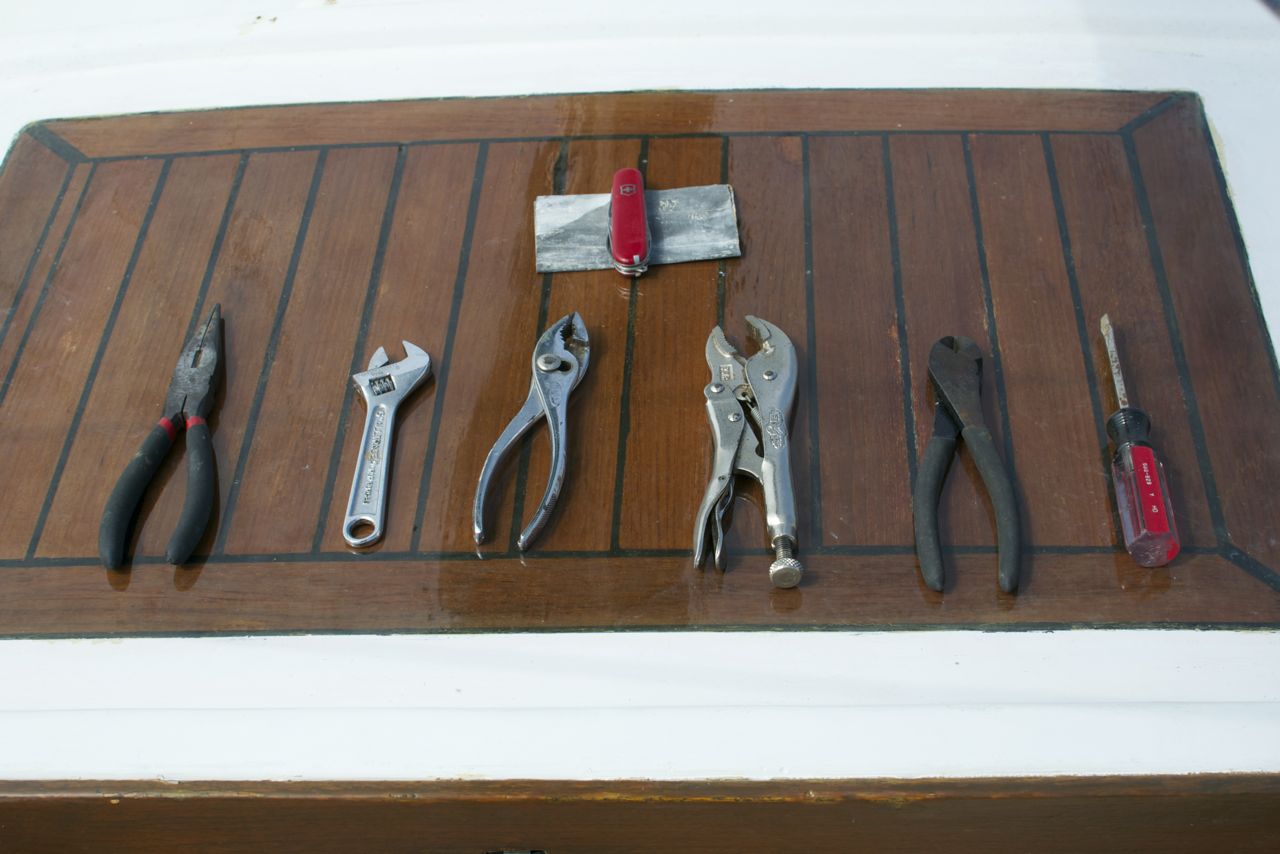
Tools
Essential tools. Piece of material under the pocket knife is emery cloth for polishing 12vdc light contacts.
Canvas buckets to the rescue: Tool bag on left, supplies on right.
Order of Work
2. At Steaming/Deck Light
- At spreaders:re-slot cap shrouds and wire/seize in place
- install spreader boots
3. At masthead
- Replace bulbs and test while aloft
4. Descend to spreaders and inspect all fittings.
- Attach new blocks, tape shackles/circular retaining pins
- Rove new line through blocks.
- Use one new line as temporary headstay
- Attach other new halyard to harness as safety line (another deck helper tends this line)
- un-attach old spin halyard
- un-attach furler/headstay and lower to deck
- Check fit of old (original) stay to hardware for match
- pin size conflict at stemhead leaves doubt that masthead hardware matches
- Visually inspect all fittings
Already done
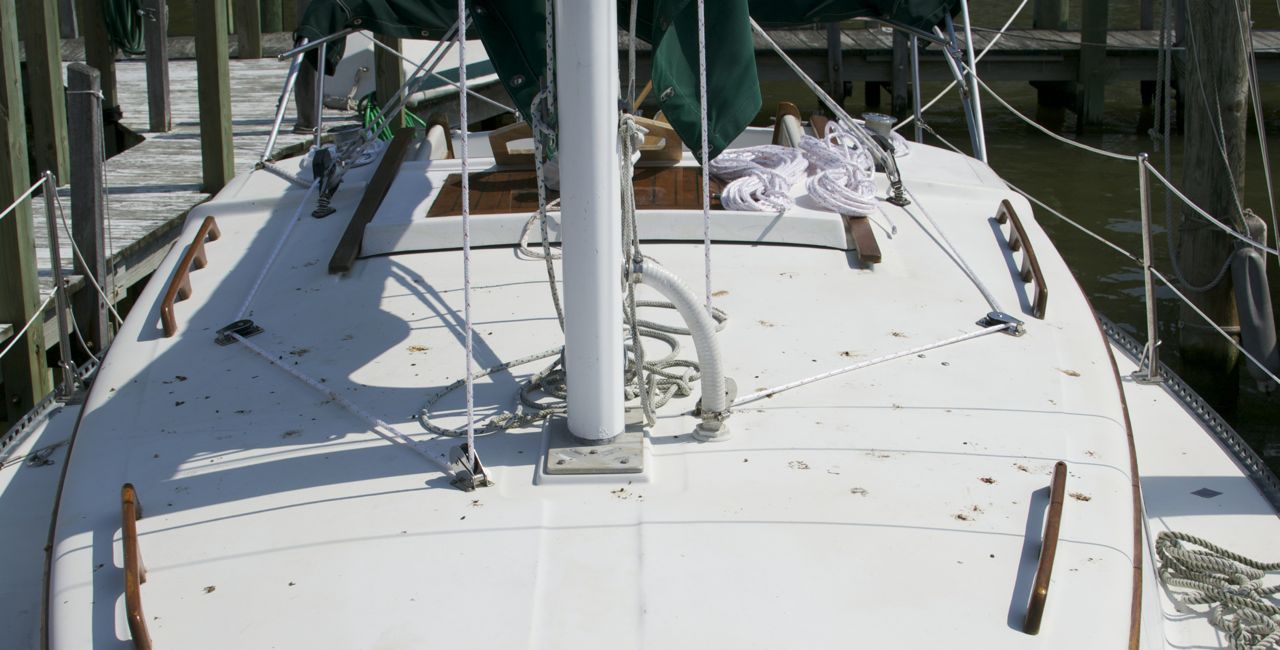
Un-attached furler from stemhead, and secured to rail. Attached old spin halyard to bow pulpit for temporary headstay.
Old furler secured to pulput, removed from stem.
Final Photo – is this where we got the term “poop deck?” Birds have been doing me wrong!


Tuesday, August 12, 2014
Battery Box
Batteries are dangerous creatures. They are heavy, they are full of corrosive and pretty concentrated sulphuric acid, and they hold a lot of energy. One of the things one doesn't want is for his/her batteries to be jumping around loose down there in the bilge in a seaway. Come along for the ride as Rick on s/v Cay of Sea constructs a restraining container for his batteries:
This seemed like it should be categorized as a small project, but it took over a week to complete, with lots of little steps to get there. It didn’t help that I had to build the battery box twice.
I filled the inside right angles with thickened epoxy to ease the 90 degree transition – the glass accepts this “fillet” better than a hard angle. That sentence sounds so straightforward: “I filled the inside. . .” & etc.. In reality, it was a mess. I had cut a piece of scrap plastic as a tool for spreading the epoxy into the angles, and it did help some. However, by the time I had filled one 90 degree angle, my hands were covered with goo, and it was just damage control for rest of this phase. Fortunately, I had remembered my latex gloves, and clean-up was as easy as stripping them off.
I fitted the top and drilled one hole for a stud (or ‘hanger bolt’ as they call them in the hardware store). I drilled through the top and into the box in one action. Then screwed the stud into the box, placed the top on it, and drilled the other stud holes having the top fixed in place by the first stud.
Next step trial fitting the box in place. I emptied the starboard cockpit locker, removed the old batteries, and brought the new box down to position. It passed through the locker opening with no problem, once I realized that I couldn’t fit it and me through the opening at the same time. What I learned through the trial fitting was that the designated space wasn’t a perfect angle. There was an extra support post in the corner, which made the installation a little more complicated. To have the box sit level and not rock from corner to corner, I installed two shims on the bottom.
Between the bump in the left-hand corner, and the curvature of the hull on the right, the box wobbled to its opposite corners The shims fixed that. Next step was let epoxy cure for setting the shims, then paint Bilge Coat grey.
Paint and epoxy cured, I drilled holes in the bulkheads for installation and fitted it in the space. There was a small problem with the fit of the top since I had to cant the box slightly. A few judicious cuts relieve the top fit, though I had to abandon one of the retaining studs.
Finally, the box was bolted into place, top trimmed and ready to go.
I installed the batteries, and was pleased with the fit.
I think ABYC specifies that batteries should not have more than an inch to move in any direction. This installation allows a little more than an inch, but I think it’s fine. And so much better than plastic battery boxes sitting loose in the locker! Here are the final photos with top installed.


Thursday, July 10, 2014
Is Your Tether Quick Release Actually Quick Release?
With his typically engineering analysis, Drew over at Sail Delmarva asks some hard questions about tethers:
This tether was found by rescue workers at the Wing Nuts accident site; there were several fatalities.
Where do you clip the "spare" leg of a 2-leg tether? To the harness ring, or course, if there is no loop on the tether... and there is not. Pull the quick release and you are still attached by the spare leg. A potentially fatal design error.
This is dangerous even on deck--if the tether gets wrapped around a sheet or guy he has 2 clips to release to get free. Not good.
And this points a scary trend, where equipment companies design to standards but don't actually test the gear in the field. They give the gear to sailors to use, but that is hardly the same as structured testing where all likely use scenarios are systematically tested.
The solution? some brands are adding a ring or loop near the harness end. If you make your own, leaving the loop long enough will do. Or in my case, I simply clipped in a small biner to give myself a parking space.
The typical vendor response? You should have a knife. Please. Why not say I should fall off the boat?
(No, I don't used quick-release harness end clips. I single hand and can't imagine a senario where releasing will leave me better off. On the other hand, I can imaging the quick-release letting go or me clipping it incorrectly. My compromise. I still prefer to clip to the "parking space" and have only one clip on the harness.)


Tuesday, June 24, 2014
New Battery Box
Batteries are heavy. An improperly secured battery can become a dangerous missile in a seaway, or Heaven forbid, a rollover. Rick over on s/v Cay of Sea knows this...
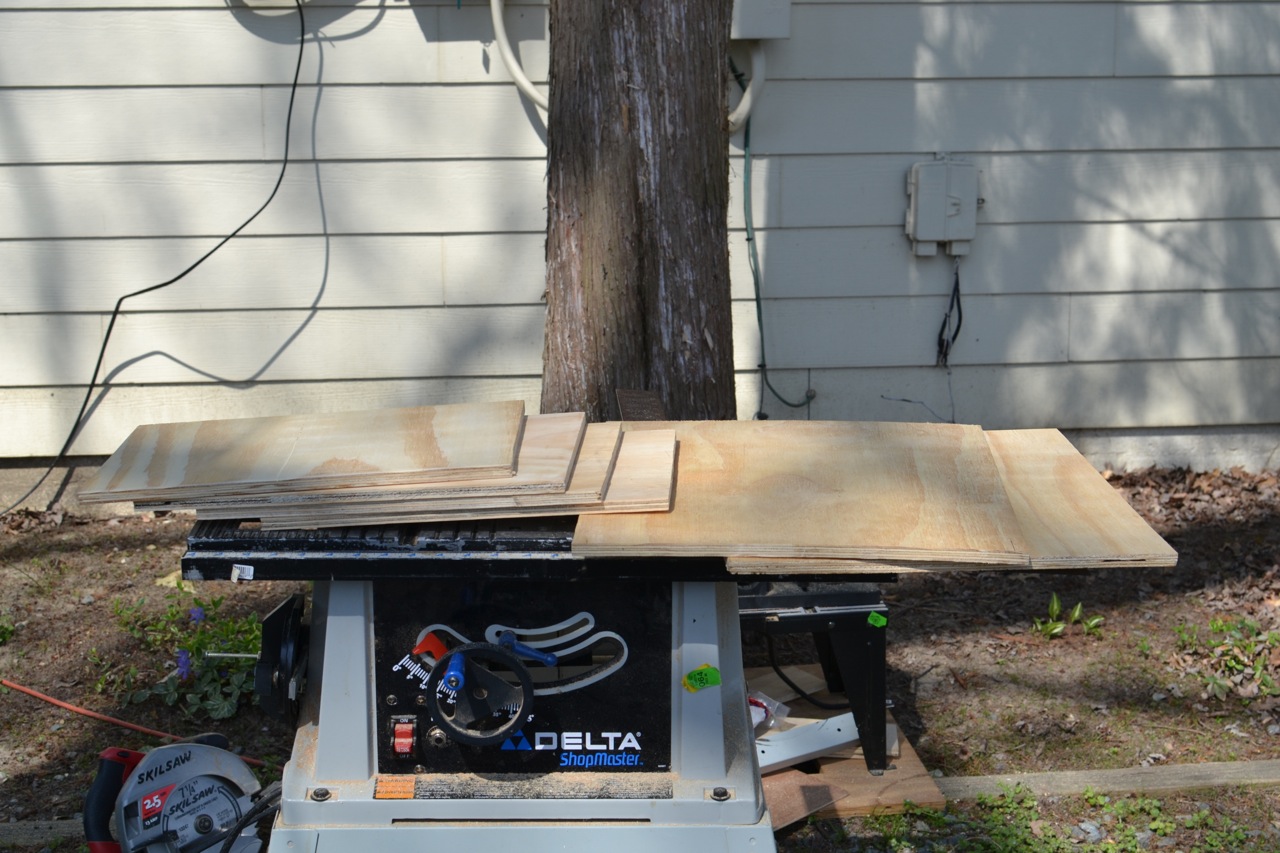
Sometimes I think I should rename this blog “stupid ways I’ve cut plywood” or “How to Make Sawdust.” It often takes me one complete failure in order to understand how to do a project. I amaze myself.[I like the attention to detail: Rounding the corners is a critical step to get the fiberglass cloth to lay tightly around them. -Ed.]
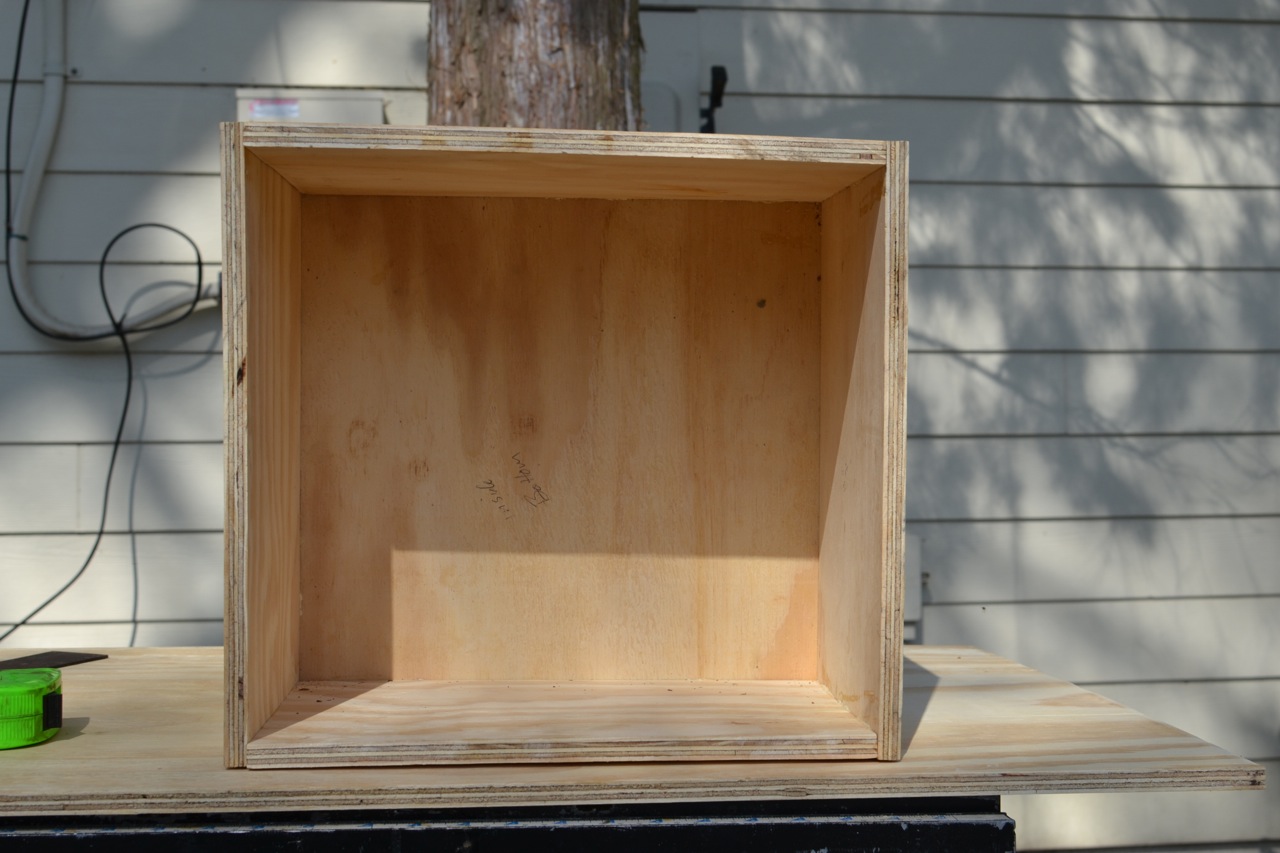
Anyway, I built a really nice plywood battery box for my new (to me) batteries. My boat neighbor was gifted a couple of gel batteries last year, and he in turn gave me his not-very-old group 29 Interstate deep-cycle batteries (two of them). It was a timely gift, because I was planning to buy a new set of batteries in very short order, and to build a new box for them. I currently have group 24 batteries – unaltered since I bought the boat 10.5 years ago – sitting loose in plastic boxes with the covers held on by a shock cord. These aren’t the original batteries – the way they are installed is original. I’ve never liked it, but didn’t change because. . . um, I just didn’t. Now that it looks like we might take longer, more adventurous trips, it seems important that the batteries are installed properly. To that end, I built this box:
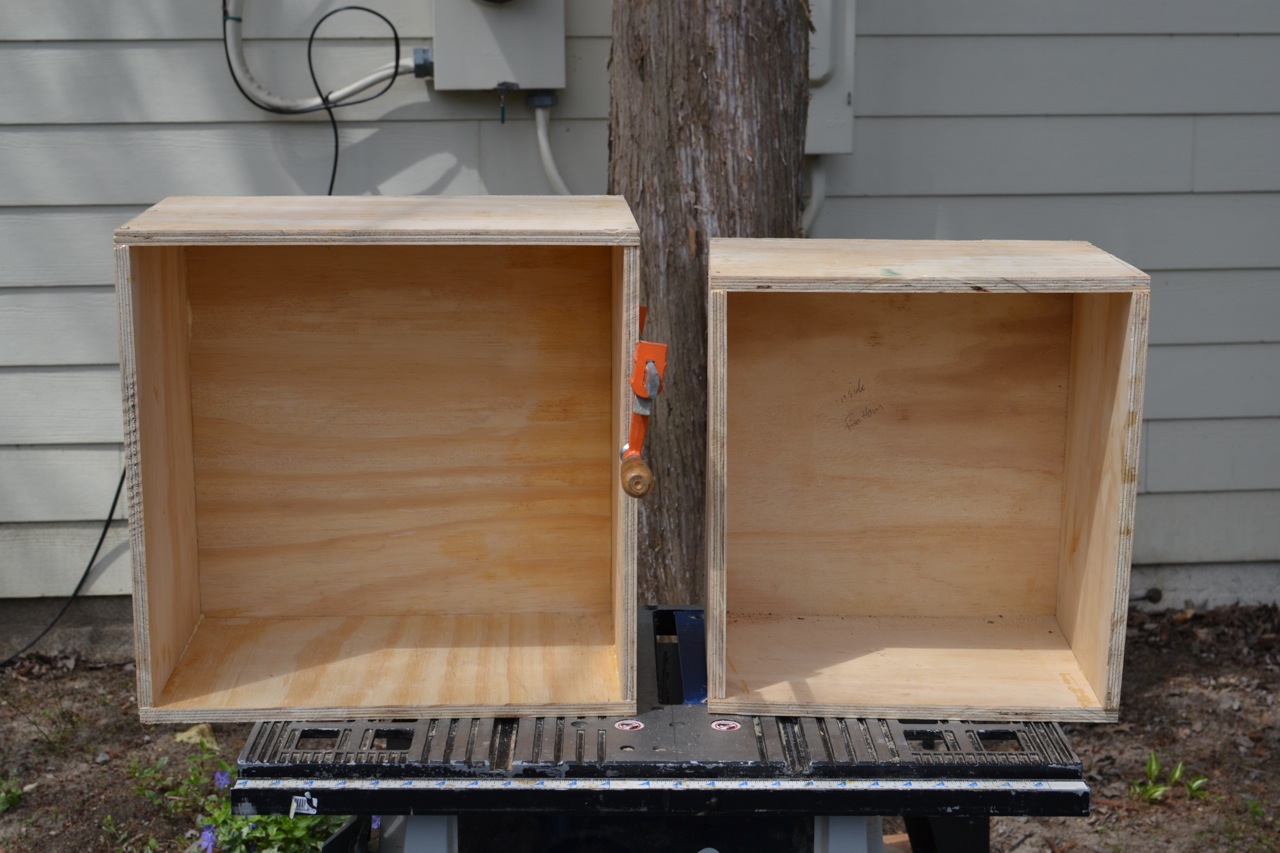
No, it is not marine ply. I don’t have a truck with which to haul a full sheet of plywood, and I don’t want to pay $95 a sheet for it anyway. I’ll epoxy and glass this box, and it will be fine. Well, not this box. You see, it’s too small. Group 29s won’t fit in there, even though I measured carefully. How did this happen, you ask? Well, never mind. Suffice it to say, that I was under the impression that the box had to be sized just so, and I indulged in a folly of false economy. But it’s a nice box. For something. . .
I bought more plywood this morning (Home Depot sells 2×4 pieces and they fit in the back of my car), cut it correctly (this time – numerous mistakes on the first box), and put it together this morning. By lunch time, I was letting the glue cure.
I’ll glass the box inside and out in the near future, install studs along the top edge to secure the top (with wing nuts), cut out wire relief slots, and it will be ready to install. It will be bolted to two adjacent bulkheads in the starboard cockpit locker, painted Bilgecoat-grey, and filled with batteries.


Thursday, May 15, 2014
Wire Cable vs. Stanchions
Over at Sail Delmarva Drew puts the test equipment he has built to work investigating the ability of various recommended lifeline materials to resist chafe thru the stanchions...
I've been investigating chafe protection and Amsteel as it relates to lifeline replacement. Certainly, wire cable is the gold standard. But now I'm not so sure....
After an hour of sawing back-and-forth through a 10mm hole in SS tubing, it had eaten a nice groove and built a corresponding burr on the inside:
After 1 hour.
And though the wire did not look very worn, when we flexed just a bit there was a different story....
Also 1 hour. The damage was not apparent until flexed. Most of the broken wires were inside.
How did Amsteel fare, in the same hole? Before the wire created the burr? Much better with very little wear in an hour. Afterwards, no as well, but still the damage was little more serious than that to the stainless cable. Given that I plan to use 1/4 Amsteel, which is nearly twice as strong as the cable to start with, I'm feeling OK. 1/4-inch it is sufficiently strong that even after 10 years in the Chesapeake sun (not so strong as the desert southwest or tropics) it should have equivalent strength, and with proper chafe guards, the strength loss in the holes should be less than wire. Protected from the sun, the pass-troughs may be the strongest part by then.
How does Amsteel like the new hole? Not so bad as you might think and about the same as it like the raw hole, just after I drilled it without deburring. By way of comparison, after the hole was deburred it showed ~ 1/3 this much wear, and if coated with Spinlock RP25, no wear after 2 hours (840 cycles).
After 1 hour on the wire cable gouged hole. About the same as a raw drilled hole, yet much worse than a polished hole.
Alternatively, I tried a dyneema anti-chafe sleeve floating for 3 hours. It could have run for 100 hours without showing wear.
A floating dyneema cover reduces wear to zero.
By way of comparison, this hole wore a polyester line through the cover in 20 seconds and in half in 5 minutes. Amsteel is tough stuff.


Subscribe to:
Posts (Atom)


