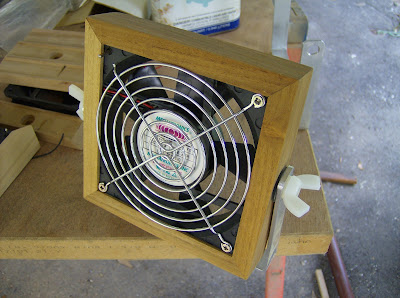
I needed a bunch of fans for the boat. If you have priced these recently you will see they are not cheap, price wise anyway. So I said " I think I'll make my own". Here is how I did it.
Find the fan you would like to use. I had 2 on hand, and found some more on Ebay.
From Update 6-8-2011
Measure it then figure how to mount it. I wanted a nice teak mounting to match the rest of the boat. I also built one with mahogany and sapele wraps. These I used a spray urethane on them. The teak ones I oiled.
So make the wood bits first. I used some scrap to test.
From Update 6-8-2011
The holes are for the swivel bolts and nuts. I used nylon bolts and wing nuts from Lowes and Home Depot. Add the rubber washer to hold it from turning. You do not need to tighten them tight as they hold real well.
From Update 6-8-2011
Glue them in with some epoxy (J-B Weld). Then run thru the router to clean them up.
From Update 6-8-2011
From Update 6-8-2011
Wire in the switch then glue them up. Give them a final sand then oil or add desired finish.
Also make Aluminum brackets.
Clamp available here.
From Update 6-8-2011
From Update 6-8-2011
Finished fan.
From Update 6-8-2011
You could make all the cuts for the wood on a table saw, but I used a router for the channel. Also the switch came from Radio Shack. I put it in one of the screw holes for the grill. Drill a half inch hole opposite to insert the switch. This hole is where the wires will come back out.
Wednesday, June 22, 2011
Man made breeze
Mike of s/v Chalice puts his considerable woodworking skills to the task of adding ventilation using muffin fans:
Labels:
carpentry,
s/v Chalice,
ventilation
Subscribe to:
Post Comments (Atom)


No comments:
Post a Comment