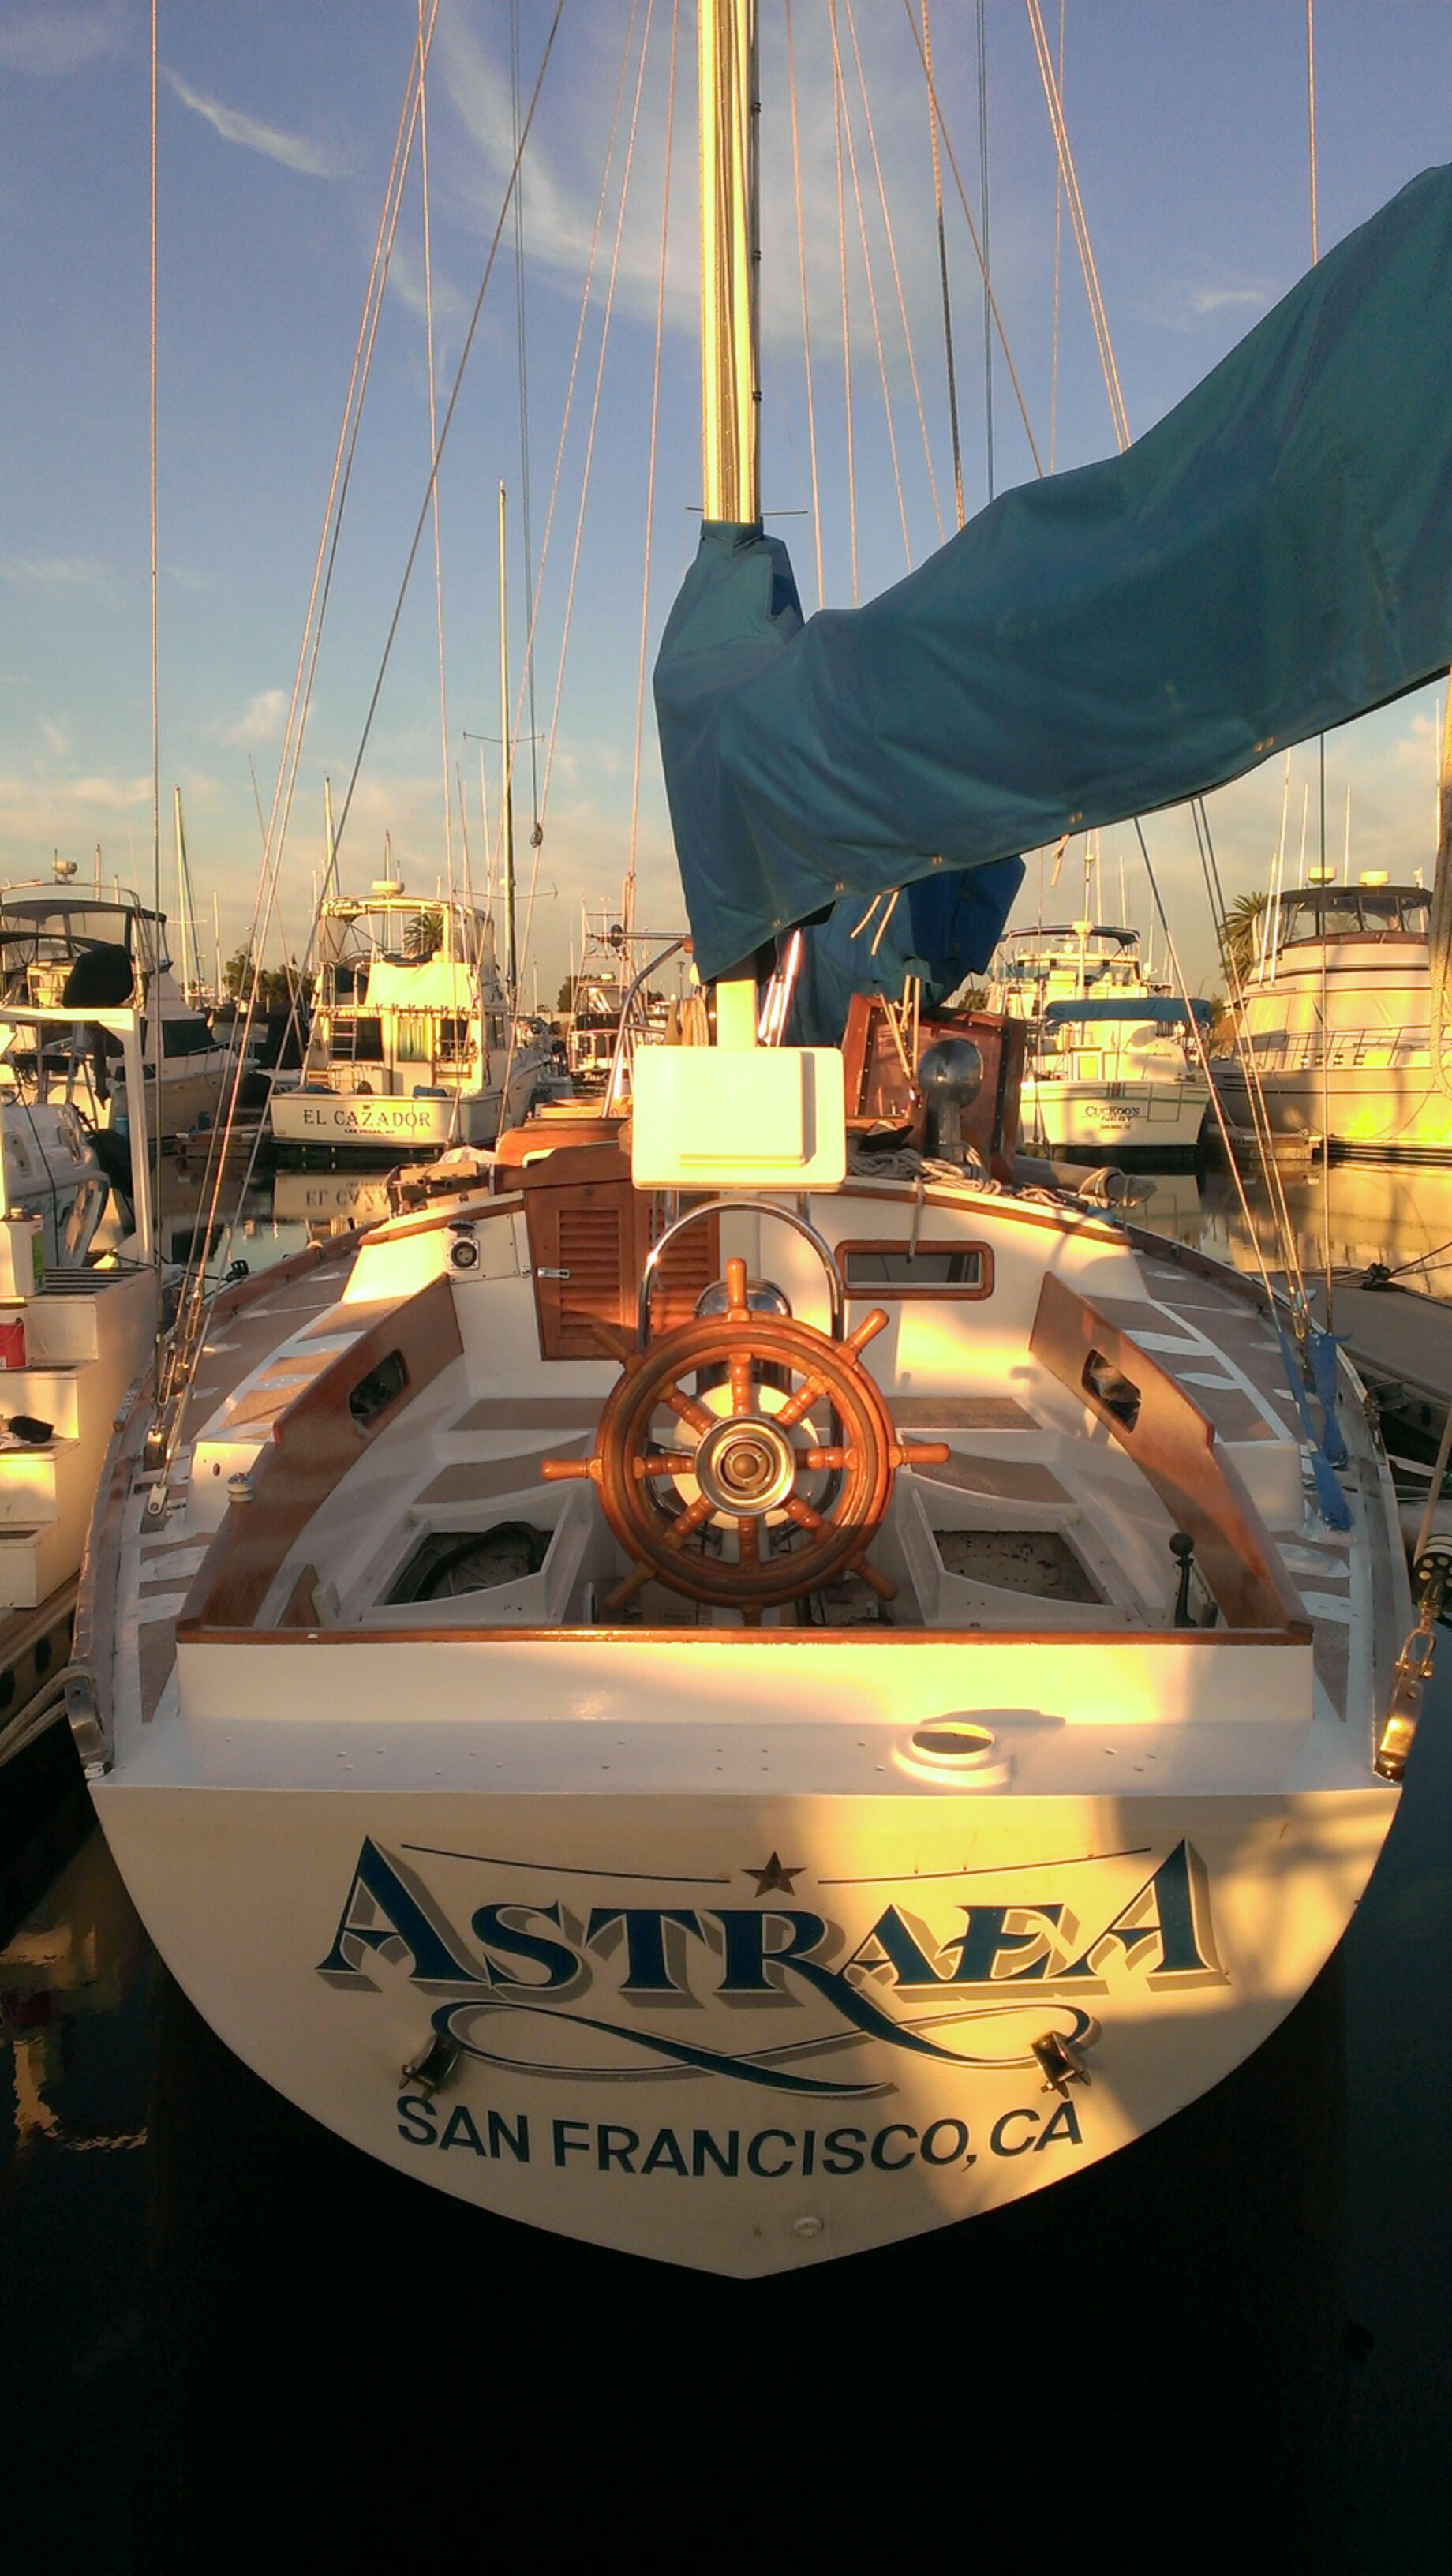
Astraea finally has a new look. After two coats of Interlux Prekote primer and two coats of Interlux Brightside paint. We did one coat each day. The primer covered the entire deck and the paint went down just around the deck edges. In between coats we sanded with 220 grit and cleaned up with Interlux 333 brushing liquid.
We rolled most of the area and only brushed in the areas behind hardware and corners. We didnt roll and tip because the results from just rolling were really good, there were very few bubbles. While working on the deck preparation and painting we wore clean socks to keep dirt off the decks.
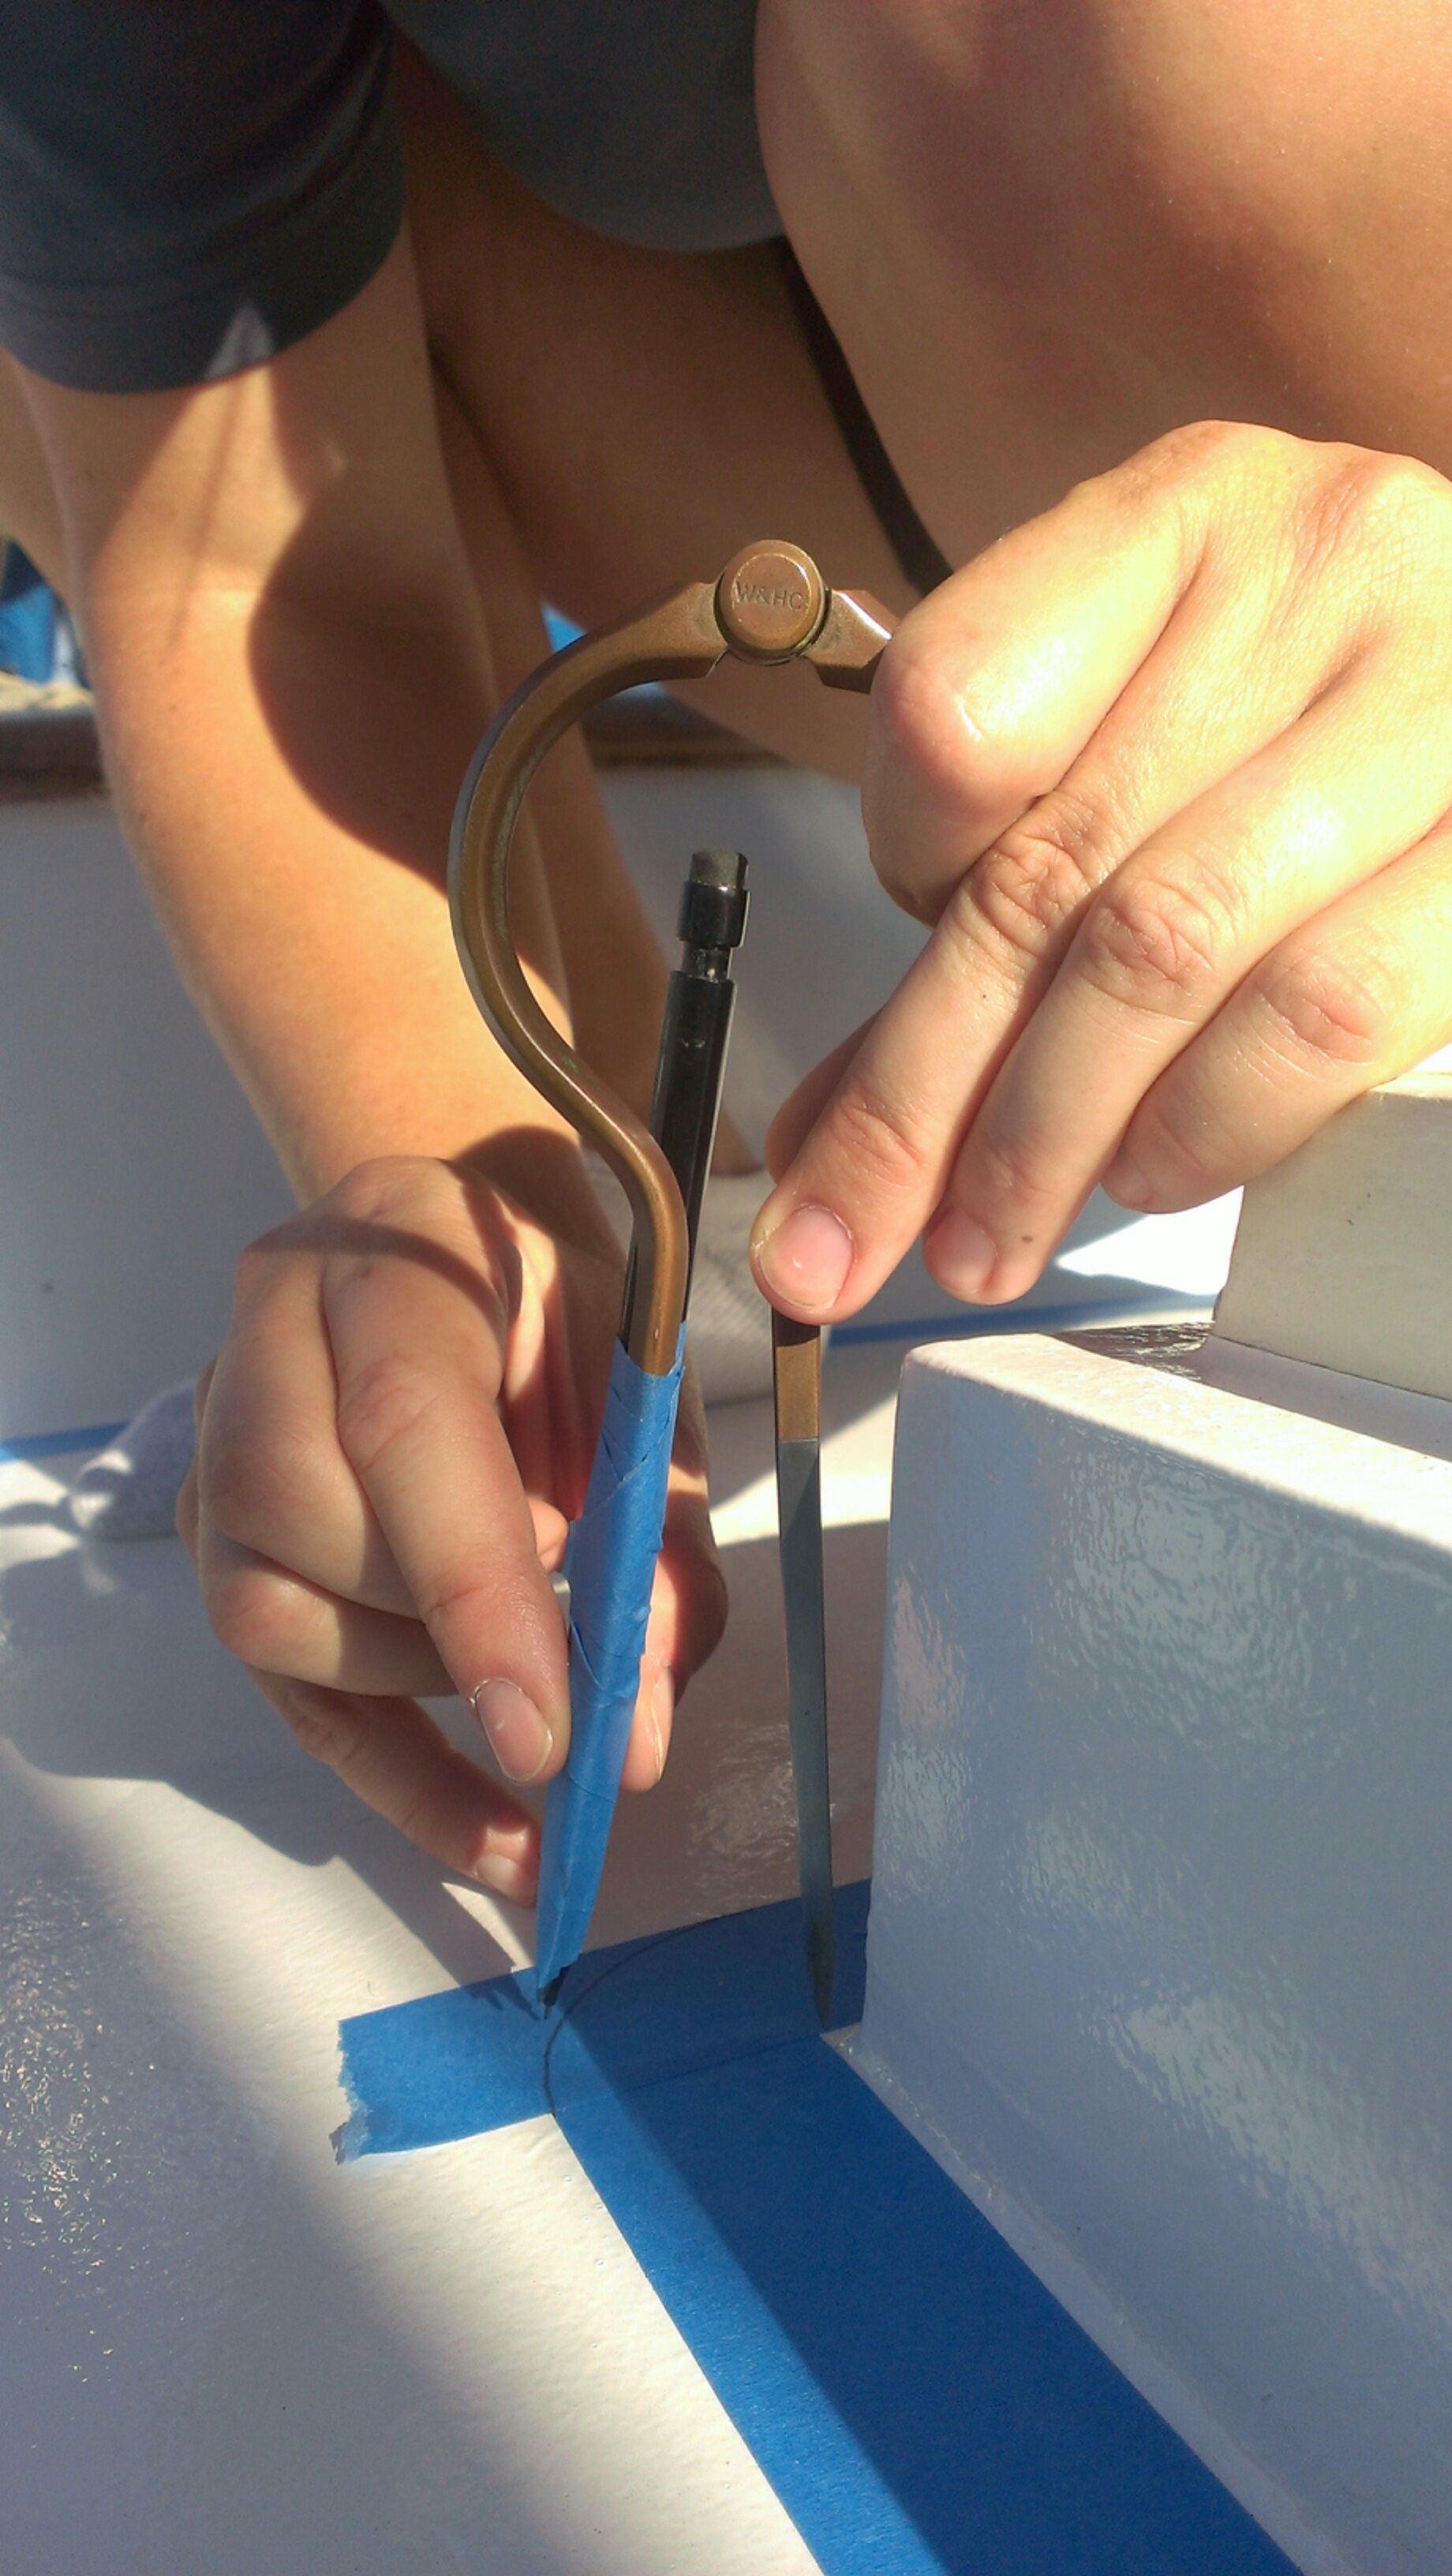
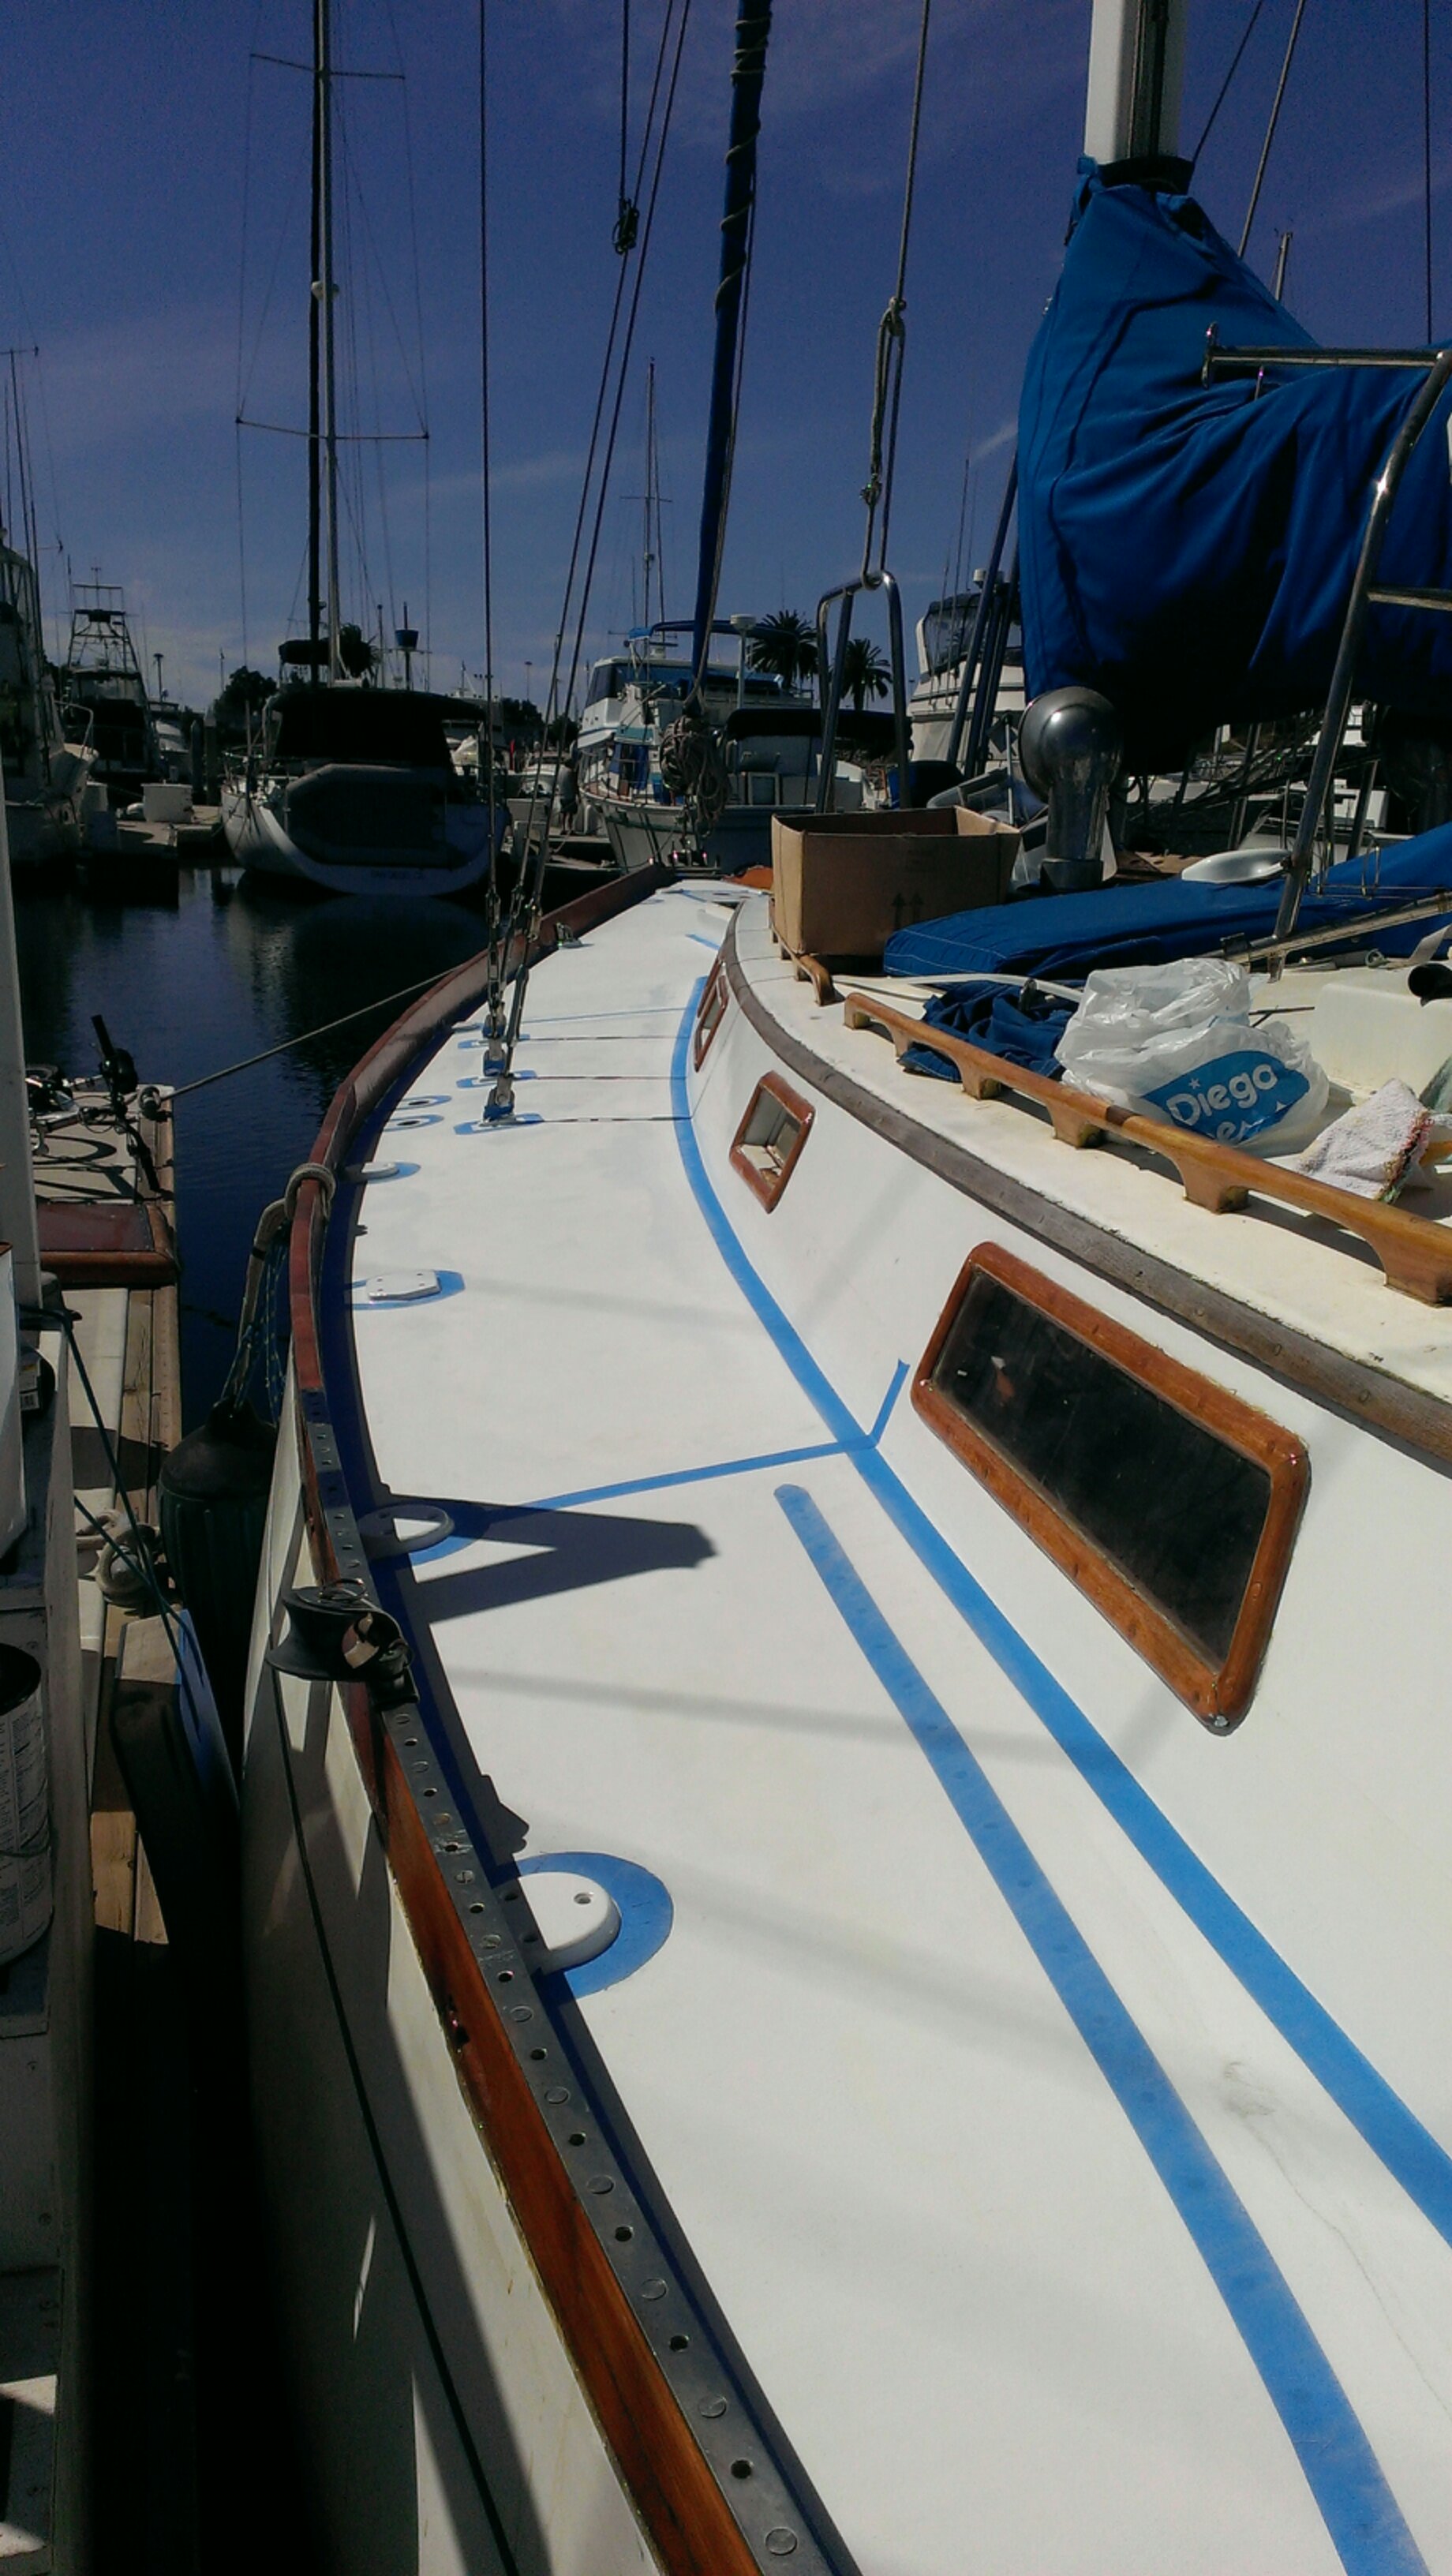
The day after our last coat of paint we taped the area around the deck edges and hardware we didn’t want nonskid to go. It took us about 8 man hours to tape the entire deck. We made all the edges the same width of a roll of blue 3M painters tape. The straight edges were easy to tape, just put the tape against the edge and roll the tape. Natalie used a compass to draw some easy curves, but it didn’t work for everything. She got creative and used kitchen tongs holding a pencil for curves around the deck house and hatches where a compass didn’t work. We over taped and traced the width of a roll of tape then cut away the excess using an exacto knife and peeled up the tape.
Natalie taped and drew the curved lines around hardware
Using a compass to draw a curve on the tape
Natalie using the tongs to hold a pencil and draw a curve
Cutting excess tape from the deck
Side decks with the tape removed
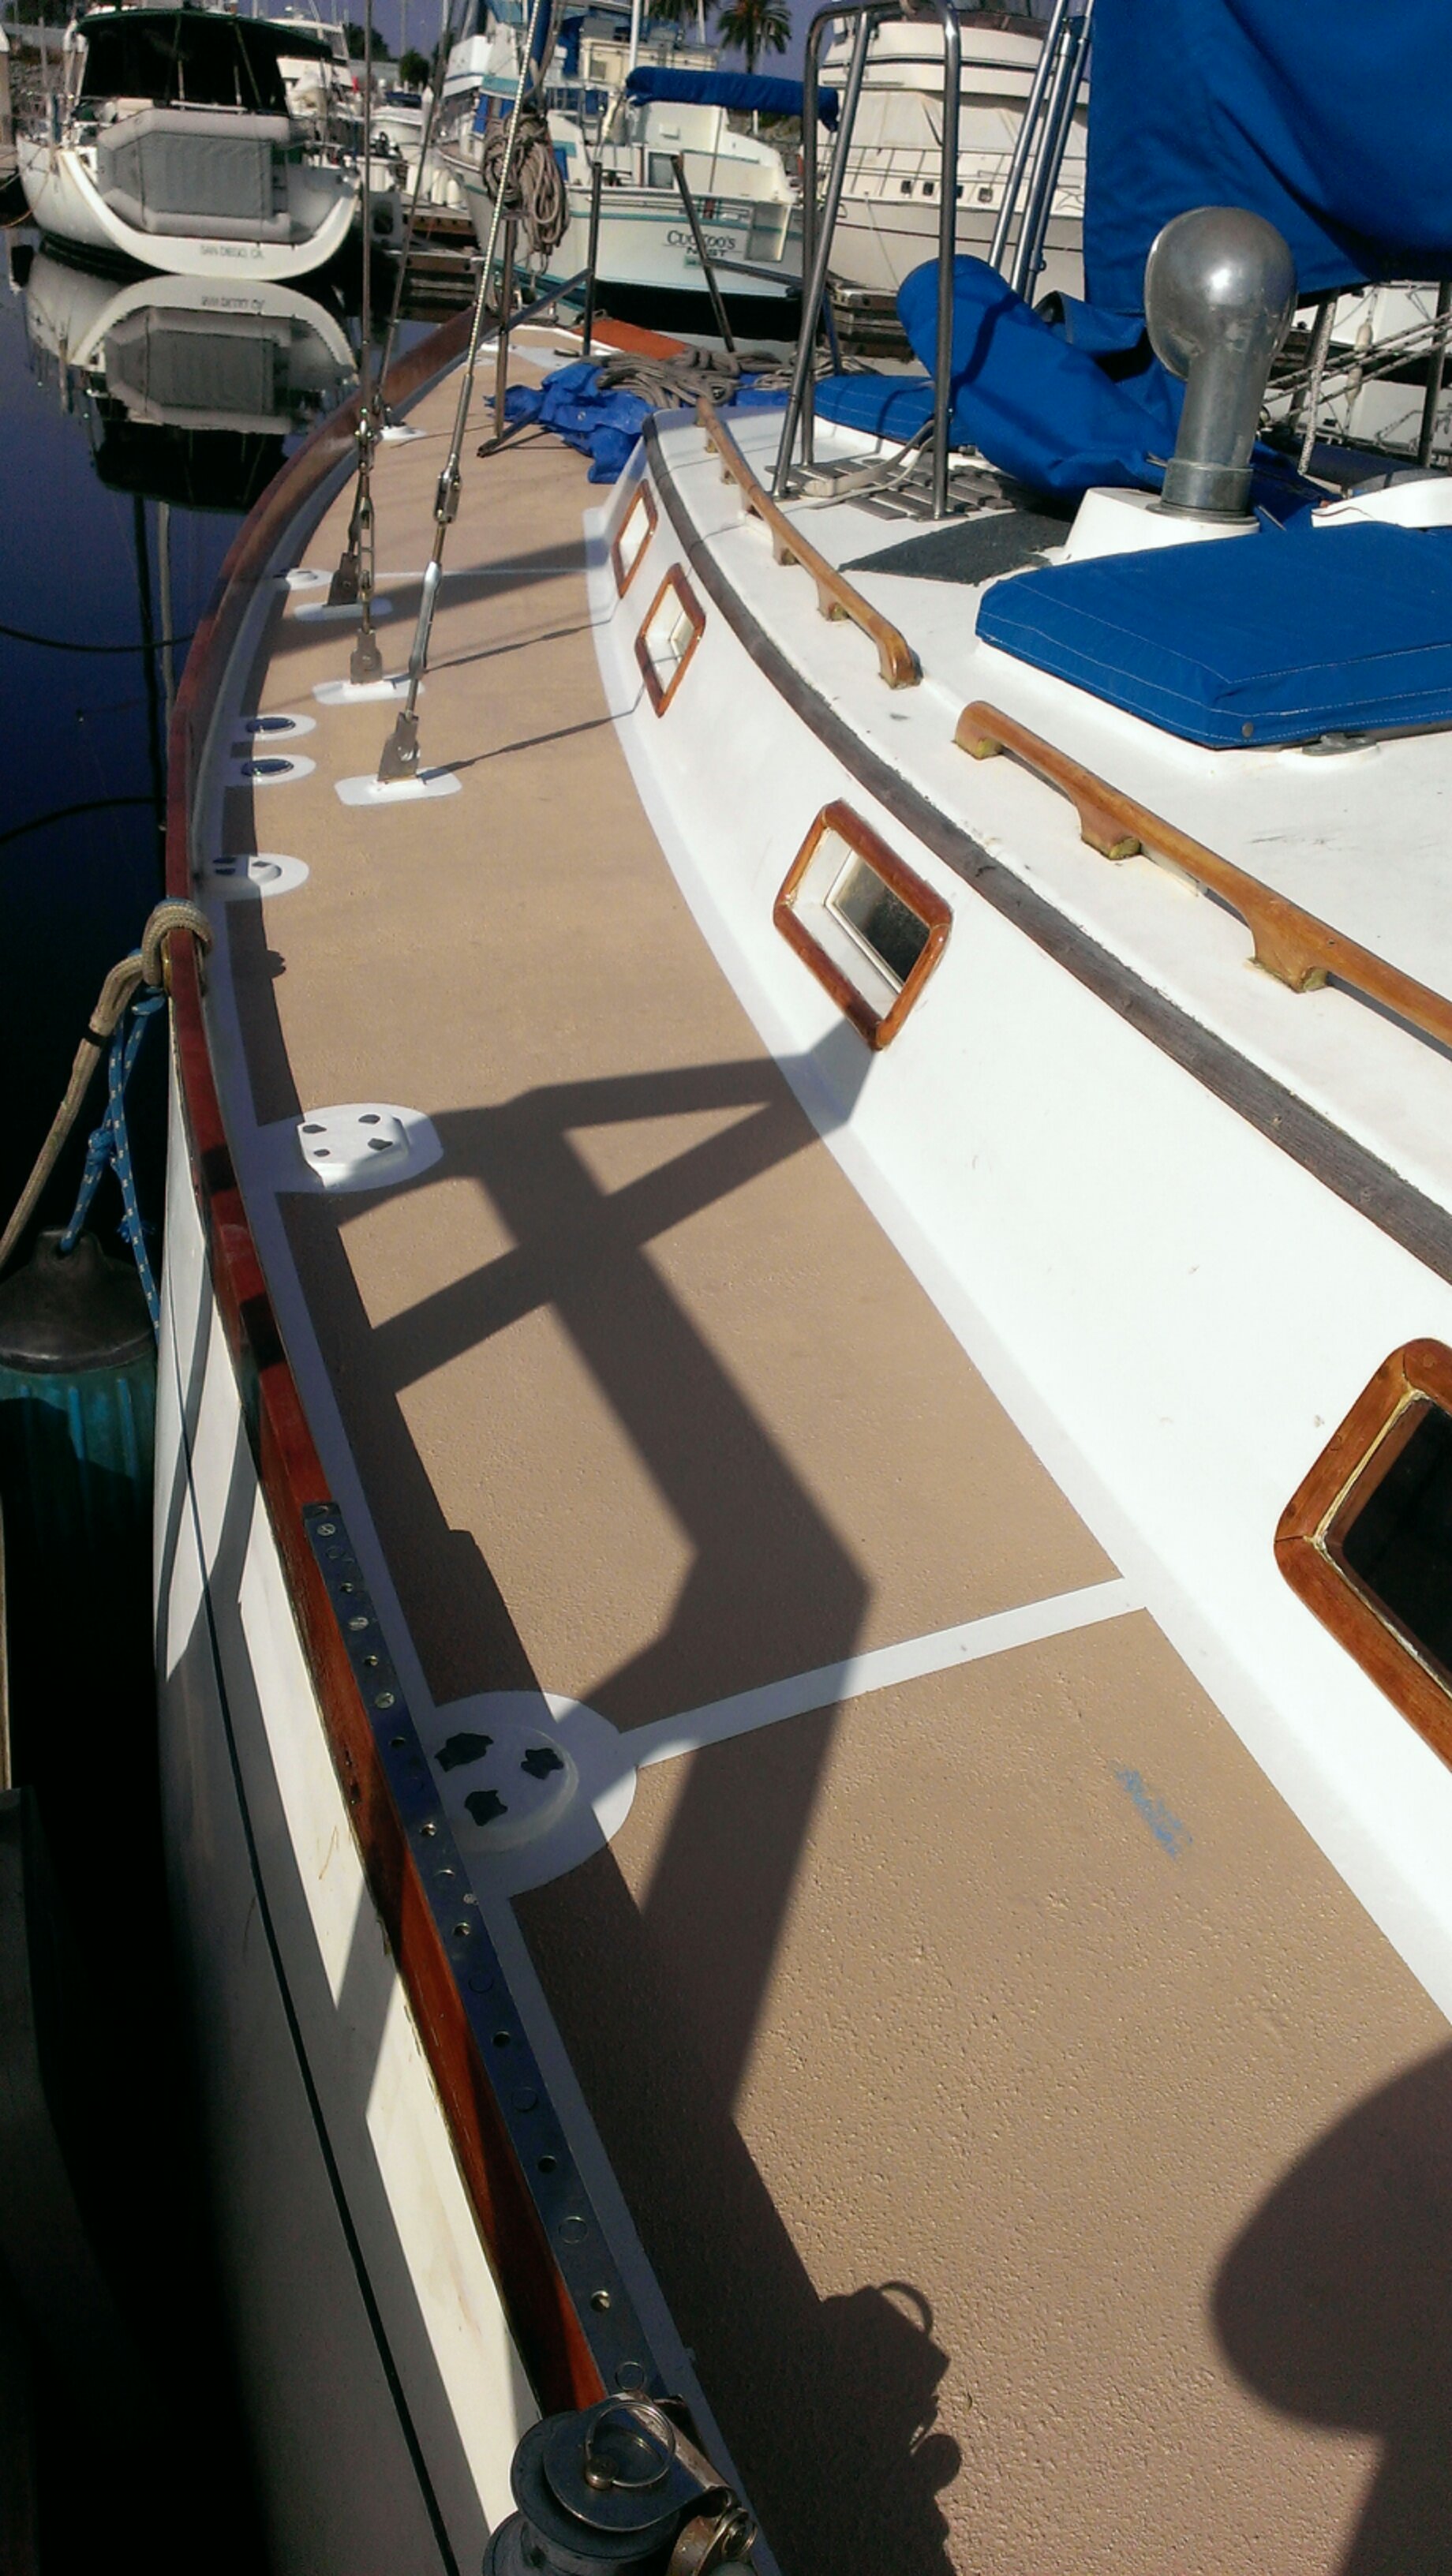
We sanded the deck with 100 grit sandpaper and cleaned up the deck twice with rags wetted with Industrial Maintenance Coating Thinner. The directions for the Durabak nonskid calls for Xylene, but Xylene isn’t available in California. Industrial Maintenance Coating Thinner is OK to use in place of Xylene.
Finally we were ready roll the nonskid! I opened the first can and mixed it up with our electric drill and a paint mixer and poured it in to a paint pan. I did some test rolling on cardboard to get used to rolling the textured material before rolling on the boat. It took about an hour and a half to cover the decks. I took a break and then rolled the second coat.
That night after the Durabak dried for four hours we could walk on the nonskid and peel up the tape from the edges before it fully cured. The tape came up easily if the Durabak wasn’t too thick. We cleaned up areas where the tape tore with an exact knife. We had some issues with the tape pulling up the white paint underneath where it hadn’t dried completely because we applied the paint too thick. We will touch up those areas later when we finish priming and painting the cockpit locker covers.
We’re so excited that this project is almost finished! It’s been a long six months…now on to re-mounting all the hardware.
Thursday, November 21, 2013
New Nonskid!
Nate and Natalie aboard their Cheoy Lee 41 s/v Astrea have renewed the non-skid on their deck. It came out great! Here's how they did it:


Tuesday, November 19, 2013
Can't Splice Old Line? Try a Sewn Eye.
Have you ever tried to splice old double-braid line? I have. And saying that it is "difficult" misses the mark by an order of magnitude. Over at Sail Delmarva Drew gives us a lesson in an alternative...
Splicing is the gold standard for forming permanent eyes and joining lines; unfortunately used double braid generally lacks the flexibility required for splicing; the cover won't open and the core won't slide. Knots are a standard solution and work in most cases; yes, there is some loss in strength, but lines generally die from chafe and I can't remember having one fail at the knot, other than in testing. But sometimes there simply isn't enough space or a knot will snag.And if you have concerns about the strength of sewn eyes, Drew addresses that in a follow-on post, which you should read.
Seizing is traditional and just as reliable as ever. I've seized a dozens of eyes over the years and never had a failure. I helps if you cover them for UV and chafe protection, but if the seizing is double layer like the old days, the outside layer is the UV protection and the inside layer holds the load. But seizings are long and stiff and can hang up, since the tail is neither covered nor tapered. So occasionally I use a hybrid sewn/seized eye. This isn't an idea I dreamed up, it is an old one that I read of many years ago in the New Glenans Sailing Manual. They also speak of stropes, the precursor to soft shackles.
____________________________________
First I remove about 1 1/2 rope diameters of core. This will allowed the end to be stitched down to create smooth taper. The New Glenans Sailing Manual calls for 3 1/2 to 4 rope diameters of core and I've got 4 1/2 diameters without counting the taper.
How much stitching is enough? Most whipping thread is about 50- to 60-pound test (I use 90-pound Kevlar, just because I have it), and doubled that suggests about 25 stitches on each side to reach 5000 pounds. Sure, it is not loaded in-line, but most of the load (about 65% in testing) is actually carried by line-to-line friction, just as in a seizing. Also remember that due to friction of the eye around the shackle or fitting, the free end is only carrying about 35% of the load. The results is that the stitching is only carrying a working load of about 1000*0.35*(1-0.65)=122 pounds and a line failure load of about 610 pounds (assuming 5000 pounds for aged 1/2" Stayset); not nearly as demanding as you would guess and as usual, the splice is stronger than the line. The stitching is scattered so that some are in every part of the core.
After stitching I add 2 seizings for good measure. The throat seizing is the important one, as it keeps the first row of stitches from getting over loaded.
Then cover it with something for UV and chafe protection. Heat shrink is fast and poor choice (doesn't last). Webbing is better in severe applications... like winching a sheet along a shroud.
The New Glenans Sailing Manula only calls for 3 1/2 to 4 rope diameters and I've got 4 1/2 diameters without counting the taper.
(Note: when I discovered the line was Warpspeed, 22000-pound test, I added another solid layer of whipping. Also good for abrasion.)
Notice the strope in place of a shackle. Less steel to flog, removable, and as strong as the larger line because it is doubled.If the eye is small it can't fall out easily. The failure point is always the same; the loop cuts off the stopper knot.After just 2 days I learned that heatshrink is not enough, not when winched across a cable shroud. I also switched to Amsteel soft shackles (home-tied) for a bit more long-term security. That and the they fit the clew better; the yacht braid stropes worked fine and would no doubt last for years, but I really didn't have room for 2; the big knots would jam on each other. The yacht brainstrope would be fine for a single set of sheets.


Tuesday, November 12, 2013
Extension Cords
Extension cords are a pain. They seem to tangle themselves into knots when they are unsupervised in a locker somewhere. Scott on s/v Valkier has a suggestion...
So someone asked me about what I use for an extension cord on the boat because of a comment I had made about having the perfect one. Everyone knows what a pain extension cords are. They are constantly getting tangled and snarled up, they are a pain to coil back up after using them, they are a pain to un-snarl and pull them out of the cockpit locker after they have become wrapped around every other thing in there. Last but not least is that you can only plug one thing into a standard extension cord. I am constantly having to switch between a drill and a sander or router etc… It just slows stuff down.
How it came about is a long story… lol… not!!!
One day I was in a tool store, not sure where, and saw one of the extension cords in a reel box with 4 outlets built into the box. It was on sale and I thought wow, I need to try that out it would be great on the boat. It has been about a year since that day and it has been everything that I thought it would be and more. The one I got was cheap and I wondered about life span but it is battered and still going strong. Mostly what it has done for me is alleviated a lot of frustration due to the above listed downsides to standard extension cords. It also means that I am more likely to grab stuff to do a quicky project because it is easier to un-spool cable and re-spool it when done. Less time in setup and clean up on both ends of the project. Mine is 25ft in length and I think I want one 50ft and one cable size bigger. However I would bet that I mostly keep using the 25ft one due to size. A 50ft cord and reel will be substantially larger.
Thursday, November 7, 2013
How to: Mask a Handrail
Do you keep your teak handrails finished bright? On Eolian we do, and so varnishing them is a part of the annual varnishing task. Therefore masking off the loops where they meet the deck is a necessity. We have 40 loops on Eolian - this is not a trivial task. So then, how to do it?
There used to be available masking tape that was pre-cut to fit the curves at the ends of the loops, but I can't find it online anymore. In any case, this was a very expensive solution - we've never used it.
Instead, here's how we mask off the loops, using just regular 1" tape. To illustrate, I'll show the process on an end loop because there is increased visibility there.
The first step is to find a nice anchorage! There is no need to do this at the dock. Why stay at the dock when you could be at anchor in a quiet cove somewhere? We are anchored in Eagle Harbor for these pictures.
First, apply tape strips along the long sides. As I have mentioned before, it is wise to hold the tape back from the loop by a tiny amount so that the varnish will help with sealing the loop to the deck.
Next, apply strips at the ends of the loops. The fit will be terrible of course, leaving triangular areas uncovered.
Next, tear a 3" or so strip of tape down the middle, lengthwise. If you are using 1" tape like us, this will give you two short lengths of 1/2" wide tape.
Now you can tear off pieces of the narrow strips, making roughly 1/2" square pieces of tape with one straight edge. These are too small to place accurately with your hands, so I stick them gently to the tip of a knife for ease of handling.

Using the knife as a handle, position the tape, and then press it down with a finger tip when it is correctly positioned. The knife allows you to get at every corner.

Apply overlapping pieces of tape to follow the curve.

The process sounds tedious, and well, it is. But with practice, I do each one in under 2 minutes (and having 40 to do each year gives me lots of practice).
So we're talking about roughly an hour and a half to mask off all the handrails - that's not a terrible way to spend an afternoon at anchor, is it?
There used to be available masking tape that was pre-cut to fit the curves at the ends of the loops, but I can't find it online anymore. In any case, this was a very expensive solution - we've never used it.
Instead, here's how we mask off the loops, using just regular 1" tape. To illustrate, I'll show the process on an end loop because there is increased visibility there.
The first step is to find a nice anchorage! There is no need to do this at the dock. Why stay at the dock when you could be at anchor in a quiet cove somewhere? We are anchored in Eagle Harbor for these pictures.
 |
| The starting point |
First, apply tape strips along the long sides. As I have mentioned before, it is wise to hold the tape back from the loop by a tiny amount so that the varnish will help with sealing the loop to the deck.
 |
| Apply two strips to the sides |
Next, apply strips at the ends of the loops. The fit will be terrible of course, leaving triangular areas uncovered.
 |
| Add strips at the ends |
Next, tear a 3" or so strip of tape down the middle, lengthwise. If you are using 1" tape like us, this will give you two short lengths of 1/2" wide tape.
 |
| Tear some tape down the middle |
Now you can tear off pieces of the narrow strips, making roughly 1/2" square pieces of tape with one straight edge. These are too small to place accurately with your hands, so I stick them gently to the tip of a knife for ease of handling.
Using the knife as a handle, position the tape, and then press it down with a finger tip when it is correctly positioned. The knife allows you to get at every corner.
Apply overlapping pieces of tape to follow the curve.
The process sounds tedious, and well, it is. But with practice, I do each one in under 2 minutes (and having 40 to do each year gives me lots of practice).
 |
| Ready for sanding and varnish |
So we're talking about roughly an hour and a half to mask off all the handrails - that's not a terrible way to spend an afternoon at anchor, is it?
Thursday, October 31, 2013
New LED Fixtures And Lights Installed
Over at s/v Cay of Sea, Rick has renewed his light fixtures with new LED-based ones, and gained a significant improvement in power consumption...
It was a tremendous relief to get the old, mismatched fixtures off the boat. They’ve bothered me for years, but I wasn’t going to pay the very high price for new fixtures and LED bulbs. I knew if I waited long enough, LED technology would become more reasonably priced.
Four different light fixture styles on the boat. Now we’re down to two.
I will install a couple of the old fixtures in the engine compartment for convenience.
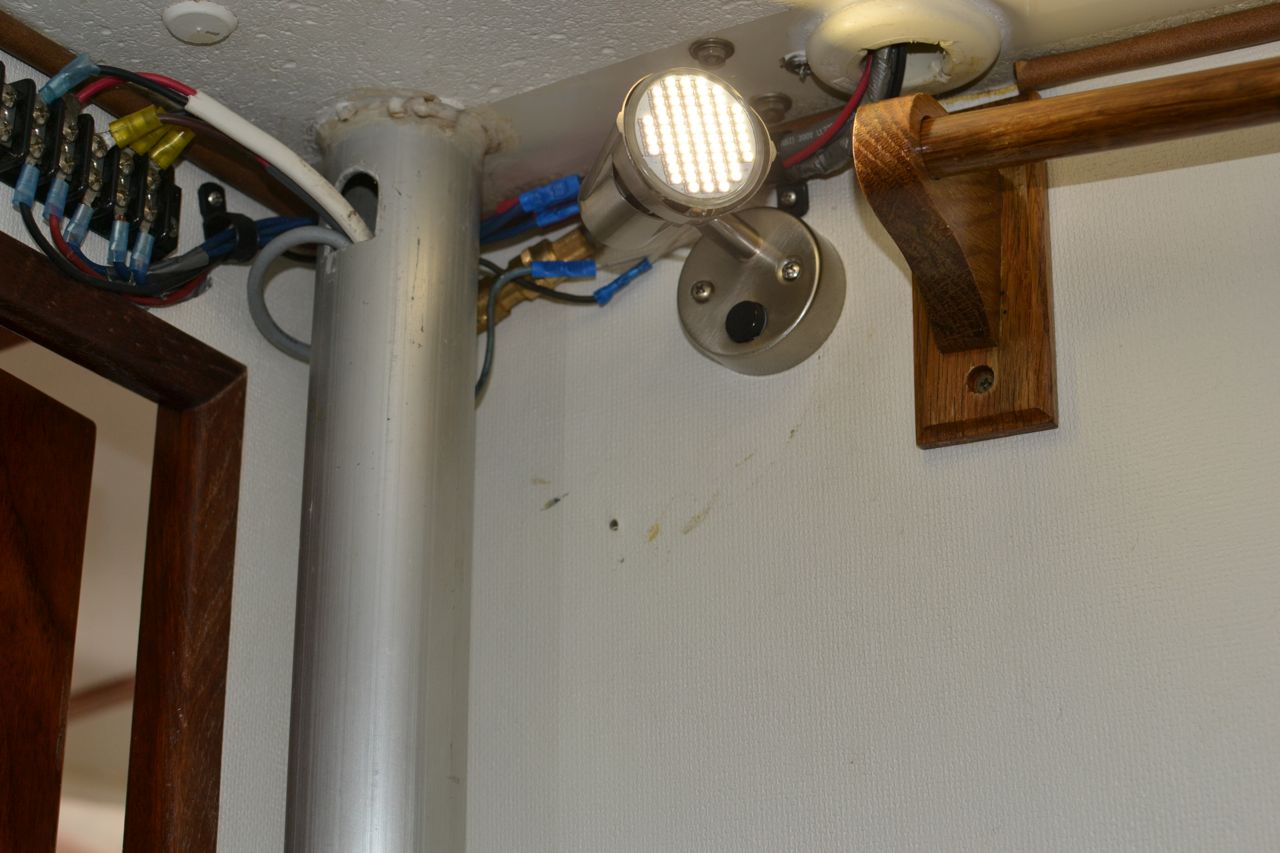
After some slight hesitation, I removed the round fixture in the head. It is a festoon bulb, and gives off a lot of light. And heat. Meaning, of course, that it burns through electricity at a tremendous rate. The new bulbs are rated at 3.12 watts (each). That’s .26 amps. Not much, and not much heat either. And for 3.12 watts per lamp, I get this kind of light output:
It’s too bright to look at.
It’s going to take some getting used to not seeing that big round fixture in the head. Looks like I’ve got some cleaning and touch-up to do on the paint where it was mounted.
The light quality tends to be a bit harsh, especially if there are two or three lamps lit at once. However, there is no lack of bright. I think that’s good – far better than dim. So with four of these lit at once, I’m using 1 amp. That’s a phenomenal amount of light for that little power.
I made the electrical connections with butt connectors, as you can see in the above photo, except for the first lamp, which unaccountably was wired with spade connectors. I saved my self a couple of crimps, and used the existing female connectors, installing spades and then shrink tubing on the lamp wires.
Just this one lamp had spade connectors. Can’t figure out why, and I don’t remember doing it. Maybe a previous owner did it.
Now I have a confession to make. I’ve never told this to anyone. . . I make my crimp connections with vice grips. I know, I know. I’m supposed to use ratcheting crimpers (the more expensive, the better). But I discovered a few years ago that vice grips do this really well. I mean, really well. The crimps don’t pull out. You can get the crimp almost completely flat with successive adjustments of the locking mechanism. So, I already have vice grips, but I don’t have the expensive ratchet crimpers.
Oh, one cool thing I discovered about this brand of light fixture, is that it is not polarity sensitive. The bulbs work regardless, which surprises me. LEDs are typically polarity sensitive, so I guess there is circuitry either in the bulb or fixture that accommodates reversed polarity and allows them to light up anyway.


Tuesday, October 29, 2013
Reboarder patrol
Please welcome new contributor Marc of s/v Alchemy (and s/v Valiente)! Marc 's two boats, one steel and one fiberglass, give him a unique perspective. For his first contribution to Small Boat Projects, Marc faces the reboarding problem: How to board the boat from the water...
Drastic steps were required.
Apparently, I have readers who worry when the pace of my blog posting slackens somewhat. Often, that's either because I have little to say, or it isn't particularly interesting (or is even less interesting than the usual not-very-interesting boat blagging), or I have to down boat tools and apply myself to money-making for the boat habit. Such has been the case recently.
It's also been the hottest part of the summer, making the interior of the steel beast intolerable even for those, like me, used to panting in its torrid, insufficiently ventilated bowels. Now, if that description hasn't been off-putting enough, I'll recount a recent repair gig on the old plastic fantastic, Valiente.
A boarding ladder bought last year to replace a previously busted ladder itself improvidentally folded the wrong way while I was descending for a swim. I'm considerably lighter than I was this time last year, so I blame shoddy construction. Irrespective of that, getting back aboard was a trial and I bear the bruises and cuts to prove it. So I determined to do better, meaning sturdier and stronger.
In our part of the world, ladders are required for the purposes of rescues, for which having at least one aboard is a mandatory safety equipment item, like flares, and of course for swimming and reboarding a boat at anchor. There are many ways to mount and deploy the many types of boarding ladder, which range from simple rope ladders...
Uh, no.
...to heavy duty welded jobs that would suit the stern of Alchemy...
Note: Not the stern of Alchemy.
There are plenty of boarding ladder options, most of which are spendy. There are folding, telescoping, single leg and even fairly novel ideas:
Novel is also expensive, although I think firemen use something like this.
All of which got filed for when the time comes to address this on Alchemy, probably at the same time I address the conceptually linked issue of "what mast step can possibly fit my giant feet". In the meantime, Valiente needed a new, unbusted and stronger ladder for the preferred amidships location (the stern is too narrow in my view and too hard to access for backing plates to bolt a ladder there).
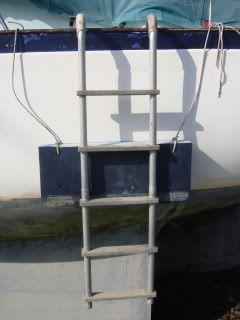
Due to a chance perusal at the chandlery where my wife works, I picked up a ladder not only of a type I had yet to see: a gunwale-mounted aluminum ladder that was light, of a good width and which folded vertically.
Nice and long, too, meaning a couple of steps are below WL
This ladder, the maker of which is not on the label, was the right price by virtue of looking pretty industrial and having hung, neglected, on the wall of more stainless, hot 'n' happening models. Maybe it's for a dock. I am indifferent. I want its functional length and its stowage compactness.
Ignore the general grubbiness. This was prior to a Big Summer Scrub/Debirding
Looks like a real house ladder, doesn't it? For me, this is a Good Thing, given how lame and plasticky swim/boarding ladders have seemed to me.
See previous repairs and former mount points. Also 40-year-old chrome on bronze. Sigh.
Installation was straightforward, if longish, as I decided on a proper "drill 'n' fill" process of oversizing the mounting holes, isolating the balsa core with thickened epoxy (West System) and then drilling the proper-sized bolt holes (3/8") through the resultant "hard core".
Slightly blurry...or was that the epoxy kicking?
The mounting plates were sealed around their edges with 4200, as were the bolts themselves. As the bolts are snugged down, the "bead" of sealant climbs up the threads, making a further gasket of sorts under the bolt head and in the drilled hole itself, without mucking up the part the nuts and washers go on. This greatly lessens, for the years I've been doing it, the chances of rain or seawater migrating below, which can really ruin your Little Library of Boat Repair, in my unfortunate and pre-smartening-up experience.
Evidence of my previous labours
After letting the epoxy fill cure, the holes were drilled and "backing plates" in the form of largish fender washers were installed; my son held the bolts still while I used a 1/4" ratchet driver to dog down the nuts to an acceptable degree (Note to self: must get a "clicky torque wrench" in order to quantify "acceptable degrees"). The line of larger bolts running aft is the port genoa track, fixed after it tore straight out of the deck at 28 knots. Has not budged since the recore and remounting!
Might have to consider repainting the interior at some point as this is getting old.
A closer look: The tape was there to keep the epoxy from dripping, but leaving this piece in place is a tell-tale. As it is paper painters' tape, if it feels damp, you've got a leak and a sealing job ahead. Not damp so far after several drenchings of mid-summer intensity.
Will swim shortly, applying the ultimate field (stream?) test
The finished project looks good to me and packs down even better into the starboard cockpit locker than did its crappy forebear. I saw on a sailing forum an idea to get the ladder more vertical vis-a-vis the turn (in) of the hull by lashing crosswise a foam pad or a small fender under the ladder. This sounds like a smart (and cheap!) idea I will employ.
Cleverness courtesy of Cruisers' Forum's "David Old Jersey"
Once again, needful work on Valiente leads to applicable solutions (or at least, bad ideas probably avoided) on Alchemy.


Subscribe to:
Posts (Atom)


