It may not seem like the right time of year to do a project regarding bug screens... in the Northern hemisphere. But Paul on
s/v Solace is located in the Southern hemisphere, where this a good and proper project for this time of year - Making replacement bug screens:
I have two port holes in the side of the cockpit well (near the floor), which we keep open all the time. We place in the port holes, these snap in bug screens; but as you can see, from the picture to the left, some of the plastic has broken off. It is also broken in a couple of other places not visible in the photo. These bug screens are 1985 vintage and have just deteriorated through use and I suspect UV damage. Also, these sit around shoe level when sitting in the cockpit, and occasionally get popped out by an accidental heel kick.
 |
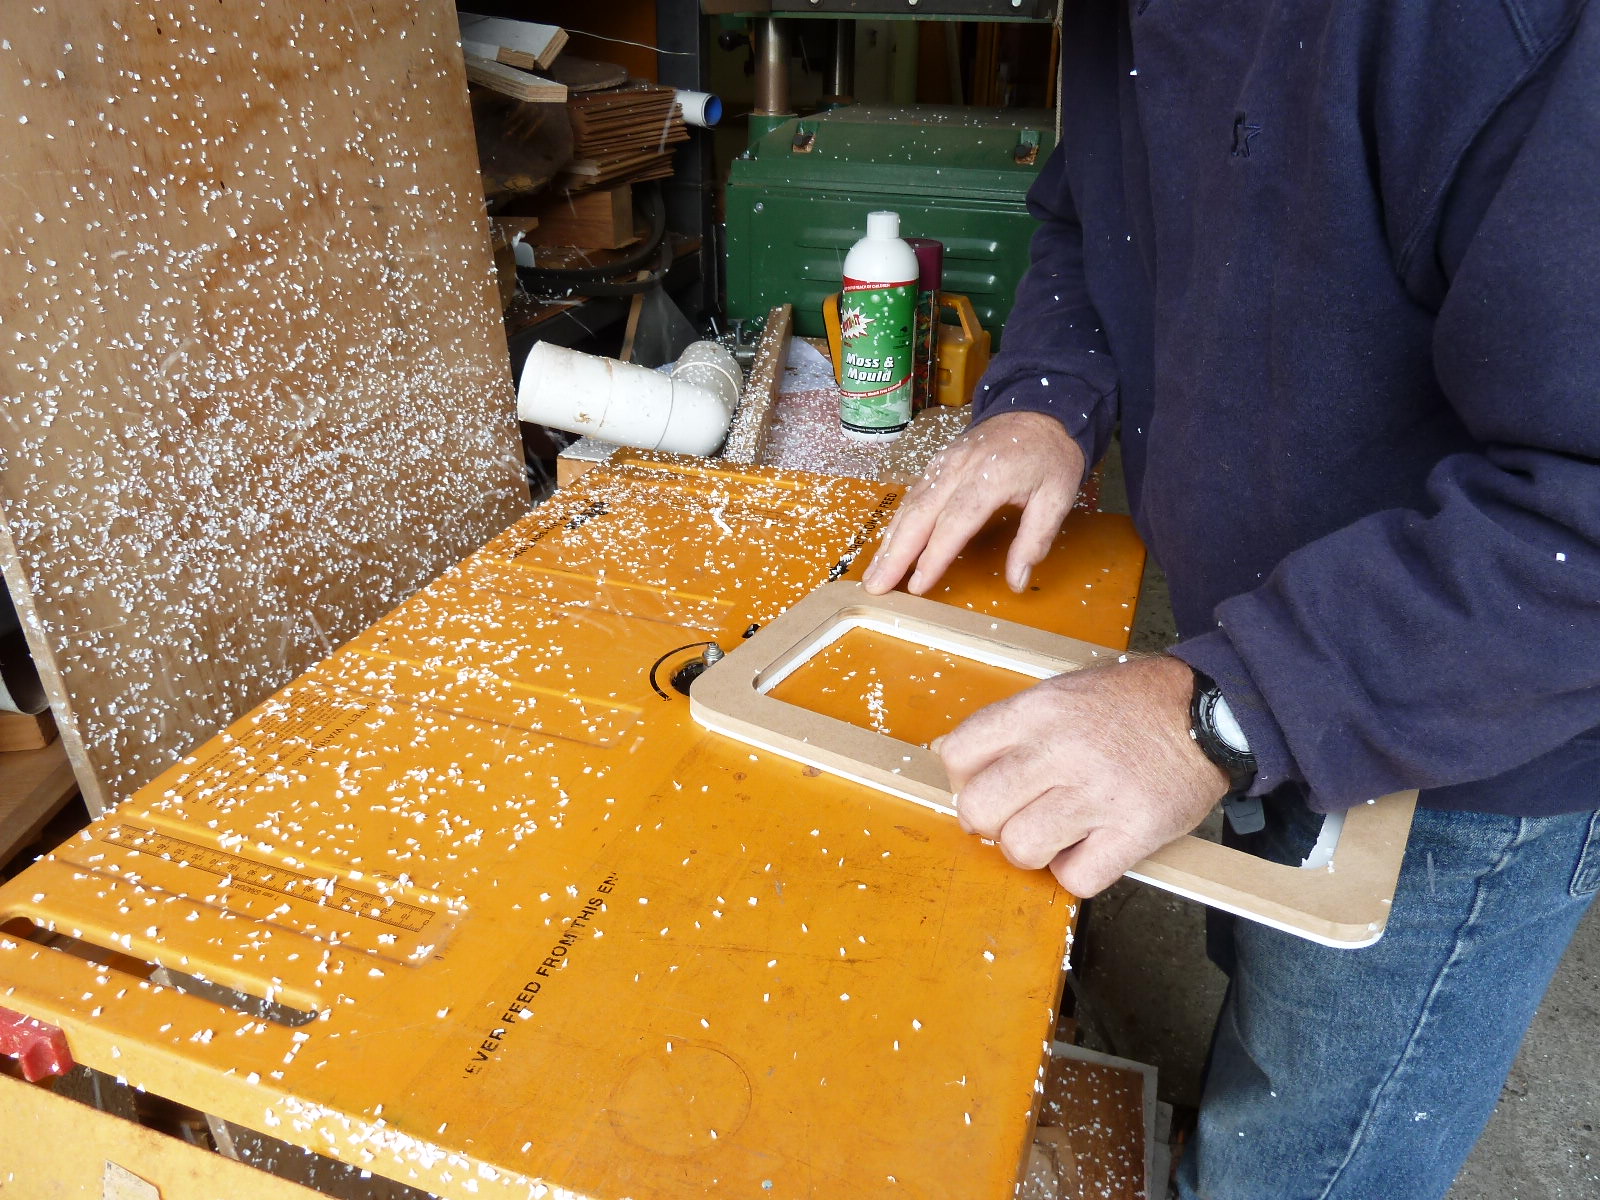
| Wooden Template |
In reconstructing these, I first made a wooden template suitable for a router. I used MDF (medium density fibreboard). Next I procured some PVC board, which when doubling the thickness of the PVC board, was just a few millimeters thicker than my old bug screen. I used PVC, but could just as easily have worked with Polyethylene plastic board.
Next I cut out of the PVC board, four rough finished frames which were about 5-10mm wider than my template. You might notice that my template has a wider surface than the original bug screen. This was to give it some added strength and make it easier to place the bug mesh between the two PVC cutouts.
 |
| Routering |
I used double sided sellotape to secure the template to the rough cutouts and then routed the remainder of the PVC off to the finished template. Each one was done in turn.
Then because my template wasn't exactly symmetrical I matched two pairs so that all corners lined up perfectly.
 |
| Mesh glued and trimmed |
I lay one side of my PVC cutout down and placed a small bead of 3M 4000 deck caulking compound in the centre of the flat surface. Then I placed my bug screen mesh (Nylon I think) over the top off this, then spread the 4000 over the mesh so that it was in the middle and not near the edges, and sat level with the mesh and not proud. Final tension was then applied to the mesh and it was allowed to set up. This was to act as a "glue" so I could the trim the mesh about 1mm in from the outer edge after it had set up.
 |
| 4000 applied before 2nd side attached |
Next application of 4000 was applied in a thin layer over the mesh, but not approaching the inside edge by about 5mm. If the 4000 is squeezed out to the inside and over the mesh, the job looks "ugly" and once set is hard to remove from the mesh without damaging it.
 |
| Glass over top for glue to set |
Finally the other side was applied, being careful that both PVC cutouts lined up perfectly. The PVC was pressed down from the inside edge to the outside, squeezing out any excess 4000. A plate of glass was applied over the two pieces and allowed to set up.
After it has set up, a sharp craft knife was used to trim the excess off, on the outside edge.
 |
| Finished product |
The finished product to the left. It's both flexible and hardy. Should last several years. But, if you need to change the mesh, just slip a blade between the two sections to break the bond. Clean up and repeat the process for new mesh.
What am I going to secure it with in the port hole? Probably "blue tack"; but one could use a double sided foam tape, like they use to secure mirrors on walls.
Don't try to do the gluing in one step with the mesh. I tried and it was very difficult to have both PVC pieces line up perfectly. Also when trimming the mesh off, you could still see the mesh on the outer edge and it looked "ugly". A much better finish, if you glue the mesh to one piece first; have it set up, and trim the mesh back from the out edge. Then, when trimming the final outer edge of 4000 is done, a nice white finish is all you see. So, in essence, what you see here is a bug screen that has had the mesh replaced once because I didn't do it right first time. Cost $30 for the PVC 1 square meter sheet; and $7 for the mesh.
[Editor's note: Not sure that the 3M 4000 - or any adhesive for that matter - would stick to polyethylene]


I've repaired screens with 3mM 4000 before, and thought I was jerry-rigging the repair. Maybe it wasn't such an odd idea after all!
ReplyDeleteRick