Monday, November 28, 2011

Clean fuel

Is your fuel clean? Are you sure? Really sure? Want to find out when the waves are sloshing it around in your tanks, stirring it up?  Tho bugs and decomposition products can foul your tank with even the cleanest fuel, Steve and Lulu aboard s/v Siempre Sabado get a head start by making sure the fuel going into their tank really is clean:

The beauty of diesels is that they don't ask for much. Plenty of air and nice clean fuel is about it. The problem is that they are quite picky about their fuel being CLEAN!

The following is definitely NOT an original idea on my part. I blatantly stole it from my friend (that I've never met) Wojtek, who sails the Westsail 28 "Namaste". I recently did a blog where I was complaining about my over-the-top fuel filtration system and said I was going to get rid of the Racor 215R filter unit that I had been using as a secondary filter. Wojtek responded with the following comment:

Steve, if I can suggest, stick with this old Racor. You never know when you might need it but there is a better thing you can do with it.

I have reused my old Racor after installing dual primaries. It is sitting on the port side of the lazarette, coupled with a small electric fuel pump. Every drop of fuel that goes into Namaste's tank is squeezed thru the 2 micron filter. Have I mentioned that I haven't had to even flick to the second primary since the setup?

Cheers,
Wojtek


He then included a link to some pictures of the set-up he made for Namaste. Well, I know a good idea when I see one. So, instead of dumping the $110 filter unit and the $30/each filter canisters, I made a copy of Namaste's filtration set-up for Siempre Sabado.


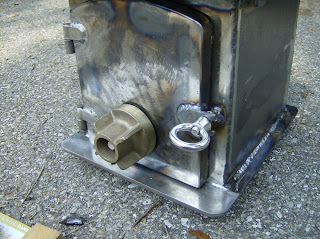
Can't remember what I paid for the nylon cutting board that it's all mounted on but the fuel pump cost about $25.00, the hose was less than $3.00, the toggle switch and various fittings were in my junk "good stuff" bins.

I transferred about 20 gallons of diesel to the main tank today using the filtration system. It takes awhile as the pump only pulls the fuel through the filter at about a liter per minute. But there was absolutely NO mess and I know that the fuel I put into the tank today is so clean that my 30 micron primary filters will pretty much have nothing to do.< Our usual practice is to take our jerry jugs to a fuel dock in the dinghy and then fill our main tank from the jugs. We haven't pulled up to a fuel dock since we were in Santa Barbara a year ago. The main tank is 39 gallons so, even if she was bone dry, it would only take 2 trips to the pumps to fill her back up. Well, then one more to fill the jerry jugs for reserve. Doesn't really matter how slow the filter/pump empties the jugs since we're not tying up a fuel dock while we're doing it. So, thanks, Wojtek for the idea and for the advice.

Friday, November 25, 2011

Easy cockpit grate

Brian over at Dock 6 demonstrates that a cockpit grate is within reach of all of us:

I needed duckboards, or a cockpit grate if you will, to replace the nasty looking deteriorated weird rubber mat that graced whiskeyjack's cockpit when I got her (see pics in first post of this thread). I priced having a teak grate custom built, my daughter burst into tears when I told her she was not going to be going to college, so then I decided to find an alternative. I bought two 8' cedar 2x6s and ripped them into 1 3/4 x 1/2" strips, measured and patterned my cockpit floor, started cutting and epoxying and gluing and screwing and varnishing and $32 later, this:


is now this:
Note that cedar is a good substitute for now-nearly-unavailable teak. It is a little lighter in weight and a little softer, and nearly as rot-resistant.

Monday, November 21, 2011

Mustand Survival Issues Voluntary Recall

As it is a safety item, I feel it is important to get the word out as widely as possible.  I'm sure Chuck and Susan would agree.  Here is their posting  (thanks to Chuck and Susan on s/v Sea Trek for this information)

We have been users of the Mustang Inflatable vests for many years and have been very satisfied with them. But we recently have been made aware of a recall due to a problem that might keep them from fully inflating. Here is the official recall notice...

MUSTANG SURVIVAL ISSUES VOLUNTARY RECALL NOTICE ON MD2010 & MD2012 model 22LB Inflatable Personal Flotation Devices

In keeping with Mustang Survival’s commitment to the highest levels of product quality and safety, we are voluntarily recalling all model number MD2010 and MD2012 inflatable Personal Flotation Devices (PFD’s) sold in the United States during 2011. To determine if you are impacted by this recall please reference the images below:
Image 1: Any inflatable product with multiple white sewn on safety labels on the back is OK and is not affected by this recall.


Image 2 If your inflatable does not have white sewn on safety labels, please check for model number MD2010 or MD2012 on the back of the PFD, then refer to Image 3.


Image 3 MD2010/MD2012 models with an “MIT” (Membrane Inflatable Technology) stamp (in black or color) above the CO2 cylinder are OK. Any MD2010 or MD2012 missing the “MIT” stamp should be returned to Mustang!
This recall is being issued for the inspection and repair of an inflator installation inconsistency that may prevent some units from fully inflating.  Mustang Survival has developed a solution that corrects any affected product and prevents re-occurrence of this issue.  The inspection and repair can only be performed at a Mustang Survival factory.
This recall notification is for only the MD2010 and MD2012 22LB buoyancy inflatable PFDs.  No other Mustang Survival products are affected as they utilize different inflator mechanisms. 
All MD2010 and MD2012 PFD’s without the stamped MIT logo as shown in Image 3 (above) should be returned to Mustang Survival for inspection.  All other Mustang PFD’s are okay for use.
Distributors and consumers are urged to contact Mustang Survival’s Customer Service department at 1-800-526-0532 between 7:30am and 4:30pm PST, Monday through Friday for specific shipping instructions.  If you have questions, please first refer to the Frequently Asked Questions below:

FREQUENTLY ASKED QUESTIONS
Q: Why do I have to return the product?
A: Our QA team has discovered an installation inconsistency with the inflator system that needs to be tested and corrected if necessary.
Q: How do I know if my inflatable is one of the affected products?
A: The model number is screen printed onto the back panel above the UL mark and will begin with the characters MD followed by four numbers. Affected products are MD2010 and MD2012
Q: When will I get my product back?
A: We are striving to have all products returned to dealers and consumers within 3-4 weeks (including shipping time to and from Mustang).
Q: What are you doing with my returned product?
A: All units will be tested and if necessary, repaired, before being returned. We will stamp the inside of the product above the CO2 cylinder with “MIT” to indicate that it has been tested and is OK.
Q: Are the re-arm kits affected by this recall?
A: Re-arm kits are not affected by this recall. The problem is isolated to the inflator assembly on the inflatable PFD.
Q: Is this a problem caused by the M.I.T. (Membrane) technology?
A: No, the problem is with the inflator installation on < the affected units.
Q: Does this recall impact any other Mustang inflatable PFDs?
A: No, the recall is limited to only the MD2010 and MD2012 models due to its unique inflator components and installation method.
Q: How do I return my product?
A: Contact Mustang Survival’s Customer Service department at 1-800-526-0532 between 7:30am and 4:30pm PST, Monday through Friday with any questions or concerns regarding this voluntary recall notice.
Q: What are the shipping and repair costs?
A: Mustang Survival will pay for all testing, repair and shipping costs.
Q: How are you notifying the public about this issue?
A: A detailed communications plan is being executed to notify all affected dealers, distributors, consumers and industry partners.

Thursday, November 17, 2011

Bring on The Cold

This project is too large to qualify as a Small boat project... but it is so darn cool that I couldn't resist including it here.  Mike of s/v Chalice, one of our uber-craftsmen here at Small Boat Projects needed a wood-burning heater to fit his dimensions.  So he made one.
After looking at many different options for heat on the boat, I decided in the end to build our own.

Many folks seem to want a nice little wood stove on their boat, but there are no plans I could find and the small cast iron ones that are available or either expensive or appear to be cheaply constructed.

So. I designed my own. For the main items I had a local welding shop use their plasma cutter to cut out the parts. The rest I hand made.

From Update 3-2-2011 Wood stove


The Grate I could have made easily, but I let them as it sped up the process a little.
The entire Stove was welded with a small TIG Process torch. TIG is easy, just takes a lot of practice to be good. Although in these next few pics I actually had started welding with my MIG welder. It does not like 1/4 inch steel, so I rewelded the door and box with TIG.

I next assembled the Box and the door.

From Update 3-2-2011 Wood stove

From Update 3-2-2011 Wood stove


From Update 3-2-2011 Wood stove


You will notice the rails below the grate, that is for the stainless ash pan.
The door has a cast bronze damper I ordered from Washington state. The damper is mounted on a stainless steel bolt that is welded to the door. I cut the bolt head off.

From Update 3-2-2011 Wood stove


Next I welded the hinges on and the feet on the bottom plate and the smoke stack connection on the top plate. This pic is with it sitting together but not welded. The hinges is 1/4 inch rod with 1/8 in x 3/4 inch strap bent around the rod and welded to only one part of the set. The door is removable only when opened fully. This is a design feature.

From Update 3-2-2011 Wood stove

From Update 3-2-2011 Wood stove


Next I needed to weld the top and bottom on and then make the sea rail.
The sea rail is a piece of stainless steel strap 1 inch x 3/16 I believe. It is welded to (4) 3/8 inch stainless steel bolts.

From Update 6-8-2011 Wood Stove

From Update 6-8-2011 Wood Stove


I had to machine the sea rail mounts. This is before and after and also it was polished.

From Update 6-8-2011 Wood Stove


Then weld it all up. This was the hardest part to weld. Very little room to get to it. As you probably guessed, it bolts on, so it is removable.

From Update 6-8-2011 Wood Stove


Now I had to make the part that will make this stove efficient. This part really should be remade as it does not look like it should, but I don't have time or money to re do it at the moment. It will work though.

From Update 6-8-2011 Wood Stove


Last but not least I created a door catch/lock.

From Update 6-8-2011 Wood Stove


Now to test it.

From Update 6-8-2011 Wood Stove


Yes it boiled water fairly quickly.
Now to clean it up and finish it with a extremely high heat paint anf some polishing.

From Update 6-8-2011 Wood Stove


From Update 6-8-2011 Wood Stove


From Update 6-8-2011 Wood Stove


A 12 inch ruler for size. The fire box is only 9 inches square.

From Update 6-8-2011 Wood Stove

From Update 6-8-2011 Wood Stove

From Update 6-8-2011 Wood Stove


And finally in it's install location. I don't have it bolted to the shelf as of yet.
From Update 6-8-2011 Wood Stove

From Update 10-22-2011


I hope you all enjoy.  Plans and precut plates may be available. Email me for more info.

Monday, November 14, 2011

Visibility

Lotte on s/v Lunde hoists her new storm sails...  her neon orange storm sails, that is.  Why aren't all storm sails colored like this?  If your boat is in difficulty requiring a rescue, it is likely that you will be flying your storm sails (if anything) - what a great attention-grabber!

Pang-colored accessories

I actually really like the orange - but these rags, I hope not, we will need to flash too often.


One of the day's chores was to get hoisted storm sails to get measured the length of the neck, find shot points and otherwise just get an idea of ​​how they should sit. For it should happen that one day they must be, there is a guarantee that the weather is bad snot. So we could put them both wearing seasickness, numb fingers and poor vision.
(I really like the new paint on the bow, Lotte!)

Friday, November 11, 2011

My Favorite Bottom Cleaning Tools

The Chesapeake is kind of a unique environment...  warm water, not quite enough fresh water dilution to be called "brackish", but then not that far from it either.  It's an environment that grows things very well (well I know - we kept our boat Deja Vu III there for several years).  Drew over at Sail Delmarva takes us on a tour of the tools he uses there in the Chesapeake to keep the critters off his hull...
My last paint job, I used Micron 66. It lasted 2 years, in spite of dire warnings that it would peel in brackish water.. It didn't. I spoke with the factory and they repeated the tale, but I spoke with a rep at the boat show in Annapolis and he explained that it was winter haul-outs that caused the trouble. He also said that if you use the bottom paint up, running for 2 years and sand a little before repainting, it's all gone and that reduces the trouble. I used Micron Extra this time, which I've used before but found slightly less effective. I'm going back to Micron 66 next time, unless the new Micron 77 is out, which is brackish compatible. But this is all off-topic.


I do end up scrubbing 2-3 times before I consider paint spent. You need a scraper that...
  • gives leverage for hard growth and enough handle for 2 hands
  • is soft enough not the remove paint
  • floats

Mine is made from 1/8-inch polyethylene sheet and closet rod split with a saw kerf. A screw secures the blade. My first version used a Home Depot plastic paint scraper with the handles removed, which was OK but perhaps a bit too aggressive. The polyethylene sheet is better. I use the same scraper to clean off my spiffy new Manson anchor; there's just enough handle and it stashes easily in one of the winch handle holders on the bow. I keep a few on the boat, in case I can get helpers.

The best pads for removing soft growth are...
  • easy to hold
  • self-cleaning
  • have enough loops to pull off small barnacles
  • don't remove soft paint

Mine are berber carpet squares. Not pile carpet--that will just smear things around--you need the irregular loop pattern. I got the idea from a professional hull cleaner, and I like them far better than the 3M pads generally recommended. They work very well in combination with Atlas Fit gloves, which keep them from sliding out of your hand.

And they are free.

A Simple Preventer

10/8
Drew over at Sail Delmarva provides us with a minor rigging modification that will majorly add to sailing safety and pleasure...

Though sailing wing-and-wing is not supposed to be a catamaran thing, on a cruising catamaran the VMG dead downwind in a breeze is better and the ride smoother. Accept it. The moment the chute comes down, whether because you are single handing or because the breeze is too much, wing and wing is faster. Simply secure the boom as described, head down wind, and jibe the genoa over.

But accidental jibes are always a problem. Locking the traveler at the end does help, but not completely, not if the main sheet is eased a bit as it should be. Monohull sailors take a line forward to a mid ships cleat. But cat sailors have more beam and can do something simpler.


Simply attach the spinnaker sheet to the boom bail. Because I would never run a preventer when using the spinnaker--we never do that dead down wind-- this required no new equipment. It can be rigged in moments and released instantly.

Tuesday, November 8, 2011

A little structgural fiberglass repair

Livia and Carol on s/v Estrellita have been poking around down in their bilge. 

We took a lot of time in San Francisco to work on boat projects because we were enjoying the town, had a lot of free places to stay, and resources through friends in the area. This is one of the projects we tackled.

We’re now certain that our gorgeous girl has been grounded hard at some point. There was the rudder shoe repair, the old bad keel repair that failed that we re-did and now we found a crack in the fiberglass in the stringer (I think technically called a “floor”) behind the mast step.

Our concern of course, was whether the crack was in the fiberglass or the underlying beam. We could tell the crack was old because of the mold (ew!). So we dug, and scraped, and ground, until we found dry, uncracked wood (phew!). Then we considered how best to deal with the big hole we had created.

P1020473 (960x1280) P1020521 (960x1280) P1020535 (960x1280) P1020642 (960x1280)
P1020641 (960x1280)West Systems has a great series of videos, articles, and use guides for using their epoxy resin to repair fiberglass. We used epoxy resin and glass cloth. This was our first experience actually doing our own fiberglass repair so we decided to tag team it “Team Giddyup” style. Carol ground and beveled and I applied the glass. We chose epoxy resin for its strength but an unintended side effect is that it smelled WAY better than the fiberglass resin that they guy who did the keel repair used. We are very thankful for that because we weren’t looking forward to getting a hotel while the stink cleared out.

So, while enjoying the hospitality at the Oakland Yacht Club, we applied about 10 layers of glass cloth with epoxy resin. Can you believe that this still did not build it up to the same thickness that the Wauquiez builders had left? It’s *crazy*. Part of that is because we had scraped some rotten wood from the surface and part because we underestimated how thick the layer would need to be in order to match the existing glass.

P1020644 (1280x960)Of course, our boat was build back in the days when they had no idea how strong fiberglass was so they just kept adding more to make sure the boats would be strong enough.

We’ll watch the repair job and see how it does over time. Luckily, these stringers/floors simply stiffen the boat laterally and so, unless you ground the boat, don’t normally take a lot of fore-aft stress.

We also found old repair jobs in the corners of other stringers on the starboard side. Hopefully, those repair jobs, which were smaller, won’t fail like this one did.

Thursday, November 3, 2011

How to: Make your own brass fittings

Having built her own screens from scratch, Lotte on s/v Lunde now makes the brass fittings for mounting them. Nicely done!

I know that many of you are choking with all this do-it-yourself (if you even still bother reading it).  It was never originally thought that this blog would be a DIY / nerd blog, but at times it really is that which fills most of my life and ergo also what is most natural to blog about.  And  I would like to share some of the best tips and tricks that I have been fortunate to be enriched during the boat projects. Many of them I have not been able to google - it's about the  tradition of craftsmen and other good people out in the physical world.  [Ed: The best kind!]

But hang on, it will not always be this way. For there are covers on hold.

However, I promised yesterday that I wanted to show how our mosquito nets are mounted.  The criteria for mounting were:
  • Simplicity
  • fast service
  • discreet
  • and so it matches the interior
In my father's rich stock hid some fine old fasteners. This was half of the suspension ready.  But there were not enough fasteners to put on all four sides, and the screen would really like to be firmly seated regardless of whether it is removable or not. So we had to devise some sort of hardware that could meet those criteria.

You will need a few strips of brass.
Cutting or trimming possibly out of a piece of old sheet or the like. It is obvious to recycle here.
Put the strip firmly in the vise so that it forms an angle at the end of the jaw (the part of the vise which clamps) of 45 degrees
Fold both ends of the strip over the vise using a sledge hammer or a large hammer
The bracket after the first bend.  Next, scribe a line such that the distance between the line and the first bend corresponds to the thickness of what you want to hang up. The frame of the screens is 10mm and then the distance must be the same. Be sure to get stroke and bend to be parallel, otherwise it will mount crooked.
Tighten firmly so that the line is flush with the edge of the vise.
Fold against vise the jaws. Here I used an old cooper tool that can best be compared with a chisel which is flat at the end. But a piece of flat iron can also easily be used - or whatever you have.
After the second bending. Repeat on the other side of the bracket.
Drill holes for screws. Cut and sand the ends. Round off all edges with a file.
Eventually polish the brackets and they are ready for installation.
The bracket in place
Mosquito net in operation. The two fasteners for easy and quick installation and removal.
I've done a similar set of brackets, so the screens may be stored elsewhere (in this case on the underside of one of the top cabinets in forecastle) when not in use.
[Editor's note: Apologies for my poor editing of Google Translate's translation from the original Danish.]
Related Posts Plugin for WordPress, Blogger...