Life aboard is living large, in a small space. Every boat owner has found ways to make life in that small space easier, more comfortable, more convenient. The idea behind this site is to provide a place where these ideas can be shared amongst the boating community.
To participate, send your contribution to SmallBoatProjects at gmail dot com.
Please welcome new contributors Rich & Jeni, who sail their Tayana 37, s/v Ramble On. As their first contribution, here's a simple and effective (the best kind!) time and money saver:
Sorry for the lack of a witty title; I just don’t have the energy right now.
If you have a boat you probably like to be outdoors. And if you enjoy being outdoors, you probably also like to cook outdoors. Ergo, if you have a boat and you like to cook outdoors, then you probably have a barbecue mounted to your rail. If not, you have no idea what you’re missing. We cook outdoors a lot. In the summer it helps keep the boat cool by not cooking inside. Pretty much, if it’s not raining I’m Q’ing.
Jeni and I were going to “Q” the other night, in fact. And that’s why I have to say it was bound to happen eventually. I’m actually quite surprised it didn’t happen sooner. And if you have one of those cute little marine barbecues with the cheesy pressure regulator, if it hasn’t already happened to you it probably will. When I pulled off the cover to warm up the grill, plop. Glug, glug, glug. Off popped the regulator, and straight to the bottom it went.
“Hey, wanna order take out tonight?”
In two days we had our replacement regulator from Port Supply and upon further inspection I realized a small tab in the casting. I’m not sure if this was the manufacturers intention or not, but this appeared to be the perfect spot to crimp a stainless steel safety cable. A trip to the hardware store and $4 later we were back in business. A small carabiner on the other end clipped right into the rail mount handle. It’s as if it was meant to be by design, even though the manufacturer makes no mention of it in its instructions, nor do they sell some overpriced version as an “accessory”.
Needless to say, my regulator (and hopefully yours now) will not be going for a swim.
It's getting cold on the East Coast, so here's a post that Rick on s/v Cay of Sea did last summer. Rick always shows excellent attention to detail...
I have been suspecting this particular stanchion as the source for leaks for quite a while. At one point 6 or 7 years ago, when we were in a shallower slip in this same marina, we had a super low tide. The boat grounded out and leaned over against the finger pier and, I think, slightly bent this particular stanchion. I’ve never re bedded any of the stanchions, so this was the original compound underneath. Stanchions are not designed to be pulled on, and certainly not designed to withstand having the weight of the boat push them into a pier, so I believe that is when it began to leak a good bit. It may have leaked some before then.
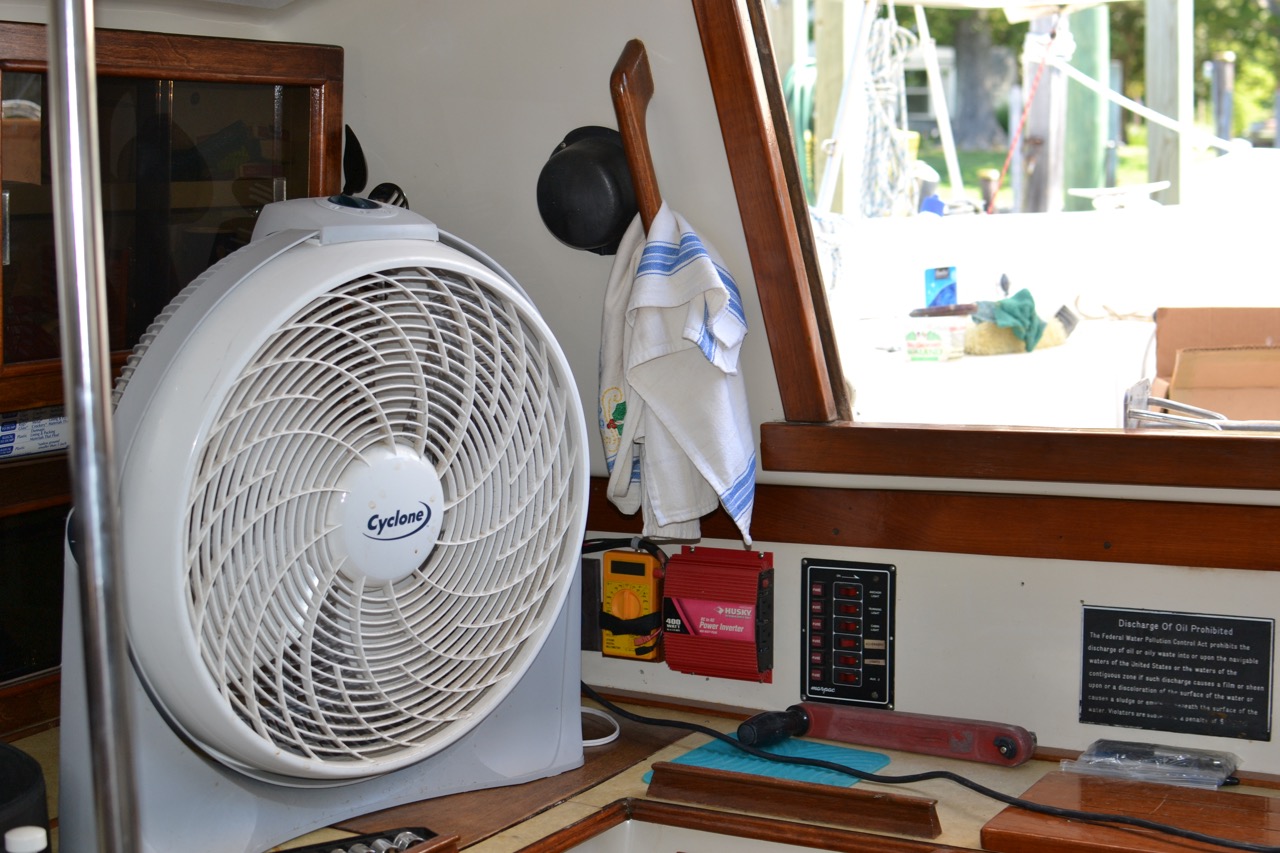
Regardless, I decided that I wasn’t going to hide from the heat today, and ventured down to the boat with my large fan in hand. I set it up on the galley counter, and it made a huge difference in tolerating the heat today. I also put up all my hot-weather canvas and kept as much sun off the boat and myself as possible.
Artificial breeze was critical today.
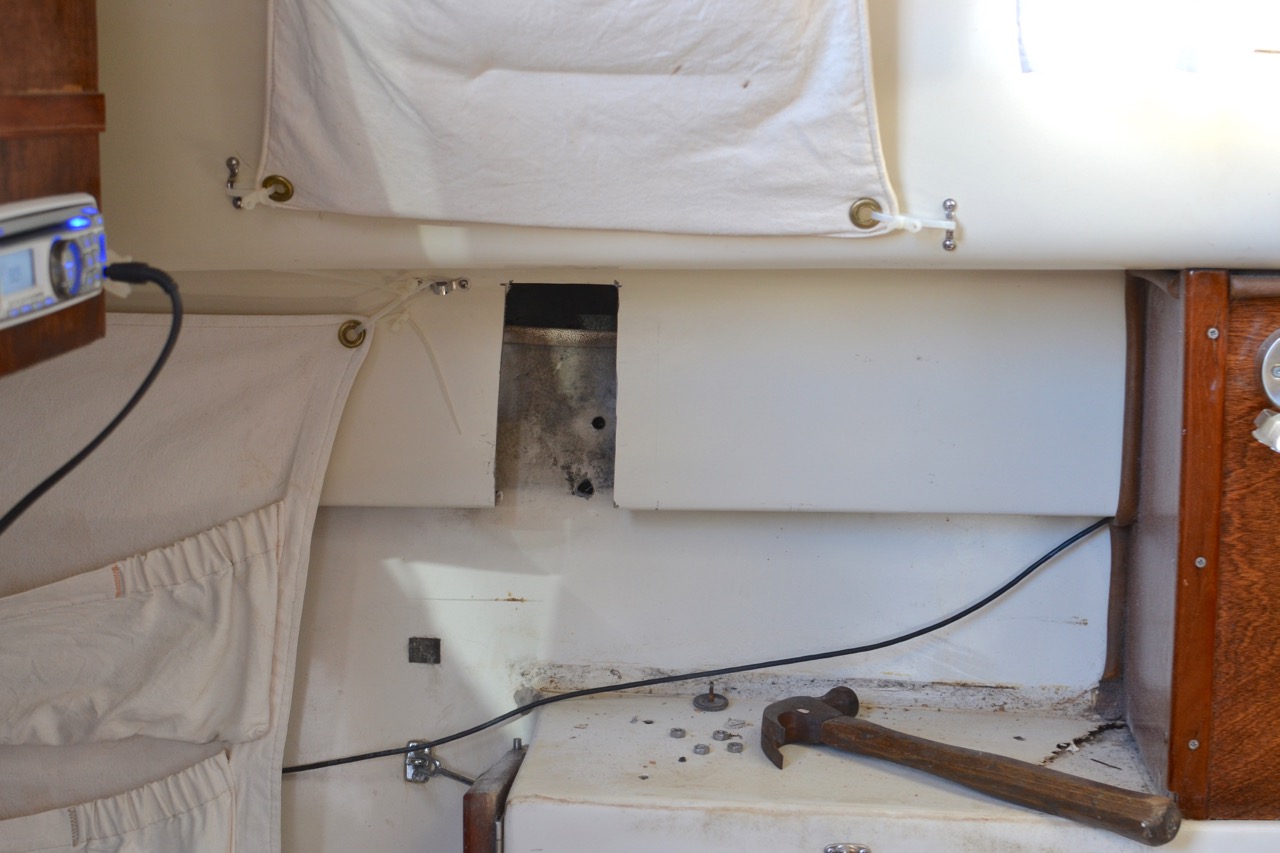
The fasteners were impossible to access with the hull liner in the way. I’ve thought about this project for a long time, and had determined that the only way to gain access to the fasteners under the side deck was to cut a window in the liner. I had to remove the stove from this space, and the fold-up table it sits on/sits behind. I moved all the cushions to the v-berth to keep them out of the dust, then donned my respirator and started cutting. Took about 90 seconds.
A 5-inch grinder with a cut-off wheel makes this so easy.
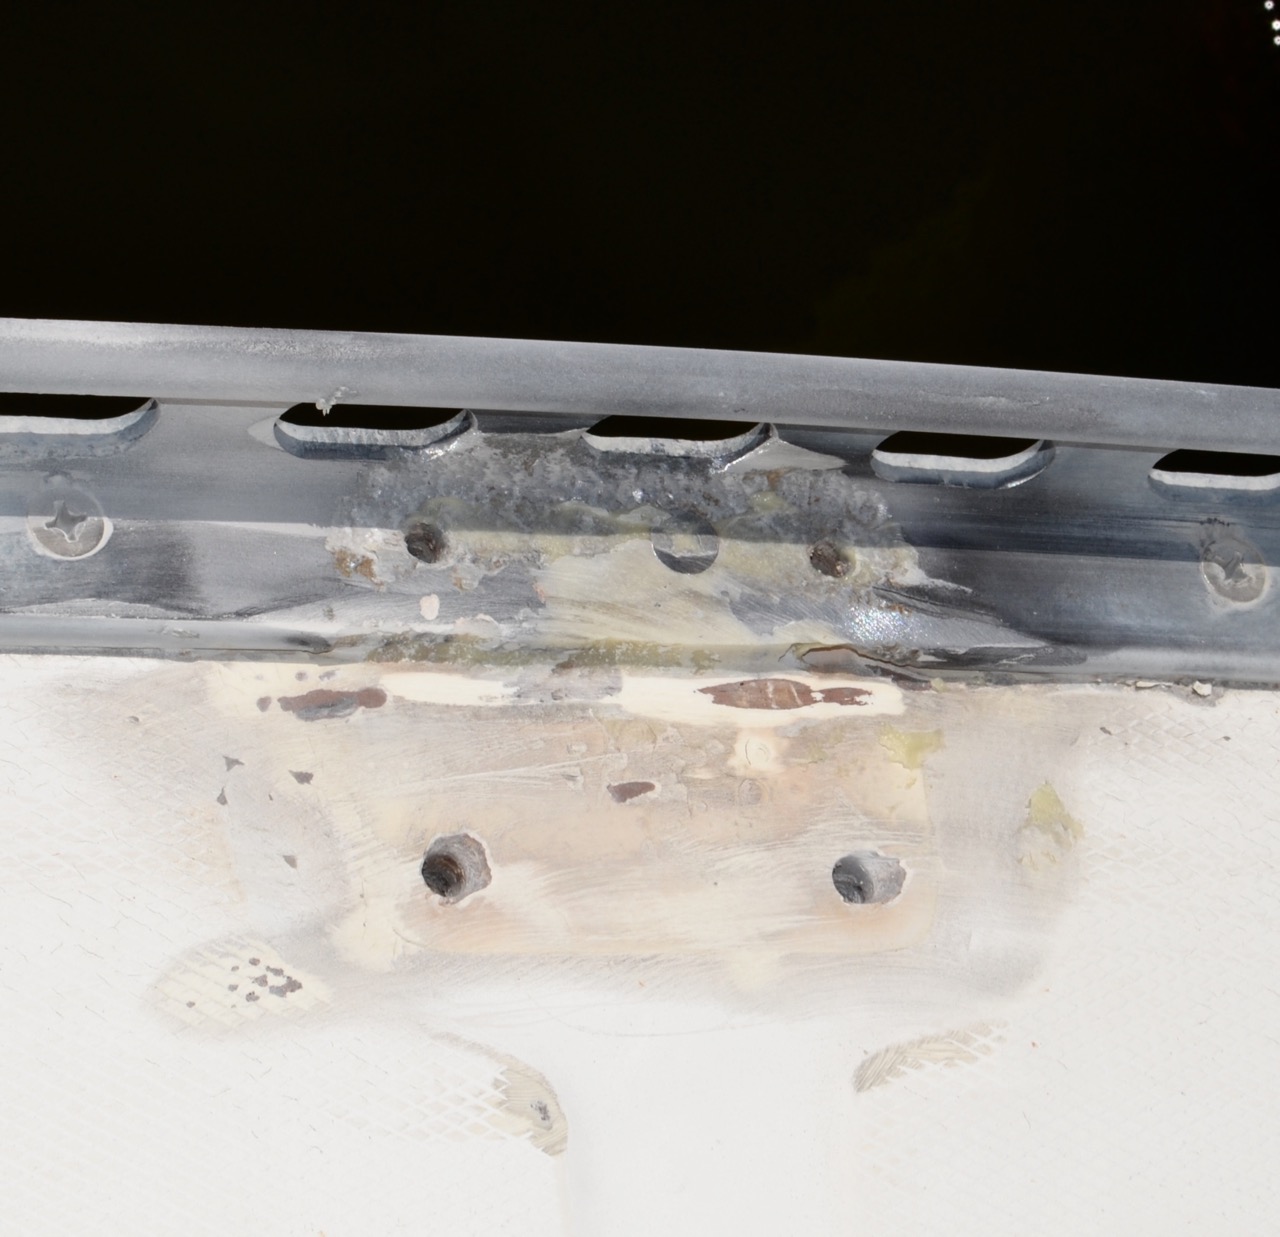
This is the view up behind the window in the liner. I’ve already removed the fasteners and stanchion.
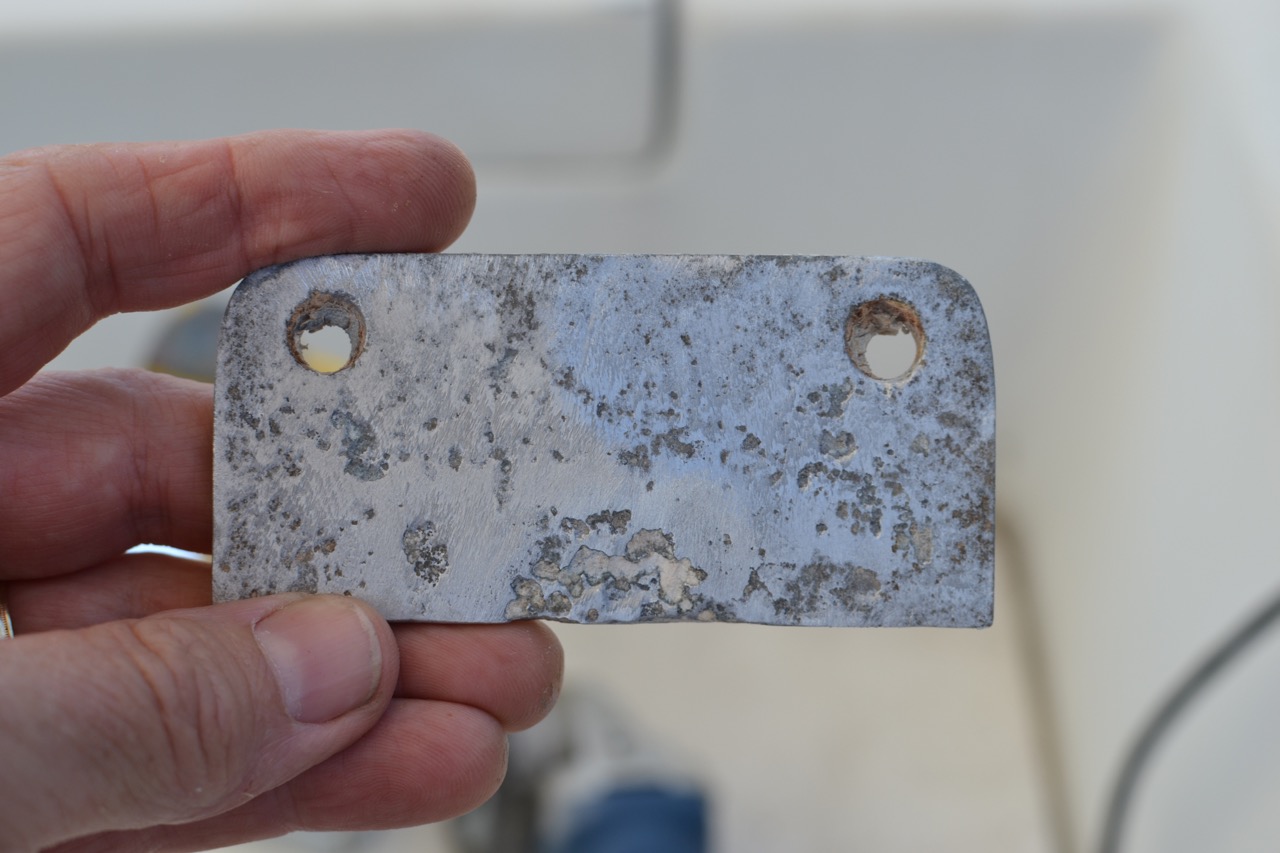
The window made access easy. I had the fasteners off and the stanchion removed in another 10 minutes. The caulking underneath was insufficient to begin with. I mean, there really wasn’t enough of the old compound down there to begin with. I scraped it off and cleaned up the surfaces with a wire wheel. There are dissimilar metals involved, so there is also quite a bit of corrosion both on the spacer plate and the toe rail.
Lots of pitting here. Aluminum against steel, with stainless fasteners, frequently dowsed with salt water. . .
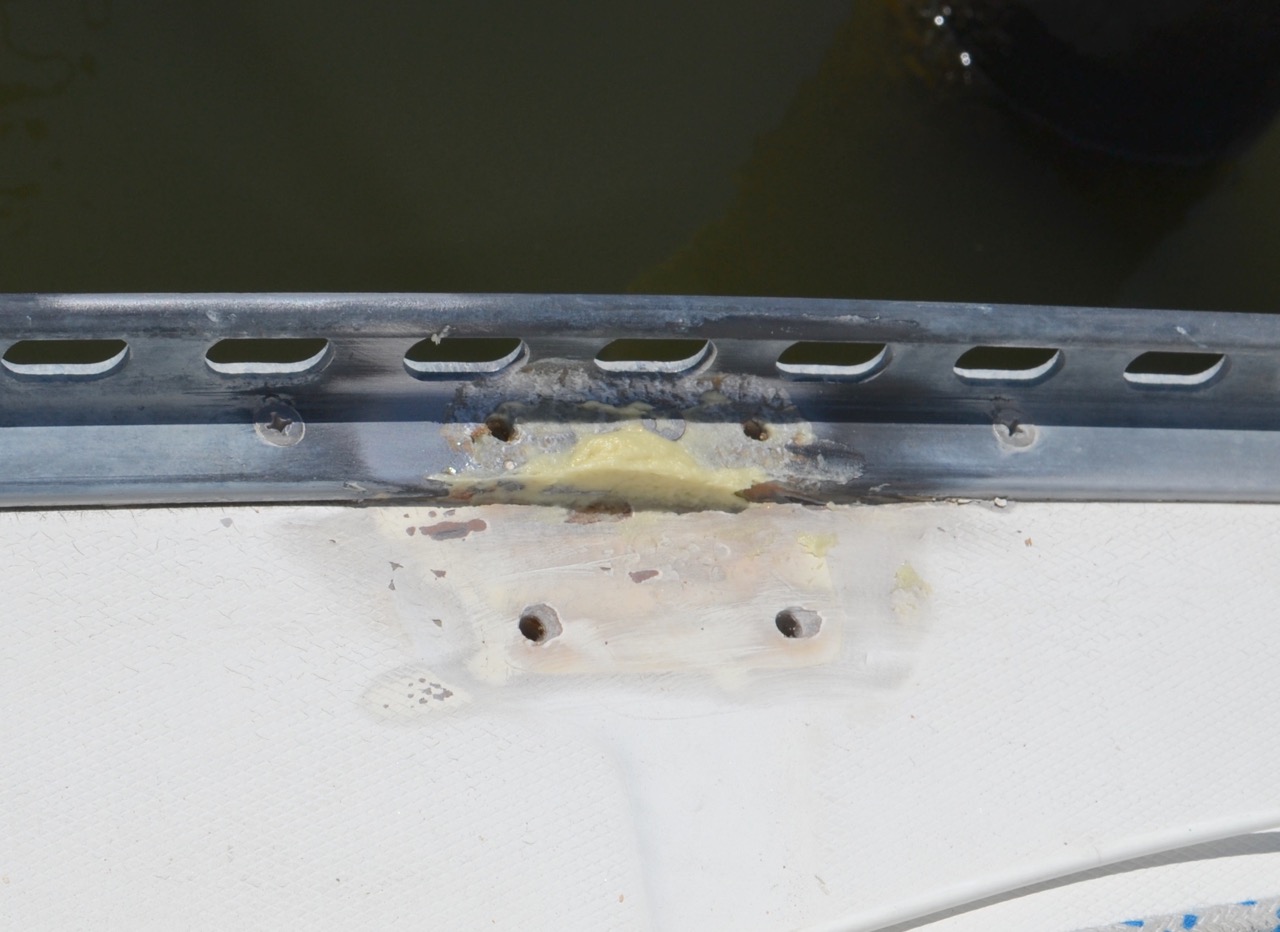
I forgot to photograph the section of the rail before filling with epoxy. It was significantly corroded away, and I had to fill it to make a flat surface for sealing.
You can better see the extent of the filled area in this photo, now that the excess epoxy has been sanded away.
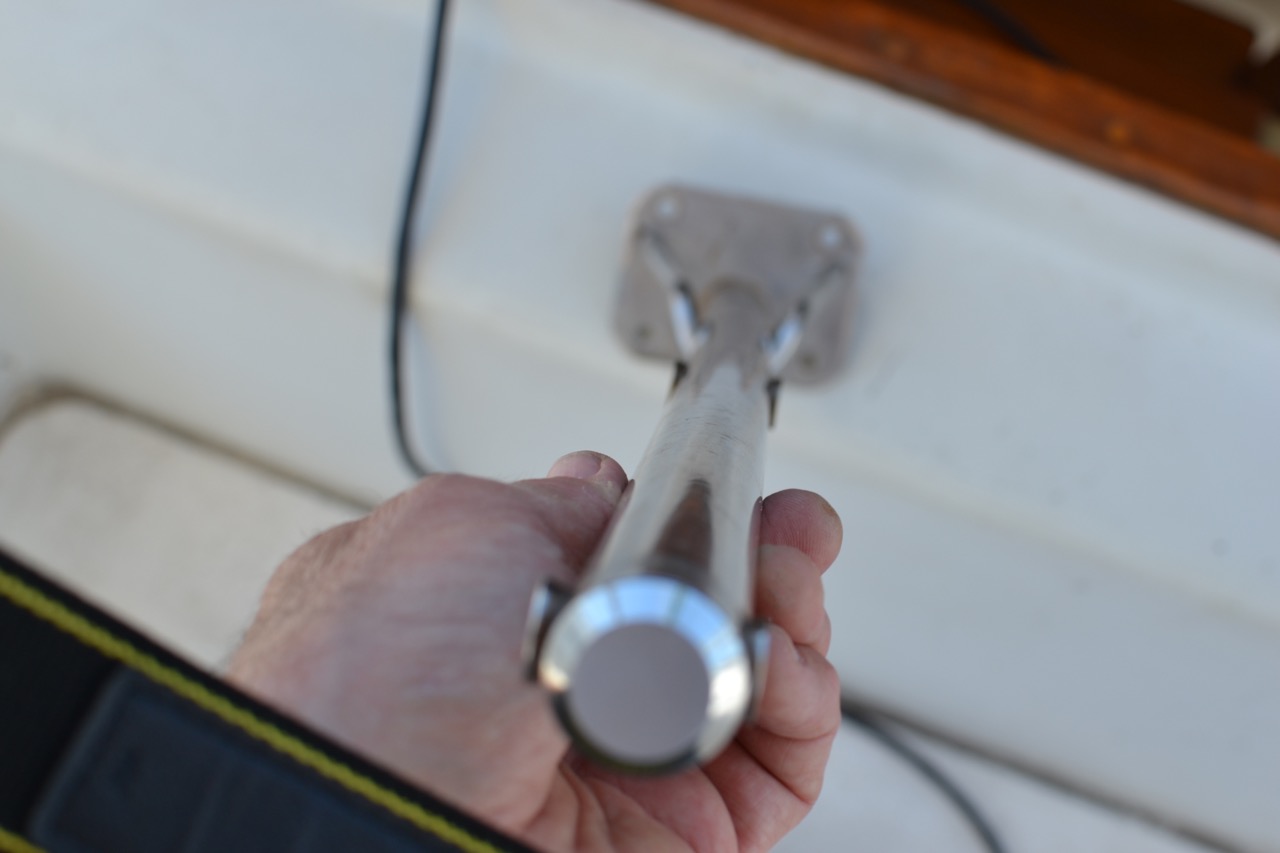
I re-bedded the stanchion with butyl, after straightening the stanchion. I was not able to get it completely straight, but it’s much better than before, and I don’t think anyone can tell it was bent now.
You can see a very slight bend to the left at the bottom of the stanchion.
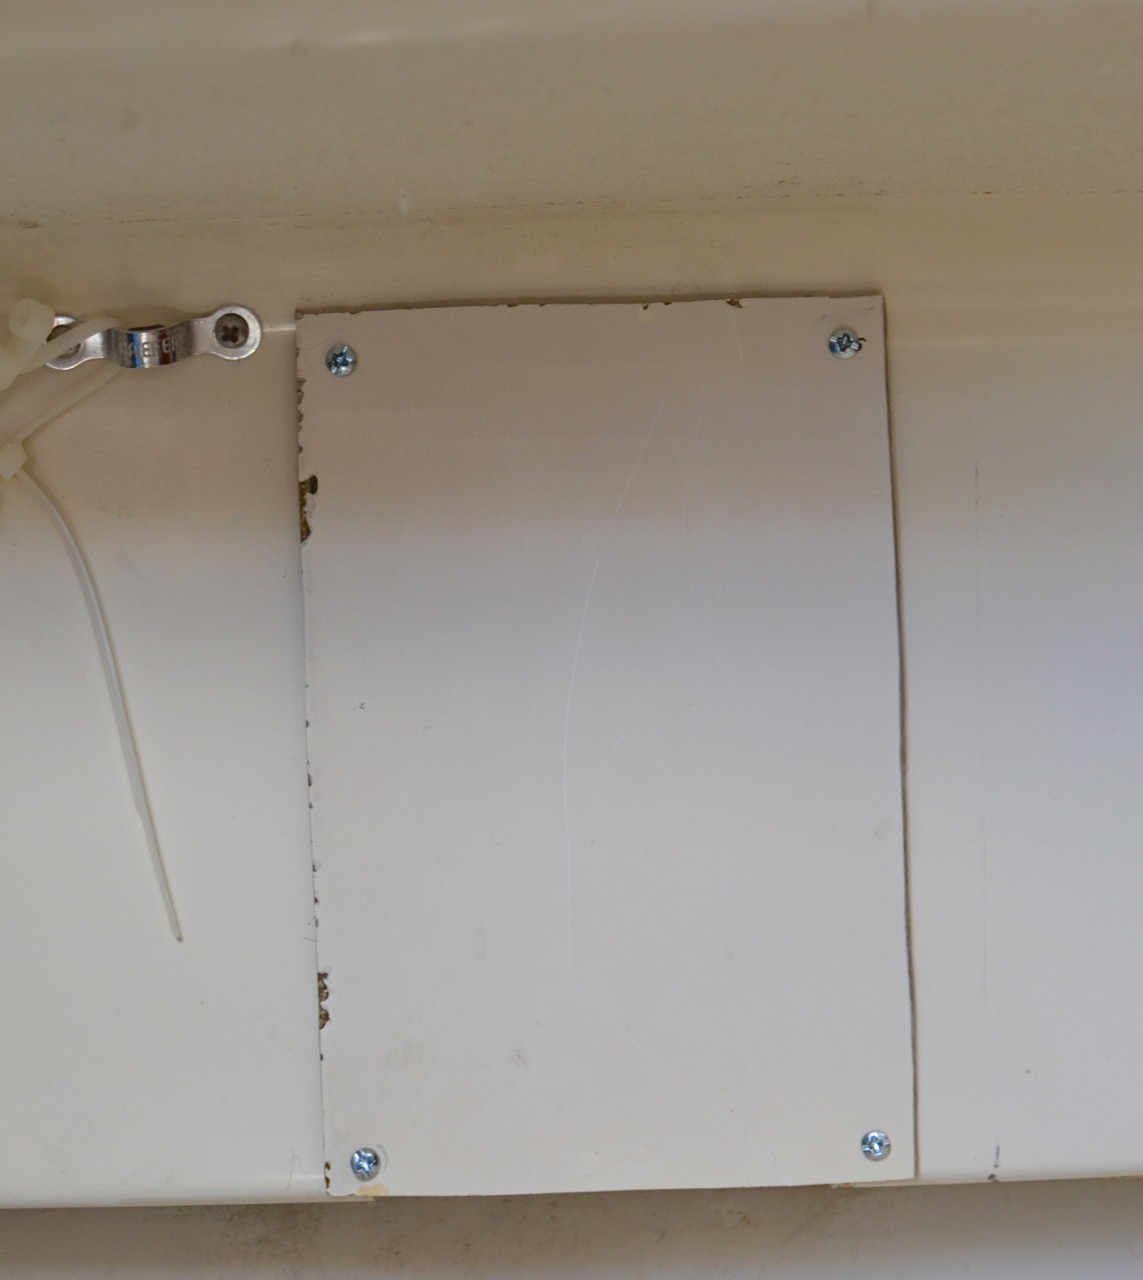
I refastened the stanchion with lots of butyl between it and the deck, bedded the screw heads and tightened it down. I got lots of squeeze-out, which is good. That’s how you know you’ve used enough bedding compound. After that, I made a cover panel for the window in the liner. I had some fiberglass left from when I enlarged my engine compartment a couple of years ago, and it was the right thickness and color.
Not a perfect piece, but it will be pretty much out of sight anyway.
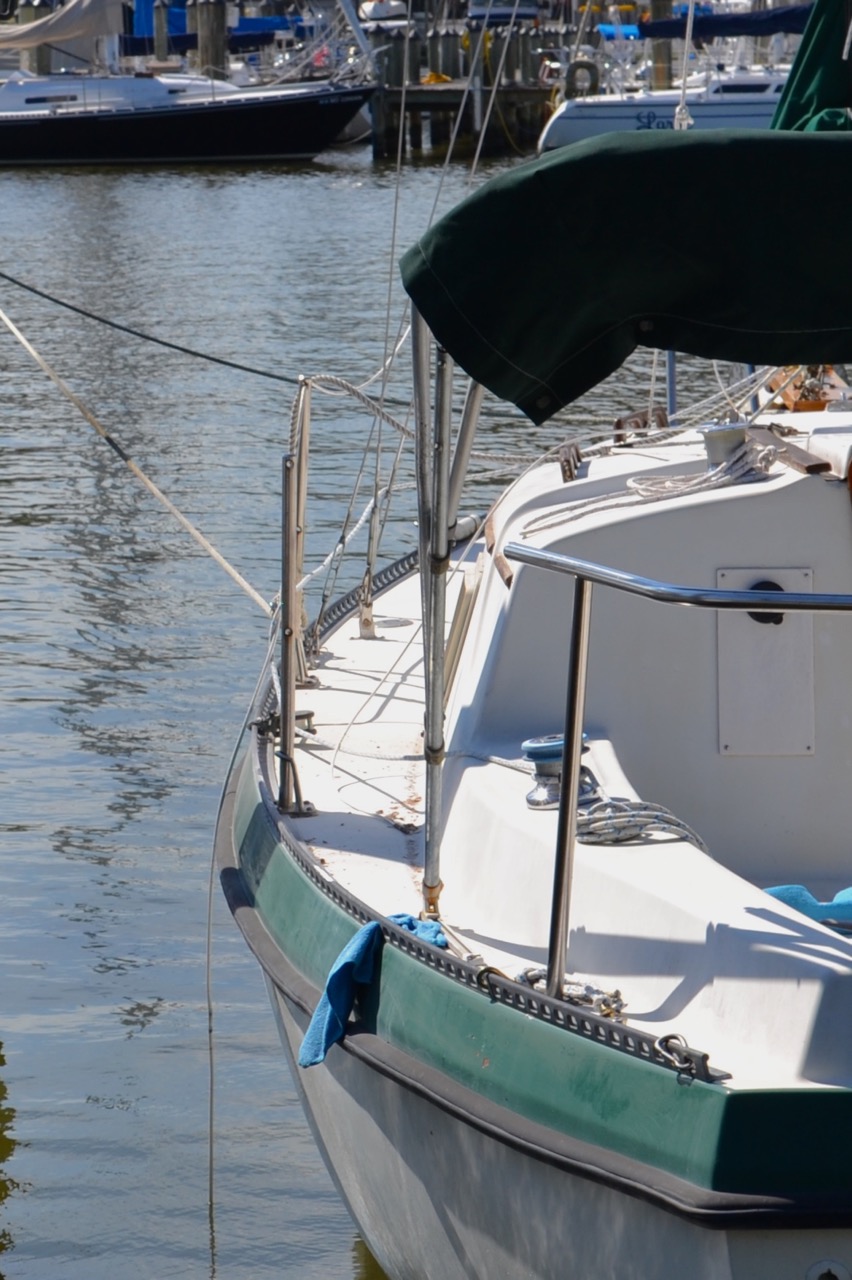
I spent another 15 minutes picking up and cleaning up, but left most of the tools out for re-bedding the next suspect stanchion in my quest to stop leaks. Here’s a photo of the remounted stanchion. It used to lean inward toward the coach-roof, but it looks straight now.
It’ s the first stanchion forward of the blue cloth in the toe rail.
This post originally appeared on Windborne in Puget Sound Finally, I have completed the last of the three cockpit bimini canvas pieces: the center section. This panel is zipped to both the forward and aft roof panels, meaning that its size is completely dependent on the placement of those two panels; they had to be completed first.
But because the old center panel had to continue in service until the new one was fabricated, the forward and aft panels had to be properly located. In other words, because I did this work in sections instead of all at once, the new roof duplicated the old completely...
Because the old center panel fit perfectly, rather than pattern the center panel with DuraSkrim I chose to simply roll out some Sunbrella and trace the outline of the old center onto it. The size is not terribly critical; instead it is the zipper placement that is crucial. That being the case, I did a lot of measuring and annotating on the old center panel:
Again, placement of the zippers is what controls the fit here. So I measured outside-tooth to outside-tooth at perhaps a dozen stations along the old panel. Then, when applying the zippers to the new panel, I duplicated the station locations and ensured that the zippers conformed to the measurements.
I have learned thru this project that zipper position in a lengthwise direction is also critical, especially when there are pairs spanning the length. To make this work out properly, I followed these steps:
Locate the centers of both the old and new panels by folding in half, and mark them.
Install the old center panel, and transfer the center markings to the forward and aft panels.
Work on one edge at a time, I started with the aft edge. Install one of the new zipper halves to the aft panel zipper.
Hold up the new panel, matching the center marks.
While continuing to hold the panel in place (you may need help here), make match marks on the new zipper half and the center panel an inch or three away from the center.
Remove the new zipper half from the aft panel.
Position the new zipper half on the new panel using SeamStick basting tape, matching up the match marks. Note: at this point, with no other reference it is not possible to exactly locate the zipper width-wise. Instead, using another new zipper half on the opposite edge, simply ensure that zipper placement will allow both zippers to fall approximately equally on the fabric. Exact spacing at the measurement stations will be established when the opposite zipper half is installed.
After sewing the first zipper half, take the panel out to the cockpit again and zip it up. Install another new zipper half on the other aft panel zipper.
Pull the panel firm athwartship, and make match marks on the new zipper half.
Following the steps above, install the second zipper half.
At this point, zipper installation is half done, with the attachment to the aft panel complete. Complete the forward zippers in a similar fashion, with these two modifications:
When establishing the position of the first zipper half, match up the centerline marks as before. But this time, slide the panel a little port and starboard, watching for wrinkles to form and dissipate. You are looking for that placement where there are no wrinkles - it may fall when the centerlines are not quite matched up. Match mark the zipper half and the new panel.
When sticking the zippers in place with SeamStick, be very, very careful to get the outside-tooth to outside-tooth spacing at the measurement stations the same as on the old panel.
Ta DAAA!
So, what did it all cost? I'm afraid I can't be entirely accurate because I used some supplies from earlier projects. But what I can do is to make an estimate on materials costs, based on the Sailrite catalog I have here on board (check the Sailrite website for current prices):
Item
Quantity
Unit Cost
Extended Cost
Sunbrella, Erin Green, 46" wide
10 yd
16.95
169.50
DuraSkrim
10 yd
2.95
29.50
Binding tape, 3/4", Erin Green
80 ft
0.50
40.00
Zipper, #10, 48"
6
7.50
45.00
Zipper, #10, 60"
4
8.70
34.80
Zipper Pull, #10
10
1.70
17.00
Zipper Stop, Stainless
2 packs of 10
2.50
5.00
Common Sense fastener, male
50
0.60
30.00
Common Sense fastener, eyelet
17
0.195
3.32
Rivet
100
0.15
15.00
Seam Stick, 3/8"
1
8.95
8.95
Seam Stick, 1/4"
1
6.95
6.95
TOTAL
$405.02
I also bought some tools that, tho they were used in this project, will be used again in future projects. I don't know if these should be charged against this project or not (you decide), but you should definitely have these tools to do the work:
Item
Cost
Rivet Setting Tool Kit
89.00
Common Sense Eyelet Hole Punch
69.50
I did not include the cost of the thread because I bought a large spool years ago and have been using it since. You definitely want the Teflon Tenara thread or equivalent - it will outlast your boat. Don't settle for polyester thread.
And finally, you need a heavy-duty sewing machine to handle this. I heartily recommend the Sailrite LS-1 or LSZ-1 (zig zag - if you intend to sew sails). They are expensive and worth it. We got ours used for less than half the new cost.

 Needless to say, my regulator (and hopefully yours now) will not be going for a swim.