From the crew of Eolian to you and yours,
May the joy and hope of
Christmas fill your hearts the
whole year through
The fine hardware I have used for hanging of screens is so old that they are probably almost vintage modern. Three pieces were saved - to my great luck - in my father's rich hardware depot. Their origin is lost in the mists of time, but now they have new life on board with us.
First, however, a bit of old corrosion needed to be eliminated.
My best tip for this consists in first giving the object an acid bath, for example, in half acid/half water (really hot, so it goes faster). Do not leave them too long - just until bubble formation ends.
Then it is on to Brasso and elbow grease, though rarely is much of this needed after a tour of the acid.
The result you can see below.

Acid bath

Before and after the acid bath but before polishing Could it be any easier?

Once polishing with Brasso and you would almost think they came directly from the manufacturer
My low-buck dinghy needed a place to live. So I had to build some low-buck davits.
Updated:
Have you priced davits lately?
At the bottom end of the scale you have Plastimo davits, which start at $750, and it goes up from there. In keeping with my low-buck theme, i figured i would see if I could build an acceptable and attractive alternative, to carry the low-buck dinghy. The dinghy itself weighs less than 60 lbs., so here's the challenge I set:
Build a pair of davits that would carry 75 lbs each, (for a combined total of 150 lbs) without failing, that would not embarass me when hung off the stern of Whiskeyjack (or her, for that matter,) and that cost less than $100.00.
Here we go.
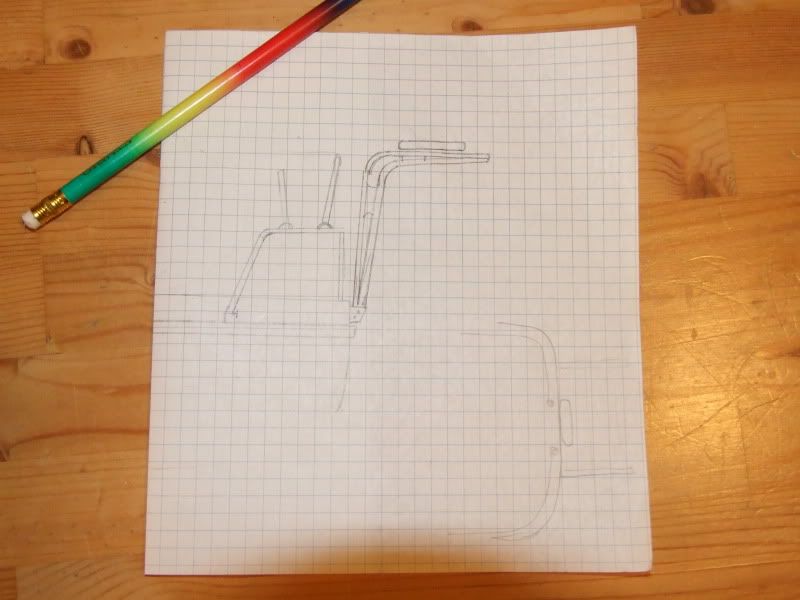
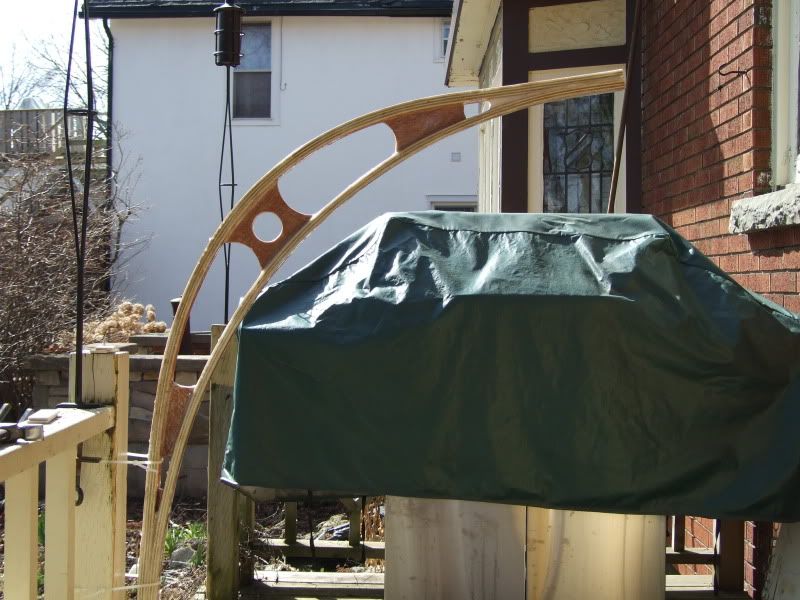
First, I created an artist's rendition of how the davits should, and if all the stars lined up correctly, would look:
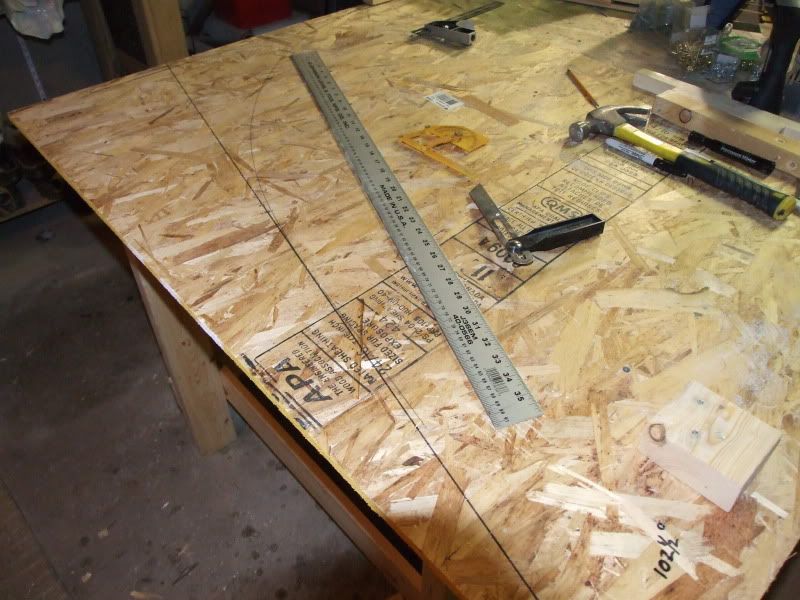
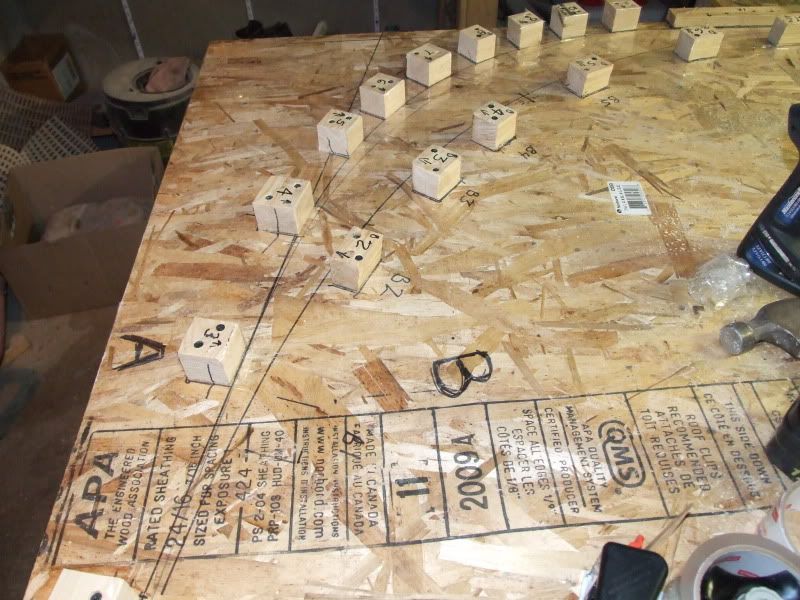
Then I carefully calculated the height and extension of the davits, as well as the angle of the dangle, then guessed at what looked like suitable dimensions. I laid out those dimensions on a layout table. this is where the davits will be born.
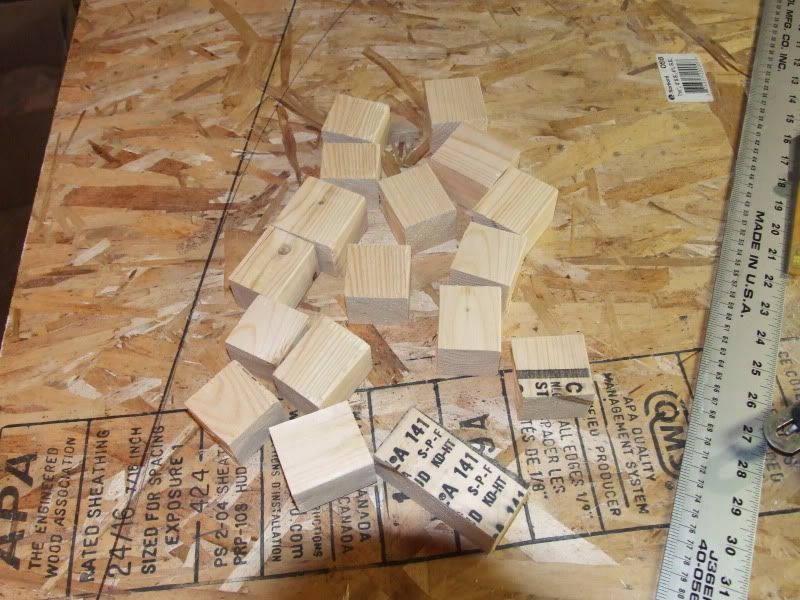
I cut a length of scrap 2x4s into even smaller scraps, then split those even smaller scraps into even more smaller scraps. These will become clamping cleats.
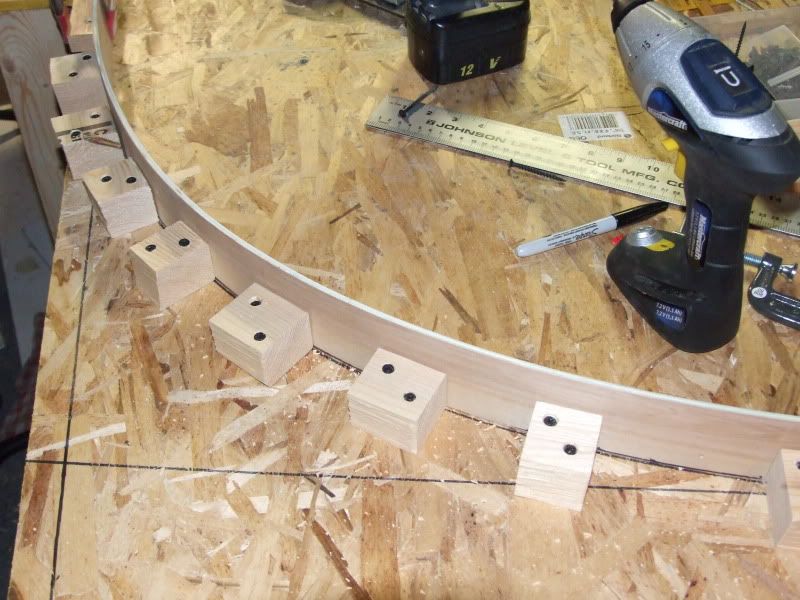
I then bent a batten of the construction material of choice, and traced the curves to establish where to secure the clamping cleats.
At which point I have unavoidably screwed up.
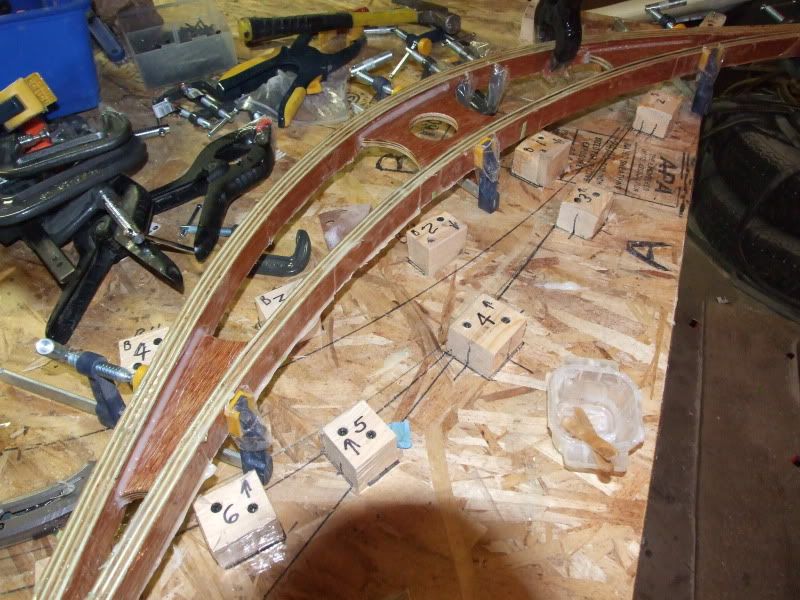
I am going to fab my davits out of my old friend, 1/4" mahogany ply and epoxy and fiberglass. For all intents and purposes, the ply is simply a support system for the epoxy and cloth. Each strip of ply will be buttered with thickened epoxy, and the entire laminate will be covered in fiberglass cloth... which will mean it will be permanently fastened to the layout table beneath it. They may very well end up being very attractive davits, but incredibly useless if permanently bonded to a table in my basement. So, I unfastened all of the cleats I had securely fastened to the table, after carefully labeling each one...
...and then I sealed the table and each cleat with a few layers of clear packing tape. Now, in theory, the davits will simply happily peel free of the table.
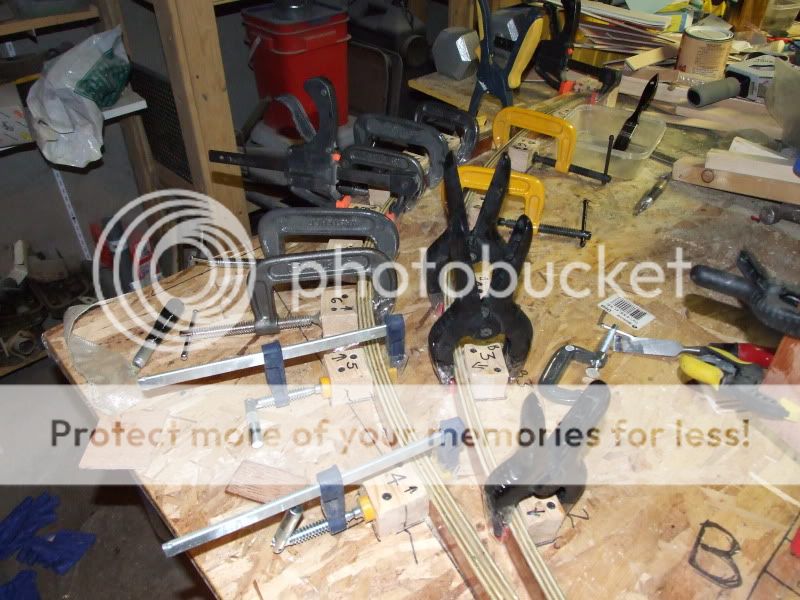
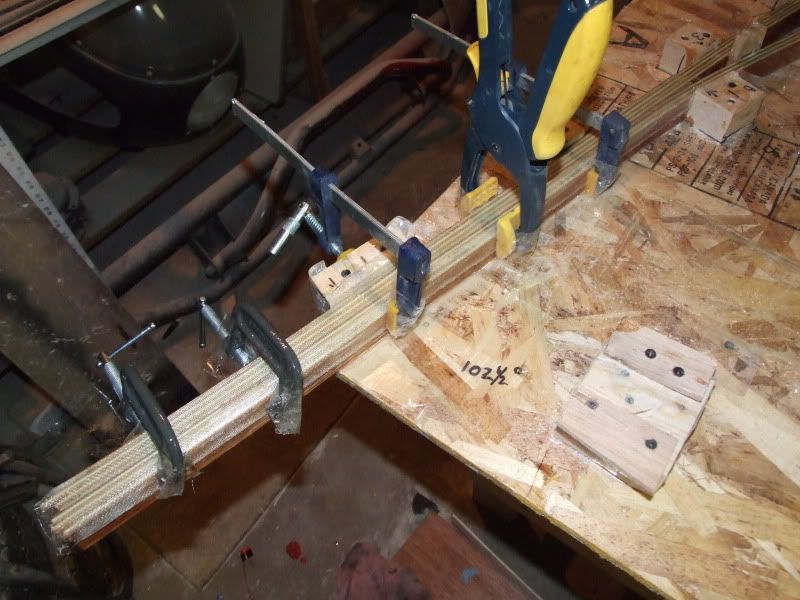
I then fired up my table saw, and ripped 20 1 1/2" strips from a 4/8' sheet. i planed them down so they were all more or less uniform in width, and dry laid the first davit. I trimmed the ends approximately to length, marked each strip for the assembly sequence, then buttered the exposed side with straight epoxy, and the mating surface with thickened epoxy, and got to clamping.
I decided to take advantage of some left over epoxy, and laid a layer of FG cloth wet on wet on the ends of the davit.
Davit one down. One more to go. Then I get to fab a mounting system.
Gussets cut and filleted into place
Next step is to sheath the plywood with a layer or two of fiberglass cloth, which will add some stiffness and also help spread the load.
Speaking of loads...
Do you really think I am just flying by the seat of my pants, guessing at all this stuff? Do you honestly think that I am not smart enough or organized enough, to have run load and stress projections on the material before I started making sawdust? Honestly, do you really think I am a complete moron, simply crossing my fingers and hoping for the best?
If so, you are absolutely right, which is why I am only building one davit at a time.
Seriously, once I have this one glassed I am going to clamp it in it's installed position and start hanging weights from the end. I THINK, based on some admittedly basic calculations coupled with past experience, that I should be able to hang 75 lbs. without failure. That represents 1.5x the weight of the dinghy, or 3x the weight of the dinghy hanging on the pair of davits, which I THINK should be enough to tolerate some wave and wind stress. If nothing else, I will have a place to hang my solar panels, which is a secondary reason for this project. Yes, there will be two crossbars to tie the davits together and add some lateral stiffness, and provide aforementioned solar panel mounting.
I am going to use a couple of pieces of scrap stainless tube and some stanchion fittings to tie into the stern rail, and the foot of the davits will mount to the transom. I think I will have to fold some stainless sheet into a flanged Ushape for the transom mounts and then through bolt the davit to the plate and through bolt the plate to the transom with backing plates.
STRESS TEST RESULTS are in:
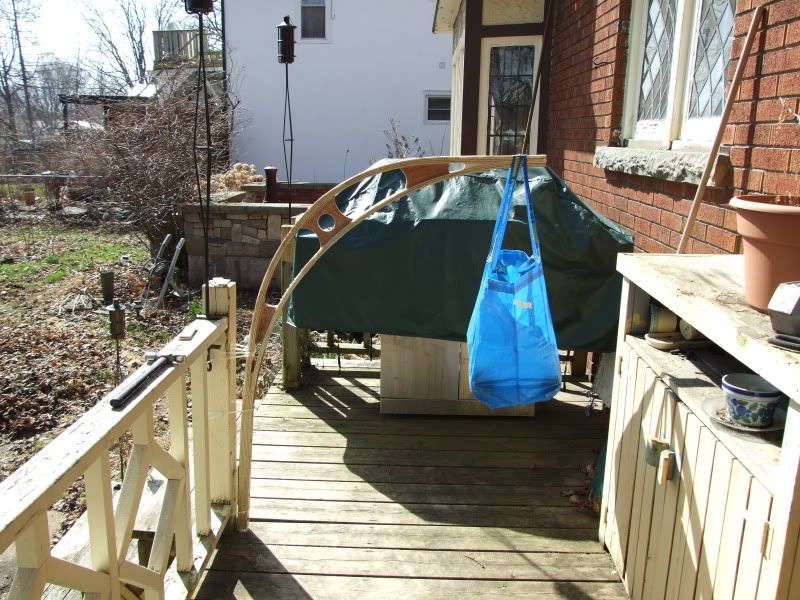
The weather was finally nice enough this week to see if my davits can carry the weight. (Actually,it took me a while to get up the guts to test my own WAG-style of engineering, but cold temps and rainy days make a good excuse.)
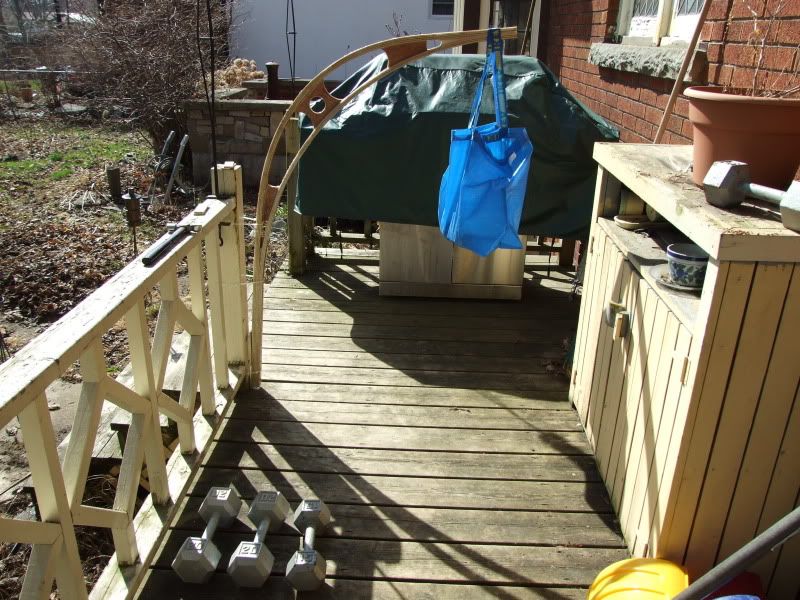
I carefully designed and skilfully constructed a cutting edge testing platform, then designed, cast and calibrated weight apparatus, and... I actually just tie-wrapped the davit to be tested to my back deck railing and hammered in a couple of wedges to keep it from moving around.
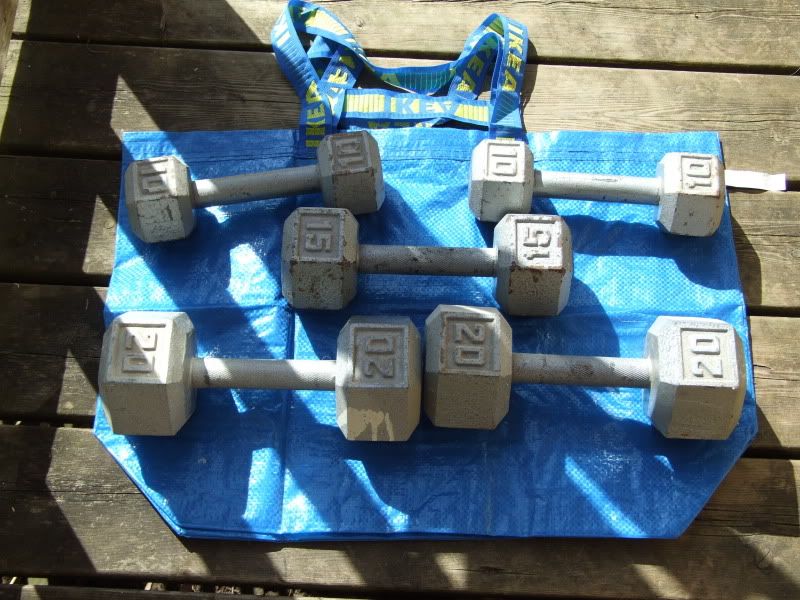
Here's the weight that the davit has to successfully carry:
I decided to start light- here's 20 lbs:
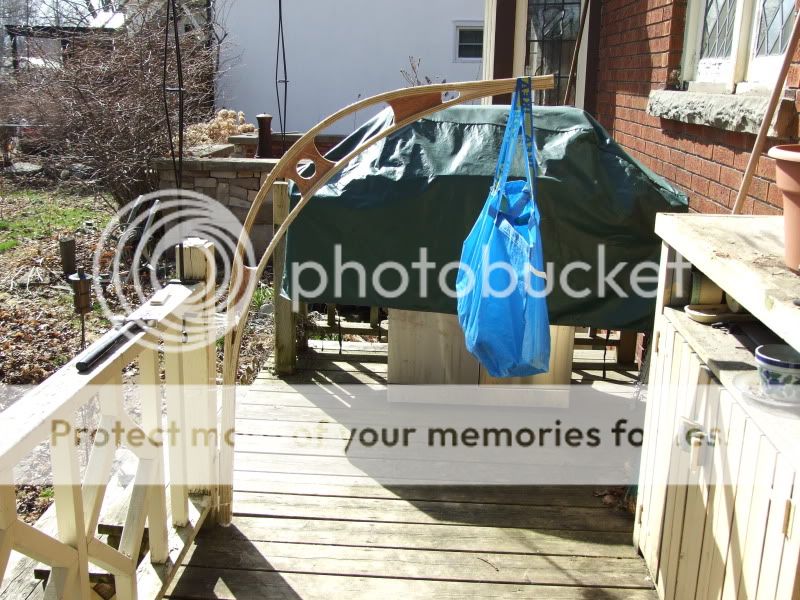
It didn't break, so I stuffed 35 lbs. in the bag. My high-tech mounting system was showing signs of stress so i threw some more tie-wraps at the problem, and no more creaking and stretching sounds.:
No problem. Next I shuffled the barbells around, and went to 60 lbs. Passed with flying colours. So, deep breath, here we go,
75 pounds....
YEAH, BABY!!!
I may add another layer of cloth to the top and bottom surface, just for peace of mind, but I am pleased with the result so far.
Currently I am working to finish up the mounting plates, and I will post pics shortly.
One constant aboard performance cats and even semi-performance cruising cats is cored hulls. If there is anything serious to mount, it's a long and methodical process:
The previous owner added a winch without following these steps, and I managed to tear it out of the deck. Cored construction can be very strong, but point-loads need to be distributed.
- Drill through.
- Route-out the core.
- Fill with epoxy.
- Wait.
- Redrill.
- Add a backing plate. Yup, perhaps that should have been FRP and epoxied on before you drilled.
- Through bolt with washer and sealant.
Front of the mountWhat if the mount is on the inside of the hull and you don't want a bolt sticking out the side? A sump pump mount. Some hooks to hang weighty objects. Screws are possible, but the skins are thin and the space between the inner skin, which must fully engage the threads, and the outer skin, which cannot be touched, is less then 1/2-inch, sometimes only 1/4-inch. Since screws come in 1/4-inch increments, this can be a real problem. The answer is a thickened patch on the wall, and to mount real equipment, built-up glass is probably best. Of course, there need to be bolts or enough thickness to get some real screws in it, so glassed in wood is common. But wood rots. There is a simple, faster way, if the surface is close to flat:
Back of the mount
Piece of cake, easily pre-fabed in the shop, and will last as long as the boat. I'm sure solid glass hulls face the same problem; you still can't just tap a screw into the hull, not unless it is well over 1-inch thick. In some ways, the problem is more ticklish. But glued-on pre-laminated FRP still makes for a tidy solution.
- Mount the object to pre-laminated FRP about 1/4-inch thick. In this case I tapped-in threads, mounted the hooks with machine screws, and ground off the excess. T-nuts could be used for heavy duty mounts, or simply thicker glass; at 3/8-inch the threads are typically stronger than the bolts.
- Screw (very short screws only used to apply clamping pressure) and glue (3M 4200 if it's not too heavy and you might remove it, thickened epoxy if it is and you won't remove it).
Finished mount. This holds heavy mooring lines and spare rode, perhaps 20-30 pounds on each section. The coils hang well below the hooks, cow-hitched with slings. The hull is ~ 5/8-inch thick with 3/32-inch triaxial glass skins. Screws alone might hold... for awhile... assuming I don't step on the coil while wading through sails and fenders, which I will.The hooks are 1/8" x 3/4" aluminum flat bar bent around a double mandrel and ground smooth. I also store my chute in this locker, so I wanted a hook that would hold line but not snag sailcloth. When you can't find what you want, you make it.
I cheat. I get pre-laminated FRP as cast-offs from chemical plant projects. Free is nice. But I've gotten it other places--old signs, cut from old boats. The flat bar were electrician cast-offs. Scrounging 101.

 |
| Start with a piece of tape perhaps an inch long, held sticky side up |
 |
| Push the screw thru the tape, so that the sticky side is against the underside of the screw head |
 | |
| Insert the screwdriver into it's recess on the screw head, and fold the two flaps of tape up over the head onto the blade of the screwdriver |
For details on how to receive the replacement flares, check the original article at Three Sheets NorthwestOrion Safety Products has issued a recall for two models of its hand-launched aerial signals, citing problems with the devices failing to launch and/or ignite.
The recall applies to older Orion XLT and 12-gauge signals made with orange ABS plastic. XLTs are self-contained, hand-launched signals, while 12-gauge signals have a pistol-style launch and a plastic shell.
In 2008, Orion switched from orange ABS to red-colored, glass-filled polyethylene for its better strength, durability and resistance to moisture. The last XLTs that used orange ABS in the launch tube body expire this month, while the last 12-inch gauge shells using the orange ABS plastic expire in March 2012.
If you have an XLT signal with an orange launch tube that has an expiration date between November 2011 and December 2011, or an orange 12-gauge shell that has an expiration date between November 2011 and March 2012, you are eligible to receive a free, four-pack replacement at no cost.
I needed to add a separate sump to our grey water system. I have a store bought sump from Rule in the forward end of the bilge for the head and shower, but needed one to handle everything else including it. At a $100 bucks or more for one of these plastic boxes, I figured I could make one for a lot less.
Here is how I did it. You can build one too. It's fairly simple. I must add I had some scrap Plexiglas already. I bought the 500 gph bilge pump on ebay. The rest was scrap pieces of marine plywood.
Box measure 11x11x6 inches. It is 1/2 inch ply with 3/4 x 1 inch around the inside for a lip to help seal it and give a place to mount the bolts. The plastic screen inside is actually from a craft store. It is used for some kind of needle work.
Build the box. Then give it several coats of thinned epoxy inside and out. Save money, Don't buy CPES epoxy, just cut your already mixed epoxy with some MEK (NOT MEKP), thin till it's just a little thicker than water, almost half and half mix. MEK is just like Acetone, but evaporates much slower. Let it cure between coats, but put the first 2 coats on while still green. Sand for the last coat and thin it only a little or maybe not at all. You'll know you have enough coats when it is very shiny when finished.
Side note; this little trick will help you fix rotted post and the like without buying special epoxy. I actually apply it to porch post and columns before installing them. Then they never rot.
I used 1/4 inch bolts for the lid. Insert them as you make the box.
From Sump
Fit Plexiglas lid.
From Sump
Install pump and float switch.
From Sump
Install all the fittings in the box and screen plus the fuse holder outside.
From Sump
From Sump
Then install it. I eliminated 12 thru hulls with these two sumps. Now I only have 3 thru hulls.
I mounted it to the bilge with some stainless brackets I had. Screw them to the side of the box, make some pads that can be epoxied to the bilge , with bolts so that the whole thing is removable.
It is under the engine, but hopefully it will be somewhat accessible.
From Sump
One issue on almost every small boat is no room for a garbage can. Another issue on "Whiskeyjack" is the amount of dead space below the galley countertop. Think, mark, cut, trim, screw together a couple of pieces of scrap luan for a lid, sand, varnish, Ta-freakin' DAH!
Some days it works, some days not so much.
I had business near Annapolis yesterday, and combined with an alpine start, I had a full afternoon to knock out a few projects, and perhaps, take a brief sail. I could sleep on the boat as well, and commute to the office from there.
Project One. Replace foot switch for windlass. Easy Button working well.
On my last several outings the button had been touchy, requiring several pushes. On the last outing it stuck on. Fortunately I realized this with enough time to dash to the cockpit and pop the breaker, so no harm. I called West Marine; nothing under $85.00 which is absurd for a small low amp low voltage switch. An on-line search revealed that the original was from Vetus and was $37.00 from Defender Marine. I ordered 2.
Installation is a simple matter of a few crimps, some heat shrink for chafe protection, and a few cable ties. Piece of cake.
Project Two. Replace sanitation hoses. East Button working better than I expected.
I'm currently working on a series of articles for Practical Sailor Magazine investigating holding tank vent filters, holding tank treatment chemicals, and sanitation hose permeation. It's been an interesting trip so far, seeing how interrelated the subjects are and how complex. Many trade-offs and many user-specific issues. These tests will be running for several years.
Some of everything!
Most of the testing is being done with matching 5-gallon holding tanks which contain sanitary waste. Subscribe to the mag if you want the gory details. However, an upside and a downside is that I received many test samples of expensive premium hose, enough to re-plumb my head and holding tank... but I would have to install it. Since PDQ plumbed much of the holding tank system with water exhaust hose, and the plumbing was all 14-year old original, most of the lines were completely shot; a PDQ rep told me those hoses typically were only good for 3-5 years. Those that were very seldom used--to pump overboard--were OK and I had replaced the pump-out hose a few years ago, since it was cracking. They did use sanitation hose (Shields 148) on the run from head to tank, but it's a low-end hose white PVC hose and it was permeated badly; wipe your hand across the surface and you regretted it immediately. The situation has been livable only because PDQ 32 sanitary plumbing is all in a bullheaded compartment vented overboard. Only 8 inches of hose are in the cabin.
I'll skip the gory details. No matter how much you flush before working, there is some material cemented to the inside of the hose and some hoses that can't be well flushed. Fortunately the head compartment has a bathtub floor that is easily hosed down and that the bilge in the holding tank compartment was painted and smooth. A few tips:
But other than some exercise, it went smoothly enough. Overall, I liked the Shields Poly-X best, in terms of flexibility, durability, and easily cleaned jacket... but the price is stout. The compartment is now multi-colored and will be a good test-bed. Like free rigging (the Shields Poly-X is $19.69/foot), it saved a few bucks.
- Flush a lot of clean water first. We covered that.
- Atlas-Fit coated palm gloves are a big help when muscling hose through bulkheads and onto fittings.
- I only needed to lubricate one fitting. I used glycerine, which is compatible with sanitation hose and will eventually (unlike soap) evaporate and leave no slippery residue. DO NOT use petroleum compounds with sanitation hose; these hoses are NOT COMPATIBLE WITH PETROLEUM and will be damaged.
- Do not use silicone to seal hoses. It only makes a mess for next time and is not needed if everything else is right.
- 2 hose clamps, 180 degrees apart. Obvious. A cordless driver with variable torque and a nut driver head makes this faster and more pleasant.
- Inspect the barbs. If there are bad spots, either replace or smooth it off with a file.
- Skip the Sea Land Odor Safe Plus hose. It's too damn stiff, requires gentle heat and lube to get on fittings, and is prone to kinking if forced. I wouldn't take it for free; I've only used it here as a necessity of the research effort.
- Trident 101/102 and Shields Poly-X may be the best hoses out there, but they too are somewhat stiff (not as bad as Odor Safe II) and may be a challenge. Raritan Sanigard (very flexible) hose is a dream to work with in tight spots and is still very well regarded.
- Shields Poly-X has a lifetime warrentee, Trident 101/102 a 5-years warrentee but a perfect 15 year record, and Raritan Saniflex has a 5-year warrentee.
- The Trident 102 is a bugger to keep clean; white and rough surfaced. The others all hose-off fine.
- The securing points and fit will change if you switch to a different hose type; all have significantly different stiffness and bend radius requirements. No big deal, just don't cut the new hose to length based upon the old hose.
- DON'T FORCE A HOSE TO BEND more tightly than it likes. It will kink.
- Secure the end of the wire reinforcement under the first band. You can try to simply cut it flush but that's difficult and it will work loose in time. It is needle sharp and will cut you someday. Since I often sit on my holding tank, this is important! I learned this practice during many years in the refinery business.
Regarding the practice of pouring vinegar in the head to prevent scale build-up: Scale build-up inside the head discharge hose is thought to be primarily due to precipitation of calcium ions with uric acid, and this precipitation requires calcium to be present at near saturation. Since the Chesapeake Bay is much lower in calcium than the ocean and far below saturation (the ocean is very near saturation), this reaction does not take place and hoses do not collect scale. In fact, my 12-year old hoses were nearly scale-free. Skip the vinegar if you are a fresh or brackish water sailor.
Project Three. Replace carburetor while underway. Singlehanding. Easy button working better than you would think.
The port engine had been starting hard and not idling well for some time. Though I ran it for an hour, just as I pulled into an anchorage, it started to run, then stop. Start hard, run, then stop. I figured I would change the carb back at the dock, but then while sailing, remembered what fun it isn't to back in with one engine. Then I decided that since I had a rebuilt spare and the tools and the sailing was easy....
OF course, it's a bit harder when everything is moving and you have to poke your head up every 5 minutes to keep watch. Not too bad, actually. The port engine is the easier to access (carb faces the cockpit) and only a few things need released...
... but after replacment it wouldn't run at all. It would start on ether, but not run.
- 2 bolts
- fuel hose
- 2 wires to electric choke
- throttle linkage clip
The main fuel filter couldn't be plugged; it is a huge Raycor and anyway, and the primer bulb would be collapsed by vacuum. However the secondary fuel filter could be bad. I pumped the primer hard and nothing to speak of came through. Yup, I had a spare. It's just a lawn mower filter and the dingy engine uses the same one. The replacement filled right up, before I even pumped the primer. Good. But still it wouldn't run, not even a cough.
I tried running the fuel pump outlet hose into a bottle. Nothing to speak of. Yup, I carry a spare. Only 2 screws and 2 hoses need moved to replace it, and access is easy when the engine is tipped.
Perfection! The replacement carb was taken off the original engines (failed from rusted cooling passages), made in Canada, and is NOT sealed against mixture tampering the way the American carbs are. Runs better than the American carb ever did.
______________________________I backed into my slip without ceremony, enjoyed dinner and a good book, and drifted off to a satisfying sleep.
______________________________
Lessons? The Easy Button works best when you are prepared, though even then a cascade of problems can make for a long day. And NEVER assume there is a single cause when trouble shooting engine fuel systems; more often than not it is an accumulation of insults.