Some amazing photos will be present in this post but maybe not for all public; once the Vahine has left the surrounding of the boat, well in my dream… With that said I was left to ponder on what could be done during this sunny day. so let’s “dive” in one of the most interesting subject of all: oil and seals on a SD20 Yanmar saildrive. Please stop all the applause, I know you are excited but one day somebody will do a Google search and will find the solution to a problem a few years ago we couldn’t!
For the rest it’s just a reverse job and 5 liters of gear oil to complete the job.
Tuesday, July 19, 2016
Changing the seal on a SD20 Yanmar saildrive
It has been said (often) that cruising is working on your boat in exotic locations. And while that is an overly pessimistic assessment, certainly cruising cannot be entirely a vacation from maintenance. While Valerie is away, Laurent on s/v Letitgo gets busy on one of those necessary tasks...


Tuesday, July 12, 2016
Corrosion, Corrosion
This post originally appeared on Windborne in Puget Sound
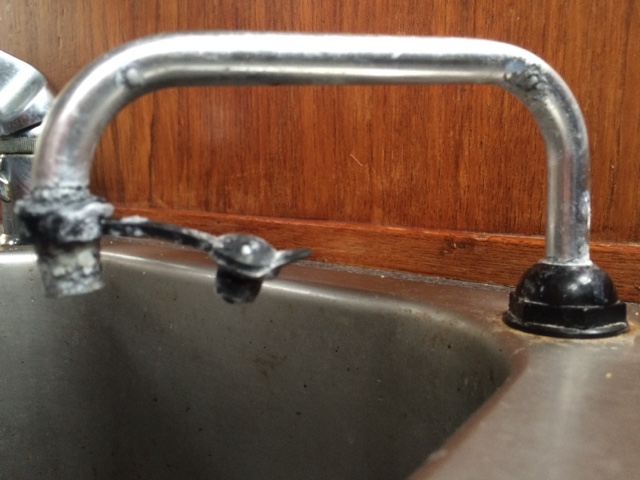
For a boat on salt water, corrosion is an omnipresent demon.

Even inside. This is the spout on our galley sink which is piped to a saltwater foot pump. And to the cooling water discharge from our 12V refrigeration system, meaning that it has saltwater flowing out of it whenever the refrigeration compressor is running, as a telltail. Look closely at the inside of the right-hand bend... yup, the aluminum has corroded thru. I don't understand this... aluminum is supposed to be reasonably proof against saltwater. The pipe is clamped to the sink in a plastic fixture, and is connected below the sink via vinyl tubing... ruling out galvanic corrosion. The entire refrigeration system is 12V, so stray 110V current cannot be an issue. The compressor is powered by an external motor thru a V-belt.
But.
The motor and compressor are mounted on the same metal plate, and there are some pressure switches to control the motor mounted on the compressor.
Is that enough to cause stray current corrosion, tho there is no direct connection between the refrigeration unit and the aluminum tubing except via the saltwater itself?
Or is the corrosion simply the result of flowing saltwater washing away the protective oxide layer on the inside of the aluminum tubing? I am very interested in what the net.wisdom has to say about this...
Regardless, this is the second spout that I have installed there, and they have gotten ridiculously expensive. I am not planning to buy a third one.
Instead, I bought some thin-gauge 316 stainless tubing from Online Metals. Now, if you've ever attempted to bend tubing, and especially thin-gauge tubing, you know that it requires special tooling to prevent kinking. The tooling constrains the tube so that it can't collapse and kink while it is being distorted. I looked up what a tubing bender for 7/16" tubing costs on the Interwebs, and Oh. My. Gosh.
OK, a Plan B is needed.
It is also possible to prevent collapse/kinking if the tubing is filled solidly with something incompressible. Apparently some people have used ice (fill with water; freeze), but I was concerned that I'd never get the tubing bent before the ice started to melt. This is where Wood's metal comes in.
I just happened to have some.
All that remained was to reheat the bent tubing in another boiling water bath to remelt the Wood's metal and pour it out.
And since our galley sink has two of these spouts (one for salt water and one for fresh water, foot-pumped from the tanks), I made another spout. Gotta be symmetrical, don't you know.

A little boat yoga, and the galley sink looks better than it ever has!
For a boat on salt water, corrosion is an omnipresent demon.
Even inside. This is the spout on our galley sink which is piped to a saltwater foot pump. And to the cooling water discharge from our 12V refrigeration system, meaning that it has saltwater flowing out of it whenever the refrigeration compressor is running, as a telltail. Look closely at the inside of the right-hand bend... yup, the aluminum has corroded thru. I don't understand this... aluminum is supposed to be reasonably proof against saltwater. The pipe is clamped to the sink in a plastic fixture, and is connected below the sink via vinyl tubing... ruling out galvanic corrosion. The entire refrigeration system is 12V, so stray 110V current cannot be an issue. The compressor is powered by an external motor thru a V-belt.
But.
The motor and compressor are mounted on the same metal plate, and there are some pressure switches to control the motor mounted on the compressor.
Is that enough to cause stray current corrosion, tho there is no direct connection between the refrigeration unit and the aluminum tubing except via the saltwater itself?
Or is the corrosion simply the result of flowing saltwater washing away the protective oxide layer on the inside of the aluminum tubing? I am very interested in what the net.wisdom has to say about this...
Regardless, this is the second spout that I have installed there, and they have gotten ridiculously expensive. I am not planning to buy a third one.
 |
| Two pieces of 7/16" stainless tubing |
OK, a Plan B is needed.
It is also possible to prevent collapse/kinking if the tubing is filled solidly with something incompressible. Apparently some people have used ice (fill with water; freeze), but I was concerned that I'd never get the tubing bent before the ice started to melt. This is where Wood's metal comes in.
 |
| This is Wood's metal - it is a eutectic alloy of 50% bismuth, 26.7% lead, 13.3% tin, and 10% cadmium by weight. It melts at 158°F |
 |
| Wood's metal foundry |
For a foundry, I purpose-bought a can of tomato paste (69¢), and froze the tomato paste, retaining the can - just the right size. I put it in a pan with some water and brought the water to a boil - 212°F, or about 50° of superheat. I then poured the molten metal into the tubing (I had previously blocked one end of the tubing by pushing it into a wine cork - we seem to have plenty of these). I then immediately plunged the filled tubing into a container of cold water - I had read that quenching creates a fine crystal structure in the Wood's metal, making it more ductile (read: easier to bend).
OK, now to bend. I created a bending jig and lag-bolted it to a 4x4 in our shed:
 |
| Homemade bending jig |
Yup, it bent just fine - no kinking, no collapse.
 |
| Recovering the Wood's metal |
And since our galley sink has two of these spouts (one for salt water and one for fresh water, foot-pumped from the tanks), I made another spout. Gotta be symmetrical, don't you know.

 |
| Done (Clever camera angle conceals dirty dishes in the sink) |
Tuesday, July 5, 2016
Where Do The Buses Go?
Jeff and Anne continue their full refit of s/v Pilgrim. Living around and on boats for a long time, with a solid engineering understanding of what makes a good one (and a bad one...) has really informed Jeff's work on the boat. If you'd like to see how a boat *should* be wired, here's a glimpse into the work. But you'll need to read the rest of Jeff's posts to get the full picture.
In September 2015, I posted to updates about converting Pilgrim’s 12V Positive Bus into a custom ANL Fuse Block...
Over the winter we installed the custom 12V positive fuse block and the corresponding 12V negative bus.
For those out there asking what is an electrical bus? An electrical bus is simply a distribution or consolidation point along the path the electricity takes to the device the user wants to power. If the electrical wires are like train tracks snaking around a country side then the electrical buses are the train depots that allow people on the main line to switch trains and take side trains to smaller communities and vice-versa on their return trip. The fuses ensure that the outbound trains (positive wires leading away from the batteries) to not become dangerously over crowded with passengers.
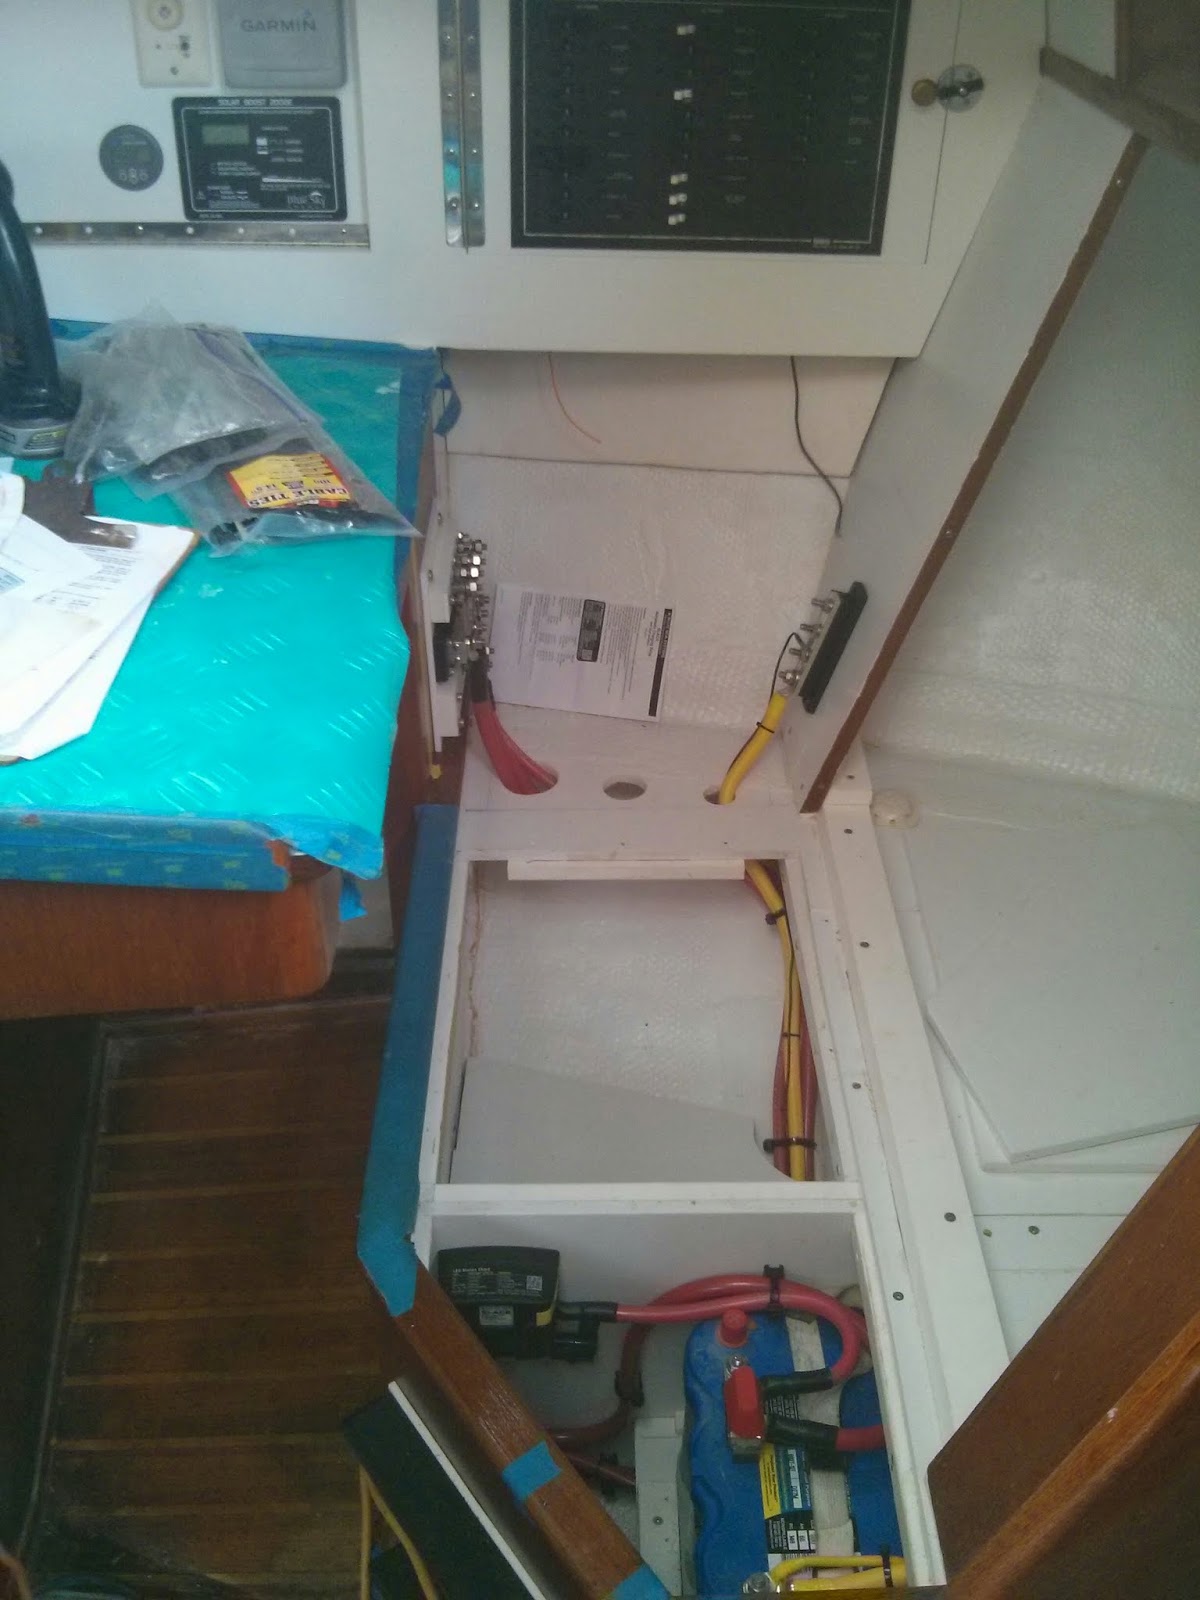
Consolidating the electrical wiring components around the nav station is a priority for us.. Installing the buses below the electrical panel offered a centralized location that provided plenty of room for the large gauge wire runs.
Pilgrim's 12V Primary Buses installed below the electrical panel.
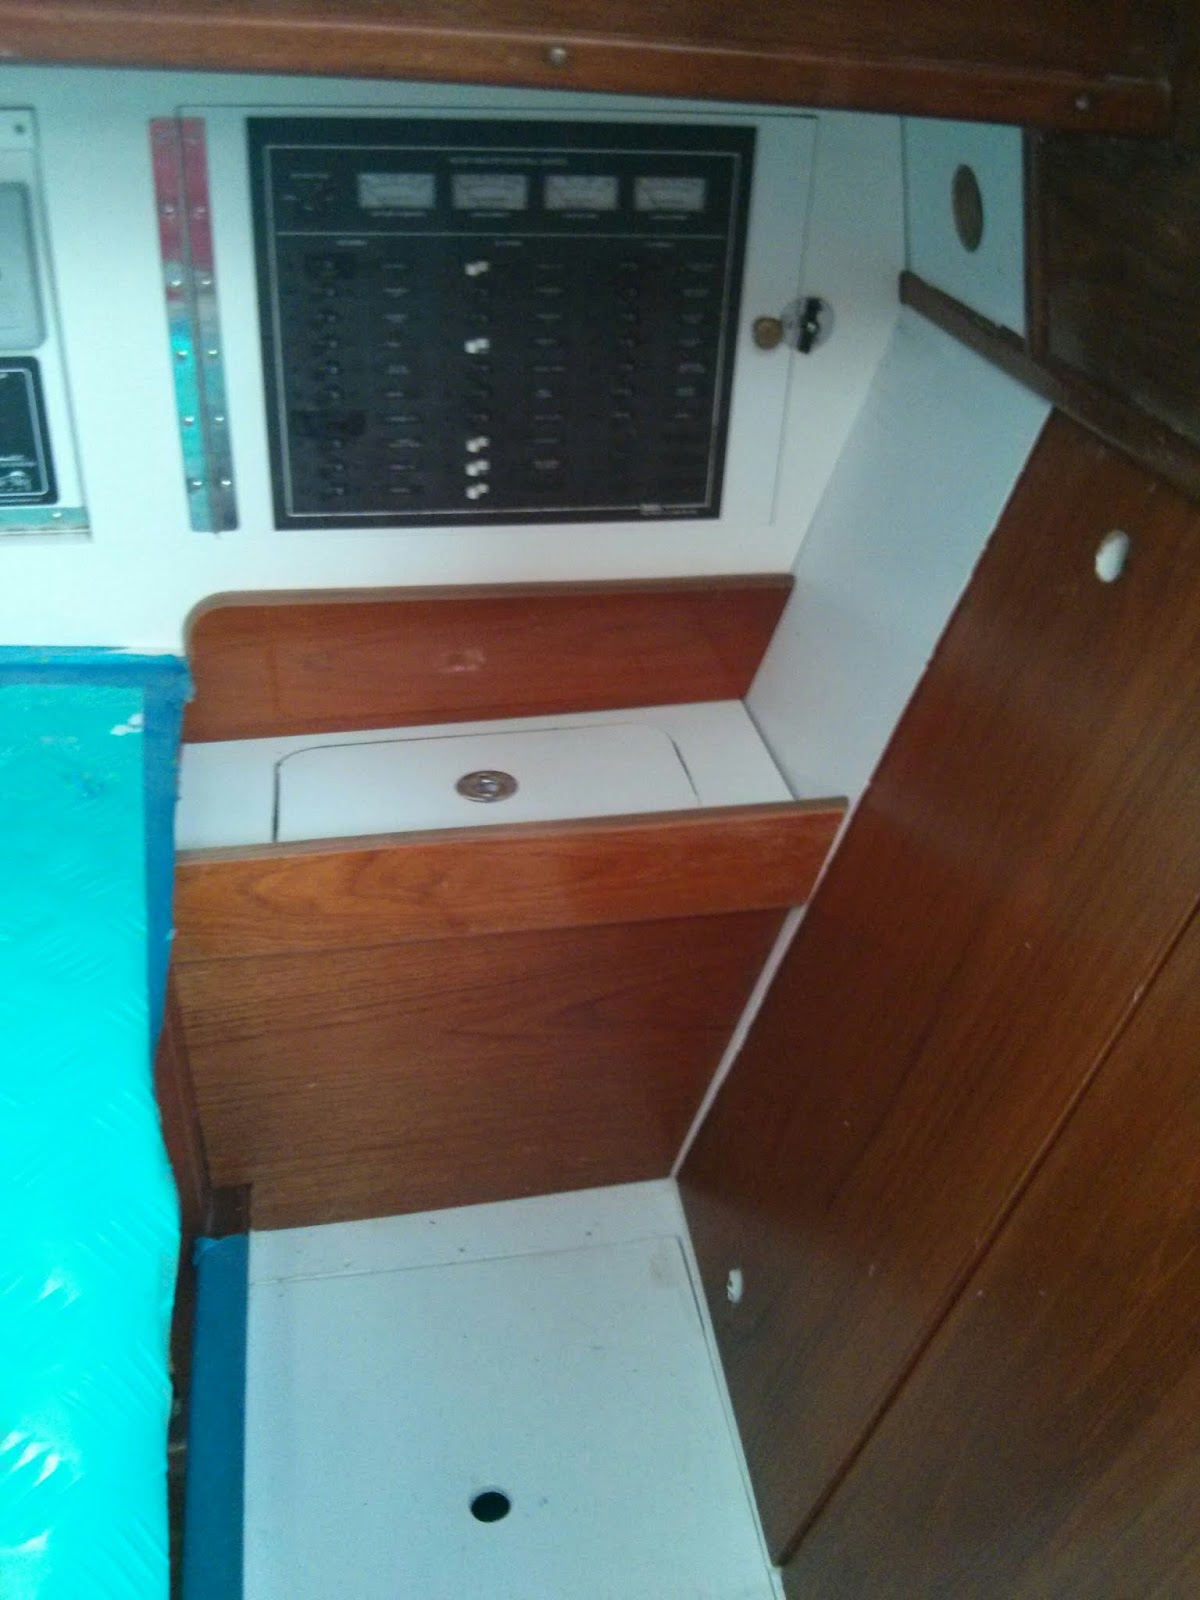
Early on in our refit we chose to eliminate the M382’s quarterberth in favor of additional storage space. Eliminating the berth allowed us to create a seat back at the nav station. The middle two panels of the seat back are removable. The outboard seat back panel is fixed. We installed the negative bus on the fixed vertical seat back panel and the positive fuse block / bus opposite along the original nav station structure.
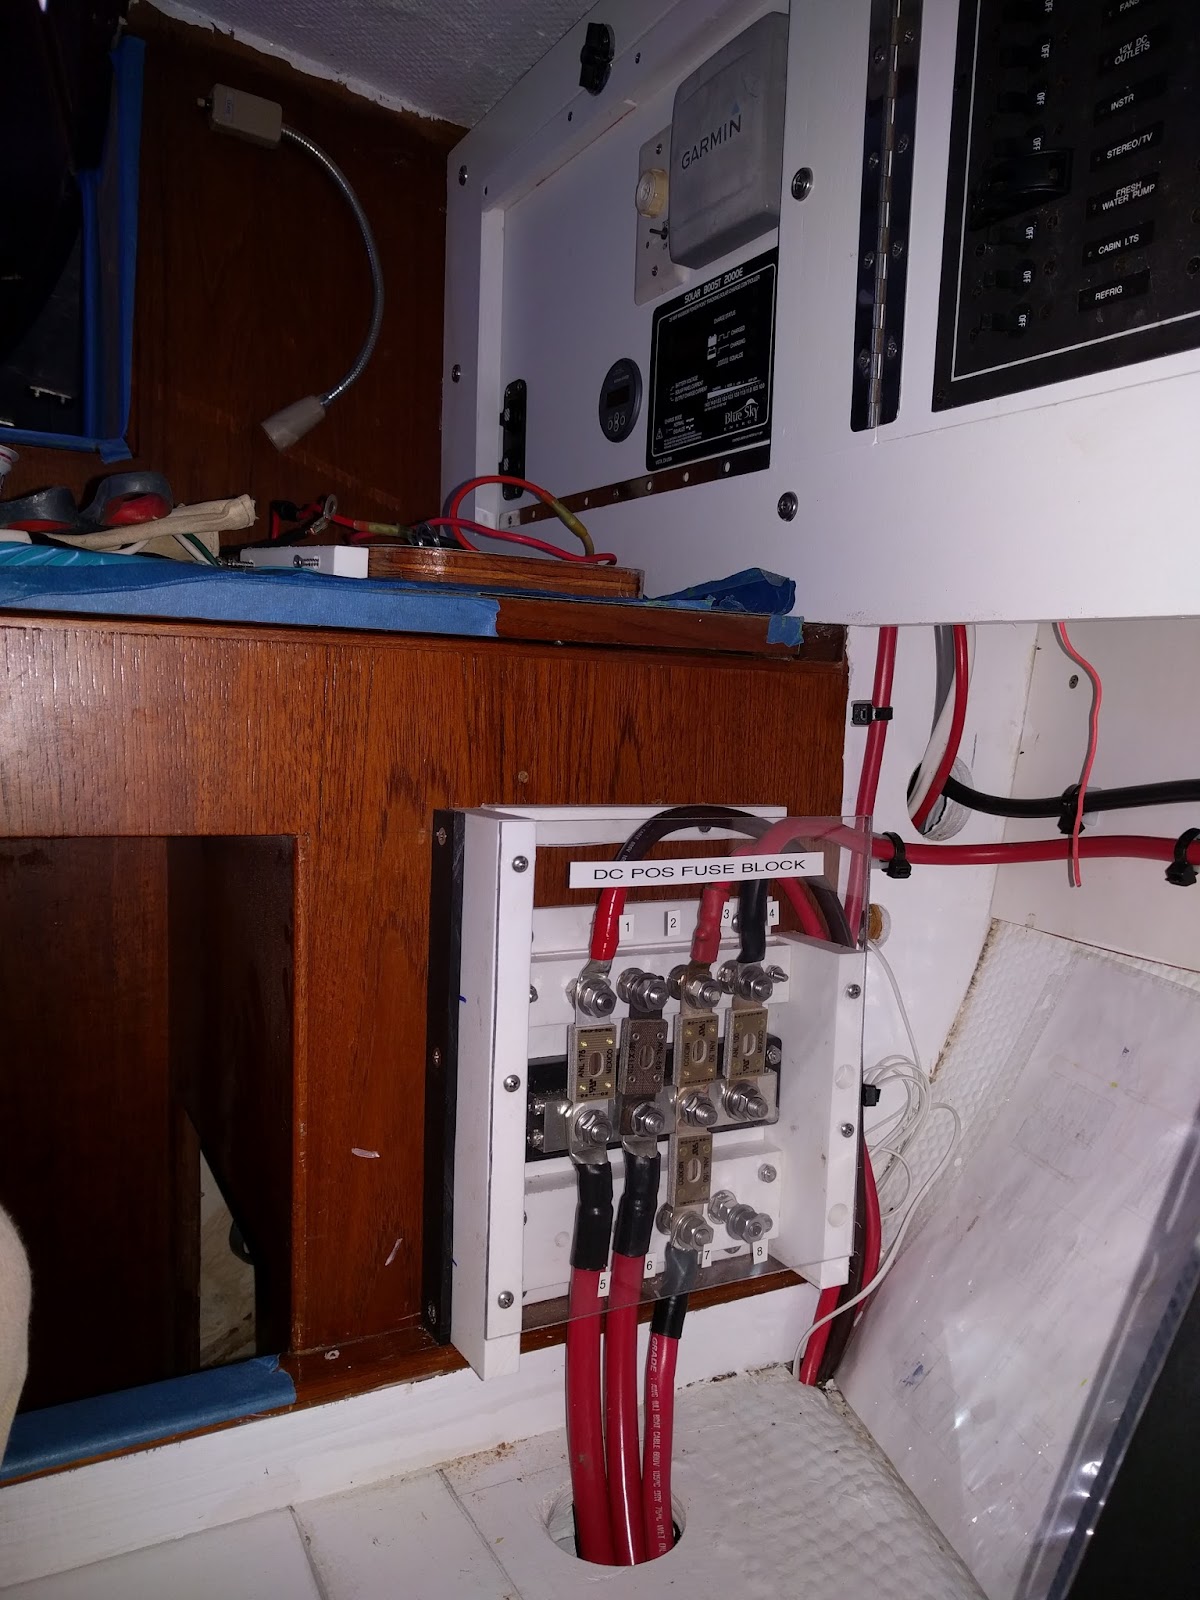
To prevent accidental shorts in a busy area, I fabricated starboard and plexiglass covers for the two buses.
12V Primary Positive Bus / Fuse Block with plexiglass cover.
12V Negative Bus at lower right in image.
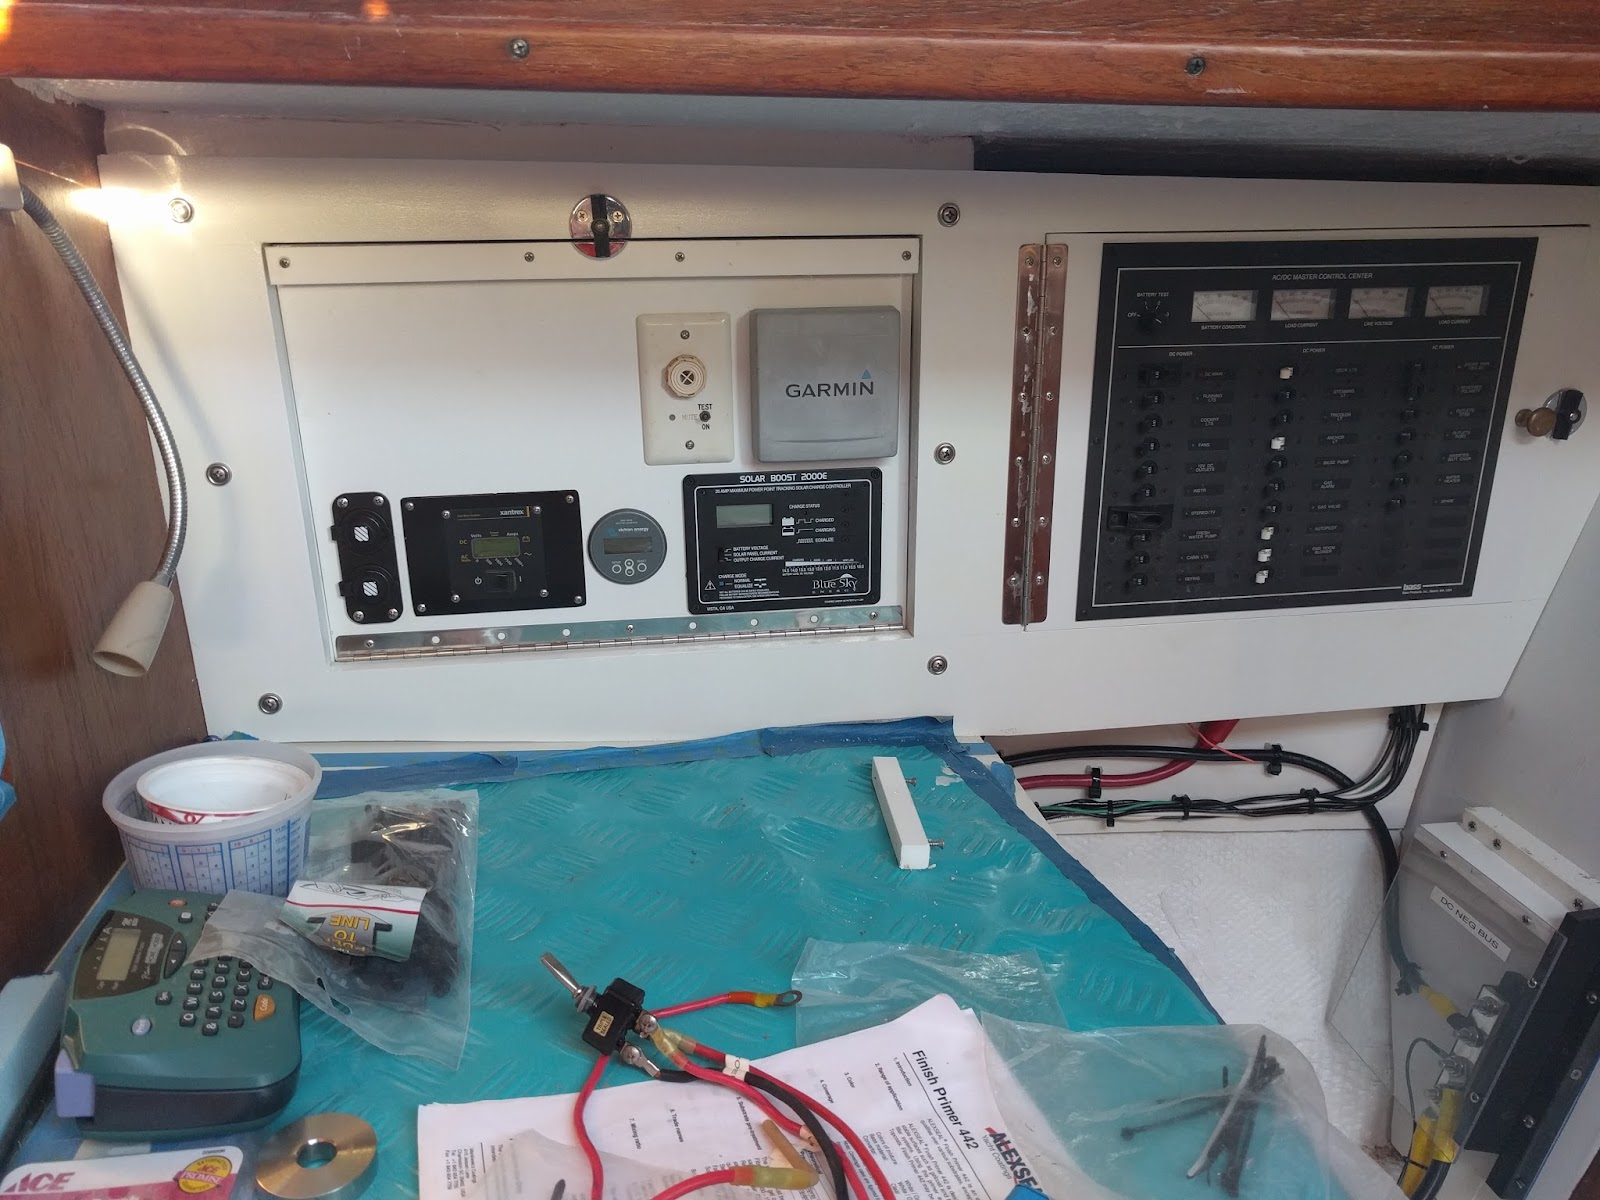
The final step was to create a functional armrest to house the unsightly wiring runs and electrical components.
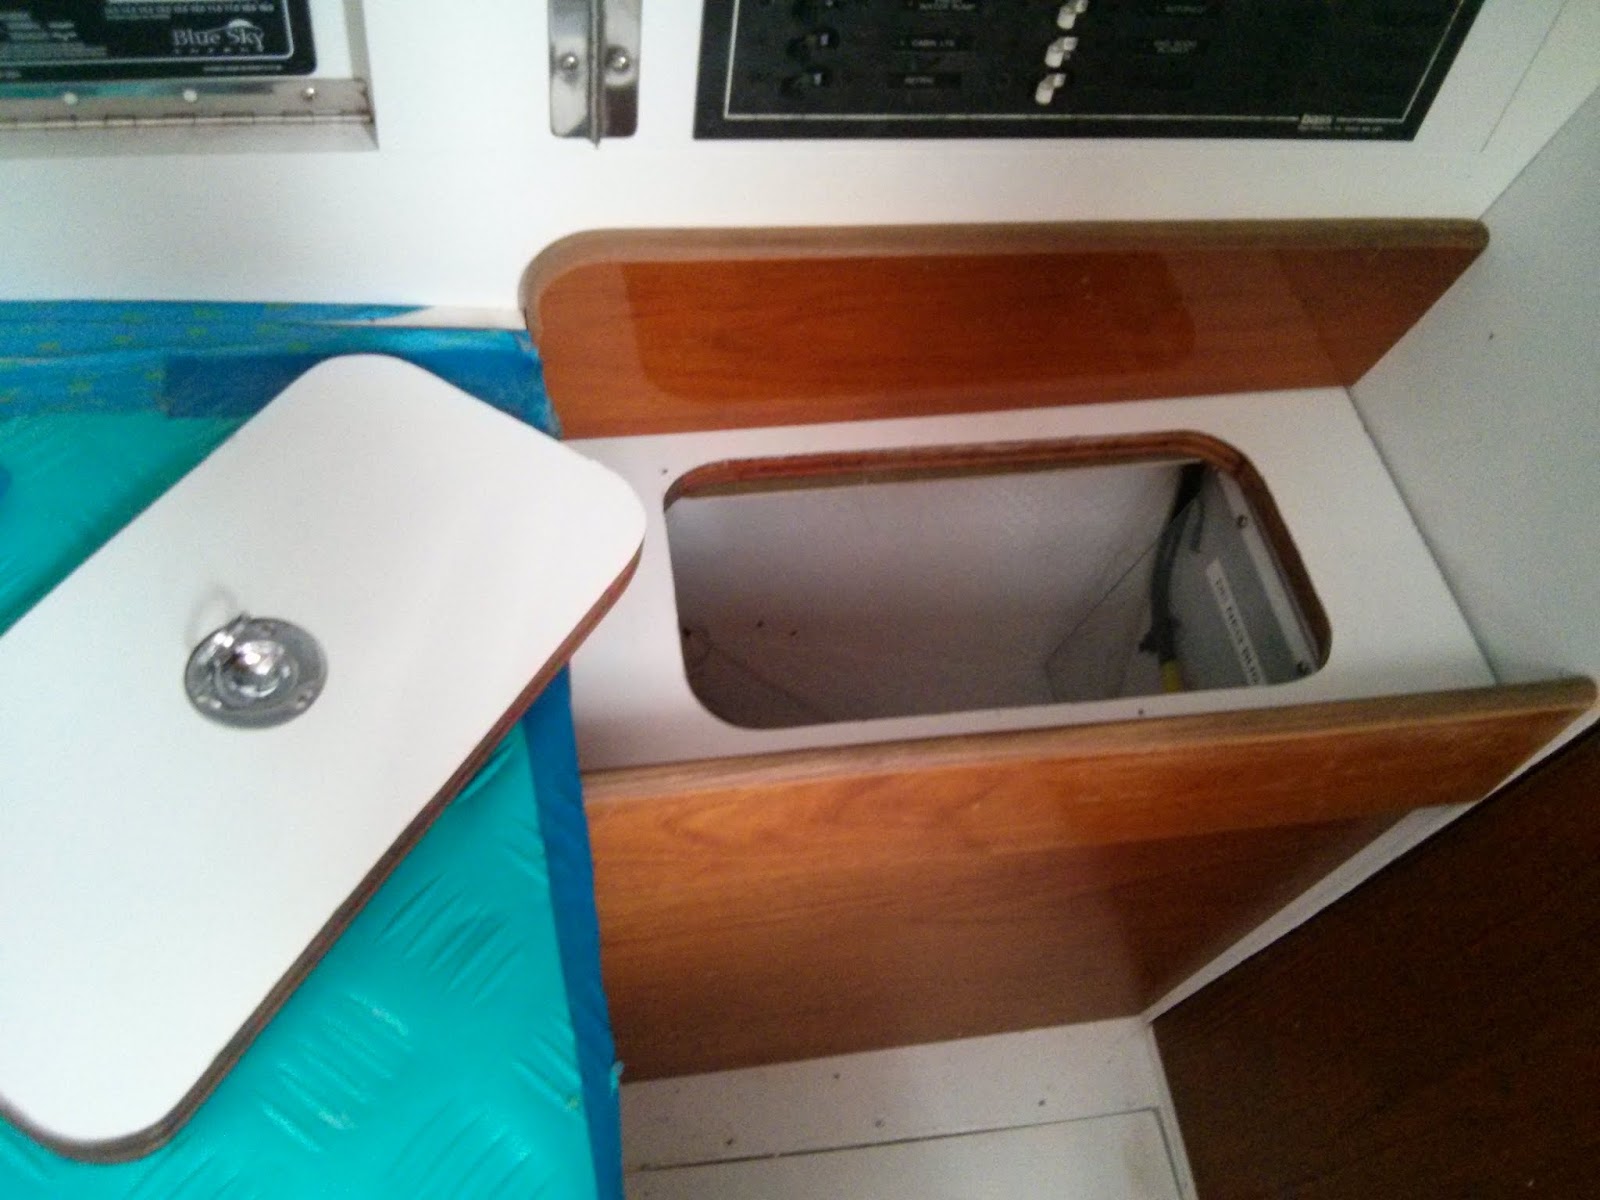
New arm rest at nav station. The armrest has a removable panel to allow for storage and quick access to the fuses.
Removable panel in arm rest allows for easy access to fuses and storage space.
If additional access is necessary for repairs or upgrades the armrest is designed to easily remove the vertical wood panel via four screws.
Additional photos and notes can be found in our on-line albums.
Re-wiring Pilgrim Photo Album
Nav Station Refit Photo Album
Will post more updates on Pilgrim’s electrical system soon.
Subscribe to:
Posts (Atom)


