The most dreaded item on our TODO list is finally crossed off. The portslights on our Hallberg-Rassy 31 Monsun probably had the original gaskets and all the windows had leaks, some leaked a lot. We were really afraid to remove them, because there was a lot of aluminum corrosion, salt sediments, etc. What if we can’t put them back again?
To get us some time, we finally made storm covers from 1/2″ acrylic sheets, trimmed with thick gasket. The storm cover is held over the broken windows by two or three supports that are placed across the window opening. It works quite well and is easy to deploy. When we removed the first window, we had the storm cover ready in case of a rain.
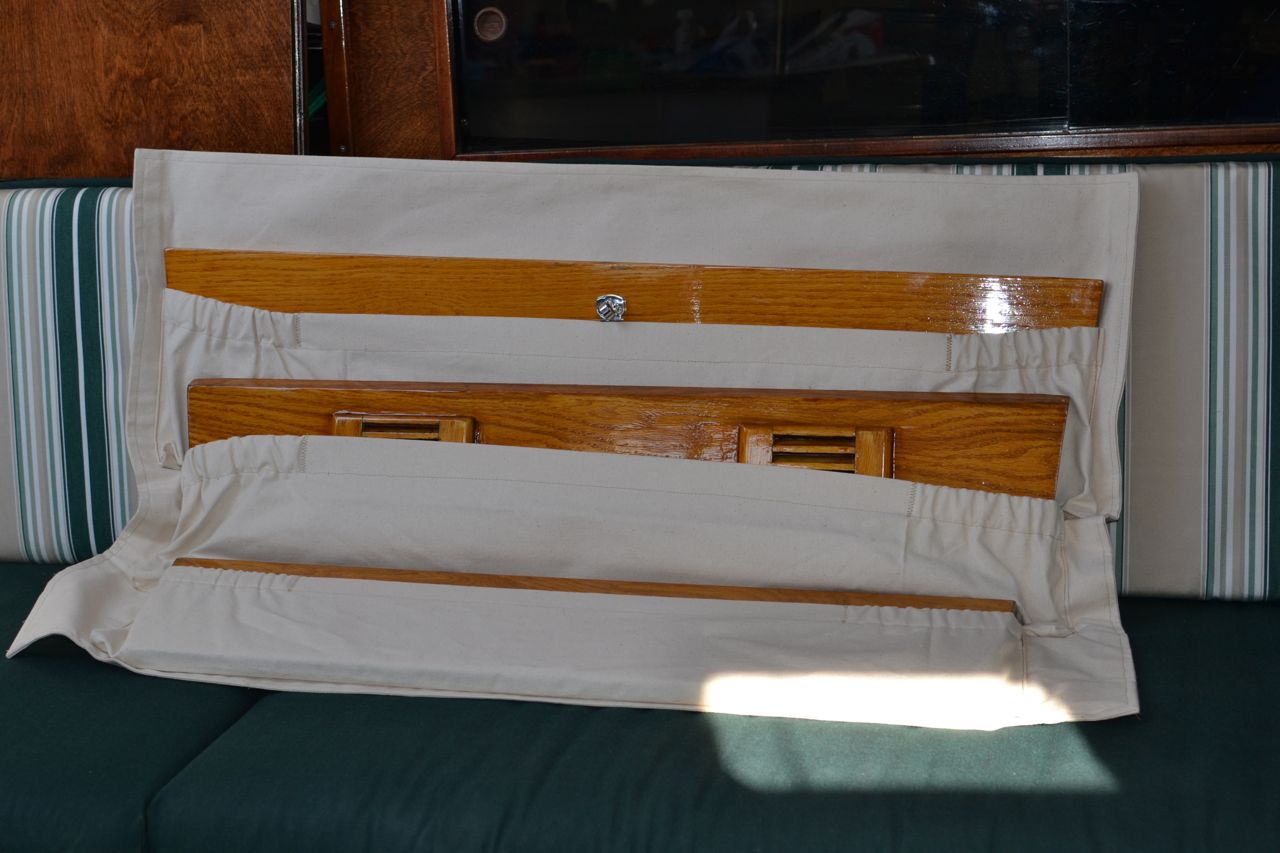
Storm covers with temporary plywood supports
Detail of backing plate mounting
Fortunately, the portlights unscrewed quite easily. We’ve found a lot of salt under the frames and some aluminum corrosion here and there, but nothing major. The gasket that holds the glass sheet in the frame cannot be replaced unless you open the outer frame. But all the leaks seem to be around the outer gaskets, so we didn’t mess with the glass. We’ll soon find out if we were right.
All you need is two types of gaskets, one flat and one L-shaped, contact cement, acetone, putty knife to scrape the old gaskets, sanding paper and a day of nice weather.
Salty mess
Jana knocking the outer frame out
Scary gaping holes
Cleaning the old gaskets
Final touches before the gluing begins
New gaskets glued with contact cement
Let’s see how much water gets through
Tuesday, January 29, 2013
Resealing Portlights on Hallberg-Rassy 31 Monsun
Sometimes getting ready for a job is as big a task as the job itself. Petr and Jana of s/v Janna take us along as they re-gasket their large fixed ports. But first they make temporary storm covers for the openings, just in case it rains during the work:


Thursday, January 24, 2013
Hatch Board Storage
Over aboard s/v Cay of Sea, Rick addresses a problem most of us have: what to do with the companionway hatch boards while under way?
In my continuing effort to de-clutter the quarter berth storage area, I asked my wife to build swash board storage pockets – and she did a wonderful job. I keep the boards nicely varnished because I like the way it looks and because I used red oak – a rot-prone wood. Keeping up with the varnish keeps them from warping and wards away any deterioration. Red oak is a tough material with lots of strength, and it’s relatively inexpensive – that’s why I like it. You can get it at Home Depot for not very much money, and it looks nice under varnish. It serves well for about 15 percent of the cost of teak. But it doesn’t tolerate neglect. So it is disheartening to sand and varnish, then carelessly stack them up to slide around in the quarter berth while not being used – therefore the pockets. Here’s a photo of them with the boards inside.
but perhaps you can see what it looks like.
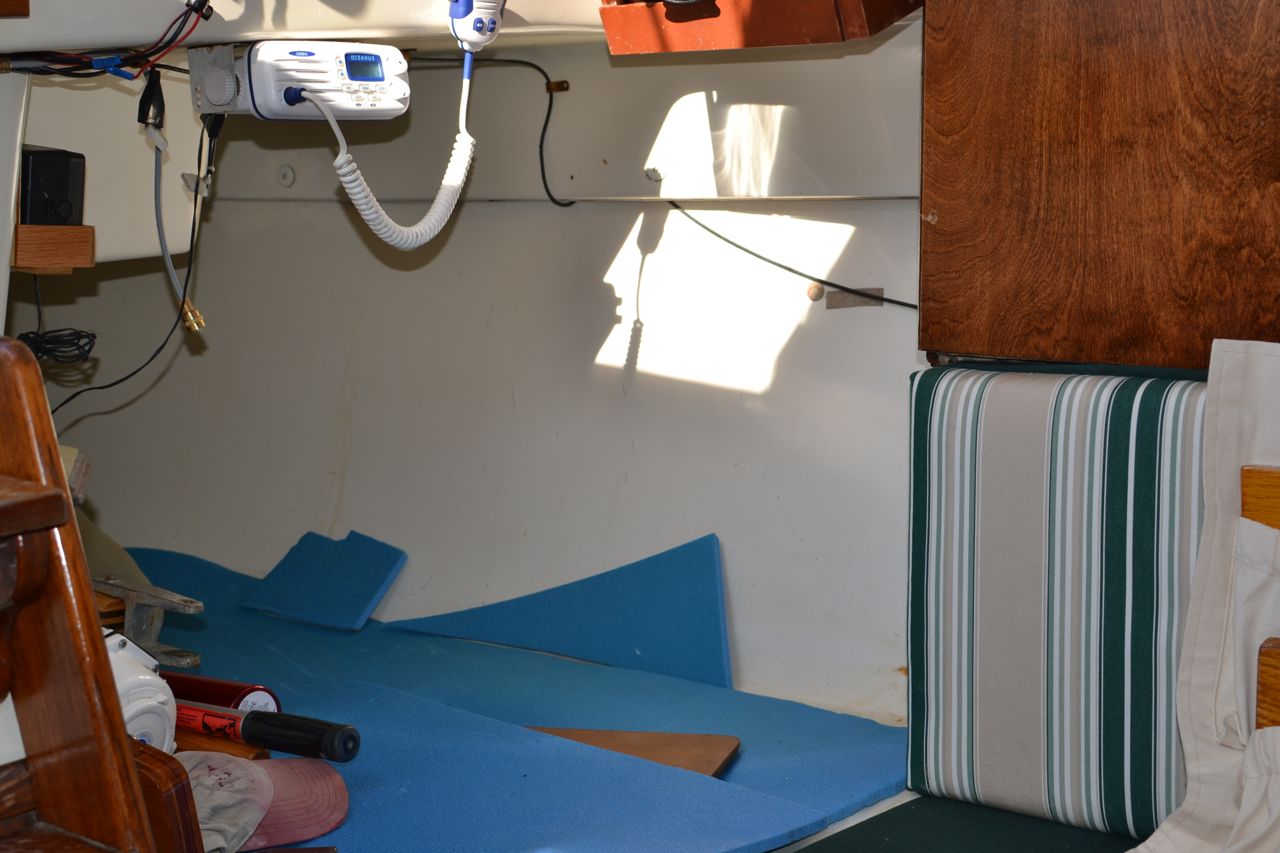
The bottom pocket is folded towards the camera. When the pockets are hung from the top edge it will hang flat. I still need to install grommets along the top, then hang on the outboard side of the quarter berth with pad eyes and small stuff. I will also tack down the bottom corners the same way, so when the boat is heeled on the port tack it won’t bang around. The next photo shows the mounting area in the quarter berth.
The top of the pockets will mount along the upper
edge of the of the hull liner, beside and just abaft
the striped cushion in the photo.
Tuesday, January 22, 2013
AIS receiver on the cheap
Please welcome new contributors Jana & Petr of s/v Janna! For their first contribution, Petr shows us how he used an old non-transmitting VHF to make an AIS receiver. In addition, he introduced your editor to OpenCPN - a valuable find for anyone looking for a free, open source chartplotter.
Here's how he did it:
Here's how he did it:
Our faithful Sailor RT2048
When we were leaving Singapore to embark on our very first passage, one Russian Australian sailor gave us his old VHF. At first we didn’t like the radio that was on Janna when we bought it. It was Sailor RT2048 with old style telephone receiver. It looked unfashionable and awkward. How wrong were we! We wanted to switch to the new one, but found out, that it does not transmit. So we put back the Sailor VHF and soon found out how great the old receiver is. One actually clearly hears what the others are saying. And you can also pull the receiver out into the cockpit so that the helmsman can easily reach for it and talk to harbor traffic control.
It was raining today in the morning so we decided to do some work on the computers. For some reason, Jana took the old radio out of the hiding where it was left out of sight for all those four years and said that we should decide what to do with it. When we sailed on Azimut and Beneteau First 40 last month, we found out what a great thing this AIS is. We looked around for a cheap solution and the cheapest one was to hack an old VHF, connect its audio output to a computer and display the information in OpenCPN.
I know absolutely nothing about electronics. I could perhaps tell what resistor does as would any English speaking person, but if asked what does the resistor resist, I would have to employ my imagination.
So when Jana put the radio in front of me, I said that today we will either have an AIS receiver or we throw it away. Then I started to fidget about. When I go into conniption, my head is suddenly overflowing with strains of ideas and plans that jump all over, total orgy. This is manifested on the outside by an increased pulse, a higher rate of typing on the keyboard and acrobatic exercises (no chair stays long with me). To slow down such a tempo, I put on some slower paced music, such as heavy metal or rap. And I stomp and toss my head as the real heavy metal aficionados do. Occasionally I produce an odd hum or even a melody.
After a little while on the internet I came around http://www.discriminator.nl, which contains step by step instructions for many types of radios. Unfortunately, our GME GX558A, was not among them. I lost all hope of doing this by numbers.
How to do it
First of all you have to find out whether your VHF is capable of receiving AIS sentences. AIS runs on channel 87 and 88. These channels are duplex on older radios, but simplex on newer ones. Channels 87 and 88 transmit on 157.375MHz and receive on 161.975MHz and 157.425MHz and 162.025MHz, respectively. You will find this information in your radio manual or you can test your radio. If it is simplex, you won’t be able to receive while transmitting.
Then you have to find out if the radio contains an integrated circuit (IC), which offers unmodulated audio output. All you have to do is to go through the ICs one by one and try to find them in table 2 at http://www.discriminator.nl/ic/index.html.
Next, identify the audio output pin. Either click on the link of you discriminator IC in table 2 or check the instructions in table 1 for any of the other radios. Then go and buy 10k resistor, 3.5mm mono chassis socket and a wire with 3.5mm mono jack on both ends. The wattage rating of the resistor doesn’t matter, just buy one that will fit into the radio.
Solder one end of the resistor on a piece of insulated wire and the other end on the proper pin on the IC. Then install the chassis socket, solder the end of the wire to it. If the chassis socket is in contact with a metal frame of your radio you are all set. If not, solder another wire to it and attach that wire to the radio’s frame as a ground.
Then get AISmon, plug in to the chassis socket and your computer’s microphone socket. That’s all.
Finally you might want to setup OpenCPN and enjoy the view.
Unfriendly guts of GME GX558A
Radio, chassis socket and resistor
Resistor soldered to pin 10
Wire from the resistor soldered on the chassis socket, which is grounded to the radio frame
We hid the radio behind our distribution panel
AIS display in OpenCPN


Wednesday, January 16, 2013
Tool Box
Over at Sail Delmarva, Drew takes advantage of a little unused space to add some handy storage:
There is a window shelf outside the head that is of no particular use. Sometimes we keep shoes there, but because of the hatch, spray is always a possibility, limiting possible uses; nothing that can't get wet, nothing tall that might block the hatch. I reasoned a light box I can pick up and move will find some purpose and stow some clutter. I like the semi-traditional look; it kind of works on a sailboat that is only semi-traditional. Though sailing is by nature nostalgic, multi-hulls have to keep their distance. No baggy wrinkle here.
A simple scrap lumber project, it is made of 3/4-inch pine to make the ends strong and 1/4-inch ply to keep it light. What will we keep in it? Though I stuffed some harnesses, tape, and cables ties in it for now, we won't really know until we've cruised with it for a while.

Thursday, January 10, 2013
The Cold of Winter
Way down south, Scott on s/v Valkier has some ideas to make the inside warmer when it is "cold" outside. These ideas will work equally well when it is below freezing...
So after a great post title like that I have to admit anyone north of us is going to hate me when I tell how cold it is.mid 40′s to 70ish.
So we don’t have it that bad but it has been getting pretty cold on the boat. In an effort to fix it we have been looking at heaters/stoves etc.. The propane one that we have works great but providing it with propane is a bit of a pain as well as expensive.
We have been using a little resistive electric floor heater. One of the little ones and it has been doing ok and surprisingly not costing a huge amount to run. Our top power bill so far has been 50 dollars. After finding that just about anything in the way of buying and installing a diesel/wood/anything stove/heater is going to start at a base of a grand and go up I decided to postpone that project and trying something a lot simpler.
I have to say after doing each of the 6 port lights, both the forward hatch and salon skylight as well as the 4 big windows in the salon that we have noticed a large difference. It is much warmer. The second thing we have done is cut out inserts using reflectix insulating material and putting it outside the port lights, between them and the screens. On the one hand this definitely helps keep it warm but it also stops all light through the port lights.
The double sided tape goes on the vinyl trim
galley curtain rods are a great place to store sippy cups
Tape, Scissors, knife, shrink wrap film and reflectix.
The only think missing is the hair dryer.
Have to do that later when we bring one from the house.


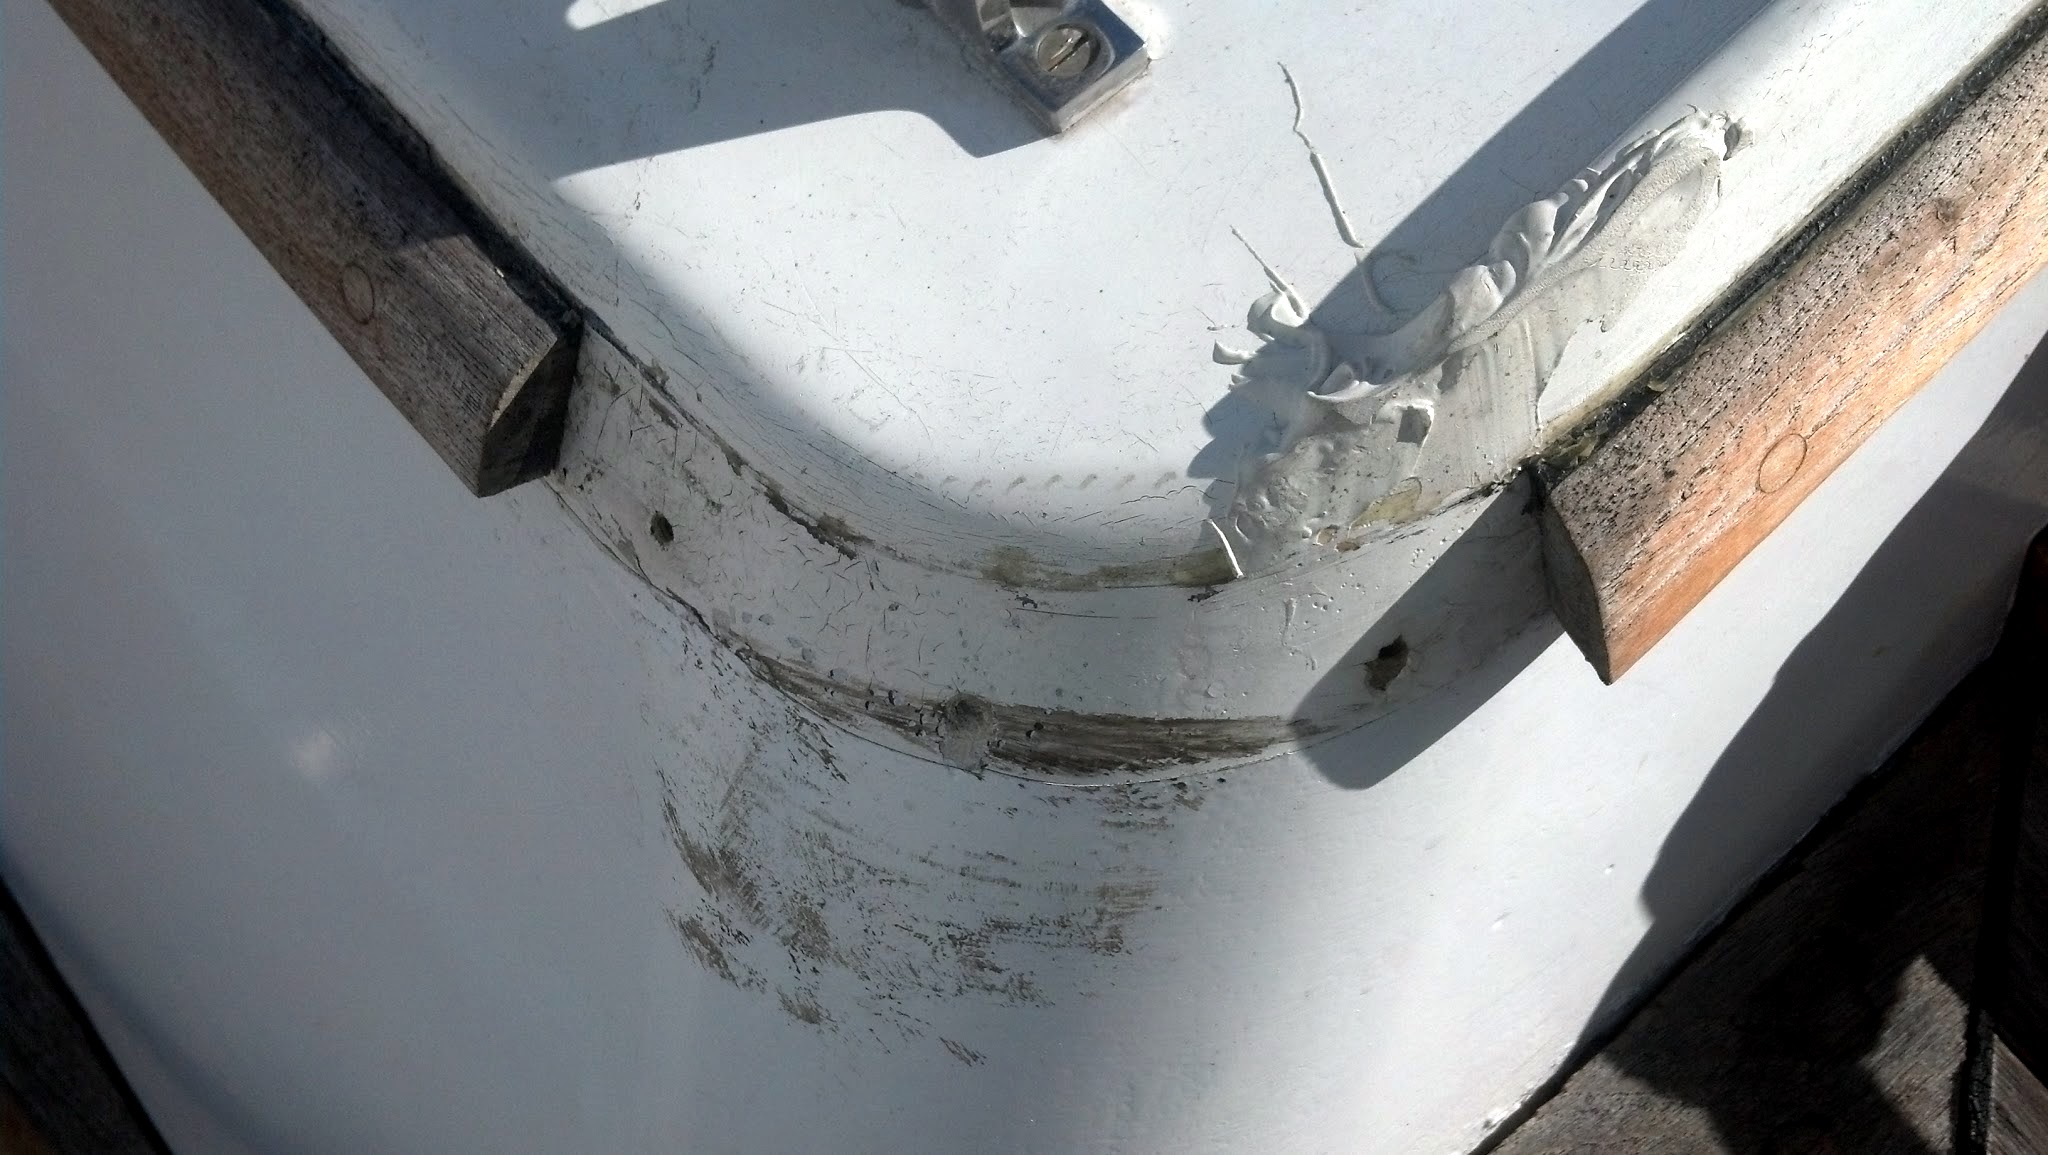
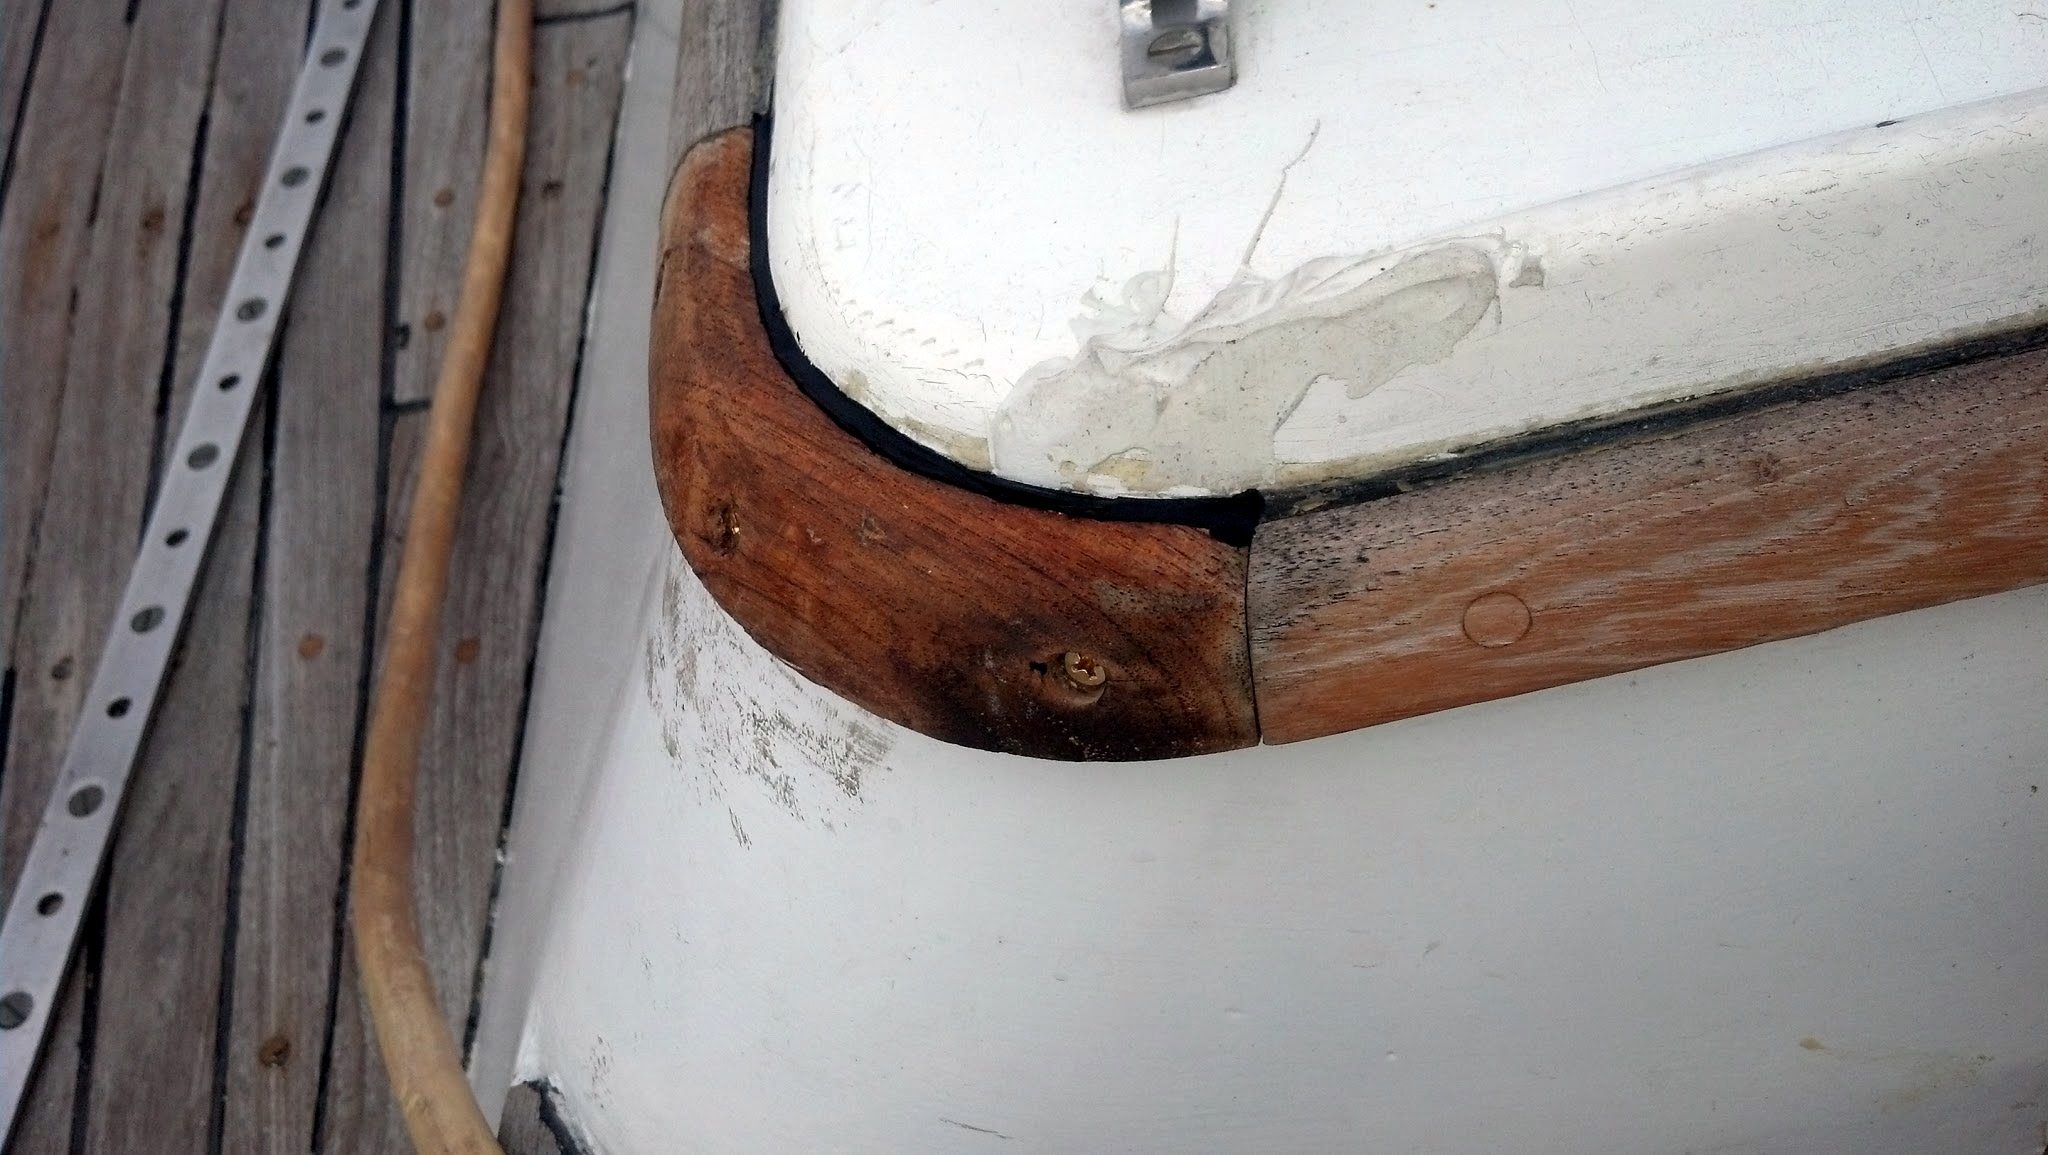
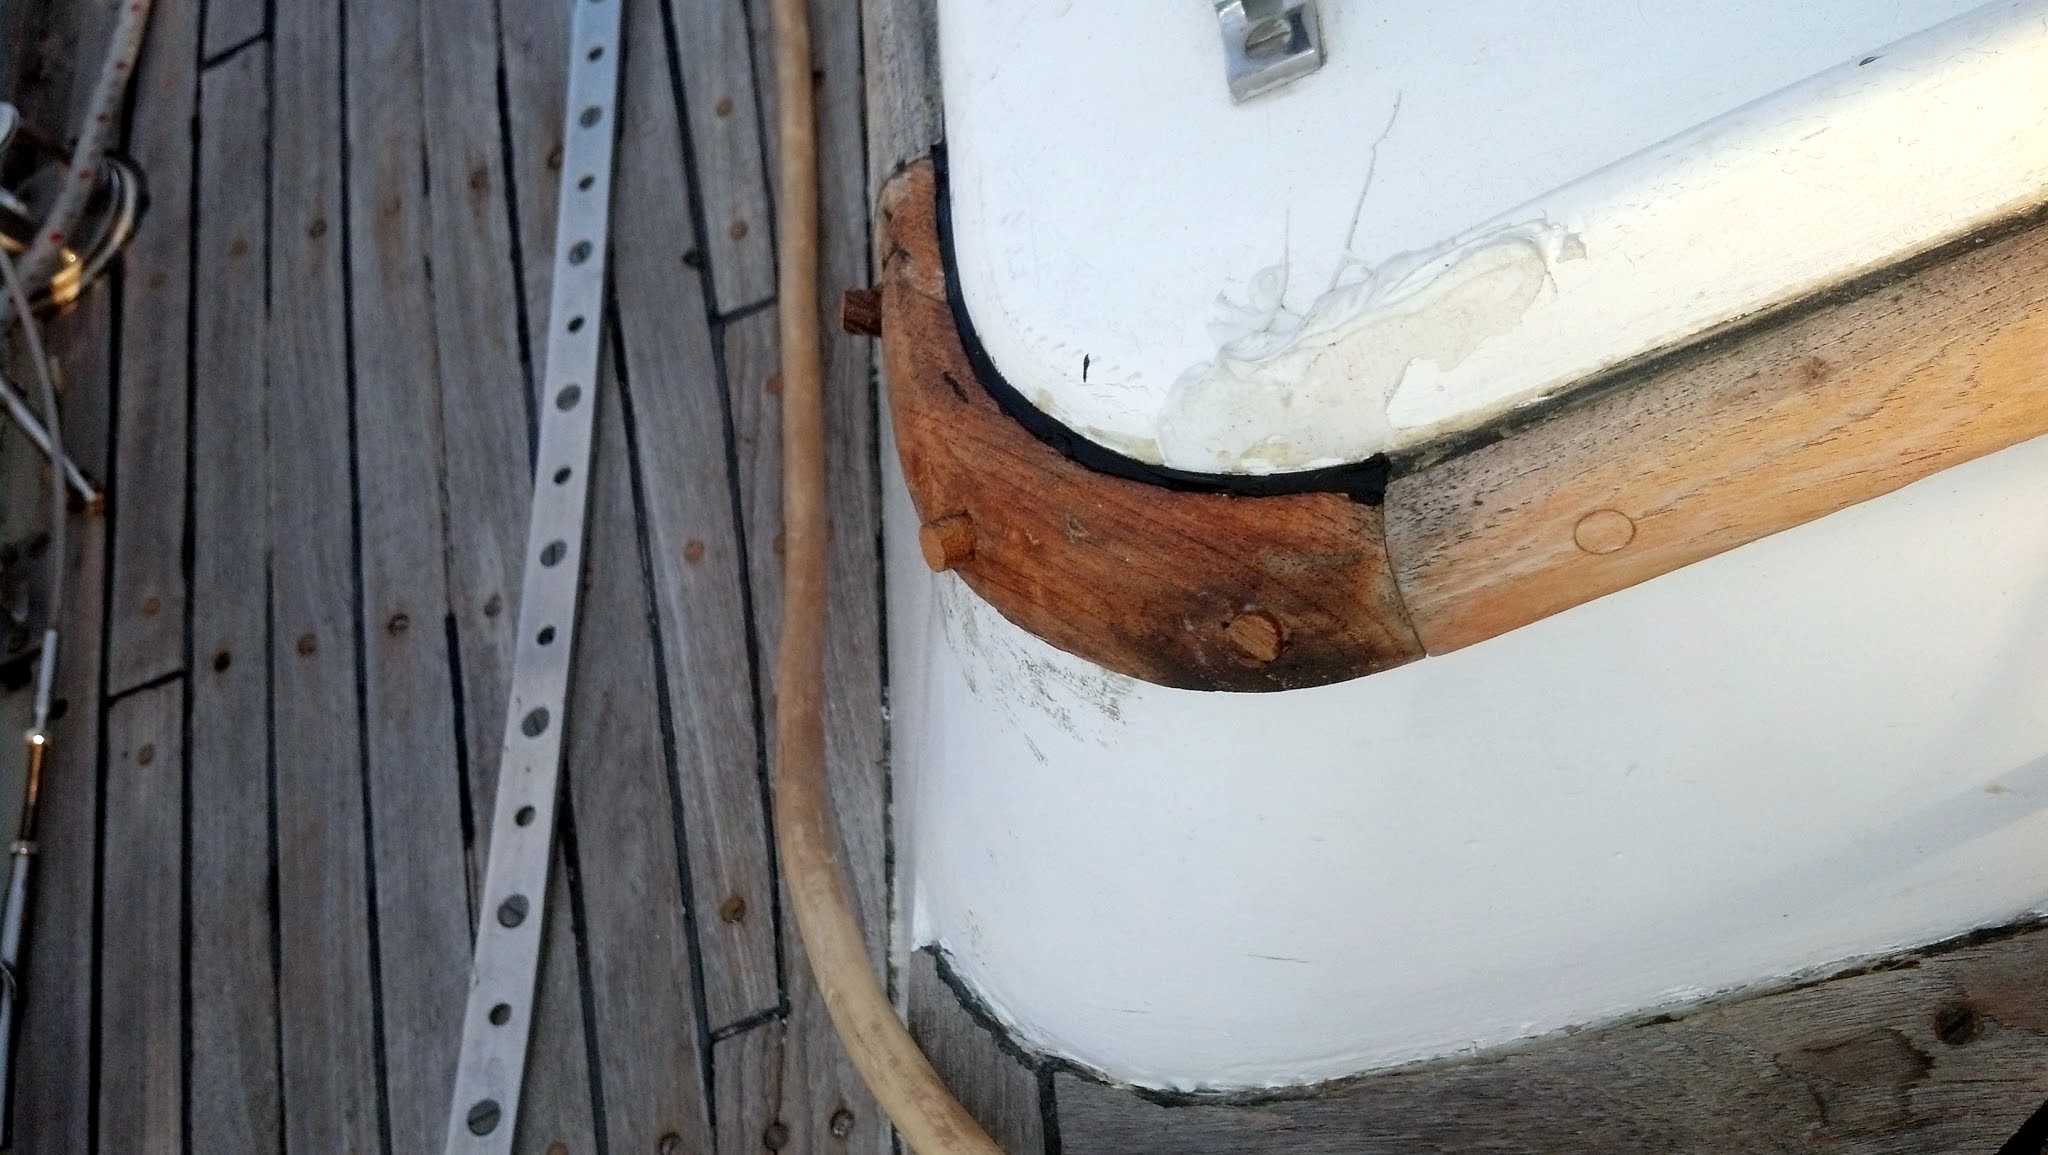
Repairing wood trim
Over on s/v Astraea, Nate shows us how he properly does a little repair work. The critical items which might be omitted by novices are the use of alcohol to remove the teak oils from the surface of the wood, and the use of the polysulphide to seal the back of the piece:
There’s a corner of trim that I’ve been putting off replacing. I broke it off a long time ago when I removed the holding tank.
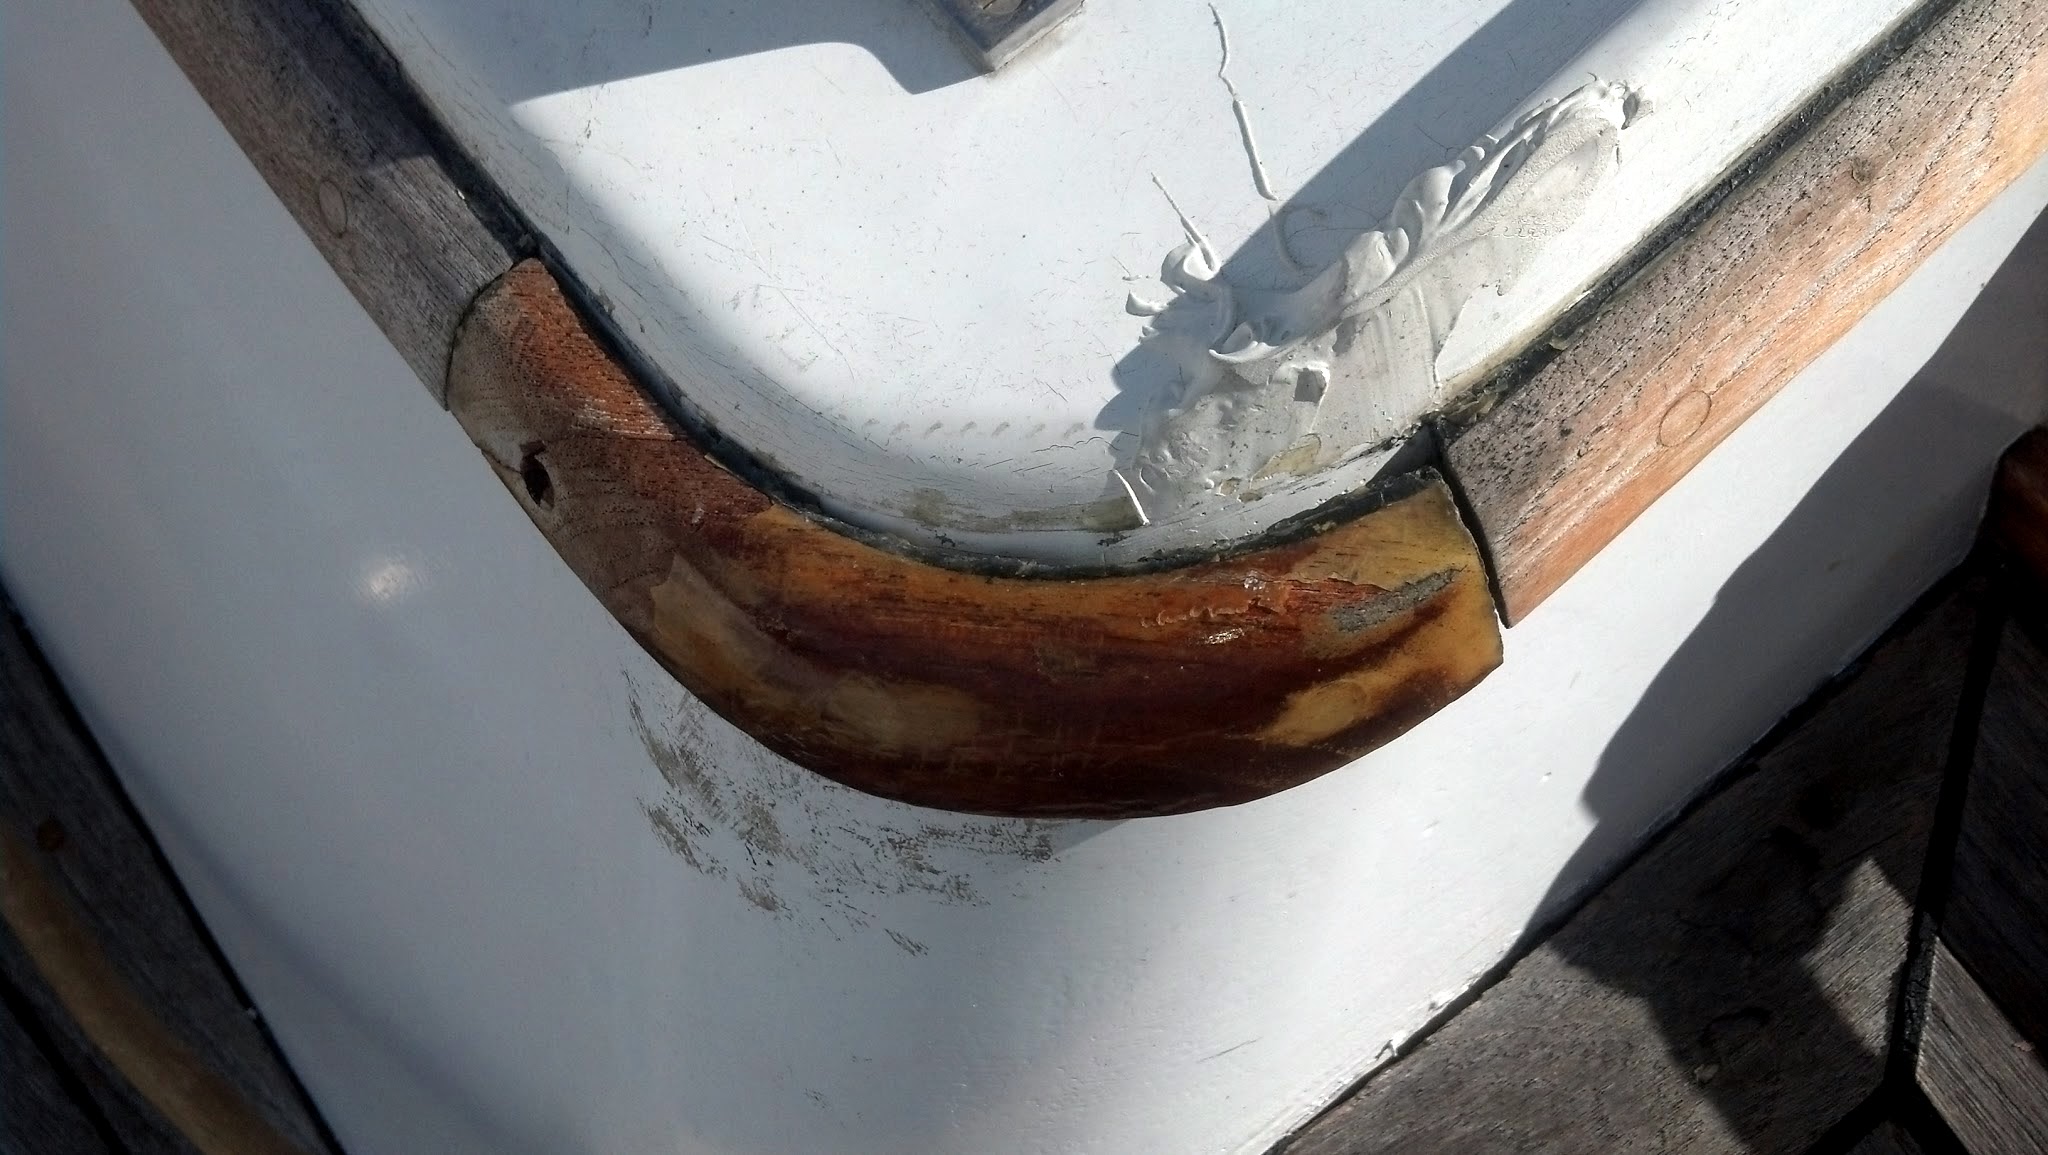
First I rough fit the piece to get an idea of how it goes in and to see if there was any other collateral damage. I found that the screws that held it in had sheared off so I had to drill them out to make it fit properly.
Then I stripped the old varnish off with a heat gun and scraper. I then sanded the inside and outside and cleaned it with isopropyl alcohol. After the alcohol evaporated I put teak deck sealer on the inside of the edge piece and screwed it on to the cabin. Next I taped across the top edge of the wood and cabin and applied teak deck sealer over the top edge to keep water from penetrating between the wood and the cabin.
Finally, I put glue on 3/8″ teak plugs and gently tapped them in over the screw holes. When it comes time to varnish I’ll use a chisel to cut the plugs off and then will sand it fair with the rest of the wood.
The entire project took only two hours. I don’t know why I put it off for so long!
Tuesday, January 8, 2013
Rust Free Locks
Livia and Carol on s/v Estrellita 5.10b have some tropic-tested advice on one of those little necessities aboard that can become a major irritant:
We use about half dozen padlocks on our boat at various times for various reasons. We have locks for our lazarettes, our outboard motor (either on the dinghy or on the stern pulpit), we lock our kayak/dinghy to the boat with a bike cable and padlock if we leave it in the water at night*, and when bringing the dinghy/kayak to shore near civilization.
Our boat came with a set of locks. I have no idea how old they were but they weren't shiny when we bought the boat and we've put another 6 years of use on them. They work line new and haven't rusted. We only had 3 of these board and so we bought other padlocks as our needs grew. All of the new padlocks rusted - it did not matter if they were called "marine grade" or "corrosion resistant". Once we had to borrow bolt cutters at the docks at Tofino so we could free our outboard motor from a lock that had rusted shut on the stern pulpit. Each time we regretted not tracking down the brand the boat came with.
So, I went through the effort of tracking down the ones the boat had come with and just bought a handful to bring back with us. If you want to save yourself the time and money of buying and replacing crappy ones, buy yourself some Abus locks to start out with:
They come in various dimensions and aren't even that expensive as high end marine grade stuff goes (about $8) especially if you consider how many locks we bought and threw away.
*In each new anchorage, we use our judgment about whether we want to bring the dinghy and kayak on deck, lock them to the boat in the water, or just leave them tied up (not locked) in the water.

Subscribe to:
Posts (Atom)


