Thursday, November 28, 2013

On giving thanks

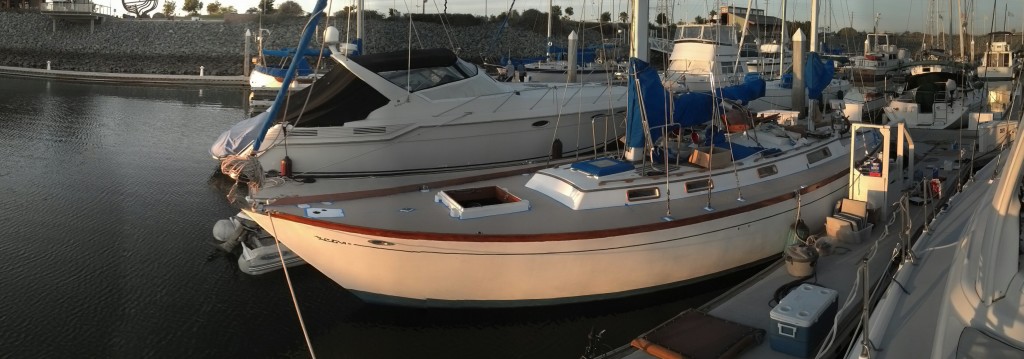
Because I don't think I can improve on it, I am reposting something I wrote in 2011...


In many cultures there is a harvest festival or feast, celebrating the end of the toil in the fields, growing and harvesting the food for the winter, and before the start of the rationing needed to make that harvest last until the first crops of the spring are available.

Americans have set aside the forth Thursday in November as such a holiday.  I have no familiarity with the harvest feast customs elsewhere, but in the United States, while there is typically a feast (turkey-based, traditionally), this also is a time of reflection, of recognition of the bounty which we receive on a daily basis (would you rather be the King of England in 1263, or you, today?  Yeah, exactly). 

It doesn't seem too much to spend one day in an attitude of thankfulness for our bounty.  So no matter where in the world you might be, please join us aboard Eolian in giving thanks for:
  • Our friends and families who are there for us, giving support in our times of need, and are there also on a daily basis to fulfill that most basic human need: companionship. We are all in this together.
  • The most amazing assortment of food available to mankind, in the history of the world, and all year round to boot (do any of you still remember receiving an orange for Christmas, and why that was so special?) 
  • Energy and technology that would make us all, every one, to be taken as Class 5 Wizards to those living but 100 years ago.
  • Peace, and the freedom to live our lives according to our desires (for the most part)
  • Those who gave up their time, their health, or their very lives in the service of this country that we might enjoy these things.
  • [Please add 5 items of your own here]
So, from the crew aboard Eolian, happy Thanksgiving.  But more importantly, may you have a thoughtful, contemplative, thankful Thanksgiving!

Bob & Jane

Tuesday, November 26, 2013

Installing Stanchion Bases

Please welcome new contributors Ken and Vicky, who live aboard s/v Painkiller!  Ken is a prolific writer and so his project write-ups spread across many posts.  For his first contribution to Small Boat Projects, we join him as he completes the rebedding of his stanchions.  But to get the context, you should also read Part I, and Part II

So here is Part III:
With a full on rainy day, the day after getting the top layer of epoxy on the night before, I was able to prep all the bases and hard rubber pads. Lots of cleaning, sanding, trimming the rubber and keeping all the ducks in a row. Bases, rubber gaskets for deck and the backing plates below decks which were all mostly fine. I see no need for all the extra work and material to replace them now that I have a solid epoxy deck layer above them.


Working with rolls of butyl rubber, which makes it so easy to prep, not to mention the mess factor is so minimal you have to wonder why you haven't done it this way for years. Squirting goop out  of a cylinder is always messy, needs masking and wasteful.


 Some of the bases had been bent so with a proper size hammer, some concrete and wood dock I persuaded them to be flat, within reason.


The epoxy was quite proud and needed more sanding than I wanted too, but they came out fine with only a few easily repaired air bubbles.


All holes transferred with butyl cheerio's in place...


...shiny new bolts started in place to ease locating the backing plate from under the deck...


...backing plate dressed with cherrio's, bolts tightened, all the lockers and wires reassembled...done.


This picture (early morning, dewy, telephotoed from the dry cockpit so it's blurry) shows some of the butyl still squeezing out overnight. In a couple of days we'll give the base a thorough cleaning and eventually touch up paint when we finish bedding all deck hardware.

Thursday, November 21, 2013

New Nonskid!

Nate and Natalie aboard their Cheoy Lee 41 s/v Astrea have renewed the non-skid on their deck. It came out great! Here's how they did it:
New Nonskid!
New Nonskid!

Astraea finally has a new look. After two coats of Interlux Prekote primer and two coats of Interlux Brightside paint. We did one coat each day. The primer covered the entire deck and the paint went down just around the deck edges. In between coats we sanded with 220 grit and cleaned up with Interlux 333 brushing liquid.

We rolled most of the area and only brushed in the areas behind hardware and corners. We didnt roll and tip because the results from just rolling were really good, there were very few bubbles. While working on the deck preparation and painting we wore clean socks to keep dirt off the decks.

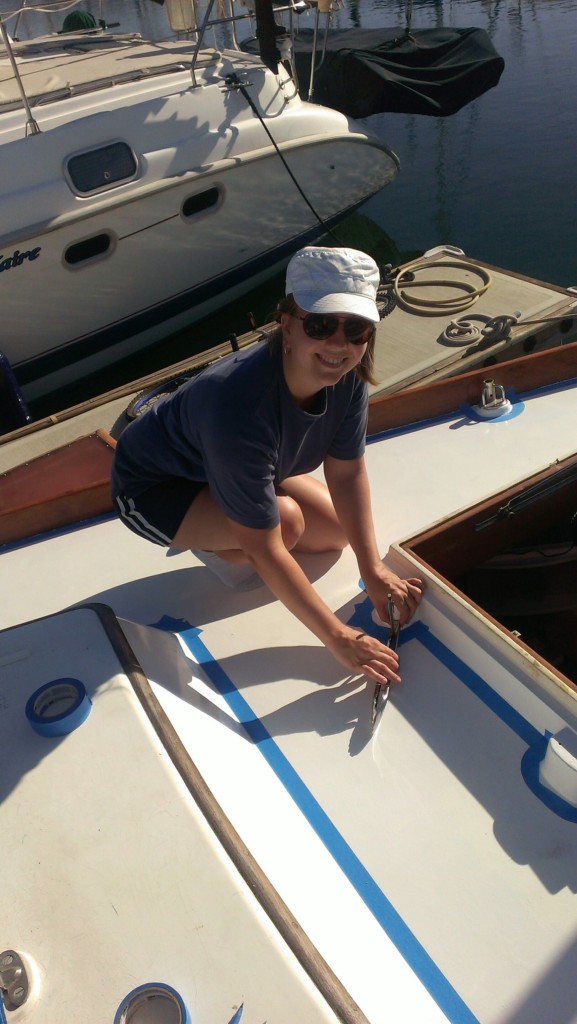
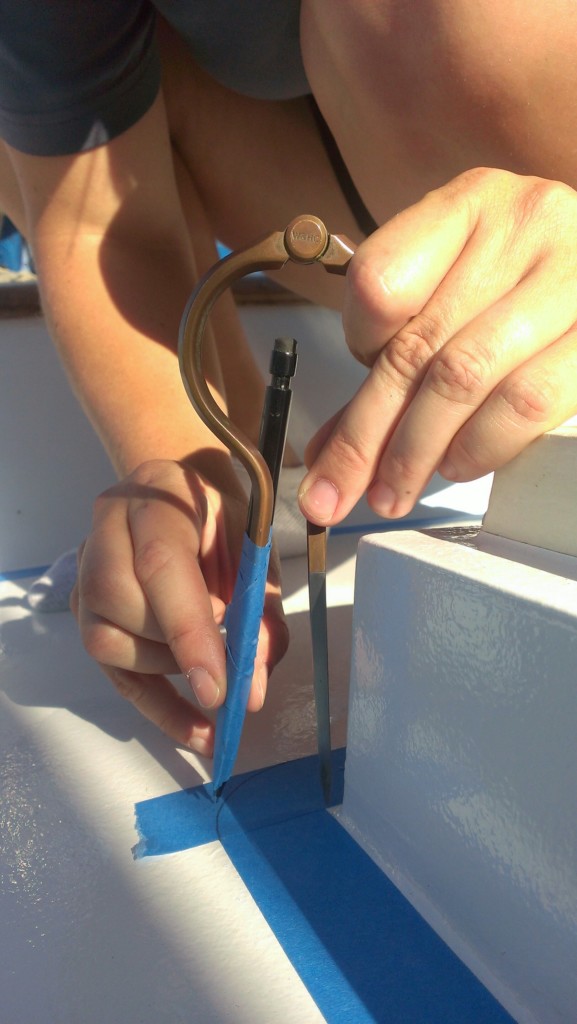
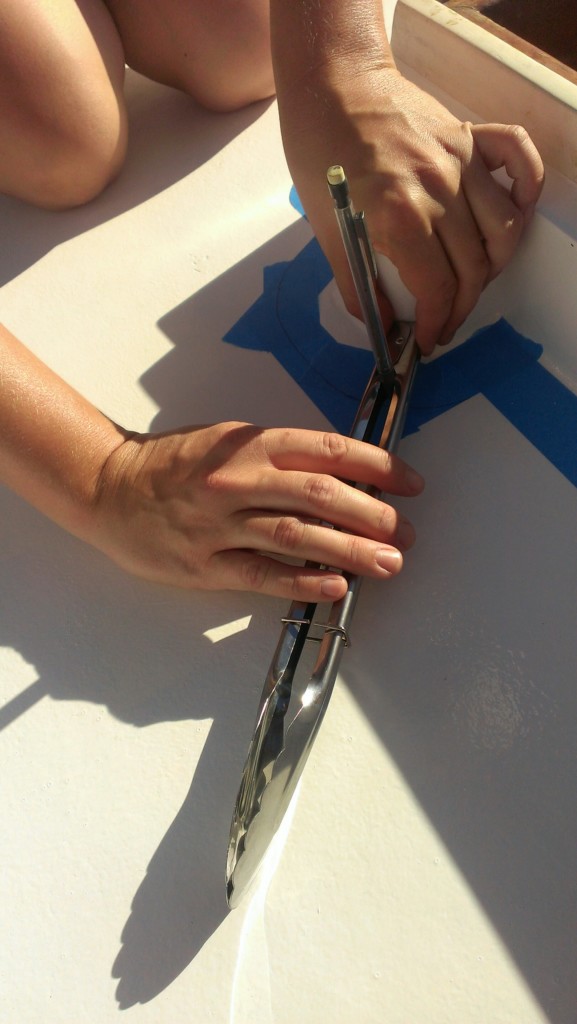
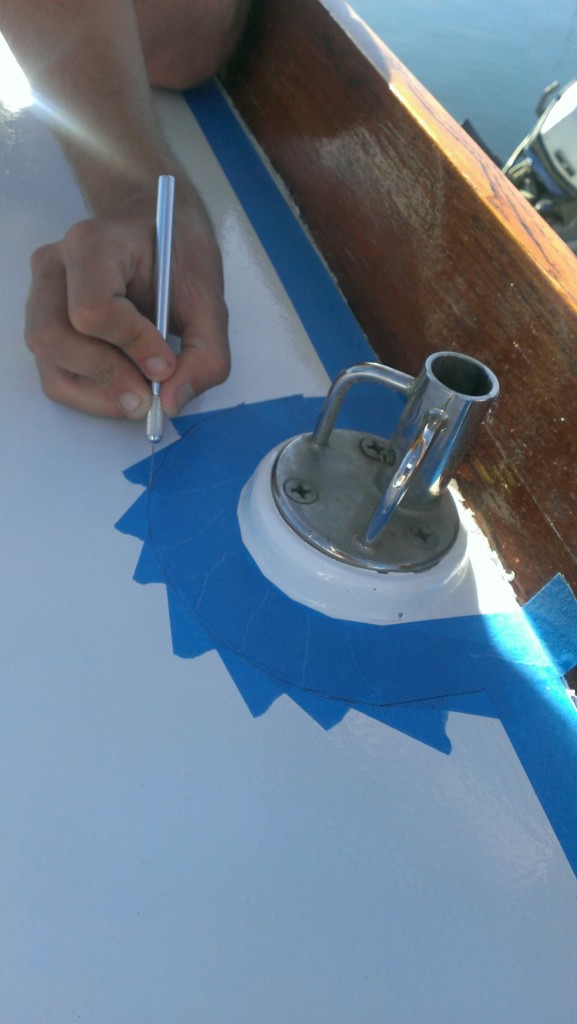
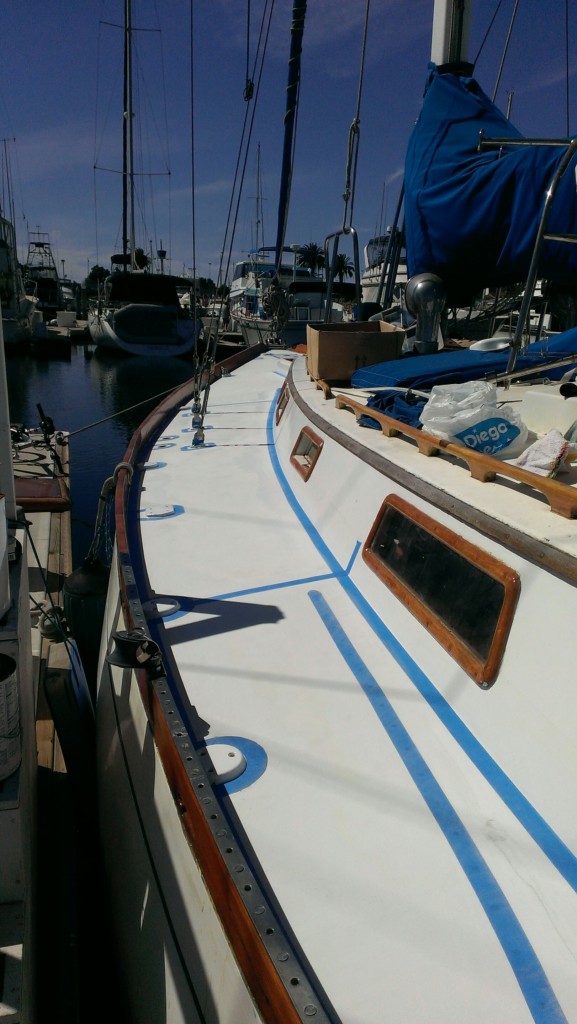
The day after our last coat of paint we taped the area around the deck edges and hardware we didn’t want nonskid to go. It took us about 8 man hours to tape the entire deck. We made all the edges the same width of a roll of blue 3M painters tape. The straight edges were easy to tape, just put the tape against the edge and roll the tape. Natalie used a compass to draw some easy curves, but it didn’t work for everything. She got creative and used kitchen tongs holding a pencil for curves around the deck house and hatches where a compass didn’t work. We over taped and traced the width of a roll of tape then cut away the excess using an exacto knife and peeled up the tape.

Natalie taped and drew the curved lines around hardware

Using a compass to draw a curve on the tape

Natalie using the tongs to hold a pencil and draw a curve

Cutting excess tape from the deck

All the tape is down and we're ready to roll nonskid
All the tape is down and we’re ready to roll nonskid

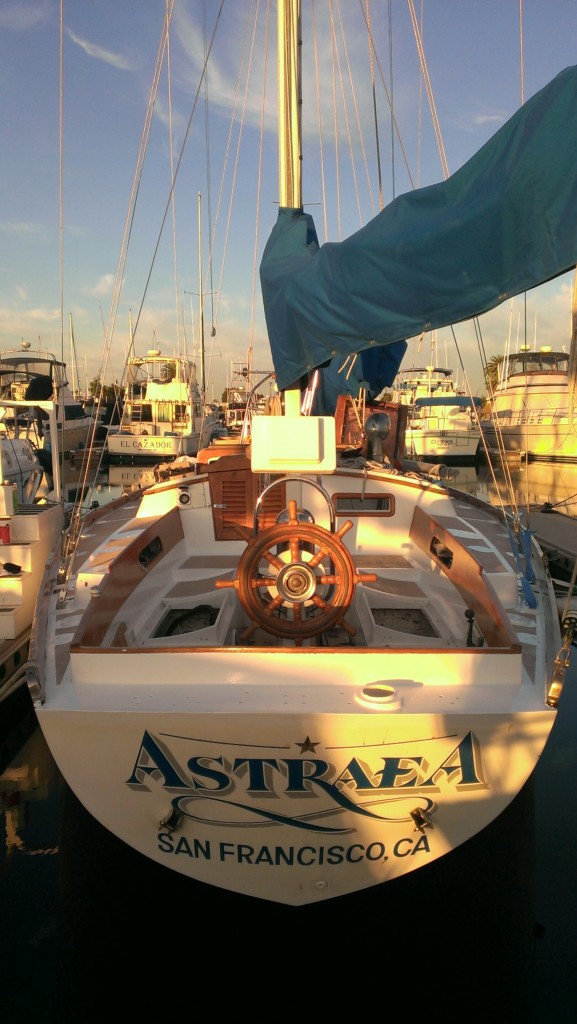
Nice transom view
Nice transom view the morning after we rolled the nonskid

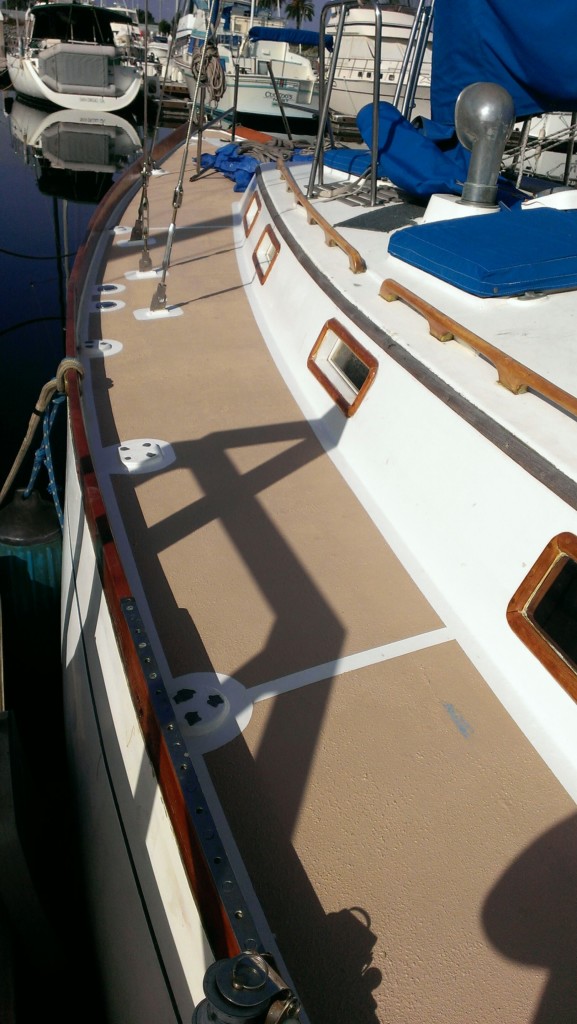
Side decks with the tape removed

Side decks with the tape removed

We sanded the deck with 100 grit sandpaper and cleaned up the deck twice with rags wetted with Industrial Maintenance Coating Thinner. The directions for the Durabak nonskid calls for Xylene, but Xylene isn’t available in California. Industrial Maintenance Coating Thinner is OK to use in place of Xylene.

Finally we were ready roll the nonskid! I opened the first can and mixed it up with our electric drill and a paint mixer and poured it in to a paint pan. I did some test rolling on cardboard to get used to rolling the textured material before rolling on the boat. It took about an hour and a half to cover the decks. I took a break and then rolled the second coat.

That night after the Durabak dried for four hours we could walk on the nonskid and peel up the tape from the edges before it fully cured. The tape came up easily if the Durabak wasn’t too thick. We cleaned up areas where the tape tore with an exact knife. We had some issues with the tape pulling up the white paint underneath where it hadn’t dried completely because we applied the paint too thick. We will touch up those areas later when we finish priming and painting the cockpit locker covers.

We’re so excited that this project is almost finished! It’s been a long six months…now on to re-mounting all the hardware.

Tuesday, November 19, 2013

Can't Splice Old Line? Try a Sewn Eye.

Have you ever tried to splice old double-braid line? I have. And saying that it is "difficult" misses the mark by an order of magnitude. Over at Sail Delmarva Drew gives us a lesson in an alternative...
Splicing is the gold standard for forming permanent eyes and joining lines; unfortunately used double braid generally lacks the flexibility required for splicing; the cover won't open and the core won't slide. Knots are a standard solution and work in most cases; yes, there is some loss in strength, but lines generally die from chafe and I can't remember having one fail at the knot, other than in testing. But sometimes there simply isn't enough space or a knot will snag.

Seizing is traditional and just as reliable as ever. I've seized a dozens of eyes over the years and never had a failure. I helps if you cover them for UV and chafe protection, but if the seizing is double layer like the old days, the outside layer is the UV protection and the inside layer holds the load. But seizings are long and stiff and can hang up, since the tail is neither covered nor tapered. So occasionally I use a hybrid sewn/seized eye. This isn't an idea I dreamed up, it is an old one that I read of many years ago in the New Glenans Sailing Manual. They also speak of stropes, the precursor to soft shackles.
  ____________________________________

First I remove about 1 1/2 rope diameters of core. This will allowed the end to be stitched down to create smooth taper. The New Glenans Sailing Manual calls for 3 1/2 to 4 rope diameters of core and I've got 4 1/2 diameters without counting the taper.

How much stitching is enough? Most whipping thread is about 50- to 60-pound test (I use 90-pound Kevlar, just because I have it), and doubled that suggests about 25 stitches on each side to reach 5000 pounds. Sure, it is not loaded in-line, but most of the load (about 65% in testing) is actually carried by line-to-line friction, just as in a seizing. Also remember that due to friction of the eye around the shackle or fitting, the free end is only carrying about 35% of the load. The results is that the stitching is only carrying a working load of about 1000*0.35*(1-0.65)=122 pounds and a line failure load of about 610 pounds (assuming 5000 pounds for aged 1/2" Stayset); not nearly as demanding as you would guess and as usual, the splice is stronger than the line. The stitching is scattered so that some are in every part of the core.

After stitching I add 2 seizings for good measure. The throat seizing is the important one, as it keeps the first row of stitches from getting over loaded.

Then cover it with something for UV and chafe protection. Heat shrink is fast and poor choice (doesn't last). Webbing is better in severe applications... like winching a sheet along a shroud.

The New Glenans Sailing Manula only calls for 3 1/2 to 4 rope diameters and I've got 4 1/2 diameters without counting the taper.

(Note: when I discovered the line was Warpspeed, 22000-pound test, I added another solid layer of whipping. Also good for abrasion.)


Notice the strope in place of a shackle. Less steel to flog, removable, and as strong as the larger line because it is doubled.If the eye is small it can't fall out easily. The failure point is always the same; the loop cuts off the stopper knot.  
After just 2 days I learned that heatshrink is not enough, not when winched across a cable shroud. I also switched to Amsteel soft shackles (home-tied) for a bit more long-term security. That and the they fit the clew better; the yacht braid stropes worked fine and would no doubt last for years, but I really didn't have room for 2; the big knots would jam on each other. The yacht brain
strope would be fine for a single set of sheets. 
And if you have concerns about the strength of sewn eyes, Drew addresses that in a follow-on post, which you should read.

Tuesday, November 12, 2013

Extension Cords

Extension cords are a pain. They seem to tangle themselves into knots when they are unsupervised in a locker somewhere.  Scott on s/v Valkier has a suggestion...
So someone asked me about what I use for an extension cord on the boat because of a comment I had made about having the perfect one. Everyone knows what a pain extension cords are. They are constantly getting tangled and snarled up, they are a pain to coil back up after using them, they are a pain to un-snarl and pull them out of the cockpit locker after they have become wrapped around every other thing in there. Last but not least is that you can only plug one thing into a standard extension cord. I am constantly having to switch between a drill and a sander or router etc… It just slows stuff down.

How it came about is a long story… lol… not!!!

One day I was in a tool store, not sure where, and saw one of the extension cords in a reel box with 4 outlets built into the box. It was on sale and I thought wow, I need to try that out it would be great on the boat. It has been about a year since that day and it has been everything that I thought it would be and more. The one I got was cheap and I wondered about life span but it is battered and still going strong. Mostly what it has done for me is alleviated a lot of frustration due to the above listed downsides to standard extension cords. It also means that I am more likely to grab stuff to do a quicky project because it is easier to un-spool cable and re-spool it when done. Less time in setup and clean up on both ends of the project. Mine is 25ft in length and I think I want one 50ft and one cable size bigger. However I would bet that I mostly keep using the 25ft one due to size. A 50ft cord and reel will be substantially larger.

Thursday, November 7, 2013

How to: Mask a Handrail

Do you keep your teak handrails finished bright?  On Eolian we do, and so varnishing them is a part of the annual varnishing task.  Therefore masking off the loops where they meet the deck is a necessity.  We have 40 loops on Eolian - this is not a trivial task.  So then, how to do it?

There used to be available masking tape that was pre-cut to fit the curves at the ends of the loops, but I can't find it online anymore.  In any case, this was a very expensive solution - we've never used it.

Instead, here's how we mask off the loops, using just regular 1" tape.  To illustrate, I'll show the process on an end loop because there is increased visibility there.

The first step is to find a nice anchorage!  There is no need to do this at the dock.  Why stay at the dock when you could be at anchor in a quiet cove somewhere?  We are anchored in Eagle Harbor for these pictures.
The starting point

First, apply tape strips along the long sides.  As I have mentioned before, it is wise to hold the tape back from the loop by a tiny amount so that the varnish will help with sealing the loop to the deck.
Apply two strips to the sides


Next, apply strips at the ends of the loops.  The fit will be terrible of course, leaving triangular areas uncovered.
Add strips at the ends


Next, tear a 3" or so strip of tape down the middle, lengthwise.  If you are using 1" tape like us, this will give you two short lengths of 1/2" wide tape.
Tear some tape down the middle

Now you can tear off pieces of the narrow strips, making roughly 1/2" square pieces of tape with one straight edge.  These are too small to place accurately with your hands, so I stick them gently to the tip of a knife for ease of handling.


Using the knife as a handle, position the tape, and then press it down with a finger tip when it is correctly positioned.  The knife allows you to get at every corner. 


Apply overlapping pieces of tape to follow the curve.


The process sounds tedious, and well, it is.  But with practice, I do each one in under 2 minutes (and having 40 to do each year gives me lots of practice).
Ready for sanding and varnish

So we're talking about roughly an hour and a half to mask off all the handrails - that's not a terrible way to spend an afternoon at anchor, is it?


Related Posts Plugin for WordPress, Blogger...