Thursday, May 31, 2012

DInghy Build (Part Dos)

Kyle from Of Winds and Water gives us Part II of his stitch 'n glue dinghy build... Paint - wild paint:
Okay, here we go: the pictures...
Step two thousand, four hundred and ninety seven: Sea trials. Only one thing left to do. Drop it in the water and see if it floats! Luckily, our first sea trials were not only successful from the floating aspect, but we even managed to stay dry! Up and down the canals, one person or two, we tested that Acrux does exactly what she was intended to do. Float, row, and transport us across the anchorage.

And last but not least, here she is resting on her preferred transport spot. Most of the time on the ICW we'll simply tow her behind, ready for quick deployment once we're at our anchorage for the night. But for crossing larger bodies of water, or just for extra security, this is where she'll rest.

(Part I of the series is here.)

Tuesday, May 29, 2012

Is it all the way up?

Do you have a mark on your halyard showing at eye level how much halyard needs to be winched in to fully hoist your sail? Today, Jeff and Anne on s/v C'est la Vie give us a tip on marking lines. Also, pay attention to the tool that they use - a hand sewing awl. I think that this is a tool that no boat should be without, because it makes stitching canvas so much easier than using a needle and palm.
While Anne piloted us ever northward along the ICW, I took advantage of the mellow conditions to properly mark the reefing lines on C’est la Vie’s mainsail.   To aid in efficiently reducing sail, it rarely seems that enlarging sail area is done under pressure, we mark the reefing lines at the cleat on the boom.  The first reef line receives a mark for the full sail and for the reef point.  The second reefing line receives a mark for the full sail, the first reef, and the second reef point. 
mainsail reefing lines marked with indelible ink
Initially we make the marks using a sharpie marker. After a couple months of sailing and assessing the position of marks it is time to properly mark the line with some whipping twine.

Marking with whipping twine has the advantage of being both easy to see and easy to feel.  When working at night or under duress feeling the marks saves time and effort.

The tools required are scissors and a sewing awl.  Using a high quality whipping twine will enhance the quality and longevity of the marks.

Resources with quality directions on whipping line can be found on the internet, example - Finish Whipping Method 1.  Look around and pick your favorite.

A hint for finishing the whipping is to use a sewing awl to pass the ends of the twine through the line. Using the sewing awl, I pass the ends through the rope three to four times.  
passing the ends of the whipping twine through the rope

This trick keeps the whipping from unraveling and gives the mark a clean look without loose ends hanged about.
completed mark 

We use this technique to mark various lines around C’est la Vie – reefing lines, halyards, dinghy painter, topping lift, etc.
new marks on first and second reef lines.

Thursday, May 24, 2012

When stairs are too shallow

It's warming up in Port Dover, and Brian is working on s/v Whiskeyjack once again. Today, he deals with stairs that are not deep enough to fully accommodate feet:
I slip down the companionway steps at least a couple of times a season. Even sober.  The problem is that the steps aren't very deep.


I cut some teak salvaged from DonorBoat and installed nosings on the treads.  They are actually straight - just a weird optical illusion in the image below.


Aside from the functional aspect, I think these look great too!

Tuesday, May 22, 2012

Cooking with silicone

Jeff and Anne on s/v C'est la Vie was talking the other day about the virtues of using silicone cupcake cups for baking on board, and that got me to thinking...
I decided I really wanted some muffins. Craving them infact. Ever since we were in titusville and passed a bakery. I almost got some scones at the farmers market but restrained myself as I have all that aboard. I just need to get over it and do it myself, kindof. To keep my sprirts up first time baking on this trip I bought a mix. I am not certain if my plan will work but I purchased silicone baking cups and I am going to use them instead of a muffin tin. I am sure many people have used these and have been successful. My worry, will they really release so that I don't have to use my precious fresh water to clean them. Can I use the salt water to wash them and the a fresh water dunk? Will it be perfectly easy and then I will be forced to enjoy muffins all the time??? The horrors

I decided today was the day to make the lemon poppyseed muffins. If these work out I have ripe bananas for tomorrow to make into tasty treats!

So, I don't carry eggs aboard but I do carry yogurt so I will sub yogurt and a bit of ripe banana for eggs. I don't carry milk but I do have powdered buttermilk and powdered skim milk. I also carry rice milk but have not found that I like using that for baking.

Also, I don't have the box the mix came in. Why?? Well I HATE cockroaches and they are attracted to the glue on cardboard boxes. We remove packaging material asap when we transfer food on board. I do not want bugs on my ship! 

The most difficult things so far has been baking heeled over and waiting for the oven to get to temperature. We are sailing right now and thank goodness for a gimbled stove! I have a nagging feeling, guilt maybe? I feel like I am wasting resources waiting for the stove to heat up. I am just using the propane without any net result. Oh well C'est la Vie.

The recipie called for 425 for 15-20 minutes after 10 min I turned off the propane to the oven and will check it at 15 and then again if I need to in 20. There are not any eggs so if they are not fully cooked no harm will come to us. The recipie also says to cool 5 min before removing from tin. I wonder if I follow that for my silicone cups...

Yes. Cool them and then wow! they come out with nary a crumb on the cup! I am so excited!!


But there are many more silicone cooking containers and utensils available... all of which stand high heat and should all be a snap to clean up. Here are some examples:
And all of these items share the virtues above.  Do a search yourself... I think Jeff and Anne have done us all a favor by pointing this out.

Thursday, May 17, 2012

How do you know that it’s full?

On s/v Zero to Cruising, Mike talks about a way to know if your propane vendor has been giving you full measure...
Do you know how to tell if a propane tank is full? As in COMPLETELY full? We didn’t, so of course we did what anyone with internet access would do, we consulted The Oracle to find out the answer. What I learned is that, stamped onto the side of a propane tank, should be the Tare Weight (TW), the weight of the tank unfilled. A 20 lb. tank should then weigh 20 lbs. more than the labeled Tare Weight after it has been topped up.


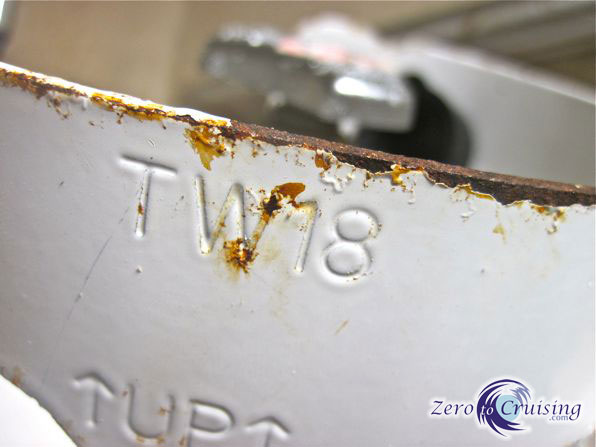
The Tare Weight of our 20 lb. steel tank is 18 lbs.
Why bring this up? Because our tank also has a fancy little gauge on it that, like an automobile fuel gauge, can tell us visually how much propane is in it. When we came to pick up our main propane tank on Wednesday after dropping it off the day prior to have it filled, our gauge did not read full. In fact, it was down what we would consider a fair bit, enough propane to last us quite some time.
Note: We had our propane tank filled shortly before leaving Grenada in November 2011. It only just the other day ran out. You can tell we don’t use all that much propane!


The gauge now reads full, as it should.
Anyway, considering that we didn’t really need to get the tank back that day, and they’re charging a fair amount to fill the tanks ($90.00 EC which equates to $33.33 US for a 20 lb. tank), we wanted to have it FILLED. When I complained, the gentleman I spoke to kindly explained that although he didn’t have any way of checking it right there, if we would leave the tank with him, he’d make sure it was looked after.
When we ultimately picked up the tank yesterday we found that our trusty little gauge read full, as it should have. Unfortunately, I think paying for a full tank in these situations but only receiving a portion of what you pay for is pretty common. In fact, I think it happened to us in Grenada too but because of the inconvenience of leaving the tank with them again (we had planned to set sail the next day) we just accepted the fact that we were ripped off a bit. It may not be a lot of money but it is a PITA. Caveat Emptor.

Just for kicks I checked our 10 lb. aluminum tank. It has a Tare Weight of 9.32 lbs. It weighed approximately 15.5 lbs. indicating that it is still about 60% full.
[Ed. Note:  I will also add that there is another set of numbers stamped into the tank that you need to pay attention to - the date of the last hydrostat test that the tank has seen.   In the USA anyway, the tank can be legally refilled for 12 years from that date. Later than that, the tank must be re-hydrostated.]

Tuesday, May 15, 2012

Morse MT-3 Engine Controls: Maintenance tips

Have you ever been leery of disassembling something for maintenance because you don't know how it is put together? Will you accidentally remove the Master Bolt, and the thing will fall apart in your hands? Or worse, come apart with force as spring-loaded internals fly far and wide?  Morse engine controls could be in this category for you.  If so, Drew at Sail Delmarva gives a quick tutorial on how to disassemble them for maintenance:
These have always been a bit of a mystery to me. The manual suggests annual lubrication--probably not needed on a PDQ 32, since they are under cover--which I never did. There are no visible fasteners and the direction always made it sound like major surgery, which I have been avoiding with some guilt until...

... I prepared to leave my anchorage this morning and the starboard handle fell limp. Oh, it would shift gears and felt normal when doing so, but the engine wouldn't rev. If the handle was pulled out as you do to adjust the throttle with the engine in neutral, the handle was limp. When I removed the engine cover and moved the throttle from there, everything felt normal and the engine was fine. I could only assume I had torn the head off the cable or that some crucial and unobtainable small part had disintegrate. Visions of boat bucks melting away filled my eyes.

Opening the control for a better look turned out to be easy:
  • Leave the handles on. They aren't in the way and will help with trouble shooting.
  • Remove the 4 screws that hold the control head to the bulkhead. Lift about 2 inches.
  •  Remove 2 screws about 3/4-inch below the mounting flange, one fore and one aft. Both are in recesses and hold the cover haves together. No other fasteners need be removed and no spring-loaded parts will fly out.
  • Pull the 2 halves apart. While you're in there, grease everything, including the exposed cable. In my case, after 14 years, the factory grease was just running thin but not gone; however, in more exposed locations, lubrication every year or 2 would be smart. Check for loose bolts--I found a few. 


The problem was delightfully simple. An E-clip (a type of external retaining ring) had fallen off of the throttle control lever and allowed the cable to come free from the control. Why? In part, because a pair of screws retaining the cable end had loosened and allowed the cable angle to change. In part, because the clip was stainless and not all that strong. I replaced it with a spring steel clip, buried in grease.

Carrying a few spare clips might be smart (5/16-inch E-clip--be aware these come in 2 thicknesses and that the thicker ones will not fit the shaft grove). The motor end controls are also 5/16-inch clips (a different design, and I have had failures there as well--the same E-clips will fit).

Thursday, May 10, 2012

Stitch 'n glue dinghy

Please welcome new contributor Kyle, who runs a blog called Of Winds and Water. Kyle's first contribution to Small Boat Projects is a 3-part series covering his build of a stitch n' glue dinghy.  Today, Part I:
So, as broke college kids, we'll be spending a lot of time at anchor, instead of marinas. As such, we need a method of getting to shore and back with groceries, water, etc. As the inflatable canoe was deemed unacceptable for such matters, we needed a dinghy.

We had two options. Buy or build. After looking at various inflatables and hard dinghies, I decided they did not meet several of my major requirements; inexpensive, lightweight, and low maintenance. The inflatables had a high initial purchase, questionable durability, and the added hassle of having to inflate it every time we wanted to use it. The hard dinghies were simply too expensive, not to mention the lightest one I found was almost 100 pounds. Just too heavy for Darcy and I to hoist over the side to lash it on deck. So, we build...

Acrux (or Alpha Crux, or Alpha Crucis, depending on who you ask) is a plywood dinghy of stitch and glue construction. This means she's simple plywood panels that are stitched together with wire ties during the initial construction, then later held structurally with epoxy resin. She's modeled after the D4 plans offered free from www.bateau.com, with some slight modifications. Anyway, here's the process of building a dinghy.


The first step: lofting. Here, we take two measurements from different sides, at a 90 degree angle to each other. At the intersection, you place a dot. After you have an entire panel lofted, to simply connect the dots, and cut the panels out.
The second step: cutting out the panels, and drilling for stitches. This part is fairly straight forward. Cut along the lines you just drew in the lofting phase, then drill a hole every 6 inches on the sides being joined for your wire ties. Here we can see the frames and side panels ready for assembly and stitching.
The third step: stitching it all together. Yet another relatively easy part. Simply align the panels and frame, match up the holes you just drilled, and wire tie them together. Her we have the bow and stern transoms in place, along with the center seat frame to give the boat some shape:
And here she's been flipped and the bottom panels stitched on:
Now, on to making it a functional boat: laying epoxy fillets in the seams. This step provides part of the structural strength to the boat. Mix resin, hardener, and filler (in this case cabosil), and push it into all the internal seams. After this hardens, you can remove the stitching, and sand the outside smooth. Once that happens, you can lay out fiberglass tapes on the outside surfaces. These tapes hold resin against the wood, giving the joint its strength. If done properly, these joints are actually stronger than the wood itself. Sorry, no pics for these steps. I was in the process of moving the dinghy from my bedroom in New Bern to Moyock. And yes, up until this point, all construction took place in my bedroom in New Bern. Don't tell the landlord.

Step number five or six: taping the inside. Again, fiberglass tapes are used over the fillets to give the joints strength. After that, the entire thing is coated in resin to seal it. We opted to cover the entire bottom in fiberglass cloth, just for an added measure of strength, and to add some durability for dragging over beaches and the like.
Steps twenty and twenty-seven: Finishing touches. Now that the structural parts are done, we have to 'glass and laminate the finishing touches. Rubrails, skeg, all that sort of stuff goes on.This process took several days. a lot of things needed epoxy laid on, then sanded down, more epoxy, then sanded. A whole boatload of fun...

Step one hundred forty seven: Flotation. We opted to fill all three seat compartments with chopped polystyrene (read as: old electronic and appliance packaging) for emergency flotation. You could break this dinghy in half now and she'd still float.
And now, the big finale: PAINT. And lots of it, at that. Green, black, and blue. And fluorescent pink. Because who doesn't want a fluorescent pink boat? I lay no claim to the beautiful paint job seen in the following pictures. Caleb and Darcy cut out some stencils, and after the paint was purchased, I left the garage, Darcy, and Acrux to their fate. To be continued... (I think I've exceeded the size for a post.)
(I particularly like the flotation choice...)

Tuesday, May 8, 2012

The Case for Softer Tethers

In another case of crossover, Drew from Sail Delmarva brings more climbing gear to the sailor...
As an experiment, hang in your safety harness for 1 minute. Go on. We'll wait for you.

_______________

Hurt pretty good after a few minutes, didn't it? Imagine falling a few feet on a 6-foot tether with no real shock absorption. The impact would over 10 Gs, or over 10 times what you  experienced just hanging there. The maximum, in lab testing, is over 20 Gs. Can you feel you ribs cracking and spine shattering?

It will save me a lot of typing if you visit this post about fall energy first. The long and the short of it is that falls on jacklines are less severe because the jackline stretches and the sailor also slides along during the line. Falls against a fixed anchor point are brutal. This is where we take up the thread.

_______________


I've made some effort to research sailing chest harnesses and injuries, with very little luck. Clearly, if a sailor takes a 4,000 to 5,000-pound hit in the ribs there will be serious injuries; OSHA and military studies support this. Yet, because of the circumstances of these accidents, the actual injuries are usually unknown. The sailor is lost. Other times there are injuries, but the assumption--right or wrong--is that the sailor hit something, other than the end of his leash.

The harness or tether is typically blamed, though there are 2 falsies in this logic: the harness should never have seen a 5,000-pound load because there should have been shock absorption in the system; the sailor would have very likely died from his injuries anyway.
  • "A lesson in harness and tether construction can be learned from Tami Ashcraft, who along with a sailor friend was making a sailboat delivery to Hawaii when they ran into a powerful storm. Ashcraft was knocked unconscious. When she came to more than 24 hours later, she climbed to the cockpit where a single tether dangled over the side. The D-ring had snapped where it was connected to her friend's PFD. He was gone. Ashcraft was convinced a round ring might have held, like those on Mustang vests." Ashcroft, in my opinion, was wrong in her conclusions.
  • 1998 Sydney-Hobart Race Accident. Glyn Charles was never found, after his tether parted. But the force of dragging his body through the water could not have generated that kind of force, only a sudden impact. The inquest stated that he was attached to a "fixed point" and thus would not have benefited from jack line shock absorption. The lanyard may have also been defective, though I can't locate the testing information. http://www.parliament.nsw.gov.au/Prod/parlment/hansart.nsf/V3Key/LA20010307027.  http://www.telegraph.co.uk/sport/othersports/snooker/2994528/Yachting-Charles-died-after-safety-harness-failed.html.

And this leads to a very interesting conclusion: the shock absorption device (Screamer) doesn't really need to be on the the tether, it belongs on the u-bolt. It is the fixed-point anchor that is the hazard. If the sailor is on the jackline, the system will stretch and slide and nothing will break. Some sailors have expressed concern about the elongation of the Screamer on-deck, and this removes that concern. No one wants more clutter on the tether. Up front, the real hazard is being dragged in the water, as many have said. Only if the sailor is attached to a u-bolt in the cockpit is the impact force extreme! Thus, if we clip Screamers only to the cockpit u-bolts, the force is absorbed where it needs to be and no new hardware needs to be invented! While this adds a little cockpit clutter, it could save lives cheap! In fact, the mere presence of shock absorbers on construction lanyards has been credited with safer work practices, as it reminds the workers of the incredible forces involved. The presence of Screamers in the cockpit might encourage sailors to shorten their tethers.

Well, at least that's one possible answer, something very simple that would only need be deployed in extreme conditions. This is much how climbers originally use Screamers; other applications came later.

________________

So I made up some new tethers a few weeks ago, for my own use on a catamaran. These are my best yet, and I like them both, though for reasons I will explain below--multihull reasons--I like the one on the left better. They both have features I like, though they will not be for everyone.


  • Knots instead of sewn loops. I'm still playing with the lengths and years of climbing expereince tell us that the knots are not a real risk. But years of climbing, industrial and marine expereince also tell us that sewn joints are stronger, reliable, and durable. They would be sewn if I were not still experimenting. (These knots weaken the webbing about 30%). Tails must be 3 inches and knots must be tightened by bouncing on them with body weight to prevent loosening or slippage--standard climbing practice.)
  • Attaching the snap to the center of a 2-leg tether with a larks head is quite convenient. It is a simple matter to adjust the legs without re-sewing or re-tying the ends. The larks head will not slip appreciably during a fall and could also be secured with a lashing, though that is not needed. This also simplifies the construction if sewn and probably results in very little net loss over time; several fewer joins, it can be moved if worn, and there is no UV vulnerable stitching. It also takes the load equally well from either leg or from end-to-end.
  • We like screw gate biners on the jackline because we do not often unhook from the jacklines. They are light and snag-free. We unhook from the harness end. This is because we have a deep center cockpit and never harness in the cockpit. If you clip on-and-off the jackline, the Kong Tango is a better choice. I may switch.
  •  Rope jacklines. Rope is stronger and withstands UV better than webbing. It offers controlled stretch, absorbing fall energy. It gives a better hand grip and clips more easily. On the down side, it can be mistaken for running rigging; on our boat this is no problem because of location and because we leave the jackline end attached. It is worse underfoot, rolling and making for poor footing; ours are not under foot because they are run on the cabin roof--cats are wide. If I had a monohull I would still strive to get the jacklines up against the cabin trunck and out from under foot. I might be forced to use webbing, which I would replace frequently (6-months?) and not like. I believe jacklines and harnesses are for everyday use, that practice with equipment breeds competence, and that rigging jacklines only when "needed" is a big mistake. Even more than reefing too late, who wants to be rigging jacklines too late, in a thunderstorm or at dusk?
  • Quick release on harness end. We don't, since getting washed off a cruising cat by a wave is very unlikely and capsize even less so. We prefer the security of a locking biner. However, there have been a number of drownings of sailors dragged by tethers or on boats that capsized; monohull, sport boat, and performance catamaran sailors should have quick release snaps at the harness end. However, be warned that most tether quick releases have failed in testing and in the real world to release under load . Test by hanging before you buy! Practical Sailor is investigating this issue.
  • One leg vs. two. Though fixed length tethers can be used, most sailors like adjustment. I've been playing with 2 versions for some years: the conventional 2-leg version; a 1-leg version with an intermediate clipping eye at about 65% length. For monohulls, the 2-leg version is more secure and gives more options, particularly if on the lee side. For multihulls, I like the 1-leg version with a clipping eye; it is simpler and offers a greater range of adjustment, useful when decks are wide. We keep the extra biner on the harness as we don't like it flopping around on deck. I intend to line the loop with either vinyl tubing or a thimble to make for faster clipping, but I keep forgetting.
  • Shock absorption. Notice the Screamer at the harness end. A simple $18.00 gadget that ensures the impact force cannot pass 600 pounds. I've broken ribs snowboarding and don't fancy doing it again. Climbers have been using these for many years, and ALL industrial and military tethers use them. Because they are easily replaceable (larks head to the 2-leg tether and overhand loop on the end of the 1-leg tether), triggering one is a minor expense (they are still full strength after triggering but will no longer absorb impact). I thought about only using the Screamers on the fixed-point anchors, but decided a fall over the side could be rough for me and that they were not in the way. This feature is NOT yet commercially available, though prototypes are being field tested.
  • Fit to boat. I think it is a mistake that all tethers are 6 feet or 3-6 feet; there are sound engineering reasons why falls over 6-feet are very serious, but honestly, boats are not one size. Some boats should have a short leg less than 3 feet. Multihulls need more than 6 feet to work effectively on the tramp. This is one reason I make my own. If you feel the need to modify your tether lengths, just be careful.
There does seem to be one potential weakness to having shock absorption installed in the tether; when it triggers the entire tether must be replaced. With a commercial tether, this will be about $200.00. There are 2 things I've asked the manufactures to consider:

  • The Screamer section should be replaceable. Then it is only a $20.00 fuse.
  • If the Screamer is non-replaceable, it must be protected from wear with a single bar tack. I have already learned that repeated non-critical impacts tend to loosen the stitching. This is not a safety concern, but in heavy duty use (Volvo?) it will reduce the effective life.

If this is something you would like to see on the market, call Yates and ask for them! They've built prototypes, but demand is required for an idea to make it to market.

Thursday, May 3, 2012

Composite fasteners

Have you seen an older wooden boat hull weeping rust from failing fasteners?  Well of course the rust is not the fault of the fasteners but the surrounding materials which are supposed to protect them.

But what if the fasteners were made of non-corrosive materials?  Non-metallic materials??!?

If that old strip planked hull had been built with these, it wouldn't be weeping rust...

Craft a Craft recently had this to say about them:


Tuesday, May 1, 2012

Bolt Hangers--A Strong Point For Small Dollars

In yet another crossover from the rock climbing world, Drew from Sail Delmarva introduces us to "bolt hangers", and how they can be useful on a boat:
Cheap hardware via cross pollination from the rock climbing world. In the mountains these are used in combination with wedge bolts to create strong anchor points. On a boat...
  • 5,000-pound strength anywhere a single 3/8-inch bolt is handy. Of course, a good backing is required.
  • 316 stainless steel.
  • Cheap. About $2.95. (others brands may be 304 or other grades, some of which have been known to fail in marine environments.)
  • Designed for clipping carabiners, they easily accommodate 2 carabiners.  
  • Obvious purpose avoids confusion over acceptable strong points. Strength rating and certifications are stamped on hanger.


Countless potential uses. A few of mine....
  • Add an extra block to a sail track.
  • Add an anchor point at the stern for diverting mooring lines or attaching a dingy.
  • Tether anchors. Don't tie rope or webbing directly; though polished to eliminate sharp corners, the radius is really too short for acceptable strength.
  • Anchors to secure bicycles.
Related Posts Plugin for WordPress, Blogger...