Thursday, January 30, 2014

Tie shooter

This post originally appeared on Windborne in Puget Sound

(I wonder how many folks ended up here because they were looking for some Star Wars© related toy)
  • Zip ties,
  • Tie-wraps, 
  • Wire ties,
  • Cable ties,
  • Nylon ties,
  • Panduits (if you work for the Boeing company)...
Whatever you call them - they're all the same thing.  And I know you have them on board - every boat does.  In fact you probably have a stash of them, ready to hand.  They are so handy that they get used for everything.  They're probably right there next to your duct tape.
That's where this tool comes in - it can pull the ties a lot tighter than you can by hand, and it cuts them off almost flush with the retainer/ratchet gizmo.  The little red knob is an adjustment for the tension that is applied - the tool is strong enough to break the smaller wire tires if the tension is all the way up.
It's not an expensive tool - I'm sure I paid less than $10 for mine, but it was an impulse buy (too many of my tool purchases are...) and I don't remember where I got it any more.  But here are some available today that I found on the Intertubes:
The bottom line is that these things are incredibly cheap, they allow you to pull and cut a wire tie in a restricted space using only one hand, and they do a better job than you can do by hand.  You need to have one on board.

Tuesday, January 28, 2014

Undiscovered storage

I think it is a basic fact of nature that no boat has enough storage space.  Ken and Vicky living aboard s/v Painkiller have discovered and utilized some space that you too might have on your boat, just hiding there, waiting for you:
My first boat had 4 drawers, all opening forward on either side of the companionway.  When standing facing aft, looking into the cockpit you had two on your right and two on your left. Above each bank of drawers there was a counter top approximately 2' long by 16" wide. To your right (port) was a small sink basin with hand pump and to your left was a counter top with a locked in place half top, split into two thicknesses. The top drawer on the right (port) when fully opened was cantilevered with long sides holding a complete 2 burner stove with fold up heat shields, the sink then just aft of it. The drawer below it had an open front (inboard) to access it's contents when the stove was out. Remove the bottom drawer and you had a huge hole all the way to the hull. Amazing what all could fit in that space. On your left (starboard) the top drawer pulled out with extra long sides so when completely pulled out and fully open it was supported by cantilever sides also so you could then flip the split counter top and cover the top of the drawer for a huge flat work space while cooking. The bottom drawer was the same as the opposite side with storage a plenty under the drawer when removed. Zero wasted space! Zero!

My Pearson 424 has quite a few drawers with wasted space, quite skinny but I found a way to utilize every bit of it.

A few cleats to keep things centered, then finding just the right size containers gave me an excellent place to keep some screws and bolts within easy reach. I haven't quite figured out how to use the space "above" the drawers but give me time and I bet I'll hang something in that wasted space.


Two large drawers under the bunk let me have a bigger space under the drawers which afforded me a space for heavier hardware closer to the bottom, center of the boat and still very easy access with the removal of the drawers. Again it was finding the right size containers.


Of course I'm not so sure I'd keep this system in place without more advanced ways to keep it all in place if I was planning a north Atlantic crossing in the off season or a battle around the horn, or Cape Town,  but for now, with nothing too adventuress in the plans I'll take the chance it will stay put in those skinny spaces.

Thursday, January 23, 2014

Rerigging

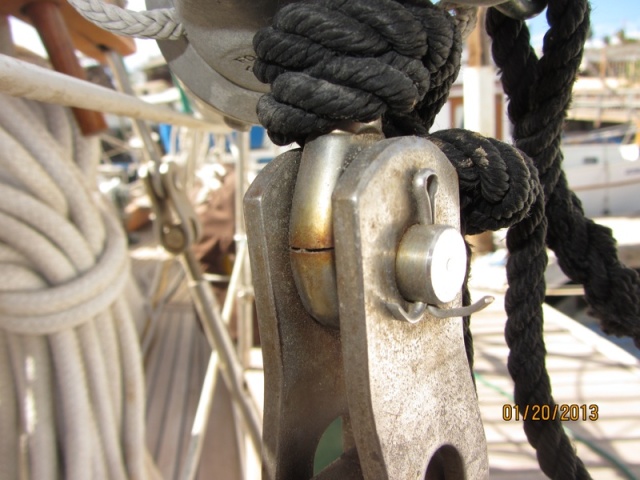
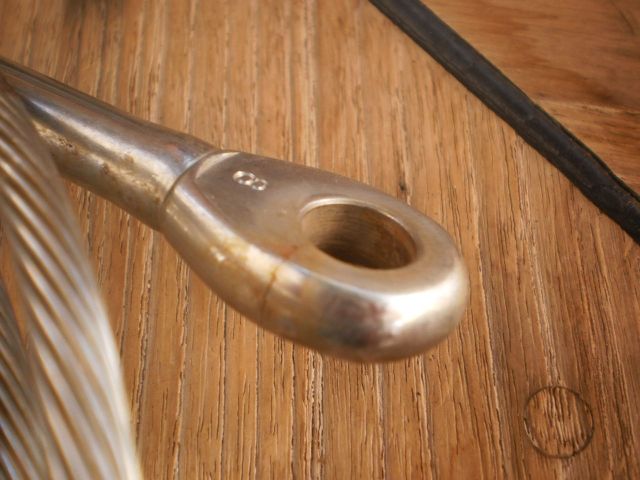
Normally, one would consider replacing the standing rigging on a boat to be a NOT small boat project. Yet, Steve and Lulu living aboard s/v Siempre Sabado show us that, tackled one stay at a time, it is not all that difficult. If you get nothing else from this post, look at the cracked eyes on the shrouds... and then go inspect yours.

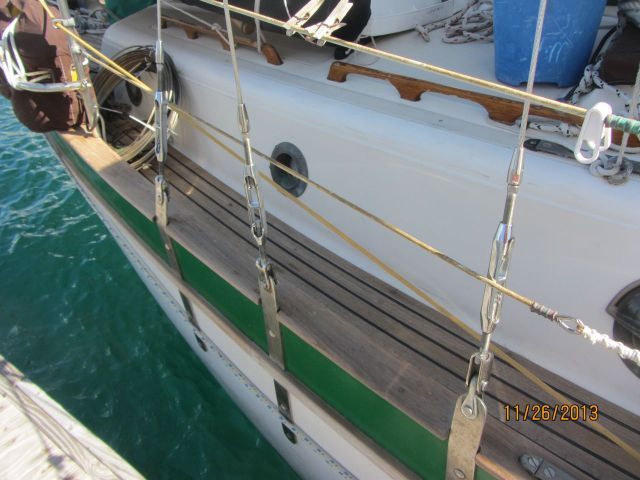
My main big job on the to-do list for La Paz was to replace all the standing rigging on Siempre Sabado.  For those not in the know, “standing rigging” is the array of wire cables and fittings that hold the mast upright.  You may remember that when we were in Santa Rosalia last January, I was a bit taken aback when I found, not just one, but two stainless steel eyes on my shrouds with breaks all the way through them.

nice crack

Well, since it’s usually recommended that standing rigging be changed out every 10-15 years and, since I suspect the standing rigging on Siempre Sabado is original, making it 37 years old, and since there are probably other cracks just waiting to be discovered, now seemed like a fine time to change out the standing rigging.

Toward that end, I pulled out my factory drawings of the Westsail 28 to get lengths and wire sizes.  Following the advice of Shannon (s/v Tink),  a clever and thrifty sailor, I ordered all my wires a few feet longer than needed, with an eye machine-swaged to the upper end.  Then I ordered swageless fittings for the lower end.  I was lucky enough to be able to team up with Rick on s/v Calypso who was also ordering new standing rigging.  Seems Rick did a solid for a fellow cruiser in La Cruz last year.  The cruiser, Brook, owns a rigging shop in Portland, Oregon and offered Rick a discount on any rigging he needed.  Brook let me in on the deal and so, I got a discount in return for transporting Rick’s rigging back down to La Paz from Portland.

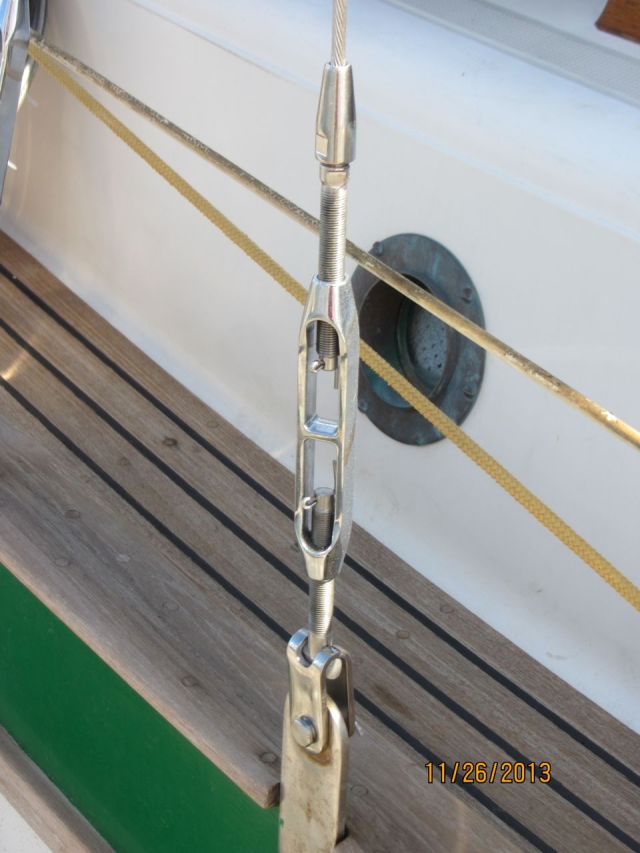
I bought 7 lengths of 1/4″ 1×19 wire for the upper and lower shrouds and the backstay (I had already replaced the forestay and inner forestay in Newport when I installed the roller furler), 2 lengths of 3/16″ 1×19 wire for the whisker stays, 2 lengths of 1/8″ wire to hold the spreaders up when you stand on them, and one length of 3/8″ 1×19 wire for the bobstay.  Each of these had an eye machine-swaged on one end.  This turned out to be a mistake but only because the whisker stays and the spreader-holder-uppers should have had a fork swaged on instead.  I also bought swageless studs for the turnbuckle end of the wires, new turnbuckles, swageless backstay insulators, and a few other odds and ends.  For the pieces that I mis-ordered, I went ahead and ordered new swageless forks from Rigging Only and had them ship it to La Paz.  There’s a story in itself.  Four pieces that fit in a 5×7 padded envelope.  A $155.66 (US) value.  It would have cost about $27.00 to ship them down via the postoffice.  But the Mexican postal service has a very bad reputation for getting things to people in a timely manner, if at all.  So I opted for UPS.  This was a good idea as the parts got here in about a week.  Here’s the cost breakdown:
  • Shipping:  $68.11 (US)
  • Import Fee: $425(MX) (~$34.00US)
  • Handling (UPS): $35(MX) (~$2.80US)
  • plus 16% IVA tax on the handling charge: $5.60(MX) (~$0.45US)
Total: $105.36(US) or 68% of the cost of the items ordered

Anyway, back to the rigging.

I started with the lower shrouds since I could reach their upper ends from the ratlines without climbing the mast.  On the first one, after loosening the turnbuckle, I went up, removed the old shroud, brought it down, laid it out on the dock as a gauge for the length of the new one, cut the new one, put the swageless stud on the lower end, climbed back up and attached the new shroud to the mast, climbed back down, installed the turnbuckle on the stud, attached the other end of the turnbuckle to the chainplate, and tightened the turnbuckle up to about what I thought it should be.

Then I got smart.

On all the subsequent shrouds, I climbed up the ratlines with the new shroud in hand.  Removed the old one, attached the new one, and then climbed back down.  Then I attached the new turnbuckle to the chainplate, held it upright with the new wire alongside, marked the place to cut it with a Sharpie, then cut it and put the swageless fitting on the end.  Much faster this way and I wouldn’t need to be tied to the dock to do it.

I used Hi-Mod swageless fittings but could just as easily have used Sta-Lock or Norseman.  I really like the Hi-Mods though.  Also, after I got everything cut and the fittings in place, I applied a light coat of Lewmar grease to the threaded fittings on the turnbuckles, ran the studs all the way in and then all the way out to distribute the grease and then wiped off the excess.  Hopefully this will help keep them from seizing up as some of my old ones had.

I learned that bolt cutters, or at least my bolt cutters, did a terrible job of trying to cut the cable.  I had much better luck with a thin cutting blade on my angle grinder.  It cut it fast and straight.

Here’s how the Hi-Mod swageless fittings are installed:

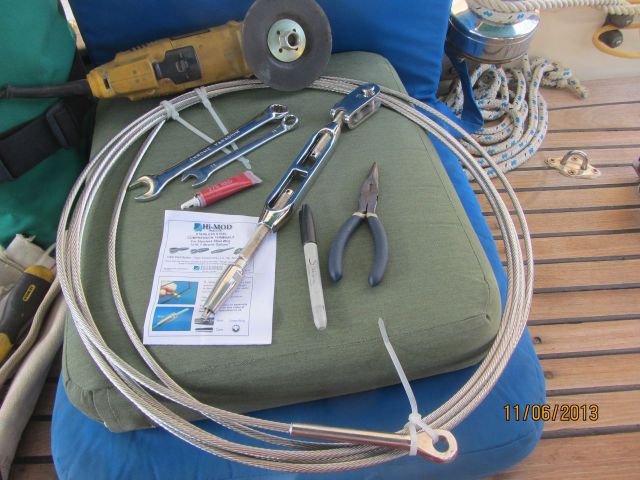
Assemble your tools.  Don't forget the instruction sheet, at least for the first one.
Assemble your tools. Don’t forget the instruction sheet, at least for the first one.

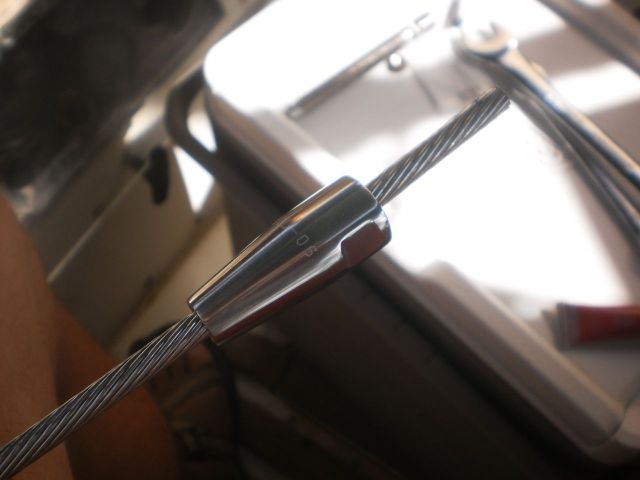
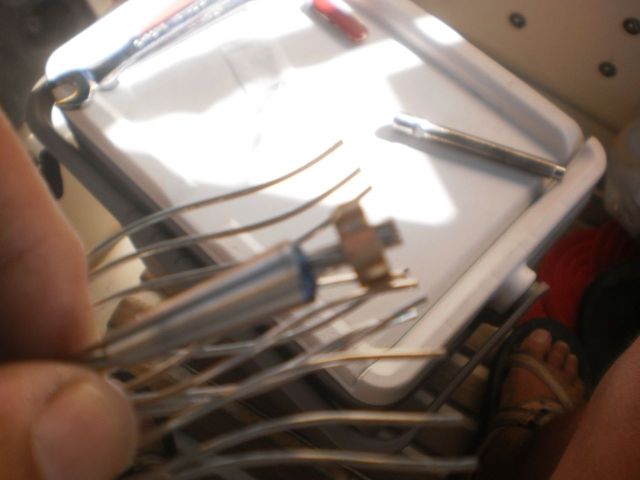
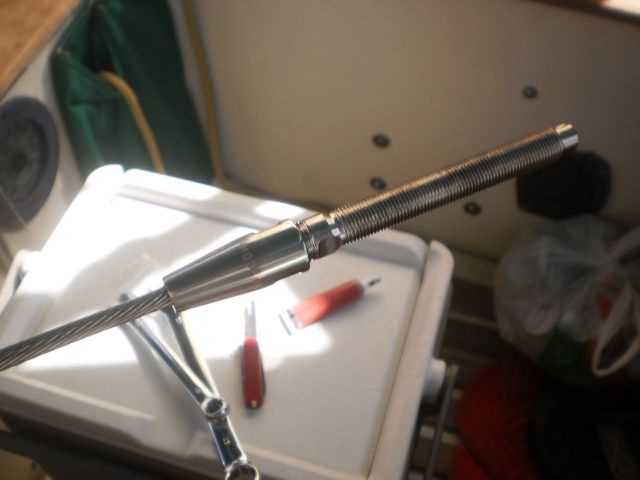
After cutting the cable to the right length, slip the ferrule over the cable.

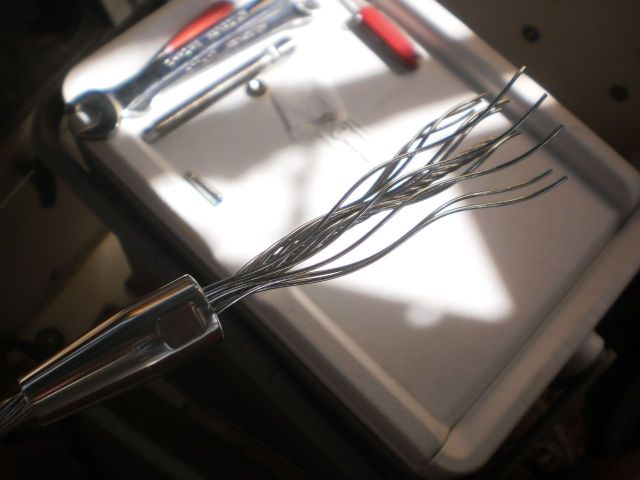
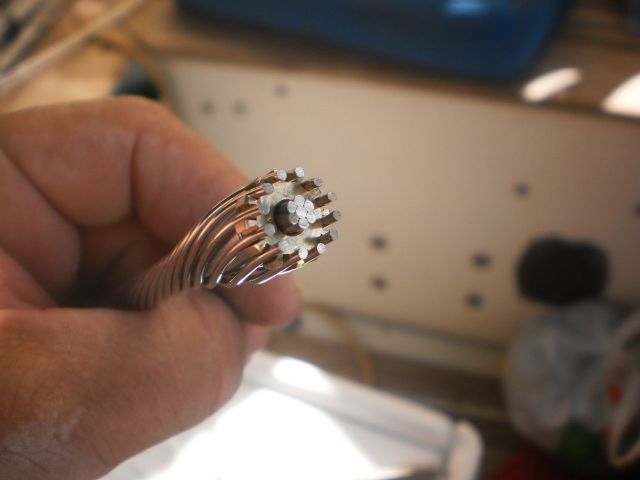
Unlay the outer wires, leaving the twisted core intact.

Then put the cone, followed by the crown over the inner core.  The crown in particular is a tight fit.  You use the piece that's going to screw into the ferrule as a pusher.  The indent in the end assures that the crown is installed exactly as far down the wire as it's supposed to be.
Then put the cone, followed by the crown over the inner core. The crown in particular is a tight fit. You use the piece that’s going to screw into the ferrule as a pusher. The indent in the end assures that the crown is installed exactly as far down the wire as it’s supposed to be.  Sorry about the focus, or lack thereof.

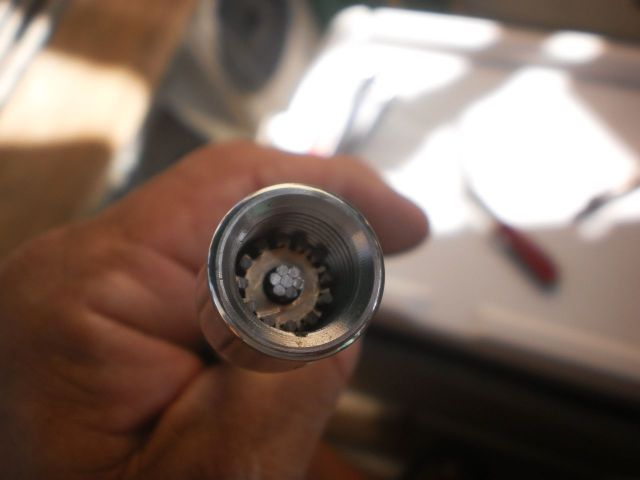
Wrap the outside wires back around the core and the cone. One wire should end up in each groove in the crown.  This is probably the hardest part and it's not particularly hard at all.
Wrap the outside wires back around the core and the cone. One wire should end up in each groove in the crown. This is probably the hardest part and it’s not particularly hard at all.

Slide the ferrule back up to make sure things look copasetic.

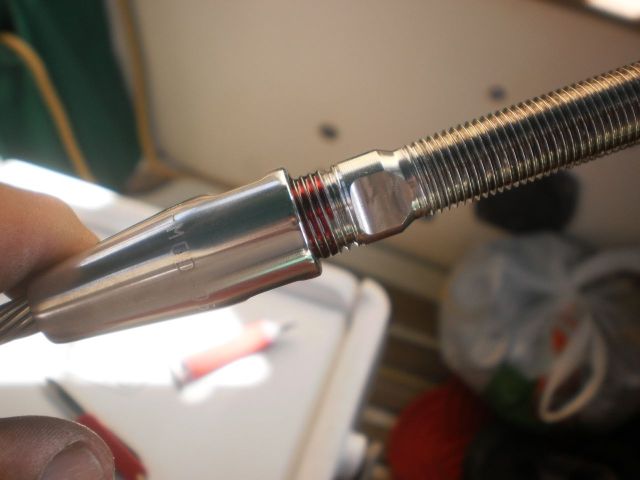
Add a little bit of red thread-locking compound to the threads of whatever end piece you're using (this is a stud), and screw it into the ferrule.
Add a little bit of red thread-locking compound to the threads of whatever end piece you’re using (this is a stud), and screw it into the ferrule.

Hi-Mod stresses that the most likely cause of failure of one of these fittings is overtightening.  I used the end wrenches shown and tightened the fitting until it was "just up against" and then a skosh more.  Hopefully that was exactly the right amount.
Hi-Mod stresses that the most likely cause of failure of one of these fittings is overtightening. I used the end wrenches shown and tightened the fitting until it was “just up against” and then a skosh more. Hopefully that was exactly the right amount.

IMG_1879

IMG_1880


By the way, when I did the upper shrouds and the backstay, I rigged a halyard to act as a temporary stay to replace the one I was removing.

I still have to do the bobstay but that requires launching the dink so I’m waiting for the northers to die down first.  The next step will be to properly tension the wires. I’ve ordered a Loos tension gauge and will pick it up when we go up to Oregon for the holidays.  I’m sure our friend Jay on s/v Wind Raven would have loaned me his but I want to have one on board so I can periodically check and adjust the tension as-needed.

The one thing that bothers me a little bit about this rerigging job is that so many people seem to be so impressed that I would tackle it, having never done it before.  Unless I’m really missing something, I just don’t see what the big deal is, other than having to go up the mast a bunch of times.  If someone knows, please tell me before I put this rig to the test and find out the hard way.

Oh, by the way, almost every wire I removed had either a very obvious problem or an impending problem with the swaged fitting on at least one end.

One of the old fittings.  When under tension, this crack was open.
One of the old fittings. When under tension, this crack was open.

There you have it.  I probably should have changed the chainplates and mast tangs as well.  I did inspect them and found no apparent problems.  Let’s hope things stay that way.

Tuesday, January 21, 2014

Rope Wheel Cover

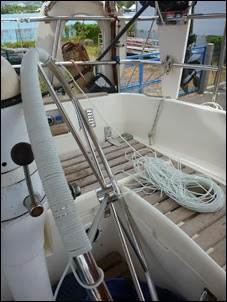
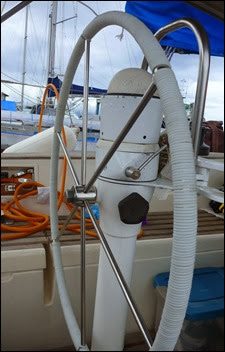
Livia and Carol, living aboard s/v Estrellita 5.10b in the south pacific, have replaced the leather on their wheel with lacing...  it took nearly 180 feet of quarter inch line!
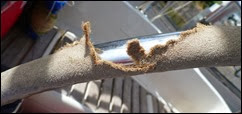
Our leather wheel cover had slowly evolved from “weathered” to “salty” to “embarrassing”. P1020061Yet, we didn’t replace it until it busted open – good cruisers that we are. I had been keeping my eyes peeled for leather wheel covers in the automotive section of various hardware stores until I saw a simple rope wheel cover on a forum. There are quite elaborate rope work options for covering your wheel but I wasn’t really willing to put more than a day of my life into the project and so simple it was.

I bought 60 meters of 4mm nylon line and ended up with some leftover.
P1020065First we stripped off the old leather cover which left bits of itself stuck to the stainless wheel and had to be scrubbed off.

Then I tied the nylon line to one of the spokes and began wrapping. When I reached the next spoke I tucked the line down, half way around the spoke, and then back up onto the wheel, and started wrapping in the opposite direction. Each time I finished a pie wedge, I milked the line tight before transiting the spoke.

Two things I wish I had done at this point were: 1) put the line on a hand spool of some sort, such as you use for handline fishing to make the wrapping easier and 2) not bothered to wet the line when I started and rather just wet it later in the process.
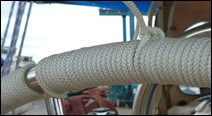
P1020066Hours later when I had finished the wheel I tied the two ends together with a square knot and wet the entire wheel. Then I started half way around the wheel from the knot and milked the line toward the knot and retied the line taking up the slack. Then I went back to the half way point and milked the line the other way.

I’m leaving the square knot for now until I milk the line another time or two and then will probably whip the two bitter ends together and then put something decorative over the whipping.

P1020067Tip: I set things up so that the knot is at the wheel’s top when the rudder is centered. When I put the decorative bit this will help us find that center by feel.

Thursday, January 16, 2014

Marking Furler Line

Drew over at Sail Delmarva has a tip for those of us with roller furling sails:
I had always marked one spot on the furler line; the 100% setting, which I used when reefed. However, adding the inside genoa track prompted me to refine the system.

  • Wide band: 110%, just short of touching the shrouds and spreaders. While it is possible to run a full genoa between the shroud and the spreaders, it risks sail damage and is more trouble than it is worth.
  • Medium band: 90% Just short of lapping. A nice setting if single or double reefed, going to weather.
  • Narrow band: 70%. Small, only 25 % of full area. Good for double reefed and blowing like stink.
To insure the whippings are tight and can pass the jammer smoothly, they should be smaller than the line. This is easily accomplish by holding the line stretched between 2 winches while whipping.

 
Yes, you can always adjust as you go, but rolling sail in a breeze isn't good for you or the sail. Advancing the furler line to the correct setting before unfurling is MUCH easier.

Tuesday, January 14, 2014

Wire chase/conduit through cabin top

Scott had need to run several (heavy) wires on s/v Valkier, from the deck under the dodger into the interior.  Not using new-fangled wire glands (he'd have needed a lot of them...), Scott opted for the time-honored solution of a standpipe.  Read on...
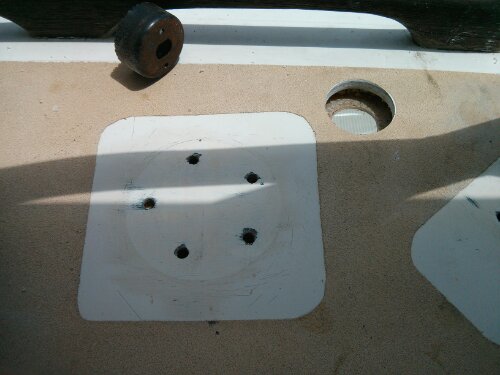
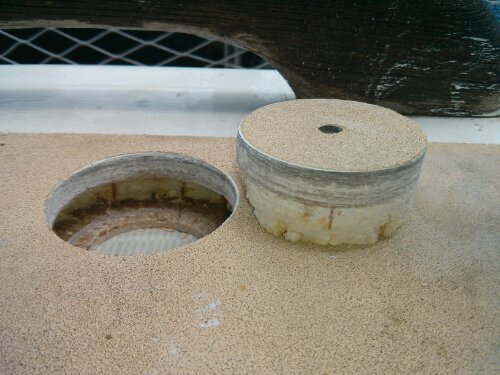
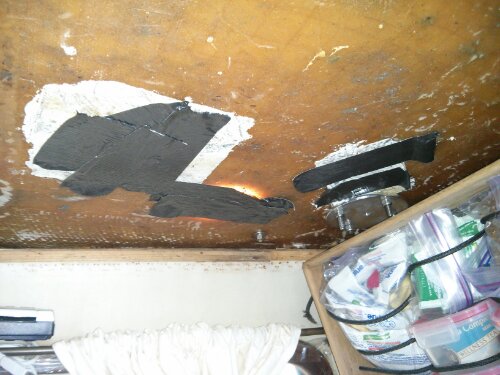
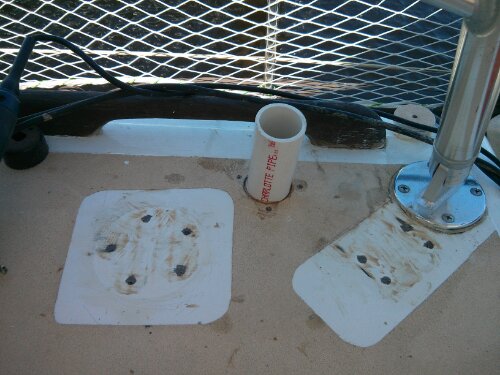
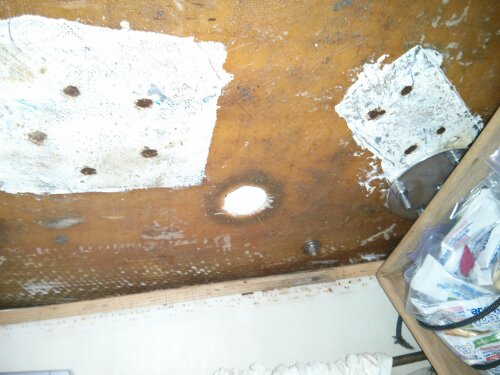
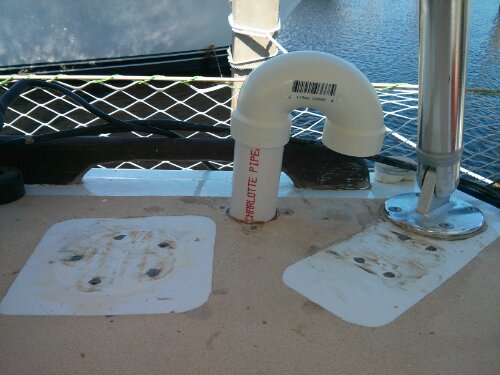
We needed to run 4-AWG cable from the solar panels on the new hard dodger down below as well as route the cable for a GPS antenna and 12 volt accessory power to under the hard dodger.  We decided to use 2 inch PVC pipe with a 180 degree bend in the pipe to keep water out of the boat.  The following pictures show the drilled holes and filling of the core and then gluing of the pipe in to the cabin top with epoxy.

image
We drilled the big hole for the pipe and took the opportunity to fill in with epoxy some bolt holes for hardware that was no longer there

image
You can see where we removed the core to fill with epoxy to seal it

image
Duct tape worked great for sealing the bottoms of the holes so that epoxy did not leak down below

image
The shows where epoxy has filled in the core and around the standpipe

image
Most of excess epoxy cleaned off

image
Underneath after tape was removed

image
Finished wire conduit.  Eventually the deck will be sanded and new non skid will go around and over all holes
Eventually after the non skid is put on we will also paint the PVC pipe.

Tuesday, January 7, 2014

Simple Boat Projects

On board s/v Astraea, Nate shows us that it is sometimes the simplest projects that make life aboard easier (and he even includes a link back to this blog!):
The decks are almost wrapped up, but that’s not the project I’m talking about today. Today I’m talking about a small boat project that makes life easier aboard and took just a few minutes to complete. Heck, the hardest part was getting my tools out!

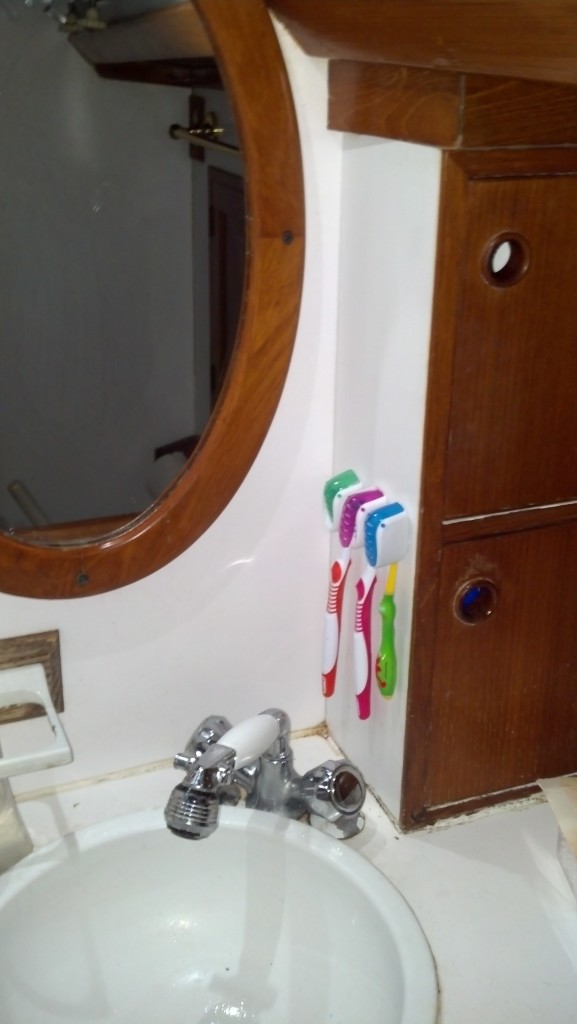
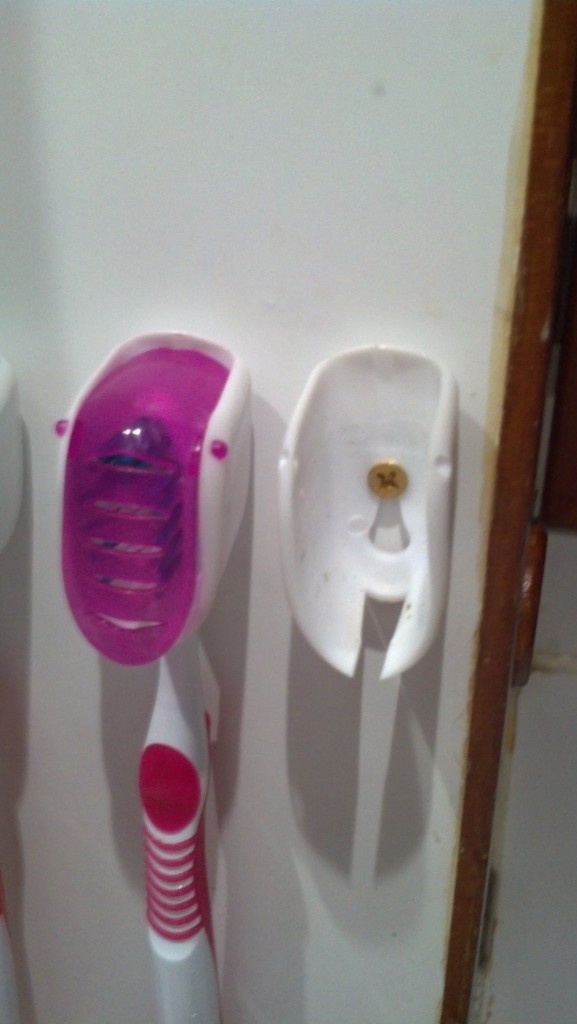
We’ve been using suction cup toothbrush holders for a while. Occasionally they’d fall off the bulkhead in the head and fall in to the sink in port and I think they’ll fall off in any kind of heavy seas. I removed the suction cup that was holding them to the wall and screwed the toothbrush holders on to the cabinet next to the sink where there were two preexisting holes. Sully’s little toothbrush is above the faucets so we can still use them easily. An easy project that made life aboard better!

3 toothbrush holders attached to the cabinet in the head.

The toothbrush holders came from Wal-Mart and were held in by a suction cup. I removed the suction cup and replaced it with a screw for permanent installation.
Related Posts Plugin for WordPress, Blogger...