Last year I replaced the holding tank. I kept the original vent through deck fitting, but installed a 3/4 inch hose from the tank to a 3/8 inch hose and then coupled that to a woefully small through hull. A larger diameter vent hose helps promote oxygen flow in the holding tank encouraging aerobic bacteria to flourish. Aerobic bacteria break down the waste, but don’t put off a foul odor. There’s plenty more information about holding tanks at The West Advisor and from Peggie Hall’s book How to Remove Boat Odors.
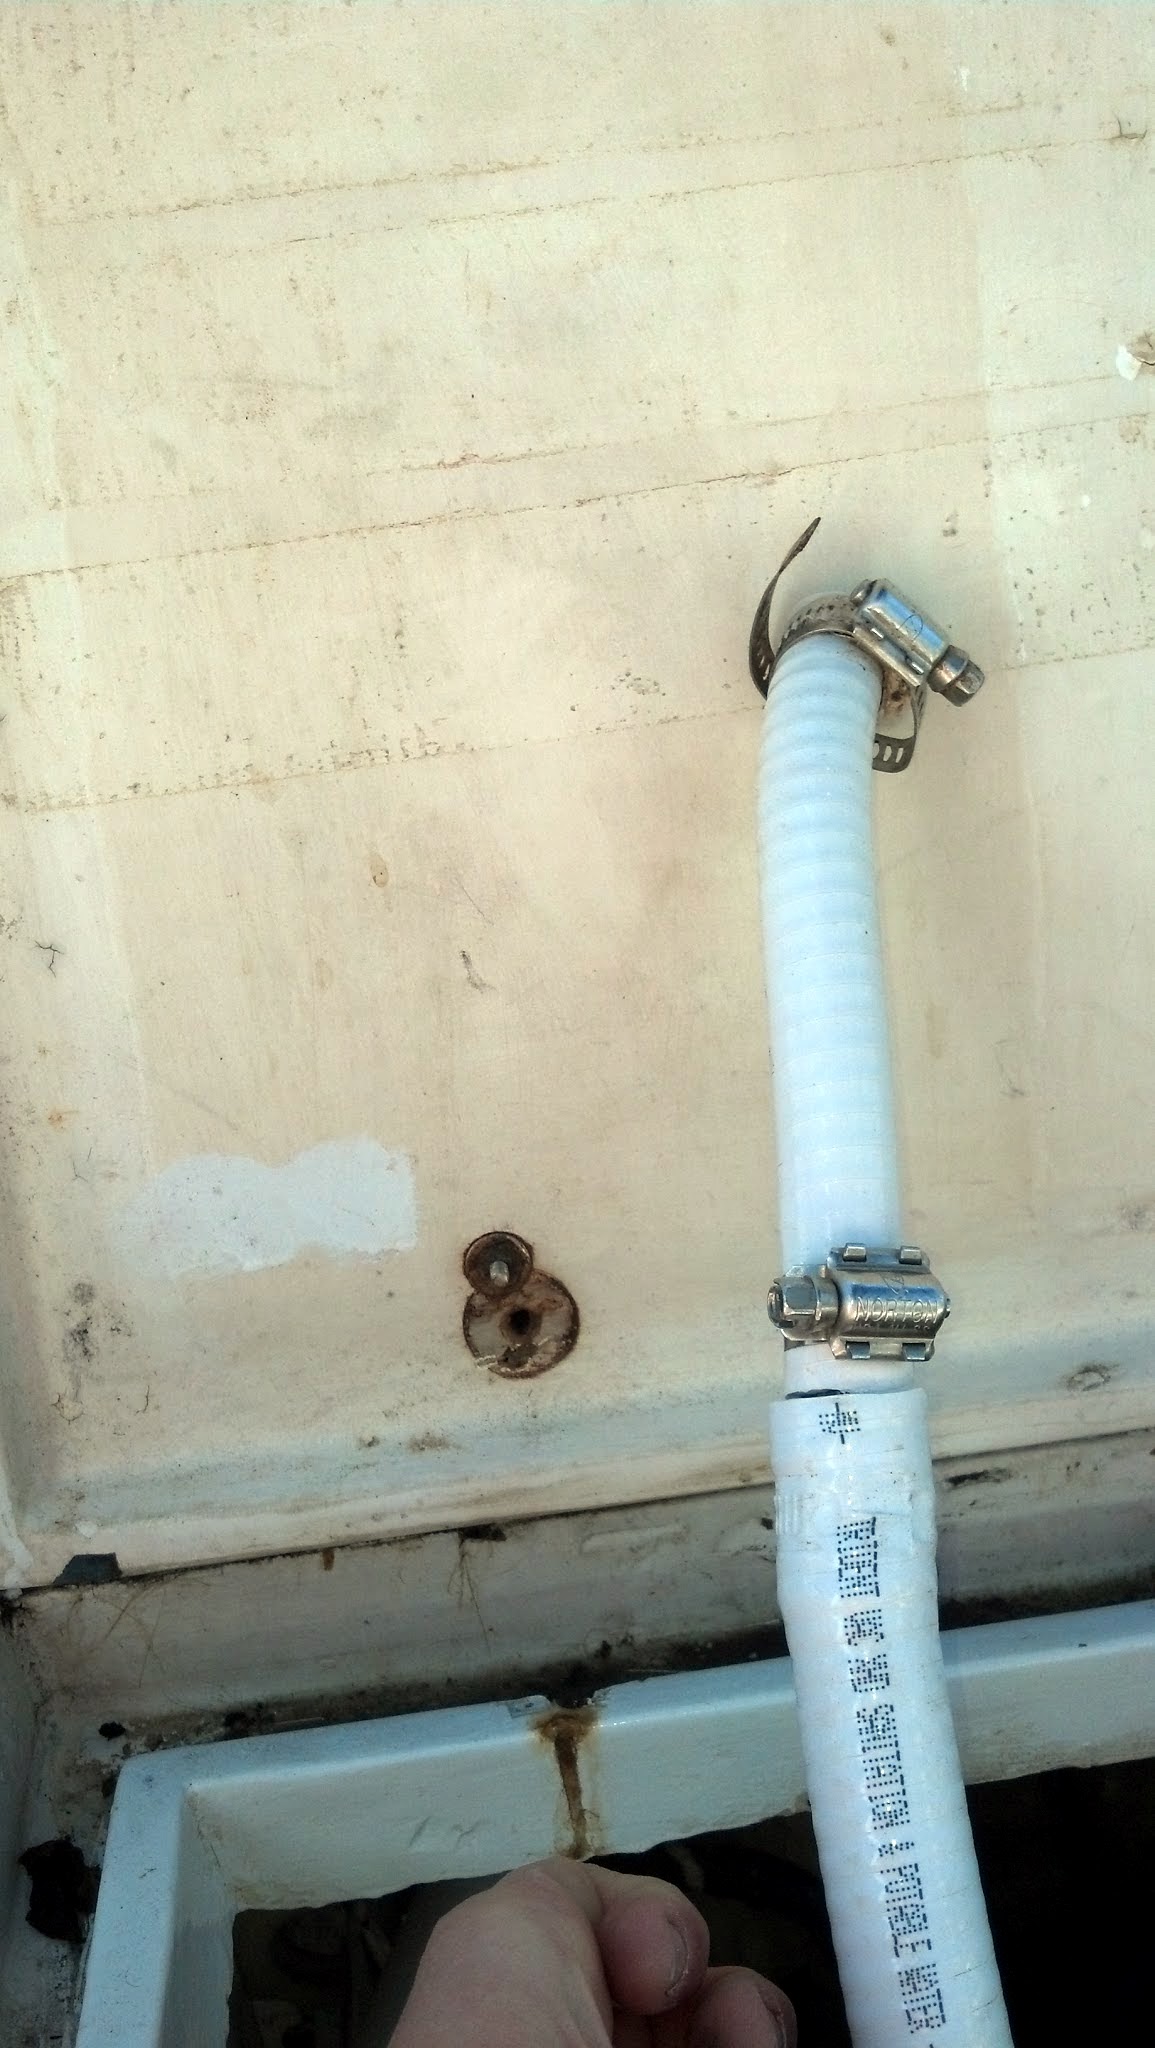
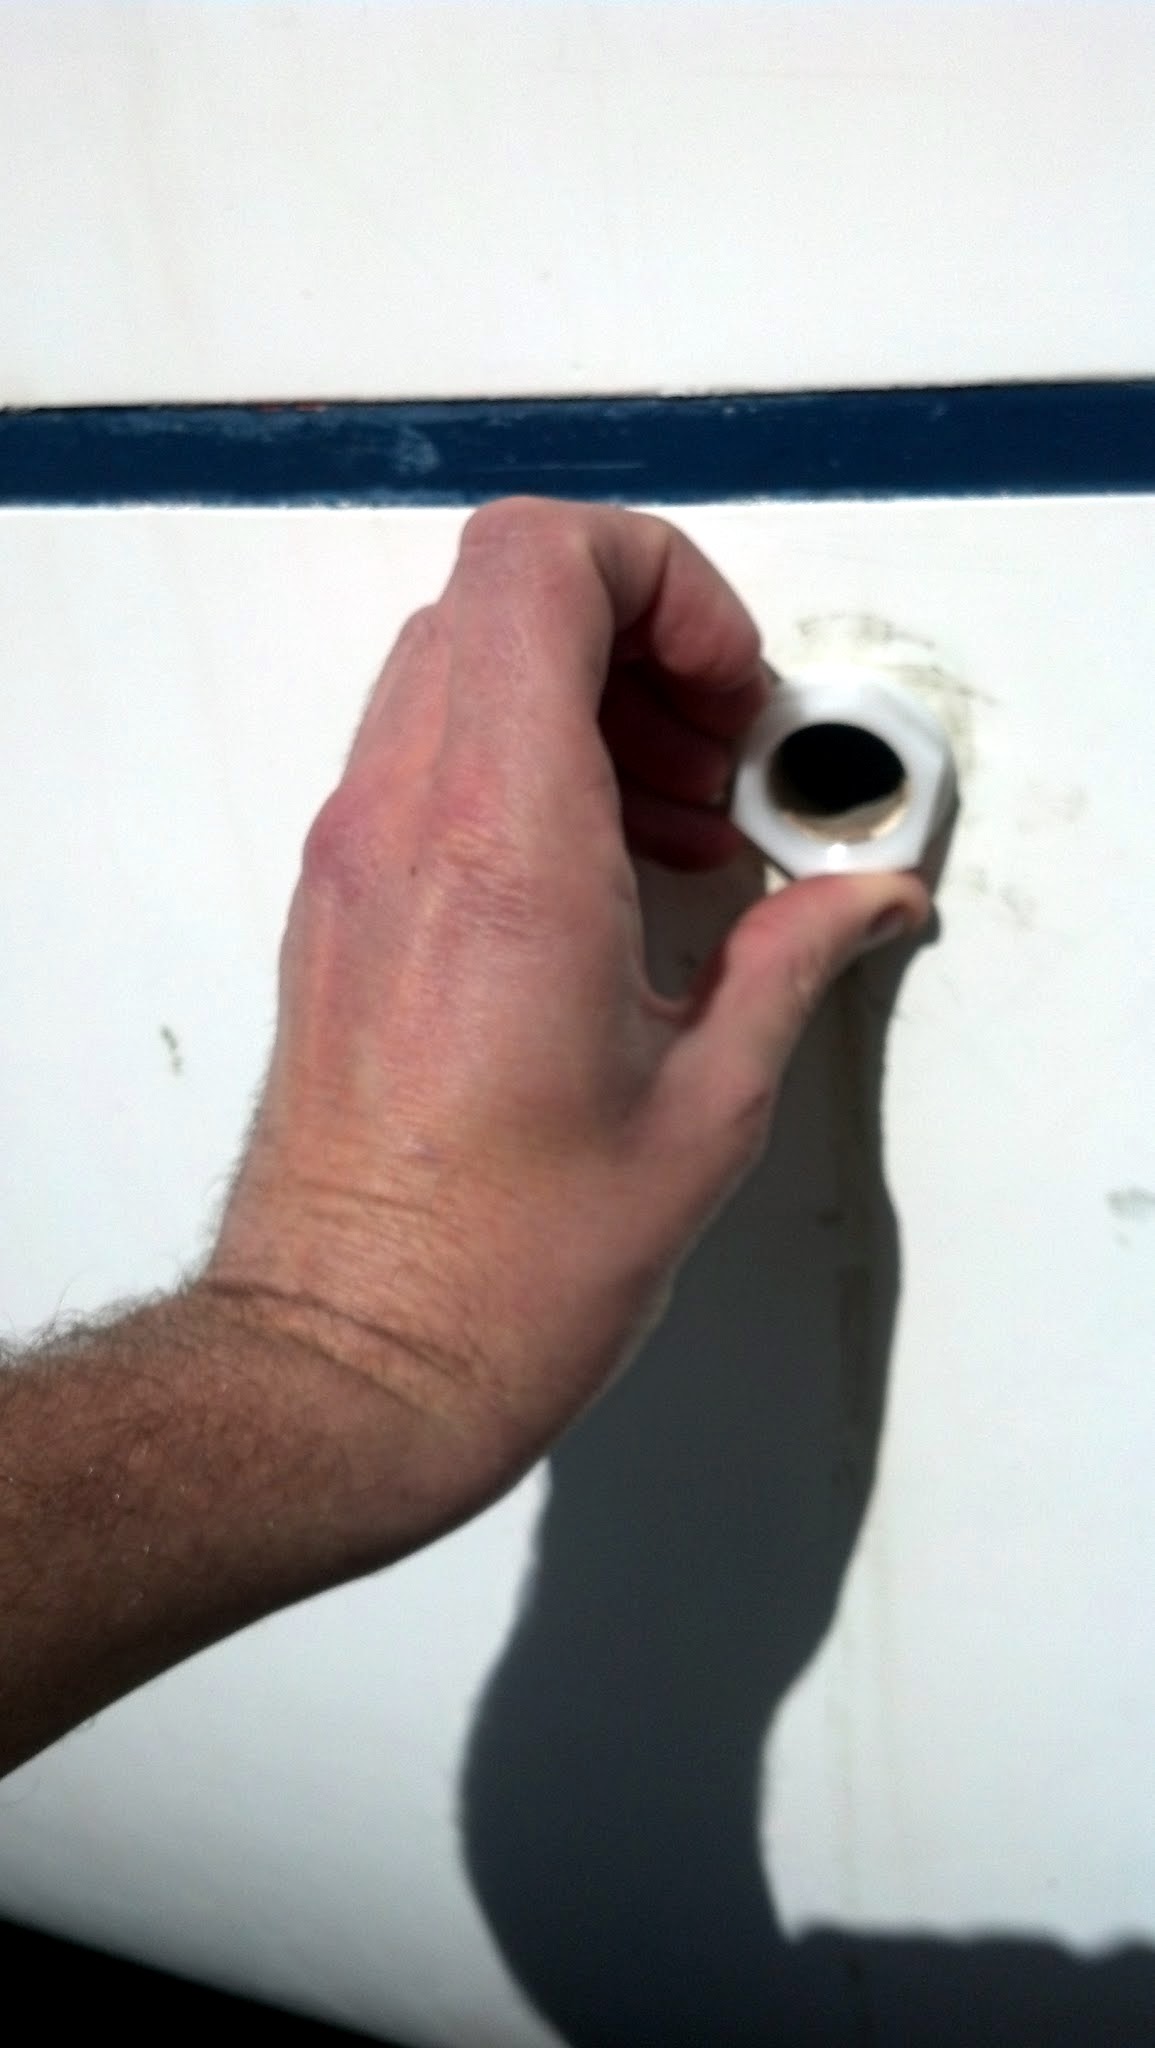
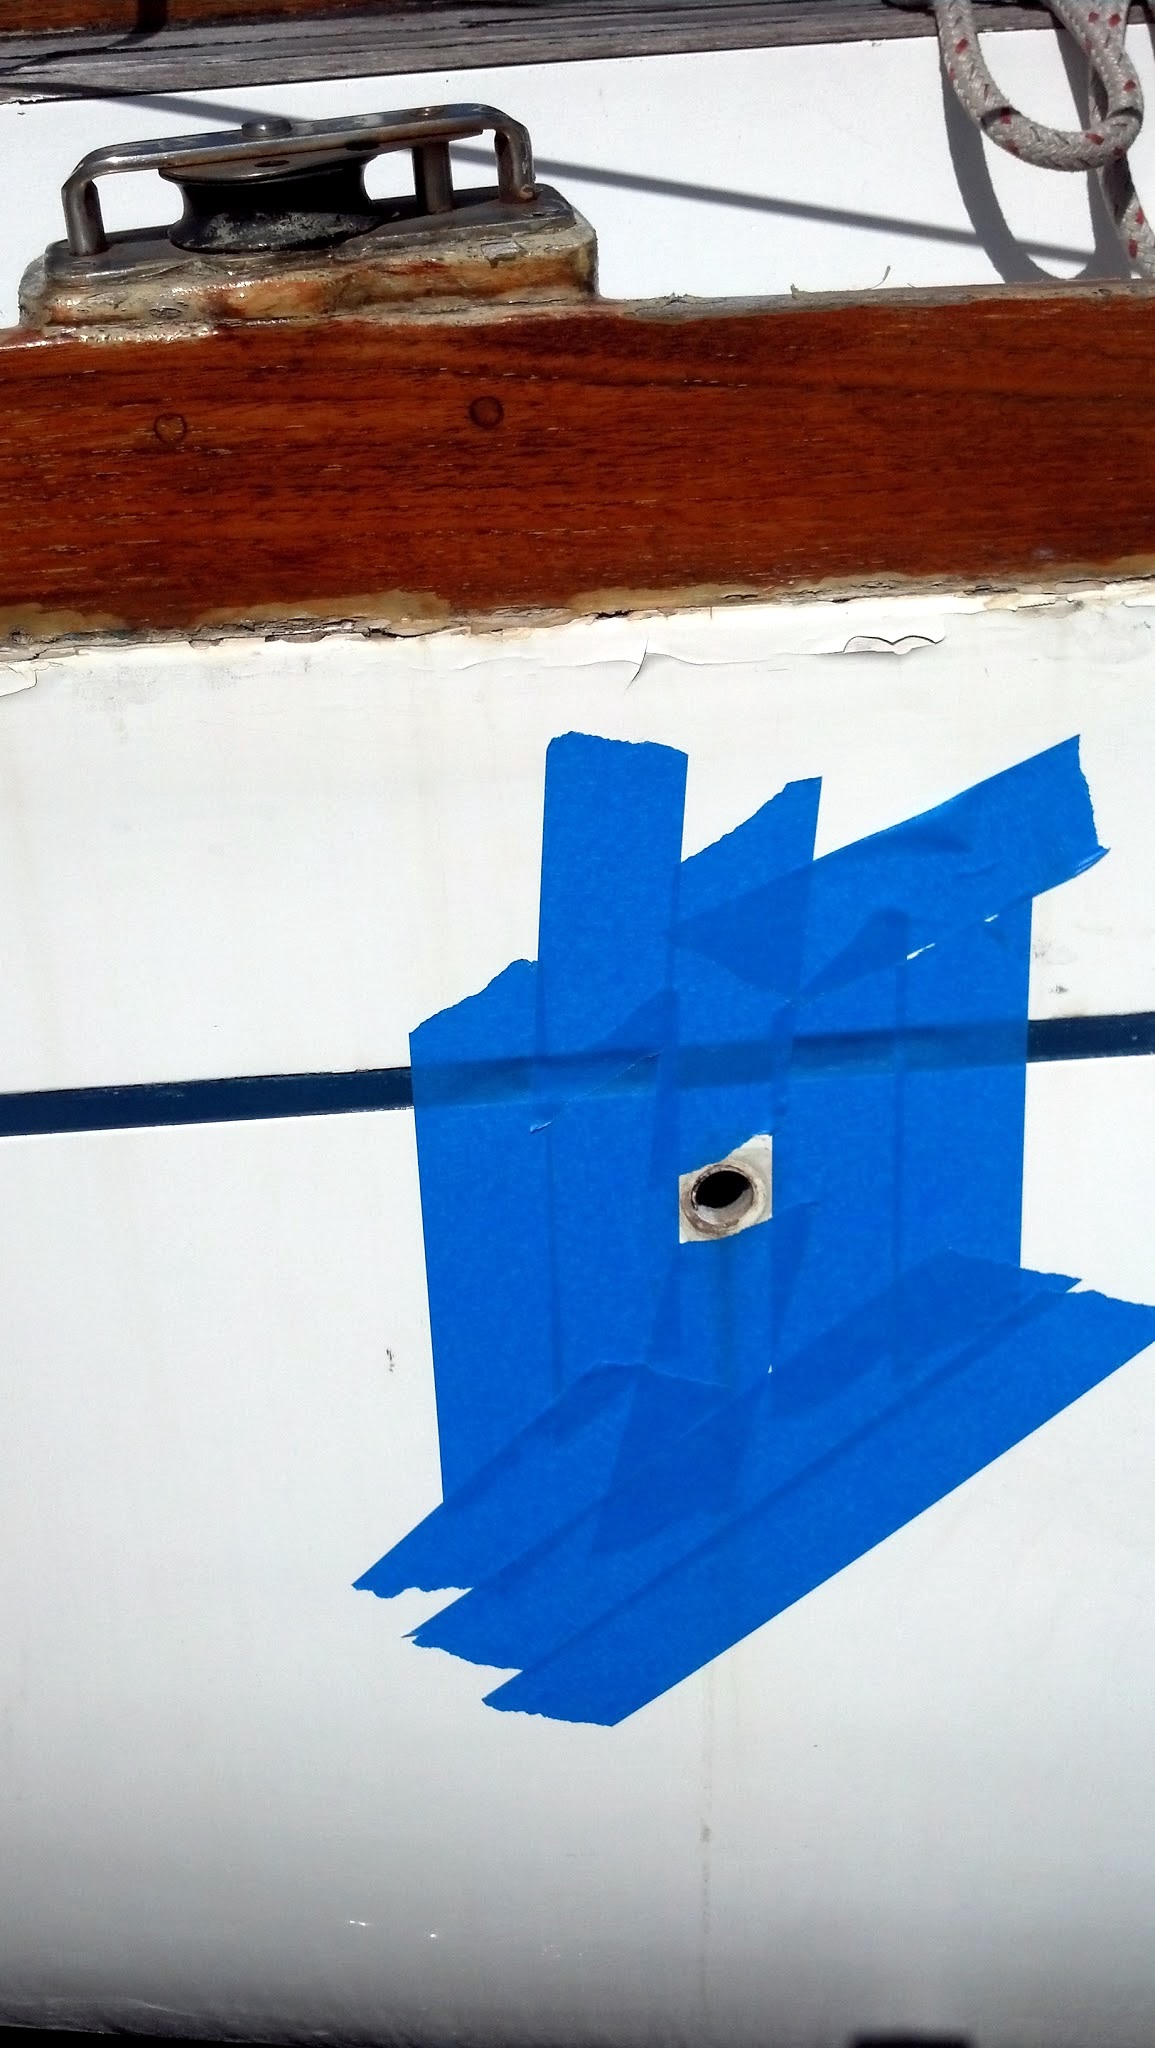
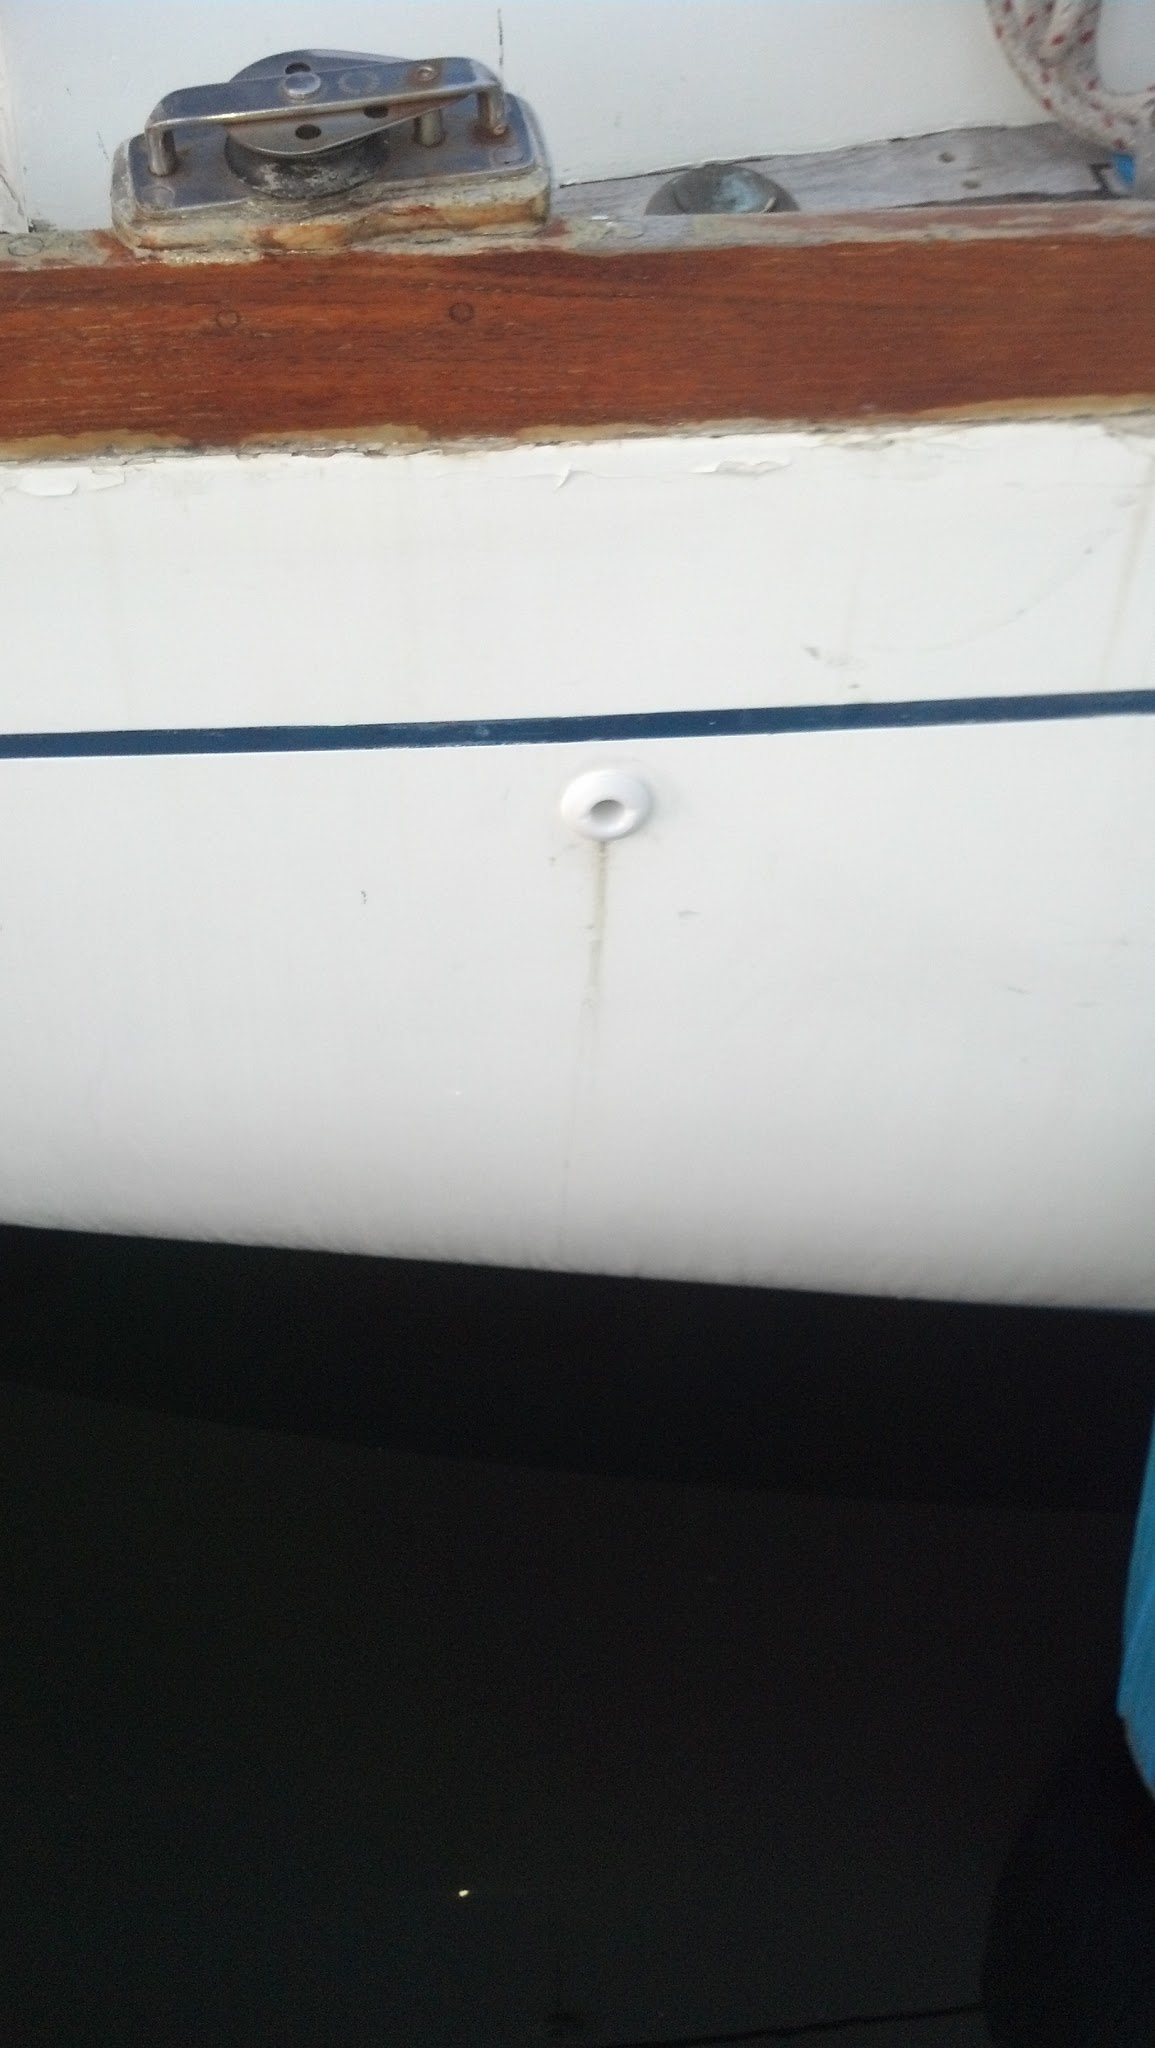
What I did today was remove the old through hull fitting and replace it with a 3/4 inch fitting to match the hose size and encourage as much air as possible to get to the tank.
Then I applied some 3M 5200 around the inside of the lip and slid the through hull in to place. Next I cleaned up the excess 5200. I also need to scrub off the stain on the side of the boat from the old through hull corroding. I chose 3M 5200 sealant because the fitting is above the waterline but could be submerged on a starboard tack.
The last part was connecting the vent line hose with a hose clamp.
Hopefully this new vent through hull will make the holding tank less stinky. We’ll have to flush and see.
Thursday, February 21, 2013
Replacing the Holding Tank Vent Thru Hull
Over on s/v Astraea, Nate tackles the problem of getting adequate holding tank ventilation.

Tuesday, February 19, 2013
Silicone rubber: Just say NO!
I despise this stuff.
No, that's not a strong enough word - I HATE silicone* rubber. There, now I feel better.
It's a weak adhesive.
It cannot be sanded. Or painted.
Nothing sticks to it - not even silicone rubber. Except dirt.
If you have ever used it on a surface, that surface is almost irretrievably contaminated. The only certain way to decontaminate a silicone fouled surface is to remove that surface, by sanding, sand blasting, etc.
Eolian's previous owner loved the stuff.
I can think of only three places on a boat where silicone rubber is called for:
Now put down that caulking gun and step away from the boat!
No, that's not a strong enough word - I HATE silicone* rubber. There, now I feel better.
It's a weak adhesive.
It cannot be sanded. Or painted.
Nothing sticks to it - not even silicone rubber. Except dirt.
If you have ever used it on a surface, that surface is almost irretrievably contaminated. The only certain way to decontaminate a silicone fouled surface is to remove that surface, by sanding, sand blasting, etc.
Eolian's previous owner loved the stuff.
I can think of only three places on a boat where silicone rubber is called for:
- There are some plastics that cannot tolerate contact with polysulphide, polyether or polyurethane adhesives or sealants. Where the manufacturer (notably Beckson, for their ports) requires it, you should use silicone rubber.
- Lubricating/sealing head hose during assembly. Apply a coating to the inside of the hose end, carefully heat it with your heat gun until both the main body of the hose and also the stiffening spiral have become soft, and assemble. Get the hose clamp on while the hose is still soft if you can.
- Making non-skid rings on the bottom of dishes, serving bowls, etc. Put down a piece of wax paper, run a bead around the bottom of the dish or bowl and set it on the wax paper. When the silicone is cured, peel off the wax paper and voilà! - a nonskid dish.
Now put down that caulking gun and step away from the boat!
* A little definition is in order. Silicon (note the absence of the trailing 'e') is a silvery metallic substance - here's a picture of a piece I have on my desk right now:
I should know - I used to work in a manufacturing facility that made the stuff, starting with quartz. Silicon is the basis for most semiconductors made today, albeit in a more purified form than that chunk on my desk. It is also dissolved in copper along with other stuff to make silicon bronze.
Silicone is a term that is used to refer to a whole series of compounds based on silicon, in much the same way as the term carbohydrate or hydrocarbon are used to refer to a whole series of compounds based on carbon. Silicone rubber, silicone grease, silicone oil (in silicone breast implants - not silicon, Heaven forbid!) are silicon compounds.
Sadly, the press seems to use the terms more or less interchangeably, indicating that they have no idea what they are talking about. But then I repeat myself.
Thursday, February 14, 2013
A valuable tool on a boat
Mike and Rebecca on s/v Zero To Cruising (aka ZTC) have a recommendation for a tool you should have onboard. This is a significant improvement over the little plastic slip-ons that go over the jaws of a pair of Vice Grips:
I mentioned yesterday that, along with the autopilot belts, we had several other packages shipped to California for us to pick up when we visited there. Among those other items was a Pres-N-Snap tool from Sailrite. While not inexpensive, this is a valuable tool on a boat as almost all vessels have at least some canvas work or cushions which are kept secure by snap fittings. These snaps do not last forever and this tool is the best way that we have found to replace them.Editor's note: See also this new set of dies from Sailrite that allows you to set snaps using a standard rivet gun. One advantage is that there is no limitation as to how far from the edge a snap can be installed...
Up until this point we were able to borrow our friends’ Pres-N-Snap tool to fix snaps which had broken off. Now that they’re no longer traveling with us, we figured that we’d better get our own. We were fortunate in that, when we ordered ours just before Christmas, the tool was on sale. It still wasn’t cheap but it was a lot better than paying full price.
The black case under the tool, which fits it perfectly,
is actually an old CD case that we happened to have on board.
No one uses CDs anymore, do they?

Tuesday, February 12, 2013
New Companionway Screen (a.k.a Reuse/Recycle)
Over at s/v C'est la Vie, Jeff takes on the bugs, in a recycling kind of way. It's a zero-cost solution:
Our existing companionway screen was ill fitting along the sides and bottom of the opening. When a day off presented the opportunity for some project time I collected an unused dive weight, a retired Outward Bound tent, old tubular webbing, and sunbrella scraps left from previous projects and set about creating a new companionway cover. Using our well fitting cloth companion way cover as a template, I began by creating the weights for the top and bottom. Filling tubular webbing with the lead shot from the dive weight was my initial plan.
But once full of lead I felt the tube's stiffness along its length would inhibit it from conforming well to the irregular topography of the top of the cabin.
Using the light weight fabric from the retired tent body, I sewed a larger diameter tube for the upper weight.
Despite receiving more lead the thin nylon and larger cross section served to create a much more supple weight for the top.
Cutting the no-see-um proof mesh screen proved to be much more challenging than anticipated. After a few failed attempts at straight cuts, I resorted to marking out the proper dimensions out on a sheet of plywood; tacking the mesh out on the plywood atop the lines; and then using a razor blade to cut the mesh to size. This system worked well. The relative stiffness of the sunbrella as compared to the screen was easy to lay out and cut to the correct dimensions.
I do realize many people lay out sewing projects with pins, but for me two sided basting tape is my go to product. Using the basting tape I assembled the screen one side at a time with the tape and then sewed it together.
The sewing order went vertical sides, the bottom, and then the top. I added a sunbrella wear patch at the location that the companionway latch contacts the screen.
I gave our old screen covers to a fellow sailor in exchange for some lead shot. Once he delivers the lead I'll begin replacing the screen covers on our two cabin hatches.


Thursday, February 7, 2013
Fresh-water flush
Rick over at s/v Cay of Sea addresses a problem all of us with our boats on salt water face: scale buildup in the head lines. It's an interesting solution...
I rebuilt our sanitation system in September 2011 after a disastrous week-long trip got transmogrified into an overnighter – the toilet stopped flushing and nothing I could do would make it work again. So back at our home port, I took it all apart. I forego the grisly details here, but the long and short of it was everything except the holding tank needed to be replaced.
It was a big job. The white sanitation hose is very difficult to bend, and I strained my aging, arthritic hands far into the pain zone. Same story with my back – all (I mean ALL) of this work is accomplished on your hands and knees. After a week’s worth of intermittent work, it’s mostly put back together – I say mostly, because I still need to complete the overboard-off-shore pump-out circuit, which requires a rebuild kit for the second-hand pump I bought to power it. However, the closed-circuit system with the holding tank and deck pump-out port are functional and work very well.
With this rebuild, I wanted to plumb the new toilet to flush with fresh water. In one of Don Casey’s books or articles he suggests plumbing the head sink’s drain to the toilet flush-water intake. The advantages are significant: primarily, no more smell! Seawater is what makes the head smell bad. There are microscopic creatures in seawater that alternately reproduce and die in the toilet bowl, especially if it’s unattended for a while. Additionally, seawater reacts with human waste and leaves deposits of calcium on the insides of the hoses. Eventually the hose diameter become so small that it clogs – which is the trouble that truncated our cruise last fall. This is the way I plumbed our toilet on Cay of Sea, and it was easy.
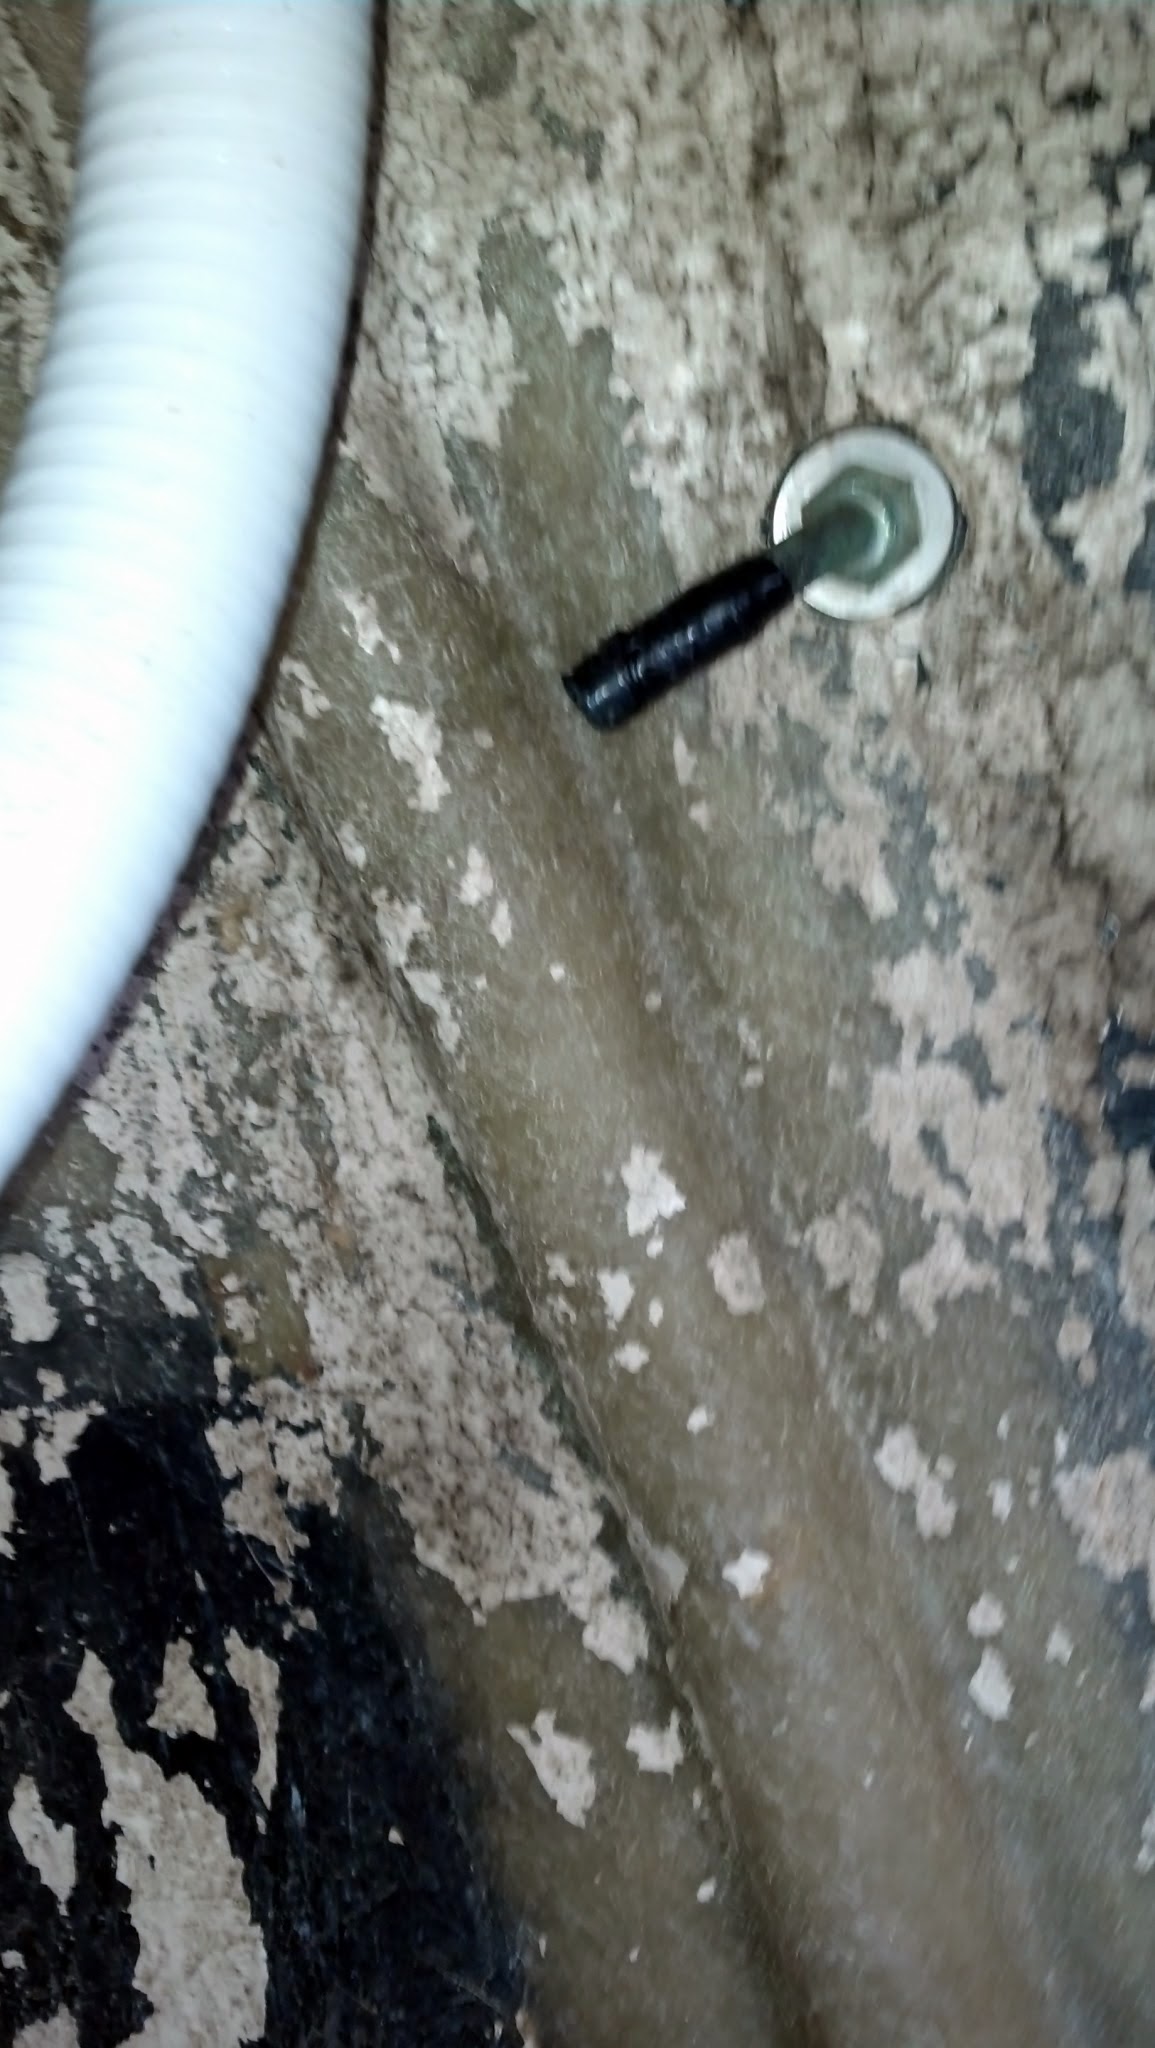
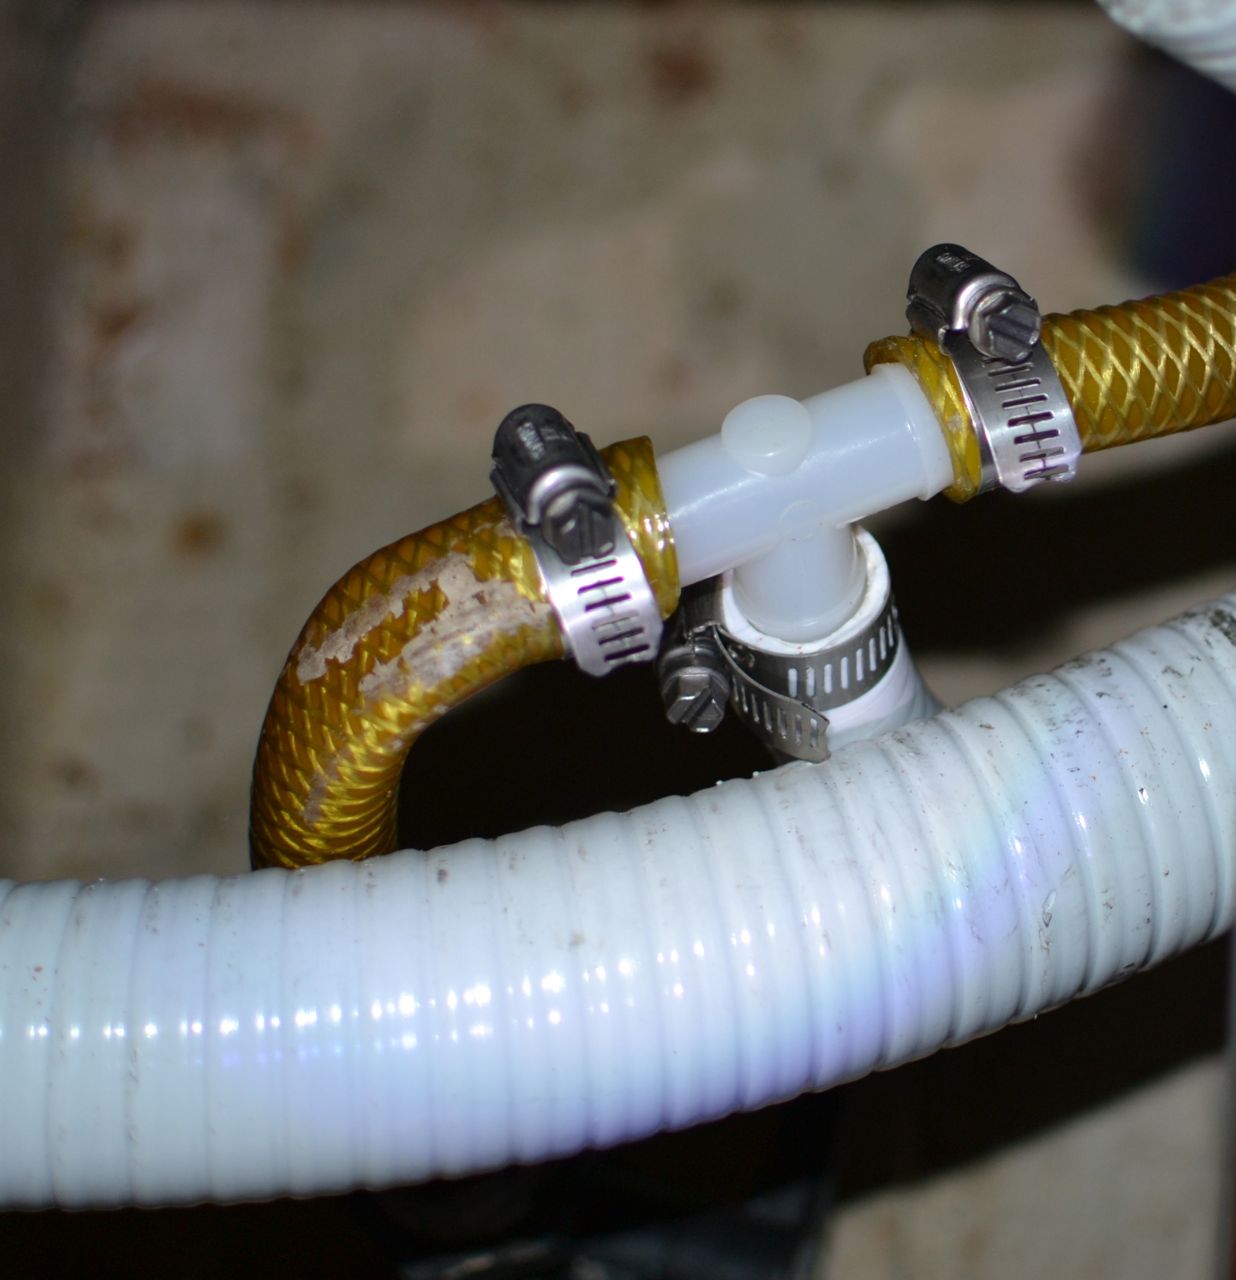
You simply insert a T connector into the sink drain hose, and connect one side to the toilet flush-water intake. When the sink drain sea cock is closed, the sink drains to the toilet. After washing hands, there is usually sufficient water to complete the flushing. If not, a few more pumps into the sink will provide what’s lacking. I plumbed another T into the line to in order to retained the ability to flush with seawater. You never know when that will come in handy.
T connector in sink drain.
The small-diameter white hose leads to the toilet intake.
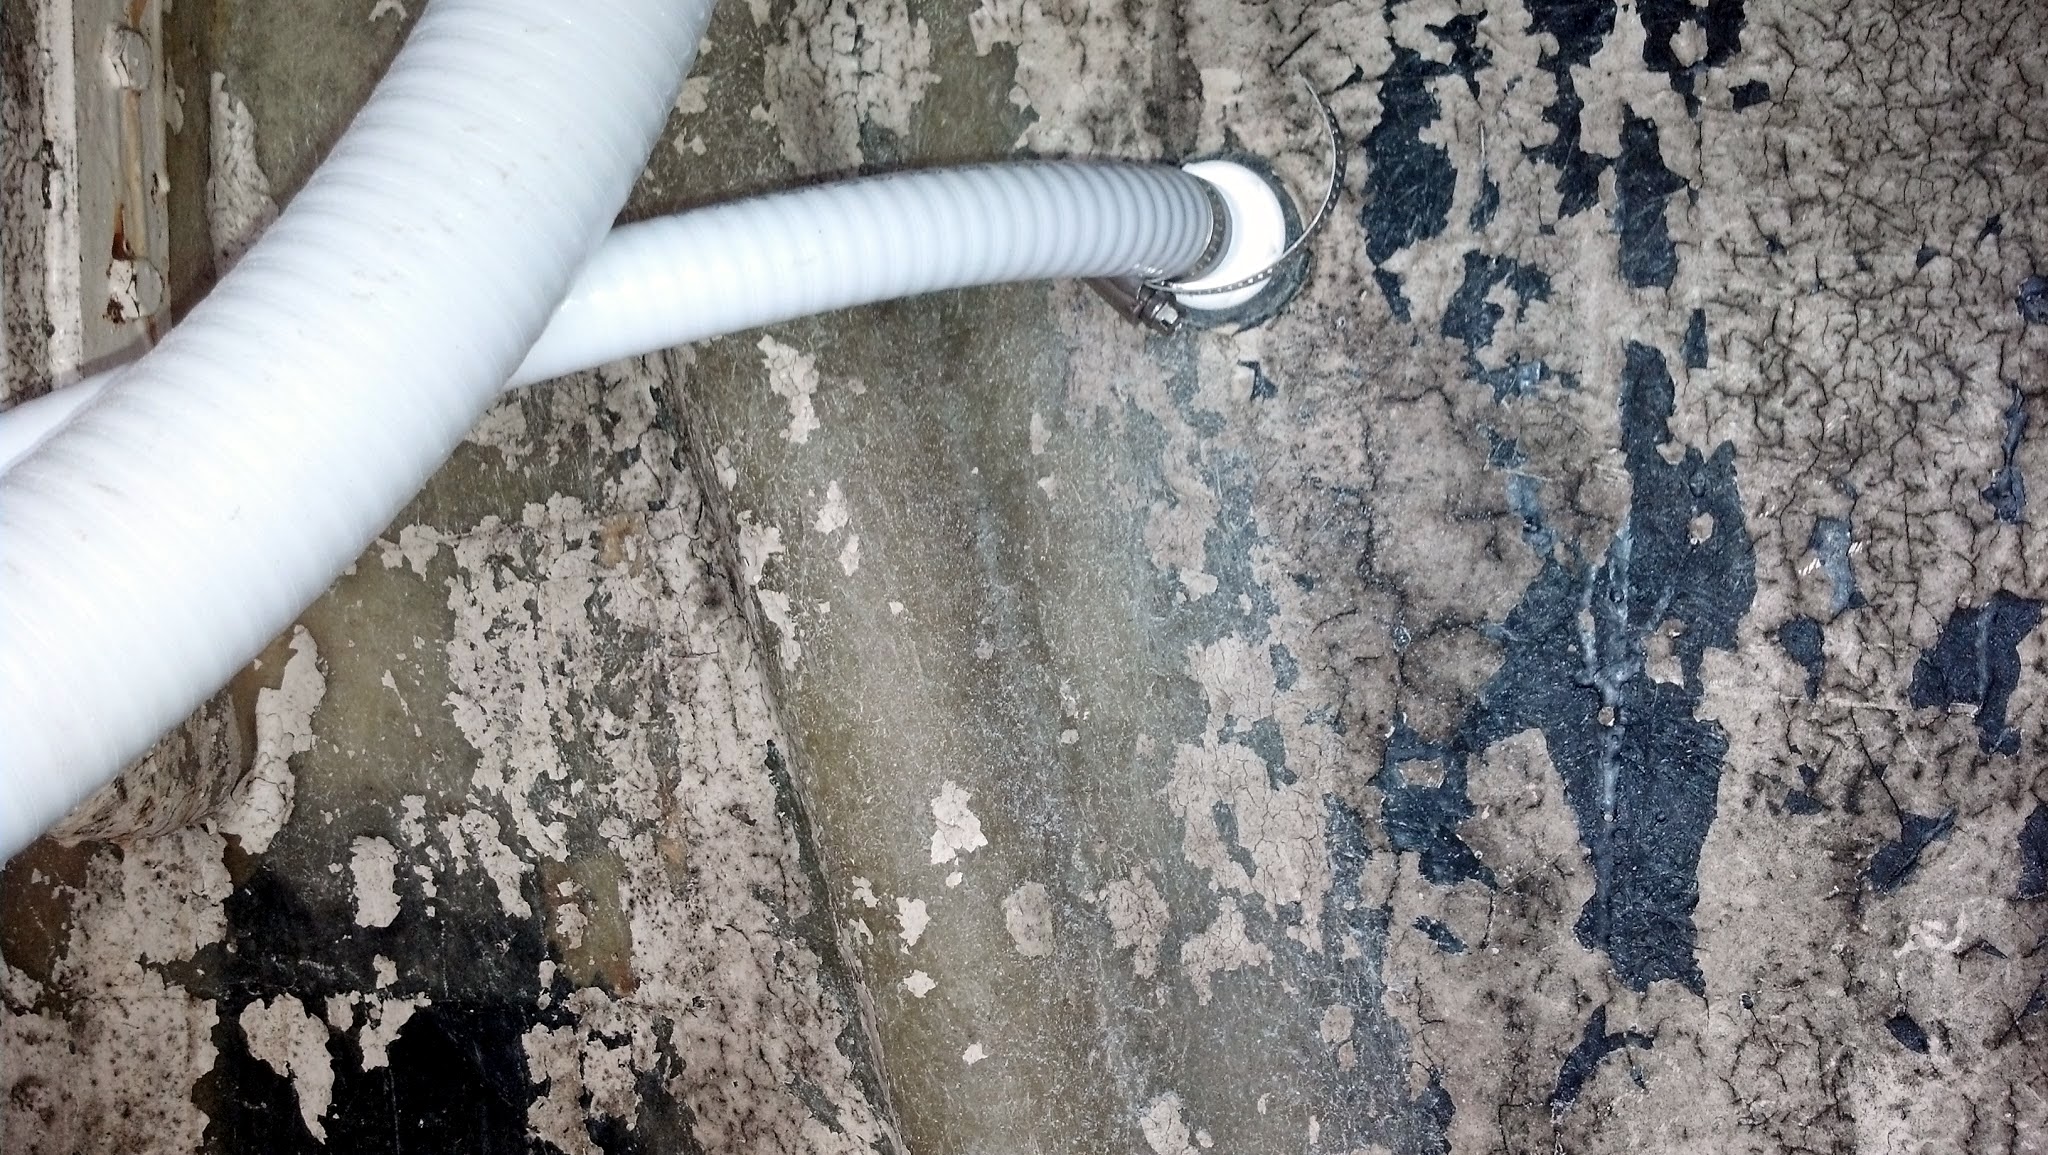
The white hose leading into the bulk head is the seawater
source. The sink drain sea cock has to be closed and the
sink plugged with its stopper in order to get seawater to
the toilet intake.
The result? Our head does not smell. We can leave the boat closed up for weeks and it doesn’t smell. This is a huge quality of life improvement for any boat.

Tuesday, February 5, 2013
Simple solutions
Please welcome new contributors Scott and Brittany aboard s/v Windtraveler! For their first contribution, they face up to a problem all blue-water cruisers must deal with - how to keep the anchor from flopping around up there on the bow in a seaway - and they find that a simple solution is the best...
Shameless plug: See Salnick's First LawIsn't it funny how sometimes the cheapest, simplest solution is often the most evasive? When we put our new anchor on our boat, it became immediately apparent that we'd need a way to prevent it rocking side to side when we were underway. Tying it off prevented any up/down and forward/back motion, but regardless of how much we tied and how tight we pulled, the side to side rocking could not be quelled. It might not seem like a big deal to those of you who aren't boaters, but a 73 pound anchor rocking to and fro and banging against the bow roller over and over is not only dangerous, but would make a tremendous ruckus in our boat. We needed a better way to secure it before we left.
Our first idea was to modify our bow roller to accomodate our specific anchor. That seemed simple enough. We called a local metal working company and after they presented us with a quote for over $2,500.00, the decision to go a different route was very easy.
It became comical, actually, how many people were putting their heads together on this thing. Even guests here at the building we are docked behind came over to offer their two cents on how to rectify our issue. With each new idea the solution snowballed into something more and more complex. I'm all for brainstorming, but this was getting out of hand. One afternoon, when Scott and some of our friends were on the bow talking about new rollers, drilling contraptions into the deck, raising the windlass, the addition of a pulley system and god knows what else I said, "We need a block to fit around the top of the anchor, essentially wedging the anchor into the roller, and then we need a hole in the top of that block to lash it down to the roller". The guys looked at me, looked at the roller, scratched their heads and after a pause replied, "That could work".
And it did. The very next day Scott fabricated my solution with $25 bucks worth of parts, and a little modification of his own. What we did was make a block out of pieces of starboard, with a slot down the middle for the anchor shank to fit in. Scott made the block sightly larger than the bow roller, and then routed out the sides of the block (with the new router I got him for Christmas!) so that it fit in the roller exactly. With the sides routed out (Scott's brilliant modification) the block will not slide fore or aft, and all I need to do is lash it down to the bowsprit with some line through the hole he drilled though the top. Make sense? I'm sure there are other solutions, but we think this will work for now.
It's strangely easy to overcomplicate things on a boat (we've done it time and time again). But usually, there is a very simple solution for just about any problem. You just need to clear the table, clear your head and find it - it might mean the difference between $25 and $2,500!


Subscribe to:
Posts (Atom)


