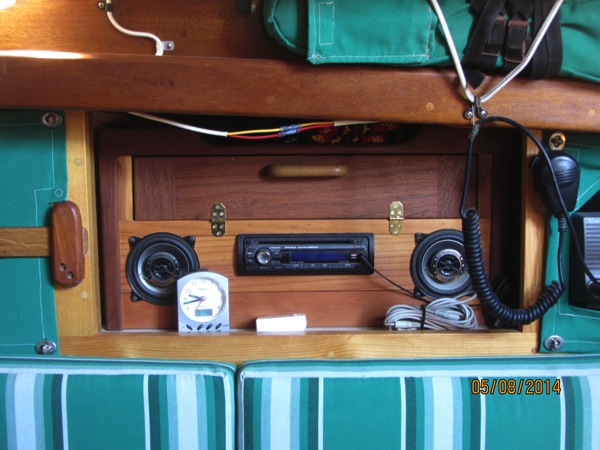
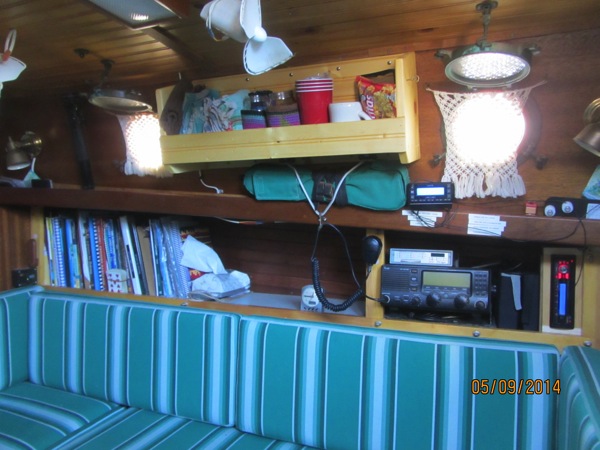
When we first got our Westsail 28, there was no stereo onboard. Matter of fact, there was pretty much nothing on board that wasn’t there when she shipped out of Costa mesa, California, back in 1977. Actually, there were a couple of major items like a relatively new Westerbeke diesel and a Webasto furnace but not much that you could see. Obviously, being music lovers, we needed a stereo. A car stereo was just the ticket although it became a little problematic where to mount speakers. Speakers tend to be a couple inches deep and the walls on the boat tend to be the thickness of one sheet of plywood, sometimes 1/4″, sometimes, 3/4″ but never more than that. So, the back side of the speaker would protrude into the space on the other side of the wall. Not knowing for sure where I wanted to put holes in walls, I decided to just build a custom cabinet and set it on the bookshelf that ran the length of the starboard side of the saloon.
It’s worked out pretty well so far. The little cabinet on top holds various chargers, disc cleaners, patch cords, etc. There’s a shelf on top where we stow the Netbook. But, we’re hurting for space and looking at this cabinet, I see a lot of wasted space. Something had to be done.
The first step was to rethink the speakers. In the past few years, the sound from small speakers has gotten better and better. Most of the surface mount speakers I found, however, were just too big for the cabin. However, in La Paz I found these little beauties:
You can turn them anywhichway and they’re small enough to not look out of place in our cabin. OK, speakers solved. Now it’s just a matter of finding a new home for the stereo.
I knew I was going to do this project someday. I’ve been thinking and pondering on it for quite awhile. Well, now it was time to either take care of business or vacate the head, as they say. I entered into the project not really knowing how it was going to end. But, I knew the first thing was to pull the cabinet:
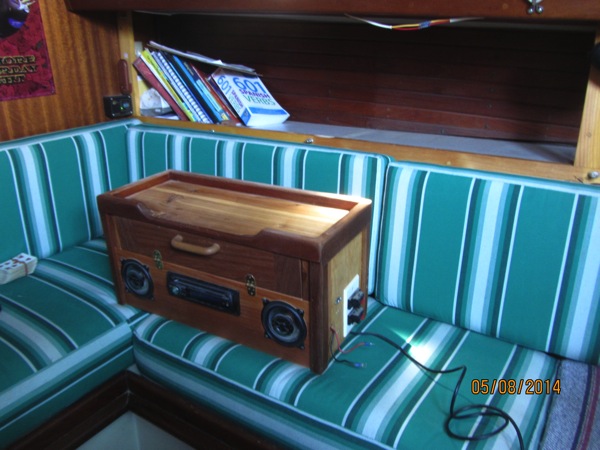
I was really pretty pleased with myself when I saw what a nice job I’d done on this cabinet. Seemed a shame to toss it but space is more important in this case. And look at how much room it frees up:
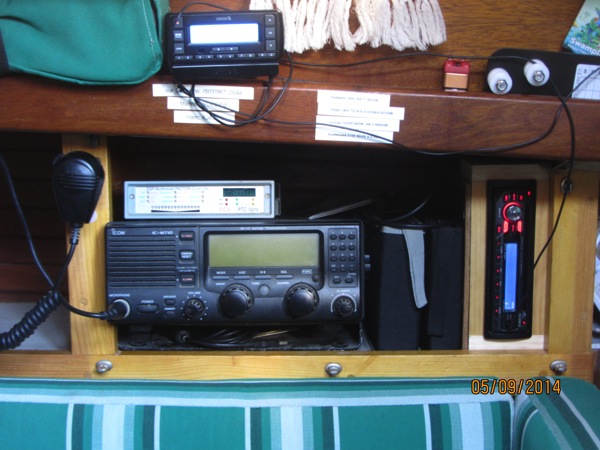
Of course, it only frees up the room if I don’t have to turn right around and fill the new space with the stereo. My original thought was that I’d build the stereo in, either on the shelf or hanging from the top of the opening. Then books could go either above it or below it, depending on how I did it. But, I wasn’t really liking this approach as much as I thought I would. The space just aft of the SSB radio was used for housing mini hard drives, blank CDs, and blank DVDs. The hard drives are currently in Flipper and will remain there until we finish our road trip. And by then, who knows? Maybe I’ll have consolidated everything I have onto a couple of 10 TB hard drives which are sure to be available by then. I’ll worry about that when the time comes.
So, what did I do? Well, I decided to use the former hard drive storage space for the stereo. Trouble was, once I built an enclosure around the stereo, the space was no longer wide enough. It would have been doable back when I had a shop that had a thickness planer in it. I could just plane the wood down to the size I needed to make the enclosure fit. But that’s not the case so I had to work with what I had which was 3/4″ thick wood.
I remember the first time I ever saw a car radio mounted vertically instead of horizontally. It was on “Route 66″. I don’t know which model year it was but I think it was around the time of the advent of the Corvette Stingray (what a cool name!) and there was a shot of either Buzz or Todd hitting a button on the radio. The radio looked just like any radio except that it looked like it had been mounted sideways, except for the fact that all the letters and numbers were set up so that it was obviously supposed to be mounted that way. Cool. Different and therefore, cool. Like the vertical headlights on the first Buick Riviera or the fastback on the first Plymouth Barracuda. Different, therefore cool. Anyway, I decided that there was absolutely no reason I couldn’t mount my stereo “Stingray-style”. Of course, the words on mine are all sideways but I can adjust. We almost never play CDs but, if we do I’m sure they’ll play just fine. If they wouldn’t, the Sony Discman never would have worked. So, here it is, my Westsail Stingray:
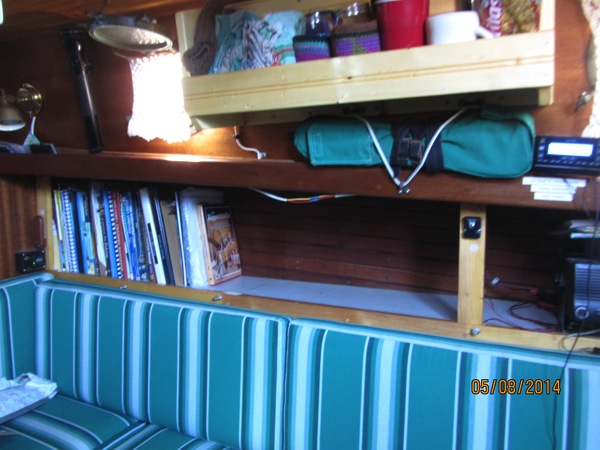
The carpentry is a little plain but it works and the system sounds great. And look at the resulting space:
BTW, the overhead (ceiling) I installed way back when proved its worth once again. I needed to run speaker wires from the forward-starboard corner to the stereo, the length of the saloon. I was able to hide the wire above the pine boards and only had to remove two boards to do it, not the entire overhead. Made the job much quicker and MUCH easier.
Tomorrow I have to figure out how to run wires to the new outside speakers. I mean I have to figure out how to run wires NEATLY to the outside speakers. Hmm. Wonder how I’m going to do it.
Tuesday, May 20, 2014
Rethinking space
Steve and Lulu who live aboard s/v Siempre Sabado have been doing so for long enough that they are having the opportunity to rethink some of their earlier decisions about interior space utilization...
Subscribe to:
Post Comments (Atom)


No comments:
Post a Comment