One of the projects I did while we were waiting for the wind to die down was to shorten one of our sets of oars for the dinghy. We had bought a nice pair of wooden oars in La Paz which we used with the PortaBote. But when I tried using them with the Walker Bay, they were very unwieldly. I finally figured out that it was because they were about 6″ longer than the oars that came with the WB. So, I decided to shorten them to make them work better.
The first step was simply to saw off the last 6″ of the handle.
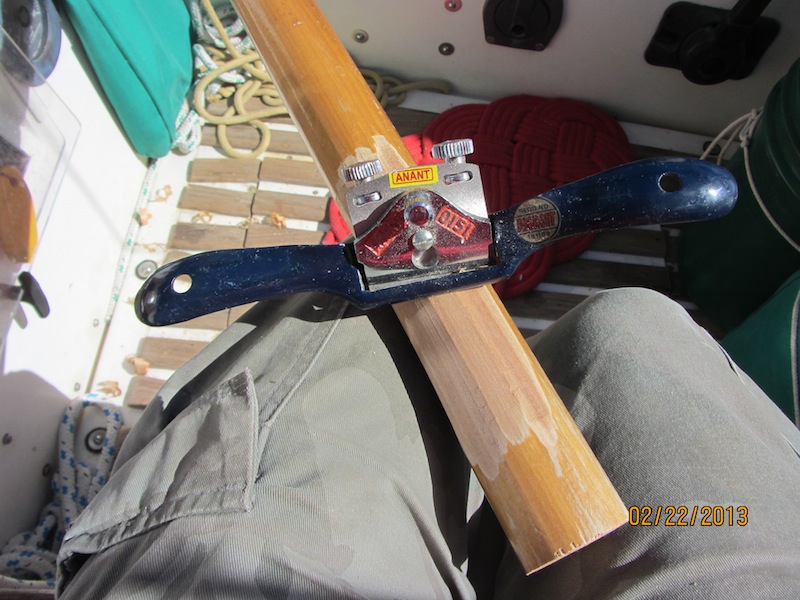
Of course, this removes the smaller hand-grip area of the oar. It would probably be useable this way but probably not too comfortable and definitely ugly. So, the next step was to shave the handle down to the proper size. I finally got to use the spokeshave that I bought several years ago.
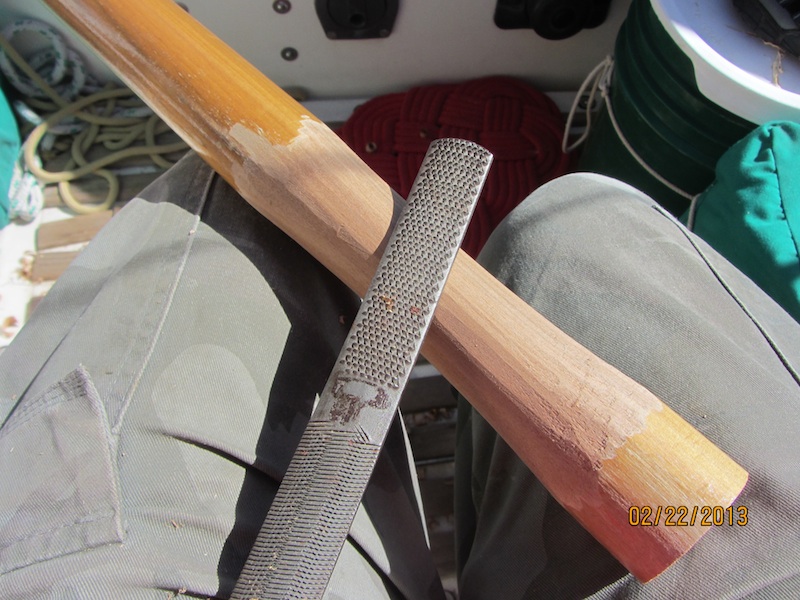
Then the hard edges were smoothed down with the rasp:
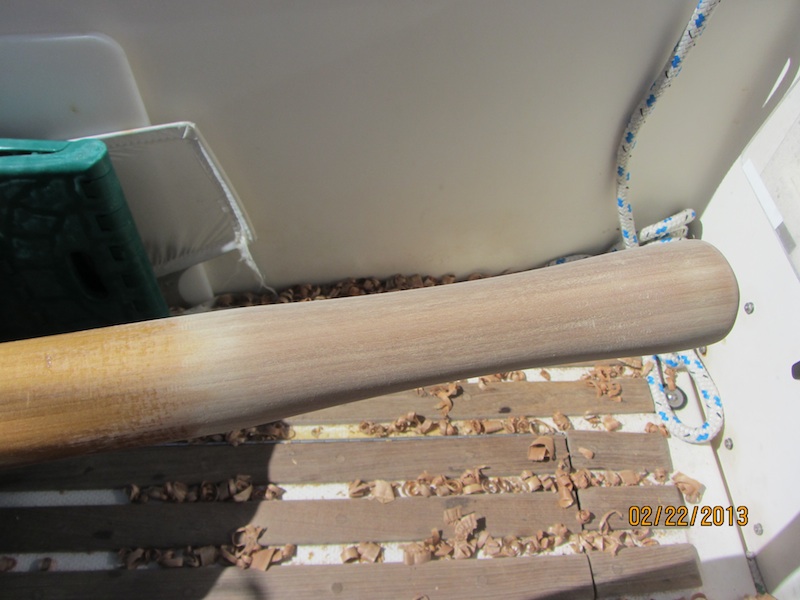
And finally the whole thing was smoothed with sandpaper:
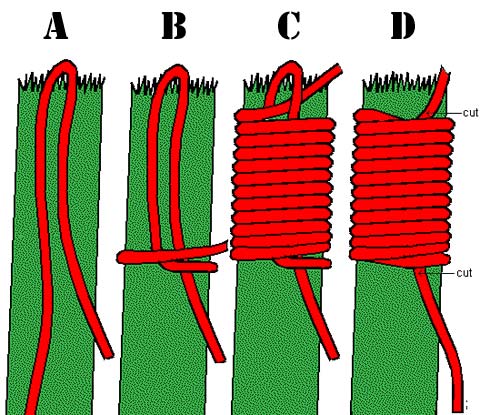
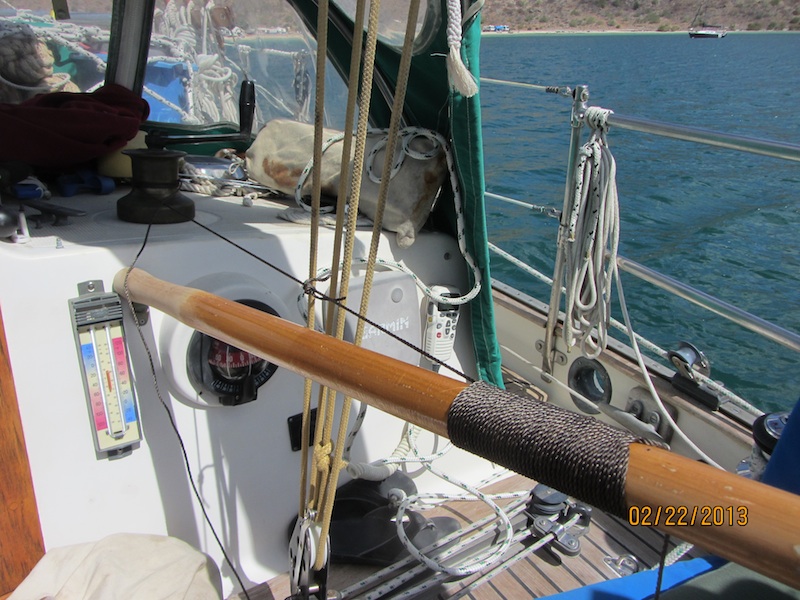
The traditional way to protect the oar where it’s in contact with the oarlock is to wrap leather around it and then sew it tight. However, I didn’t have any leather and I was pretty sure I’d never be able to sew it tight enough to stay put. So, instead I opted to wrap the shaft in nylon tarred marline. For finishing it off, I used the method where you wrap the line around a loop running the length of the wrap and then, pass the final wrap through the loop and pull the other end of the loop tight, burying the end of the loop and the last wrap underneath the turns. Just like you do when making a common whipping on the end of a line:
Well, I managed to get my wraps so tight that I ultimately had to use the staysail winch to pull the loop end back under the wraps:
Then I added a turk’s head to keep the oar from falling out of the oarlock,
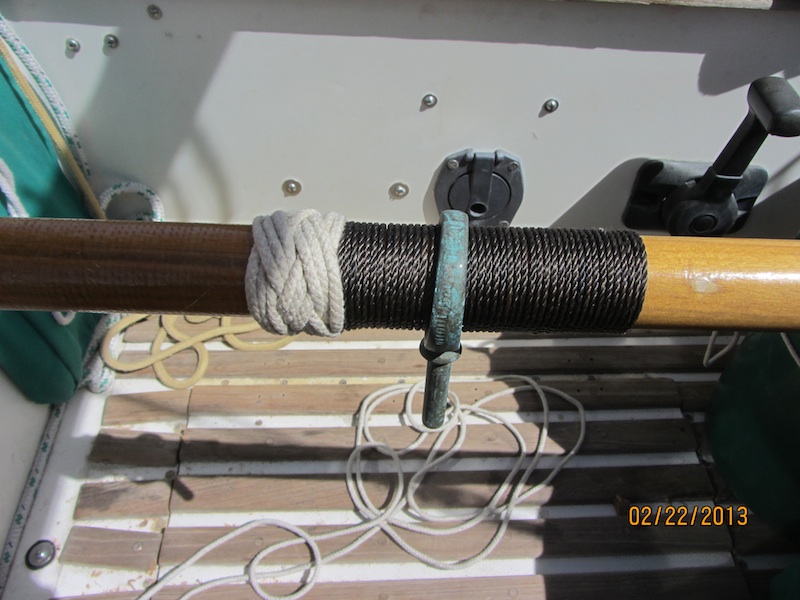
The shaft on one of the Walker Bay oars was beginning to delaminate so I decided to wrap some line around it to at least hold it together until I could fix it. This got me thinking that maybe the oars I was working on could also use some wraps to guard against splitting at the end of the handles. I’d always heard that you could pull a constrictor knot tight enough to use it as a hose clamp. I decided to try it out. I wrapped the handles on the oars above and below the grip area using a doubled constrictor knot. Then I wrapped one end of the line around a marlinespike and the other end around a big old nail (spike) that I keep in my ditty bag. Using my feet to push and my arms to pull, I pulled that knot about as tight as it could possible be pulled without a winch. Then I cut the ends off close.
In this photo I’m actually wrapping the WB oars rather then my newly modified ones, but the knot and technique were the same.
A couple coats of varnish on everything and the oars were done.
Tuesday, March 19, 2013
Shortening oars
When first I saw this post, I read it as "shortening sails" - I wonder if you did too. Steve aboard s/v Siempre Sabado shows us some very proper and seamanlike oar maintenance:


Subscribe to:
Post Comments (Atom)


Very cool - I thought I was doing something bizarre when I did a similar thing with my oars to take up space between the oar and the oarlock/ring. I didn't use tarred marline - just a three-strand twist (Steve's look much saltier than mine ) but it works absolutely perfectly. Nor do I know how to do a Turk's head knot. . . If I were to do it again, I would try to use leather. I think I understand how to work with it now, and could simply make my own leathers with a heavy gauge cow leather.
ReplyDeleteNice. Ad sewing leather tight: cut it little shorter, soak it in water which will allow it to stretch, sow and wait for the nature do the rest ;)
ReplyDelete