Please welcome new contributor Rick of
s/v Cay of Sea! Rick shares with us a clever adaptation of a brass door kick plate, thus avoiding the "marine tax"...
Warm weather has ensured good luck with epoxy curing, and I’ve finished, broken, and remade the lamp bracket – which required epoxy for success. I never do anything right the first time, and the lamp bracket was no exception. First of all, check this photo of the bracket from my last post. Notice anything special about the grain of the wood?
 |
| The grain runs across the width |
Yeah, see how the grain runs across the narrow section of the bracket? That creates a weak spot. I didn’t realize that until I broke it across there with the slightest of effort. So, here is what I did to fix it:
 |
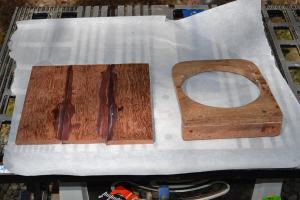
| A new edge-glued teak board |
The new board you see glued up was to be the new bracket oriented with the grain running the other way. Then I had a truly inspired idea: what if I glued the new on top of the old (repaired) bracket? That would be very strong indeed, with no tendency to break across the narrow dimension. That’s what I did. Here it is installed.
 |
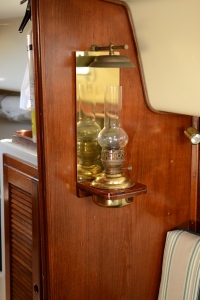
| Bracket mounted |
I think I’m going to install a heat shield on the bulkhead behind the lamp. I don’t know if the bulkhead is going to get hot or not, but there is no need to take a chance.
I dug through my shed and found the door kick-plate. Happily, it’s polished brass, so will match the lamp well. Also happily, the edges and corners were pre-drilled. All I had to do was purchase stand-offs and fasteners. The stand-offs were pretty straightforward. 7/16ths diameter, 1/2 inch long steel sleeves did the trick. I got the correct fasteners on my second trip to the hardware store, because I got the wrong type of screw head on the first trip. Yeah – story of my life. I never get it right the first time around. For the record, unless your material is counter-sunk, flat-head screws won’t fit flush. I got regular round-headed screws and it looks and works much better.
I drilled mounting holes in the bulkhead for the plate, which I cut to size with my Dremel. I experimented with sheet metal shears, but they left a distorted, slightly bent edge. The Dremel was clean, and the rough edge was easy to smooth with sandpaper and sanding drum on my regular drill.
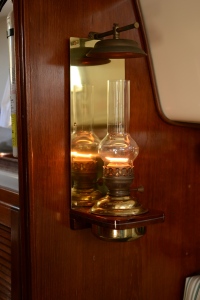
Now mounted on the bulkhead, it looks like this:
 |
| Oil Lamp with Heat Shield |
 |
Unanticipated benefit -
reflection of lamp provides
more light in the area. |


Hey Rick I like this Idea. I have an Aladdin lamp I want to use on our boat, and I was going to make it hanging, but this is a much better idea.
ReplyDelete