Our lifelines were getting sad. Although it’s possible to tighten them up when the gates are closed, when the gates are open they sag like a sad old man.
Besides that, the plastic cover is cracked and broken in places and a lot of the fittings are somewhat suspect. Some are rusty, some have after-market welds on them, and on some of them, the amount of metal left to hold a cotter pin in is nearly non-existent. Our extended stay in Mazatlán combined with Lulu’s fortuitously-timed trip back to the USA made this the perfect time to renew the lifelines which are very likely original issue. That is, they are now probably 35 years old. Keep in mind that, as a general rule, the lifelines don’t keep us from falling off the boat. Our good sense and caution do that. But the lifelines do provide a last chance to stay aboard when all else has failed. It’d be nice to know they were up to the job.
If I were to replace all the original fittings with the same kind of fittings, the project would have probably cost a over $1300.00. A wee bit steep if there’s another alternative. By choosing to make my own swaged fittings, and using welded stainless steel eye bolts several sizes larger than the original fittings, I was able to keep my costs down to around $600.00 including the tools I needed to do the job, which of course, are reusable. And, I think I ended up with a stronger installation.
Lulu returned from the States lugging an extra checked bag that weighed a bit over 30 pounds. It had my lifeline wire, all the end fittings I’d need, and the swaging tools. The only thing I had to buy here was a pair of bolt cutters to cut the cable with and some stainless steel 3/8″ all-thread since the eye nuts I bought were a different thread than the eyebolts I bought to put them on. Here are some of the tools I needed for the job.
Working from the top down, we have the angle grinder with the abrasive cut-off wheel. I used this to cut the too-long eyebolts down to size as well as to cut the all-thread to length. Next are the 24″ bolt cutters. I tried cutting the cable with a hacksaw at first but that’s a poor way to spend one’s time. The bolt cutters work way better. And besides, every cruising boat is “supposed” to have bolt cutters aboard so that when you get dismasted in a huge storm, you can cut the standing rigging so the mast will fall away from the boat and quit trying to gouge a hole in the hull. So now I guess I’m well-equipped. Below the bolt cutters is the Nicopress swaging tool. This is used to crimp a copper alloy collar around the cable.
They have an expensive version that looks a lot like the bolt cutters but this cheaper version, while being more work, filled the bill quite nicely for me. The smaller swaging tool below the Nicopress is made by Johnson and is used to crimp their stainless steel fittings onto the wire.
Mostly I tried to stay away from the Johnson fittings because they are so freakin’ expensive. But their pelican hooks were about the most reasonably priced adjustable ones I found. Over to the right side is the Dremel tool with an abrasive cut-off wheel. I used this to trim the wire sticking out of the end of the swage collar.
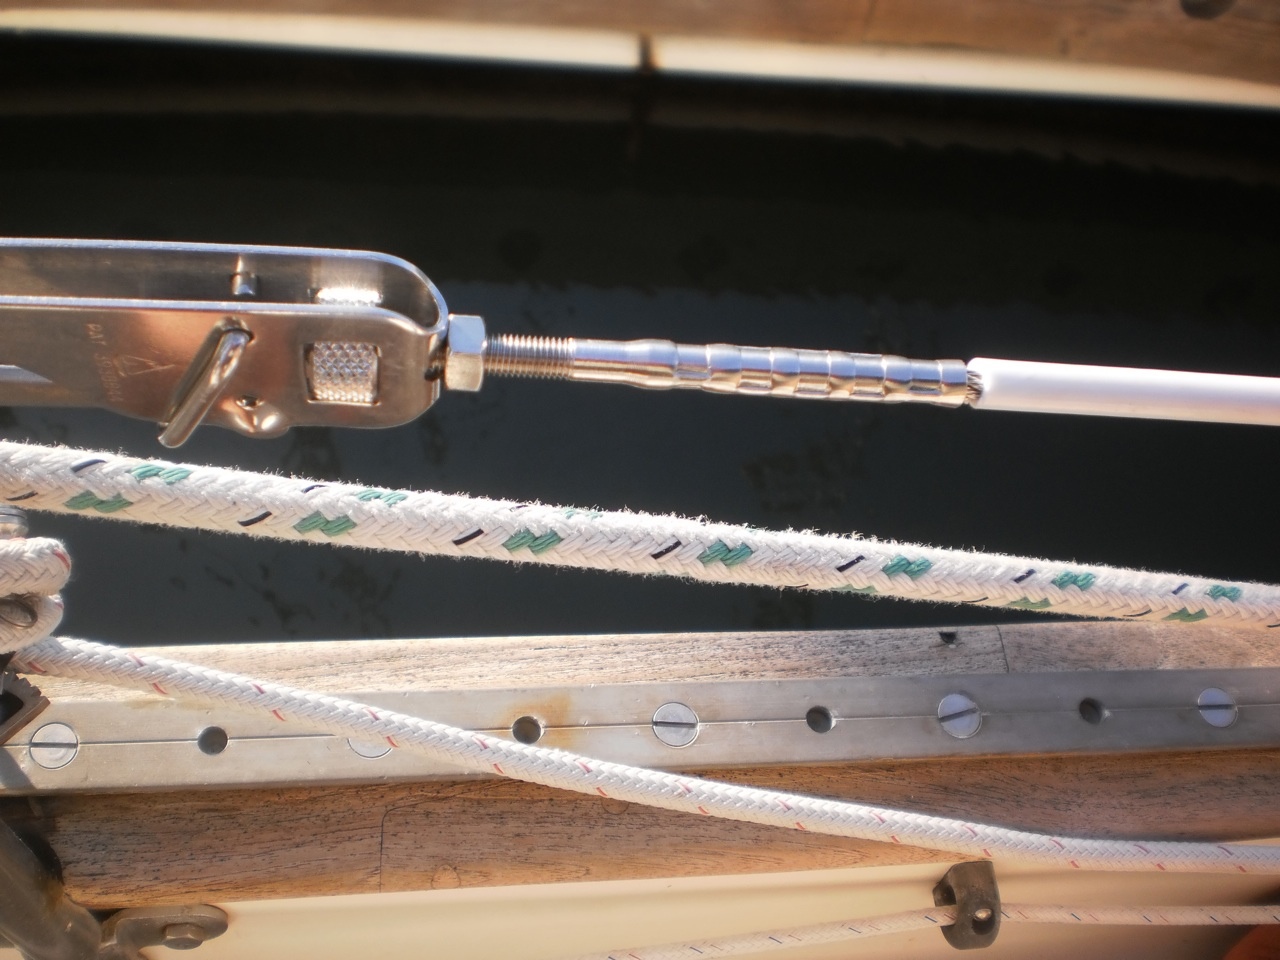
Usually, the slack in a lifeline is taken up by a turnbuckle on one end.
However, there are a couple of things I don’t like about turnbuckles. First, if they’re not tended to fairly regularly, they can freeze up and be un-turnable. It’s usually possible, with lots of WD40, long handled tools, vice grips, and muscle, to refurbish them. But what a hassle. I know that many folks out there do just fine with their turnbuckles and probably think I’m being a big baby. Maybe I am. Or maybe I’m just justifying doing without. The other thing I really dislike about turnbuckles is that they are EXPENSIVE! How expensive? Well, my Bosun Supplies catalog lists the turnbuckle with the swage on one end and the toggle on the other, just like in the photo above, at $48.63 each. And I need 6. That’s almost $300.00 just for one end of each lifeline. Also, you see the u-shaped piece that is attached to the loop on the stanchion? Well, that’s a toggle. There is a pin that runs through holes in the end. The pin is kept in place by either a split ring or a cotter key. On some of the toggles I inspected, the cotter key had slowly worn the hole until there was almost no metal left on the end of the pin. Scary. So what did I do instead? I applied a lashing in place of the turnbuckle.
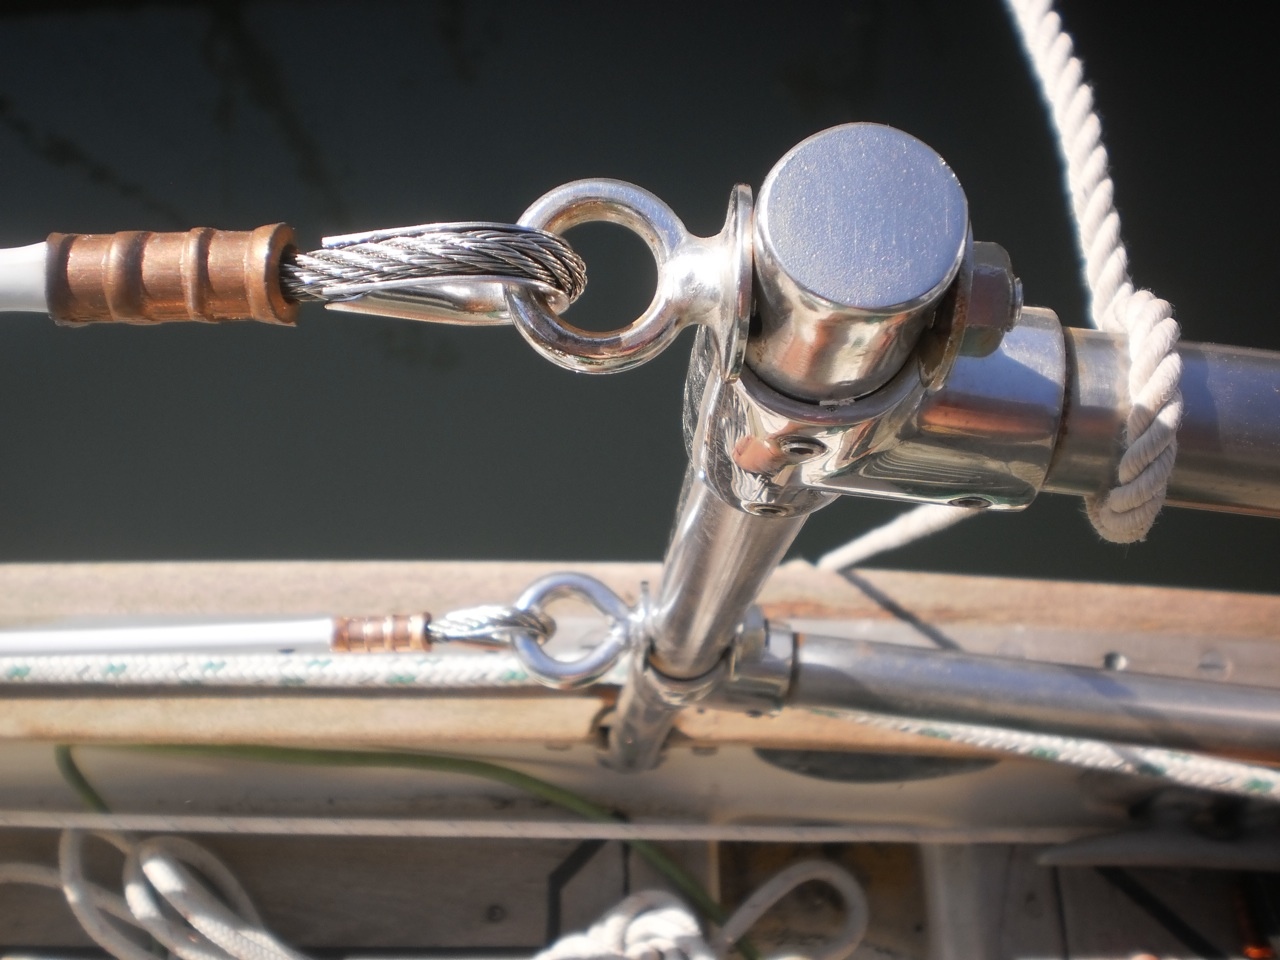
I may or may not be able to pull these quite as tight as a turnbuckle but I can definitely make them plenty tight enough. This is 1/8″ nylon braid. There are 5 or 6 loops connecting the lifeline to the stanchion. Then the whole thing is wrapped in overhand knots, closing the loops and making the whole thing extremely tight. Our friend Mike (s/v Tortue), a Brit, says that the yacht racing rules in England require lashings on the lifelines. The reason being that, in the event of a man overboard, it’s very difficult to drag someone over the lifelines and it takes too long to lower them by backing the turnbuckle off. The lashing can be cut through with a knife and the lifelines immediately dropped. I don’t know if this is true or not and, in our case, since we have a gate on both sides of the boat, it’s probably unnecessary, but I still prefer my lashings to turnbuckles.
This is the first time I’ve done any swaging. I must say that it got easier, and I did it better, as time went on. The first one was very frustrating. Trying to bend a short piece of 3/16″ 7×7 (7 bundles of 7 wires each) cable 180º is a bitch! Would have been easier without the PVC coating because you could slide the collar down, make your bend, and then slide the collar back up. But, with the coating, the collar had nowhere to go so all movement had to be done with a short piece of cable. But I eventually got better and it got a little easier.
A few shots of the starboard side, which is all finished:
Found a couple of scary things when I took the old lifelines down.
The old gates were attached to a ring that was swaged to a short lifeline heading aft. The ring end is screwed on to a threaded, swaged fitting. When I attempted to unscrew the ring, this is what I got:
Scary, huh?
So, the starboard side is done. We can open the gate and still have the lifelines forward of the gate remain taut. The scary, rusty pieces are gone and, should we ever find ourselves signed up for a sanctioned sailboat race in the UK, we’re ready. Or we will be in a couple more days after I finish the port side.
Tuesday, March 20, 2012
DIY Lifelines
Steve and Lulu needed new lifelines, and like the SmallBoatProject'ers that they are, they made them themselves, right there on board s/v Siempre Sabado:


Subscribe to:
Post Comments (Atom)


Interesting write up. Thanks for taking the time to share. Alan
ReplyDelete