Over on
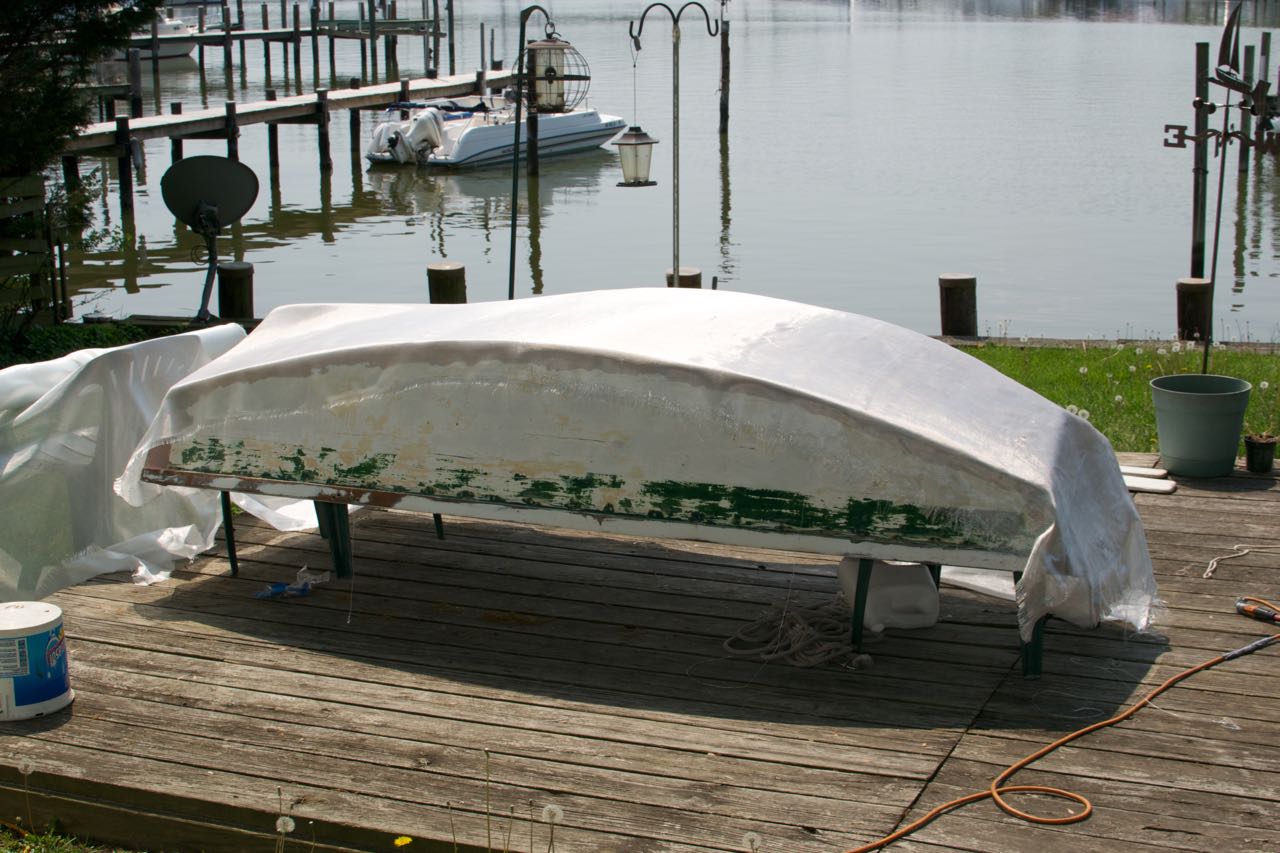
s/v Cay of Sea, Rick and Ruth go to work sheathing their dinghy with fiberglass. Why do this? Well, it is a way to extend the life of a wood dinghy, and the fiberglass takes running up on sand and gravel much better than does wood.
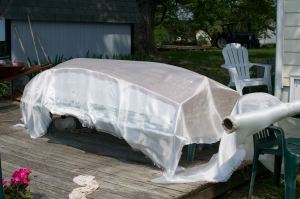 |
Well, not the see-through-the-bottom kind.
|
I filled more small splits with peanut butter-consistency epoxy on the bottom today. These are super small splits – just narrow cracks – I forced epoxy into them with a putty knife, filling with cross-grain motion, then scraping up excess with the grain. Had I prepped the bottom for glass and resin, I could have gone directly to sheathing without waiting for resin cure. But I didn’t think it through, and needed to solvent wash the surface first and grind a few patches of cured epoxy. After letting the crack fills cure, I finished the prep.
[Editor's note: for those of you that have not worked with epoxy, as it cures a substance is pushed to the surface, called the "amine blush". If this is not removed before
anything else is applied, it prevents a bond from being made.]
Draping the glass over the bottom showed me where to trim the excess, and where likely relief cuts were going to be needed: at the keel, in the corners, and a couple of places on the transoms I didn’t anticipate. It’s easy to push the weave of the fabric around while it’s wet, but care has be taken to keep pockets of void from pushing up as a result. Relief cuts are the best way to get the fabric to lay flat.
 |
Trimmed and ready to wet out.
|
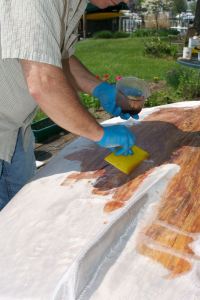 |
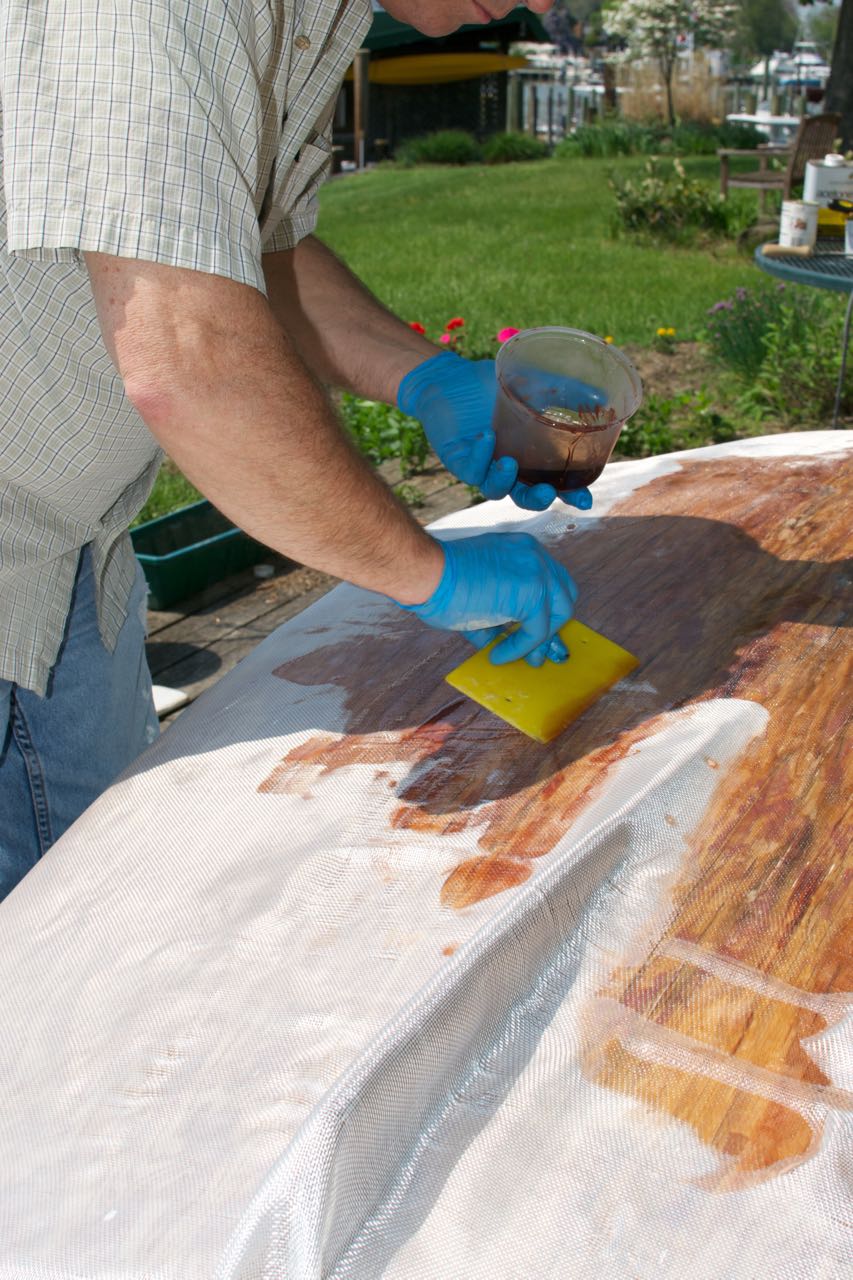
Squeegee moves the resin around efficiently on flat horizontal surfaces. Thanks to my wife, Ruth, for taking these photos while my hands were in the resin.
|
A large squeegee or putty knife/scraper is the best tool for wetting out on horizontal surfaces. It was a beautiful day – about 70 degrees – but the sun shining on dark surfaces made them warm, and consequently the resin set up pretty quickly. I had ample time to wet out each section, but I still had to move quickly. I spread out the resin and thoroughly saturated the weave, then quickly replenished my resin container. Three pumps each of resin and catalyst provided just the right amount to spread at one time. I used about 20 ounces of resin and catalyst to saturate the whole surface, including transoms.
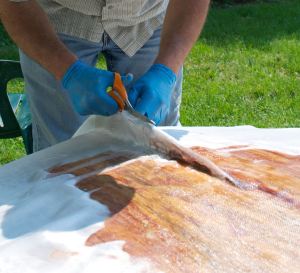 |
Cutting a relief for the skeg. I should have done this before pouring resin.
|
I switched to a chip brush for the transoms and turn of the bilge, as pouring the resin wasn’t going to work on vertical surfaces. After an hour’s steady work, the entire surface was done and beginning to cure in the sun. I’ll do an additional coat tomorrow (or next time, depending on weather). One more coat will serve to completely fill in the weave pattern of the fabric, and provide a smooth surface. When I removed the boat from its elevated supports, I could readily feel the increased rigidity the glass and epoxy provides. The transoms will get even more rigid when I glass their inside surfaces.
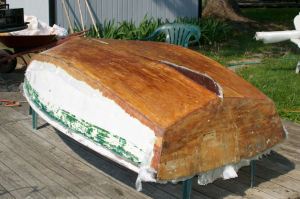 |
Bottom sheathed, waiting for second application of resin.
|


We have always wanted to get a glass-bottomed dinghy to go fishing in the creek. I never thought about doing it ourselves.
ReplyDelete