Batteries are dangerous creatures. They are heavy, they are full of corrosive and pretty concentrated sulphuric acid, and they hold a lot of energy. One of the things one doesn't want is for his/her batteries to be jumping around loose down there in the bilge in a seaway. Come along for the ride as Rick on
s/v Cay of Sea constructs a restraining container for his batteries:
This seemed like it should be categorized as a small project, but it took over a week to complete, with lots of little steps to get there. It didn’t help that I had to build the battery box twice.
I filled the inside right angles with thickened epoxy to ease the 90 degree transition – the glass accepts this “fillet” better than a hard angle. That sentence sounds so straightforward: “I filled the inside. . .” & etc.. In reality, it was a mess. I had cut a piece of scrap plastic as a tool for spreading the epoxy into the angles, and it did help some. However, by the time I had filled one 90 degree angle, my hands were covered with goo, and it was just damage control for rest of this phase. Fortunately, I had remembered my latex gloves, and clean-up was as easy as stripping them off.
 |
Here’s the sort-of-effective plastic tool I made.
|
 |
Angles filleted and glassed with the high/rough spots sounded down.
|
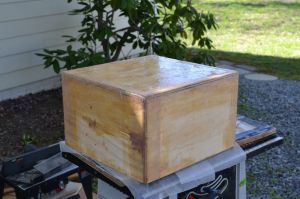 |
Exterior glassed at the corners, and the entire bottom is coated with straight epoxy.
|
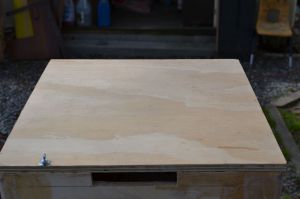
I fitted the top and drilled one hole for a stud (or ‘hanger bolt’ as they call them in the hardware store). I drilled through the top and into the box in one action. Then screwed the stud into the box, placed the top on it, and drilled the other stud holes having the top fixed in place by the first stud.
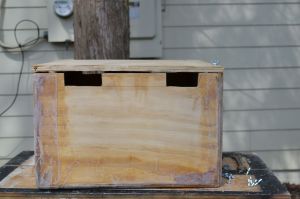 |
Wire relief holes
|
 |
One stud in place
|
 |
All the studs in the right place.
|
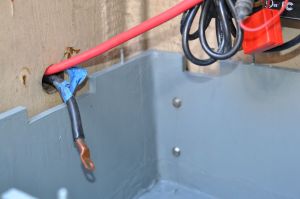
Next step trial fitting the box in place. I emptied the starboard cockpit locker, removed the old batteries, and brought the new box down to position. It passed through the locker opening with no problem, once I realized that I couldn’t fit it and me through the opening at the same time. What I learned through the trial fitting was that the designated space wasn’t a perfect angle. There was an extra support post in the corner, which made the installation a little more complicated. To have the box sit level and not rock from corner to corner, I installed two shims on the bottom.
 |
The black line marks the edge of the shelf, which the box over hangs by about a third of its width. The shims stabilized the box satisfactorily.
|
 |
See that bump that runs vertically in the left corner? That prevented the box from fitting flush into the corner. You can also see the curvature of the hull on the right.
|
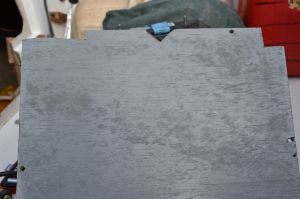
Between the bump in the left-hand corner, and the curvature of the hull on the right, the box wobbled to its opposite corners The shims fixed that. Next step was let epoxy cure for setting the shims, then paint Bilge Coat grey.
 |
My favorite color.
|
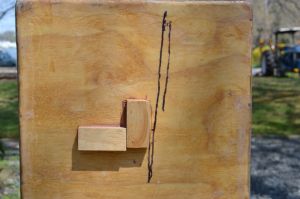
Paint and epoxy cured, I drilled holes in the bulkheads for installation and fitted it in the space. There was a small problem with the fit of the top since I had to cant the box slightly. A few judicious cuts relieve the top fit, though I had to abandon one of the retaining studs.
 |
Kind of a poor photo, but you can see where I notched out the corner, a piece in the middle, and trimmed away the left side too. That side still has one stud/wing nut on the right.
|
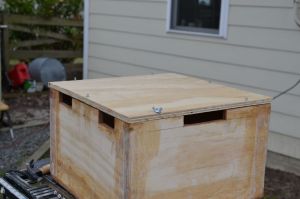
Finally, the box was bolted into place, top trimmed and ready to go.
 |
Bolted to adjacent bulkheads.
|
I installed the batteries, and was pleased with the fit.
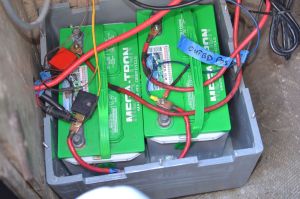 |
I knew they would fit because I had tested the fit earlier, but it was still gratifying to see them in place and wired up.
|
I think ABYC specifies that batteries should not have more than an inch to move in any direction. This installation allows a little more than an inch, but I think it’s fine. And so much better than plastic battery boxes sitting loose in the locker! Here are the final photos with top installed.
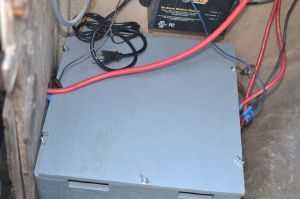 |
Done. It took all day to finish this up.
|


No comments:
Post a Comment