As reported earlier, when we got back to Siempre Sabado from our trip to the U.S., something just didn’t look right. Then I saw it: the upper lifeline was no longer attached to the stanchion. There were a few strands of nylon left on the stanchion ring but that was it. Then, a couple days later we were visiting with some friends on the dock. Lulu was sitting on the cabintop and put her feet up on the lower lifeline. Guess what? Yep, that was enough to break through what remained of the lashing on the lower lifeline. I suspect that the degradation that led to the final failure probably happened in the last 6 months or so. Last time we were out was when we were coming back to La Paz last May (Jeez! Has it been that long?). During that trip we didn’t notice any issues with the lifelines in spite of abusing them with the dinghy every time we launched or retrieved it. Nevertheless, I’ve added replace lifeline lashings to my annual to-do list.
It’s been almost exactly two years since I replaced our lifelines in Mazatlán. At that time, I didn’t really document the lashing process itself so I thought I’d take care of that today.
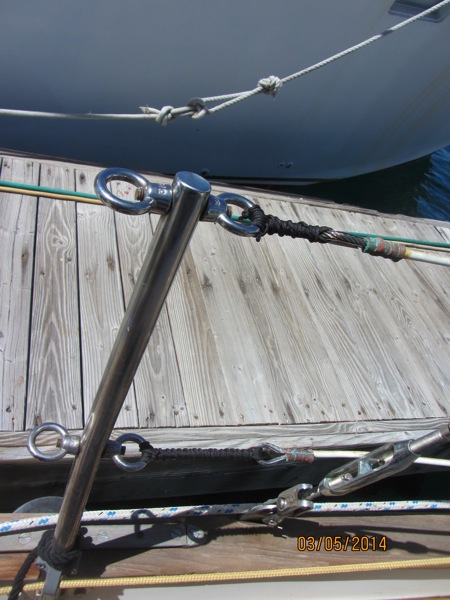
This time, instead of white 1/8″ nylon braid, I used black 3/32″ nylon braid. The main reason for the change was that I though black might be a little less susceptible to damaging UV rays, but mostly because we have a huge spool of it we bought at a commercial fishing outfit in Puerto Peñasco. Not sure what the fishermen use it for but they must use a lot since the huge spool we bought was the smallest one they sold.
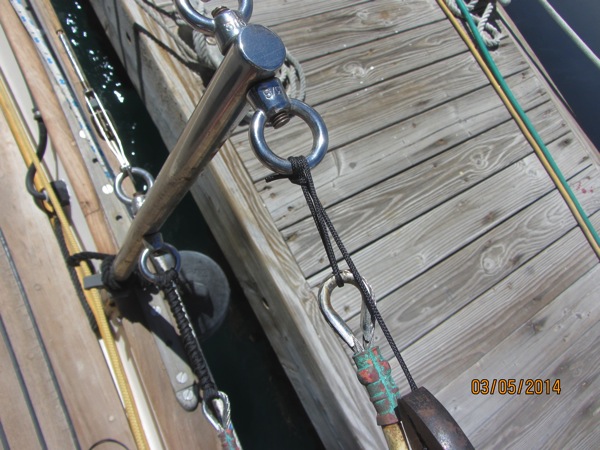
The first step is to tie the line to the ring on the stanchion. I used a fisherman’s bend.
Then just start wrapping line between the ring and the lifeline, pulling it as tight as you possibly can each time.
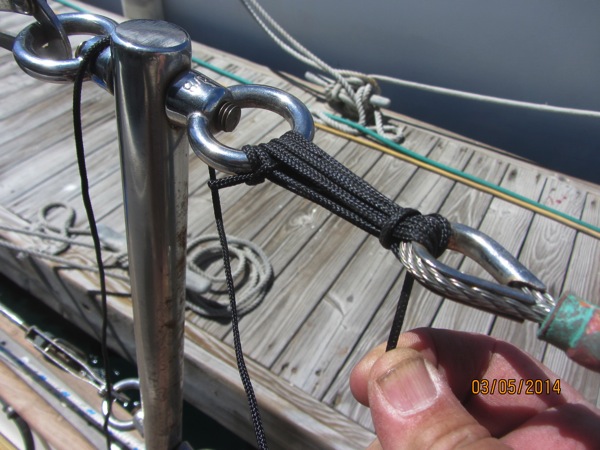
I suggest using pliers to pull the line tight. I figured this out a little too late.
Once you have as many wraps as you think is appropriate (I used 6), pull it tight and tie it off with a half-hitch pulled mondo-tight with the pliers.
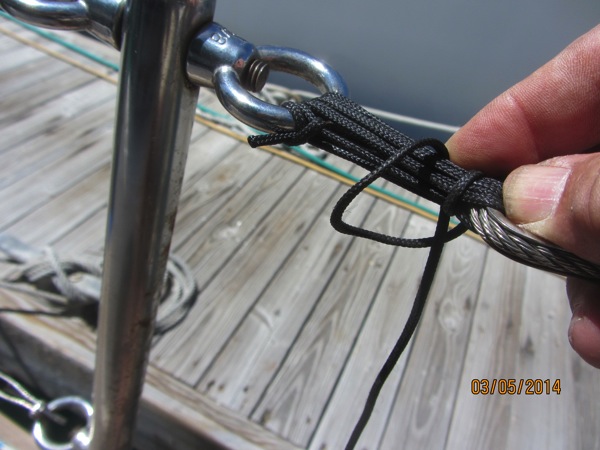
Now, just keep tying half-hitches, always in the same direction, until you reach the other end.
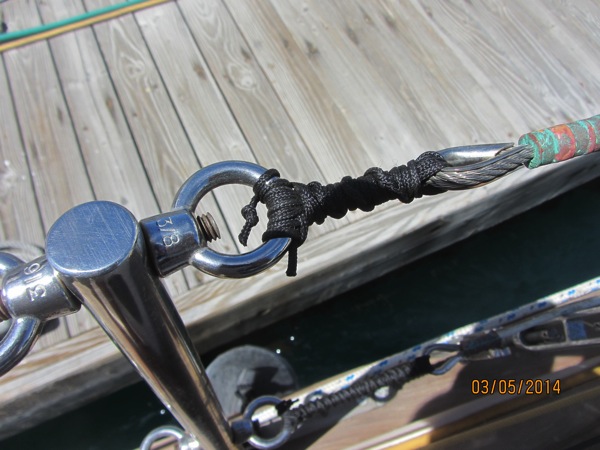
When you reach the end, you can finish it a couple of ways. Last time I just tied a last half-hitch and then tied an overhand knot up close in the end. This time I decided to tie the end off with a clove hitch on the stanchion ring followed by the pulled-very-tight overhand knot. I didn’t get this overhand knot as close to the ring as I would have liked but I suspect it’ll be just fine. As soon as the wind dies down, I’ll apply some heat and fuse the overhand knot to itself so it’ll never ever come loose.
Personally, I don’t think these look quite as nice as the white ones did but they look a LOT better than the parted ones laying on deck.
If you have a gate in your lifelines, be sure it’s closed before you start lashing. You can put incredible force on the stanchions when you pull the lashings tight and you don’t want to bend a stanchion. I didn’t put the slight bend in this stanchion, it was that way when we bought the boat. Although it’s open now, I did have the gates closed while lashing.
So there you have it. Change your lashings at least yearly. It’s too easy and cheap to do to take a chance on the line lasting any longer than that.
Tuesday, April 1, 2014
Who needs turnbuckles?
Steve and Lulu who live aboard s/v Siempre Sabado don't use turnbuckles on their lifelines - they use lashings...


Subscribe to:
Post Comments (Atom)


I've found that 2" webbing make a very nice lashing covering; they last much longer, it is easily slid to the side for inspection, and, and they outlive several lashings.
ReplyDelete