Nobody likes clutter - it saps strength from the soul. And in the small spaces on a boat, clutter is especially telling. Rick on
s/v Cay of Sea uses his carpentry skills to right some galley wrongs:
This has been on the list for a long time. The cause of “cruising domestic tranquility” made this project rise to the top of the list. My wife’s frustrations with our single galley drawer finally prevailed, and I set about to make a solution. The problem with the drawer is that the oddly shaped utensils often jam under the upper edge of the drawer facing, preventing its opening. With such an easy fix as a utensil holder, this jamming drawer syndrome shouldn’t be tolerated. So doubtless, you’re already picked up on the word “easy” and skepticism is growing steadily in your minds. You are right, of course, to be skeptical, and this little project was not without its challenge. If the accommodation is to be “elegant” or “just right” in some way, there will be a challenge to surmount.
 |
| Galley Disaster Area |
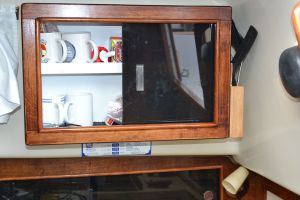
Since bulkhead space is limited, I wanted to use the space next to my galley cabinet adjacent to the bulkhead. This is the perfect place.
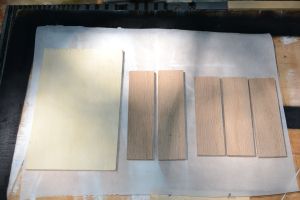
Just not enough bulkhead space for everything, so I wanted to mount the utensil holder on the cabinet across from the bulkhead. That uses that little dead area to the right of the cabinet. Obviously, the holder has to be slender enough to fit. Accordingly, I used 1/4 inch oak and clear ply stock for materials, cut to length, as shown below.
 |
Sorry about the shadows… |
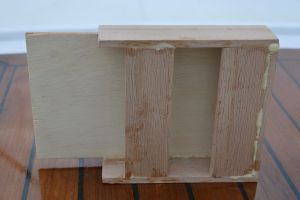
I also used Gorilla glue – which, by the way, is over-kill and messy to boot. I’m going to stop using it for these little interior projects. Gorilla glue makes a very strong joint, but it expands and must be scrapped/sanded to get the waste off, and it is difficult to clean up when wet. There is other waterproof glue that is plenty strong and not nearly so messy.
 |
| After clamping and gluing, but before cleaning up and varnishing. |
Yes, I see the joint gap top right. It’s still strong, and won’t be seen when installed. None of my cuts are ever perfect.
 |
Just a different angle |
 |
Varnished and ready to install |
Here it is installed:
Just as I had hoped, it fills the space, and still allows easy access to the utensils
The challenge was the installation. Of course, it was not possible to drill holes from the outside of the cabinet, so the holes had to be made from inside. The drill didn’t fit inside very well. Side to side was okay, but the handle of the drill hit the top shelf of the cabinet. Then I had to operate the trigger with my thumb, and somehow apply enough pressure to make the holes. Challenges notwithstanding, I managed to drill three holes where only two were needed.
This is the way all my projects go. . .
Here’s a photo of the draw withOUT all the utensils. Better, huh? Hopefully Ruth will think so too. Hopefully, she won’t ask me why we have three can openers.
It’s because all 3 work badly. You might need the extras when the other two won’t finish opening the can. I need to buy one of those OXO openers. They always work, but I don’t think it will fit in the drawer . . .


No comments:
Post a Comment