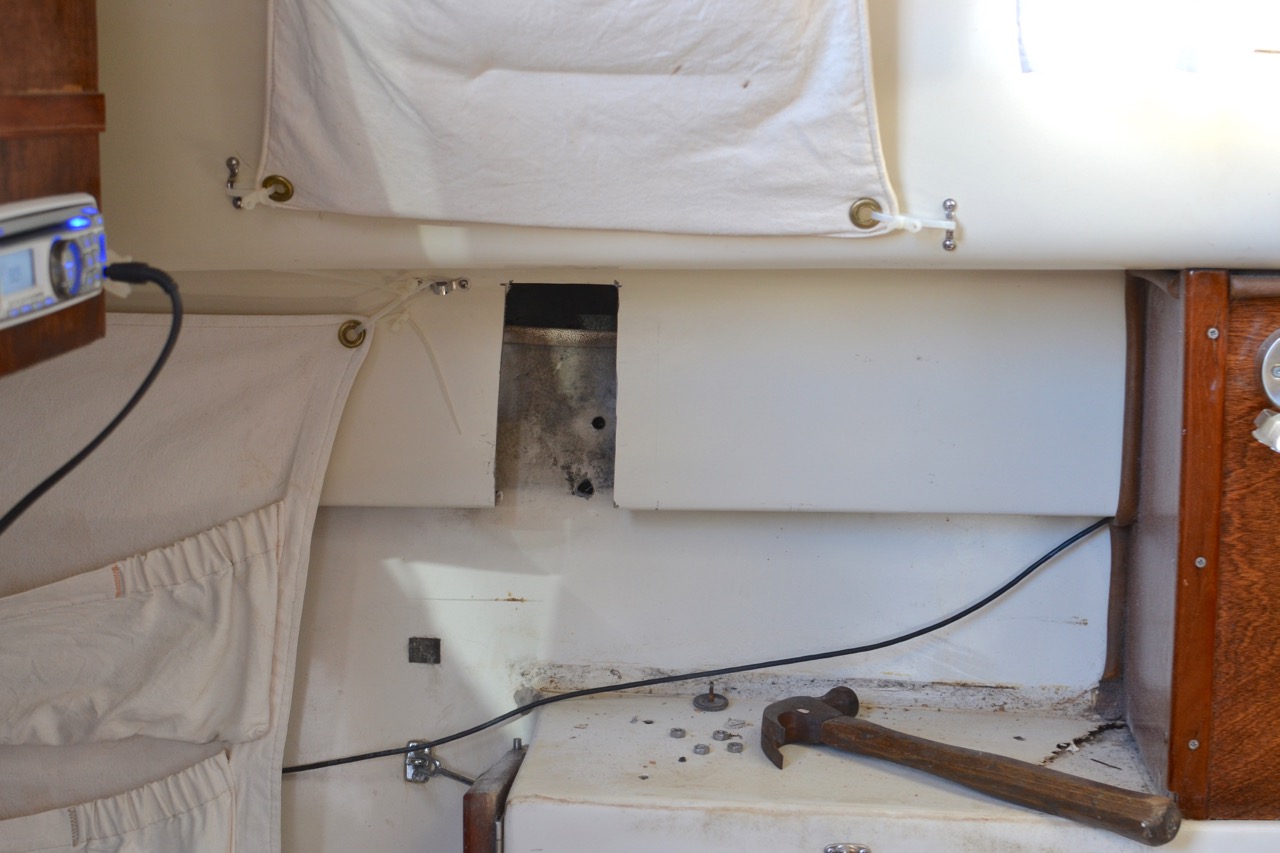
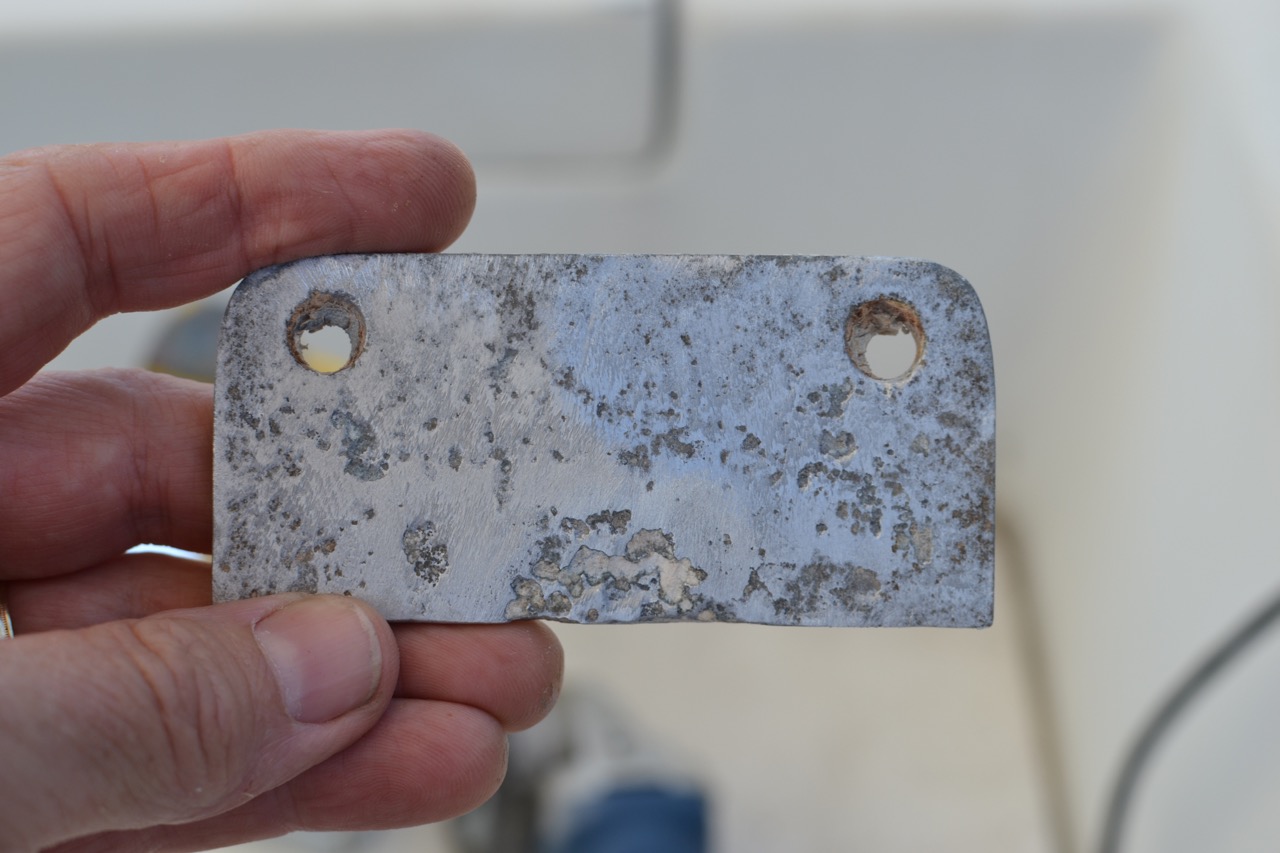
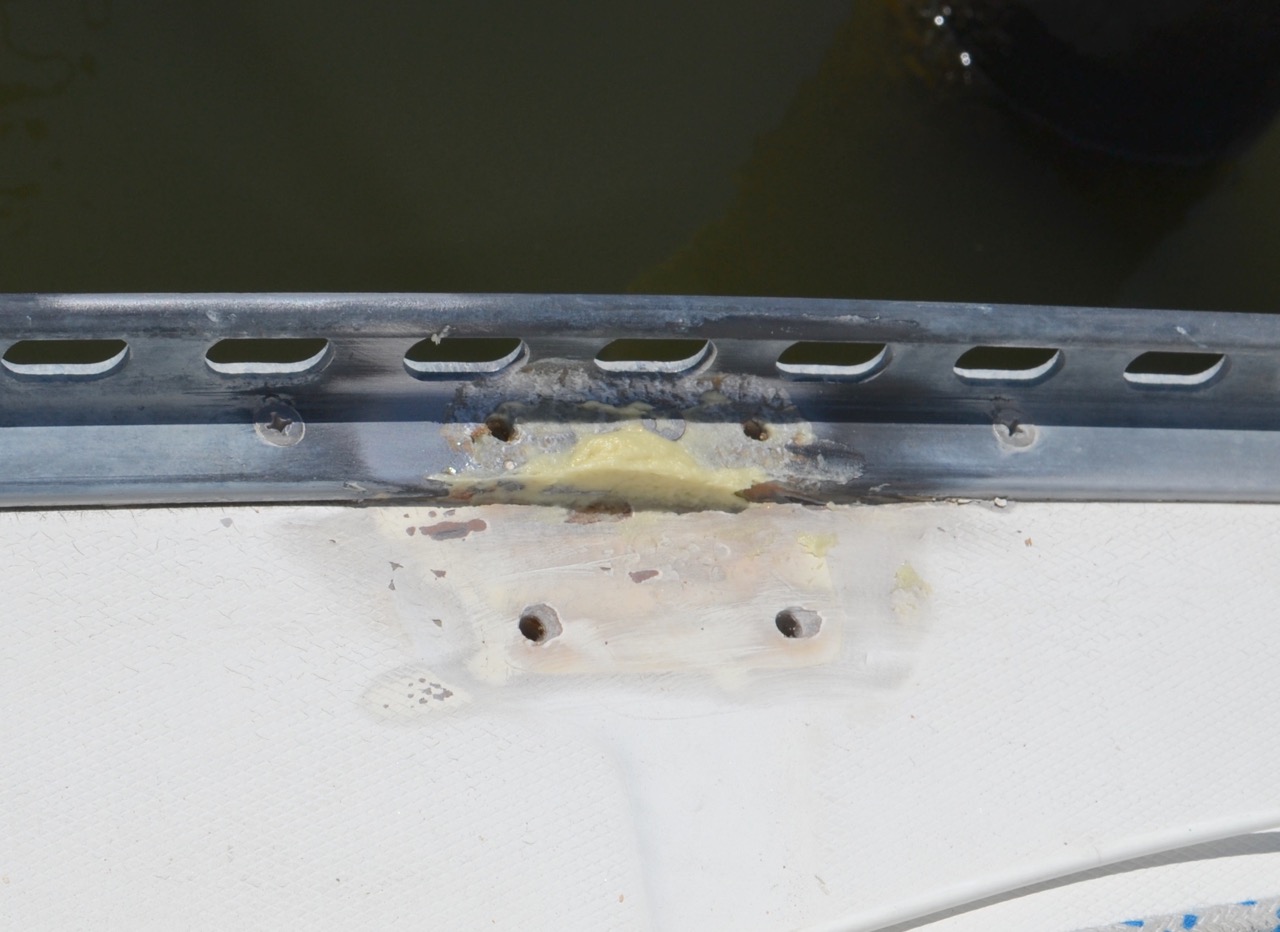
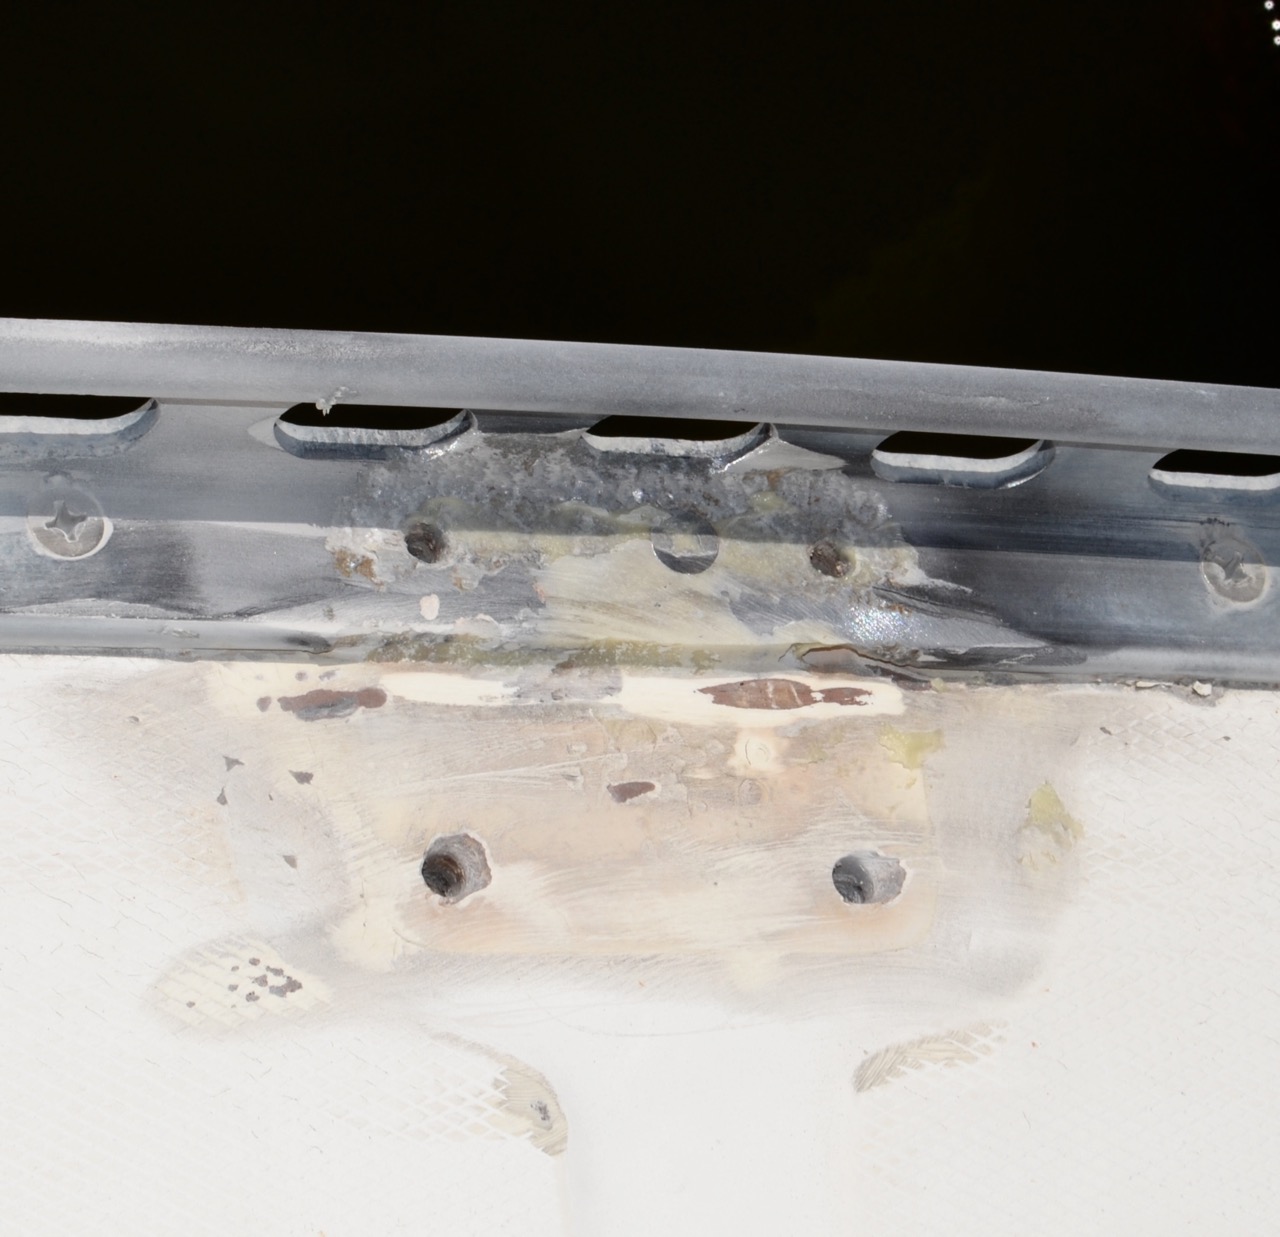
I have been suspecting this particular stanchion as the source for leaks for quite a while. At one point 6 or 7 years ago, when we were in a shallower slip in this same marina, we had a super low tide. The boat grounded out and leaned over against the finger pier and, I think, slightly bent this particular stanchion. I’ve never re bedded any of the stanchions, so this was the original compound underneath. Stanchions are not designed to be pulled on, and certainly not designed to withstand having the weight of the boat push them into a pier, so I believe that is when it began to leak a good bit. It may have leaked some before then.
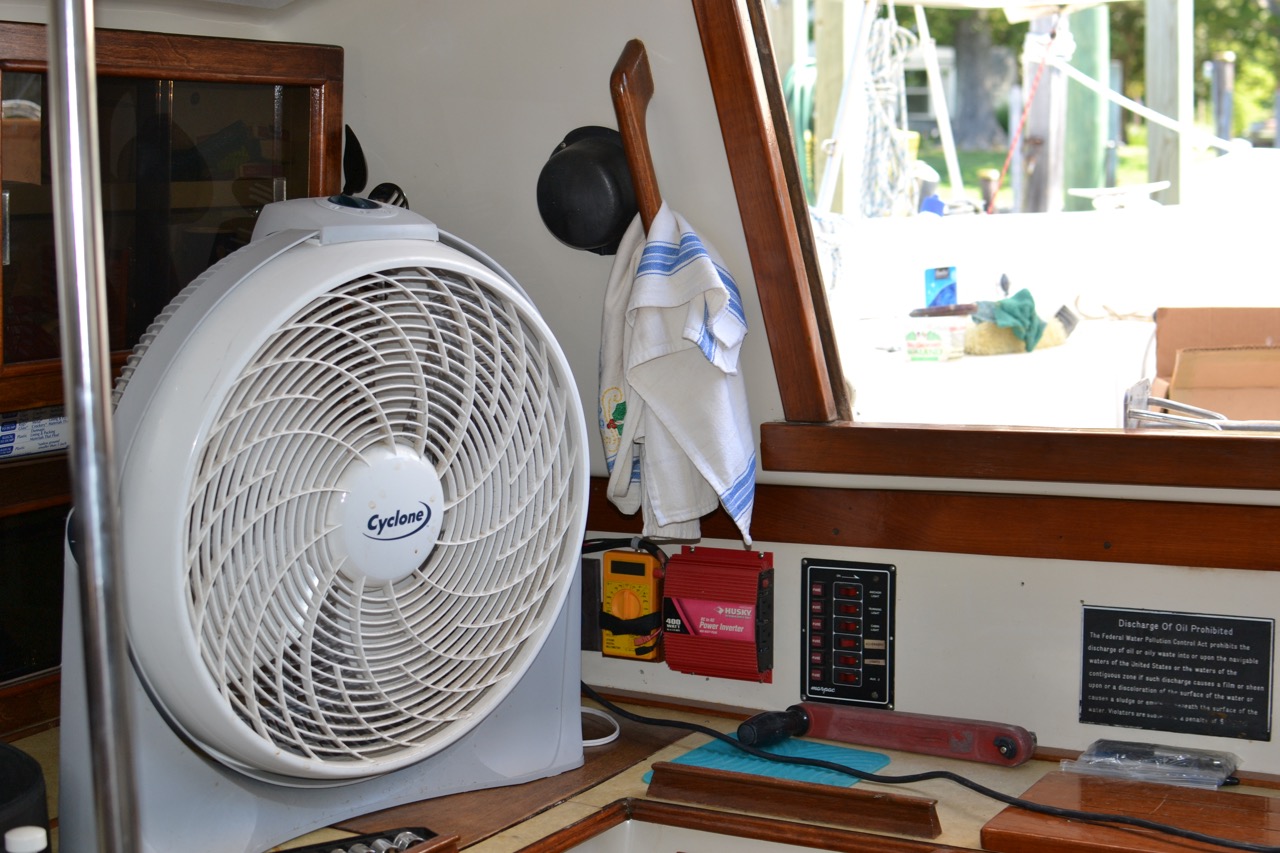
Regardless, I decided that I wasn’t going to hide from the heat today, and ventured down to the boat with my large fan in hand. I set it up on the galley counter, and it made a huge difference in tolerating the heat today. I also put up all my hot-weather canvas and kept as much sun off the boat and myself as possible.
Tuesday, November 15, 2016
Re-bedding One Stanchion
It's getting cold on the East Coast, so here's a post that Rick on s/v Cay of Sea did last summer. Rick always shows excellent attention to detail...

Tuesday, November 1, 2016
Bimini Roof Canvas Completed
This post originally appeared on Windborne in Puget Sound
Finally, I have completed the last of the three cockpit bimini canvas pieces: the center section. This panel is zipped to both the forward and aft roof panels, meaning that its size is completely dependent on the placement of those two panels; they had to be completed first.
But because the old center panel had to continue in service until the new one was fabricated, the forward and aft panels had to be properly located. In other words, because I did this work in sections instead of all at once, the new roof duplicated the old completely...
Because the old center panel fit perfectly, rather than pattern the center panel with DuraSkrim I chose to simply roll out some Sunbrella and trace the outline of the old center onto it. The size is not terribly critical; instead it is the zipper placement that is crucial. That being the case, I did a lot of measuring and annotating on the old center panel:

Again, placement of the zippers is what controls the fit here. So I measured outside-tooth to outside-tooth at perhaps a dozen stations along the old panel. Then, when applying the zippers to the new panel, I duplicated the station locations and ensured that the zippers conformed to the measurements.
I have learned thru this project that zipper position in a lengthwise direction is also critical, especially when there are pairs spanning the length. To make this work out properly, I followed these steps:
So, what did it all cost? I'm afraid I can't be entirely accurate because I used some supplies from earlier projects. But what I can do is to make an estimate on materials costs, based on the Sailrite catalog I have here on board (check the Sailrite website for current prices):
I also bought some tools that, tho they were used in this project, will be used again in future projects. I don't know if these should be charged against this project or not (you decide), but you should definitely have these tools to do the work:
I did not include the cost of the thread because I bought a large spool years ago and have been using it since. You definitely want the Teflon Tenara thread or equivalent - it will outlast your boat. Don't settle for polyester thread.
And finally, you need a heavy-duty sewing machine to handle this. I heartily recommend the Sailrite LS-1 or LSZ-1 (zig zag - if you intend to sew sails). They are expensive and worth it. We got ours used for less than half the new cost.
Finally, I have completed the last of the three cockpit bimini canvas pieces: the center section. This panel is zipped to both the forward and aft roof panels, meaning that its size is completely dependent on the placement of those two panels; they had to be completed first.
But because the old center panel had to continue in service until the new one was fabricated, the forward and aft panels had to be properly located. In other words, because I did this work in sections instead of all at once, the new roof duplicated the old completely...
Because the old center panel fit perfectly, rather than pattern the center panel with DuraSkrim I chose to simply roll out some Sunbrella and trace the outline of the old center onto it. The size is not terribly critical; instead it is the zipper placement that is crucial. That being the case, I did a lot of measuring and annotating on the old center panel:

Again, placement of the zippers is what controls the fit here. So I measured outside-tooth to outside-tooth at perhaps a dozen stations along the old panel. Then, when applying the zippers to the new panel, I duplicated the station locations and ensured that the zippers conformed to the measurements.
I have learned thru this project that zipper position in a lengthwise direction is also critical, especially when there are pairs spanning the length. To make this work out properly, I followed these steps:
- Locate the centers of both the old and new panels by folding in half, and mark them.
- Install the old center panel, and transfer the center markings to the forward and aft panels.
- Work on one edge at a time, I started with the aft edge. Install one of the new zipper halves to the aft panel zipper.
- Hold up the new panel, matching the center marks.
- While continuing to hold the panel in place (you may need help here), make match marks on the new zipper half and the center panel an inch or three away from the center.
- Remove the new zipper half from the aft panel.
- Position the new zipper half on the new panel using SeamStick basting tape, matching up the match marks. Note: at this point, with no other reference it is not possible to exactly locate the zipper width-wise. Instead, using another new zipper half on the opposite edge, simply ensure that zipper placement will allow both zippers to fall approximately equally on the fabric. Exact spacing at the measurement stations will be established when the opposite zipper half is installed.
- After sewing the first zipper half, take the panel out to the cockpit again and zip it up. Install another new zipper half on the other aft panel zipper.
- Pull the panel firm athwartship, and make match marks on the new zipper half.
- Following the steps above, install the second zipper half.
- When establishing the position of the first zipper half, match up the centerline marks as before. But this time, slide the panel a little port and starboard, watching for wrinkles to form and dissipate. You are looking for that placement where there are no wrinkles - it may fall when the centerlines are not quite matched up. Match mark the zipper half and the new panel.
- When sticking the zippers in place with SeamStick, be very, very careful to get the outside-tooth to outside-tooth spacing at the measurement stations the same as on the old panel.
 |
| Ta DAAA! |
So, what did it all cost? I'm afraid I can't be entirely accurate because I used some supplies from earlier projects. But what I can do is to make an estimate on materials costs, based on the Sailrite catalog I have here on board (check the Sailrite website for current prices):
| Item | Quantity | Unit Cost | Extended Cost |
|---|---|---|---|
| Sunbrella, Erin Green, 46" wide | 10 yd | 16.95 | 169.50 |
| DuraSkrim | 10 yd | 2.95 | 29.50 |
| Binding tape, 3/4", Erin Green | 80 ft | 0.50 | 40.00 |
| Zipper, #10, 48" | 6 | 7.50 | 45.00 |
| Zipper, #10, 60" | 4 | 8.70 | 34.80 |
| Zipper Pull, #10 | 10 | 1.70 | 17.00 |
| Zipper Stop, Stainless | 2 packs of 10 | 2.50 | 5.00 |
| Common Sense fastener, male | 50 | 0.60 | 30.00 |
| Common Sense fastener, eyelet | 17 | 0.195 | 3.32 |
| Rivet | 100 | 0.15 | 15.00 |
| Seam Stick, 3/8" | 1 | 8.95 | 8.95 |
| Seam Stick, 1/4" | 1 | 6.95 | 6.95 |
| TOTAL | $405.02 | ||
I also bought some tools that, tho they were used in this project, will be used again in future projects. I don't know if these should be charged against this project or not (you decide), but you should definitely have these tools to do the work:
| Item | Cost |
|---|---|
| Rivet Setting Tool Kit | 89.00 |
| Common Sense Eyelet Hole Punch | 69.50 |
I did not include the cost of the thread because I bought a large spool years ago and have been using it since. You definitely want the Teflon Tenara thread or equivalent - it will outlast your boat. Don't settle for polyester thread.
And finally, you need a heavy-duty sewing machine to handle this. I heartily recommend the Sailrite LS-1 or LSZ-1 (zig zag - if you intend to sew sails). They are expensive and worth it. We got ours used for less than half the new cost.
Tuesday, October 25, 2016
Solar Power, And More
We haven't heard much from Brian over at Dock Six. But he's been busy...
"But where we are going, Oh it hasn't fully, fully been told..."
-Ruby Velle and the Soulphonics
So, where were we?
Right: Boat is launched, boat is sinking, boat stops sinking, yadda yadda, Karma glides into her slip with no further drama.
With one boat launched successfully, it was on to the rest of the fleet. With a little help from the crew of Boats....
...we got our commuter dinghy, Chameleon, to the marina and into the water.
Then, we tackled Ereni, giving SWMBO's Bluenose a quick and dirty makeover... and a black nose in the process, to cover some of that quick and dirty.
Ereni is due for some serious hull refitting this winter- the brightwork needs to be brightened, the hull needs to have some blisters ground/filled/faired, and then we'll refinish the deck and topsides. But, we think we'll keep the nose treatment, and add some nose art- SWMBO and I agree we both kinda dig the vintage "rat rod' vibe.
Over the two full years we've lived with, and aboard, Karma, we've developed a pretty good idea of our wants and needs, and have fulfilled many of them along the way...
... and created new ones.
Our reefer install has been a well-received luxury, with an unintended consequence - power insecurity.
We have 3 40w solar panels that live on top of our bimini, feeding a single Group 24 house battery and a Group 24 starting battery, also charged by the 35 amp alternator on the inboard diesel. Last season, this system proved sufficient....
... barely.
If the solar panels underperformed for more than a day, some motorsailing was required to top up the batteries. We were careful about energy usage, charging electronics only during the middle of the day, being judicious about illumination, vhf and instrument use, etc. and never really had a power crisis...
But still....
This season, I made the decision to add more power and more power storage. Here's the plan: add another 100w of solar power, in the form of a semi-flexible 100 w panel installed on the dodger, then combine the 2 Group 24 batteries already onboard into a two battery house bank, and add a third Group 24 battery for starting, locating it just aft of the transmission in the engine bay. Next year, we will replace the group 24 house bank with a pair of 230 amp hour 6 volt GC-1 golf cart batteries, if we find that the 160 amp hour capacity of the house bank is not enough We decided to isolate the starting battery from the charging circuit- we opted to install a Xantrex Digital Echo Charge.
To quote the manual:
The Digital echo-charge automatically switches ON and OFF, charging a starter or auxiliary battery without affecting the main house battery bank. The maximum charge current is 15 amps when the starting battery is 1/2 volt to 1 volt DC less than the house battery... When the input voltage is 13.0/25.5 volts DC or higher, echo-charge automatically switches ON. The LED glows a steady green. When the input voltage is lower than 13.0/25.5 volts, the echo-charge automatically switches OFF, and the LED blinks green. The output voltage of echocharge is limited to 14.4/28.8 volts. When it reaches 14.4/28.8 volts, the charge current will decrease, maintaining a float condition."
So, I bought a bunch of obscenely priced cable, less obscenely priced wire, a battery and assorted electrical parts and pieces and tools and stuff and dug in, on the hottest day of the year....
... and everything largely went together better than I expected....
.... once I pretty much gave up on the original plan.
I cut and stripped and crimped new cable to wire the existing batteries in parallel...
...and that is pretty much where the original plan ended.
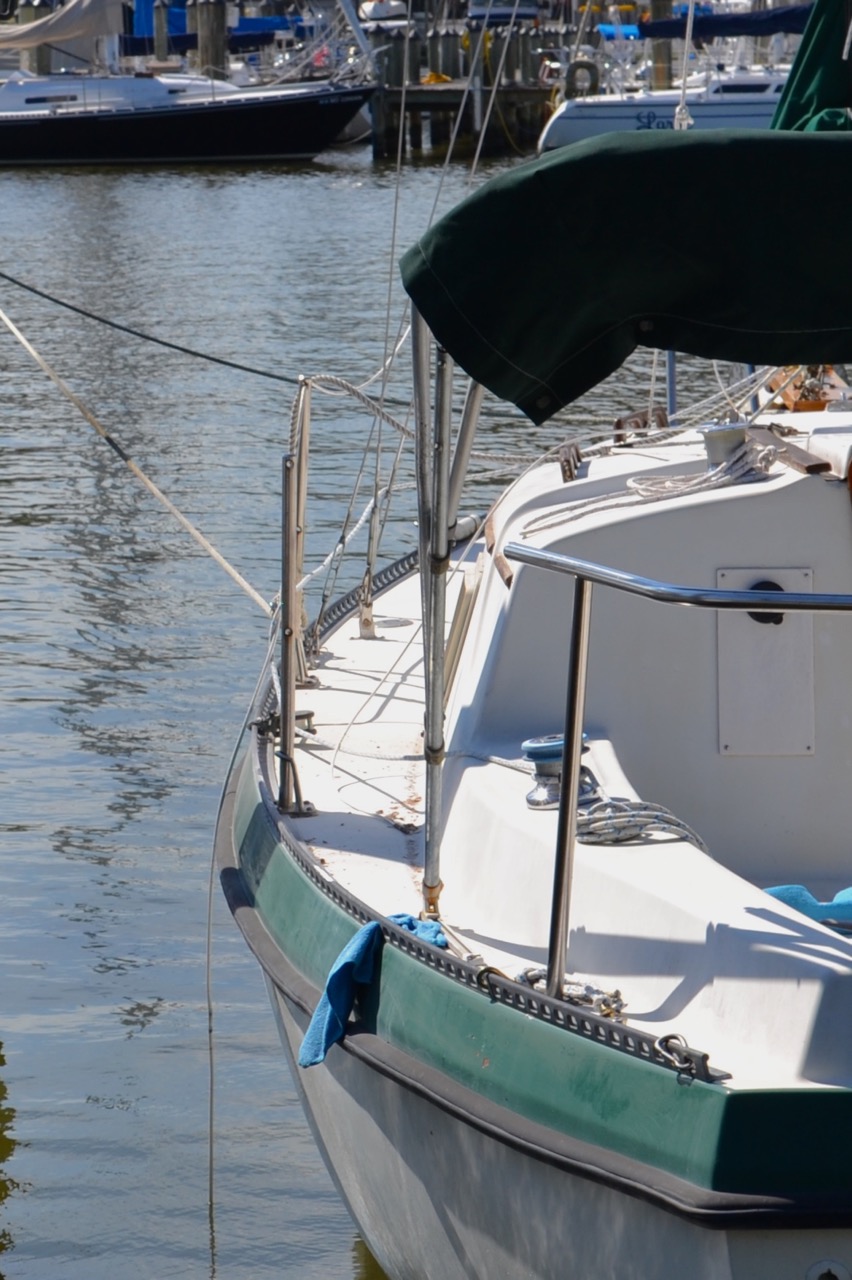
A "semi-flexible 100w panel installed on the dodger" became a semi-flexible 100w panel mounted on the foredeck. temporarily laying the panel on top of the dodger and measuring output demonstrated that there was just too much shading for the panel to generate anywhere near it's potential output. Because of our boat's design, and our usage, the foredeck gets little traffic, so I decided to see if the "you can even walk on it' claims about semi-flexible panels were true.
The install was pretty straightforward, once I wrapped my head around drilling 3/4" holes in the deck. An hours worth of work saw two of the aforementioned holes drilled, some wires run, and the panel fastened to the deck with, and all fittings sealed with, 3M 4200.
The new panel got a new charge controller, to complement the existing bimini bank charge controllers, then the controller output for both the bimini solar bank and the foredeck solar bank were driven to a distribution block and thence to batteries...
...Which were not happy at all.
Note to self: always check polarity before connecting 100 w panel to new charge controller.
Then check it again.
Then check it again.
I didn't, and wired the panel to the charge controller backward, and didn't realize my error for 48 hours.
I bought a new charge controller, and now the batteries happily charged away... but wouldn't hold a charge. Well, 5 year old lead acid batteries are due for replacement anyway, so "Next year, we will replace the group 24 house bank with a pair of 230 amp hour 6 volt GC-1 golf cart batteries" became "TODAY we will replace the group 24 house bank with a pair of 230 amp hour 6 volt GC-1 golf cart batteries."
(Note to those of you playing along at home: Golf cart batteries are about the same width and length as Group 24 batteries...but about twice the weight. Getting them up onto the boat, then down into the boat, then down further into the battery bay, was an exercise, that in retrospect, would be less danger-filled if one is wearing steel-toed boots, not flip-flops.)
So, new batteries go in, cabling is connected, and power flows! Meanwhile, it becomes apparent that "add a third Group 24 battery for starting, locating it just aft of the transmission in the engine bay." is a non-starter. So, the new batery gets located slightly farther aft, under the aft cabin berth. The Xantrex Echo Charge install was a breeze- the instructions were clear, the manual was well-written, and all of the supplied bits and bobs were of good quality.
Was it worth it?
Yep.
We now generate more power than we can use and store most days, and have had no problem keeping ahead of our loads even during our very hot July, when our refrigerator was running much more often than it's typical 30% duty cycle.
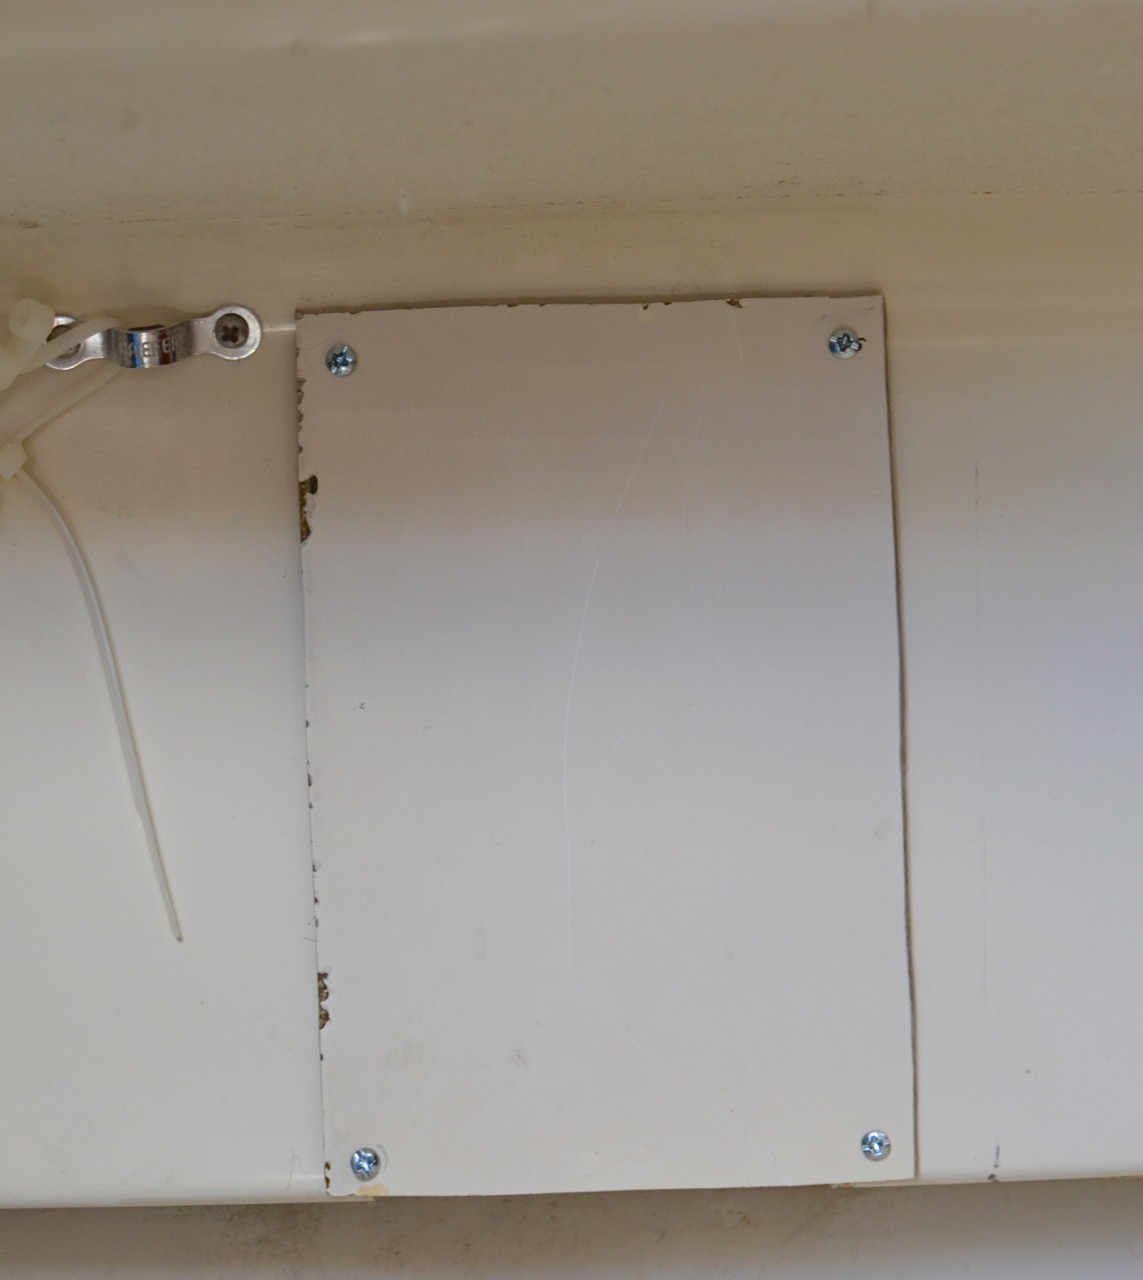
As we have realized the need for more power, we also have been grappling with our need for more space. the S2 8.0C is a cleverly designed boat, pulling 26 feet of accomodations out of a 26 foot LOA hull... but that means that on-deck and cockpit storage is non-existent. Coaming pockets would be a big help for line management- sheets would no longer be all over the cockpit benches and underass, an uncomfortable proposition during a crash tack. I did some measuring, found a pair of fire extinguisher pockets in the clearance rack at a local chandlery, and a little mahogany and varnish and cutting larger holes in our boat and screws later...
Our cockpit is slightly more organized.
Also seen in the above picture, behind the compact sportsdawg, you can kinda spy that scrap mahogany was also used to craft risers, to raise the height of the bimini slightly.
Below, little has changed, other than cushions that are 1" thicker and comfier, and new Low-Buck back cushions and throw pillows have been added:
We lucked out at our local grocery store (I shit you not- the grocery store) and found outdoor furniture cushions and pillows in the right colours, and amazingly, the right size, for half price.
Life is good, and more comfortable than ever...and the sailing's not too bad either.
Thanks for having a read. Pass the word- Please "Talk the Dock!"


Monday, October 17, 2016
Put the ‘Fun’ in Functional Storage with this Cheap Trick
Over on s/v Galapagos Michael & Melissa continue making their boat into a home...
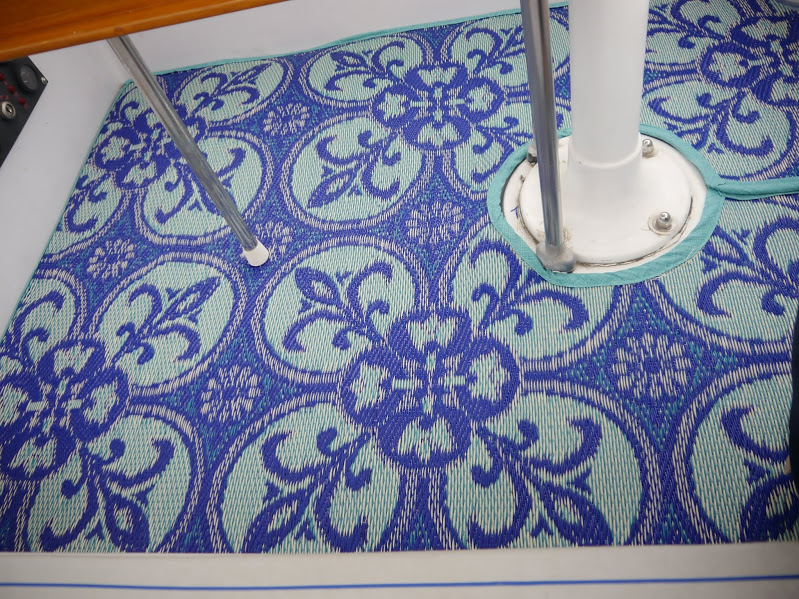
I was complaining of being bored the other day. We won’t be moving aboard until at least the end of the summer, and we don’t get to have a long cruise this year because of Mike’s work. That pesky annual leave thing is going to be a thing of the past soon enough, so we’re content to wait out the remaining months doing a little bit here and there to move forward with our plan. The house and yard are in maintenance mode, my practice continues to slowly wind down. I’m fine with living in the liminal space, as a rule. But finding myself kind of wandering aimlessly around the house trying to look busy just isn’t my style. It’s like don’t know what to do with myself. I decided I needed a few small but useful projects for the boat, starting with that cool cockpit mat.
The rumpus room in the v berth is taking shape and we will be using this cabin to watch movies and TV shows we like. To move forward with that plan, I sorted and stored our DVD collection, throwing out all the colorful plastic containers and storing each DVD in its own plastic sleeve. I then labeled and stored them in nifty snap-locking containers I bought at JoAnn Fabric for 8$ apiece. I know many cruisers store hundreds of movies on thumb drives and maybe that will be in our future. For now, I don’t have the patience for that. This was quick and easy and finding what we want will also be quick and easy.
You’ll be glad to know that the aft cabin project is moving along. We took possession of the finished mattresses this week and I carted them down to the boat to see that they fit before getting them covered. It’s probably overkill, but since I didn’t have any old foam to take in to use as patterns ( I had made my own paper pattern) I just wanted to eyeball the fit before covering. They fit beautifully and allow us to sleep any old which way. The bed is going to be very comfortable and will last for 20 years if we protect them. The next task is to bring them home so I can cover them in that PUL fabric, then take them for their final upholstery. After that, I get to make custom covers and sheets. Won’t that be a creative undertaking! I do believe our goal of having a totally comfortable, sleepable aft cabin is coming to fruition.
The trusty Brother sewing machine has been dusted off and I am rediscovering my love of sewing. As we are now envisioning being able to live with that aft cabin, it was time to turn my thoughts to how we would store our clothing there. We have one hanging locker, a small set of drawers, and a small drawer under each side of the bunk. There are shelves along the hull on each side and I’d like to keep them uncluttered. I would like to keep both clothing and bedding in that cabin and I wanted that storage to be easy to access because otherwise I am tempted to leave my clothes laying around draped decoratively on doorknobs and corners of objects. I know it’s a long shot, but we both really want to keep a neat and tidy look in our boat. It just feels better that way.
I had been considering colorful soft sided baskets to keep clothing in but where to put them was in question. Instead I opted to make fabric bags that look like pillow shams of different sizes and shapes. I bought 1.5 yards of this super cute owl outdoor fabric on sale for 12$/yard. Then I found a 3$ remnant of orange fabric that matched. I purchased thread, some velcro, and a set of nylon upholstery zippers. Total cost for materials was about 40$. For that price, plus some fun time at the sewing machine, I have a selection of sizes of storage containers for soft things like bedding and clothing: 2 large for blankets and such, two standard sized bolsters for shorts, tops, bathing suits, and three additional sizes – 7 storage units in all. These can be stored right in sight on the beds as pillows. The fabric is water repellant and UV protected. Plus…owls! Seriously, you can fit a ton of stuff in these things. Functional, practical, and fun!
Mike is working on a couple of interior projects that he will write about soon. Our next joint project will be putting shelving in most, if not all, of the hanging lockers. We have a generous amount of hanging locker space, most of which is completely wasted because we don’t have that many clothes that hang. We already know that this job is going to be a pain in the hind end, so if you have any shortcut tips on how to make it easier, do tell. We want the shelves to take full advantage of all space, so that means they will have have to be custom cut.
Oh, and guess what! We get to go on a short cruise over the Memorial Day weekend. We’ve got friends to stay with Skippy, so Thursday night we are out of here! Yay! We are both so ready for that.


Tuesday, October 11, 2016
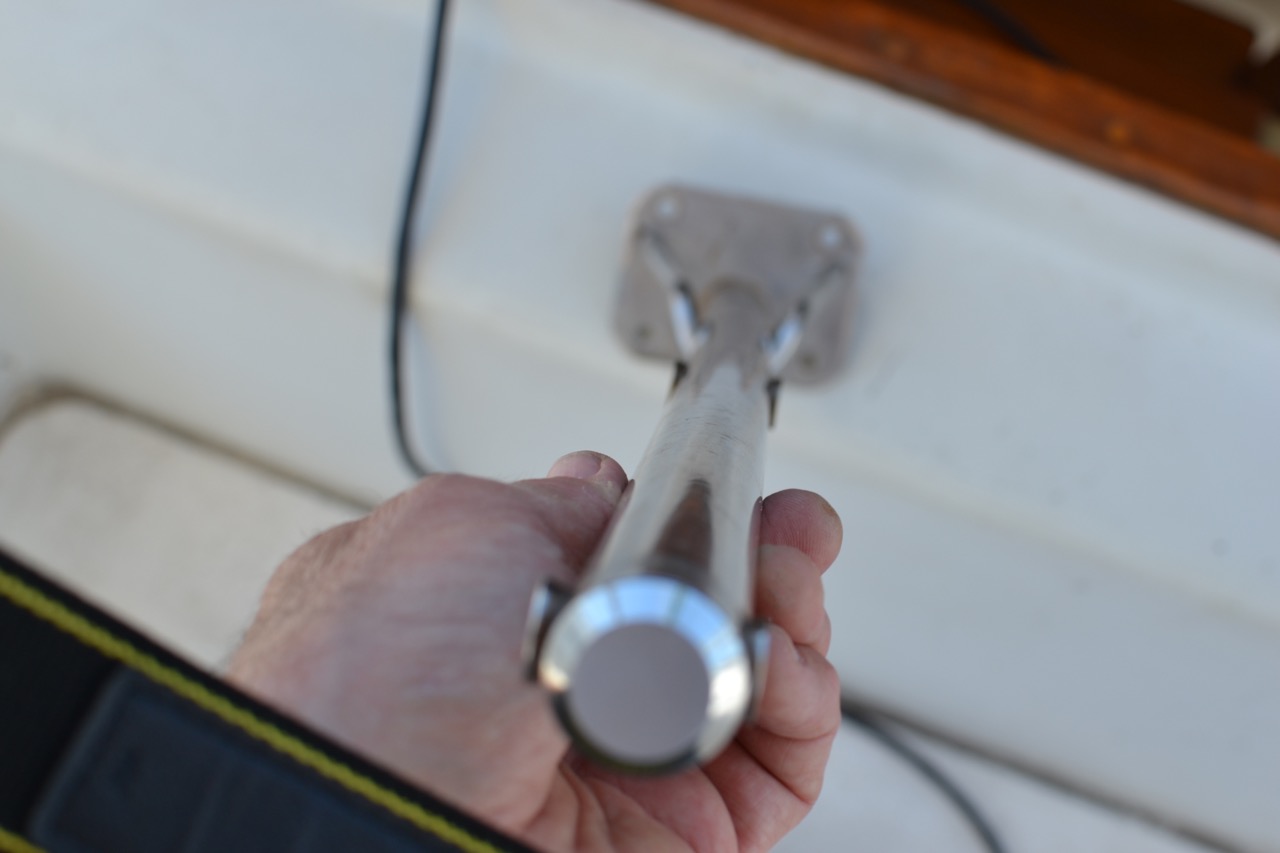
Boat Hooks
Over at Sail Delmarva, Drew has some comments on that ubiquitous tool: the boat hook
Six months ago I was asked to review boat hooks for Practical Sailor Magazine. Everybody needs one. How dull I thought; I've never bought one, not in 30 years. I always find them by the dumpster or on the beach, and have a stack of "spares" at home that I haven't used yet. Keeps me from getting to choked up if someone drops one. Most days we just drop it in the middle of the tramp--I've never lost one from there, even in heavy going, though I generally tie it down when it starts banging into things.
Everybody does need one.
And low and behold it was more fun than I thought.
- The most expensive, heavy duty model was the first to fail in the field.
- Most would not allow me to pull with full strength without breaking.
- The company that urged us to test, feeling theirs were best, was absolutely right.
- I still like my 20-year-old pole for daily use.
How about this classic crabber's hook? It's been hanging on the wall in my daughter's room for years, after I found it tangled up in my docklines after Isabel (I left in on the dock for 2 weeks, but no one claimed it). In fact, it was perhaps the best balanced and most suitable for all-day heavy use. No surprise.
The old guard vs. the new kids. Second from the left is my every-day pole.
I wonder who got the bright idea that a boat hook makes a good brush pole (I'm not picking on West Marine--they are ALL like that now)? All it does is snag lines. Unfortunately, about 1/2 of them won't screw into a brush because part of the hook is in the way. And nothing can be screwed into the "take" part of the hook anyway, so what's up with threads there? Worst of all...
... the bulbous padded tip makes them useless for snagging a line off a piling or dock...
Which all of the old-school poles can do easily, but only ONE of the new poles. Not an improvement in my opinion.


Tuesday, October 4, 2016
Canvas - Round Two Completed!
This post originally appeared on Windborne in Puget Sound
Round two of cockpit canvas replacement - the roof section of the dodger - is done! Here's how it went:
Having completed the actual construction of the panel, I needed to create the attachment to the "windshield" portion of the dodger. The original canvas had the roof and the windshield sewn together, making a hugely unwieldly thing, almost impossible to handle with all the compound curvature and the easily damaged vinyl. As I reported last time, I made a design decision: The new roof panel would be separate, and attach to the windshield via Common Sense fasteners.
So, how to locate those fasteners? For a taut roof panel, the fasteners need to be in the exact right spot, and further, the eyelets and male portions need to end up in registration with each other. How to do this? I solve problems like this as I am falling asleep and letting my subconscious work on them. This is the procedure I came up with:
And man oh man is it good to see the old faded canvas as a jumbled up pile (and eventually in the dumpster) instead of gracing the cockpit!
Now there is only one more roof panel to make - the center section. This is much simpler to construct, being a single panel of cloth with only edging installed. Ah, but exact sizing and zipper placement are critical for a taut installation. Gotta think about this...
 |
| Topstitching the aft tail seam |
So, how to locate those fasteners? For a taut roof panel, the fasteners need to be in the exact right spot, and further, the eyelets and male portions need to end up in registration with each other. How to do this? I solve problems like this as I am falling asleep and letting my subconscious work on them. This is the procedure I came up with:
- Mark, on the tuck back tail of the new roof panel the desired location for fasteners - this portion will show in the final installation
- Place the new roof panel in place, carefully aligning the sides, and positioning the front seam on the front surface of the tube, as designed. You'll note that the old panel seam (built by a professional) missed the tube by as much as an inch in the center.
- Insert T-pins at the marked locations. By pushing them all the way in, they made a good solid temporary connection because the vinyl in the windshield gripped them, allowing tension to be applied so that wrinkles could be worked out. Adjust the T-pin locations in the windshield as required (keep the pin locations in the tail as marked since, again, these will show) and reposition as needed for a good fit everywhere.
- Mark exactly the T-pin locations on both the tuck back tail, and the windshield. To mark the windshield, pull a pin part way out, giving enough room to work under the tail, but keeping the location established. Since this is all done with the existing canvas all in place, it is easy because the old roof panel is keeping the windshield tensioned and in place.
 |
| T-pins for alignment |
- Pull the new canvas off
- Punch holes in the windshield using Sailrite's Common Sense punch... this is the only way to do this, given that 4 layers of Sunbrella and the vinyl need to be cut. Jane was inside, with a buck made out of a 6" piece of railroad track with a piece of Starboard taped on as the working surface. Without something to work against, the punch would not have worked.
- Install the eyelets in the windshield.
 |
| Holes punched and eyelets installed |
- Install the male portions of the fasteners on the tuck back tail of the new canvas. Getting the male fastener mounting holes in the right place cannot be done by eyeball. I made myself a jig out of an old blank non-silvered CD, by drilling holes at the correct spacing and then marking the outline of the fastener and horizontal and vertical centerlines. This can then be held in place on the marked T-pin location and a pen can be used to mark the rivet locations thru the holes in the jig. (Sailrite? Are you listening? You need to sell something like this...)
 |
| Homemade drilling jig |
- The moment of truth: Test fit. Will everything work? In order to get a true assessment, I disconnected the rear of the old canvas from the rear tube and installed the new canvas completely. Since the old roof canvas was still attached to the windshield, it hung down inside. Yup, it looked good.
 |
| Test fitting |
OK, punching the holes in the windshield was a commitment, but not a serious one... Eventually tho, it was time to make the big jump, and say "I do." So I cut the old roof panel off of the windshield and voilà, c'est fini!
 |
| Done! |
And man oh man is it good to see the old faded canvas as a jumbled up pile (and eventually in the dumpster) instead of gracing the cockpit!
 |
| Good riddance! |
Now there is only one more roof panel to make - the center section. This is much simpler to construct, being a single panel of cloth with only edging installed. Ah, but exact sizing and zipper placement are critical for a taut installation. Gotta think about this...
Subscribe to:
Posts (Atom)


