
Some amazing photos will be present in this post but maybe not for all public; once the Vahine has left the surrounding of the boat, well in my dream… With that said I was left to ponder on what could be done during this sunny day. so let’s “dive” in one of the most interesting subject of all: oil and seals on a SD20 Yanmar saildrive. Please stop all the applause, I know you are excited but one day somebody will do a Google search and will find the solution to a problem a few years ago we couldn’t!
For the rest it’s just a reverse job and 5 liters of gear oil to complete the job.
Tuesday, July 19, 2016
Changing the seal on a SD20 Yanmar saildrive
It has been said (often) that cruising is working on your boat in exotic locations. And while that is an overly pessimistic assessment, certainly cruising cannot be entirely a vacation from maintenance. While Valerie is away, Laurent on s/v Letitgo gets busy on one of those necessary tasks...


Tuesday, July 12, 2016
Corrosion, Corrosion
This post originally appeared on Windborne in Puget Sound
For a boat on salt water, corrosion is an omnipresent demon.

Even inside. This is the spout on our galley sink which is piped to a saltwater foot pump. And to the cooling water discharge from our 12V refrigeration system, meaning that it has saltwater flowing out of it whenever the refrigeration compressor is running, as a telltail. Look closely at the inside of the right-hand bend... yup, the aluminum has corroded thru. I don't understand this... aluminum is supposed to be reasonably proof against saltwater. The pipe is clamped to the sink in a plastic fixture, and is connected below the sink via vinyl tubing... ruling out galvanic corrosion. The entire refrigeration system is 12V, so stray 110V current cannot be an issue. The compressor is powered by an external motor thru a V-belt.
But.
The motor and compressor are mounted on the same metal plate, and there are some pressure switches to control the motor mounted on the compressor.
Is that enough to cause stray current corrosion, tho there is no direct connection between the refrigeration unit and the aluminum tubing except via the saltwater itself?
Or is the corrosion simply the result of flowing saltwater washing away the protective oxide layer on the inside of the aluminum tubing? I am very interested in what the net.wisdom has to say about this...
Regardless, this is the second spout that I have installed there, and they have gotten ridiculously expensive. I am not planning to buy a third one.
Instead, I bought some thin-gauge 316 stainless tubing from Online Metals. Now, if you've ever attempted to bend tubing, and especially thin-gauge tubing, you know that it requires special tooling to prevent kinking. The tooling constrains the tube so that it can't collapse and kink while it is being distorted. I looked up what a tubing bender for 7/16" tubing costs on the Interwebs, and Oh. My. Gosh.
OK, a Plan B is needed.
It is also possible to prevent collapse/kinking if the tubing is filled solidly with something incompressible. Apparently some people have used ice (fill with water; freeze), but I was concerned that I'd never get the tubing bent before the ice started to melt. This is where Wood's metal comes in.
I just happened to have some.
All that remained was to reheat the bent tubing in another boiling water bath to remelt the Wood's metal and pour it out.
And since our galley sink has two of these spouts (one for salt water and one for fresh water, foot-pumped from the tanks), I made another spout. Gotta be symmetrical, don't you know.

A little boat yoga, and the galley sink looks better than it ever has!
For a boat on salt water, corrosion is an omnipresent demon.
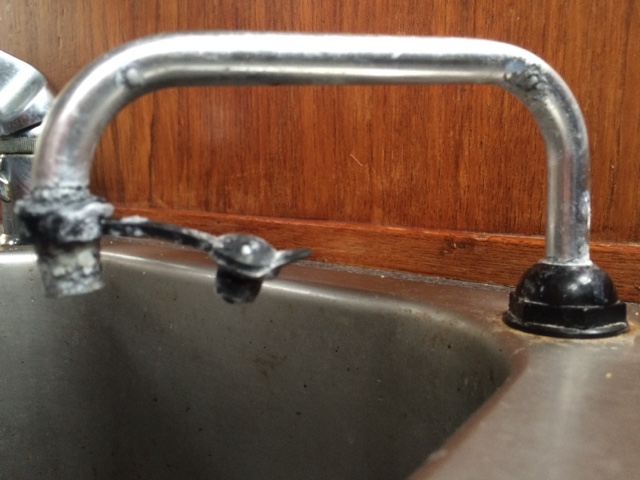
Even inside. This is the spout on our galley sink which is piped to a saltwater foot pump. And to the cooling water discharge from our 12V refrigeration system, meaning that it has saltwater flowing out of it whenever the refrigeration compressor is running, as a telltail. Look closely at the inside of the right-hand bend... yup, the aluminum has corroded thru. I don't understand this... aluminum is supposed to be reasonably proof against saltwater. The pipe is clamped to the sink in a plastic fixture, and is connected below the sink via vinyl tubing... ruling out galvanic corrosion. The entire refrigeration system is 12V, so stray 110V current cannot be an issue. The compressor is powered by an external motor thru a V-belt.
But.
The motor and compressor are mounted on the same metal plate, and there are some pressure switches to control the motor mounted on the compressor.
Is that enough to cause stray current corrosion, tho there is no direct connection between the refrigeration unit and the aluminum tubing except via the saltwater itself?
Or is the corrosion simply the result of flowing saltwater washing away the protective oxide layer on the inside of the aluminum tubing? I am very interested in what the net.wisdom has to say about this...
Regardless, this is the second spout that I have installed there, and they have gotten ridiculously expensive. I am not planning to buy a third one.
 |
| Two pieces of 7/16" stainless tubing |
OK, a Plan B is needed.
It is also possible to prevent collapse/kinking if the tubing is filled solidly with something incompressible. Apparently some people have used ice (fill with water; freeze), but I was concerned that I'd never get the tubing bent before the ice started to melt. This is where Wood's metal comes in.
 |
| This is Wood's metal - it is a eutectic alloy of 50% bismuth, 26.7% lead, 13.3% tin, and 10% cadmium by weight. It melts at 158°F |
 |
| Wood's metal foundry |
For a foundry, I purpose-bought a can of tomato paste (69¢), and froze the tomato paste, retaining the can - just the right size. I put it in a pan with some water and brought the water to a boil - 212°F, or about 50° of superheat. I then poured the molten metal into the tubing (I had previously blocked one end of the tubing by pushing it into a wine cork - we seem to have plenty of these). I then immediately plunged the filled tubing into a container of cold water - I had read that quenching creates a fine crystal structure in the Wood's metal, making it more ductile (read: easier to bend).
OK, now to bend. I created a bending jig and lag-bolted it to a 4x4 in our shed:
 |
| Homemade bending jig |
Yup, it bent just fine - no kinking, no collapse.
 |
| Recovering the Wood's metal |
And since our galley sink has two of these spouts (one for salt water and one for fresh water, foot-pumped from the tanks), I made another spout. Gotta be symmetrical, don't you know.

 |
| Done (Clever camera angle conceals dirty dishes in the sink) |
Tuesday, July 5, 2016
Where Do The Buses Go?
Jeff and Anne continue their full refit of s/v Pilgrim. Living around and on boats for a long time, with a solid engineering understanding of what makes a good one (and a bad one...) has really informed Jeff's work on the boat. If you'd like to see how a boat *should* be wired, here's a glimpse into the work. But you'll need to read the rest of Jeff's posts to get the full picture.
In September 2015, I posted to updates about converting Pilgrim’s 12V Positive Bus into a custom ANL Fuse Block...
Over the winter we installed the custom 12V positive fuse block and the corresponding 12V negative bus.
For those out there asking what is an electrical bus? An electrical bus is simply a distribution or consolidation point along the path the electricity takes to the device the user wants to power. If the electrical wires are like train tracks snaking around a country side then the electrical buses are the train depots that allow people on the main line to switch trains and take side trains to smaller communities and vice-versa on their return trip. The fuses ensure that the outbound trains (positive wires leading away from the batteries) to not become dangerously over crowded with passengers.
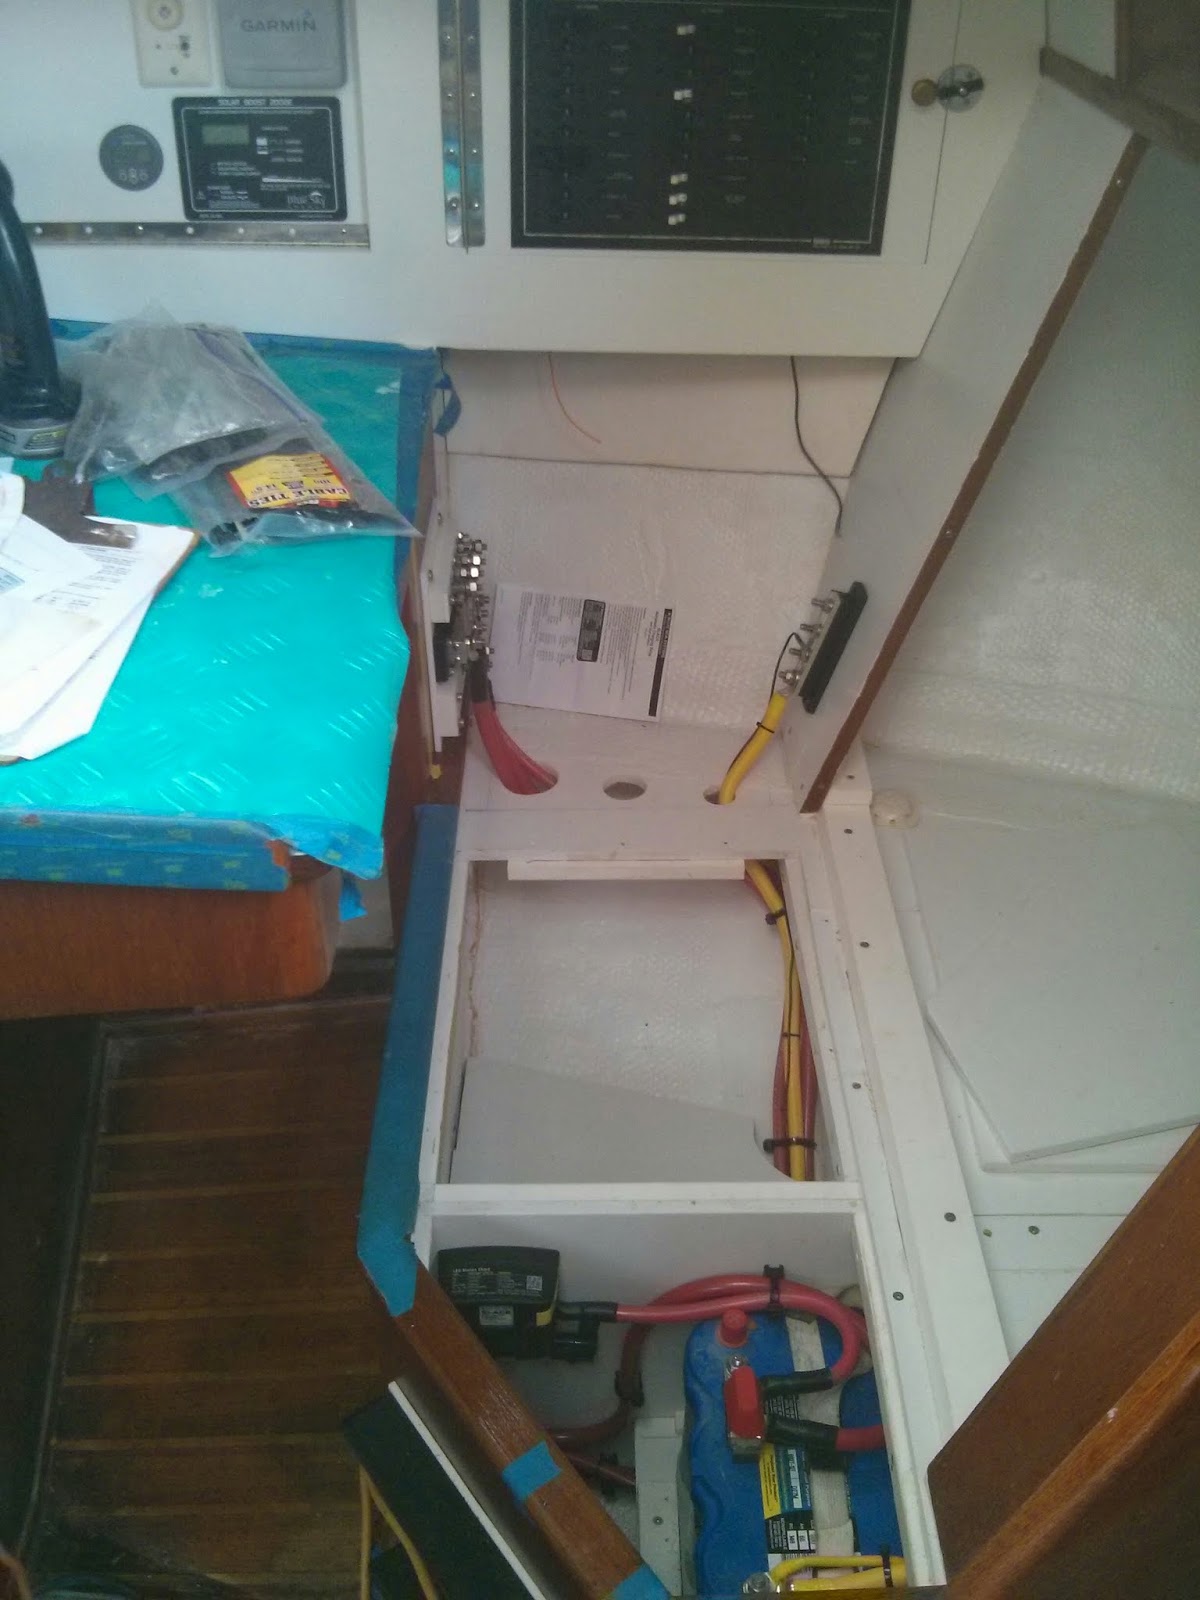
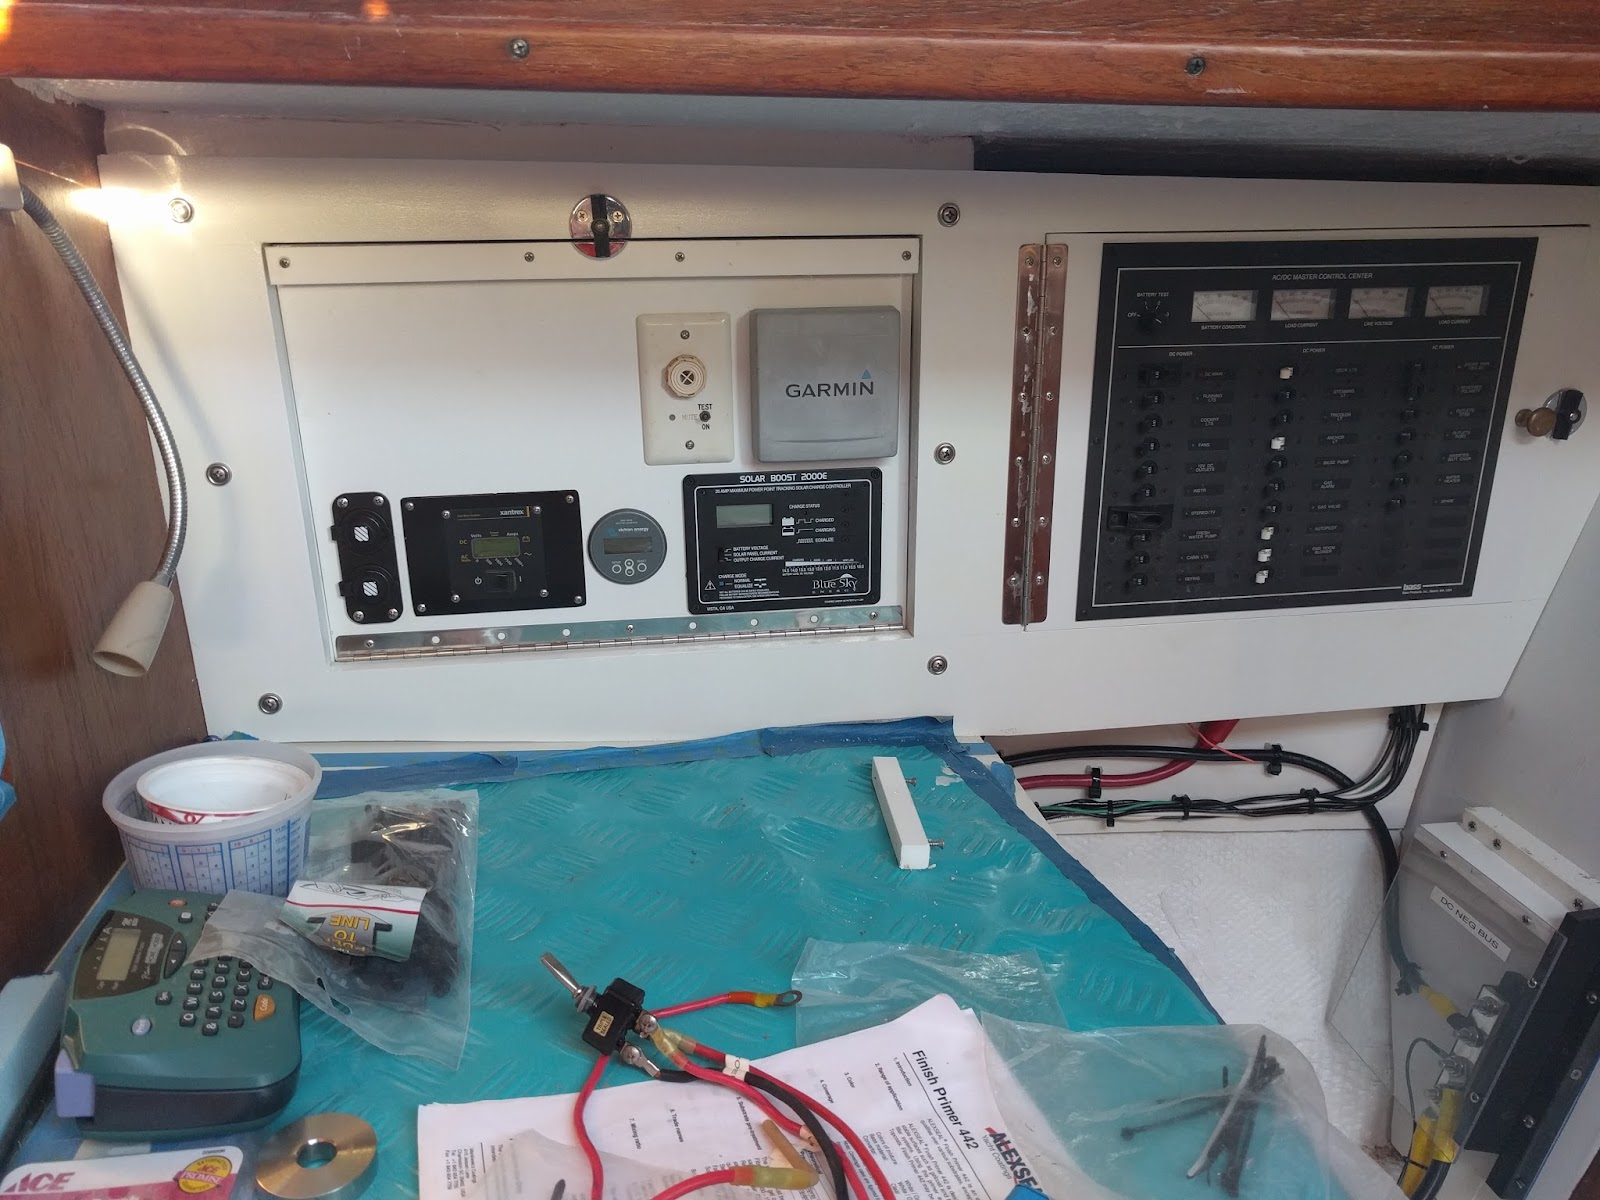
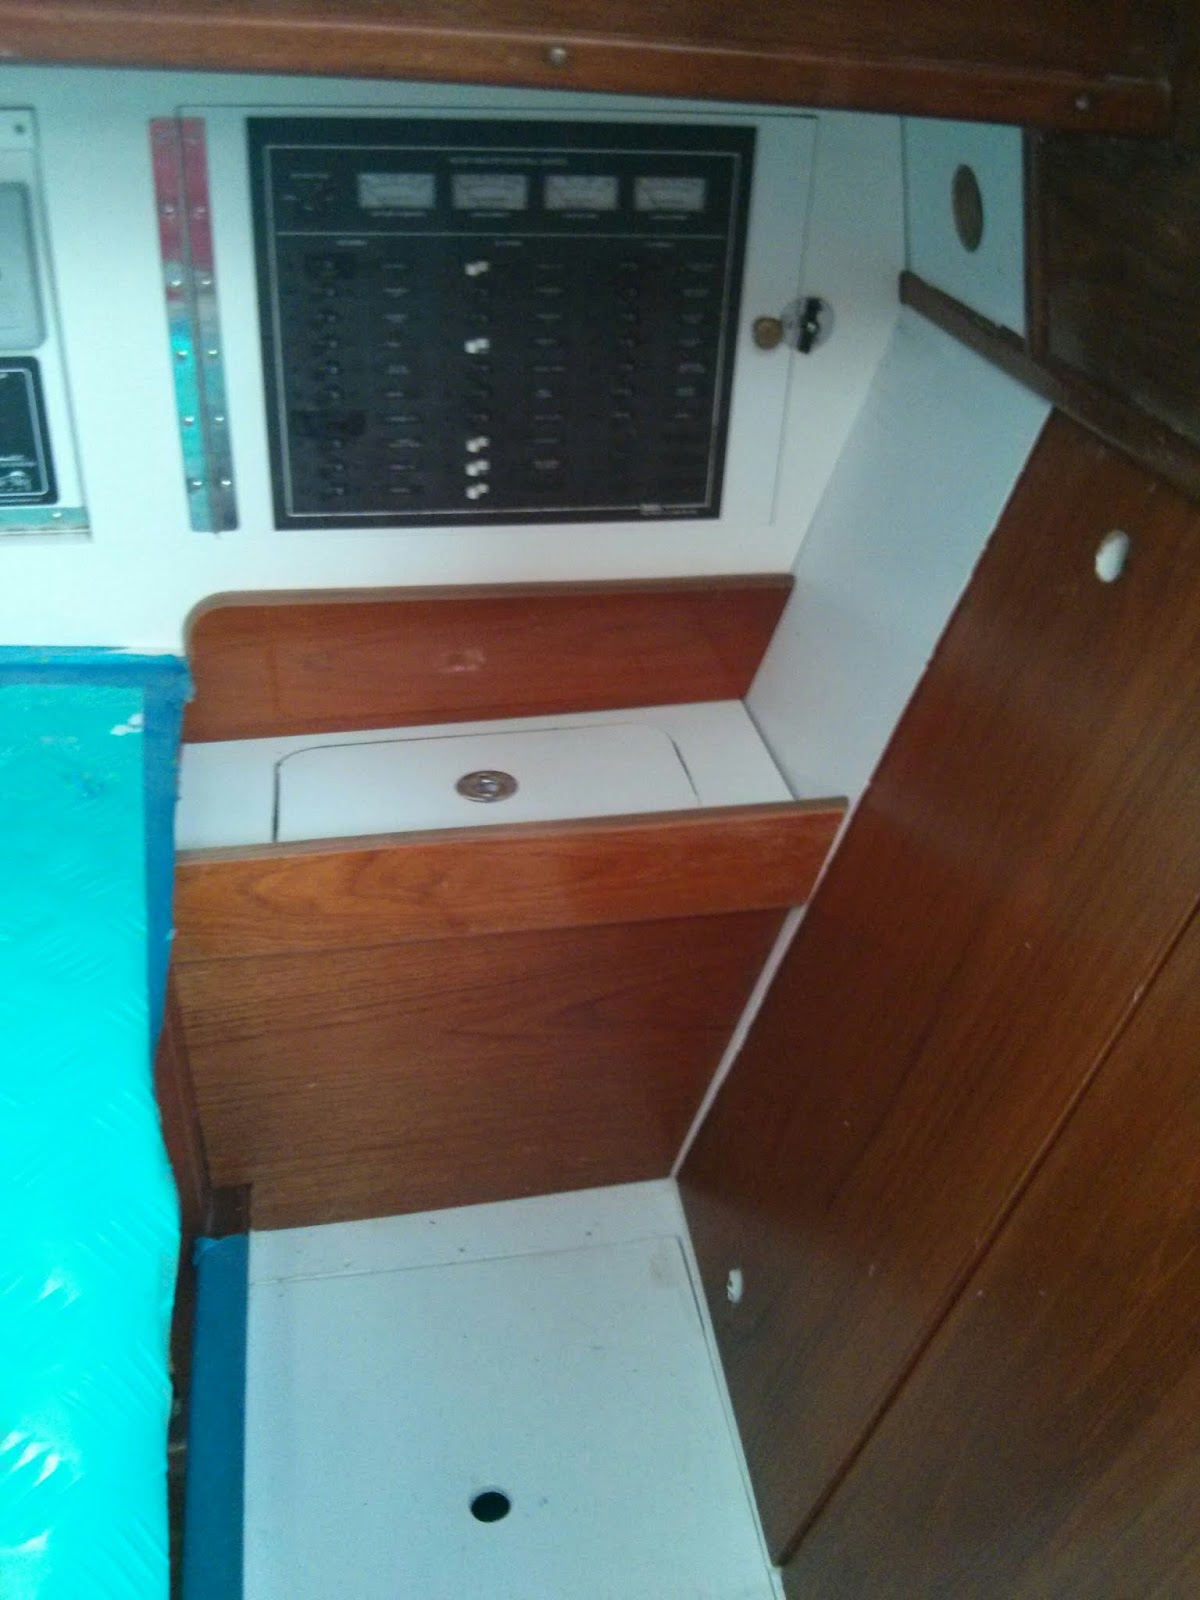
Consolidating the electrical wiring components around the nav station is a priority for us.. Installing the buses below the electrical panel offered a centralized location that provided plenty of room for the large gauge wire runs.
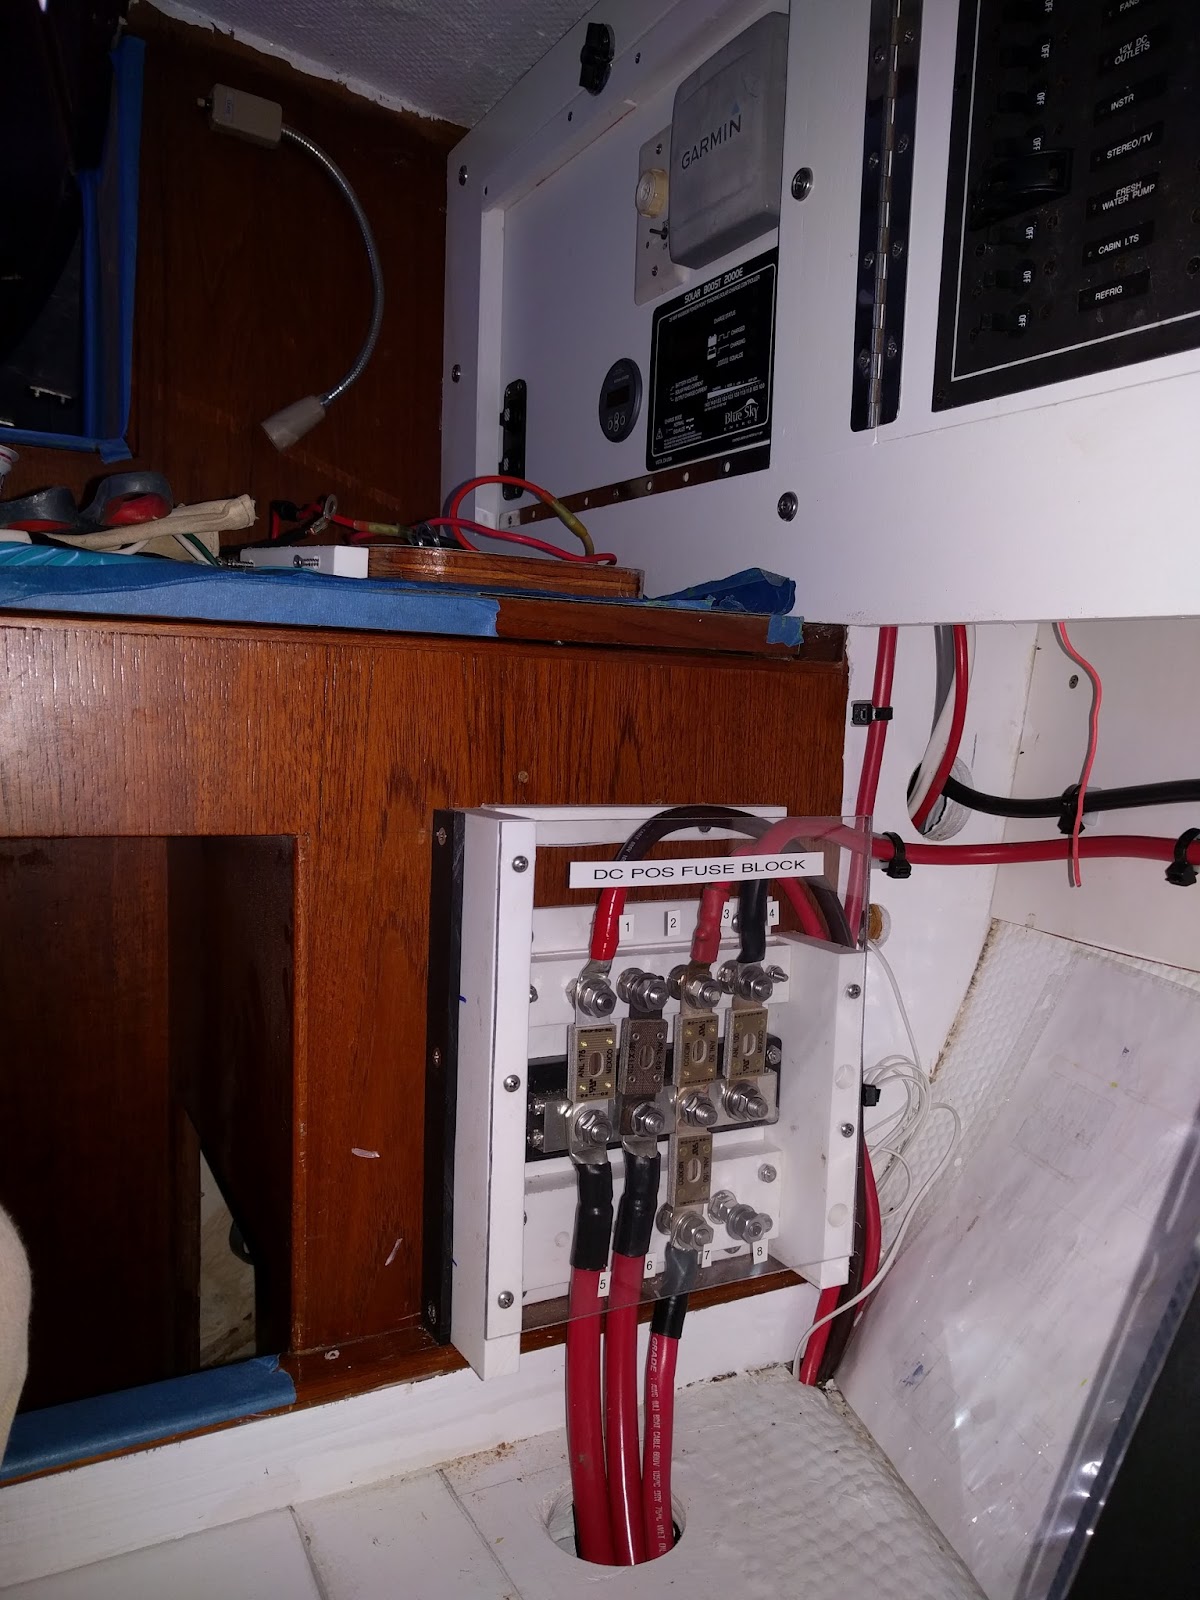
Pilgrim's 12V Primary Buses installed below the electrical panel.
Early on in our refit we chose to eliminate the M382’s quarterberth in favor of additional storage space. Eliminating the berth allowed us to create a seat back at the nav station. The middle two panels of the seat back are removable. The outboard seat back panel is fixed. We installed the negative bus on the fixed vertical seat back panel and the positive fuse block / bus opposite along the original nav station structure.
To prevent accidental shorts in a busy area, I fabricated starboard and plexiglass covers for the two buses.
12V Primary Positive Bus / Fuse Block with plexiglass cover.
12V Negative Bus at lower right in image.
The final step was to create a functional armrest to house the unsightly wiring runs and electrical components.
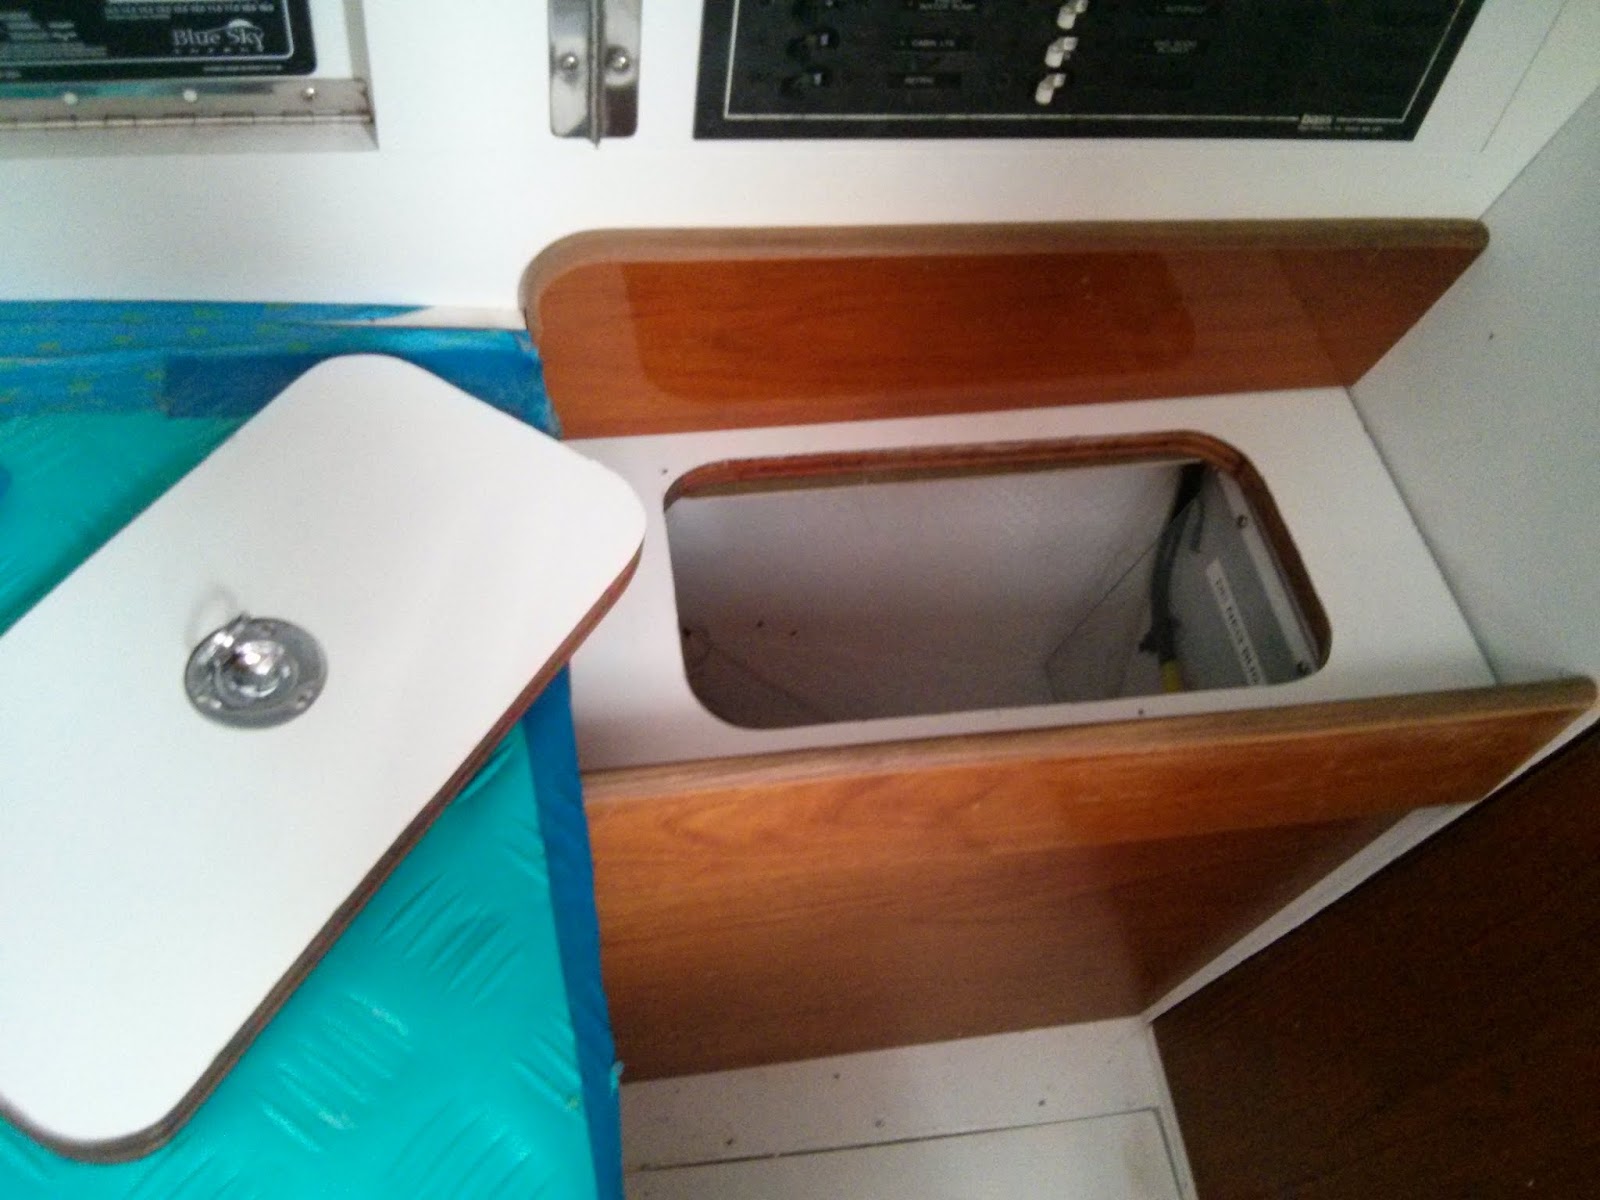
New arm rest at nav station. The armrest has a removable panel to allow for storage and quick access to the fuses.
Removable panel in arm rest allows for easy access to fuses and storage space.
If additional access is necessary for repairs or upgrades the armrest is designed to easily remove the vertical wood panel via four screws.
Additional photos and notes can be found in our on-line albums.
Re-wiring Pilgrim Photo Album
Nav Station Refit Photo Album
Will post more updates on Pilgrim’s electrical system soon.
Tuesday, June 28, 2016
Navigating Foamy Seas of Fabric
Up in Alaska aboard s/v Wayward,work turns from the rigid determinism of wood to the flexibility of fabric...
That's some chalkboard, "Einstein"!
Every point on the mollusc is treated as a space-point, and every material point which is at rest relatively to it as at rest, so long as the mollusc is considered as reference-body.From Relativity by Albert Einstein
Navigating Foamy Seas of Fabric
To those of us used to the Newtonian absolutes of 'rigid' plywood, turning to fabric is to enter the undulating reaches of Einstein's relativistic universe.
Fabric is visibly flexible. Roll out a strip of it, and it may lay straight. Or it may curve like a banana, one way or the other. Or snake both ways. It can fold, hump and pucker, too, leaving its two dimensional plane. Hang an end over an edge, and it has the tendency to siphon itself to gravitational equilibrium. Fortunately, in the era of synthetic threads, we don't have to worry about shrinkage in the temporal dimensions!
Foam - at least the cushy sort - isn't much better.
To tame the mollusc, we need an external reference... in our case, the straight edge of a long-ish table in the caretaker's cabin. Line up one edge of foam or fabric with that (and keep it aligned) and smooth it flat, and we've imposed a reference edge and a planar surface. After that, it's just a matter of layout, cut, fold, and sew to the lines.
Of course, folding is something we seldom do to plywood.
Spatial visualization of flat stuff folding into shape tries the imagination. Some folks have developed it more than others. But really, unless you're a genetic sport, it starts out hard. Practice makes perfect. Like learning a new dance, the first attempts tread on toes. First one is a mind-bender; second is not half-bad; third a piece of cake.
Mostly.
As in all things, we looked for the KISS approach. No piping, fancy shapes, zippers (velcro, instead), etc.. We sewed a single join around the perimeters. At the corners, where excess gathers, we fold under as one would wrap a package in paper. Here and there we tack any floppy excess with thread and needle, or dart it out, as seems indicated.
A confused sea
Tips n' Tricks (from the Ignorant):
- Bobby pins can be used to secure hems for sewing... not as prickly as pins.
- Hot Melt Glue can often be used to tack things together... be sure to press the 'dots' flat before they cool!
- Woof and Warp (the long and cross threads in fabric) are freebie square and parallel... follow them and it's hard to go wrong.
- An Electric Knife cuts foam cleanly... the double bladed, turkey carvin' kind.
Dinette, cushions, left
Settee cushions behind
Folded Bunk (upside in), with ice blanket showing
Loose fit will snug up when finished with Hook n Loop
Salon Seats and Backrests:
These were all variations on a theme. Simple boxes in simple wrappers.
The only complication was that we wanted to use a second type of fabric for inboard faces. It was from SLACKTIDE's bunk, and we like to carry a bit forward from each boat. Also, we under ordered the blue nylon seconds by about a yard. 8/
Bunk:
Pretty simple in retrospect, but we burned a lot of braincells on this one.
First, our 60in cloth has to be joined to cover the 72in x 78in bunk. A longitudinal join, we figure, runs up where our sensitive upper bodies lie, like a miniscule bolster. A transverse join runs across our shins/calves, and seems much less intrusive. So that was our choice.
Our foam is open cell. Moisture travels downward and condenses at the first cool surface (the plywood bunk deck, in this case) and soaks the mattress from the bottom up. One semi-fix is to raise the mattress on a low lattice for airflow under, which evaporates and transports moisture. But also, we laminate a layer of close cell foam on the upper surface. This keeps moisture to the upper surface where it can harmlessly evaporate. Plus it firms the total foam, which we like for sleeping.
Next problem is that, to access the under-bunk storage, the bedding has to fold in half around the long axis. If the foam is a single block, this is AWKwaaaaard! But if we cut the foam into two blocks, then, if not compressed equally, we get a cliffy rift along the centerline.
Our solution was to cut the foam in two along the long centerline, then glue the close cell foam in a contiguous sheet to both surfaces, crossing the divide. We left the first foot to either side of the divide unglued.
Our cover unfolds to resemble a couple of bicycle panniers; two pockets topped by a flap that tucks between open and closed cell foam into that first, unglued foot.
The entire cover is made from a single strip 'scrolled' from one flap, down the divide face, across one bottom face, up the side face, all across the top face, down the other side face, across that bottom side, up the divide face and tucked between foams. End faces sewn together pillow-case style along the mid, end face (not shown). Whew!
The fabric and closed cell foam form a longitudinal hinge for folding the mattress over. Meanwhile, since it spans the divide, it eliminates that cliffy ridge. Result... works like a charm and comfortable!
Looks like we made harbor.


Tuesday, June 21, 2016
Cheap Boat Tricks – Cockpit Floor Mat
Please welcome new contributors Melissa and Mike, of s/v Galapagos, a 1975 47 foot Olympic Adventure ketch! For their first contribution, Melissa shows us a cheap and easy addition to cockpit comfort...
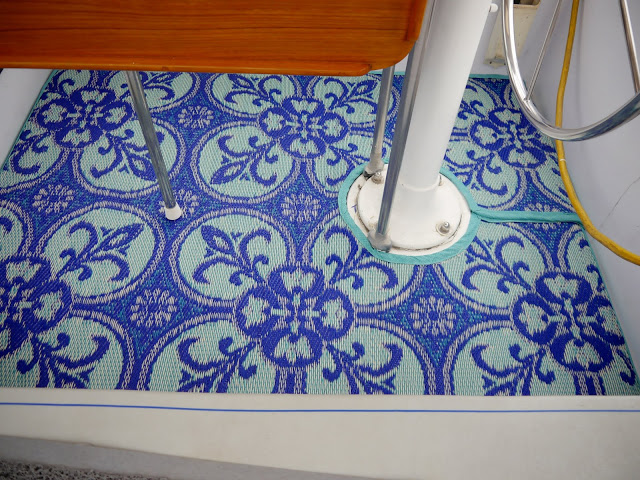
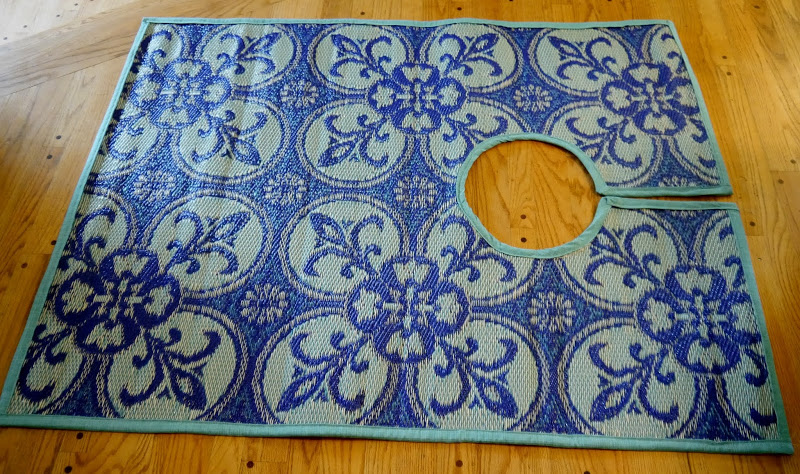
This little project has all the qualities that make a project satisfying for me: creative use of a material, hunting and gathering all the crafty pieces, long straight seams to sew, fairly low level of difficulty, and lots of colorful bang for less than 50 bucks. In this case, much less, only about $32 all in. Woo hoo!
Don’t ask me what I was doing in World Market because truly I don’t even know. I had just bought fabric for another project over at the fabric store and with time to kill I wandered in just to look around. That’s usually a dangerous thing, but since I’m determined to NOT buy anything for the house, I felt safe. But then, I found these cool mats made from woven recycled plastic. Hmmm. The little grey cells began to process all the possibilities and 20$ later I left with a 4×6 mat destined to cover our cockpit floor.
Want to make one? Here’s how I did this one.
You will need: your mat, scissors, outdoor thread, outdoor fabric in a matching color, masking tape, butcher paper and tape for the pattern.
Et voila! This will be exposed to UV rays all the time, so who knows how long it will last? But who cares? For that price, it was worth it just for the fun.
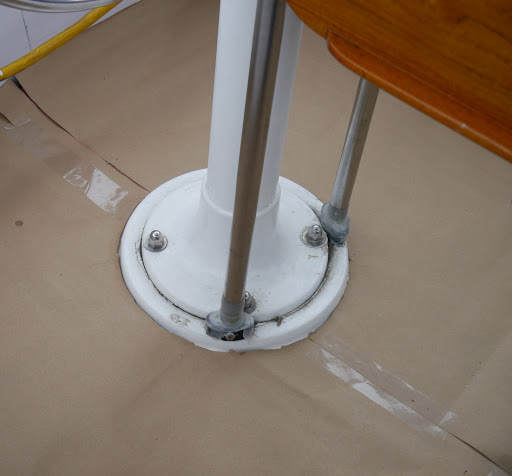
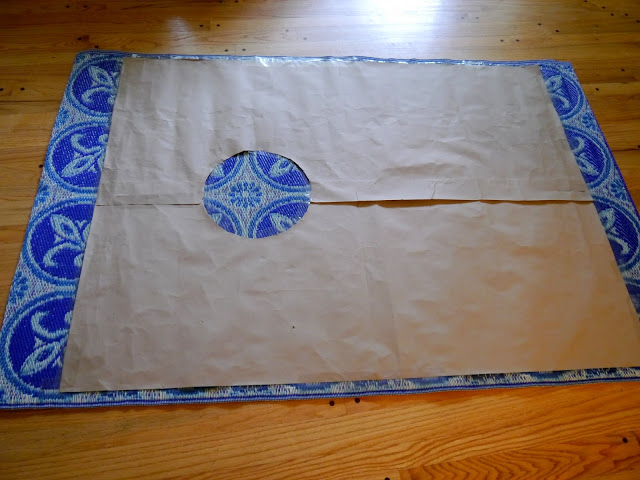
- Make a pattern of your cockpit floor. In our case, I needed to cut out a circle to fit around the steering pedestal. Sure, the engineering types reading this will come up with a thousand easier ways to make a pattern, probably using things like numbers and formulas and measurements. I prefer my patterns to be on paper. I’m tactile and visual, and I just feel better having a template I know fits exactly. Or at least close. I used left over butcher paper I had from making the patterns for the aft cabin berths.

- Center the pattern over the mat. It’s easy to do this by folding the pattern in half the long way and marking the middle, then repeating in the other direction. Do the same thing with your mat. Mark the middle on each side, then lay the pattern on top of the mat, making the marks match up. Then trace around the pattern using a sharpie marker.

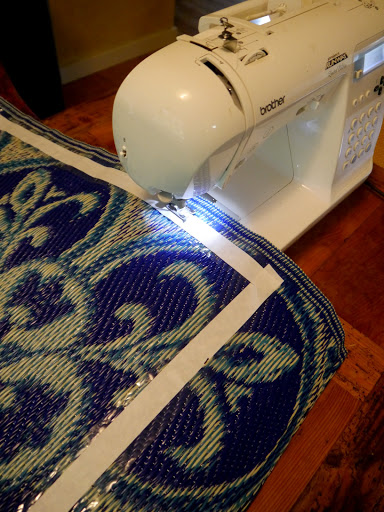
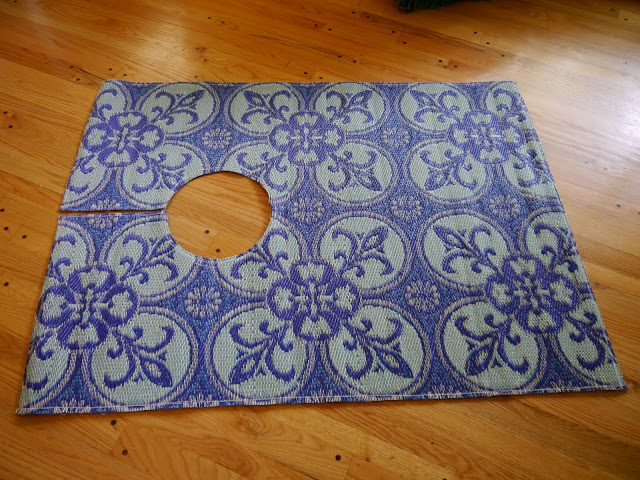
- Now put tape along the edge of the line. The purpose here is to keep the mat from unraveling when you are cutting it, before it is sewn. With this mat, that was only an issue in one direction, but I didn’t know that before I cut, so better safe. Place the tape on the inside of the line. Cut along the tape and get ready to sew. I used sail thread that I already had, but be sure to use outdoor thread. I sewed this on my Brother sewing machine, which is a regular machine. It handled this just fine. Sew along the middle of the tape to secure the edges.

- At this point, make sure your mat fits the cockpit floor.

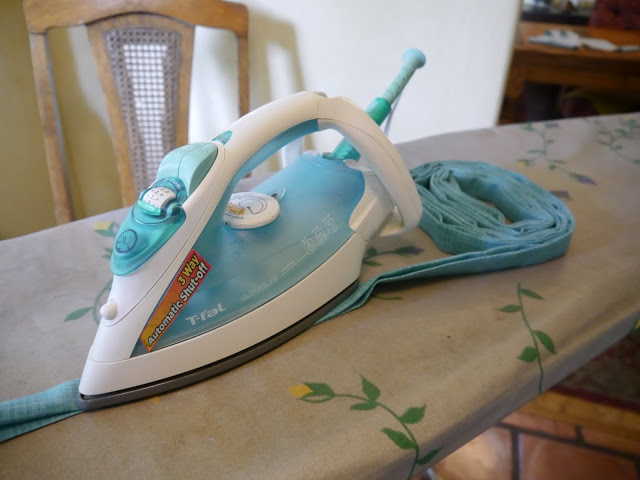
- Make the binding. Cut 4″ strips from your chosen fabric. Using an iron, fold the fabric in half, then fold each side in half again. Use the iron to make crisp edges. Then cut 4″ strips along the bias of the remaining fabric for the binding for the circle cut out, if you have one. fold and iron that the same way.

- Sandwich the edge of the mat in the folded binding and sew along the edge, binding a blanket. Use the bias cut binding to do the circle.


Wednesday, June 8, 2016
Canvas, Round Two
This post originally appeared on Windborne in Puget Sound
In the past few days, we had an appearance (sadly brief) of nice spring weather... weather where the following all coincided:
And glory of glories, the weather held for the next day, which allowed me to use the pattern to cut out the pieces to make the roof panel. As you can see from the picture above, there simply is not enough room to do this down below on Eolian, out of the weather, making this an outside job.

Our existing dodger has the roof panel and the forward panel (the "windshield") attached, making the combination large and unwieldy. I will not be continuing that design. Instead, I will use Common Sense fasteners (male on the roof, female on the forward panel) to fasten the panels to each other.
I expect to start sewing on Friday, but I doubt that I will finish this weekend. Besides doing the sewing, there is the matter of the installation of all those Common Sense fasteners.
[Finally, a brief note to those of you to whom I cryptically mentioned Wood's metal: that post is coming, it's just not far enough along yet.]
Previous post in this series
In the past few days, we had an appearance (sadly brief) of nice spring weather... weather where the following all coincided:
- It wasn't raining
- It was warm
- It wasn't windy
 |
| The pattern, before trimming |

Our existing dodger has the roof panel and the forward panel (the "windshield") attached, making the combination large and unwieldy. I will not be continuing that design. Instead, I will use Common Sense fasteners (male on the roof, female on the forward panel) to fasten the panels to each other.
I expect to start sewing on Friday, but I doubt that I will finish this weekend. Besides doing the sewing, there is the matter of the installation of all those Common Sense fasteners.
[Finally, a brief note to those of you to whom I cryptically mentioned Wood's metal: that post is coming, it's just not far enough along yet.]
Previous post in this series
Subscribe to:
Posts (Atom)


 Posts
Posts


