Showing posts with label canvas. Show all posts

Tuesday, October 17, 2017

Actualization

This post originally appeared on Windborne in Puget Sound

I have no excuse for the long pause in posting here, except: life.


As with many projects, the design and planning stages take longer than the actual execution.  Making a new sail cover for Eolian's mizzen was one of those projects.  I started thinking about this last summer, while hanging on the mizzen boom by one arm, way out past the stern rail, making up the fasteners on the far end of the sail cover.  I have been doing this acrobatic act for 20 years, but lately my shoulders have started to bother me, telling me that this process was going to have to change.  

Well finally last week everything came together and I was able to spend the time to put the plans and design to the test: actual sewing.

You really want to use a hot knife for this...

I unrolled the Sunbrella on the dock, laid out the pieces using a chalk line, and cut them out using my brand new, handy-dandy hot knife (you really want to use a hot knife for this work because it seals the edges of the cut, preventing unraveling).  The only tricky part of the layout was the placement of the cut outs on the side pieces for the lazy jacks.  To get these right, I tied the lazy jack lines to the boom at their design locations, and then stretched a tape measure along the diagonal that the top of the sail cover will make, taking the measurements where the diagonal intersected the jack lines.

Then the depth of the cut outs needed to be established.  I wanted them to be just deep enough so that the top of the cut out, which will be the bottom once the stitching to make the batten pocket is completed, would be just above that seam in the finished product.  Here's the detail on that:  I had determined that a 4.5" circumference would make a batten pocket large enough to accommodate the 3/4" schedule 40 PVC pipe that I was going to use as battens.  Adding a 1/2" seam allowance, I struck a "fold-to" line 5" away from the top edge of the side piece.  Then I laid out the cut outs so that their ends were 1/2" (seam allowance) + 3/8" (allowing for the edging to be applied to the cut outs) = 7/8" from the fold-to line.

The rest was just sewing.  The cover is just shy of 12 feet long, and there is no place inside Eolian to stretch it all the way out.  But sewing it over the saloon table worked out OK.


I mentioned that I used 3/4" sched 40 PVC pipe for the battens (the gray kind, rated for outdoor use).  PVC pipe comes in 10 foot lengths; the sail cover is just shy of 12 feet long...  a splice was necessary.  I didn't want to use a coupling, since that would make a lump that would make feeding the battens into the pockets difficult.  It turns out that 1/2" sched 40 pipe has an OD just slightly larger than the ID of 3/4" pipe.  So I bought a short length of 1/2" pipe, cut two 12" lengths, a slit one side of each piece lengthwise on my little table saw.  That 1/8" kerf provided just the right amount of clearance to allow the 1/2" pipe to telescope into the 3/4".  Assembling with pipe dope gave me a smooth splice.

Almost done...
I added ties that go under the sail using black Sunbrella webbing and Common Sense fasteners (not visible in this picture - they're on the other side).

The top zipper would be impossible to operate if its aft end were not stabilized - a short strap there is seized to the topping lift line.  The finishing touch is a tiny block seized to the topping lift line just above the zipper seizing - and a 1/8" line loop routed thru the block and tied to the zipper pull allows the zipper to be operated while standing on the deck, not hanging over the rail.  Doing this work was interesting...  I had to swing the boom out over the dock and stand on top of a ladder to reach the aft end of the boom.

I wasn't sure what I was going to do with closing off the aft end - I think I'll do nothing - the opening is not large enough to bother with.

I still need to make a front panel that wraps around the mast - the zippers that will attach it to the sail cover are already installed on the sail cover.

And I haven't yet cut the lazy jack lines to length - I think I am going to fiddle with them a little more - I want to see how things settle in with some use.


Previous post in this series

Tuesday, April 11, 2017

Cockpit Cushion Toppers

Aboard s/v Galapagos, Melissa finds a wonderful use for something that would have been simply discarded.  She also has significant puzzling skills:
Regular readers will recall that we recently had new mattresses made for our aft cabin. Part of that remodel was the purchase of some rather expensive latex foam toppers for the berths. These came at a cost of $570 for the space. That’s not an insignificant cost, even though it was completely worth every single penny. As every boat owner knows, boat beds do not come in regular sizes like your earthbound beds. Therefore, in order to get what you need, you frequently have to cut to fit. And you know what that means.  That’s right. That means extra material. Extra EXPENSIVE material!

That nice 3″ latex foam. We still love it.

When we picked up our new mattresses we were blessed to receive all of the extra pieces of latex foam, neatly stuffed down into large plastic bags. I was going to toss them, but being the cheap and easy boat trick queen, I just couldn’t bring myself to do it. I don’t like to throw away perfectly good materials that I might put to use. So I kept them and waited for an idea to pop into my head. And it did.

p1100499
Let’s build some rectangles!

Galapagos has a great cockpit. We love it. But one of the things that I’ve wanted to improve is the napability of the two longest sides. They are long enough to lie down on (one of the absolute requirements for us in a boat, being the famous sleepers that we are), but the hard Bottomsider-style cushions that came with the boat are dead uncomfortable. I decided to see if I had enough latex foam to make cushion toppers for them.

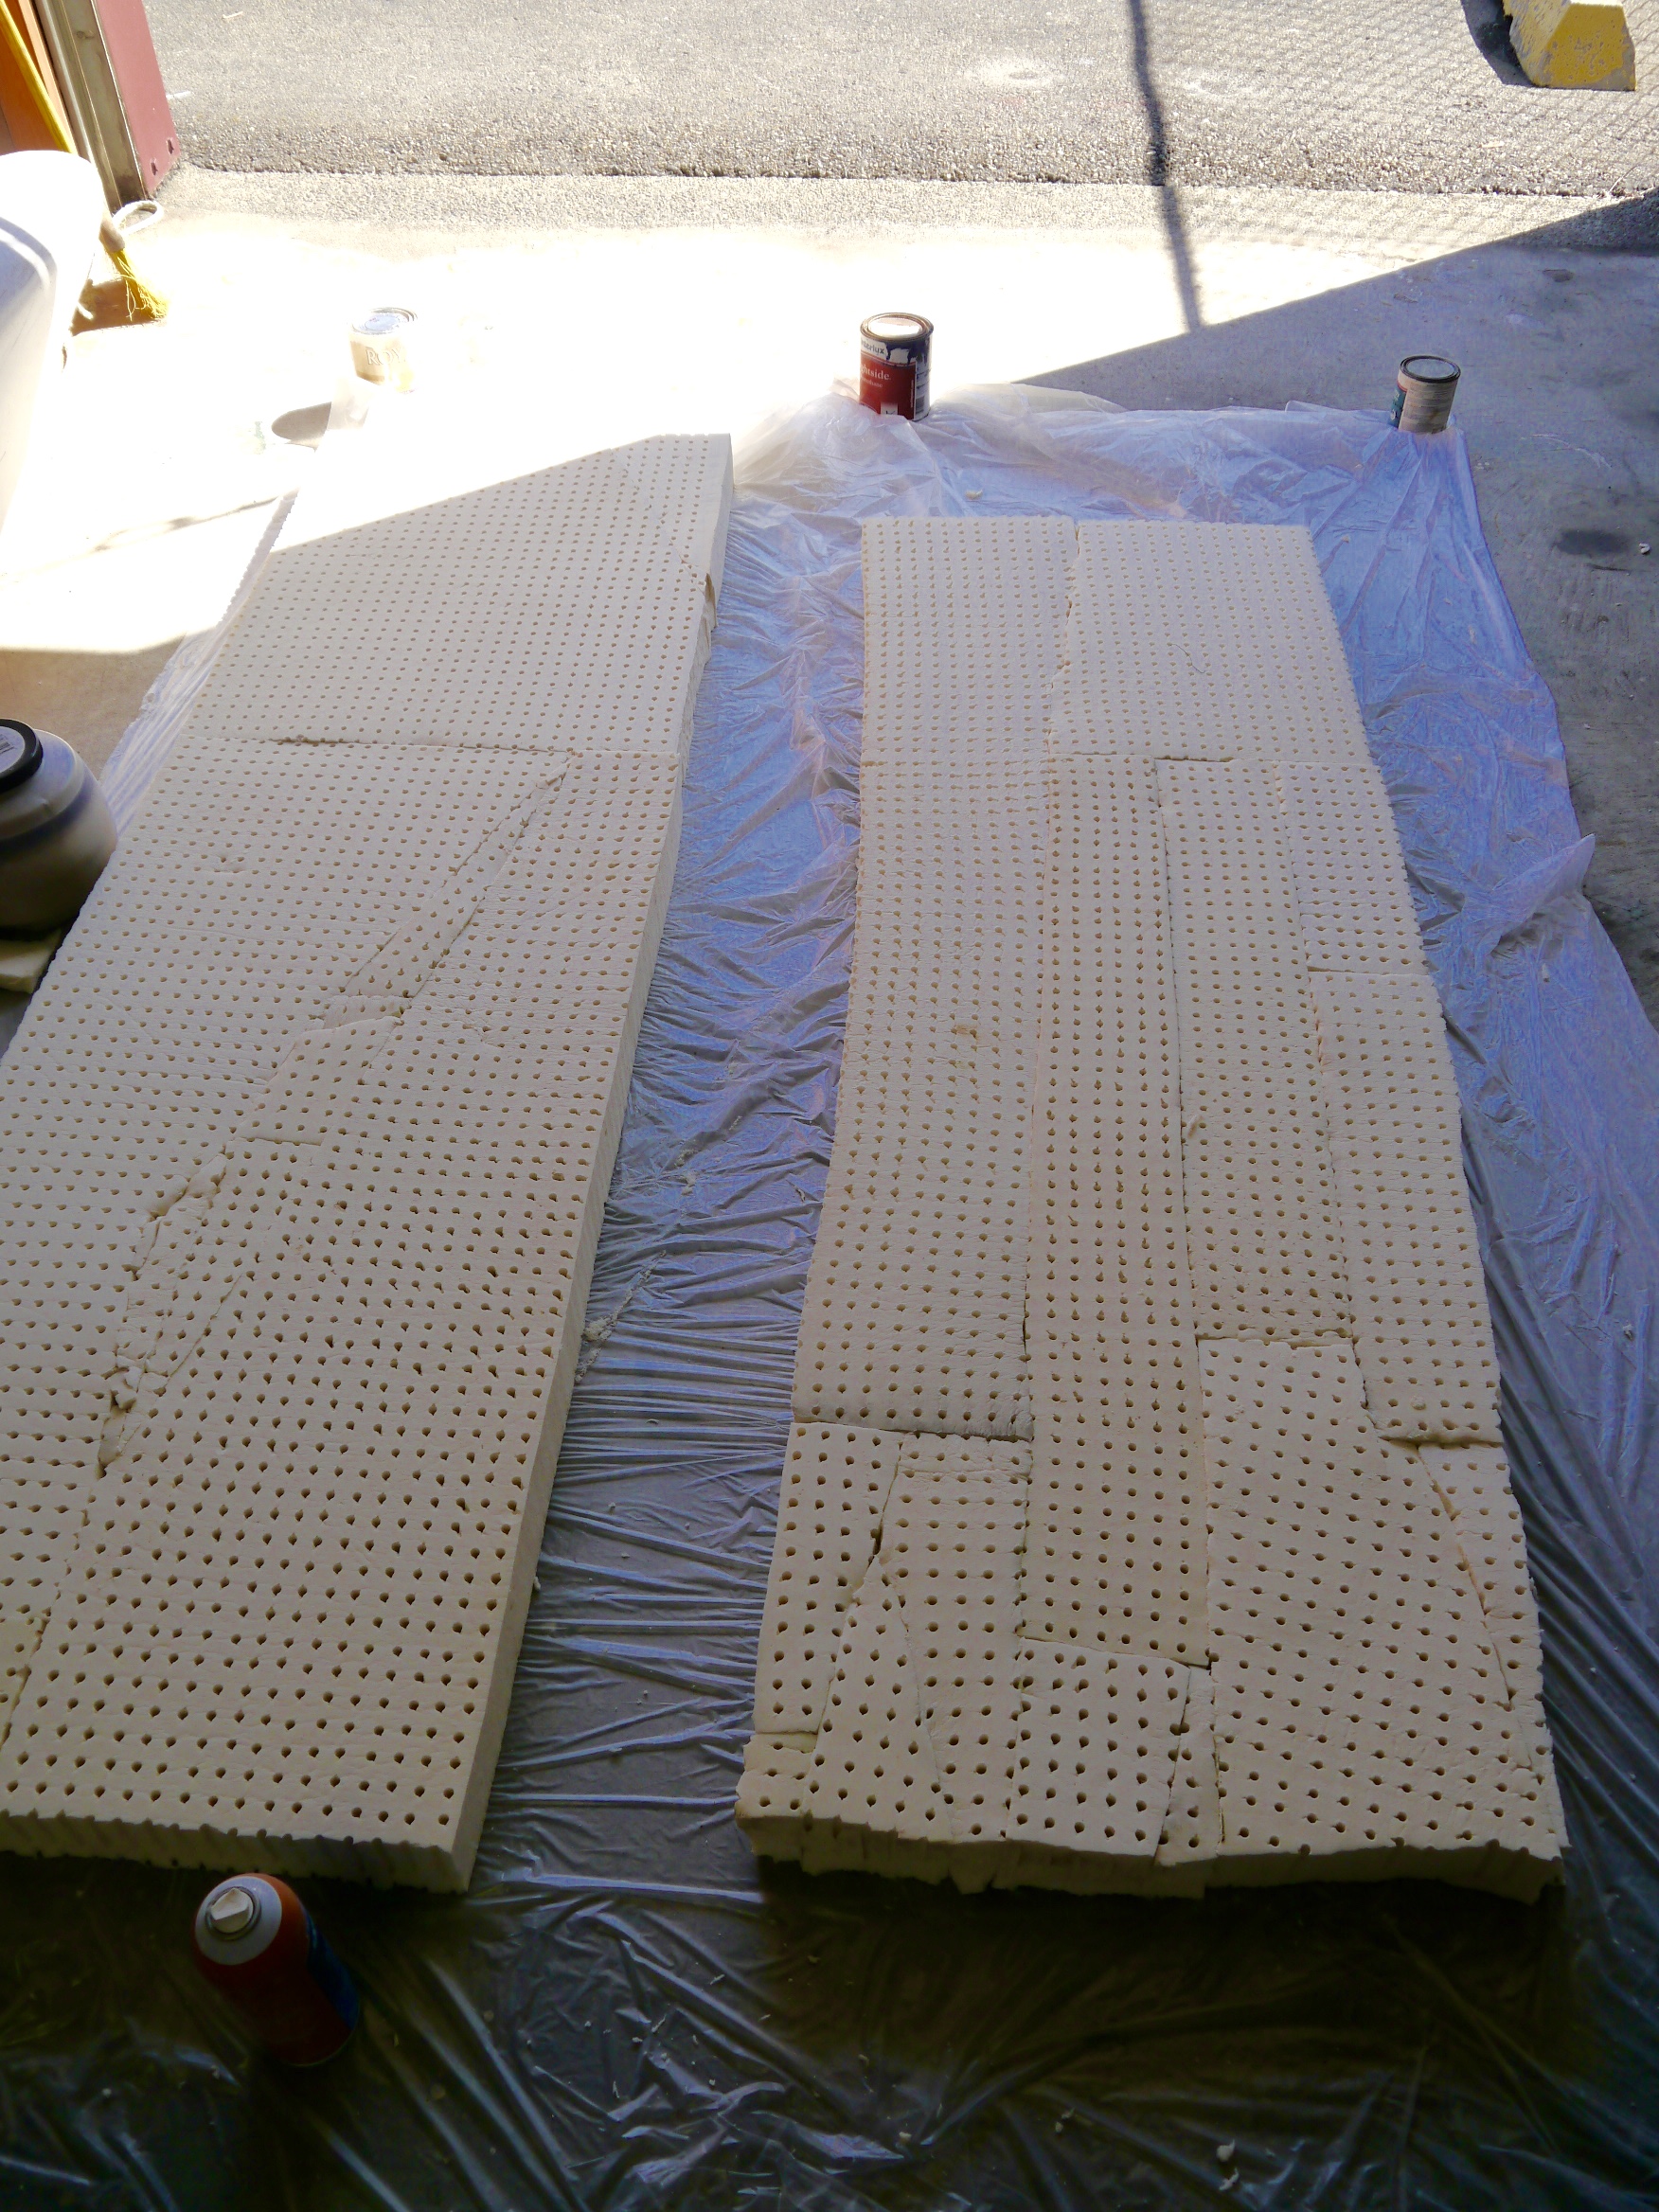
After measuring the sides, I lay the foam pieces out on some plastic up in our workshop/storage space at the marina. Supplied with Elmer’s spray glue and a healthy love of puzzles, I began piecing the foam together to make the long, thin rectangles required. I glued the seams as firmly as possible and then let them sit for a day to cure. Although I had the garage door open for all the gluing, I cannot swear that I didn’t lose a few brain cells to that spray. Do make sure you have good ventilation with that stuff. I trimmed the uneven ends with large scissors, making several cuts from the top down. Sure, I have an electric knife, the tool of choice for this job. It’s at  home. Not at the marina. Scissors worked just fine. We’re not building the Parthenon here.

p1100501


As I did with the new cushions in the v-berth and aft cabin, I decided I wanted to protect these with that PUL fabric I used to keep water from soaking into the foam. This also makes coverings easy to take off and put back on.  Once again, I used the handy 40% off coupon Hobby Lobby has each week.

My only concern here is that there really are a lot of glued seams on these. It is possible that the glue will not hold up in the heat of Mexico and beyond. If that happens, though, I will still have all the other materials all set up to pop the latex out and replace it with foam all in one piece. The PUL fabric has a lot of stretch to it so it can be pulled tightly around the latex. It supports the seams in the foam as well as making the whole thing waterproof. The extra support makes it less likely that we’ll experience a total fail just from moving the cushions around.

Neatly covered in waterproof fabric.
Neatly covered in waterproof fabric, ready for canvas.

To ‘upholster’ these, I wanted outdoor canvas that was water and UV resistant. Since it’s fall, this is a good time to look for summer fabric in the clearance section of Joanne Fabrics. I made a beeline for the clearance bin and found some perfect yellow canvas for $3.50/yard. Done! I actually bought extra of this because I liked it and it was such an excellent price. Retail on this canvas is $29.99/yard. As if I would ever pay that much.

The sewing was straight forward; not exactly my favorite kind of sewing but at least with this project my machine doesn’t protest. I cut two rectangles, some sides, then sewed them together.

Cheerful and comfortable!

These are just the ticket in the cockpit for sitting or laying around at anchor. While underway they can be stored along the sides in the v-berth, or even in the aft cabin, just tucked under the shelf, which will hold them in place. They are a cheap and cheerful addition to the comforts of home on board Galapagos.

Cost Breakdown:
  • Latex foam – 0 because it was leftover from another project, destined to be thrown out
  • PUL fabric – 4 yards, 40% off – $31.20
  • Yellow Canvas – 4 yards at $3.50/yd – $14.00
  • Yellow thread – $3.00
Total cost: $48.20 plus tax. Win!

Stored in the v berth with Patrick.


Tuesday, January 3, 2017

Sail Repair

Like most boat owners, Rick over on s/v Cay of Sea is a jack of many trades. Here he is working on his sailmaker badge...
The lesson here is that a sail’s stitching should be repaired before it becomes a tear in the sailcoth.

I just learned that lesson.

I’ve known for the past few sails that there was a section of stitching near the clew of the main that needed re-sewing. Yeah sure, I’ll get to it. Eventually. During a day-sail last week, eventually became immediately, as the foot of the sail tore out around the broken stitches for a length of about 12 inches. I pulled down to the first reef to finish out the sail, and took the sail down the next day to fix it.

I could have done this by hand with my Speedy Stitcher, but I have access to a marina neighbor’s heavy-duty sewing machine. It was time to give it a try.

Forthunately, I’ve watched my wife sew long enough and asked her enough questions to understand what has to happen with the machine – the concept of the locking stitch, what the bobbin does, what effect the tension knob has, and why a sewing machine is threaded the way it is – so I was able to figure out how to thread and adjust the machine, and how to refill the bobbin with a little trial-and-error.

I cut a patch to sew down over the tear, placed over the carefully positioned section for repairing with the help of double-sided sewing tape, and began to carefully feed it through the machine. Four times! This is a straight-stitch-only machine, so I had to make sure I had sewn down all the edges and fully supported the material surrounding the tear.

The machine is made by Thomas - heavy, strong gears and body allow it to punch through many layers of cloth.
The machine is made by Thompson – heavy, strong gears and body allow it to punch through many layers of cloth.


In the photo above you can see the patch applied – it’s to the left of the seam opening – through which daylight is pouring! I repaired this open seam, and inspected the rest of the sail as well. I restitched down the entire length of the leach, as much of the stitching was weak or missing, and reenforced a few other places too.

Here's an image of the repaired sail in use. The repairs aren't beautiful, but the are strong.
Here’s an image of the repaired sail in use. The repairs aren’t beautiful, but they’re strong. And it looks like I need to adjust the wrinkles out of the trim too. . .


I discovered yesterday that I missed one weakened seam just above the first reef point – and it began to open up in the brisk breeze. I dropped the main as soon as I noticed it (see – I’m learning) and finished out the sail on jib alone. Today, I’ll take a closer look at it. This one may be small enough to repair by hand. If not, I’ll bring the machine down to the boat, simply pull the foot of the sail off the outhaul, and repair it right there on deck.

Finally, during a walk today through another marina in my neighborhood, I came across this beautiful lapstrake dinghy and though you would enjoy a photo of it.

Tender to s/v Hesper, featured in this post.

Tuesday, November 1, 2016

Bimini Roof Canvas Completed

This post originally appeared on Windborne in Puget Sound

Finally, I have completed the last of the three cockpit bimini canvas pieces:  the center section.  This panel is zipped to both the forward and aft roof panels, meaning that its size is completely dependent on the placement of those two panels; they had to be completed first.

But because the old center panel had to continue in service until the new one was fabricated, the forward and aft panels had to be properly located.  In other words, because I did this work in sections instead of all at once, the new roof duplicated the old completely...

Because the old center panel fit perfectly, rather than pattern the center panel with DuraSkrim I chose to simply roll out some Sunbrella and trace the outline of the old center onto it.  The size is not terribly critical; instead it is the zipper placement that is crucial.  That being the case, I did a lot of measuring and annotating on the old center panel:


Again, placement of the zippers is what controls the fit here.  So I measured outside-tooth to outside-tooth at perhaps a dozen stations along the old panel.  Then, when applying the zippers to the new panel, I duplicated the station locations and ensured that the zippers conformed to the measurements.

I have learned thru this project that zipper position in a lengthwise direction is also critical, especially when there are pairs spanning the length.  To make this work out properly, I followed these steps:
  • Locate the centers of both the old and new panels by folding in half, and mark them.
  • Install the old center panel, and transfer the center markings to the forward and aft panels.
  • Work on one edge at a time, I started with the aft edge.  Install one of the new zipper halves to the aft panel zipper.
  • Hold up the new panel, matching the center marks.
  • While continuing to hold the panel in place (you may need help here), make match marks on the new zipper half and the center panel an inch or three away from the center.
  • Remove the new zipper half from the aft panel.
  • Position the new zipper half on the new panel using SeamStick basting tape, matching up the match marks.  Note:  at this point, with no other reference it is not possible to exactly locate the zipper width-wise.  Instead, using another new zipper half on the opposite edge, simply ensure that zipper placement will allow both zippers to fall approximately equally on the fabric.  Exact spacing at the measurement stations will be established when the opposite zipper half is installed.
  • After sewing the first zipper half, take the panel out to the cockpit again and zip it up.  Install another new zipper half on the other aft panel zipper.
  • Pull the panel firm athwartship, and make match marks on the new zipper half.
  • Following the steps above, install the second zipper half.
At this point, zipper installation is half done, with the attachment to the aft panel complete.  Complete the forward zippers in a similar fashion, with these two modifications:
  • When establishing the position of the first zipper half, match up the centerline marks as before.  But this time, slide the panel a little port and starboard, watching for wrinkles to form and dissipate.  You are looking for that placement where there are no wrinkles - it may fall when the centerlines are not quite matched up.  Match mark the zipper half and the new panel.
  • When sticking the zippers in place with SeamStick, be very, very careful to get the outside-tooth to outside-tooth spacing at the measurement stations the same as on the old panel.


Ta DAAA!


So, what did it all cost?  I'm afraid I can't be entirely accurate because I used some supplies from earlier projects.  But what I can do is to make an estimate on materials costs, based on the Sailrite catalog I have here on board (check the Sailrite website for current prices):

Item Quantity Unit Cost Extended Cost
Sunbrella, Erin Green, 46" wide 10 yd 16.95 169.50
DuraSkrim 10 yd 2.95   29.50
Binding tape, 3/4", Erin Green 80 ft 0.50   40.00
Zipper, #10, 48" 6 7.50   45.00
Zipper, #10, 60" 4 8.70   34.80
Zipper Pull, #10 10 1.70   17.00
Zipper Stop, Stainless 2 packs of 10 2.50     5.00
Common Sense fastener, male 50 0.60   30.00
Common Sense fastener, eyelet 17 0.195     3.32
Rivet 100 0.15   15.00
Seam Stick, 3/8" 1 8.95     8.95
Seam Stick, 1/4" 1 6.95     6.95
TOTAL

$405.02

I also bought some tools that, tho they were used in this project, will be used again in future projects.  I don't know if these should be charged against this project or not (you decide), but you should definitely have these tools to do the work:

Item Cost
Rivet Setting Tool Kit 89.00
Common Sense Eyelet Hole Punch 69.50

I did not include the cost of the thread because I bought a large spool years ago and have been using it since.  You definitely want the Teflon Tenara thread or equivalent - it will outlast your boat.  Don't settle for polyester thread.

And finally, you need a heavy-duty sewing machine to handle this.  I heartily recommend the Sailrite LS-1 or LSZ-1 (zig zag - if you intend to sew sails).  They are expensive and worth it.  We got ours used for less than half the new cost.

Monday, October 17, 2016

Put the ‘Fun’ in Functional Storage with this Cheap Trick

Over on s/v Galapagos Michael & Melissa continue making their boat into a home...
I was complaining of being bored the other day. We won’t be moving aboard until at least the end of the summer, and we don’t get to have a long cruise this year because of Mike’s work. That pesky annual leave thing is going to be a thing of the past soon enough, so we’re content to wait out the remaining months doing a little bit here and there to move forward with our plan. The house and yard are in maintenance mode, my practice continues to slowly wind down. I’m fine with living in the liminal space, as a rule. But finding myself kind of wandering aimlessly around the house trying to look busy just isn’t my style.  It’s like don’t know what to do with myself. I decided I needed a few small but useful projects for the boat, starting with that cool cockpit mat.

cockpitmat

The rumpus room in the v berth is taking shape and we will be using this cabin to watch movies and TV shows we like. To move forward with that plan,  I sorted and stored our DVD collection, throwing out all the colorful plastic containers and storing each DVD in its own plastic sleeve. I then labeled and stored them in nifty snap-locking containers I bought at JoAnn Fabric for 8$ apiece. I know many cruisers store hundreds of movies on thumb drives and maybe that will be in our future. For now, I don’t have the patience for that. This was quick and easy and finding what we want will also be quick and easy.

Our midship cabin got refurbished, too, with the addition of a layer of latex to the foam, and new upholstery.
You’ll be glad to know that the aft cabin project is moving along. We took possession of the finished mattresses this week and I carted them down to the boat to see that they fit before getting them covered. It’s probably overkill, but since I didn’t have any old foam to take in to use as patterns ( I had made my own paper pattern) I just wanted to eyeball the fit before covering. They fit beautifully and allow us to sleep any old which way. The bed is going to be very comfortable and will last for 20 years if we protect them. The next task is to bring them home so I can cover them in that PUL fabric, then take them for their final upholstery. After that, I get to make custom covers and sheets. Won’t that be a creative undertaking! I do believe our goal of having a totally comfortable, sleepable aft cabin is coming to fruition.

So much nicer than what we had before!

The trusty Brother sewing machine has been dusted off and I am rediscovering my love of sewing. As we are now envisioning being able to live with that aft cabin, it was time to turn my thoughts to how we would store our clothing there. We have one hanging locker, a small set of drawers, and a small drawer under each side of the bunk. There are shelves along the hull on each side and I’d like to keep them uncluttered. I would like to keep both clothing and bedding in that cabin and I wanted that storage to be easy to access because otherwise I am tempted to leave my clothes laying around draped decoratively on doorknobs and corners of objects. I know it’s a long shot, but we both really want to keep a neat and tidy look in our boat. It just feels better that way.

Cuteness overload!
Cuteness overload!

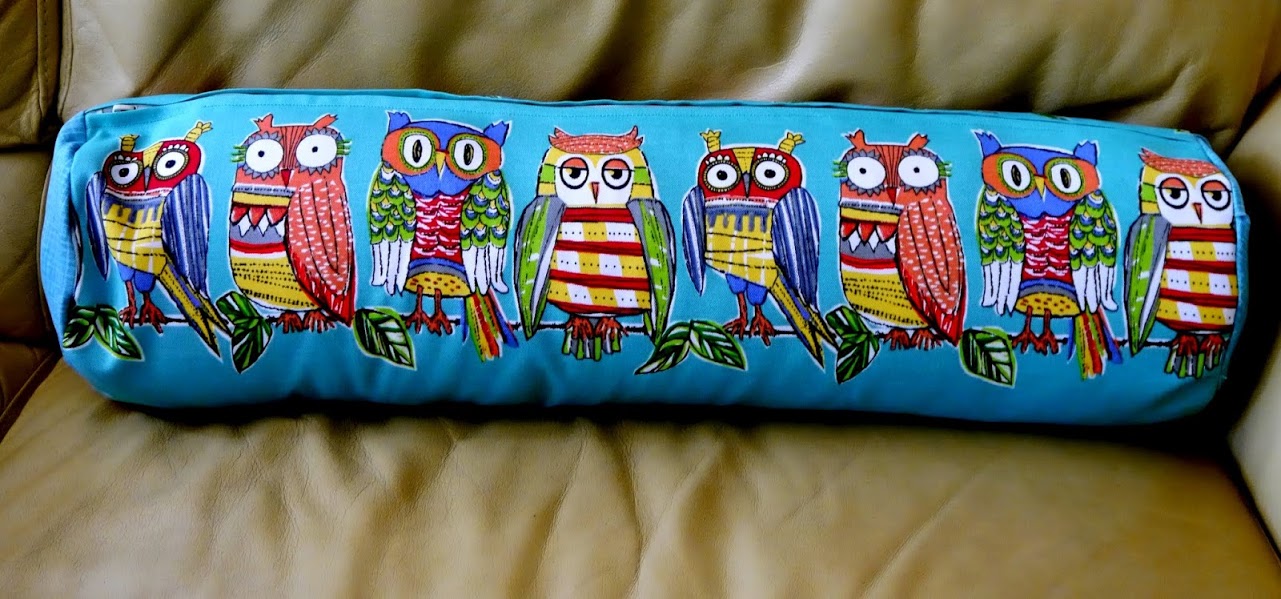
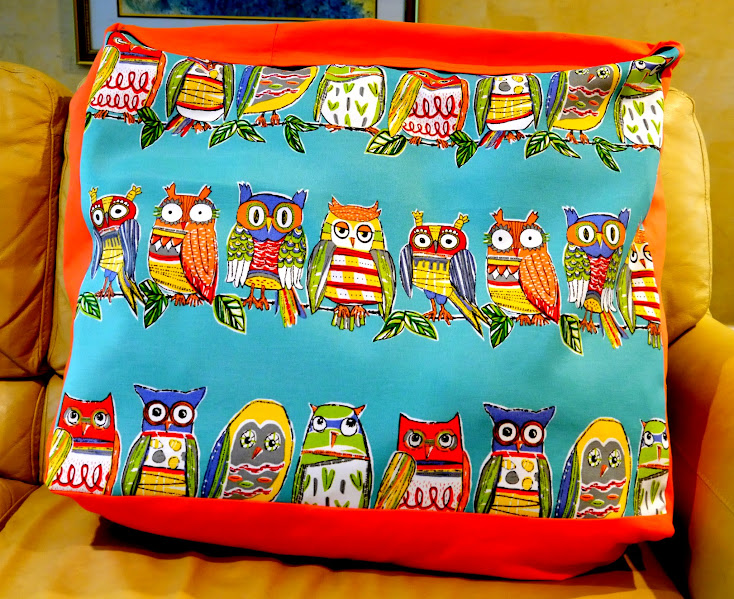
I had been considering colorful soft sided baskets to keep clothing in but where to put them was in question. Instead I opted to make fabric bags that look like pillow shams of different sizes and shapes. I bought 1.5 yards of this super cute owl outdoor fabric on sale for 12$/yard.  Then I found a 3$ remnant of orange fabric that matched. I purchased thread, some velcro, and a set of nylon upholstery zippers.  Total cost for materials was about 40$. For that price, plus some fun time at the sewing machine, I have a selection of sizes of storage containers for soft things like bedding and clothing: 2 large for blankets and such, two standard sized bolsters for shorts, tops, bathing suits, and three additional sizes – 7 storage units in all. These can be stored right in sight on the beds as pillows. The fabric is water repellant and UV protected. Plus…owls! Seriously, you can fit a ton of stuff in these things. Functional, practical, and fun!

The largest bag is 15″ x 26″, for scale purposes.

Mike is working on a couple of interior projects that he will write about soon. Our next joint project will be putting shelving in most, if not all, of the hanging lockers. We have a generous amount of hanging locker space, most of which is completely wasted because we don’t have that many clothes that hang. We already know that this job is going to be a pain in the hind end, so if you have any shortcut tips on how to make it easier, do tell. We want the shelves to take full advantage of all space, so that means they will have have to be custom cut.

This currently holds two blankets and two pillows. It would work great in the forward cabin as an extra pillow for lounging.

Oh, and guess what! We get to go on a short cruise over the Memorial Day weekend. We’ve got friends to stay with Skippy, so Thursday night we are out of here! Yay! We are both so ready for that.

Tuesday, October 4, 2016

Canvas - Round Two Completed!

This post originally appeared on Windborne in Puget Sound

Round two of cockpit canvas replacement - the roof section of the dodger - is done!  Here's how it went:

Topstitching the aft tail seam
Having completed the actual construction of the panel, I needed to create the attachment to the "windshield" portion of the dodger. The original canvas had the roof and the windshield sewn together, making a hugely unwieldly thing, almost impossible to handle with all the compound curvature and the easily damaged vinyl.  As I reported last time, I made a design decision:  The new roof panel would be separate, and attach to the windshield via Common Sense fasteners.

So, how to locate those fasteners?  For a taut roof panel, the fasteners need to be in the exact right spot, and further, the eyelets and male portions need to end up in registration with each other.  How to do this?  I solve problems like this as I am falling asleep and letting my subconscious work on them.  This is the procedure I came up with: 
  • Mark, on the tuck back tail of the new roof panel the desired location for fasteners - this portion will show in the final installation
  • Place the new roof panel in place, carefully aligning the sides, and positioning the front seam on the front surface of the tube, as designed.  You'll note that the old panel seam (built by a professional) missed the tube by as much as an inch in the center.
  • Insert T-pins at the marked locations.  By pushing them all the way in, they made a good solid temporary connection because the vinyl in the windshield gripped them, allowing tension to be applied so that wrinkles could be worked out.  Adjust the T-pin locations in the windshield as required (keep the pin locations in the tail as marked since, again, these will show) and reposition as needed for a good fit everywhere.
  • Mark exactly the T-pin locations on both the tuck back tail, and the windshield.  To mark the windshield, pull a pin part way out, giving enough room to work under the tail, but keeping the location established.  Since this is all done with the existing canvas all in place, it is easy because the old roof panel is keeping the windshield tensioned and in place.

T-pins for alignment
  • Pull the new canvas off
  • Punch holes in the windshield using Sailrite's Common Sense punch...  this is the only way to do this, given that 4 layers of Sunbrella and the vinyl need to be cut.  Jane was inside, with a buck made out of a 6" piece of railroad track with a piece of Starboard taped on as the working surface.  Without something to work against, the punch would not have worked.
  • Install the eyelets in the windshield.
Holes punched and eyelets installed
  • Install the male portions of the fasteners on the tuck back tail of the new canvas.  Getting the male fastener mounting holes in the right place cannot be done by eyeball.  I made myself a jig out of an old blank non-silvered CD, by drilling holes at the correct spacing and then marking the outline of the fastener and horizontal and vertical centerlines.  This can then be held in place on the marked T-pin location and a pen can be used to mark the rivet locations thru the holes in the jig.  (Sailrite?  Are you listening?  You need to sell something like this...)
Homemade drilling jig
  • The moment of truth: Test fit.  Will everything work?  In order to get a true assessment, I disconnected the rear of the old canvas from the rear tube and installed the new canvas completely.  Since the old roof canvas was still attached to the windshield, it hung down inside.  Yup, it looked good.
Test fitting
OK, punching the holes in the windshield was a commitment, but not a serious one...  Eventually tho, it was time to make the big jump, and say "I do."  So I cut the old roof panel off of the windshield and voilà, c'est fini!
Done!

And man oh man is it good to see the old faded canvas as a jumbled up pile (and eventually in the dumpster) instead of gracing the cockpit!

Good riddance!

Now there is only one more roof panel to make - the center section.  This is much simpler to construct, being a single panel of cloth with only edging installed.  Ah, but exact sizing and zipper placement are critical for a taut installation.  Gotta think about this...

Tuesday, August 9, 2016

Renovating a LifeSling

Once again, Drew over at Sail Delmarva tackles a safety issue with his usual verve:
A reader wrote into Practical Sailor that his LifeSling had basically fallen apart, the result of UV exposure. The blue webbing straps tore under hand pressure (a write up in PS will certainly be forthcoming). The age was uncertain (probably more than 20 years) and I believe it may have been stored upside down, since the straps should be on the bottom, completely protected from UV.

But the other issue is that the LifeSling cases are notoriously UV sensitive, or rather parts of them are. I bet the failed LifeSling was in a failed cover. The coated polyester itself is pretty durable, but the stitching goes and all of the Velcro fastenings go at about year 5-10, depending on the latitude and whether it sits on the rail year-round, like mine does.

Packing. Packed according to the instructions, all of the critical parts are well protected. The line (VERY vulnerable is in a tube in the center, with the sling over it; triple protection. After 19 years, mine is still pristine. The tail of the rope that attached to the stanchion base is covered with webbing. Although the webbing is sunburned, the rope is fine.

I cut a section open to look. Note that there are a few failed strands on the lower left, where sun must have peaked in. Polypropylene is touchy stuff.

Velcro Top Closure. I dislike the UV vulnerability of Velcro, so I replaced it with a tubular webbing and pin system, something like a door hinge. Just pull the red flag. This endured for 10 years without damage, so I left it alone this time. Durable, secure, and fast.


Velcro Ties. Really, a stupid application, when a knot will do better and last forever. Again, the Velcro fails in 5-10 years, I cut the remaining stitches, attached a 2" x 4" webbing strip on the inside with Sikaflex, a 4" circle of Sunbrella on the outside with Sikaflex, and punched a pair of holes. I was going to install grometts, but the laminate was too thick, about 1/8", so I simply threaded webbing.


Stitiching. Some of the seams had gone at 10 years, where they rubbed on the rail. I hemstitched them 10 years ago using whipping twine, and they are still fine.

Paint. I had some white vinyl inflatable paint left over, so after a good TSP scrubbing I painted the whole thing to provide some sunscreen (I masked off the instructions--that section seemed OK and has no seams or stress points). I have used Kilz primer plus house paint on projects like this before, through, so don't run out and by special paint.

I will 20 minutes work I should get another 10 years from the cover. Since the initial cover needed repairs at 10 years, I'm OK with that.

Tuesday, June 28, 2016

Navigating Foamy Seas of Fabric

Up in Alaska aboard s/v Wayward,work turns from the rigid determinism of wood to the flexibility of fabric...
That's some chalkboard, "Einstein"!


Every point on the mollusc is treated as a space-point, and every material point which is at rest relatively to it as at rest, so long as the mollusc is considered as reference-body.
From Relativity by Albert Einstein

Navigating Foamy Seas of Fabric

To those of us used to the Newtonian absolutes of 'rigid' plywood, turning to fabric is to enter the undulating reaches of Einstein's relativistic universe.

Fabric is visibly flexible. Roll out a strip of it, and it may lay straight. Or it may curve like a banana, one way or the other. Or snake both ways. It can fold, hump and pucker, too, leaving its two dimensional plane. Hang an end over an edge, and it has the tendency to siphon itself to gravitational equilibrium. Fortunately, in the era of synthetic threads, we don't have to worry about shrinkage in the temporal dimensions!

Foam - at least the cushy sort - isn't much better.

To tame the mollusc, we need an external reference... in our case, the straight edge of a long-ish table in the caretaker's cabin. Line up one edge of foam or fabric with that (and keep it aligned) and smooth it flat, and we've imposed a reference edge and a planar surface. After that, it's just a matter of layout, cut, fold, and sew to the lines.

Of course, folding is something we seldom do to plywood.

Spatial visualization of flat stuff folding into shape tries the imagination. Some folks have developed it more than others. But really, unless you're a genetic sport, it starts out hard. Practice makes perfect. Like learning a new dance, the first attempts tread on toes. First one is a mind-bender; second is not half-bad; third a piece of cake.

Mostly.

As in all things, we looked for the KISS approach. No piping, fancy shapes, zippers (velcro, instead), etc.. We sewed a single join around the perimeters. At the corners, where excess gathers, we fold under as one would wrap a package in paper. Here and there we tack any floppy excess with thread and needle, or dart it out, as seems indicated.

A confused sea

Tips n' Tricks (from the Ignorant):
  • Bobby pins can be used to secure hems for sewing... not as prickly as pins.
  • Hot Melt Glue can often be used to tack things together... be sure to press the 'dots' flat before they cool!
  • Woof and Warp (the long and cross threads in fabric) are freebie square and parallel... follow them and it's hard to go wrong.
  • An Electric Knife cuts foam cleanly... the double bladed, turkey carvin' kind.

Dinette, cushions, left
Settee cushions behind
Folded Bunk (upside in), with ice blanket showing
Loose fit will snug up when finished with Hook n Loop


Salon Seats and Backrests:

These were all variations on a theme. Simple boxes in simple wrappers.

The only complication was that we wanted to use a second type of fabric for inboard faces. It was from SLACKTIDE's bunk, and we like to carry a bit forward from each boat. Also, we under ordered the blue nylon seconds by about a yard.  8/


Bunk:

Pretty simple in retrospect, but we burned a lot of braincells on this one.

First, our 60in cloth has to be joined to cover the 72in x 78in bunk. A longitudinal join, we figure, runs up where our sensitive upper bodies lie, like a miniscule bolster. A transverse join runs across our shins/calves, and seems much less intrusive. So that was our choice.

Our foam is open cell. Moisture travels downward and condenses at the first cool surface (the plywood bunk deck, in this case) and soaks the mattress from the bottom up. One semi-fix is to raise the mattress on a low lattice for airflow under, which evaporates and transports moisture. But also, we laminate a layer of close cell foam on the upper surface. This keeps moisture to the upper surface where it can harmlessly evaporate. Plus it firms the total foam, which we like for sleeping.

Next problem is that, to access the under-bunk storage, the bedding has to fold in half around the long axis. If the foam is a single block, this is AWKwaaaaard! But if we cut the foam into two blocks, then, if not compressed equally, we get a cliffy rift along the centerline.

Our solution was to cut the foam in two along the long centerline, then glue the close cell foam in a contiguous sheet to both surfaces, crossing the divide. We left the first foot to either side of the divide unglued.

Our cover unfolds to resemble a couple of bicycle panniers; two pockets topped by a flap that tucks between open and closed cell foam into that first, unglued foot.

The entire cover is made from a single strip 'scrolled' from one flap, down the divide face, across one bottom face, up the side face, all across the top face, down the other side face, across that bottom side, up the divide face and tucked between foams. End faces sewn together pillow-case style along the mid, end face (not shown). Whew!


The fabric and closed cell foam form a longitudinal hinge for folding the mattress over. Meanwhile, since it spans the divide, it eliminates that cliffy ridge. Result... works like a charm and comfortable!

Looks like we made harbor.


Tuesday, June 21, 2016

Cheap Boat Tricks – Cockpit Floor Mat

Please welcome new contributors Melissa and Mike, of s/v Galapagos, a 1975 47 foot Olympic Adventure ketch! For their first contribution, Melissa shows us a cheap and easy addition to cockpit comfort...
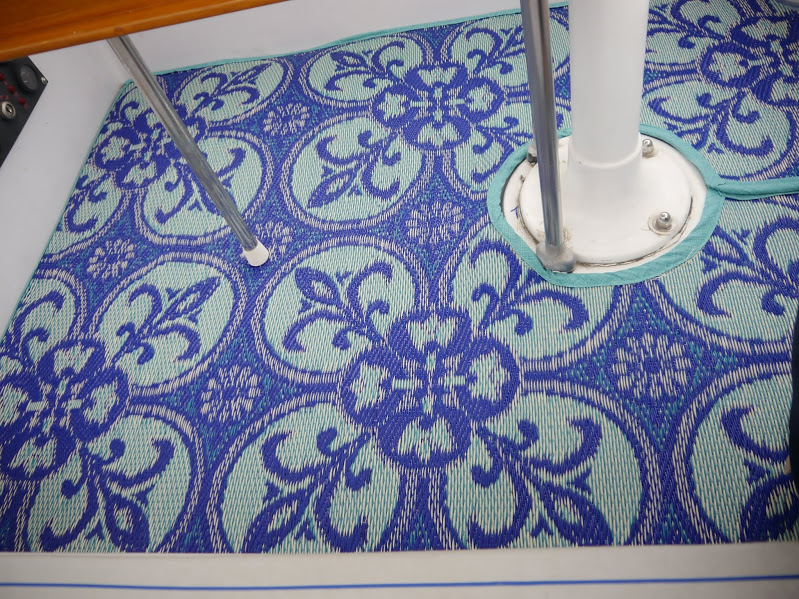
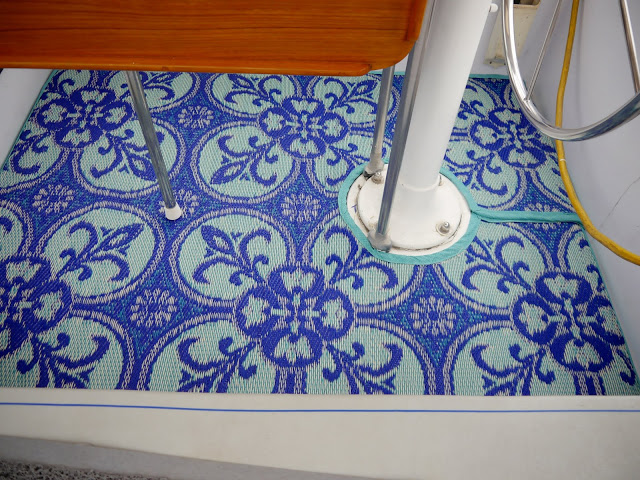
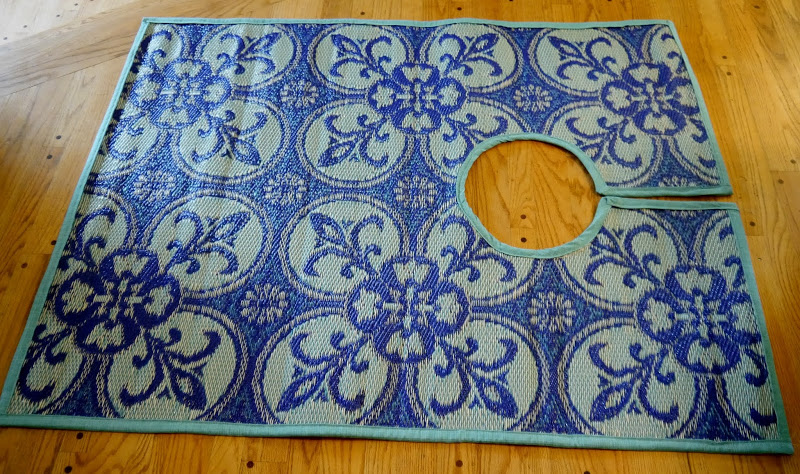
This little project has all the qualities that make a project satisfying for me: creative use of a material, hunting and gathering all the crafty pieces, long straight seams to sew, fairly low level of difficulty, and lots of colorful bang for less than 50 bucks. In this case, much less, only about $32 all in. Woo hoo!

matincockpit

Don’t ask me what I was doing in World Market because truly I don’t even know. I had just bought fabric for another project over at the fabric store and with time to kill I  wandered in just to look around. That’s usually a dangerous thing, but since I’m determined to NOT buy anything for the house, I felt safe. But then, I found these cool mats made from woven recycled plastic. Hmmm. The little grey cells began to process all the possibilities and 20$ later I left with a 4×6 mat destined to cover our cockpit floor.
Want to make one? Here’s how I did this one.
You will need: your mat, scissors, outdoor thread, outdoor fabric in a matching color, masking tape, butcher paper and tape for the pattern.
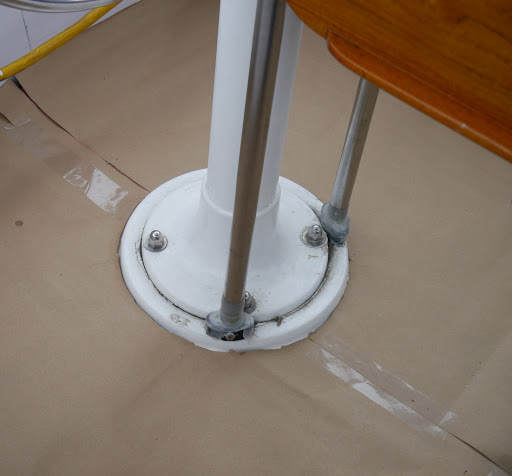
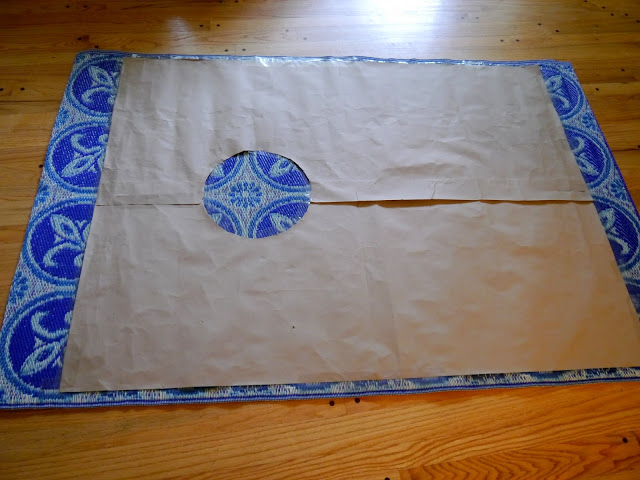
  1.  Make a pattern of your cockpit floor. In our case, I needed to cut out a circle to fit around the steering pedestal. Sure, the engineering types reading this will come up with a thousand easier ways to make a pattern, probably using things like numbers and formulas and measurements. I prefer my patterns to be on paper. I’m tactile and visual, and I just feel better having a template I know fits exactly. Or at least close. I used left over butcher paper I had from making the patterns for the aft cabin berths.

  2. Center the pattern over the mat. It’s easy to do this by folding the pattern in half the long way and marking the middle, then repeating in the other direction. Do the same thing with your mat. Mark the middle on each side, then lay the pattern on top of the mat, making the marks match up. Then trace around the pattern using a sharpie marker.

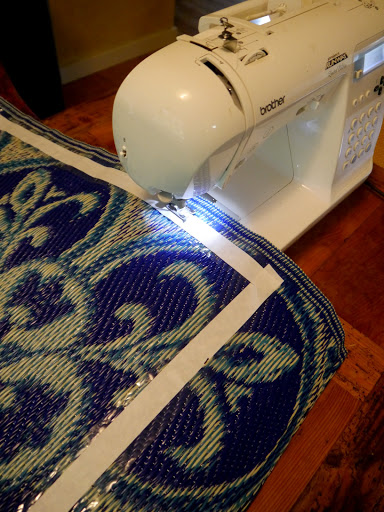
  3. Now put tape along the edge of the line. The purpose here is to keep the mat from unraveling when you are cutting it, before it is sewn. With this mat, that was only an issue in one direction, but I didn’t know that before I cut, so better safe. Place the tape on the inside of the line. Cut along the tape and get ready to sew. I used sail thread that I already had, but be sure to use outdoor thread. I sewed this on my Brother sewing machine, which is a regular machine. It handled this just fine. Sew along the middle of the tape to secure the edges.

  4. At this point, make sure your mat fits the cockpit floor.

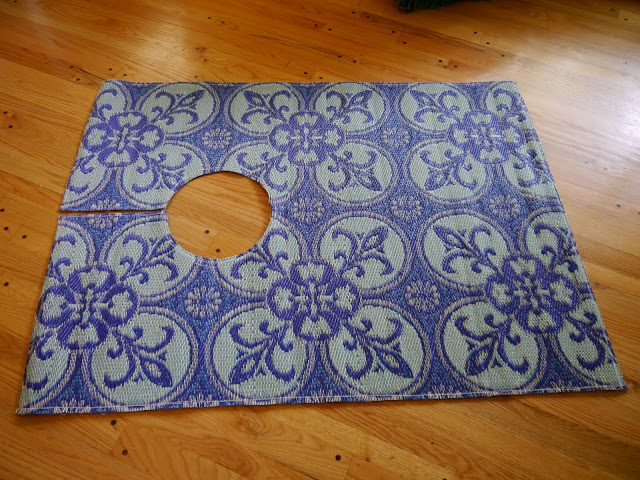
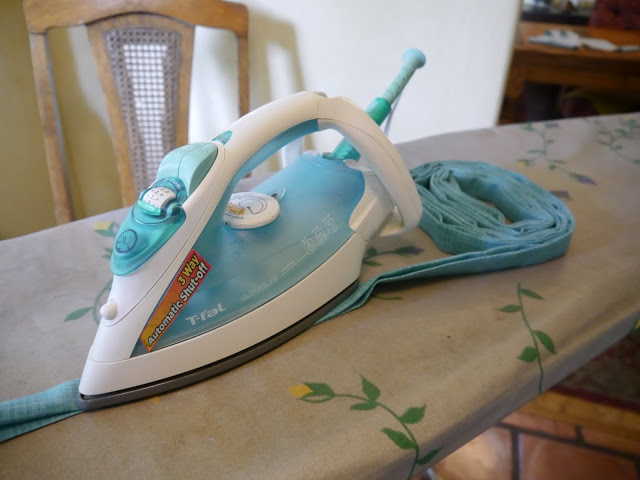
  5. Make the binding.  Cut 4″ strips from your chosen fabric. Using an iron, fold the fabric in half, then fold each side in half again. Use the iron to make crisp edges. Then cut 4″ strips along the bias of the remaining fabric for the binding for the circle cut out, if you have one. fold and iron that the same way.

  6. Sandwich the edge of the mat in the folded binding and sew along the edge, binding a blanket. Use the bias cut binding to do the circle.
Et voila! This will be exposed to UV rays all the time, so who knows how long it will last? But who cares? For that price, it was worth it just for the fun.

Wednesday, June 8, 2016

Canvas, Round Two

This post originally appeared on Windborne in Puget Sound

In the past few days, we had an appearance (sadly brief) of nice spring weather... weather where the following all coincided:
  • It wasn't raining
  • It was warm
  • It wasn't windy
For this year, it was that last item which has been the rarest.  But all three things did indeed happen, and so I got out the DuraSkrim and patterned the forward roof panel on our bimini.  As I did for the rear panel, I patterned right over the existing canvas.  This allowed me to have everything tensioned and in place, so that the replacement panel should fit well.  I hope.

The pattern, before trimming
And glory of glories, the weather held for the next day, which allowed me to use the pattern to cut out the pieces to make the roof panel.  As you can see from the picture above, there simply is not enough room to do this down below on Eolian, out of the weather, making this an outside job.
 

Our existing dodger has the roof panel and the forward panel (the "windshield") attached, making the combination large and unwieldy.  I will not be continuing that design.  Instead, I will use Common Sense fasteners (male on the roof, female on the forward panel) to fasten the panels to each other.

I expect to start sewing on Friday, but I doubt that I will finish this weekend.  Besides doing the sewing, there is the matter of the installation of all those Common Sense fasteners.

[Finally, a brief note to those of you to whom I cryptically mentioned Wood's metal:  that post is coming, it's just not far enough along yet.]

Previous post in this series

Tuesday, January 19, 2016

Bimini Renewal

This post originally appeared on Windborne in Puget Sound as a series of three posts; they have been collapsed into a single, longer post here.


One of the things about owning a boat for a long period of time (or ageing in general, for that matter...) is that you get to see the effects of time.  They are almost never kind.  But to avoid becoming morose, let's keep this focused on Eolian's cockpit canvas.

Way back in 2003 we had our cockpit canvas renewed by Barrett Enclosures in Seattle.  They did a masterful job.  But that was 12 years ago.  In the intervening years, I have had to redo almost all the stitching (because I made a short-sighted decision to use the somewhat less expensive "UV Stabilized" polyester thread instead of the Teflon thread), refresh the Sunbrella's waterproofing on an annual basis, and deal with slow but inevitable fabric shrinkage.  It is a sad thing to me to see the sorry state that things have reached, from such initial beauty.  So, it is  time to do that "once in a lifetime task", a second time.  New cockpit canvas is needed.

But this time, instead of investing more than 6.500, I decided to give it a try myself.  Already having a Sailrite LSZ-1 makes this a possibility.  So I reviewed Sailrite's excellent online videos, ordered a bunch of Sunbrella, fittings, and notions from Sailrite, and set to work.

After uneventfully patterning the aft bimini panel, I encountered the first problem:  There was no place on the boat large enough to lay out the pattern on the cloth.  We were able to get about 3/4 of it on the cabin top, so we did that and then folded the marked section up enough to get room to finish.  Yes, I know that this process was fraught with opportunities for errors to creep in.  But within the tolerance that we were working with (about 1/8") I think we did OK.

But there are a lot of fabric pieces involved in the aft panel.  Altogether 7 more pieces were needed, besides the obvious big one.  And then the space thing reared its head again.  Working with the LSZ-1 on the edge of the saloon table, I was able to sew the long seams by letting the completed section pass over the table and then off the far edge, on its way back to the floor.

On a project like this, fabric management is always difficult, especially when working in a limited space (tho not as big a problem as this).  My recommendation:  always, ALWAYS use  seam-stick tape, 3/8" for normal seams and 1/4" for zippers.  It is a lifesaver.  And don't be in a hurry.

This last weekend, I finally got the last of it done and installed it.  But sadly, somehow I managed to get the locations for the Common Sense fasteners for one of the aft side curtains off slightly.  Rather than make another set of holes in the new piece, I am going to relocate the eyelets in that side curtain instead.  The thinking is that the side curtain is old and will be replaced anyway at a time in the future much nearer than the just-completed panel.  And because of this, I am not going to show you a picture of it.  Yet.

The plan is to move ahead with the other roof panels in sequence - the loose center panel that connects the dodger to the bimini, and then the top panel of the dodger.  When redoing the top panel of the dodger, I will be revising Barrett's design, making the top panel and the front panel separate pieces - the thing is just too unwieldy for me to handle as a unit.  And in fact, it looks like Barrett made the roof and front of the dodger separately, and then stitched them together as a final step.  I will use Common Sense fasteners to hold them together instead of stitching.

So.  I can say at this point, nearly 1/3 done with the top of the bimini and dodger, that with Sailrite's instructional videos, their tools and their materials, this is a doable project.  It is complex and requires constant attention to detail, but it is doable by the cruising sailor, at a savings of 90% over the cost of having a professional do the work.  But don't figure on getting it done over a weekend...


OK, as promised, here is the result.  I am one third done with redoing the bimini and dodger. That is, I have completed the bimini roof (I am excluding the side curtains and the dodger front from consideration at this point in time - the vinyl is still serviceable, and because these surfaces are not horizontal they have not suffered sun damage to the same extent).


I think it came out pretty good. In fact, it looks about as good as the original did when it was new and before shrinkage pulled everything tighter than a drumhead.

So, can you do this yourself?  The answer is yes.  But first, I strongly recommend that you view the following Sailrite video: How to pattern a bimini. There used to be another video on the website that took you thru the process after patterning, but they have apparently taken it down. But if this whets your appetite, then get this DVD and study it, thinking thru each thing that is done, and understanding why it was done.

First, nomenclature.  In the roof panel I made, there are three major piece types:
  • The roof panel itself - the largest piece of fabric by far
  • The sleeves.  These pieces of fabric form the sleeves which zipper around the tubing at the front and rear of the roof panel.  
  • The tails.  These are the narrow strips of fabric that hang down at the front and rear of the roof panel - they serve as the attachment points for the side curtains (at the rear - on mine you can see the rivets holding the Common Sense fasteners) and the center panel (at the front).
  • There are also some narrow reinforcing strips that go on the bottom edges of the sides to strengthen the attachment points for the side curtains.
If you decide to tackle this project I have the following recommendations for you:
  • Use Tenara Teflon thread.  I can't recommend this strongly enough.  The special "UV resistant" polyester thread will last approximately 5 years (in the PNW - less in the tropics).  The Tenara thread will last indefinitely - far outliving the fabric.
  • When sewing, use the basting tape that Sailrite sells.  The stuff you can buy in your local fabric store is designed to wash out and is a far weaker adhesive.  Use 3/8" for most seams and 1/4" for zippers.
  • When installing zippers, make sure that they will be covered - that is, protected from the sun.
  • Tools - you should buy these tools and consider them part of the cost of the bimini.  Your cost will still be far, far less than what you'd pay for professionally built canvas.
    • First and foremost, a walking foot sewing machine.  You just can't do this work with a home sewing machine. I have a Sailrite LSZ-1 and love it.
    • A binder of some type for applying bias edging tape
    • This nifty tool set for installing male Common Sense fasteners
    • This punch for installing Common Sense eyelets
    • Please note that my project did not require installation of snaps, Lift The Dot fasteners, etc. so I have not included tools for their installation here.  But if you need these fasteners you should look carefully at the tools that Sailrite offers.
  • If you are doing what I did, replacing an existing bimini, you can pattern right over it without removing it.  This allows you to get a better take on where the edges need to be, and saves a lot of labor.  You should apply the seam stick tape directly to the old bimini without an intervening layer of some other kind of tape.  It holds better, and yet can still be removed after the patterning.
  • For the panel to install correctly and fit well, it is critical that you consider and think about things like this:
    When patterning, the line defining the front and rear seams (where the sleeves and tails attach to the roof panel) should be made, not on the top of the tubing, but rather 90° away on the front (or rear) side of the tube.  Doing it this way makes it simple to attach the other edge of the sleeve.  Magically, you can just smooth the sleeve flat against the roof panel and stitch the zipper where it lays, without making any allowance for the wrap around the tubing whatsoever. I know that doesn't seem right, but it is.  Get out some strips of paper and try it out - I know that I had to in order to convince myself.

    If on the other hand you need for the seam to be on top of the tubing (as for example if the seam joins two adjacent roof panels over an intermediate support), then you cannot simply lay the sleeve flat to determine its attachment point to the roof panel.  Instead, lay it flat, mark the edge, and then move it back 1.25 inches (I think...  get out your paper strips and confirm this number - it will depend on the size of your tubing) and attach it there.  Because in this case you do need to account for the wrap around the tubing, and it's a surprisingly large amount.

    If you should use a top seam for the forward edge of your roof panel, you will need to make the tail wider by half the diameter of your tubing so that it will extend the desired distance.
  • You will face a decision whether to use "hang down" tails or "tuck back" tails.  Hang down tails are just straight rectangular pieces of fabric; tuck back tails are contoured to match the edge of the bimini to which they will be attached.  I initially made mine with the hang down tails, but I was disappointed with the way they, well, hung.  Because they are straight fabric pieces, they do not follow the contour of the bimini - they just look bad.  I made new tuck back tails, ripped out the seams and installed them.  
  • When laying out the sleeves or the tuck back tails, the video may encourage you to use the pattern to determine one edge and then laboriously lay out a second line the desired distance away by making a series of markings perpendicular to the original line.  This is unnecessarily tedious.  Instead, lay out the first line using the edge of the pattern, pull the pattern back the desired amount, and lay out the second line, again using the edge of the pattern. 

As you can see, there are two more panels that need to be reconstructed. And that sail cover is looking pretty shabby too...


A quick revisitation of the tails issue, with an illustration.  And then I promise I will shut up about it.

Consider the forward edge of the aft bimini roof panel.  Because I am lazy, I originally made the tail as a hang down tail.  That is, the tail was a long skinny rectangle - easy to cut, and minimal fabric usage.  But because it had no curvature, it did not match the contour of the front edge of the panel.  Consequently, after installation it had a scalloped appearance and made a loose fit to the center panel:


Hang down tail.  Bow is to the left, and new panel is on the right
What is worse, with Eolian moored facing into the weather, when it rained (and oh, does it rain here in the PNW), the wind blew the rain under the edge of the tail and into the cockpit.  In fact the tail acted as a funnel, actually scooping in rain.

Tuck back tail - doesn't that look better?
So I picked all the seams and took apart the front edge of the panel.  And I cut fabric for a new tail, this time a tuck back tail - contoured to match the forward edge of the panel.  The result is gratifying - look how tightly it meets up with the center panel!  The built-in curvature makes the edge of the tail actually press down on the center panel - wind-blown rain is excluded (tested less than an hour after reinstallation... this is the PNW after all).

So far, I cannot think of a situation where I would use a hang down tail.
Related Posts Plugin for WordPress, Blogger...