
Remember my post about wanting to have a dry bilge? Well, we ultimately decided to go the route of installing a couple of sump boxes to deal with the air-conditioners’ condensation. We selected this one[Tho not clean enough to drink, the condensate from the air conditioner would be an ideal source of ion-free water for battery maintenance. -Ed]and Michael brought two of them with him when he arrived on the 15th.
I am 80% of the way through installing the first of the two. Here are the steps I have taken thus far:
The next step is to permanently connect the outlet hose. My plan is to T it into the sink drain hose. In order to do that properly, I’ll need to place a non-return valve (check valve) in the outlet hose, just before the T. This will prevent any water draining out of the sink from finding its way into the sump box’s outlet hose*. Unfortunately, the chandlery will not have the check valve I need until some time tomorrow. Until then, we’ll be living with a hose zip tied to our sink.
- Before getting started, we dried and cleaned the bilges.
- I then ran a line from the AC unit’s drip tray outlet down into the bilge to see if it would gravity feed the water where I wanted it to. I put a short length of hose into a plastic container. We ran the air conditioner and it fed the water as I had hoped. I was surprised at how quickly it filled the container!
- Before doing any actual plumbing and electrical connections, I wanted to test the unit to ensure that it worked, and also to ensure that it would pump the water high enough to exit where I planned to dispose of it. We tested this by taking the sump box out into the cockpit, connecting a hose to the outlet and filling the box with water. While Rebecca held the hose in the air, I applied temporary power to the pump using a 12V plug and alligator clips. It worked as we had hoped.
- The next step was to attach the inlet and outlet hoses. We had already made one trip to the chandlery to purchase parts for this (hose, clamps, fittings). This particular box has multiple inlets of various sizes. The strange thing (to me) is that you need to saw off the end of the inlet that you want to use! It seems to me there could be a better solution but it is what it is, I cut it off.
- I temporarily positioned the box in the bilge, a location which is at a lower level than the AC unit. This allows the condensation water to gravity feed into the box, as tested earlier. I connected the sump pump’s power leads to a bus bar in a nearby junction box which supplies 12V to the electric bilge pumps. The outlet hose I simply ran into a nearby sink. We tested the operation of the unit in this configuration and it worked perfectly. The AC unit ran for some time and the bilge remained dry as we had hoped.
*Alternatively, I guess I could route the sump box outlet hose so that it feeds down into the drain hose. Gravity should then prevent the sink water from making its way into that hose.
Notes: I also want to plumb our refrigerator’s drain into this sump box. The sump box that I’ll be installing on the starboard side will have to deal with the condensation from both the salon AC unit, and the starboard hull’s AC unit.
Showing posts with label condensation. Show all posts
Showing posts with label condensation. Show all posts
Thursday, January 29, 2015
Dry Bilge
Mike and Rebecca on s/v One Love really want a dry bilge. And air conditioning a boat in the tropics was working against that goal. I am also an advocate of the incremental test/installation process that Mike used. Here's what he did:


Thursday, October 9, 2014
Warm Boots
The time of year is coming when this idea will be very welcome indeed. Warm dry sea boots? What a luxury! As usual, Drew at Sail Delmarva shows us how to have them for a very minimal investment:
A few days ago I was following a thread on a sailing forum regarding how to best dry a pair of high-dollar leather and Goretex seaboots. Suggestions from experts ranged all over, but missed that most obvious answer; a boot drier. Perhaps this won't resonate with warm climate folk, but it should; I've seen enough mold and mildew in Florida to make it the state plant... if it were a plant.
I built this one15 years ago in an evening, for the specific purpose of drying wet snow gear, but it has certainly been used far more for rain soaked gear.
Even the most sodden boots, shoes, or gloves are dry, warm, and fresh in a few hours. Odor is eliminated, as there is no chance for anything to grow. Wet gear has a proper place, and space is conserved since less gear is needed. The materials came entirely from the might-need bin, but I suppose it could be built for $30 if everything were purchased. It could be made longer, for a larger family, with very little change in cost.
The fan provides just enough flow. A bit of flashing creates an internal baffle, directing all of the air flow over the bulb before it goes to the pipe outlets. A 60W bulb seems to provide just enough warmth, but a larger bulb or lamp-base heater could adapt the design to larger sizes. Hardware cloth keeps small fingers and trash out. Pipes could be made longer for sea boots. The unused pipes are plugged by dropping a large bolt in the hole, focusing the heat on a reduced number of holes. The weight is sufficient to keep it from tipping over.
What would I change? I should have built it for 8 pipes (4 boots + 4 gloves) to better serve 2 people. I should have made the pipes just a little longer (no so much that it could tip over) and drilled a cross-wise hole near the end (so that they cannot be blocked if the boot is sitting on the end). But Jessica is off to college, so it's really just me playing outside, and it works quite well as it is.
- 110v computer fan
- ceramic socket with 60W bulb
- box and switch
- a salvaged cord
- 3/4" lumber and some screws
- 3/4" PVC pipe stubs
- a bit of flashing and some hardware cloth
- paint
I've been tempted to build something similar into the boat--it's really sweet to have warm, dry shoes in the winter--and perhaps I will if I start cruising more in the off season, now that school schedules don't matter. Perhaps something that diverts warm, dry air from the mini-dehumidifier.

Monday, March 25, 2013
Nano-tech super hydrophobia
Saw this stuff over on Rhys' blog The World Encompassed:
Has anybody out there used it on a boat? Say, on canvas or Sunbrella?
Has anybody out there used it on a boat? Say, on canvas or Sunbrella?
Thursday, September 6, 2012
V-berth drama
Please welcome new contributors Paul and Amber on s/v Kingsley! For their first project on Small Boat Projects, we are featuring their repair to the hull covering in their v-berth. This is a novel solution, and even allows for changing decor in the future!
When you get done reading the post here, please go to their site and read it again there - there were some fun polls interspersed in the post that sadly I cannot reproduce here.
When you get done reading the post here, please go to their site and read it again there - there were some fun polls interspersed in the post that sadly I cannot reproduce here.

Our v-berth with the forward cover removed
We'd like to introduce you to our v-berth. You know, it's the front pointy part of the boat, it usually has a pretty cozy bed (ours does) and when you lay down on a clear night you can see out the hatch to the moon and stars. Problem is, our v-berth had a leak.
Long-leaky-v-berth-story short - we fixed it. Unfortunately, our previous owner hadn't fixed it, for I don't know, years before we bought the boat so it caused a good amount of damage to the white boards in the picture above. Long-warped-rotting-replace-wood story short - we fixed that too.
So, this brings us to today's post. The v-berth walls. The vinyl/foam insulation on the walls needed removed and replaced. That seemed easy enough. Well, it wasn't (drama!). We invite you to share in our story and become a part of it! Periodically throughout the story we'll have an anonymous quiz that asks you the reader if you would keep going on the project yourselves or throw in the towel and hire some pros. Put yourself in our shoes for a few minutes. How handy are you? Marine vinyl masters? Or newbies like us trying to save a few bucks and risk it by doing the project ourselves!?!?!

Our v-berth with the old vinyl/insulation walls removed
First, we had to remove the old vinyl/insulation from the v-berth walls. A little sweat, pulling, and scraping and we were down to fiberglass (pic above).
Now, we could of just purchased some new insulation and vinyl, cut and glued, and we'd have been good to go. Where's the drama in that? Who needs the pros, we got this. Time for your first vote!
[poll removed. :( ]

We then purchased some tan marine vinyl on sale with a coupon from Jo-Ann Fabrics and also some crazy looking insulation-type neoprene fabric to take the place of the old foam. We saved tons of money, especially with the coupons (P.S. stuff at Jo-Ann's is always on sale at some point - like 50-70% so be patient, hunt some online coupons, and get a great deal). The cutting was no problem. Then we started looking into glues...and adhesives...and more glues...and more adhesives.
After much research and glue price checking (it turns out glue is expensive... depending on the glue) we decided to go with some water-based contact cement (from Lowe's). Was this the best choice? Probably not. Was it somewhat affordable? Yes. Does water-based contact cement cause a few less cancers than normal contact cement? We think so.
Here's the thing about glue. It really boils down to nasty, cancer causing ingredients. The more of that stuff, the more flammable perhaps, the better it will stick. We aren't gluing something in the garage here. This is our bedroom...in our house (boat) where we live. Whatever we decided to glue we'd be living where we glued it...while it dries. Something I've learned about myself during boat living over the past year was that I love living on the water, I love sailing, I love my boat, but giving myself cancer just to attach some new walls to my v-berth isn't really worth it.
Price was a factor as well. Great glue often seemed to come in tiny bottles and we were talking about gluing quite a bit of vinyl. Time to vote!
[poll removed. :( ]
Now for some drama. The contact cement didn't stick. After days of drying, it didn't stick. We had 4 pieces (2 walls with 2 pieces of insulation) of giant fabric with glue on them that didn't stick. The money for the glue - wasted. Time spent - wasted. Now, time to call the pros?
[poll removed. :( ]
We called the pros. They gave us an estimate. Drum roll please. It would cost us roughly $3,000 +. We hung up with the pros and never called them back. For that kinda cash we could afford to screw up multiple times! Next up - us screwing up multiple times...with glue...again.
Despite my best friend's hatred for Gorilla Glue, we purchased some (it's at least affordable) and tested it on a small piece of our each of our fabrics. It worked great. We knew that it expanded upon drying, but that didn't seem to bother the situation. Let's do this!
We added the glue to the fabric pieces in lines - it looked like long strings of spaghetti, winding their way all over the pieces. We set books on top and left it for a day. Well, guess what? The glue expanded. Quite a bit. It stuck great, but when we put the walls up in the v-berth we could see the spaghetti lines all over the place. Grrrrrr!!!
[poll removed. :( ]
We took a little break from the drama. We rolled up the warped vinyl and let the project sit for awhile. Then a little lightbulb turned on in my brain. This type of thing is one of the reasons I like the combination of owning a boat and not being rich - you get creative.
We trashed the vinyl/insulation. We took the unopened can of the water-based contact cement back to Lowe's to get a little money back. We hit up Jo-Ann's again, but this time it wasn't for more vinyl...it was for fabric.

We just so happened to hit a 50% outdoor fabric sale...perfect. We bought some Sunbrella-type fabric and ordered some nautical-sailcover-like fasteners online (they're way cheaper here online). Captain wifey does have a sewing machine aboard, and she worked the seams, edges, (I'm just making up sewing words here) & fasteners. I used a little dab of 4200 epoxy to hold the other side of the fasteners on the v-berth walls ...and...


…complete! We're pretty happy with our final product and, despite how your votes end up, happy that we finished the project ourselves. We think the heavy outdoor fabric will hold up nicely. Since the fabric walls are not actually attached to the boat, we can easily remove them if we need to or if we got really bored - change the fabric to suit our interior design needs (I don't see that happening anytime soon…er…ever).
Looking back on the project, we think the Gorilla Glue might have actually worked fine if we would have used a little less and really spread it out. We also decided not to add insulation - we had lived most of the winter without it so it didn't really bother us. I hope you enjoyed our tale, and thanks for voting! Final project (with cat) below.
~Paul & Amber (& Kali below)

Wednesday, November 3, 2010
Keeping the water out
Here in Seattle, keeping the water out is a nearly full-time job. Aaron and Nicole from s/v Bella Star walk us thru a very well-done repair here:
We’ve had a leak since we got the boat that we were finally able to fix with some helpful insight from another HC33 owner. Thanks Steve! The leak was coming from the hole in the deck where our diesel heater’s stove pipe passes through the deck.Usually, finding the leak is much more difficult than fixing it.
To fix it, the first thing I did was remove the charlie noble (boat chimney) to get at the hole.

Next was to remove the fairing block – it was cracked in half so I used epoxy to glue it back together. For this project I used West System G/Flex due to its greater elasticity.
We could see right where the water was coming in.

With the fairing block removed I used a Dremel with a sanding cylinder bit to clean out the old sealant and prepare the surface for some epoxy and fiberglass tape.

Then I applied the epoxy and fiberglass tape.

I let that cure overnight and then cut off the excess with the Dremel and a cutoff wheel. ALL HAIL THE DREMEL! I also sealed up the holes in the deck where the fairing is screwed down.

Then I taped off the area in preparation for applying the sealant.

I reattached the newly fixed-up fairing pad and tightened the screws just enough to that the sealant was squishing out. Then wiped away the excess. (With sealants you want to wait until it’s cured before you screw down the item tightly.)

I pulled the tape while the sealant was still wet.

I let that cure overnight, then tightened up the screws.
Next was to repeat the tape and sealant process with the charlie noble.
So after we got everything put back together all we had to do was wait for it to rain. We didn’t have to wait long. Fortunately the work paid off and the leak is fixed.
%5B3%5D.jpg "IMG_6560 (Small)")


Tuesday, August 3, 2010
Why didn't we...
This project was originally published on Windborne In Puget Sound in May, 2010.
I don't know why we didn't. You would think that we would have long ago.
Living aboard and dealing with the problems of humidity, especially in the winter when the boat is sealed up should have pointed us at this solution sooner.
In a dock gathering discussion last week, we realized that most of the other boats were keeping dehumidifiers running in the winter.
But my memories were of the huge clanking monster of a dehumidifier that my parents ran in the basement of our childhood home. It was a heavy, file cabinet-sized unit that needed its own circuit - it drew 15 amps. Not exactly appropriate for a boat.
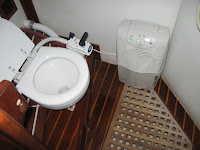
But now we have the world's products at our fingertips - I did a quick Internet search and found this one - it draws only 1.6 amps, is small enough to live in the aft head, and yet is capable of pulling 25 pints of water/day out of the atmosphere inside the boat. It even has provision for a continuous drain (which I haven't set up yet), that would go right into the shower sump it is sitting above. Oh yeah... and that is distilled water it is producing too - ideal for the batteries. Finally, condensing water produces heat, so it functions as a small space heater too (you can almost think of it as a tiny heat pump).
One of the dangers of living with problems is that they cease to be viewed as problems after living with them long enough. If it hadn't been for that casual dock conversation, we'd still be living with the humidity.

I don't know why we didn't. You would think that we would have long ago.
Living aboard and dealing with the problems of humidity, especially in the winter when the boat is sealed up should have pointed us at this solution sooner.
In a dock gathering discussion last week, we realized that most of the other boats were keeping dehumidifiers running in the winter.
But my memories were of the huge clanking monster of a dehumidifier that my parents ran in the basement of our childhood home. It was a heavy, file cabinet-sized unit that needed its own circuit - it drew 15 amps. Not exactly appropriate for a boat.
But now we have the world's products at our fingertips - I did a quick Internet search and found this one - it draws only 1.6 amps, is small enough to live in the aft head, and yet is capable of pulling 25 pints of water/day out of the atmosphere inside the boat. It even has provision for a continuous drain (which I haven't set up yet), that would go right into the shower sump it is sitting above. Oh yeah... and that is distilled water it is producing too - ideal for the batteries. Finally, condensing water produces heat, so it functions as a small space heater too (you can almost think of it as a tiny heat pump).
One of the dangers of living with problems is that they cease to be viewed as problems after living with them long enough. If it hadn't been for that casual dock conversation, we'd still be living with the humidity.
Saturday, July 10, 2010
Vinegar: it's not just for cucumbers any more
This is a tip from Doug, on s/v Angelique, late of G Dock (now in Tacoma):
Is your canvas a happy home for mildew and bacterial colonies? Here in the moist Pacific Northwest, this is common. Doug suggested to us that vinegar cures the infestation. Vinegar! Who would have thought it?
The low pH from the acetic acid content kills all the bacterial life. And if you use "white distilled vinegar" which is composed of nothing but water and acetic acid - both of which will evaporate, no follow-on rinse is needed.
It works! Beautifully.
Is your canvas a happy home for mildew and bacterial colonies? Here in the moist Pacific Northwest, this is common. Doug suggested to us that vinegar cures the infestation. Vinegar! Who would have thought it?
The low pH from the acetic acid content kills all the bacterial life. And if you use "white distilled vinegar" which is composed of nothing but water and acetic acid - both of which will evaporate, no follow-on rinse is needed.
It works! Beautifully.
Tuesday, June 15, 2010
Ventilation: Good
"Out of sight, out of mind" is a concept that may work well elsewhere, but on a boat, a long unopened storage compartment will develop mildew and odors. Chuck and Susan detail on their blog, Voyages of Sea Trek one solution to this problem:
I wonder where they found those grills?If there is any one thing that people object to on a boat the most, it is unwanted smells. And as a boat gets older, it develops smells from all kinds of sources. There are volumes of information out there on holding tank and head odors so we did not plan to address them with this minor modification. After almost 20 years of living aboard, we have found that certain areas of the boat can develop odors from trapped moisture and condensation in any climate and any season. A bigger problem that can surface is mold and mildew, which can generate odors and also cause health problems in some individuals. We learned all of these lessons the hard way, and the solutions were actually quite simple.
The secret to keeping a boat odor and mold and mildew free is ventilation, ventilation and, of course, ventilation. Fans, air-conditioning and heating systems all help in the ventilation department. Other things like leaving hatches or ports open, even a crack, make a big difference, and fans and solar vents make huge improvements. But none of this will help much if there are compartments all over the boat that have no way to exchange air, and allow air to flow in and out. These enclosed compartments are further insulated by cushions and mattresses, not to mention latches that keep the access closed tight. Almost all boat builders want the interior surfaces to look as smooth and unbroken as possible, but once again, this contributes to the problem.
In our current boat, and the previous one that we cruised and lived aboard for 17 years, we took some time to open up all of the interior space to air circulation. Using a hole saw, we drilled ventilation holes inside the cabinets and lockers so the air can flow from one end of the boat to another. We use 12 volt computer fans strategically placed to assist the circulation process, since they are extremely quiet, use very little power and will run continuously for long periods of time. We also use a dehumidifier that runs all year long when we are plugged into the dockside power. It is incredible how much moisture it pulls out of the air, no matter what season and no matter whether we are running the air-conditioner or the heater.
The weekend was set aside to work on the circulation issues and make some improvements. The forward v-berth was a particularly problematic area. It seemed to always be damp, and since the anchor locker was forward of it and the shower just aft of it, this was a moist environment. The dehumidifier sits in this cabin and blows the treated, dry air up into the main salon from where it sits. But we knew we needed to get the area under the v-berth circulating air and with 5 inch cushions on top, this was only going to be accomplished by cutting vents in the side. The two berths in the aft cabin are the same with the added problem of water tanks under each berth. We store lots of items, including clothing, under these berths so it needs to be dry and odor free.
In the past, we have used a variety of vent grills. Our previous boat had an all teak interior just as this one does. So naturally we use teak grills for that finished look. But aside from the fact that these teak grills are way too expensive, in my opinion, need to be varnished and the slats are easily broken if something heavy inside the locker falls against them. We have had this happen on more than one occasion.We have used stainless steel grills and they work fine, but just don't look right to us. With the areas we wanted to cover done in a dark teak, we were concerned that anything white would stand out too much. So our options were black or brown, and square or round. The brown grills we could find were either too flimsy or designed to have an air-conditioning duct attached, and stuck out too far in the back. We found a nice, sturdy, black, round grill and ordered 6 of them to do the surfaces we wanted to vent.
The installation part was very simple. We used the appropriate size hole saw to drill through in the location we wanted the vent. We measured carefully to be sure it was centered where we wanted it, and took care that there was nothing behind the spot that could be damaged by the hole saw. When a hole saw is used on teak plywood, it is best to start the hole on one side and before it goes all the way through, finish drilling from the other side. This keeps the wood from splintering as the saw passes through the opposite side. Before we attached the grills, we took the time to sand the teak around the area the vent would be placed and put a coat of varnish on the wood. This way, once we start re-varnishing the interior, these areas will be done and we won't have to remove the grills again for a long time.


Saturday, May 29, 2010
Please don't weep!
 Moisture wicking down thru the end grain of the sampson posts over the long, rainy Seattle winters was a source of water in the chain locker on Eolian. A quick and very nautical fix for this was some thin sheet copper (gotten at a craft store) and some small copper brads.
If you decide to do this and find the sheet is too stiff to work with, heat it to red heat and let it cool slowly - this should take the work-hardening out of it.
Tuesday, May 11, 2010
Public safety item
I found this on the Voyages of Sea Trek blog. As it is a safety item, and in fact one which could affect some of those on our dock, I feel it is important to get the word out as widely as possible. I'm sure Chuck and Susan would agree. Here is their posting:
Please check to see if your dehumidifier is on the recall list. Boat fires never end well.
Dehumidifier Recall
We try and post any safety issues we find that would have a affect a broad number of boaters and we feel this is an important one since many of us in all climates along the eastern seaboard especially, could be affected. We use a dehumidifier all of the time on board Beach House but not any of the ones affected by the recall. Nothing is more frightening and devastating for boat owner like a fire so we considered this one important. This humidifiers can be purchased on line or at many home improvement stores. Check the link and be sure yours is not included
The U.S. Consumer Product Safety Commission has issued a recall of 98,000 dehumidifiers sold under the Goldstar and Comfort-Aire brands between January 2007 and June 2008. The model in question, manufactured by China's LG Electronics Tianjin Appliance Co., has a 30-pint resevoir with a front-loading bucket, and a red shut-off button. This unit has been determined to be the cause of a number of fires — and we all know how boat fires usually turn out. To see if your dehumidifier is on the recall list, check this site.

Monday, April 26, 2010
Shelving It
Project from s/v Estrellita 5.10b, April, 2010.
We had three sets of hanging lockers in our boat: one in the v-berth (master bedroom), a big one in the main living area across from the head, and one in the aft cabin.
For us, they are a waste of space. This is the large hanging locker in the main living area which I painstakingly lined with rFoil using double-sided contractor-strength rug taped with insulating tape on top to the hull.

The rFoil has helped with condensation a little - not enough for me to recommend it to anyone. Thankfully we only have one more (planned) winter up here and the condensation will go away when we get South...until we end up somewhere with chilly water again.
But I digress.
I measured, cut and installed shelves for two of the hanging lockers before running out of good weather. Over two other good weather windows, Carol cut the remaining shelves and I painted everything.
Then we realized we needed to cut finger/ventilation holes in them which we did and I repainted the holes.


We bought a bunch of Mountainsmith Travel Cubes which we use to organize our clothing and to keep it from getting "boat smell".

We can fit 6 cubes on the two shelves with room for a big bag of less regularly needed goods beneath the bottom shelf. Right now we have a big bag of paper goods in there but that will probably be changed to spares because it is a good, low center of gravity and central storage place.

This creature comfort addition has made a big change in our daily lives, removing one more layer of stress from living on a boat. I can find my clothes. I have room for plenty. They don't get damp and they smell like laundry detergent when they come out of the cube. When we need to access the items below, the cubes are much easier to unload and reload than stacks of clothing.
I (heart) our cubes.
This post originally appeared at s/v Estrellita 5.10b. This post copyright s/v Estrellita 5.10b.
We had three sets of hanging lockers in our boat: one in the v-berth (master bedroom), a big one in the main living area across from the head, and one in the aft cabin.
For us, they are a waste of space. This is the large hanging locker in the main living area which I painstakingly lined with rFoil using double-sided contractor-strength rug taped with insulating tape on top to the hull.
The rFoil has helped with condensation a little - not enough for me to recommend it to anyone. Thankfully we only have one more (planned) winter up here and the condensation will go away when we get South...until we end up somewhere with chilly water again.
But I digress.
I measured, cut and installed shelves for two of the hanging lockers before running out of good weather. Over two other good weather windows, Carol cut the remaining shelves and I painted everything.
Then we realized we needed to cut finger/ventilation holes in them which we did and I repainted the holes.
We bought a bunch of Mountainsmith Travel Cubes which we use to organize our clothing and to keep it from getting "boat smell".
We can fit 6 cubes on the two shelves with room for a big bag of less regularly needed goods beneath the bottom shelf. Right now we have a big bag of paper goods in there but that will probably be changed to spares because it is a good, low center of gravity and central storage place.
This creature comfort addition has made a big change in our daily lives, removing one more layer of stress from living on a boat. I can find my clothes. I have room for plenty. They don't get damp and they smell like laundry detergent when they come out of the cube. When we need to access the items below, the cubes are much easier to unload and reload than stacks of clothing.
I (heart) our cubes.
This post originally appeared at s/v Estrellita 5.10b. This post copyright s/v Estrellita 5.10b.
Subscribe to:
Posts (Atom)


 Posts
Posts


