Life aboard is living large, in a small space. Every boat owner has found ways to make life in that small space easier, more comfortable, more convenient. The idea behind this site is to provide a place where these ideas can be shared amongst the boating community.
To participate, send your contribution to SmallBoatProjects at gmail dot com.
Please welcome new contributors Rich & Jeni, who sail their Tayana 37, s/v Ramble On. As their first contribution, here's a simple and effective (the best kind!) time and money saver:
Sorry for the lack of a witty title; I just don’t have the energy right now.
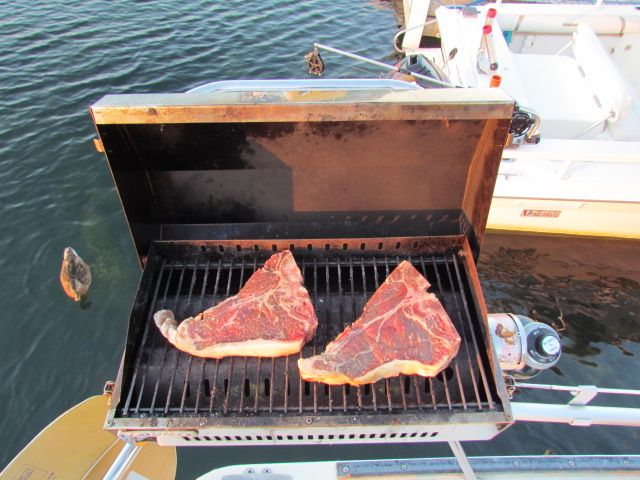
If you have a boat you probably like to be outdoors. And if you enjoy being outdoors, you probably also like to cook outdoors. Ergo, if you have a boat and you like to cook outdoors, then you probably have a barbecue mounted to your rail. If not, you have no idea what you’re missing. We cook outdoors a lot. In the summer it helps keep the boat cool by not cooking inside. Pretty much, if it’s not raining I’m Q’ing.
Jeni and I were going to “Q” the other night, in fact. And that’s why I have to say it was bound to happen eventually. I’m actually quite surprised it didn’t happen sooner. And if you have one of those cute little marine barbecues with the cheesy pressure regulator, if it hasn’t already happened to you it probably will. When I pulled off the cover to warm up the grill, plop. Glug, glug, glug. Off popped the regulator, and straight to the bottom it went.
“Hey, wanna order take out tonight?”
In two days we had our replacement regulator from Port Supply and upon further inspection I realized a small tab in the casting. I’m not sure if this was the manufacturers intention or not, but this appeared to be the perfect spot to crimp a stainless steel safety cable. A trip to the hardware store and $4 later we were back in business. A small carabiner on the other end clipped right into the rail mount handle. It’s as if it was meant to be by design, even though the manufacturer makes no mention of it in its instructions, nor do they sell some overpriced version as an “accessory”.
Needless to say, my regulator (and hopefully yours now) will not be going for a swim.
Over at Dock 6, Brian has experienced those two best days of boat ownership:
The day he sold his boat
The day he bought his new boat
And of course, with a new boat, there are lots of, erm..., opportunities. Read along with Brian as he makes NextBoat his own:
"Yes, I'm workin' all the time..." -Rush
The stages of New/Old Boat ownership:
Stage 1. Admiration stage- admire how much roomier (or prettier or shinier or faster or just plain better your New/Old Boat is than your Old/Old Boat.)
Stage 2. Installation stage- Start installing stuff. Begins approximately 7 minutes after the onset of Stage 1.
Stage 2 never, ever stops.
If you have bought the right boat, the first stage never stops, either.
Having lived with and aboard NextBoat for almost 3 months, much Low-Buckness, and some Mid-Buckness, has ensued.
For those of you still following along, (thanks!) you know the story. For those who just stumbled into this meandering morass of a blog, here’s the short version:
We owned a boat, wanted a slightly bigger boat, found a bigger boat, bought a bigger boat, sold the slightly smaller boat…
Now we are pouring money and time and effort into the slightly bigger boat.
And enjoying every minute of it.
The upside of NextBoat is that she had been well maintained by two previous owners. The downside is that there were few upgrades, and some gear that we consider necessities was missing entirely. Like, oh….
A compass.
Didn’t have one.
Apparently, never had one since new- the binnacle was as smooth and unblemished as a baby’s transom.
We'll come back to that later.
So, after peering into the purse and seeing the present paucity of pennies, (prolonging our perpetual pondering of whether we are presently poverty stricken or penurious,) providence presently allowed us to press the button on a plenitude of purchases, provided by the profits of this profligate’s penmanship.
In other words, I got paid for some scribbles. Cool.
So, with cash in hand, we got all Bugs Bunny and Road Runner on the boat.
(Okay, come on, I can’t be the only one who remembers the theme to the “Bugs Bunny and Road Runner Hour”? Come on, sing it with me, “….On with the show, this is it…”)
er...
*turns the Obscure Weirdness dial down to 7*
A flurry of mouseclicks and credit card approvals and straight-up hand-to- hand cash transfers later, we had a whole bunch of new stuff to stuff aboard our new ride.
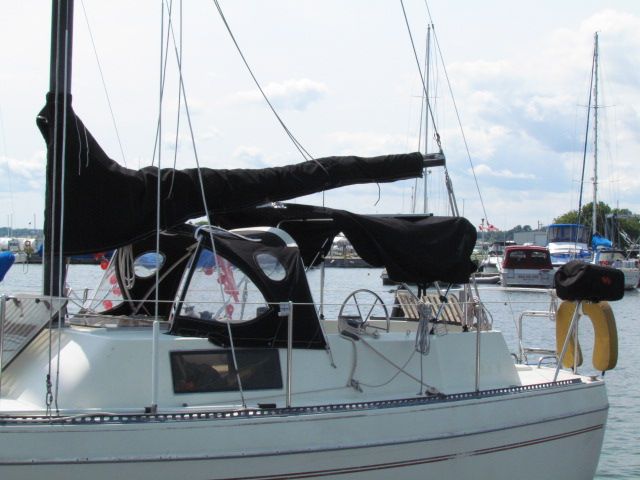
SWMBO is a ginger, and with a redhead’s propensity to burst into flames upon exposure to sunlight, she immediately noted that NextBoat lacked cockpit canvas of any sort. A shadeless boat with a redhead aboard is an unhappy boat for all aboard. Luckily, a beaten and battered and unused-by-the-previous-owners dodger was included in the purchase.
It needed help.
Canadian Canvas Works underpromised and overdelivered, restitching the entire top in less than 48 hours.
The skipper of Cyclone sold us a languishing bimini from his currently-for-sale S2 8.0A, and with a little cutting and sweating we soon had a comfortable cockpit.
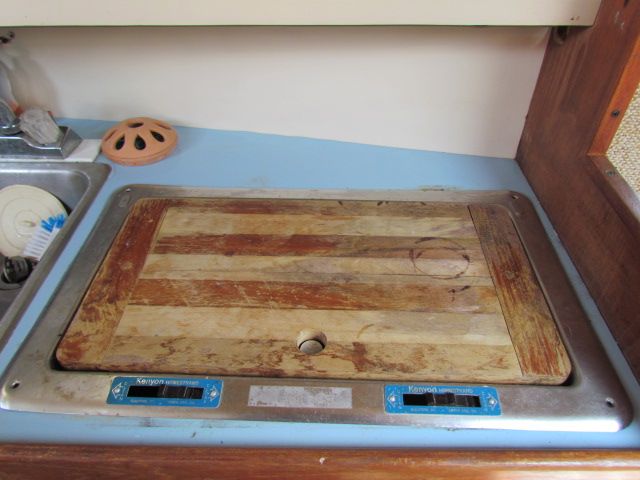
The stove that came with the boat had to go. Kenyon Homestrand pressurized alcohol stoves may have worked just fine when new, but 30+ years later….
… not so much.
The scary quotient, however, had increased considerably.
After following the less-than-simple lighting instructions, ( Pump tank of flammable fuel, tunr burner valve to introduce flammmable fuel to burner, close burner valve, light flammable fuel, let it burn out, then reopen valve and relight ) we inevitably faced a *WOOF* of ignition, resulting in burners with flames that had only one setting- Total Conflagration.
Seriously, the few attempts at using this DeathBlaster stove to create Two Burner Tastiness resulted in singed entrees trailing the faint odor of burnt eyebrows.
A quick click toBinnacle.com got us a great deal on a Cookmate non-pressurized alcohol stove. Under $250, including shipping.
Installation took less than a half hour, and the result is incredibly satisfactory.
Great temperature control, easy to light, and the burner capacity is measured in weeks, not hours. 6 weeks of regular use have borne out the value of this investment.
Further, we have upped the culinary ante by permanently installing the Kuuma Stow-n Go propane grille we bought during our first season aboard Whiskeyjack, but rarely used.
We have used this grille more this season than in the past 6 seasons combined.
Which means we are using more propane.
Which presents another challenge: Storage.
The one drawback to this center cockpit layout is that it eliminates all cockpit storage- no lockers, or lazarettes or cubbies on deck at all. I had no desire to store 1 lb. propane cylinders in the cabin, so a solution was required.
A quick trip to Home Hardware netted 2 feet of 6" PVC pipe, an end cap, a cleanout, and a couple of hose clamps. Less than $25 later, we were able to store 3 propane bottles on deck safely.
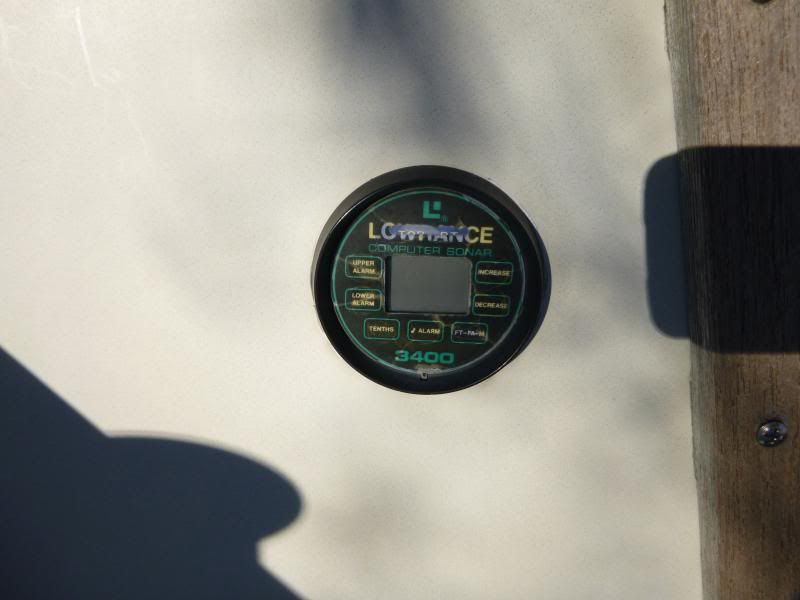
So, back to that no-compass thing: The existing cockpit instrumentation on NextBoat consisted of an inoperable Lowrance depth gauge.
That’s it.
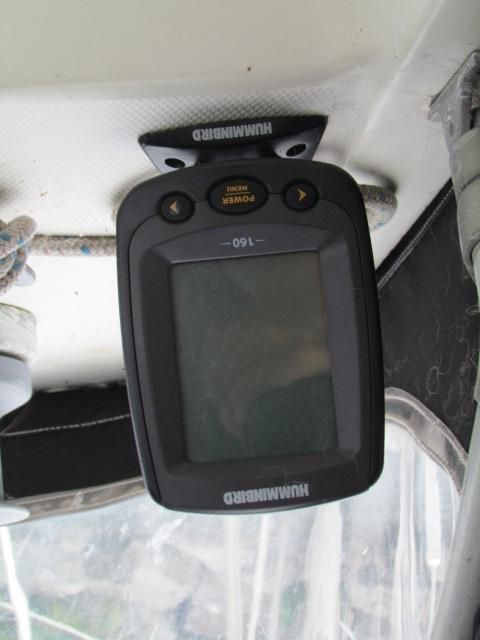
A quick trip to Dovercraft Marine netted us a Humminbird 160 fishfinder for $80. Some headscratching on where to locate the transducer and how to route the cables and roughly an hour or so of sweating and drilling and and wiring later, we not only had depth display, but water temperature as well.
Back to that absence- of -cockpit- storage issue:
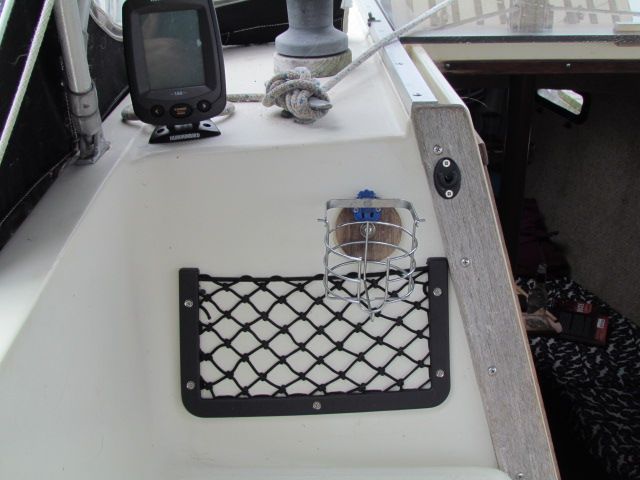
I picked up a couple of these mesh map pockets a half decade ago, and finally got around to using one! Very handy for books, sunscreen, sunglasses, all the stuff that would otherwise end up in the way.
With depth out of the way, time to deal with the compass issue. I opted to go with a small handheld compass as a backup to a small Lowrance chartplotter at the helm, from Radioworld.
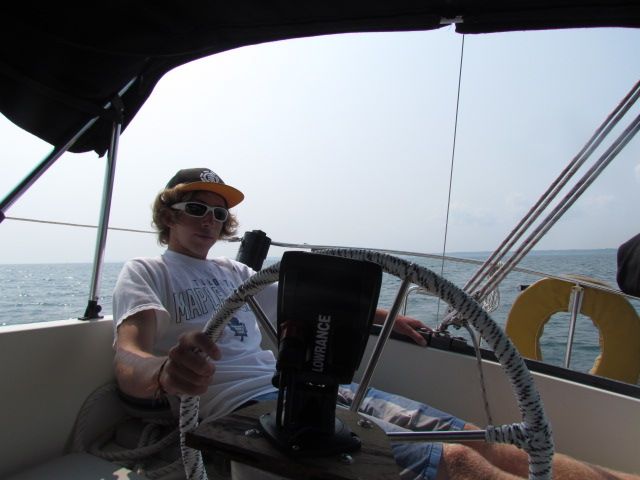
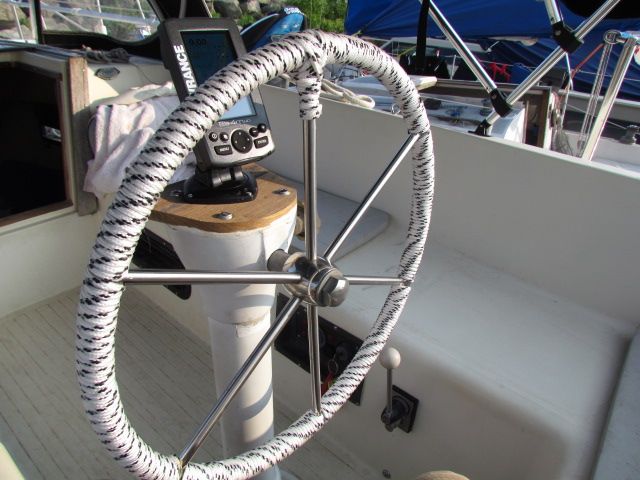
I LOVE these things. Lowrance "Gold" plotters include a 2 gig Navionics chart card, and the plotter we had on Whiskeyjack never let us down. The seated helm position on NextBoat makes the 4"ish screen size practical, and, though small, the screen is easy to read, the controls are intuitive and the menus easy to understand. The included mount swivels and tilts, making it viewable from anywhere in the cockpit....
...even if you are a slacker teenager, as Jordan demonstrates:
$250 well spent.
$3 worth of 1/4" line and an hour or so of time dressed up the wheel...
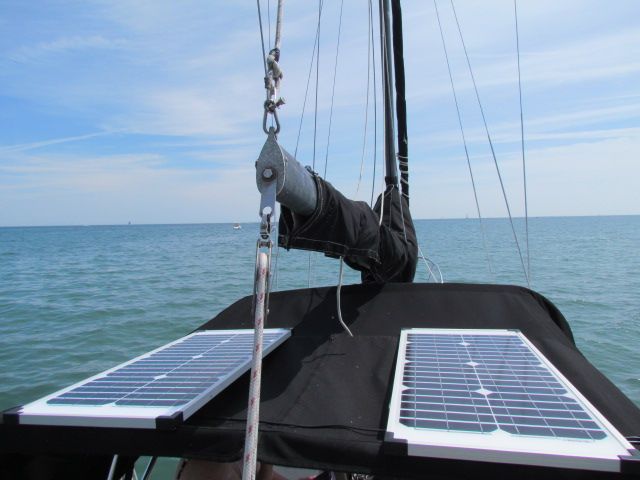
All of this new electrical gear requires improved electrical charging management- Two $99 40 watt solar panel/ 7 amp charge controller kits from Canadian Tire were installed to charge the battery bank. When docked, or flat water motoring, the panels live on the bimini-
When the wind picks up, they migrate to the aft deck. An upcoming project is to sew pockets into the bimini to secure these lightweight panels up there full time.
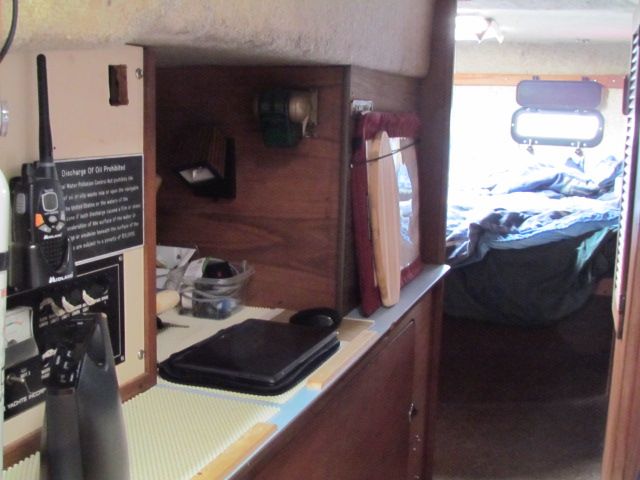
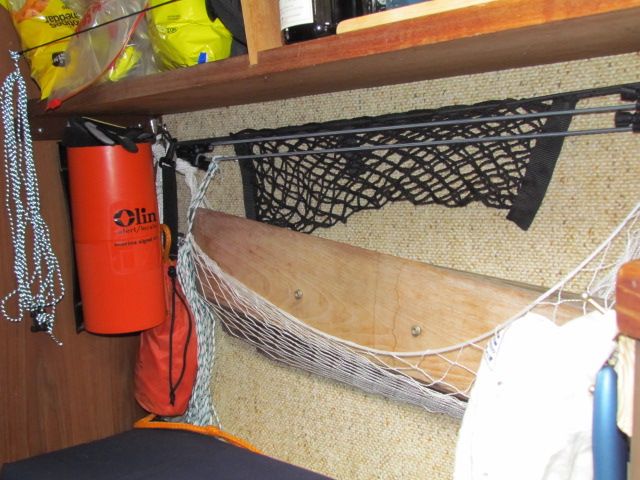
Down below, hammocks were hung and bungies were strung and non-skid mats were laid to keep everything that has a place, in it's place.
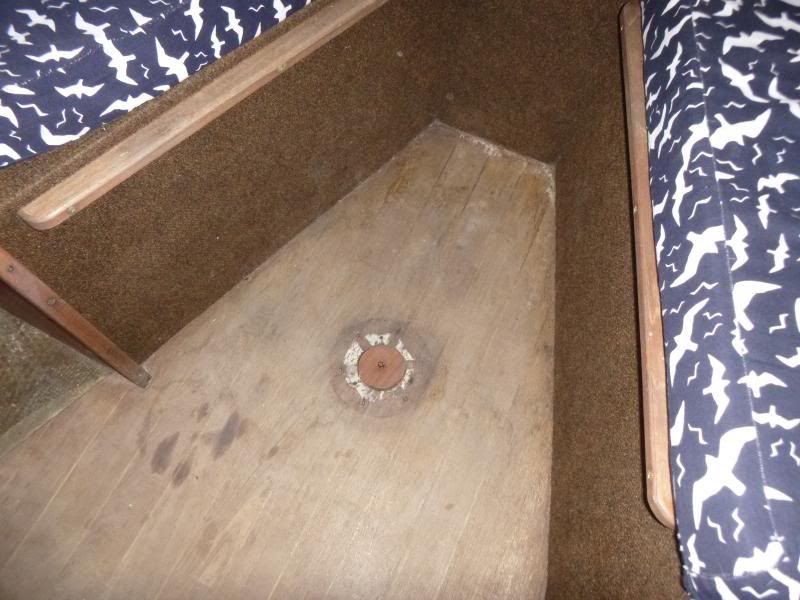
The settee-berth did not have a table, although there was one installed at some point in the past:
A while back some of the stuff that James was clearing out of his boat shed ended up in my boat shed. Among the assortment of stuff was a table base and post. a little plywood and edgebanding later, we now have a salon table:
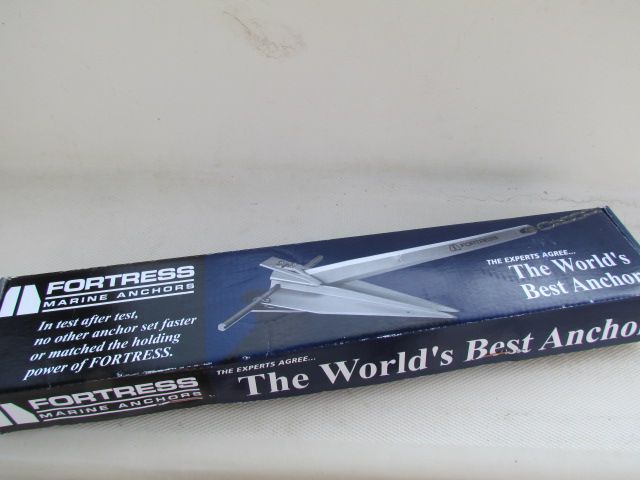
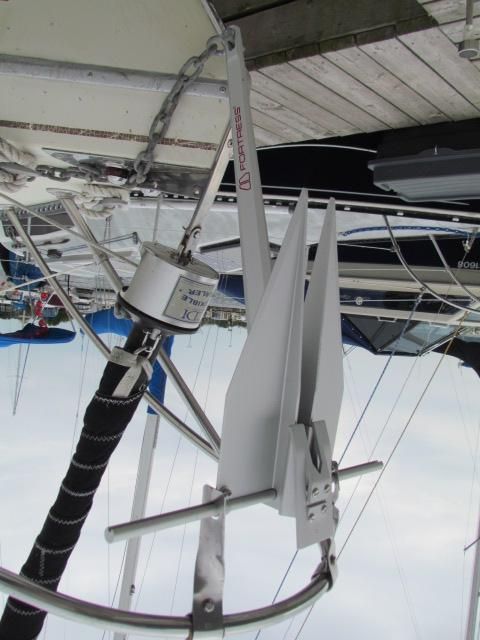
We managed to bend the shank on the anchor that came with NextBoat, and decided this was an opportunity to reduce weight on the bow and make anchoring a less strenuous task for the crew on the foredeck, by replacing the current steel anchor with an aluminum Fortress anchor....
...which requires assembly.
slightly larger flukes, slightly longer shank, half the weight of the previous anchor should make anchor launching and retrieving easier.
We'll let you know how it goes.
Last but not least, a quick little project with a big "why didn't they do this from the factory?" factor:
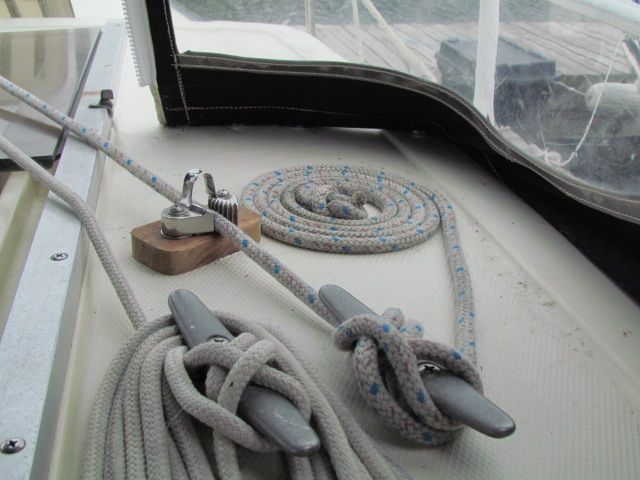
There are no clutches on the cabin top, and the only cleats are horn cleats...
which leave much to be desired when it comes to tying off halyards. You get a couple of wraps on the winch to get a full pull on the mainsail halyard, only to lose tension when you try to secure the halyard around the cleat, leaving you with a baggy sail.
We installed a cam cleat ahead of the horn cleat. No more baggy sails for us!
We also ran the mainsail reefing line to the coachroof, enabling us to reef the main without having to leave the cockpit.
Finally, we made life easier for the mutts. We carpeted the companionway ladder, to make it easier for them to climb/descend.
Ellie demonstrates that she now has ample room to run around.
Lots more projects ahead, lots more work to do, but, she's getting there.
She is becoming a home.
On s/v Zero to Cruising, Mike talks about a way to know if your propane vendor has been giving you full measure...
Do you know how to tell if a propane tank is full? As in COMPLETELY full? We didn’t, so of course we did what anyone with internet access would do, we consulted The Oracle to find out the answer. What I learned is that, stamped onto the side of a propane tank, should be the Tare Weight (TW), the weight of the tank unfilled. A 20 lb. tank should then weigh 20 lbs. more than the labeled Tare Weight after it has been topped up.
The Tare Weight of our 20 lb. steel tank is 18 lbs.
Why bring this up? Because our tank also has a fancy little gauge on it that, like an automobile fuel gauge, can tell us visually how much propane is in it. When we came to pick up our main propane tank on Wednesday after dropping it off the day prior to have it filled, our gauge did not read full. In fact, it was down what we would consider a fair bit, enough propane to last us quite some time. Note: We had our propane tank filled shortly before leaving Grenada in November 2011. It only just the other day ran out. You can tell we don’t use all that much propane!
The gauge now reads full, as it should.
Anyway, considering that we didn’t really need to get the tank back that day, and they’re charging a fair amount to fill the tanks ($90.00 EC which equates to $33.33 US for a 20 lb. tank), we wanted to have it FILLED. When I complained, the gentleman I spoke to kindly explained that although he didn’t have any way of checking it right there, if we would leave the tank with him, he’d make sure it was looked after.
When we ultimately picked up the tank yesterday we found that our trusty little gauge read full, as it should have. Unfortunately, I think paying for a full tank in these situations but only receiving a portion of what you pay for is pretty common. In fact, I think it happened to us in Grenada too but because of the inconvenience of leaving the tank with them again (we had planned to set sail the next day) we just accepted the fact that we were ripped off a bit. It may not be a lot of money but it is a PITA. Caveat Emptor.
Just for kicks I checked our 10 lb. aluminum tank. It has a Tare Weight of 9.32 lbs. It weighed approximately 15.5 lbs. indicating that it is still about 60% full.
[Ed. Note: I will also add that there is another set of numbers stamped into the tank that you need to pay attention to - the date of the last hydrostat test that the tank has seen. In the USA anyway, the tank can be legally refilled for 12 years from that date. Later than that, the tank must be re-hydrostated.]
There's always a consequence, isn't there? Tho sometimes it may be delayed.
When Jane and I attended this year's winter Boat Show, we stopped by the booths of all of our favorite local vendors. One of those is Sure Marine - like Hank Hill, they deal in propane and propane accessories. Tho that was a joke, it pretty well covers things if I also include marine space heating and cooling in the mix.
At the show, amongst a lot of other things, Sure had on display all the newest offerings from stove vendors, and we took a quick gander at the new version of our stove. Not much has changed since 1998 when we bought ours. Unlike ours tho, the new one had sealed burners (which would be really nice). And unlike ours, the old piezo burner ignitor had been replaced with an electronic one.
The old ignitor -
impossible to turn with wet hands
Our old piezo ignitor, unlike the push-button one which seems to be standard on BBQ's, required you to turn a knob. Doing so wound up a spring and then finally released it - bang! But when your hands were greasy from cooking (on a stove? Who would have thought!), wet from washing them during the course of cooking... or even slightly moist, even I didn't have enough strength in my fingers to grip the knob tight enough to be able to turn it against the spring.
So, those consequences? I stopped in at Sure Marine and bought one of the new electronic ignitors - a repair part for the new stoves. Because so little has changed with these stoves, it installed right into the same hole that held the old one. Now all it takes is a gentle press of the rubber-coated button, and you get those repeating sparks you may be familiar with if you have a household gas stove.
And it was way, way less expensive than a new stove.
Rather than just replacing it when it failed, Paul on s/v Solacehot-rodded his BBQ grill:
Original Magma BBQ
Some of us have BBQ's on our boats, which after time, seem to not perform as well when new, and in my case had an annoying feature. Mine progressively produced less heat and had grill bars which allowed fluids to drip into a "catch tray" but often overflowed and dripped on my deck. In the end I couldn't bbq any way, because the heat from the element just seemed to die.
With the cost of new BBQ's being very expensive, I decided to rebuild the unit myself and hopefully save some money.
Two ring burner
So, first I "gutted" the heating element from the BBQ. Then I purchased a 5.5KW [that's 18,700 BTU/hr -Ed], two ring propane burner. This I purchased in New Zealand for about $30USD from a hardware store, but I remember that these where very common in the islands at most of their hardware stores. They use them to put large pots on to cook with.
Control valves for gas. Comes with burner.
Next I cut the end of the BBQ with a Dremel to open up to allow the valves of the burner to protrude through and allow gas hookup.
Next I purchased a BBQ plate with it's own raised ridges and channels for fluid to drain away from the meat. The BBQ plate was a generic plate and wasn't quite the right size for my Magma. I used a metal cutting wheel and cut to size. But to keep all fluids produced while BBQing, I welded a metal strip along where I had cut. The BBQ plate came with handles at the sides, which proved to be a bonus for handling the plate. Plate cost $15USD from the BBQ Factory Store.
Finally, I purchased a small 3KG propane tank along with a new regulator and hose. The tank had a bracket made for it so that it could be mounted on the railing close to the BBQ.
BBQ plate in place. Metal strip at front.
Finally, to "season" the plate, a coating of oil, was rubbed into the plate and the plate "cooked" to allow for the burn in. It is now important to heat the plate and then turn down the heat, because it actually gets too hot and burns off the seasoning. Cooking steaks is now a great success, with the steaks being seared on the plate with ease, rather than a slow broiling which use to happen. All guests have declared my BBQ steaks to be wonderfully cooked.
All fluids seem to "evaporate", including fats, so it is important to spray periodically with oil to keep the "seasoning" up. Otherwise the plate will just turn rusty.
Bottle to BBQ
Cost for the BBQ mods. $45USD and about a days work looking in the stores and the workshop work. A small piece of scrap mild steel strip I had lying around and a welding machine was needed in addition to the dremel and steel cutting wheel on the angle grinder.
Now there's something we'd all like to have... Paul on s/v Solace will have it now, even at anchor!
One thing lead to another with these boat projects. This blog is about linking three boat projects, and each one is worthy of it's own post. But for now, I'll give a precise of the events.
Firstly, in the shower cubicle of the boat, I had a cupboard with a large 12 gallon hot water tank that I wanted to replace with a washing machine. So I set about removing the HW tank and then installing the washing machine. Because the doors were only 18 inches wide, the WM had to be disassembled to get through the door and then reassembled in-situ. This may become another blog at some time.
Now, because I had removed the HW tank and our only method of heating water, I then set about installing a califont, or probably better known as a "heat as you go, propane water heating unit". This was a unit sold in New Zealand, but I have seen similar units sold in RV World in the USA. The igniter is powered by two "D" size batteries, and is small enough to install in boats and RV's.
I installed the unit under the aft vanity unit on a bulkhead. I have a means of varying the temperature output and have placed some blue masking tape for the shower temperature so that we don't need to use the mixer tap to get the temperature right. The ducting is 4 feet in length and vents to the bilge. Heat at the end of the 4 foot ducting is almost nil, and one can hold your hand over it easily. I saw many units installed on other boats with out the ducting to outside, and as others have said, "it's no worse than running the stove". Propane and co2 monitors are a safety measure. Now we have hot water on tap with no need to run the generator to supply power to the old HW tank.
Finally, when installing the propane califont, I had to install a propane hose to the unit. Initially, I "Teed" into the existing propane line with the one propane cut off switch to be used to supply both the califont and the stove. This however proved to be less than satisfactory, because the califont would remove some of the gas from the stove line while it was in use. This then made igniting the stove burners, a little more time consuming as we had to wait for the gas to flow back through the line to the stove.
New Brass T to Propane Tank
The solution was to use another solenoid and regulator for the new califont and "Tee" in both solenoid/regulators to that "Tee". Each solenoid has it's own on/off switch.
We also plumbed a hot water line to the aft of the boat so that we can have hot showers on the aft deck. We also think we will use less propane, than heating a kettle of hot water on the stove to do the dishes. I'll comment on that as data comes to hand.
The "T" also allows us to carry a spare propane tank to swap to when running out on the tank in use.
I am curious to find out how the propane usage will work out in practice.
Boat ovens are not known for their even heat distribution. Paul on s/v Solace shows us a way to make an improvement on that:
Most boat ovens are heated by propane and don't give an even distribution of heat. An idea heard from others was to place a pizza stone in the oven, which heats up and gives a more uniform form of heat distribution. We used a surplus pizza stone we had at home, and cut it to size so that there is about one inch of air space around the stone to allow for heat convection. The stone was cut using a masonry cutting wheel on an angle grinder and smoothed along the edges. The stone was then secured to the oven tray by four bulldog clips at each corner.
This prevents the stone sliding around while stored in the oven.
A ceramic tile can also be used for the same purpose, but we like the added bonus of having a pizza stone to do our pizzas on. Yum.
Look what my lovely wife gave me for my birthday! A new Dickenson SeaBQ!
This replaces our old Magma grill... actually, our second Magma grill - we used up the one that came with the boat. The "new" Magma was shot (again) and was going to need a transfusion of expensive parts.
To make the SeaBQ even easier to use, I plumbed it directly into the low pressure side of our propane system. We already have those two 20 lb propane tanks - why would we want to fool around with the small disposable cylinders?
The propane tanks on Eolian are aluminum, and can stand the sun and rain. But then there is the salt spray, and the effects of sun and rain on the hoses, fittings and the propane solenoid valve. A cover was called for.
I laid it out, and Jane sewed it. It was made out of some Sunbrella scraps we had, so there were some unusual effects - like the nicely-made seam at the bottom. The only tricky part was the tapered top. I laid this out as if it were a mast boot, cut in half, with a straight section inserted between the halves. There is a drawstring in the bottom to keep it in place in a blow, and it is slit up the back to accommodate the propane hose.


 Needless to say, my regulator (and hopefully yours now) will not be going for a swim.










The Tare Weight of our 20 lb. steel tank is 18 lbs.
The gauge now reads full, as it should.


 To make the SeaBQ even easier to use, I plumbed it directly into the low pressure side of our propane system. We already have those two 20 lb propane tanks - why would we want to fool around with the small disposable cylinders?


 Posts
Posts


