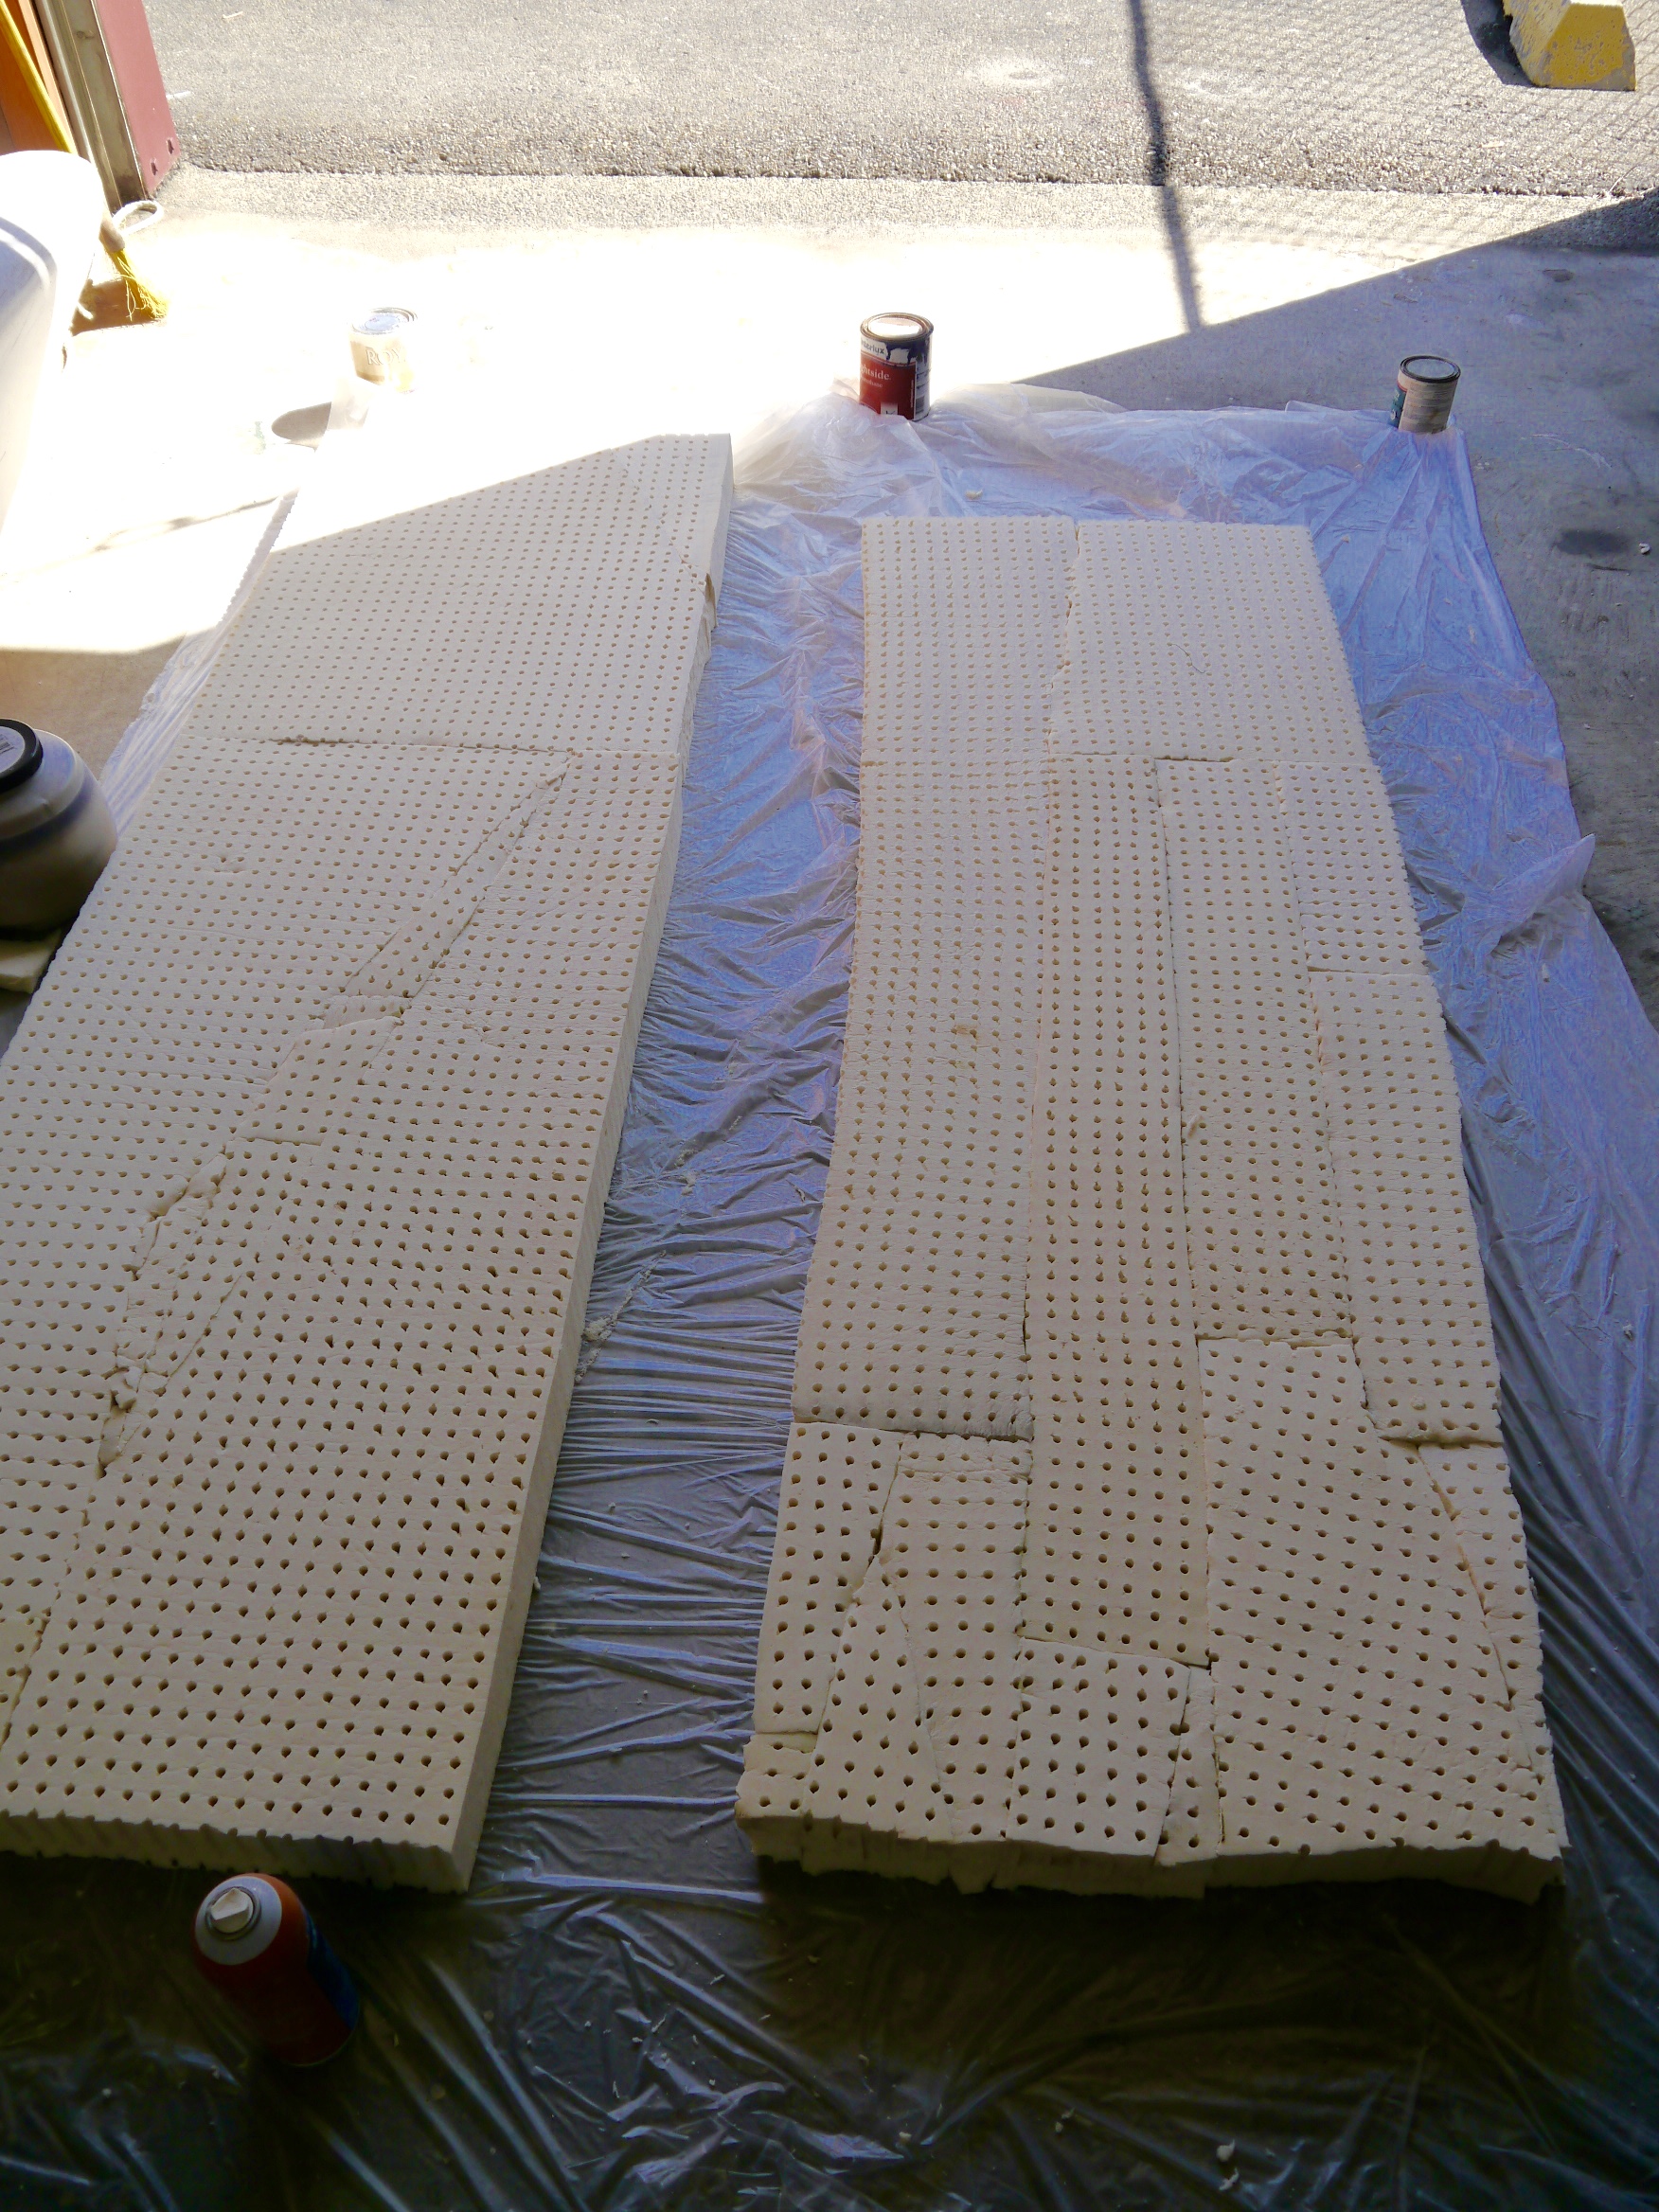
Regular readers will recall that we recently had new mattresses made for our aft cabin. Part of that remodel was the purchase of some rather expensive latex foam toppers for the berths. These came at a cost of $570 for the space. That’s not an insignificant cost, even though it was completely worth every single penny. As every boat owner knows, boat beds do not come in regular sizes like your earthbound beds. Therefore, in order to get what you need, you frequently have to cut to fit. And you know what that means. That’s right. That means extra material. Extra EXPENSIVE material!
When we picked up our new mattresses we were blessed to receive all of the extra pieces of latex foam, neatly stuffed down into large plastic bags. I was going to toss them, but being the cheap and easy boat trick queen, I just couldn’t bring myself to do it. I don’t like to throw away perfectly good materials that I might put to use. So I kept them and waited for an idea to pop into my head. And it did.
Galapagos has a great cockpit. We love it. But one of the things that I’ve wanted to improve is the napability of the two longest sides. They are long enough to lie down on (one of the absolute requirements for us in a boat, being the famous sleepers that we are), but the hard Bottomsider-style cushions that came with the boat are dead uncomfortable. I decided to see if I had enough latex foam to make cushion toppers for them.
After measuring the sides, I lay the foam pieces out on some plastic up in our workshop/storage space at the marina. Supplied with Elmer’s spray glue and a healthy love of puzzles, I began piecing the foam together to make the long, thin rectangles required. I glued the seams as firmly as possible and then let them sit for a day to cure. Although I had the garage door open for all the gluing, I cannot swear that I didn’t lose a few brain cells to that spray. Do make sure you have good ventilation with that stuff. I trimmed the uneven ends with large scissors, making several cuts from the top down. Sure, I have an electric knife, the tool of choice for this job. It’s at home. Not at the marina. Scissors worked just fine. We’re not building the Parthenon here.
As I did with the new cushions in the v-berth and aft cabin, I decided I wanted to protect these with that PUL fabric I used to keep water from soaking into the foam. This also makes coverings easy to take off and put back on. Once again, I used the handy 40% off coupon Hobby Lobby has each week.
My only concern here is that there really are a lot of glued seams on these. It is possible that the glue will not hold up in the heat of Mexico and beyond. If that happens, though, I will still have all the other materials all set up to pop the latex out and replace it with foam all in one piece. The PUL fabric has a lot of stretch to it so it can be pulled tightly around the latex. It supports the seams in the foam as well as making the whole thing waterproof. The extra support makes it less likely that we’ll experience a total fail just from moving the cushions around.
To ‘upholster’ these, I wanted outdoor canvas that was water and UV resistant. Since it’s fall, this is a good time to look for summer fabric in the clearance section of Joanne Fabrics. I made a beeline for the clearance bin and found some perfect yellow canvas for $3.50/yard. Done! I actually bought extra of this because I liked it and it was such an excellent price. Retail on this canvas is $29.99/yard. As if I would ever pay that much.
The sewing was straight forward; not exactly my favorite kind of sewing but at least with this project my machine doesn’t protest. I cut two rectangles, some sides, then sewed them together.
These are just the ticket in the cockpit for sitting or laying around at anchor. While underway they can be stored along the sides in the v-berth, or even in the aft cabin, just tucked under the shelf, which will hold them in place. They are a cheap and cheerful addition to the comforts of home on board Galapagos.
Cost Breakdown:
Total cost: $48.20 plus tax. Win!
- Latex foam – 0 because it was leftover from another project, destined to be thrown out
- PUL fabric – 4 yards, 40% off – $31.20
- Yellow Canvas – 4 yards at $3.50/yd – $14.00
- Yellow thread – $3.00
Showing posts with label s/v Galapagos. Show all posts
Showing posts with label s/v Galapagos. Show all posts
Tuesday, April 11, 2017
Cockpit Cushion Toppers
Aboard s/v Galapagos, Melissa finds a wonderful use for something that would have been simply discarded. She also has significant puzzling skills:


Tuesday, February 28, 2017
Windlass Locker Refit: Epoxy is Your Friend
Rot is insidious. It sneaks in quietly, eating away at the structure of your boat. Mike and Melissa on s/v Galapagos discovered the rot monster eating away at their anchor locker - this is how they defeated it:
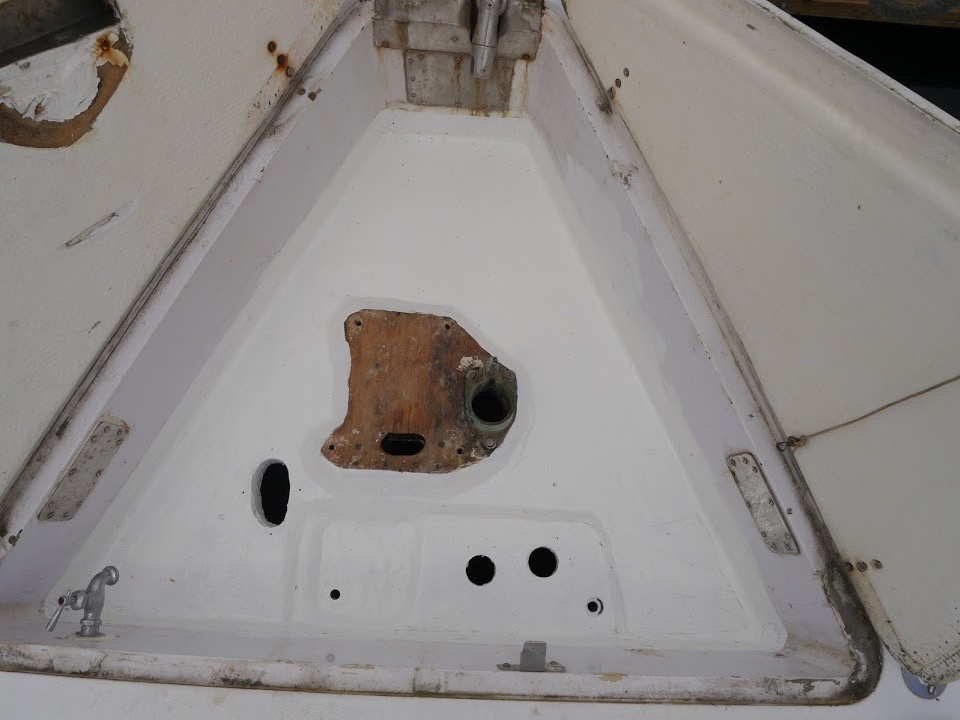
When we bought Galapagos we were kind of enthralled with our Lofrans electric windlass. It’s a love affair that continues to this day and because we love her, we want her to live in a nice place. Long ago we noticed that her locker on the foredeck had seen better days. It looked to me like there was wood rot underneath her foot switches and a couple of times when we pulled up anchor, Mike saw the floor of the locker move a little bit. This gave us pause.
So it came to pass that we decided we better get to it and refurbish that part of the boat. This has been one of those projects that takes much longer than you’d like, simply because there are a lot more parts to it than you think, and because Mike still works for a living. That leaves the weekends. And me.
Mike pulled the windlass off and carried her home to take her apart and make sure all of her parts were shiny and new looking and give her a general going over. He can write about that part soon. The windlass has always worked great and we want to keep it that way considering that pulling up anchor by hand on this boat, even given the hand ‘crank’ we can use, would cost a lot in terms of energy, time, and effort. Whatever needs to be done to keep this windlass in good shape is time and money well spent.
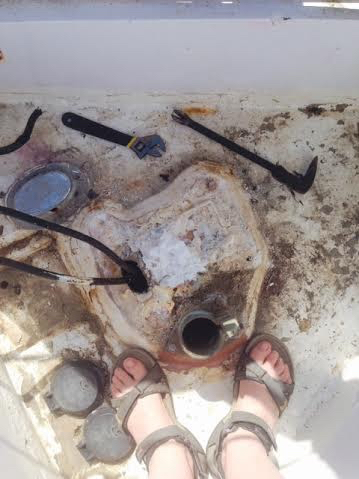
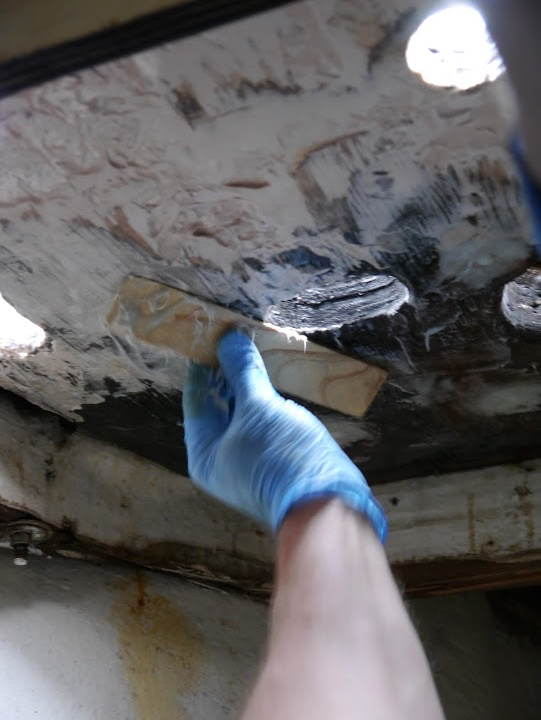
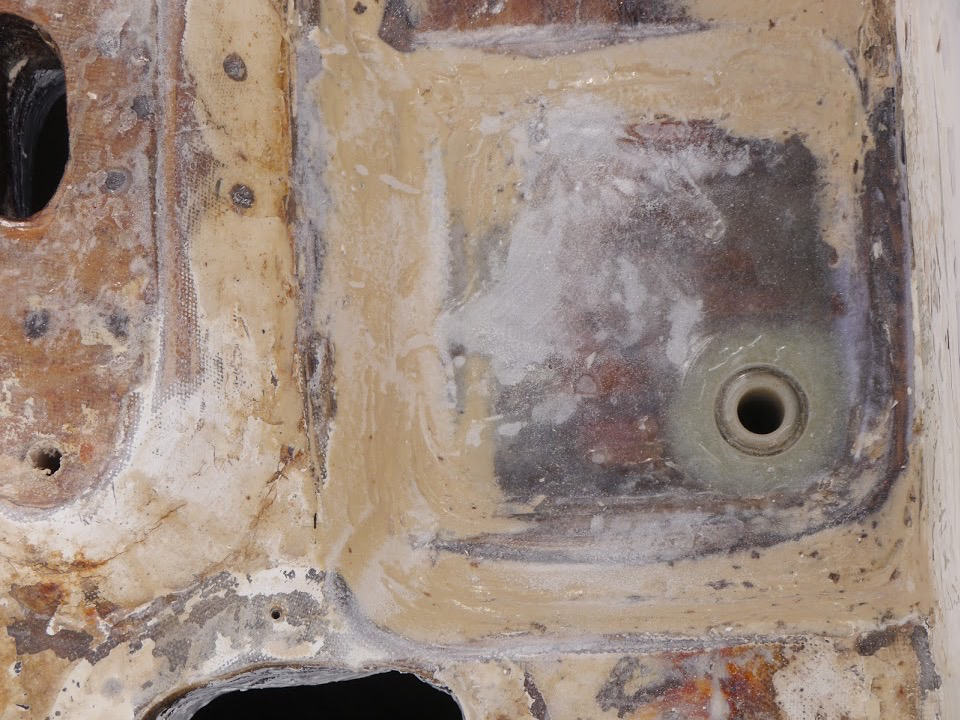
When we examined the wood under the switches it was clear that there was not only rot, but that there was a lot of it. If it were not for the fact that this entire locker is hell for stout, we would have had a bigger job on our hands. The wood in this area is about 10” thick meaning you can have a lot of rot before things start getting serious. That also means that after I removed all the rotted wood, we still had plenty to work with. We decided we did not need to remove the entire floor (thank you, gods of windlass lockers!) and that we could fix the area with a series of epoxies, from the liquid kind that soaks into wood to give it new structure, to the kind you smear on like wood putty.
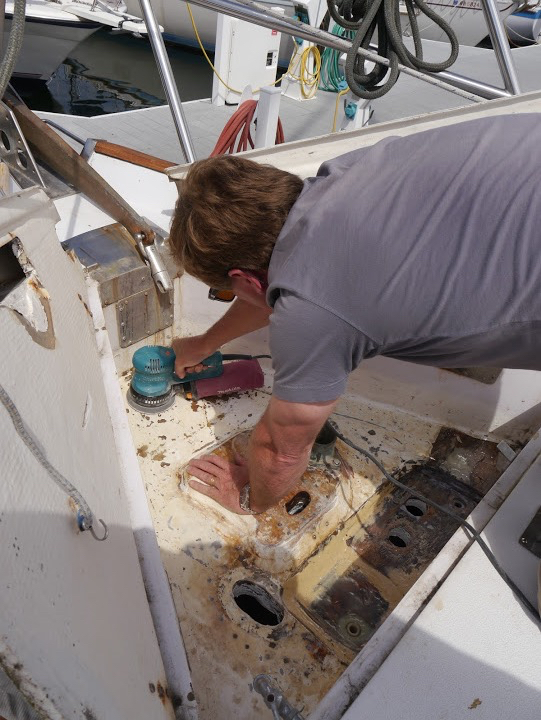
After drilling holes all over the place to make sure we found all the rot, and a good thing we did, too because water came out of some of the holes, we waited as everything dried out in the hot summer sun. Then, over a week or so we mixed batch after batch of System Three End Rot liquid epoxy and their wood putty version called Sculp Wood. When we ran out of the End Rot stuff, we used the straight System Three liquid resin epoxy. We poured the liquid stuff down into the holes and let it seep into the surrounding wood on the topside. When that was cured, we poured in more. We added fiberglass fibers to thicken the paste and troweled it onto the inside of the locker from below, filling in gaps left by the wood we removed. It was a long process that involved a lot of boat yoga, waiting, and sanding in close quarters.
You may be wondering how rot got involved with this windlass locker in the first place. Two reasons became apparent. Let the first reason be a cautionary tale about being sure you are bedding your screws with butyl tape or the equivalent if they are going to be exposed to water. On our two foot switches, the screws holding one switch onto the wood were bedded with something that protected them from water. The screws on the other side were not. So one side had rusty screws, proving that water was ingressing in that area. The wood around that switch was where the rot started and it spread from there. Of course, it’s probably been 20 years or more since those switches were installed. Let’s keep things in perspective here.
Second, the drainage in this locker was poorly designed in our opinion. I don’t know about you, but I don’t think that drains that are above the level where water stands make sense. Think about it. In your sink, the drain is installed slightly lower than the bottom of the sink. That’s because water runs…..down. Not up. So a drain that stands proud of the surface will never, due to the laws of the physical universe, drain all the water out. Standing water is a bad thing, especially if it is close to electric switches installed with unbedded screws. Voila, rot.
So Mike decided to redesign the drains making them much simpler, and making them drain correctly. You know how when people are married for a long time they start thinking alike? We both came up with the exact same idea independent of each other. When that happens, it’s a go. So instead of reinstalling the drains as they were, he filled in the hole where they would be set, cut off the top of the drain that was too high, then drilled out an area and epoxied the drain directly into the hole. Then he attached the hose. It’s not going anywhere and it drains really well now. Plus with all that epoxy the wood will stay protected long after we’re dead. We are considering this simple solution for some other areas of the boat.
When all the epoxy was cured, he sanded everything smooth on top and on bottom. I followed behind him with two coats of bilgecoat, since this area is protected from UV rays unless the locker is open. Although I didn’t bother with a photo yet, the inside of the locker has a nice smooth ‘ceiling’ now. Our windlass will be much happier in her newly refurbished digs. And we have a locker that will see another 25 years in good shape. Stay tuned for part two, where Mike fills you in on the insides of the windlass. Or something like that.

Monday, October 17, 2016
Put the ‘Fun’ in Functional Storage with this Cheap Trick
Over on s/v Galapagos Michael & Melissa continue making their boat into a home...
I was complaining of being bored the other day. We won’t be moving aboard until at least the end of the summer, and we don’t get to have a long cruise this year because of Mike’s work. That pesky annual leave thing is going to be a thing of the past soon enough, so we’re content to wait out the remaining months doing a little bit here and there to move forward with our plan. The house and yard are in maintenance mode, my practice continues to slowly wind down. I’m fine with living in the liminal space, as a rule. But finding myself kind of wandering aimlessly around the house trying to look busy just isn’t my style. It’s like don’t know what to do with myself. I decided I needed a few small but useful projects for the boat, starting with that cool cockpit mat.
The rumpus room in the v berth is taking shape and we will be using this cabin to watch movies and TV shows we like. To move forward with that plan, I sorted and stored our DVD collection, throwing out all the colorful plastic containers and storing each DVD in its own plastic sleeve. I then labeled and stored them in nifty snap-locking containers I bought at JoAnn Fabric for 8$ apiece. I know many cruisers store hundreds of movies on thumb drives and maybe that will be in our future. For now, I don’t have the patience for that. This was quick and easy and finding what we want will also be quick and easy.
You’ll be glad to know that the aft cabin project is moving along. We took possession of the finished mattresses this week and I carted them down to the boat to see that they fit before getting them covered. It’s probably overkill, but since I didn’t have any old foam to take in to use as patterns ( I had made my own paper pattern) I just wanted to eyeball the fit before covering. They fit beautifully and allow us to sleep any old which way. The bed is going to be very comfortable and will last for 20 years if we protect them. The next task is to bring them home so I can cover them in that PUL fabric, then take them for their final upholstery. After that, I get to make custom covers and sheets. Won’t that be a creative undertaking! I do believe our goal of having a totally comfortable, sleepable aft cabin is coming to fruition.
The trusty Brother sewing machine has been dusted off and I am rediscovering my love of sewing. As we are now envisioning being able to live with that aft cabin, it was time to turn my thoughts to how we would store our clothing there. We have one hanging locker, a small set of drawers, and a small drawer under each side of the bunk. There are shelves along the hull on each side and I’d like to keep them uncluttered. I would like to keep both clothing and bedding in that cabin and I wanted that storage to be easy to access because otherwise I am tempted to leave my clothes laying around draped decoratively on doorknobs and corners of objects. I know it’s a long shot, but we both really want to keep a neat and tidy look in our boat. It just feels better that way.
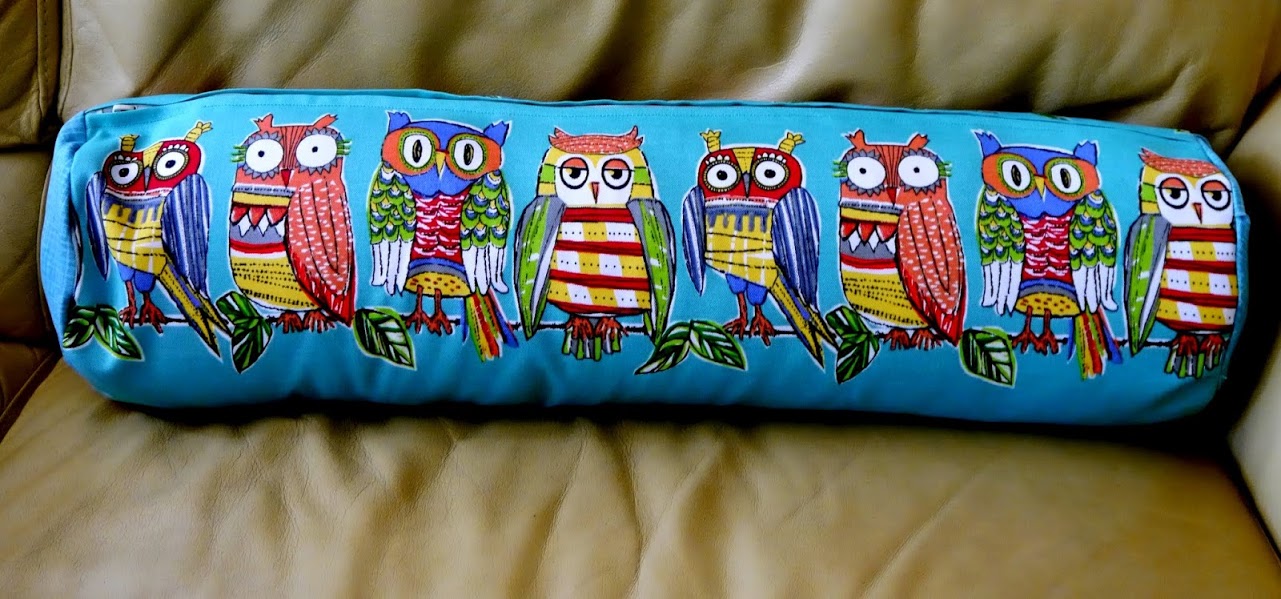
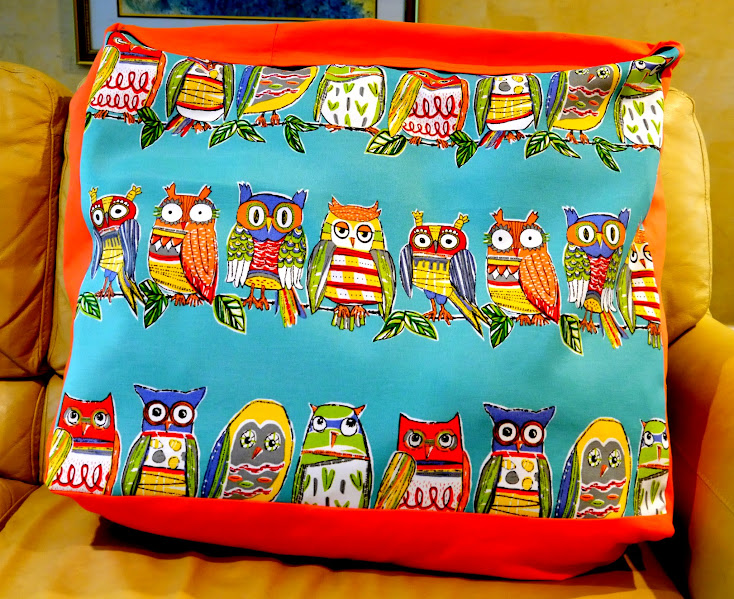
I had been considering colorful soft sided baskets to keep clothing in but where to put them was in question. Instead I opted to make fabric bags that look like pillow shams of different sizes and shapes. I bought 1.5 yards of this super cute owl outdoor fabric on sale for 12$/yard. Then I found a 3$ remnant of orange fabric that matched. I purchased thread, some velcro, and a set of nylon upholstery zippers. Total cost for materials was about 40$. For that price, plus some fun time at the sewing machine, I have a selection of sizes of storage containers for soft things like bedding and clothing: 2 large for blankets and such, two standard sized bolsters for shorts, tops, bathing suits, and three additional sizes – 7 storage units in all. These can be stored right in sight on the beds as pillows. The fabric is water repellant and UV protected. Plus…owls! Seriously, you can fit a ton of stuff in these things. Functional, practical, and fun!
Mike is working on a couple of interior projects that he will write about soon. Our next joint project will be putting shelving in most, if not all, of the hanging lockers. We have a generous amount of hanging locker space, most of which is completely wasted because we don’t have that many clothes that hang. We already know that this job is going to be a pain in the hind end, so if you have any shortcut tips on how to make it easier, do tell. We want the shelves to take full advantage of all space, so that means they will have have to be custom cut.
Oh, and guess what! We get to go on a short cruise over the Memorial Day weekend. We’ve got friends to stay with Skippy, so Thursday night we are out of here! Yay! We are both so ready for that.


Tuesday, August 23, 2016
Rumpus Room Media Center
Michael & Melissa on s/v Galapagos turn their V-berth into a media center. (And I must confess that it was this post which convinced me to get a label maker.)
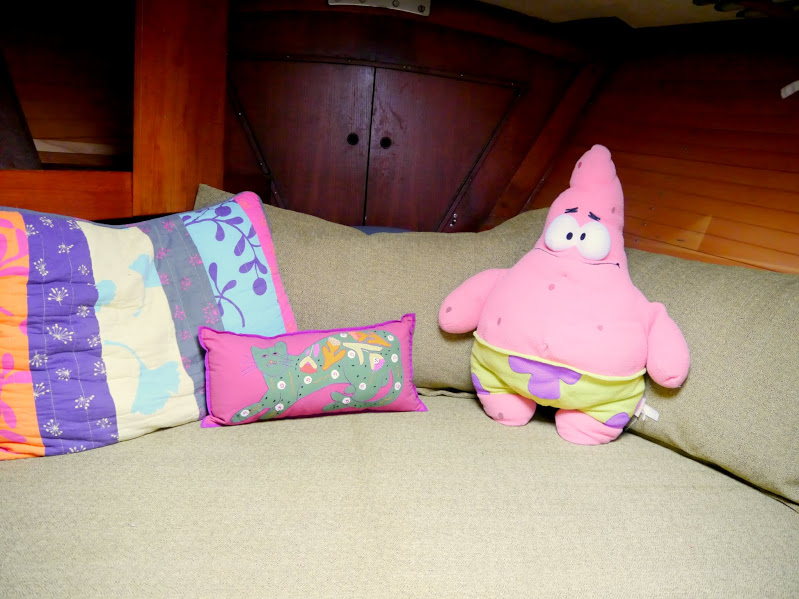
In previous posts we have reported on our progress in updating the V-berth. With a new cushion and upholstery, the space is really comfortable and has become like a second salon. We will use the V-berth as a guest cabin when company is aboard but when it is just the two of us, we call this the space the Rumpus Room.
One of the more decadent projects I have been planning is to have a TV and DVD player on the boat. We watch more movies on the boat than we ever do at home and it is has become a bit of a ritual to save up a season of some show to binge watch when we are out on a cruise. For example, we have season six of Downton Abbey unopened and ready for our Memorial Day South sound trip.
In the past, we have used a laptop to watch movies which is okay but not optimal. The speakers aren’t too great and since the battery life on our laptops is pathetic, we have to plug in to the inverter to keep the juice flowing. It works but the whole setup seemed a little cheesy.
So, for some time I have been ruminating on how I would install a small entertainment center on the boat. With the Rumpus Room all but complete, now seemed like a good time to stop thinking and start installing. Alas, as with every other boat project, installing one thing means you must drill, move, re organize and generally tear the boat apart, twice.
One of the most important criteria for designing this system was to have it be entirely powered from the 12 volt system. There are a few small TV and TV/DVD combos which are set up for 12 volt. Long Haul truckers use them and there are some marine grade systems as well. But the units I found seemed really expensive relative to their size.
So last year (I ruminate a long time) I was looking at a TV or computer monitor and noticed that it had an AC to DC power supply (commonly referred to as a brick). So, just like your laptop, you plug the brick into an AC outlet but the TV is actually running on DC. However just because the TV uses DC does not mean it will work with the 12 volt system on your boat but the seed was planted and more research ensued.
Finally, after a bit of googling, I went to Best Buy and looked at the smaller Insignia brand LED TVs. Most of these use a AC to DC power supply and one, the Insignia 24 inch LED TV. actually uses 12 volts. Be aware that Best Buy sells a few 24 inch TVs in this size and brand. This model was the only one I found in the store that used a 12 volt power supply. If you want to attract attention at Best Buy, start moving their TVs around and unplugging the power supplies so you can read the voltage and current values for the output. Also it is quite fun to try and explain a project like this to someone that is not entirely sure that TVs even use electricity.
$140!
With a TV secured, I also wanted a DVD player that could also run off the 12 Volt system. This was quite a bit easier since the players are small and I could look at the power supplies without too much trouble. I ended up buying a Sony BDP-S3700 for $80. You can buy a cheaper DVD player that will work well on 12 volts for about half the price but this unit is WiFi capable. At home, the only TV we ever watch is via NetFlix or Amazon. I doubt we will be doing much streaming of video away from the marina but we might stream from a networked hard drive at some point.
Sony BDP-S3700
$80
I wanted to mount the TV on the bulkhead both to keep it out of the way and to improve the viewing angle. For this task, I bought the $40 Rocket Fish Full Motion TV mount.
I was and still am a bit worried about the security of this mount and will continue to monitor this. The TV only weighs 6 pounds but in a bouncy sea way the stress could be higher than the attachment points were designed to stand. I will also install a bungy cord to hold the TV snugly against the bulkhead when not in use.
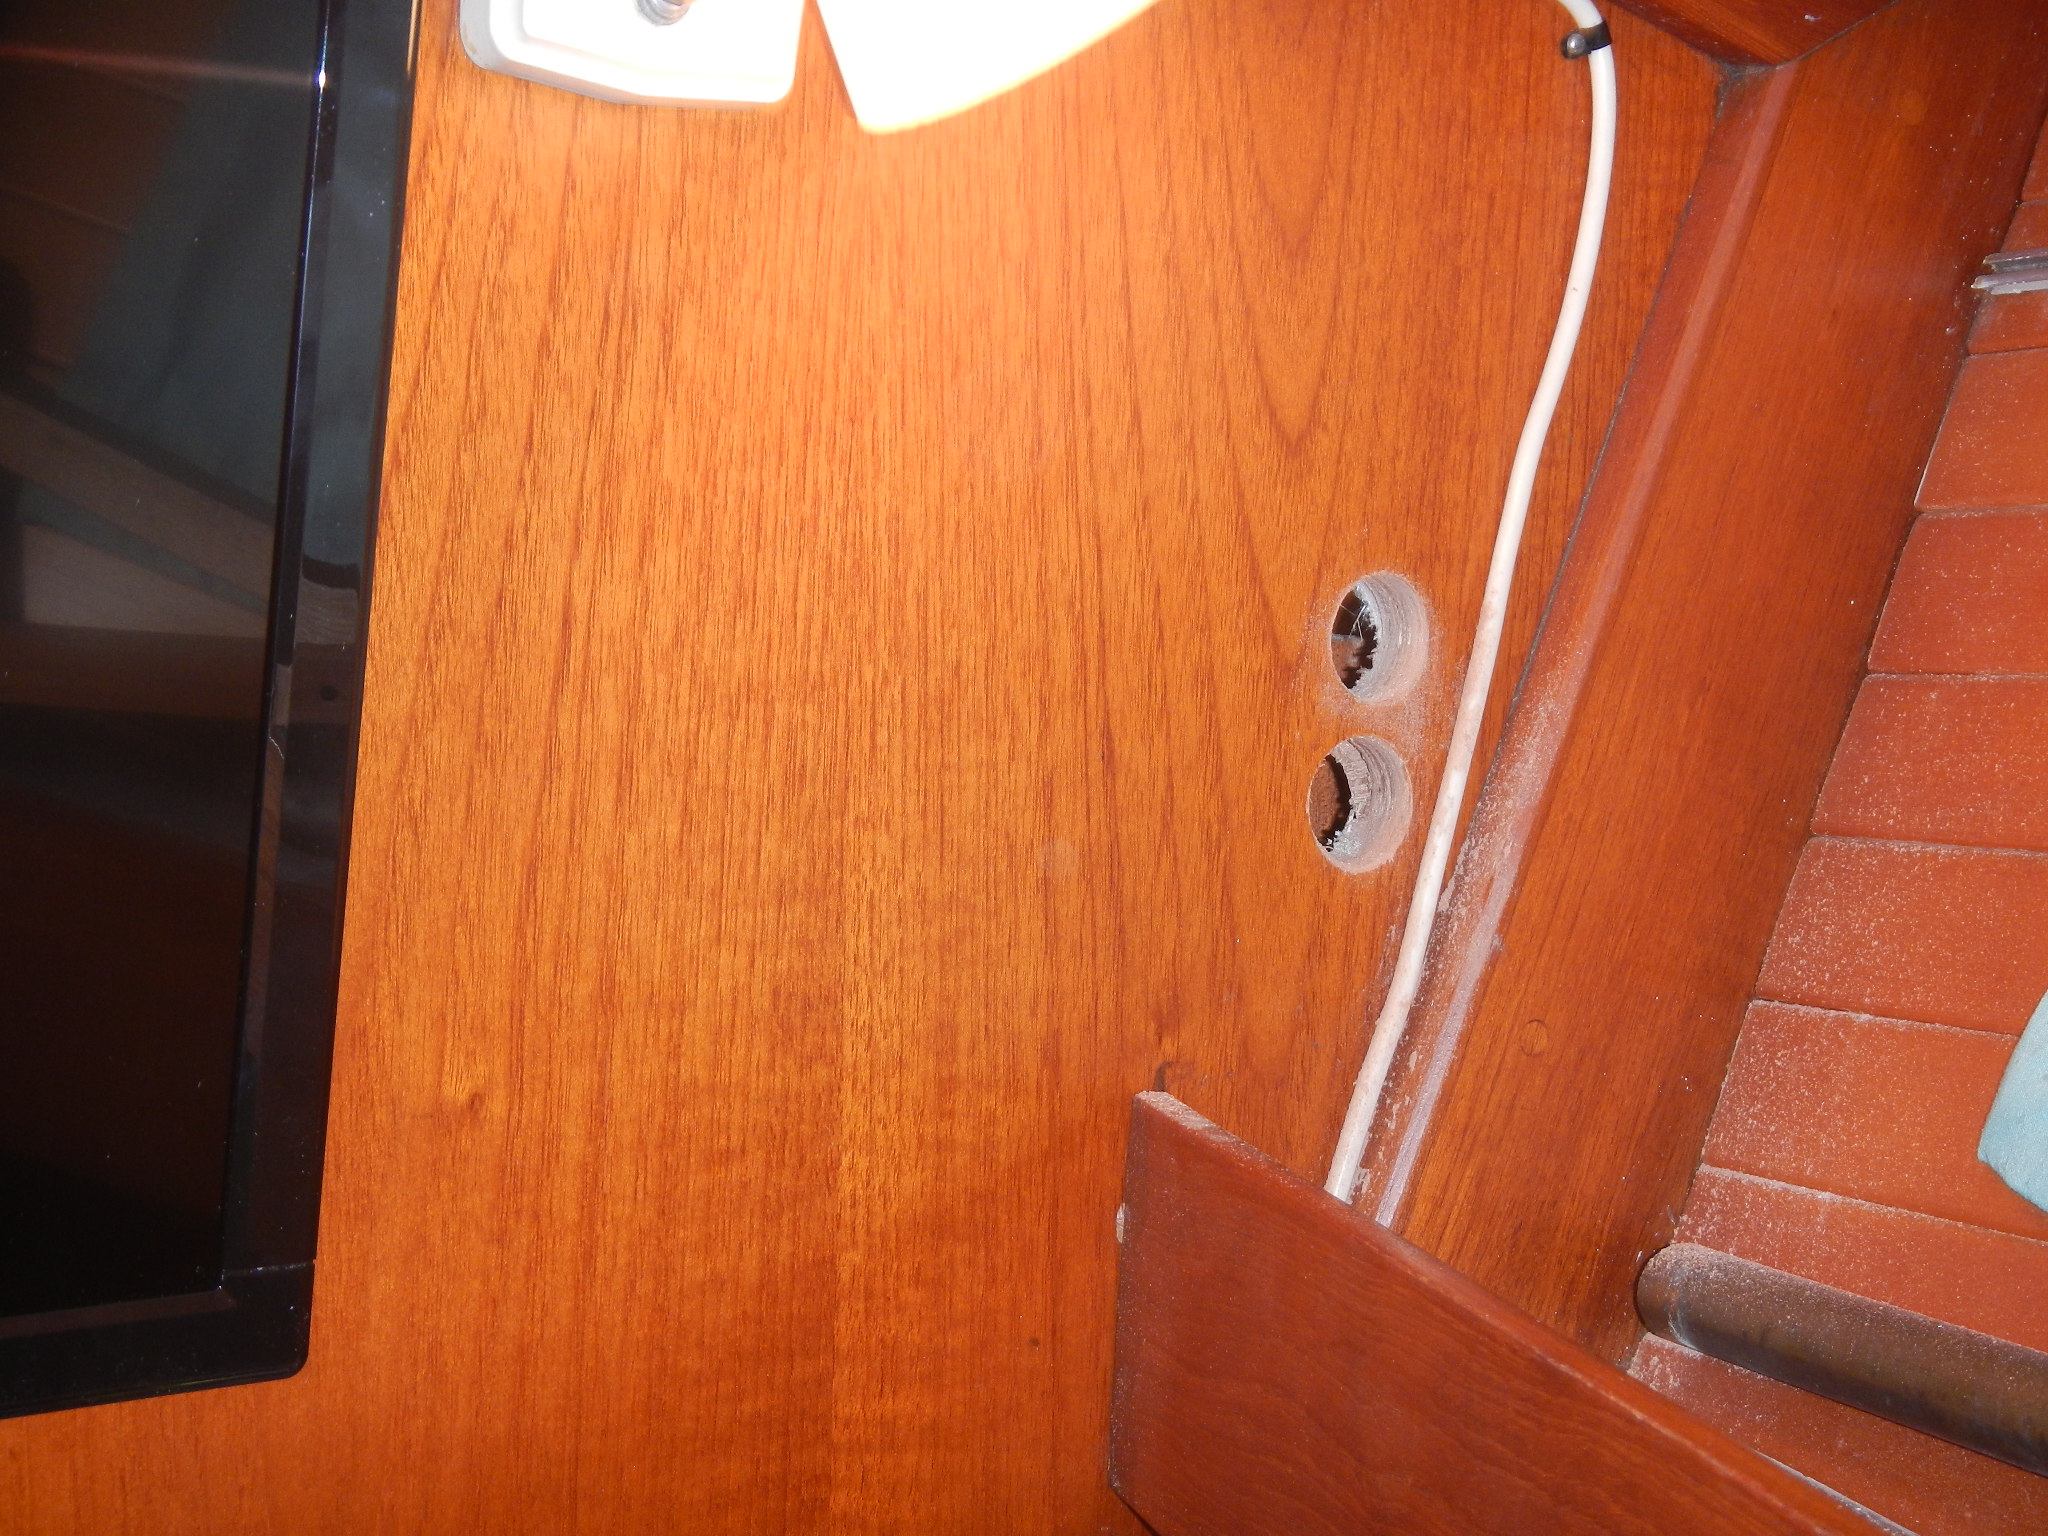
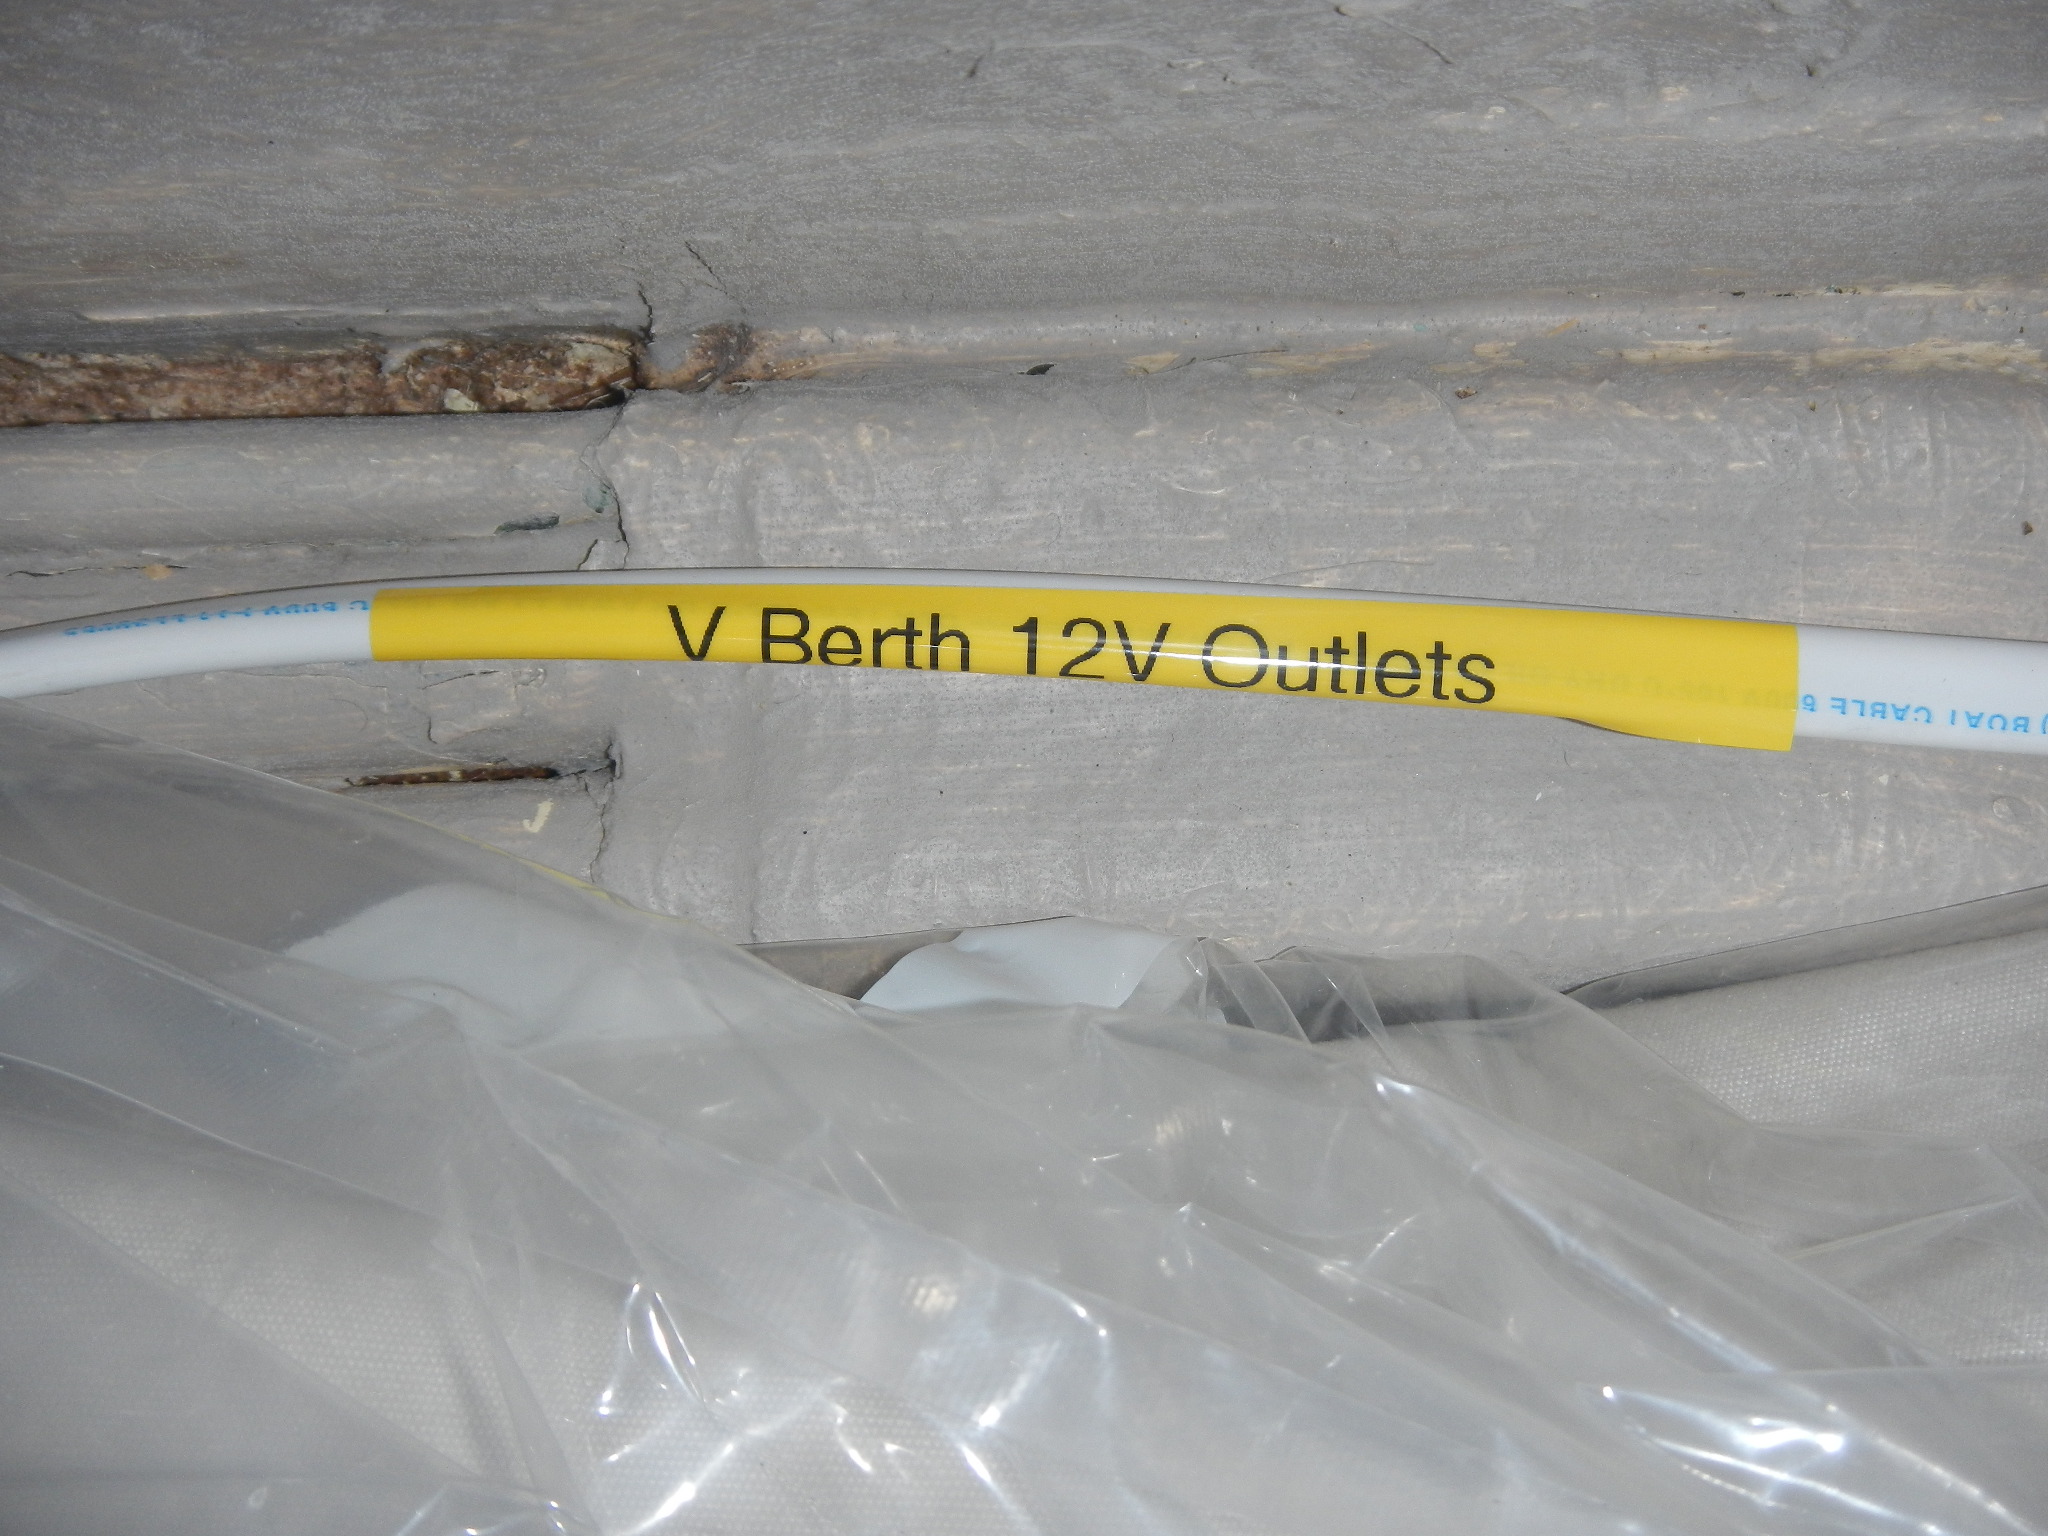
So, with the main components secured, I still needed to run wiring to the bulkhead and create outlets for the the TV and DVD player. That’s where tearing the boat apart comes in. I ran 30 feet of 12 gauge marine wire through the forward head, salon, galley and into the DC distribution panel.
Probably the moment of truth to this whole project is when I cut the DC connector off of the bricks for the TV and DVD player. You are committed when you willfully destroy part of the equipment you just paid good money for. I could have bought adapters for each of the electronics and made new wiring harnesses for them but I don’t intend to use the TV anywhere but on the boat. I did keep the bricks and could always splice the wires back together.
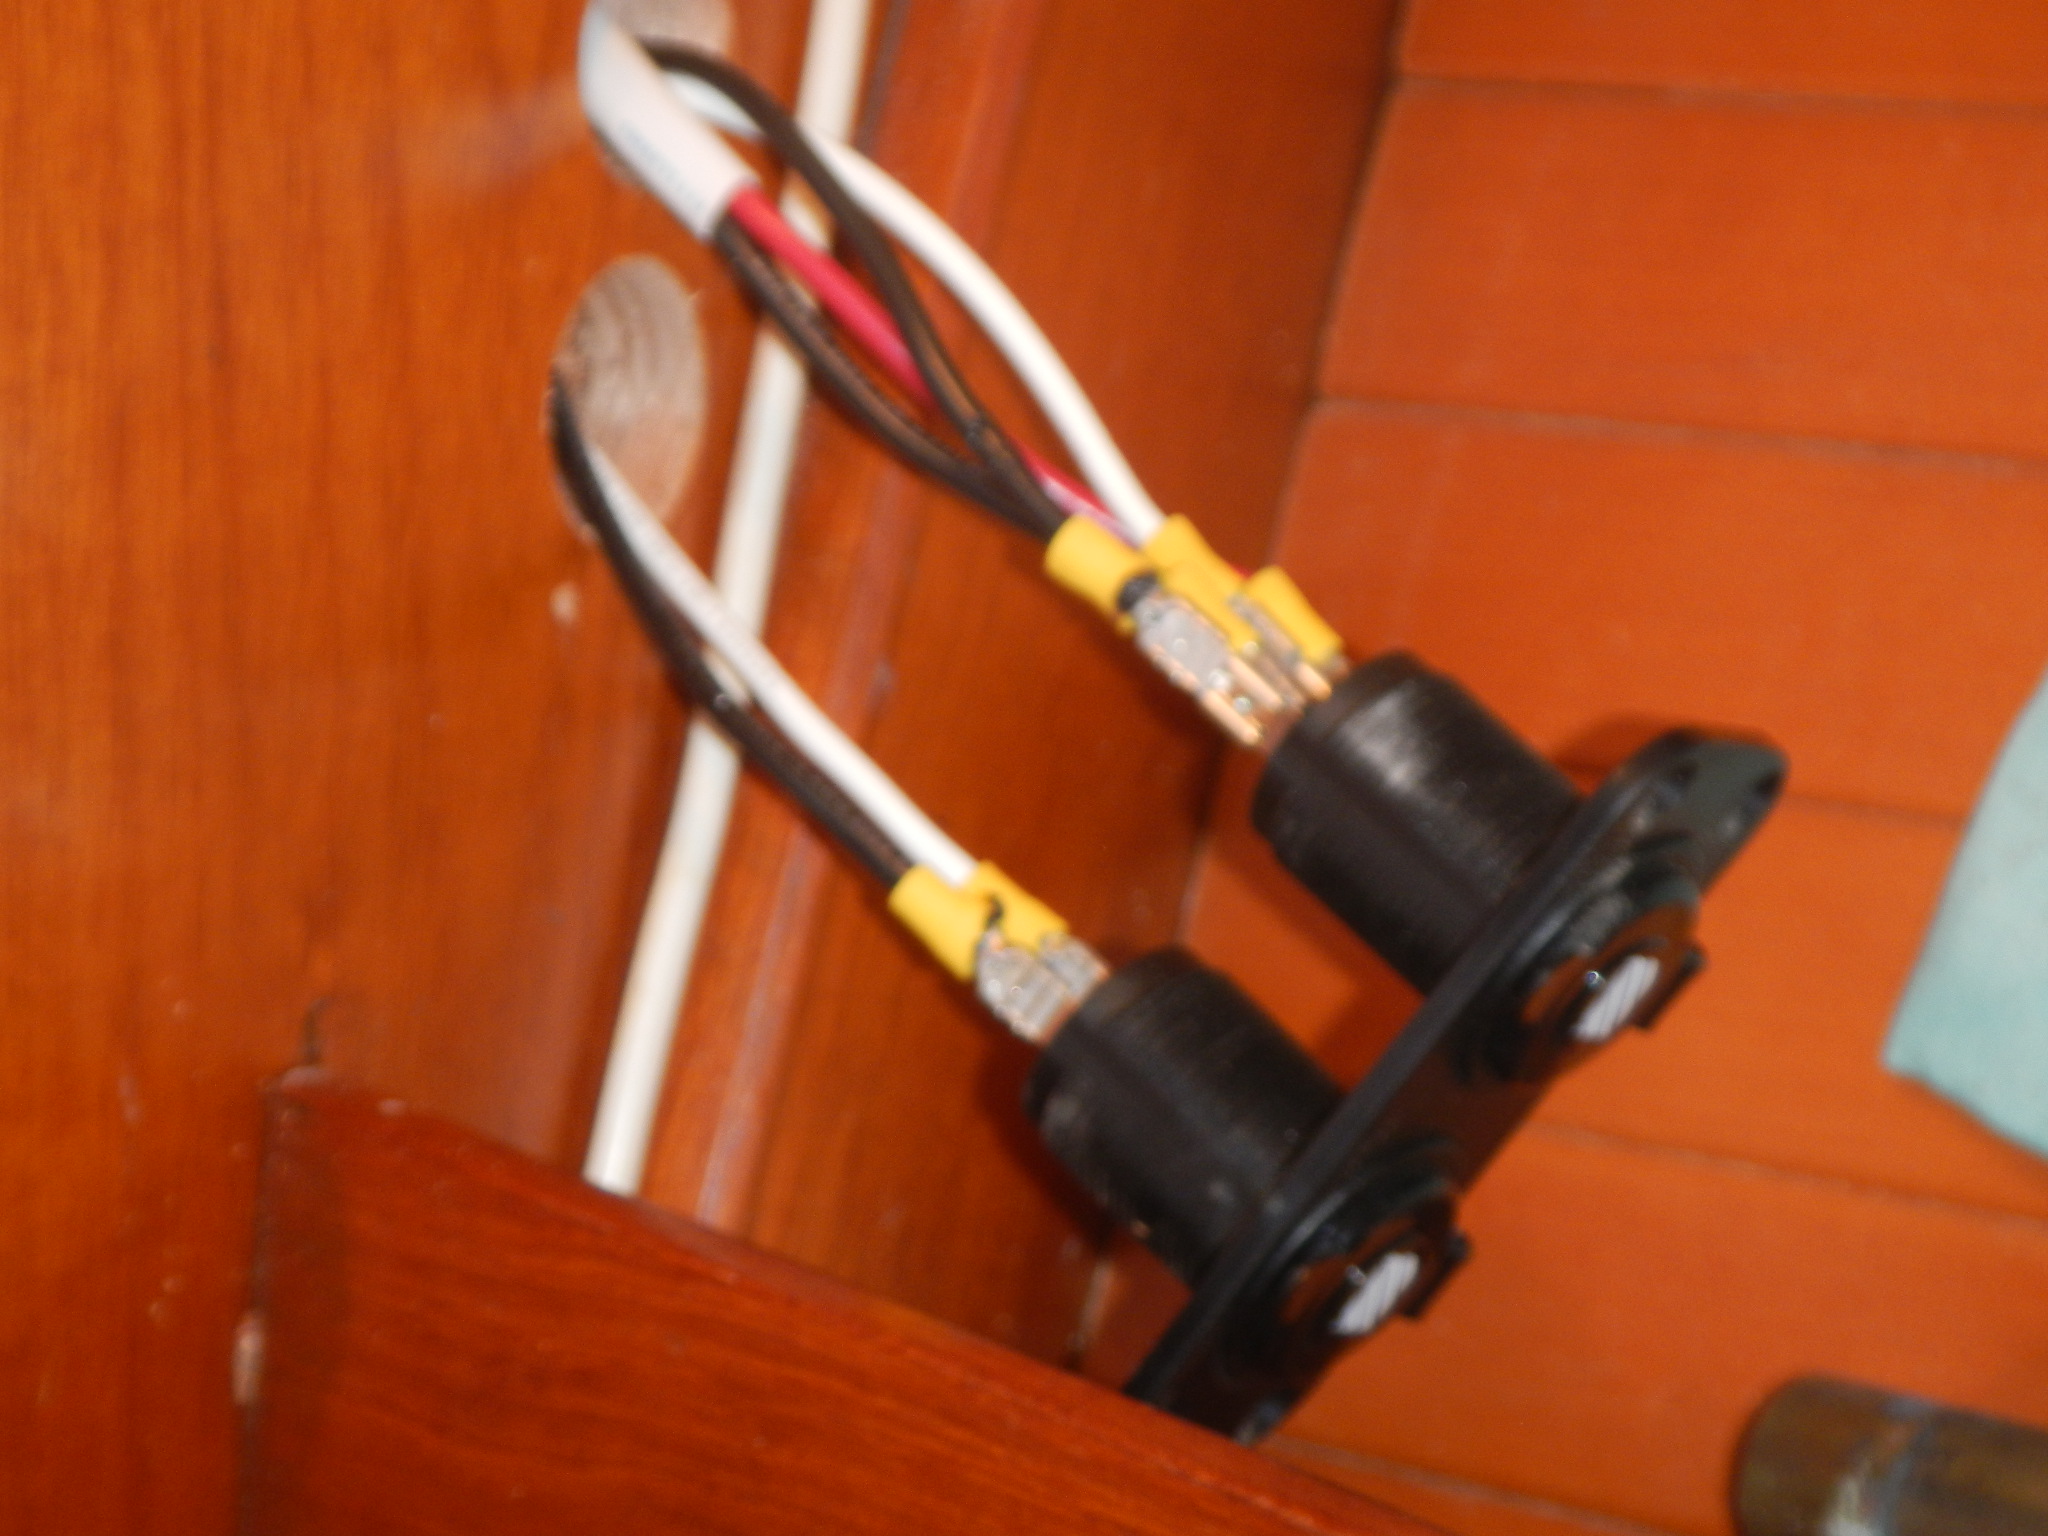
After cutting the wires and checking the polarity three times, I soldered the the wires onto the fused DC Accessory plugs I picked up for the purpose. And Finally the moment of truth.
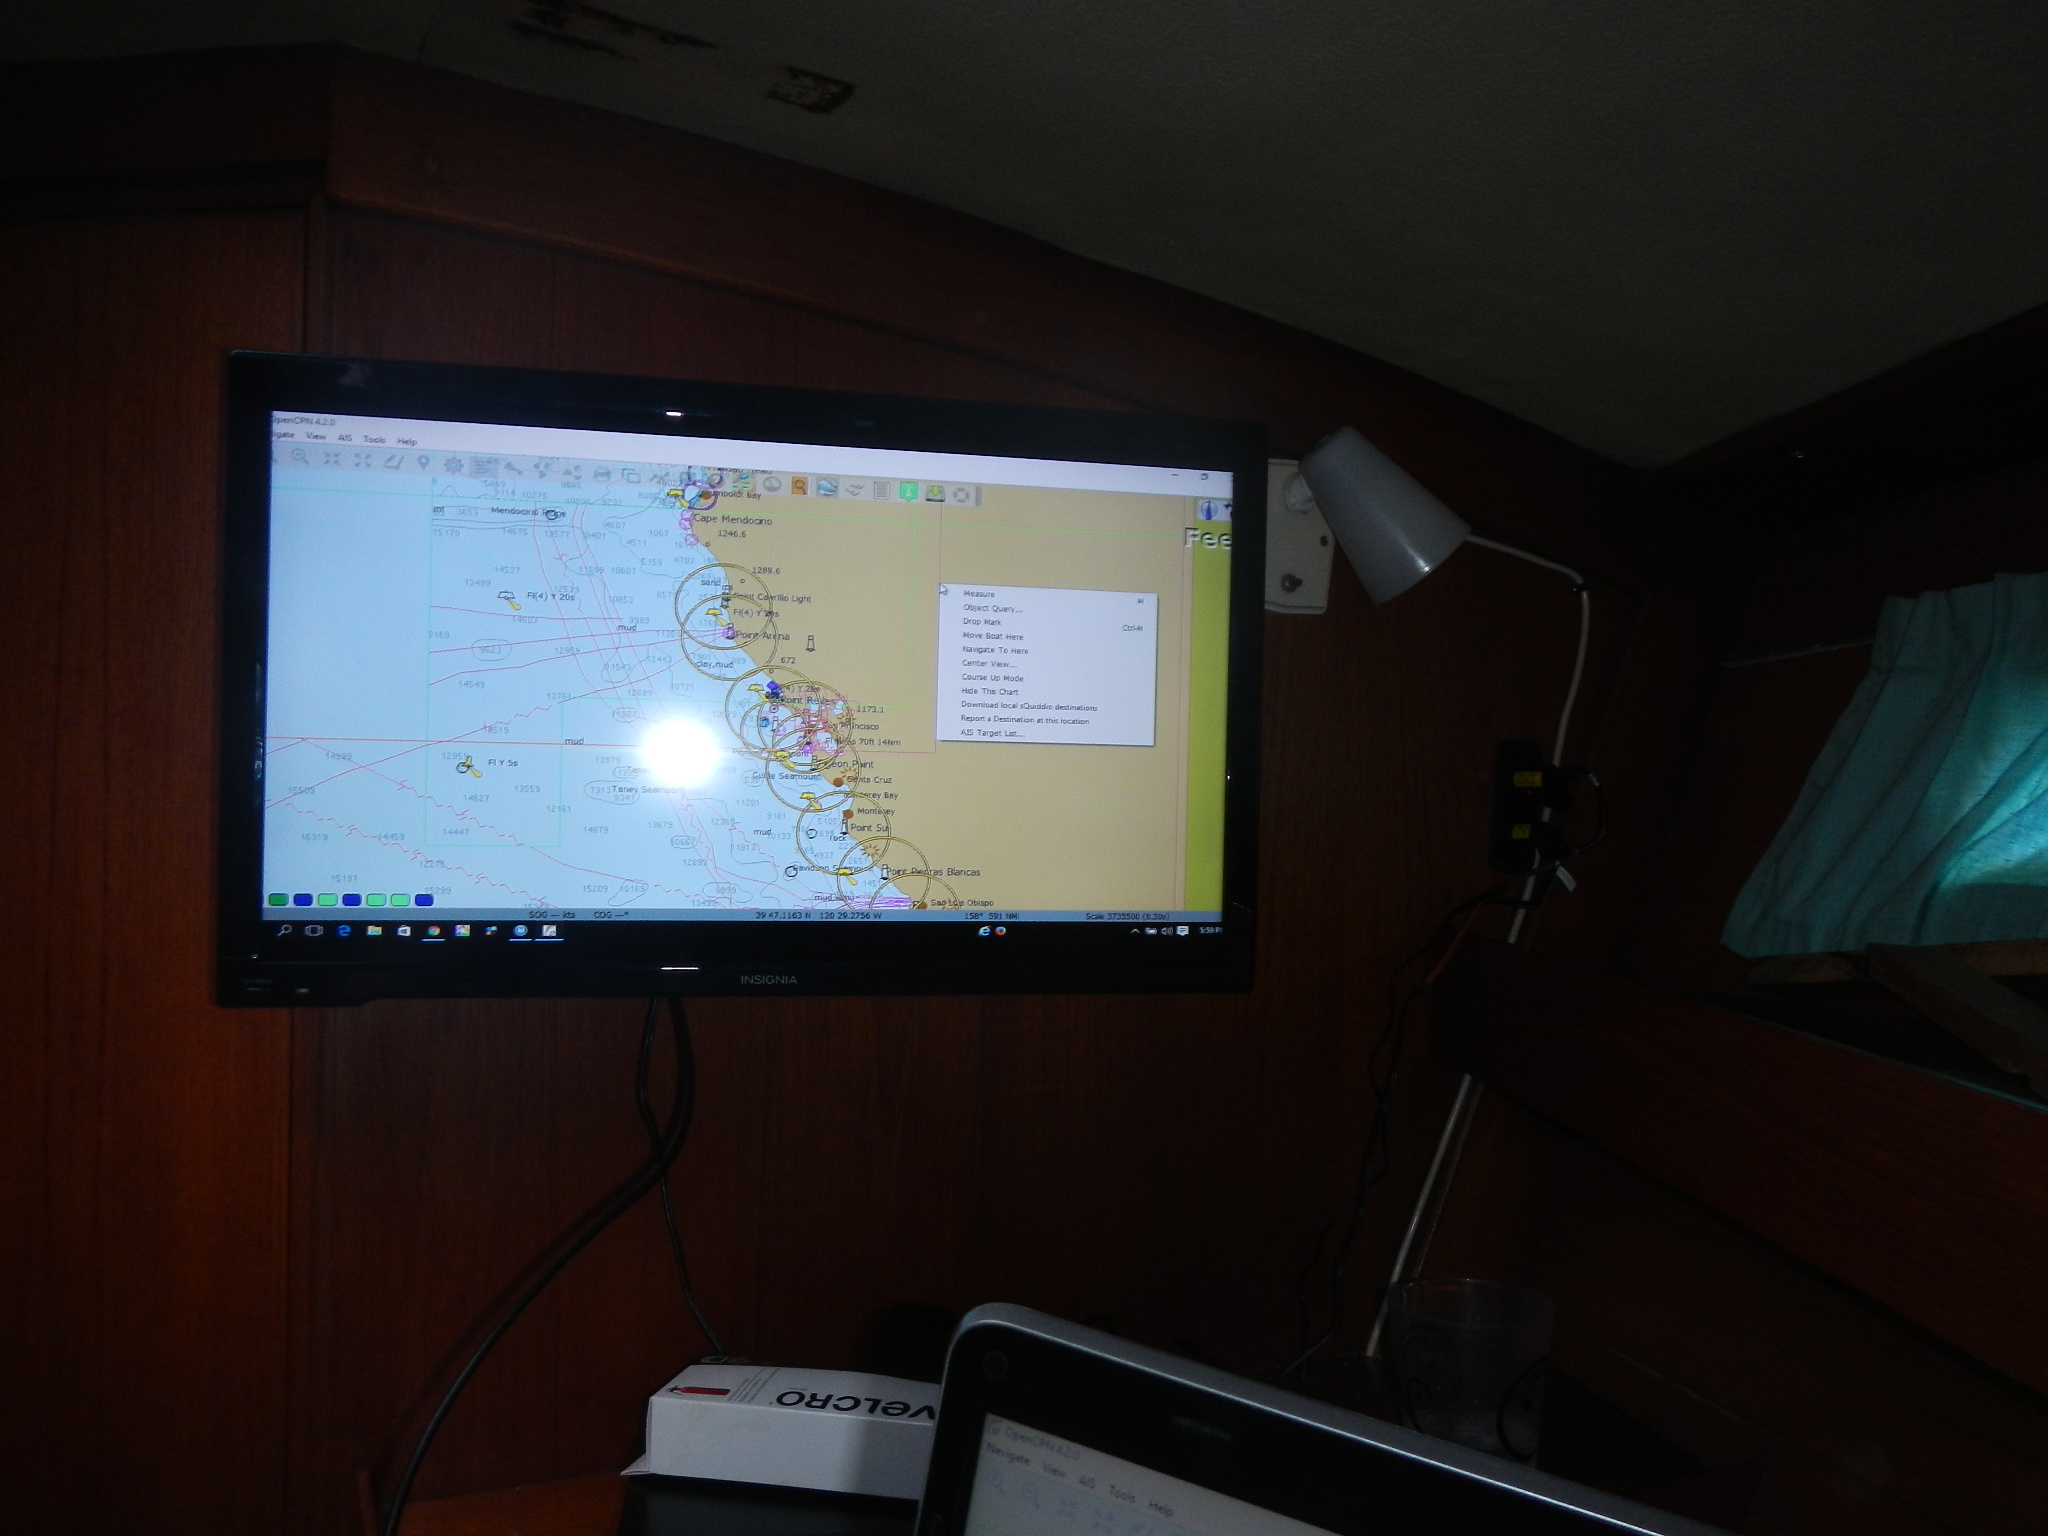
I have Open CPN on my laptop and it displayed beautifully on the TV. I could see using this display for planning a day’s journey with Melissa.
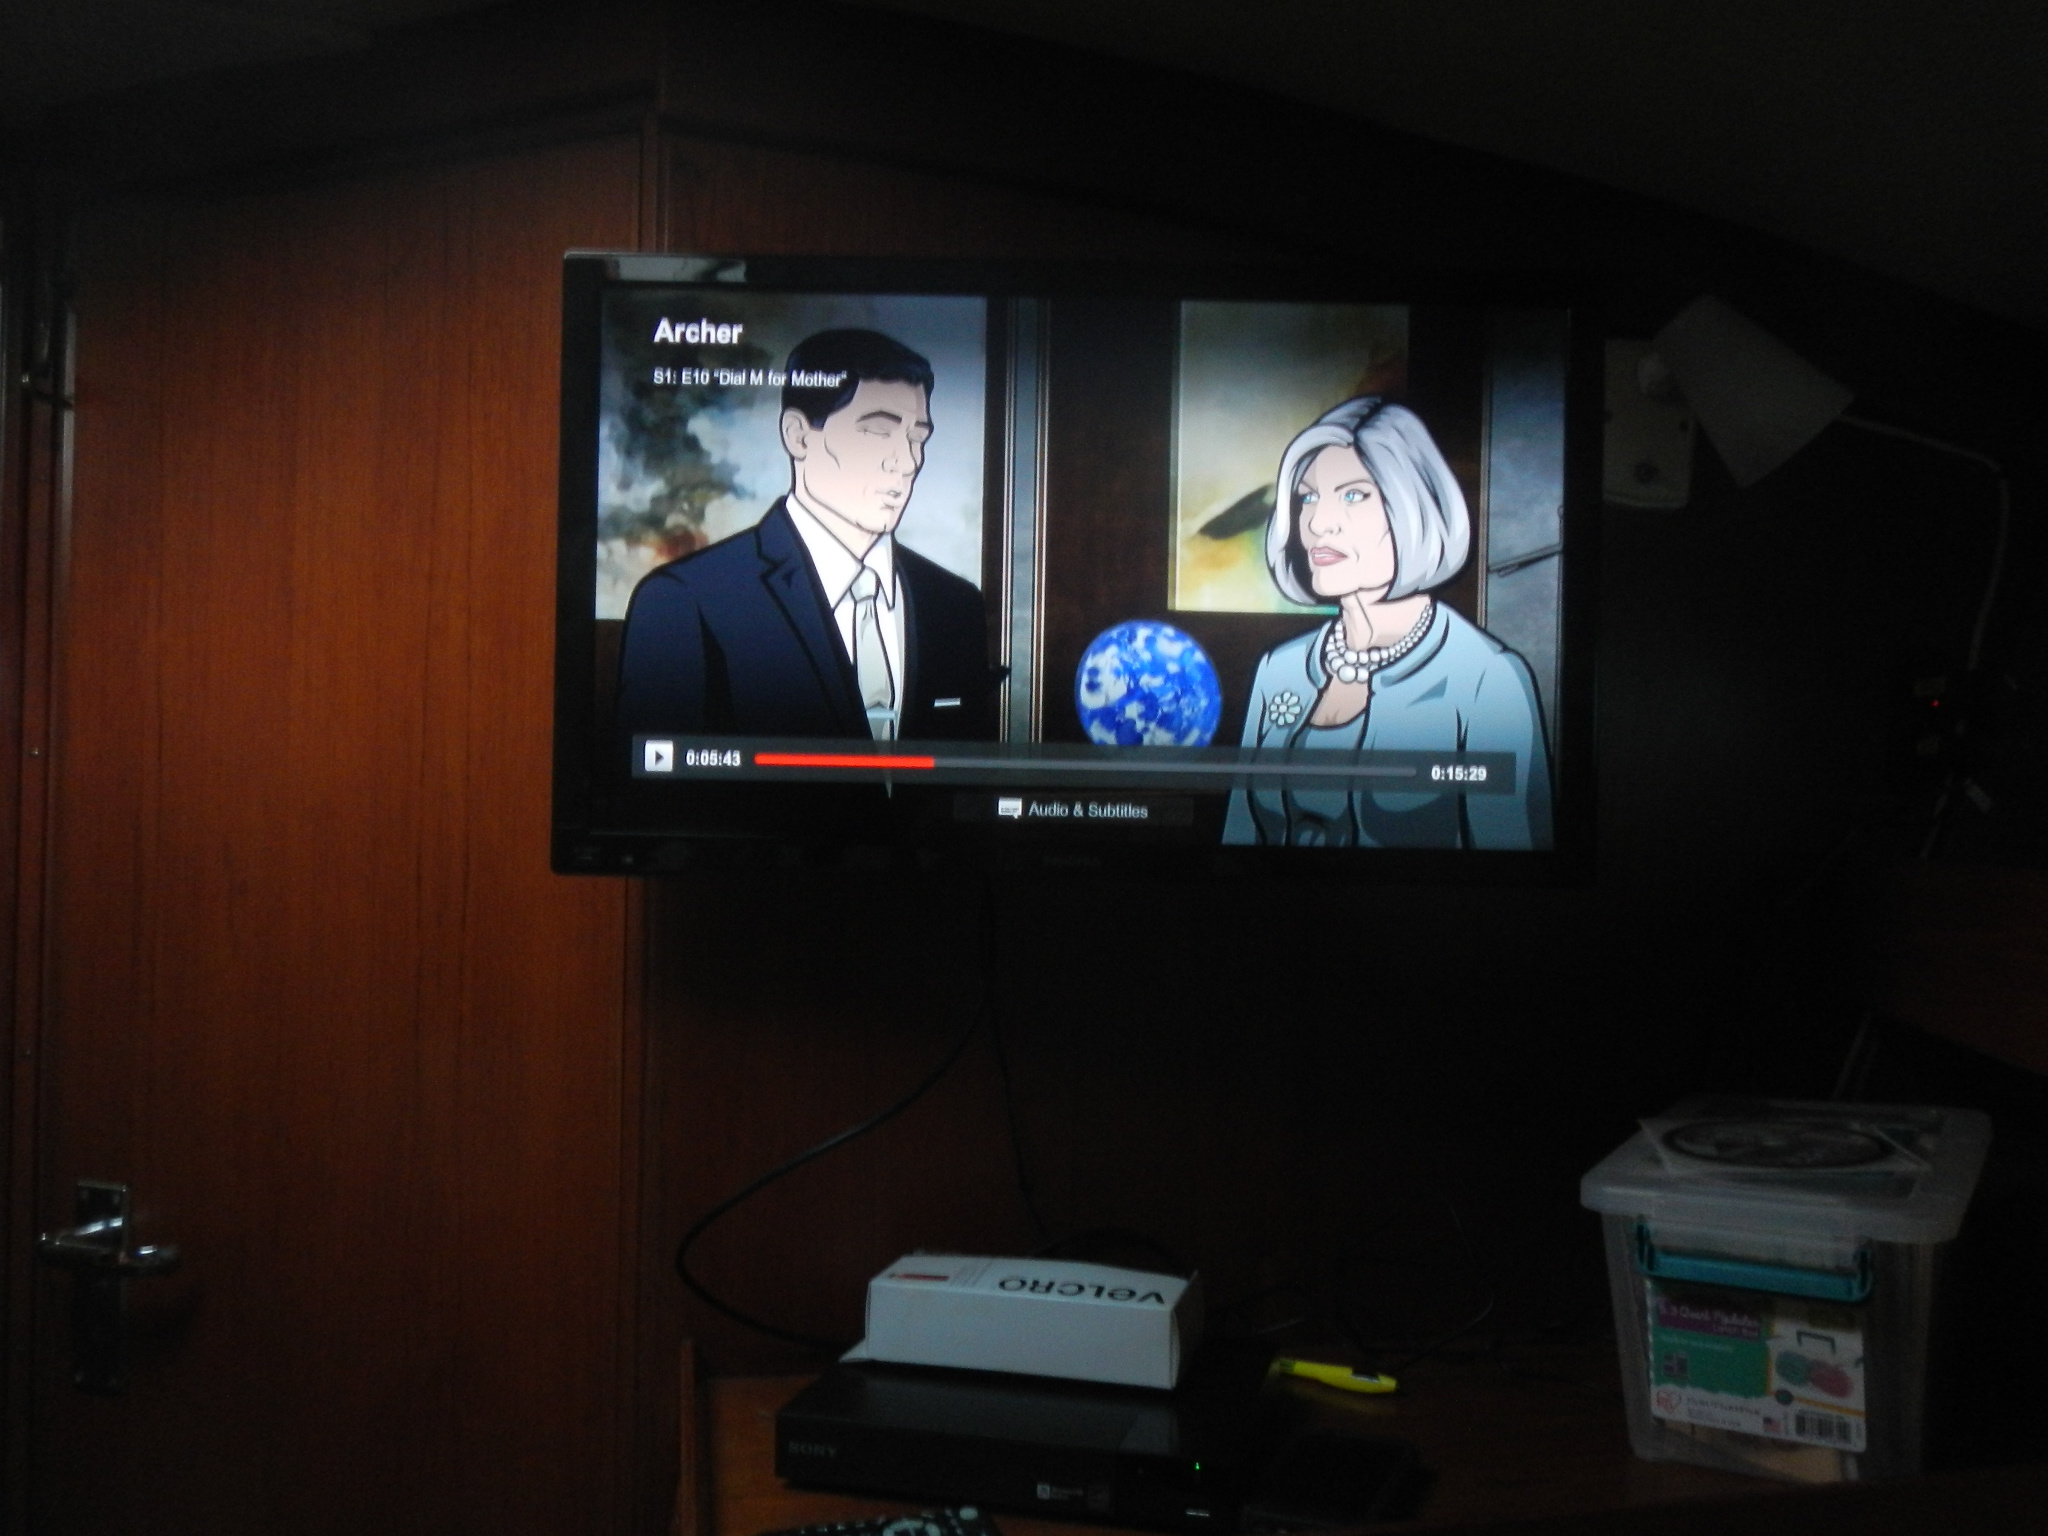
Both units worked perfectly! After a little fussing, I was even able to stream Netflx with the DVD player. The audio quality is quite good for such an inexpensive TV and the Rocket Fish mount makes it easy adjust the viewing angle. I think that will be particularly important if we use the TV as a computer monitor.
With the WiFi enabled DVD player, we can stream Netflix if a signal can be found. Foss Harbor marina recently added a really nice WiFi system to our dock and it worked beautifully.
The power supplies that came with the TV and DVD player both had an open voltage of about 15.5 volts DC, well over the charging voltage that any of the charging sources on Galapagos provide. Still I will probably just unplug these devices when not in use to be on the safe side. A low voltage condition might cause problems as well and I will have to monitor that as we go.
So far, I am quite pleased with how well this project turned out. I love not having to turn on the inverter and trying to make the tinny laptop speakers loud enough. All in all, a nice addition to our Rumpus Room.



Tuesday, June 21, 2016
Cheap Boat Tricks – Cockpit Floor Mat
Please welcome new contributors Melissa and Mike, of s/v Galapagos, a 1975 47 foot Olympic Adventure ketch! For their first contribution, Melissa shows us a cheap and easy addition to cockpit comfort...
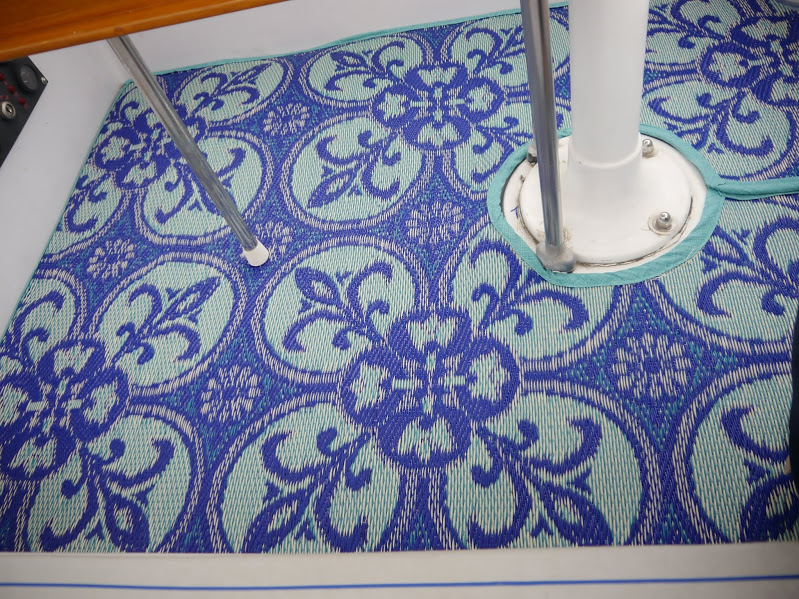
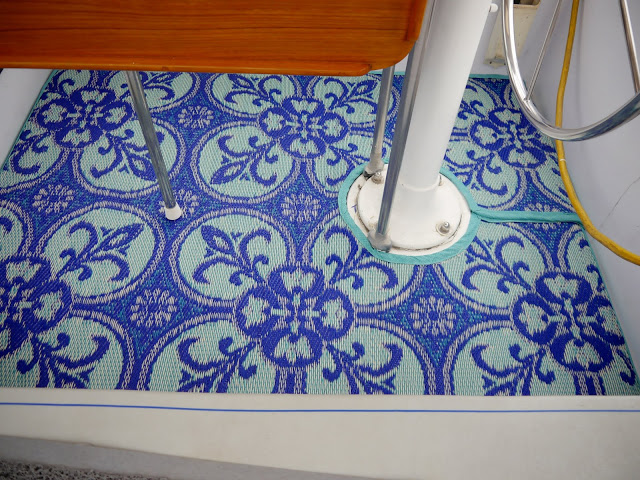
This little project has all the qualities that make a project satisfying for me: creative use of a material, hunting and gathering all the crafty pieces, long straight seams to sew, fairly low level of difficulty, and lots of colorful bang for less than 50 bucks. In this case, much less, only about $32 all in. Woo hoo!
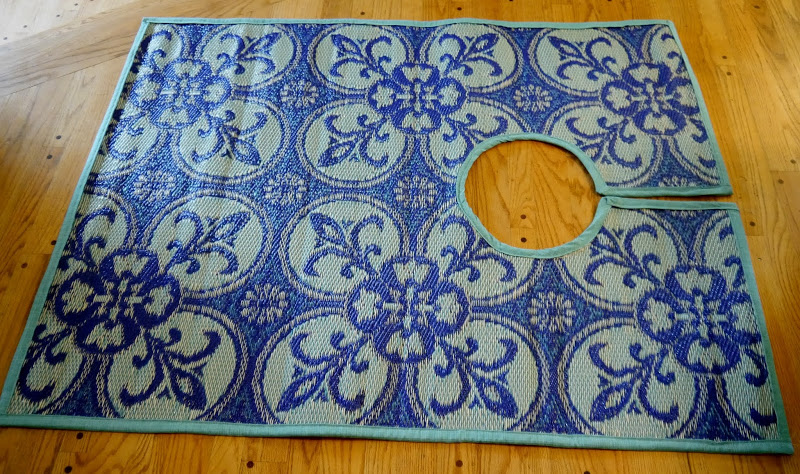
Don’t ask me what I was doing in World Market because truly I don’t even know. I had just bought fabric for another project over at the fabric store and with time to kill I wandered in just to look around. That’s usually a dangerous thing, but since I’m determined to NOT buy anything for the house, I felt safe. But then, I found these cool mats made from woven recycled plastic. Hmmm. The little grey cells began to process all the possibilities and 20$ later I left with a 4×6 mat destined to cover our cockpit floor.
Want to make one? Here’s how I did this one.
You will need: your mat, scissors, outdoor thread, outdoor fabric in a matching color, masking tape, butcher paper and tape for the pattern.
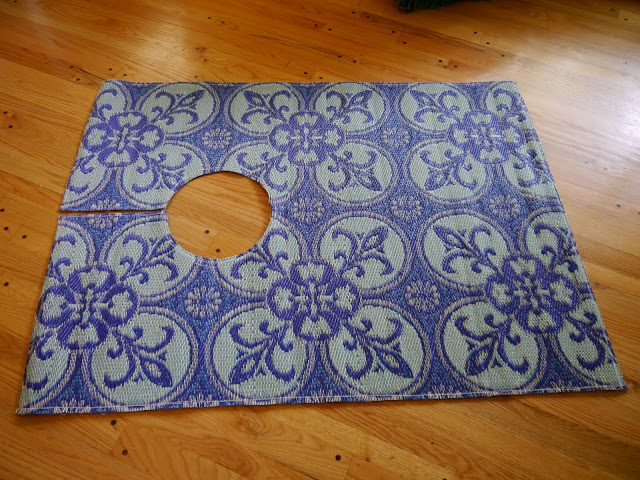
Et voila! This will be exposed to UV rays all the time, so who knows how long it will last? But who cares? For that price, it was worth it just for the fun.
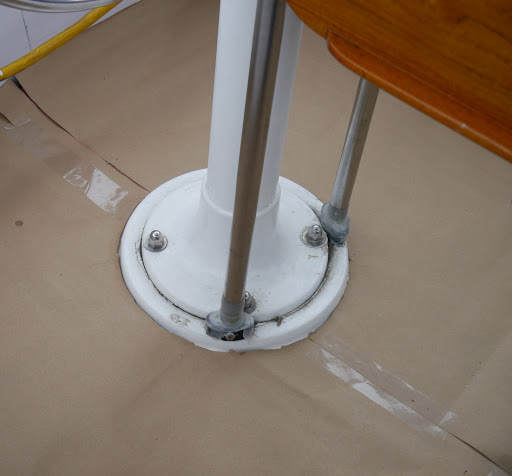
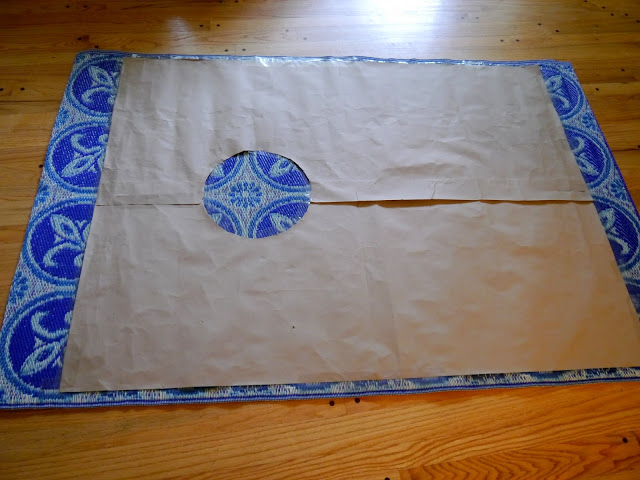
- Make a pattern of your cockpit floor. In our case, I needed to cut out a circle to fit around the steering pedestal. Sure, the engineering types reading this will come up with a thousand easier ways to make a pattern, probably using things like numbers and formulas and measurements. I prefer my patterns to be on paper. I’m tactile and visual, and I just feel better having a template I know fits exactly. Or at least close. I used left over butcher paper I had from making the patterns for the aft cabin berths.

- Center the pattern over the mat. It’s easy to do this by folding the pattern in half the long way and marking the middle, then repeating in the other direction. Do the same thing with your mat. Mark the middle on each side, then lay the pattern on top of the mat, making the marks match up. Then trace around the pattern using a sharpie marker.

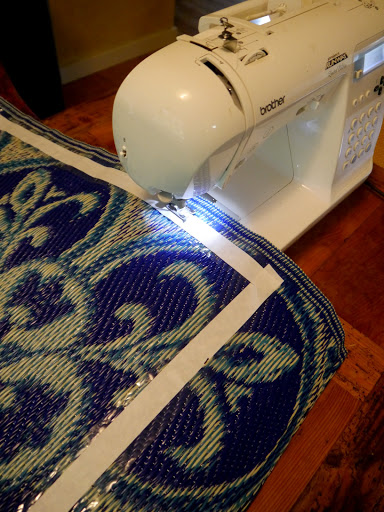
- Now put tape along the edge of the line. The purpose here is to keep the mat from unraveling when you are cutting it, before it is sewn. With this mat, that was only an issue in one direction, but I didn’t know that before I cut, so better safe. Place the tape on the inside of the line. Cut along the tape and get ready to sew. I used sail thread that I already had, but be sure to use outdoor thread. I sewed this on my Brother sewing machine, which is a regular machine. It handled this just fine. Sew along the middle of the tape to secure the edges.

- At this point, make sure your mat fits the cockpit floor.

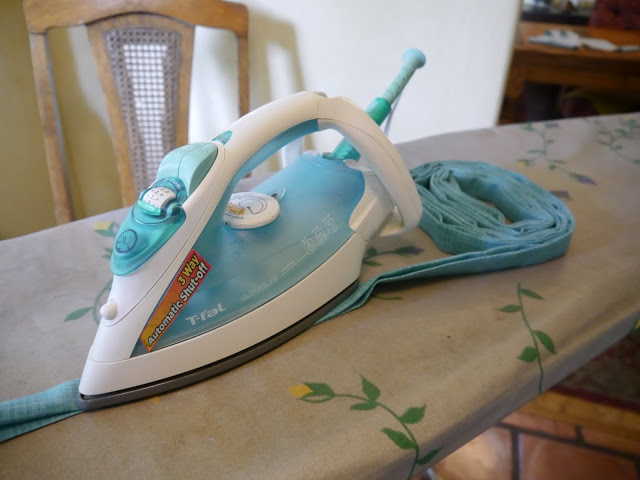
- Make the binding. Cut 4″ strips from your chosen fabric. Using an iron, fold the fabric in half, then fold each side in half again. Use the iron to make crisp edges. Then cut 4″ strips along the bias of the remaining fabric for the binding for the circle cut out, if you have one. fold and iron that the same way.

- Sandwich the edge of the mat in the folded binding and sew along the edge, binding a blanket. Use the bias cut binding to do the circle.


Subscribe to:
Posts (Atom)


 Posts
Posts