
Hatches & Cabin Top Projects – Week 2
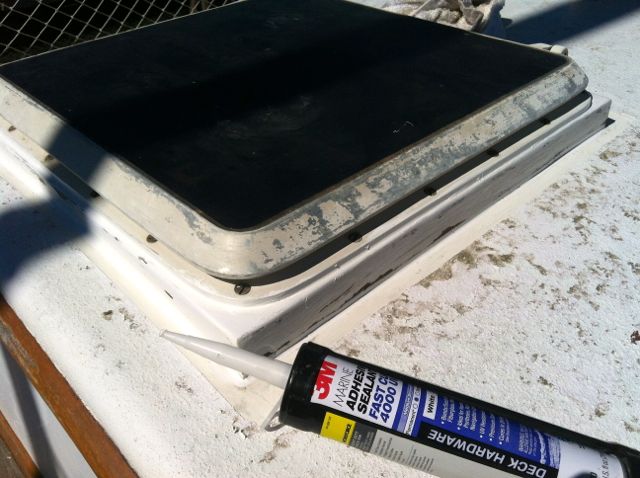
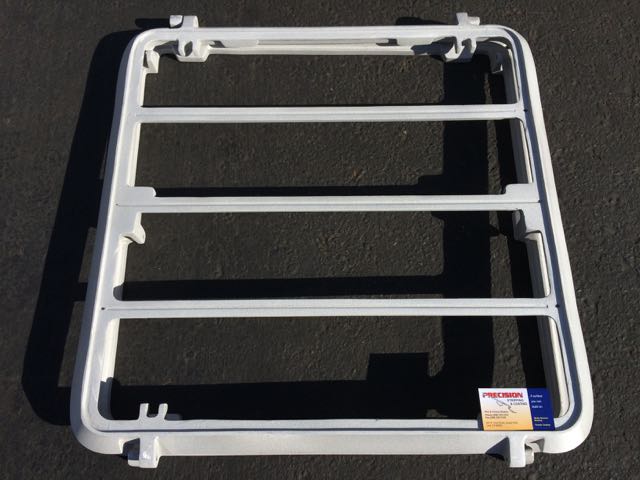
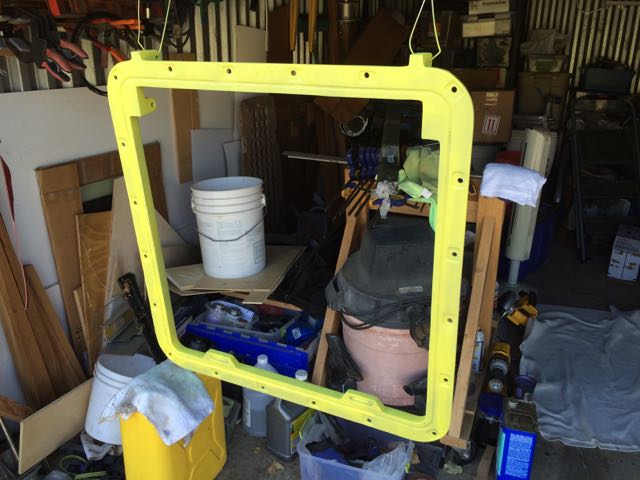
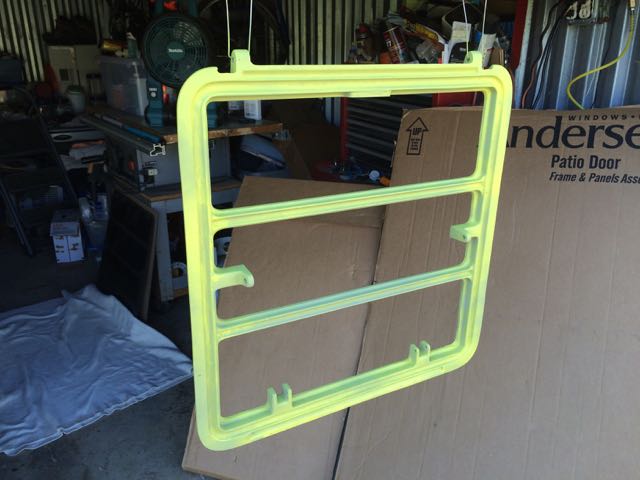
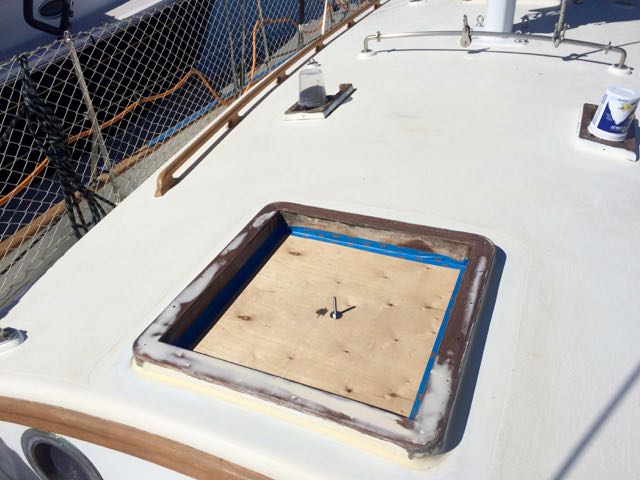
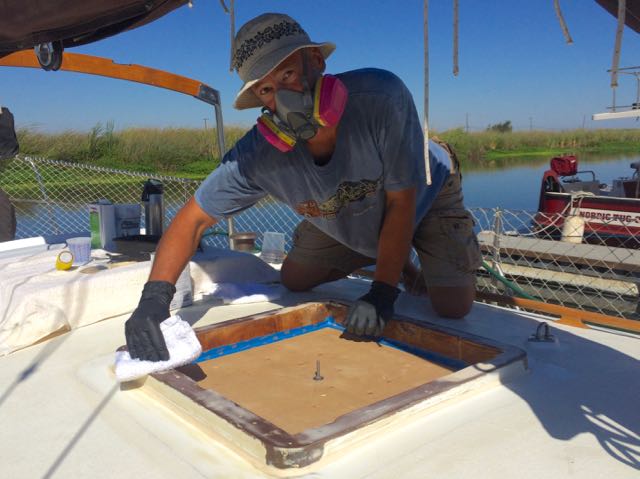
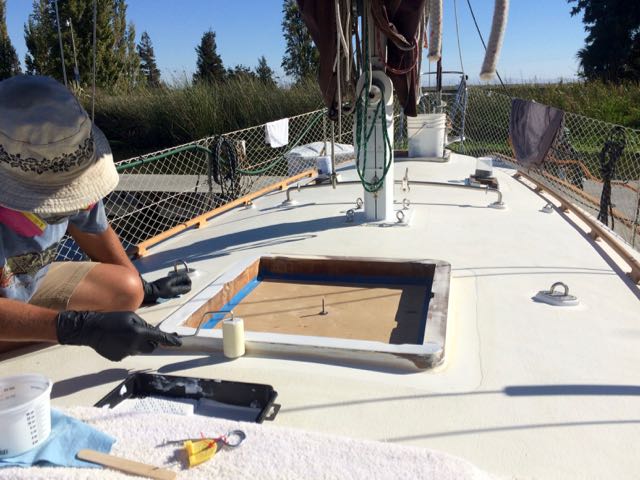
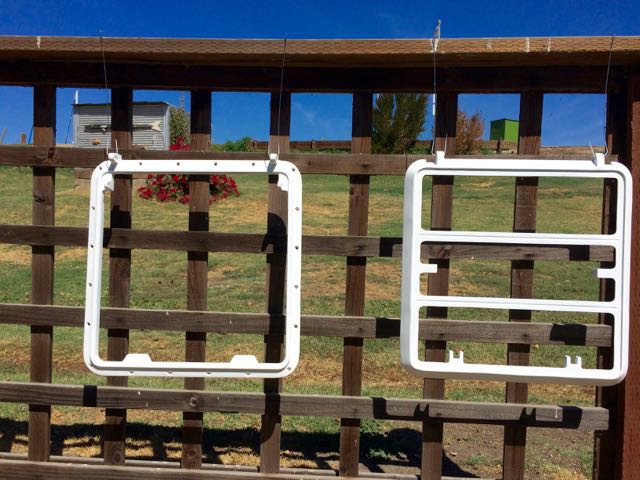
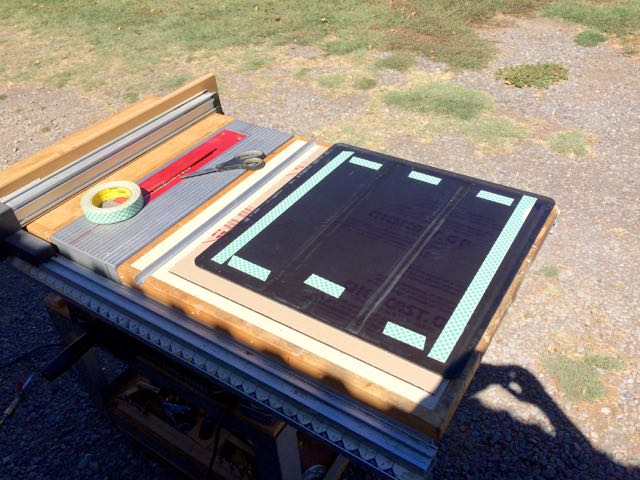
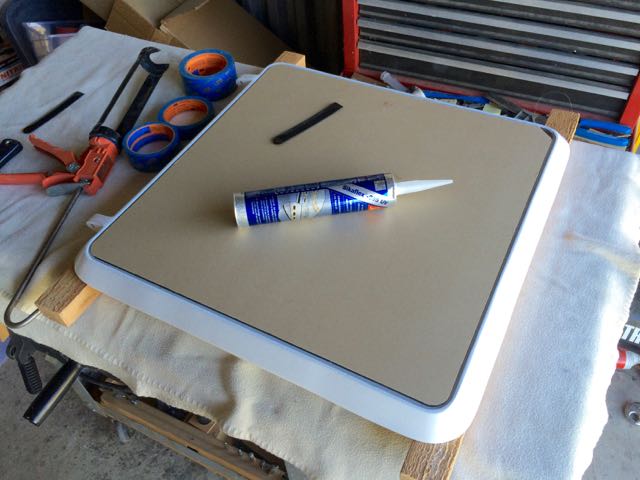
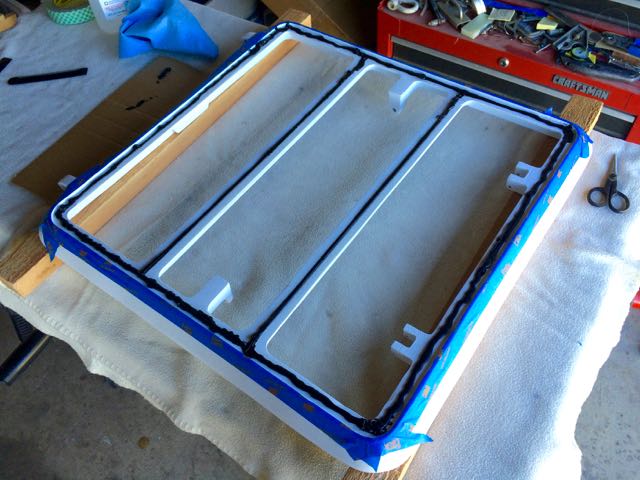
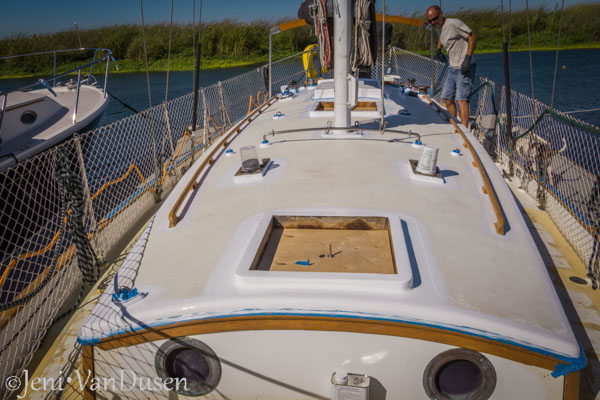
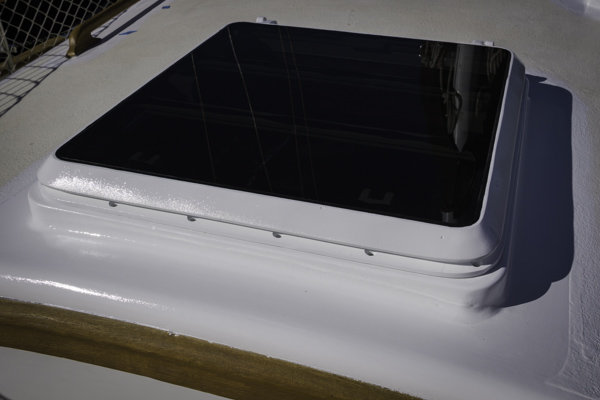
In typical boat-project fashion, refurbishing the two overhead hatches has taken way longer than expected. Rich managed to get both Bomar metal hatch frames off the boat without bending them too much. He removed the old glazing, scraped out the weather-stripping, and attempted to remove the old paint with mechanical means, but it was just too tough. Sand blasting all the old paint off was the better option and after 3 days we finally got the frames back from the sand blasting guy. Rich used an entire can of zinc phosphate primer on one hatch, ran to West Marine for a second can and finished the last hatch last Friday.
Last Saturday Rich spent spraying Interlux Primkote on the metal hatch frames and faring in the wooden hatch frames on the boat with epoxy. Those things should never leak again (fingers crossed). I picked up trash in the morning for the annual Coastal Cleanup day. It’s always so disappointing to find so much trash right near the water. It makes you wonder what is wrong with people.
Interlux Primekote
Last Sunday we lightly sanded the Primekote on the cabin top that Rich put on last summer. We just had to sand it enough to give the next coat of Interlux Perfection something to hold on to. Next, we removed all unnecessary tools and the traveler from the boat. Then we washed the boat and scrubbed the cabin top really well. What a dirty mess it was; not only from our work on it, but also from the neighboring farmers who are harvesting and planting again. Finally, late in the day, Rich painted the Interlux Primekote on the two wooden hatch frames.
Interlux Perfection
Monday I went to work and Rich prepped the boat for painting the shiny Interlux Perfection on the parts of the cabin top that won’t get non-skid. The mornings have been dewy so Rich had to first dry the boat off. He taped off the teak trim, teak handrails, and other deck hardware then wiped down the cabin top with solvent. Late in the day he started the first coat of Interlux Perfection and finished just as the sun went down. When he started peeling off the masking tape, it was clear that the paint had creeped under the tape on the teak, even though he used the super special masking tape that’s not supposed to bleed. He spent another hour or so with a putty knife and rag scraping paint off the teak.
Tuesday morning was a drier than it had been. The paint looked pretty good, but Rich decided to give it a light sanding before painting on a second coat of Perfection. Wednesday morning we woke up to rain on our faces at 4:20 in the morning. The paint from the day before was fine, but Rich had to spend the day in the shed due to weather painting the first coat of Perfection on the metal hatch frames.
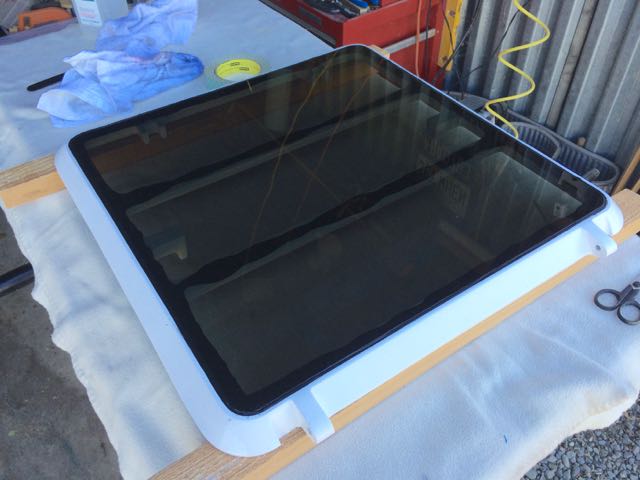
The whole week went by in a blur. On Friday Rich installed the new Lexan lenses into the metal hatch frames. Saturday morning we were determined to finish the non-skid on the cabin top. I started off masking the white areas that Rich painted on Tuesday. Rich came over to give me a lesson in masking and when he ripped off some of the tape I had put down, some of the Perfection came up on the tape (ALARM BELLS SOUND!)
We stopped everything to caucus and decide what to do next. We had to fix the big ding in the paint from the masking tape and Rich also pointed out some other areas where the paint didn’t brush on as smoothly as he’d like. Plus there were a few drips and sags; nothing major, but enough to sway me to decide that we had to do a touch-up coat of Perfection. We did a 180 and started masking the teak for another coat of Perfection.
I also talked Rich into spraying the Perfection instead of brushing. Spraying is Rich’s preferred painting method, but it was windy this week and it would have been too difficult to spray. Plus there is a really nice, and expensive powerboat in the slip next to us. The last thing we need is to get over-spray on their shiny gelcoat.
So with the teak and other bits masked off, Rich sprayed paint while I held a large piece of cardboard to block the wind. We didn’t spray the entire boat, just the areas that needed touching up; mostly under the grab rail and along the forward edge.
Late in the afternoon on Saturday, we started installing the hatches. Rich had to drill out the holes in the wood frame that he had epoxied over. He used 3M’s UV4000 sealant to secure the metal hatches to the wooden frame. Lastly, he installed the metal pins for the dogs that hold the hatches closed.
So we didn’t get the cabin top completely painted before Rich starts his new job on Monday, but the weather should be good next weekend and we’ll try again.
Showing posts with label ventilation. Show all posts
Showing posts with label ventilation. Show all posts
Tuesday, May 16, 2017
Hatch Rennovation
Aboard Tayana 37 s/v Ramble On, Rich & Jeni continue their re-fit. Here, they refurbish their two Bomar hatches and their mounts...



Tuesday, April 4, 2017
Storm Windows? On A Boat??
This post originally appeared on Windborne in Puget Sound
We use Eolian all winter long (at the dock anyway), therefore we heat her all winter long. On houses, storm windows are used to provide an extra layer of insulation against the winter cold and weather. If you have ports like these:
And then you just drop them into the recess that the screen was in, and reinstall the rubber gasket. (If you look closely, you'll notice that there is a joint on the gasket - this should go to the top.) Be sure to get the gasket flange firmly pushed into the slot all the way around, otherwise the window won't close - you could break it if you try.
Easy peasy.
We use Eolian all winter long (at the dock anyway), therefore we heat her all winter long. On houses, storm windows are used to provide an extra layer of insulation against the winter cold and weather. If you have ports like these:
 |
| Do you have ports like this? |
...you can easily make and fit storm windows for them too! I don't take credit for this idea - it came from Drew, 6 years ago.
But in any case, it couldn't be simpler. First you need to remove the screens from your ports (we don't have ours installed - no bugs to speak of in the PNW... :^) ). It is easy to do this. The rubber gasket that traps the screens in place is not glued in - it is just wedged into a slot on the port frame:
 |
| Just pull it out |
You just need to pull it out. If you haven't ever had yours off, they may be glued in there with algae and other growth tho. With the gasket off, simply lift the screen out of its recess.
Of course, you'll need the actual storm windows. For these you'll want some kind of thin plastic - less than 1/8" (the thickness of the screens). I made mine out of the glazing from a couple of old poster frames that were destined for the recycle bin. I just traced the outline of the screen on the plastic sheet and then cut them out on my bandsaw. I suppose you could use a sabre saw, or even a hack saw (tho the corners would be tedious). And you might even want to smooth out the edges with a bench grinder and/or a file - I did this with mine.
 |
| And just slip them in where the screens were |
And then you just drop them into the recess that the screen was in, and reinstall the rubber gasket. (If you look closely, you'll notice that there is a joint on the gasket - this should go to the top.) Be sure to get the gasket flange firmly pushed into the slot all the way around, otherwise the window won't close - you could break it if you try.
Easy peasy.
Tuesday, August 16, 2016
Ratty Port Replacement
This post originally appeared on Windborne in Puget Sound
Last summer while doing gelcoat repair, I mentioned that the ratty fixed ports on Eolian's aft-facing cabin house were long overdue for replacement. Well, now is that time.
Removing the port was easy. Back out the screws on the inside, and then push it out. No, that bedding was definitely NOT firmly holding the port in place. Tho it was clearly not leaking, there appeared to be no reason for that except for habit.
The next problem was that the new port is a little larger than the old one (well, I guess that's better than the reverse...). First I taped over the entire area with some white duct tape I had on board to protect it from the vibrating sabersaw table. Then I used the outer trim ring of the new port as a stencil, and marked a cut line. My trusty (but crummy - I gotta get a better one) saber saw with a grit-edge blade cut thru the 1" thick sandwich of fiberglass, foam, fiberglass with relative ease. To constrain the mess, Jane was inside with a shop vac positioned to catch the dust and chips.
(Note to self: Next time, just tape some plastic over the inside and clean up afterwards - that will be more effective and easier.)
Before the final installation, one more step was necessary. Because we often sit on the back deck and lean against the bulkhead that has this port (and a second one, which will also get replaced), it was necessary to trim the spigot to a minimum projection - for comfort. So I installed the port, held the trim ring in place, and traced around the projecting spigot with a ballpoint pen.
Then I removed the port and laboriously cut off the extra spigot length with a hand hacksaw (the same one I used to cut the exhaust hose...). I preferred to use a hand tool for this job because, tho it cut slowly... it cut at a speed that permitted me to maintain a uniform 1/8" from the pen marking. After cutting, I used a fine file to smooth off the saw cut markings, and break the resulting sharp edges slightly.
Before final installation, I carefully sealed the exposed foam core in the opening with the same silicone that Beckson requires for bedding the port*. If there was any leakage in the future, I didn't want it to get into the core. Then I injected silicone into the gap between the port and the deckhouse, and smeared a little on the back side of the trim ring. Press the trim ring into place, some clean up, and it is done!
Now, one more to go, and then all the fixed and opening ports on the boat will have been replaced, giving us a total of 11 opening ports.
* I hate the use of silicone on a boat, but this is one of the few places that I will use it. In this case, it is because Beckson specifies it.
 |
| One of two failing ratty fixed ports |
Last summer while doing gelcoat repair, I mentioned that the ratty fixed ports on Eolian's aft-facing cabin house were long overdue for replacement. Well, now is that time.
 |
| Even Plexiglas eventually falls prey to the relentless UV from the sun, tho it lasts far, far longer than Lexan - this port is 38 years old. If it had been polycarbonate, it would have looked much worse after only 5 years. |
 |
| Tho there are no leaks (yet!), the bedding is overdue for replacement, as well as the port. |
The next problem was that the new port is a little larger than the old one (well, I guess that's better than the reverse...). First I taped over the entire area with some white duct tape I had on board to protect it from the vibrating sabersaw table. Then I used the outer trim ring of the new port as a stencil, and marked a cut line. My trusty (but crummy - I gotta get a better one) saber saw with a grit-edge blade cut thru the 1" thick sandwich of fiberglass, foam, fiberglass with relative ease. To constrain the mess, Jane was inside with a shop vac positioned to catch the dust and chips.
(Note to self: Next time, just tape some plastic over the inside and clean up afterwards - that will be more effective and easier.)
 |
| The new opening port is a little larger than the old one. |
Then I removed the port and laboriously cut off the extra spigot length with a hand hacksaw (the same one I used to cut the exhaust hose...). I preferred to use a hand tool for this job because, tho it cut slowly... it cut at a speed that permitted me to maintain a uniform 1/8" from the pen marking. After cutting, I used a fine file to smooth off the saw cut markings, and break the resulting sharp edges slightly.
 |
| Trimmed and ready for final caulking |
Now, one more to go, and then all the fixed and opening ports on the boat will have been replaced, giving us a total of 11 opening ports.
* I hate the use of silicone on a boat, but this is one of the few places that I will use it. In this case, it is because Beckson specifies it.
Tuesday, July 28, 2015
Galley Work
This post originally appeared on Windborne in Puget Sound
Back in October, I re-designed the curtain tracks on two of our aft ports in order to allow them to open more completely. The results were so nice and professional looking that the remaining six ports just begged to be upgraded too. So I ordered more curtain track from Sailrite.
This last weekend I got around to making the installations. But because there were six to do, a little manufacturing engineering came into play.

First, at home I cut and trimmed the track with my trusty hacksaw and vice. Then I set up a work station at the galley sink for drilling - the sink traps the drill swarf and keeps it off the floor where it would damage the finish. Above, you can see that I have marked where the holes go on the tracks and am busy drilling them with a 5/32" bit.
After finishing the manufacture of the tracks, the work fell naturally (that is, unplanned...) into four workstations, each with its own dedicated tools:
And then move on to the next port...
Tho having these four stations pretty much occupied the whole boat during the work, it completely eliminated all movement of tools except for the small handful used at Station 1. For me this is a huge advantage, since otherwise I am always looking for one tool or another.
It took all afternoon, but only one beer.
This last weekend I got around to making the installations. But because there were six to do, a little manufacturing engineering came into play.

First, at home I cut and trimmed the track with my trusty hacksaw and vice. Then I set up a work station at the galley sink for drilling - the sink traps the drill swarf and keeps it off the floor where it would damage the finish. Above, you can see that I have marked where the holes go on the tracks and am busy drilling them with a 5/32" bit.
After finishing the manufacture of the tracks, the work fell naturally (that is, unplanned...) into four workstations, each with its own dedicated tools:
- Station 1: At the current port. Tools here were a #2 Phillips screwdriver, a 3/8" box wrench, a small flat blade screwdriver, and a small #1 Phillips screwdriver.
- Station 2: The galley sink. Tools here were the drill, water and a sponge
- Station 3: The saloon table. Tools here were Meguires plastic cleaner, Meguires plastic polish, and some rags
- Station 4: The saloon settee. Tools here were a #2 Phillips screwdriver and a 5/16" nut driver.
- At Station 1:
- Remove the existing curtain track and curtains from the rusty spring clips and set aside
- Using the #2 Phillips and the 3/8" wrench, remove the nuts and screws holding the port hinges together.
- Remove the port lens.
- At Station 2:
- Carefully wash the port lens using water and the sponge.
- Transfer the hole locations from the track to the port lens and mark with a Sharpie.
- Drill two 5/32" holes.
- At Station 3:
- Apply polish to the inside of the lens and turn it over
- Apply cleaner to the outside and rub vigorously to remove the oxidized lexan.
- Remove the cleaner with a rag and apply polish to the outside of the lens
- Buff the outside of the lens.
- Buff the inside of the lens.
- At Station 4:
- Now that the lens is clean, it won't dirty the settee cushion, and it needs protection. Working on the settee is perfect. Install the track to the lens with two 6-32 screws and nylock nuts, using the #2 Phillips and the nut driver.
- Back at Station 1:
- Insert the lens hinge plates into the hinge plates on the port frame.
- Use the small Phillips screwdriver to align the holes. It is perfect for this - the shaft is exactly the right diameter and the tapered tip allows easier alignment. I struggled mightily with this step before I stumbled across the use of the screwdriver.
- Insert the screws into the hinges and add the nuts.
- Using the small flat blade screwdriver, remove the stop screws from the ends of the old track.
- Remove the curtains from the old track.
- Install the curtains into the new track.
- Install the stop screws in the ends of the new track.
And then move on to the next port...
Tho having these four stations pretty much occupied the whole boat during the work, it completely eliminated all movement of tools except for the small handful used at Station 1. For me this is a huge advantage, since otherwise I am always looking for one tool or another.
It took all afternoon, but only one beer.
Thursday, April 16, 2015
From Curtains to Blinds - A More Streamlined, Private Option
Please welcome new contributor Dana who lives aboard her Challenger 32, s/v NoName - yes, that's right! Her boat has not yet been named, and she has blogged about that great dilemma as well. But for her first appearance here, Dana deals with replacement of the old curtains that came with her boat:
When I first viewed my boat-to-be, I was impressed with the amount of light in the cabin. For a monohull, and especially an old one, it seemed airy and bright and was one of the things that made me fall in love with her. Although I scrutinized the details of the inside of the cabinets, lazarettes, bilge, and oven, the curtains escaped my attention since I considered them a frivolous, easy change that could be ignored in the short term.
I researched a few different options for tracks for the windows, but they all looked similar to what I had, and I hated the look when the curtains were open. I ruled out the one-way vinyl window film because I felt that I still wouldn’t feel I had my privacy, didn’t want to lose any of the sunlight during the day, and I didn’t want my neighbors to think I was pimping out with mirrored windows.
Eventually, I settled on the idea of blinds. I searched online for days comparing options and prices and decided that the cordless cellular blinds were the way I wanted to go. Options include light filtering vs. blackout blinds, single or double cell, top down/bottom up, and cordless with a half dozen or more color options. Even If I didn’t live with a cat whose favorite game is to bat around a rope, I felt cordless was more desirable, and due to the size of the head rail system, I stayed with single cell (outside mount – inside mount is for homes with deep window wells). I chose a light filtering blind in a cream color that matched my headliner. I found the Super Value Cordless Single Cellular shades from Blindster.com were on sale and a good deal. With 5 blinds of varying customs sizes from 46″ x 14″ to 28″ x 14″, my total, with shipping was $228. That was about $50 for the bigger windows and $40 for the smaller window. I also purchased stainless steel screws for another $20 because the included screws weren’t for the marine environment.
While I waited for my order, I started the process of the removal of the current system. The tiny screws holding the existing plastic track in place were rusted flat heads. After an hour or so of unsuccessful attempts with my smallest screwdriver to unscrew them, I resorted to using a small cat’s paw tool which I have had since my old house restoration days, with a queasy feeling in my stomach. It seemed barbaric in the situation, and I occasionally had to use a hammer with the claw to get the old rusted screw out. The wood around the rusted screws was stained, and so was the wall under the tracks. I lightly sanded the thin mahogany veneer where the tracks were, cleaned the area, applied Orange Oil and hoped for the best. I filled in the holes with color matched wood filler, but the perceptive eye will always pick out the discoloration of the old track. To do more was going to be a major project, and I was one month in to ownership and not willing to strip/sand/bleach the walls just yet.
Although I can still see the ghost of the old tracks, the blinds look streamlined and tidy. They provide complete privacy at night, and during the day allow 95% of the available window space to let sunlight come in, an invaluable commodity in Seattle during the winter.


Tuesday, November 11, 2014
Bomar Cast Aluminum Hatch Rebuild
The hatches on s/v Painkiller needed attention. Ken tackles a complete rebuild head-on:
The dogs came out just as easy with an 1/8" punch and small hammer.

Very simple construction, a shaft, a dog, couple of pins and a tightening nut.
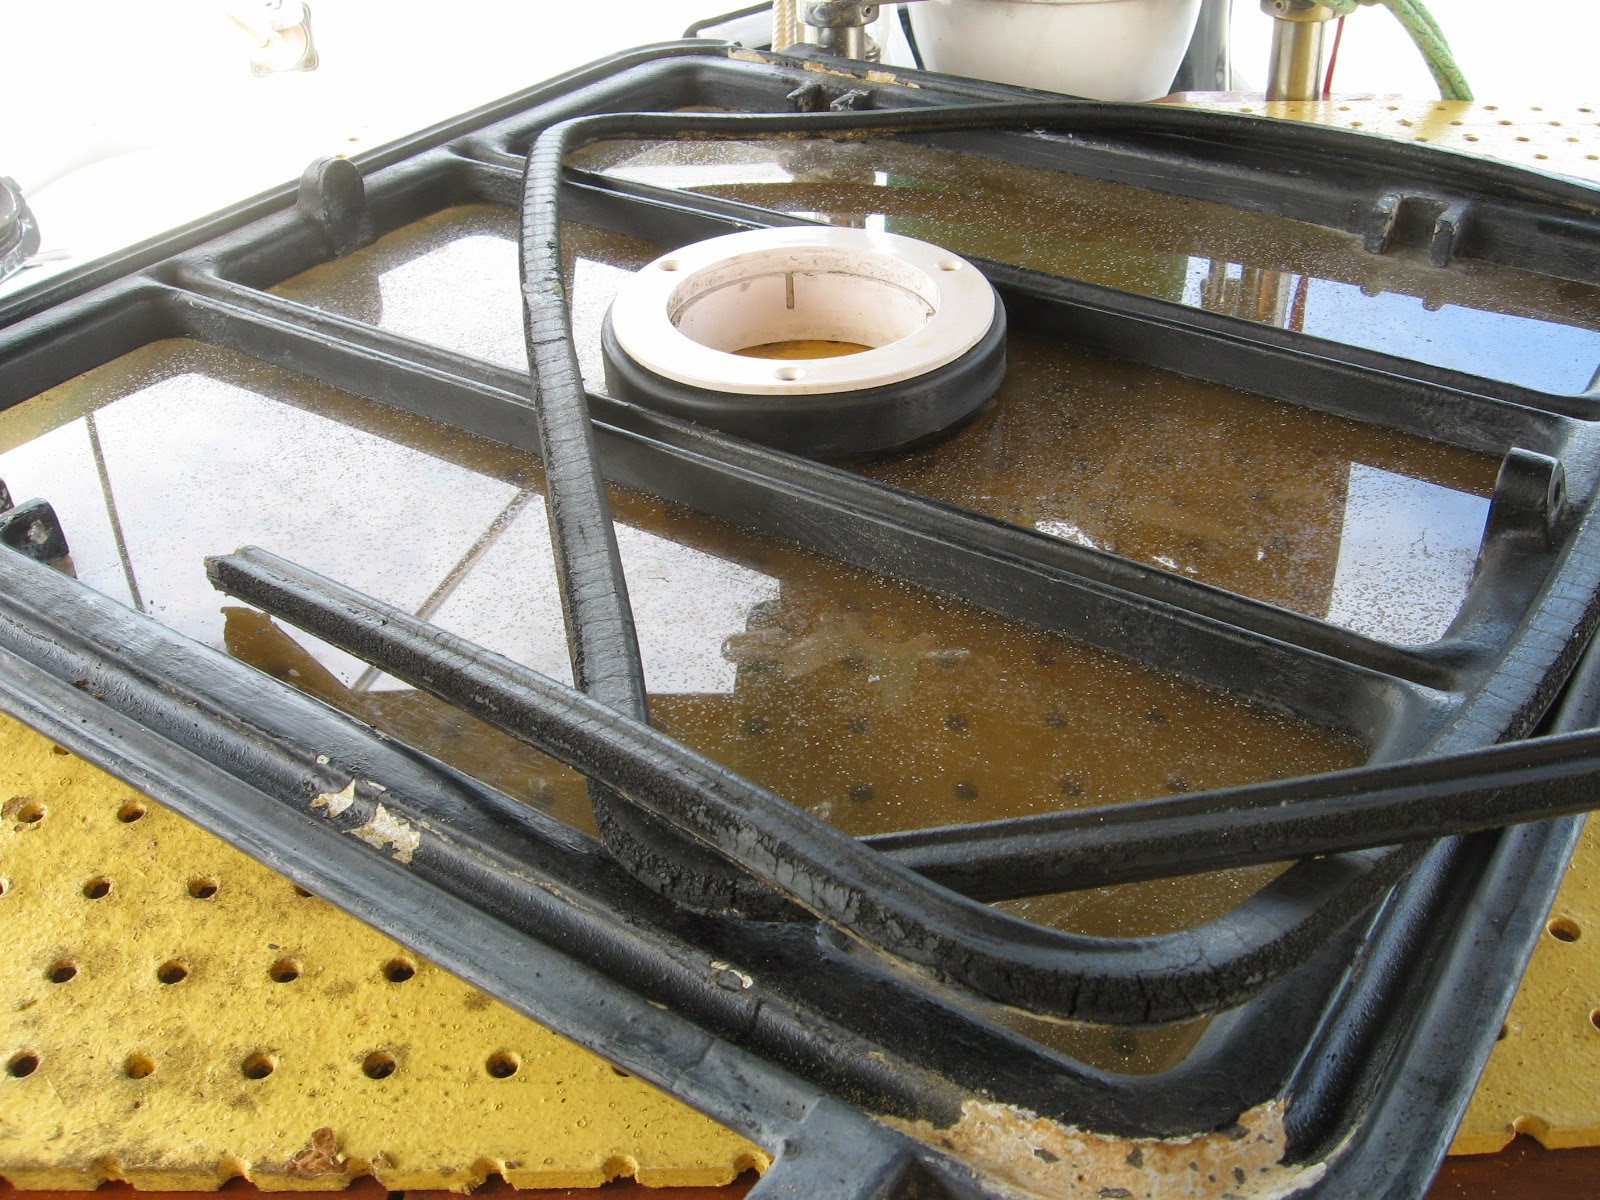
Old dry gasket material just as easily came right out.

Lots of wire scraper, wire brush and sandpaper cleaning of all surfaces inside and out, it's kinda therapeutic for me, I just love making things better!
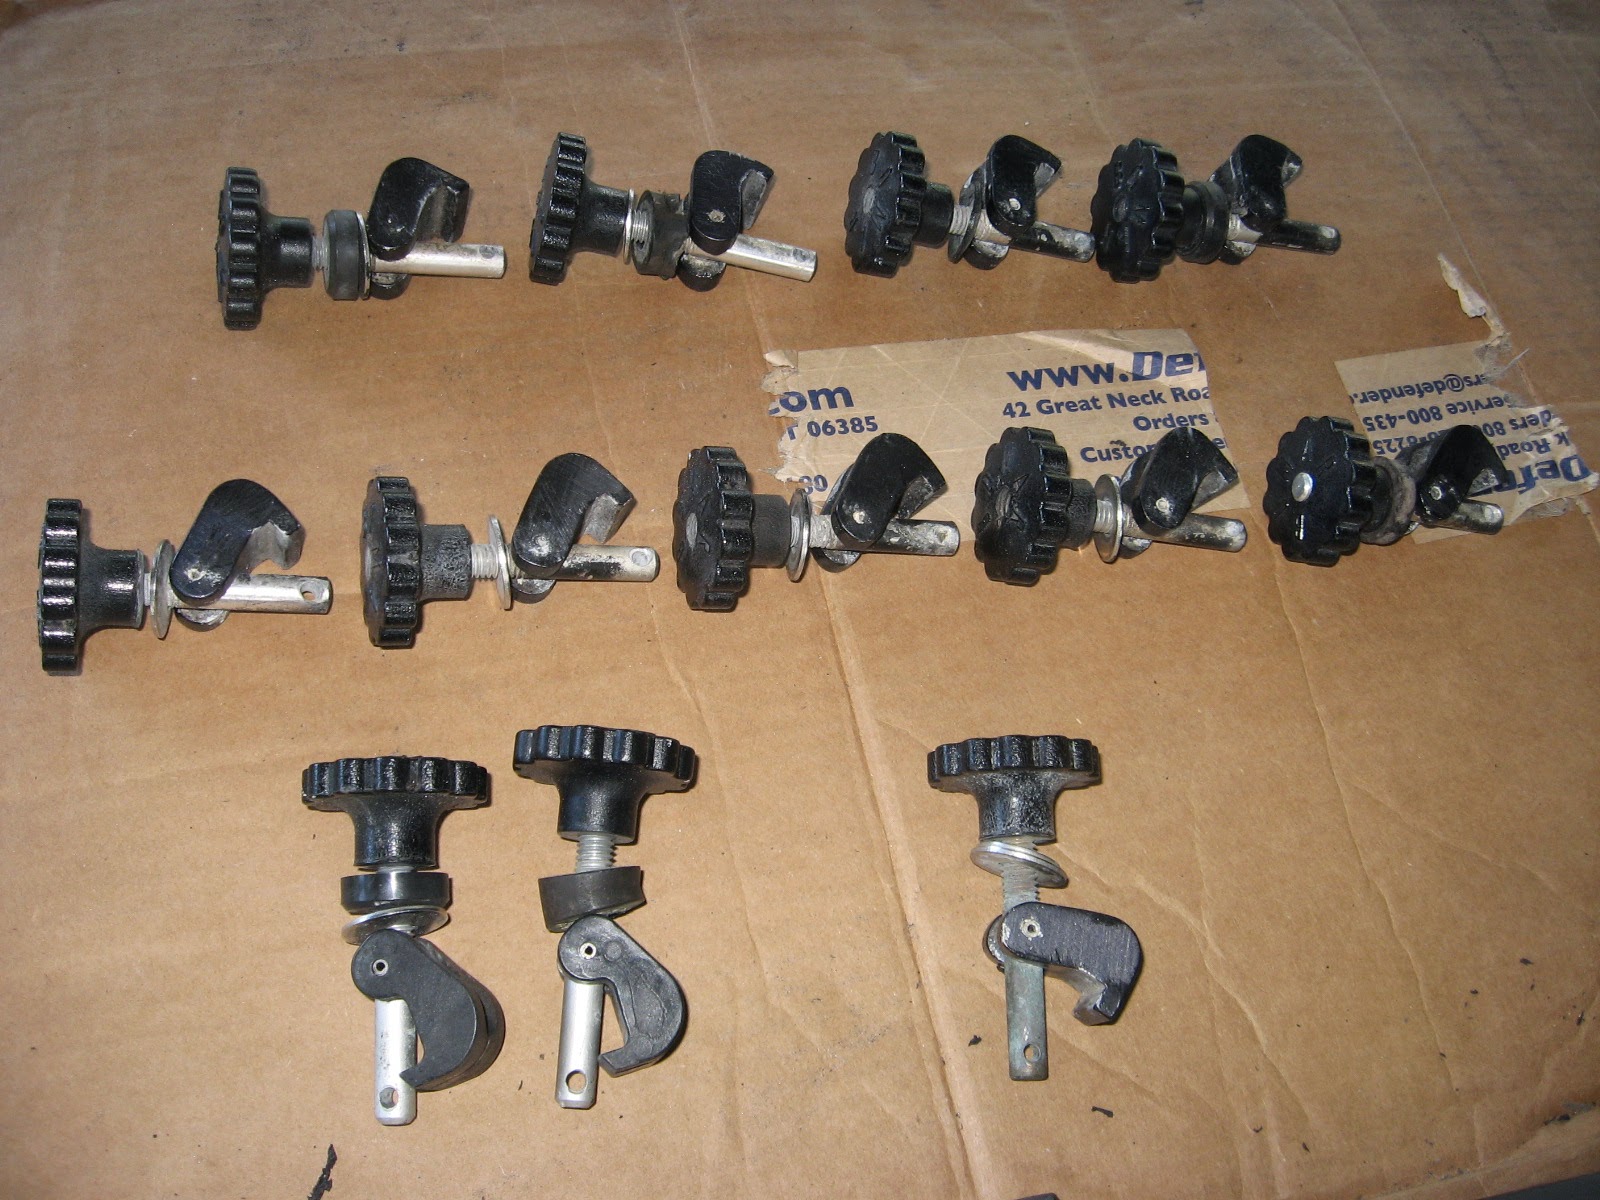
Sorting through all the dog downs, deciding what is worth keeping and or repairing and how many "new" complete kits to buy.
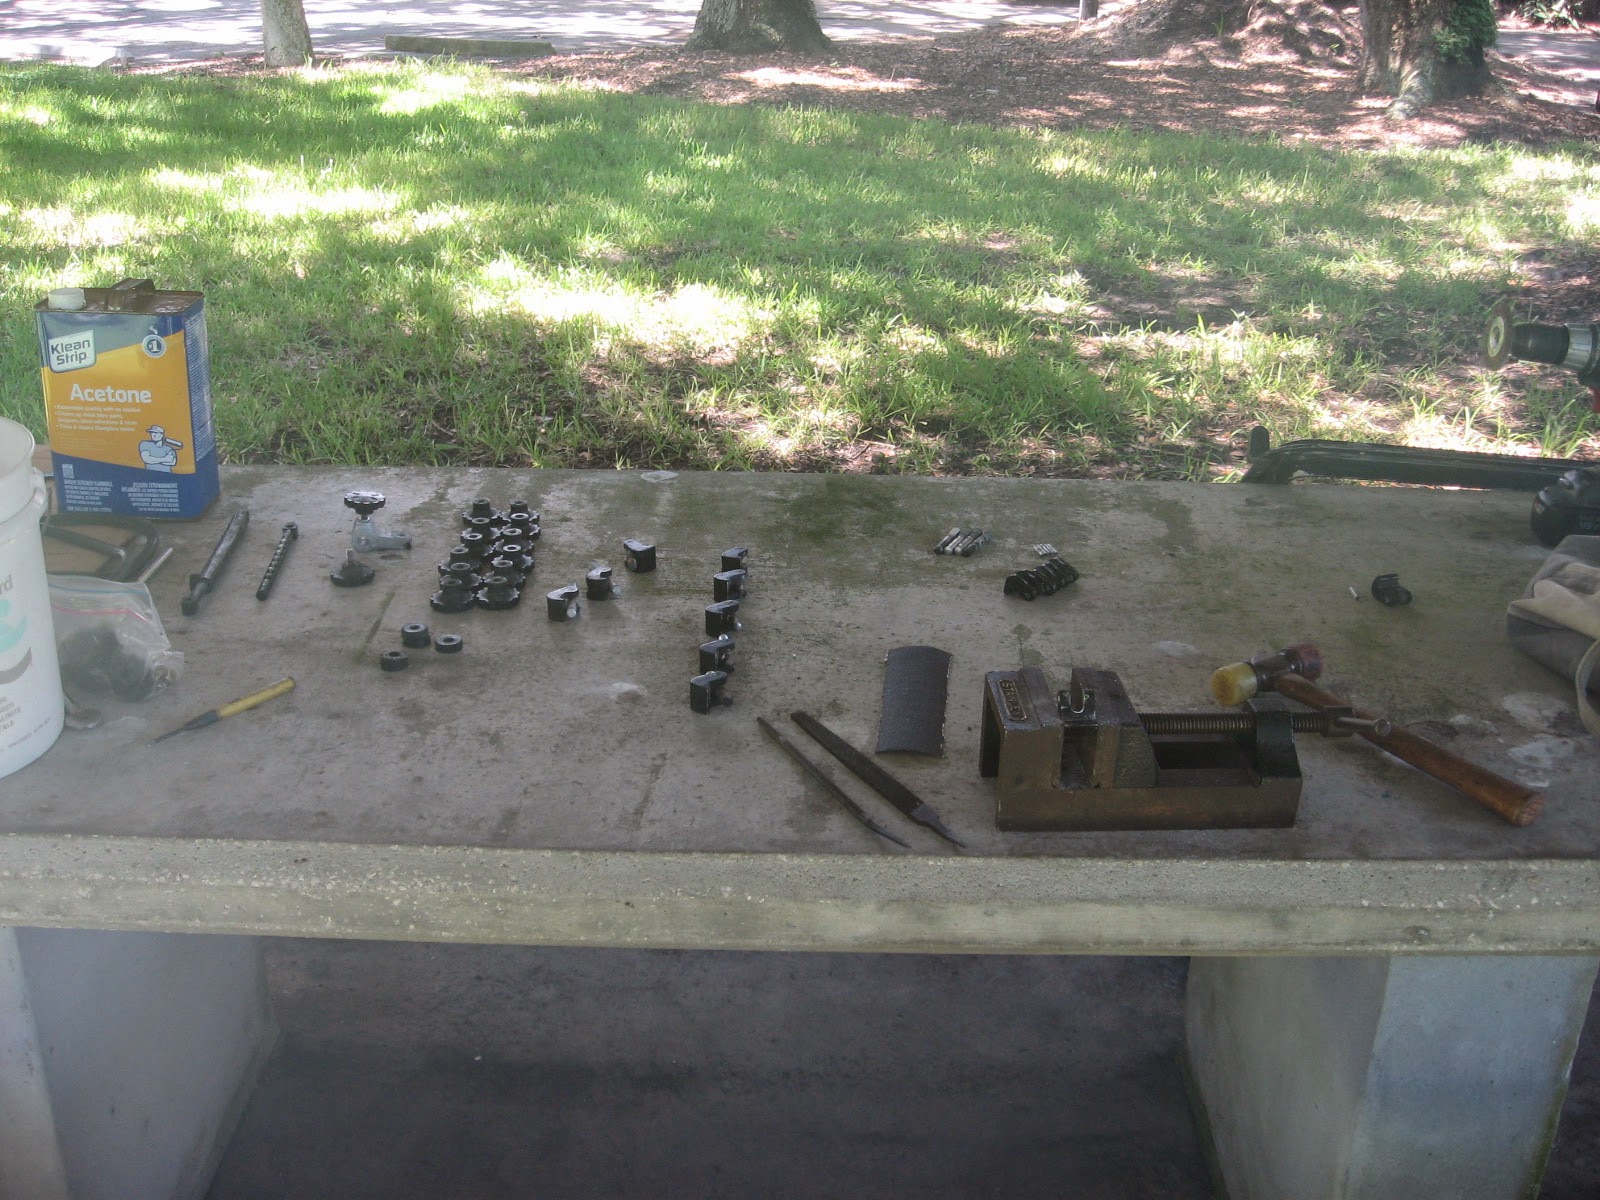
I filed and tuned up most all the dogs, had to make a few new shafts with material I had at hand ...

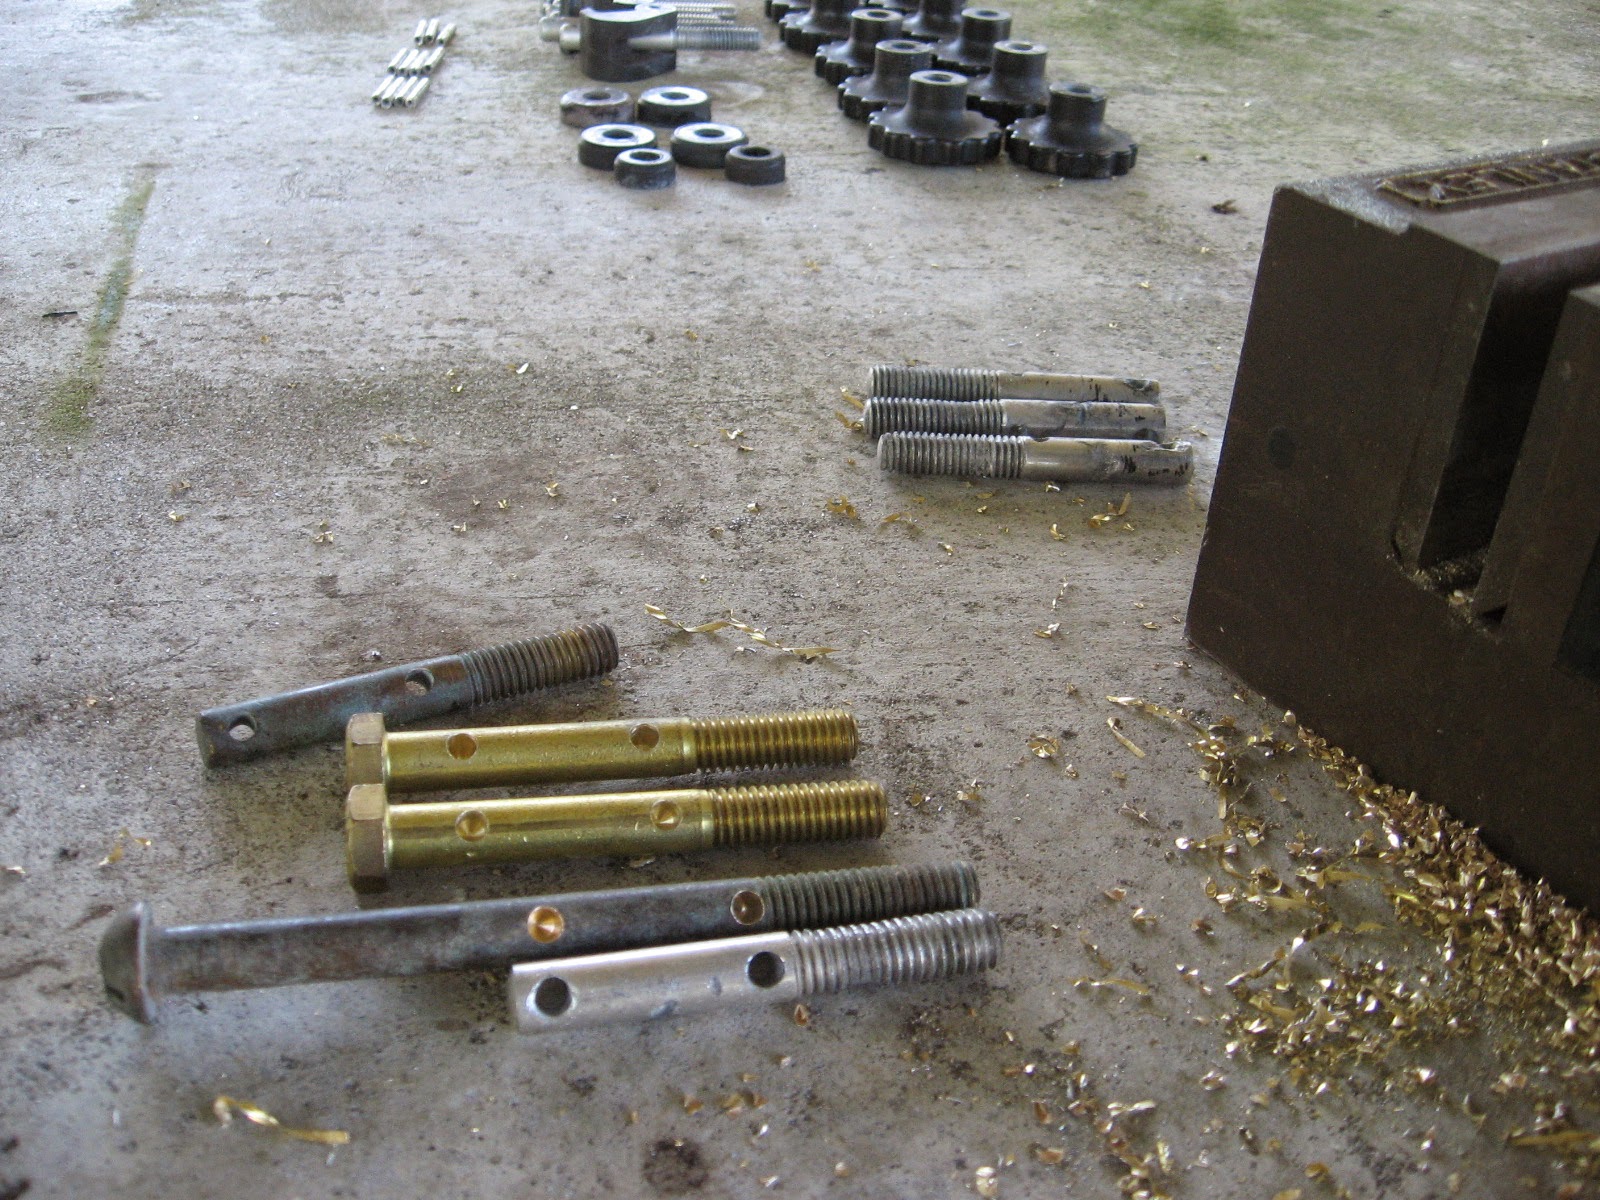
... to give me one hatch with 4 new bronze and brass studs, one hatch with original aluminum studs that were in good condition and one hatch with all new kits at $35 a kit. That's the one in the galley, used the most.

Using an old lens re-cut for more clearance, with a router I traced the new stock for a proper fit.
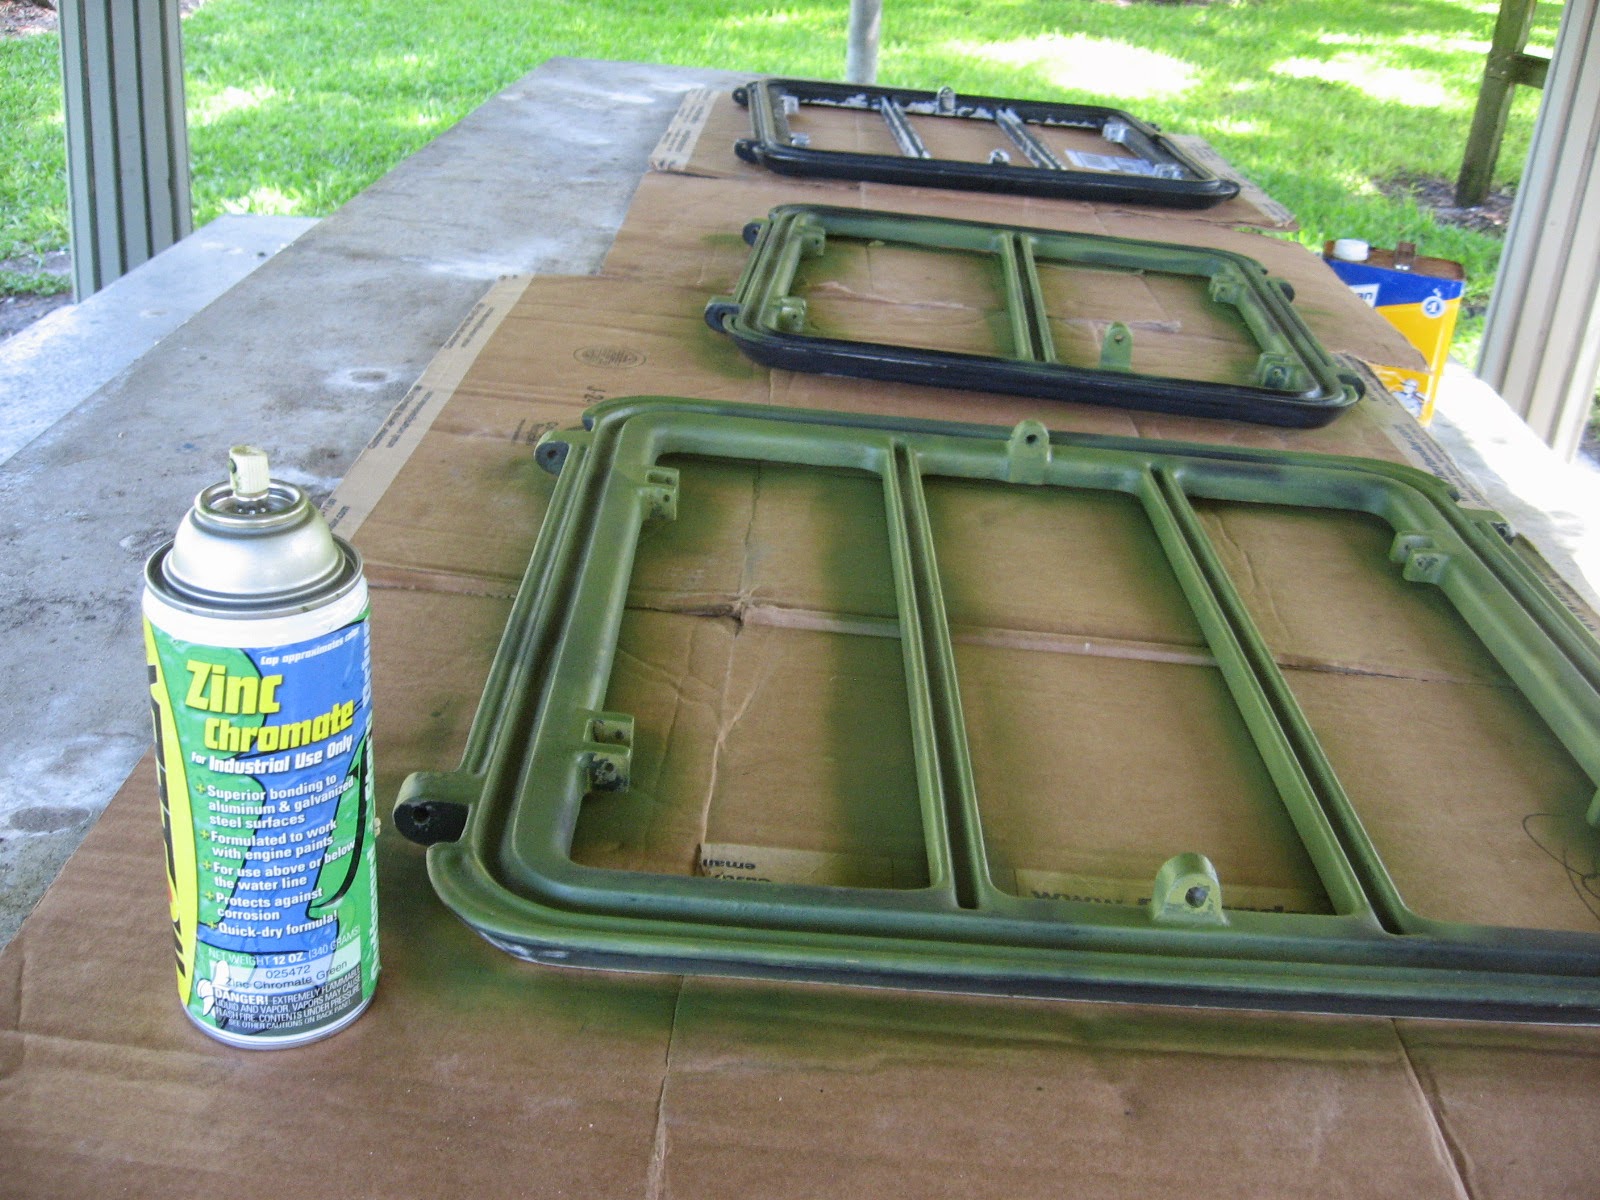

Zinc Chromate for the bare aluminum and a couple of coats of paint, let dry for a few days and...

... mask everything then...clean, clean and be careful of even your fingerprints as handling the new lens ...

... lay on the goop for a waterproof shiny new hatch.
I didn't get any pictures of laying in the new gasket. it went simple enough after a thorough cleaning and then clamping the hatches in place for a couple of days.

A total of about $100 per hatch, what's not to love about that?
After seeing the replacement cost of these old style offshore hatches we actually went and bought three, one step down, Bomar replacements for just over a $1000. After getting the new ones back to the boat we took a closer look at them side by side with the old ones. Wow! We brought the new ones back for a full refund. Let's keep the old ones and rebuild!
Once started, the old lenses came right out. A couple of these were leaking and it seemed to me that the lens were at one time cut too big and not given enough room to expand and contract. Should be (I think) about an 1/8" per foot of lens, 2' hatch=1/4". Google it, find out for yourself.


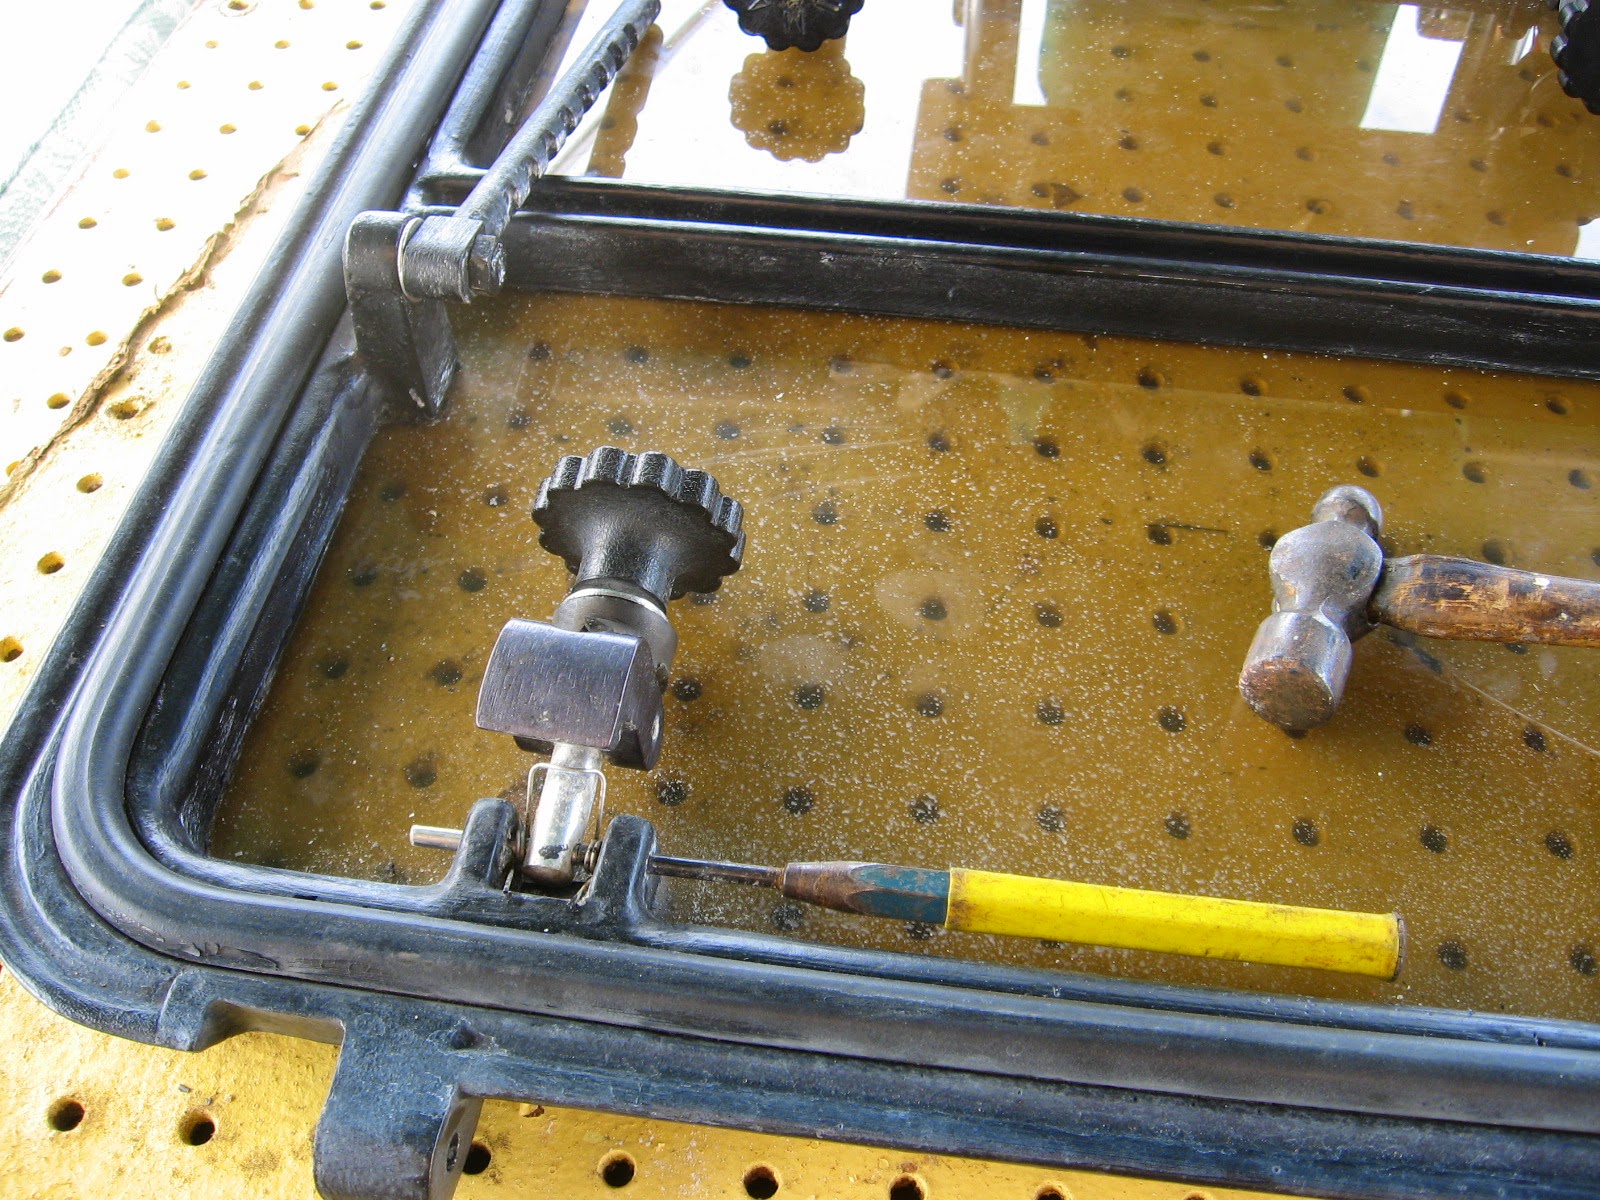
The dogs came out just as easy with an 1/8" punch and small hammer.

Very simple construction, a shaft, a dog, couple of pins and a tightening nut.
Old dry gasket material just as easily came right out.

Lots of wire scraper, wire brush and sandpaper cleaning of all surfaces inside and out, it's kinda therapeutic for me, I just love making things better!
Sorting through all the dog downs, deciding what is worth keeping and or repairing and how many "new" complete kits to buy.
I filed and tuned up most all the dogs, had to make a few new shafts with material I had at hand ...

... to give me one hatch with 4 new bronze and brass studs, one hatch with original aluminum studs that were in good condition and one hatch with all new kits at $35 a kit. That's the one in the galley, used the most.

Using an old lens re-cut for more clearance, with a router I traced the new stock for a proper fit.

Zinc Chromate for the bare aluminum and a couple of coats of paint, let dry for a few days and...

... mask everything then...clean, clean and be careful of even your fingerprints as handling the new lens ...

... lay on the goop for a waterproof shiny new hatch.
I didn't get any pictures of laying in the new gasket. it went simple enough after a thorough cleaning and then clamping the hatches in place for a couple of days.

A total of about $100 per hatch, what's not to love about that?
Friday, October 31, 2014
On The Opening Of Ports
This post originally appeared on Windborne in Puget Sound
One of Eolian's two Previous Owners outfitted her opening ports with curtains. In order to hang them, he used an extruded aluminum curtain track that was available at the time - the same track, as a matter of fact, that the factory used to hang the shower curtains in the heads. But on two of the aft cabin ports, the installed track interfered with an overhead beam, preventing the complete opening of the ports. (These are not the original curtains; they are the curtains that Jane made back in 1989, one of her "make the boat mine" projects.)
Unfortunately, the only fittings available at the time for attaching the curtain extrusions were these (now rusty) steel spring clips, which he installed by wiring them to the port hinges.
While making a recent Sailrite order (I must do a post on this wonderful company sometime soon!), I found that they carried three forms of the curtain track:
A little work with a hacksaw cut two pieces of tracks to length, and then removed the mounting flange from their ends so that they could be mounted to the port lens:
Then I drilled holes in the track flange and matching holes in the port lens. Using a couple of 3/4" 6-32 SS screws and nylock nuts, I attached the track to the under side of the top flange of the port lens:
The port now opens almost completely!
And yes, it looks a lot better. Eolian has six more ports for which this treatment should be done, tho none of them have overhead interferences... doing the work would only serve to improve the professionalism of the interior finish. So, yeah, that means that I will do them, but not as a high priority task. There will be another piece of track in the next Sailrite order.
 |
| Original setup only opens part way |
 |
| Rusty steel attachment clip, wired on |
- one like the ones used on Eolian,
- one designed for mounting to a vertical surface,
- and one designed for mounting to a horizontal surface.
A little work with a hacksaw cut two pieces of tracks to length, and then removed the mounting flange from their ends so that they could be mounted to the port lens:
 |
| Hacksaw hack |
 |
| Better than a wired-on rusty steel clip |
 |
| Open wide! |
 |
| Look Ma! No wires! |
Subscribe to:
Posts (Atom)


 Posts
Posts


