
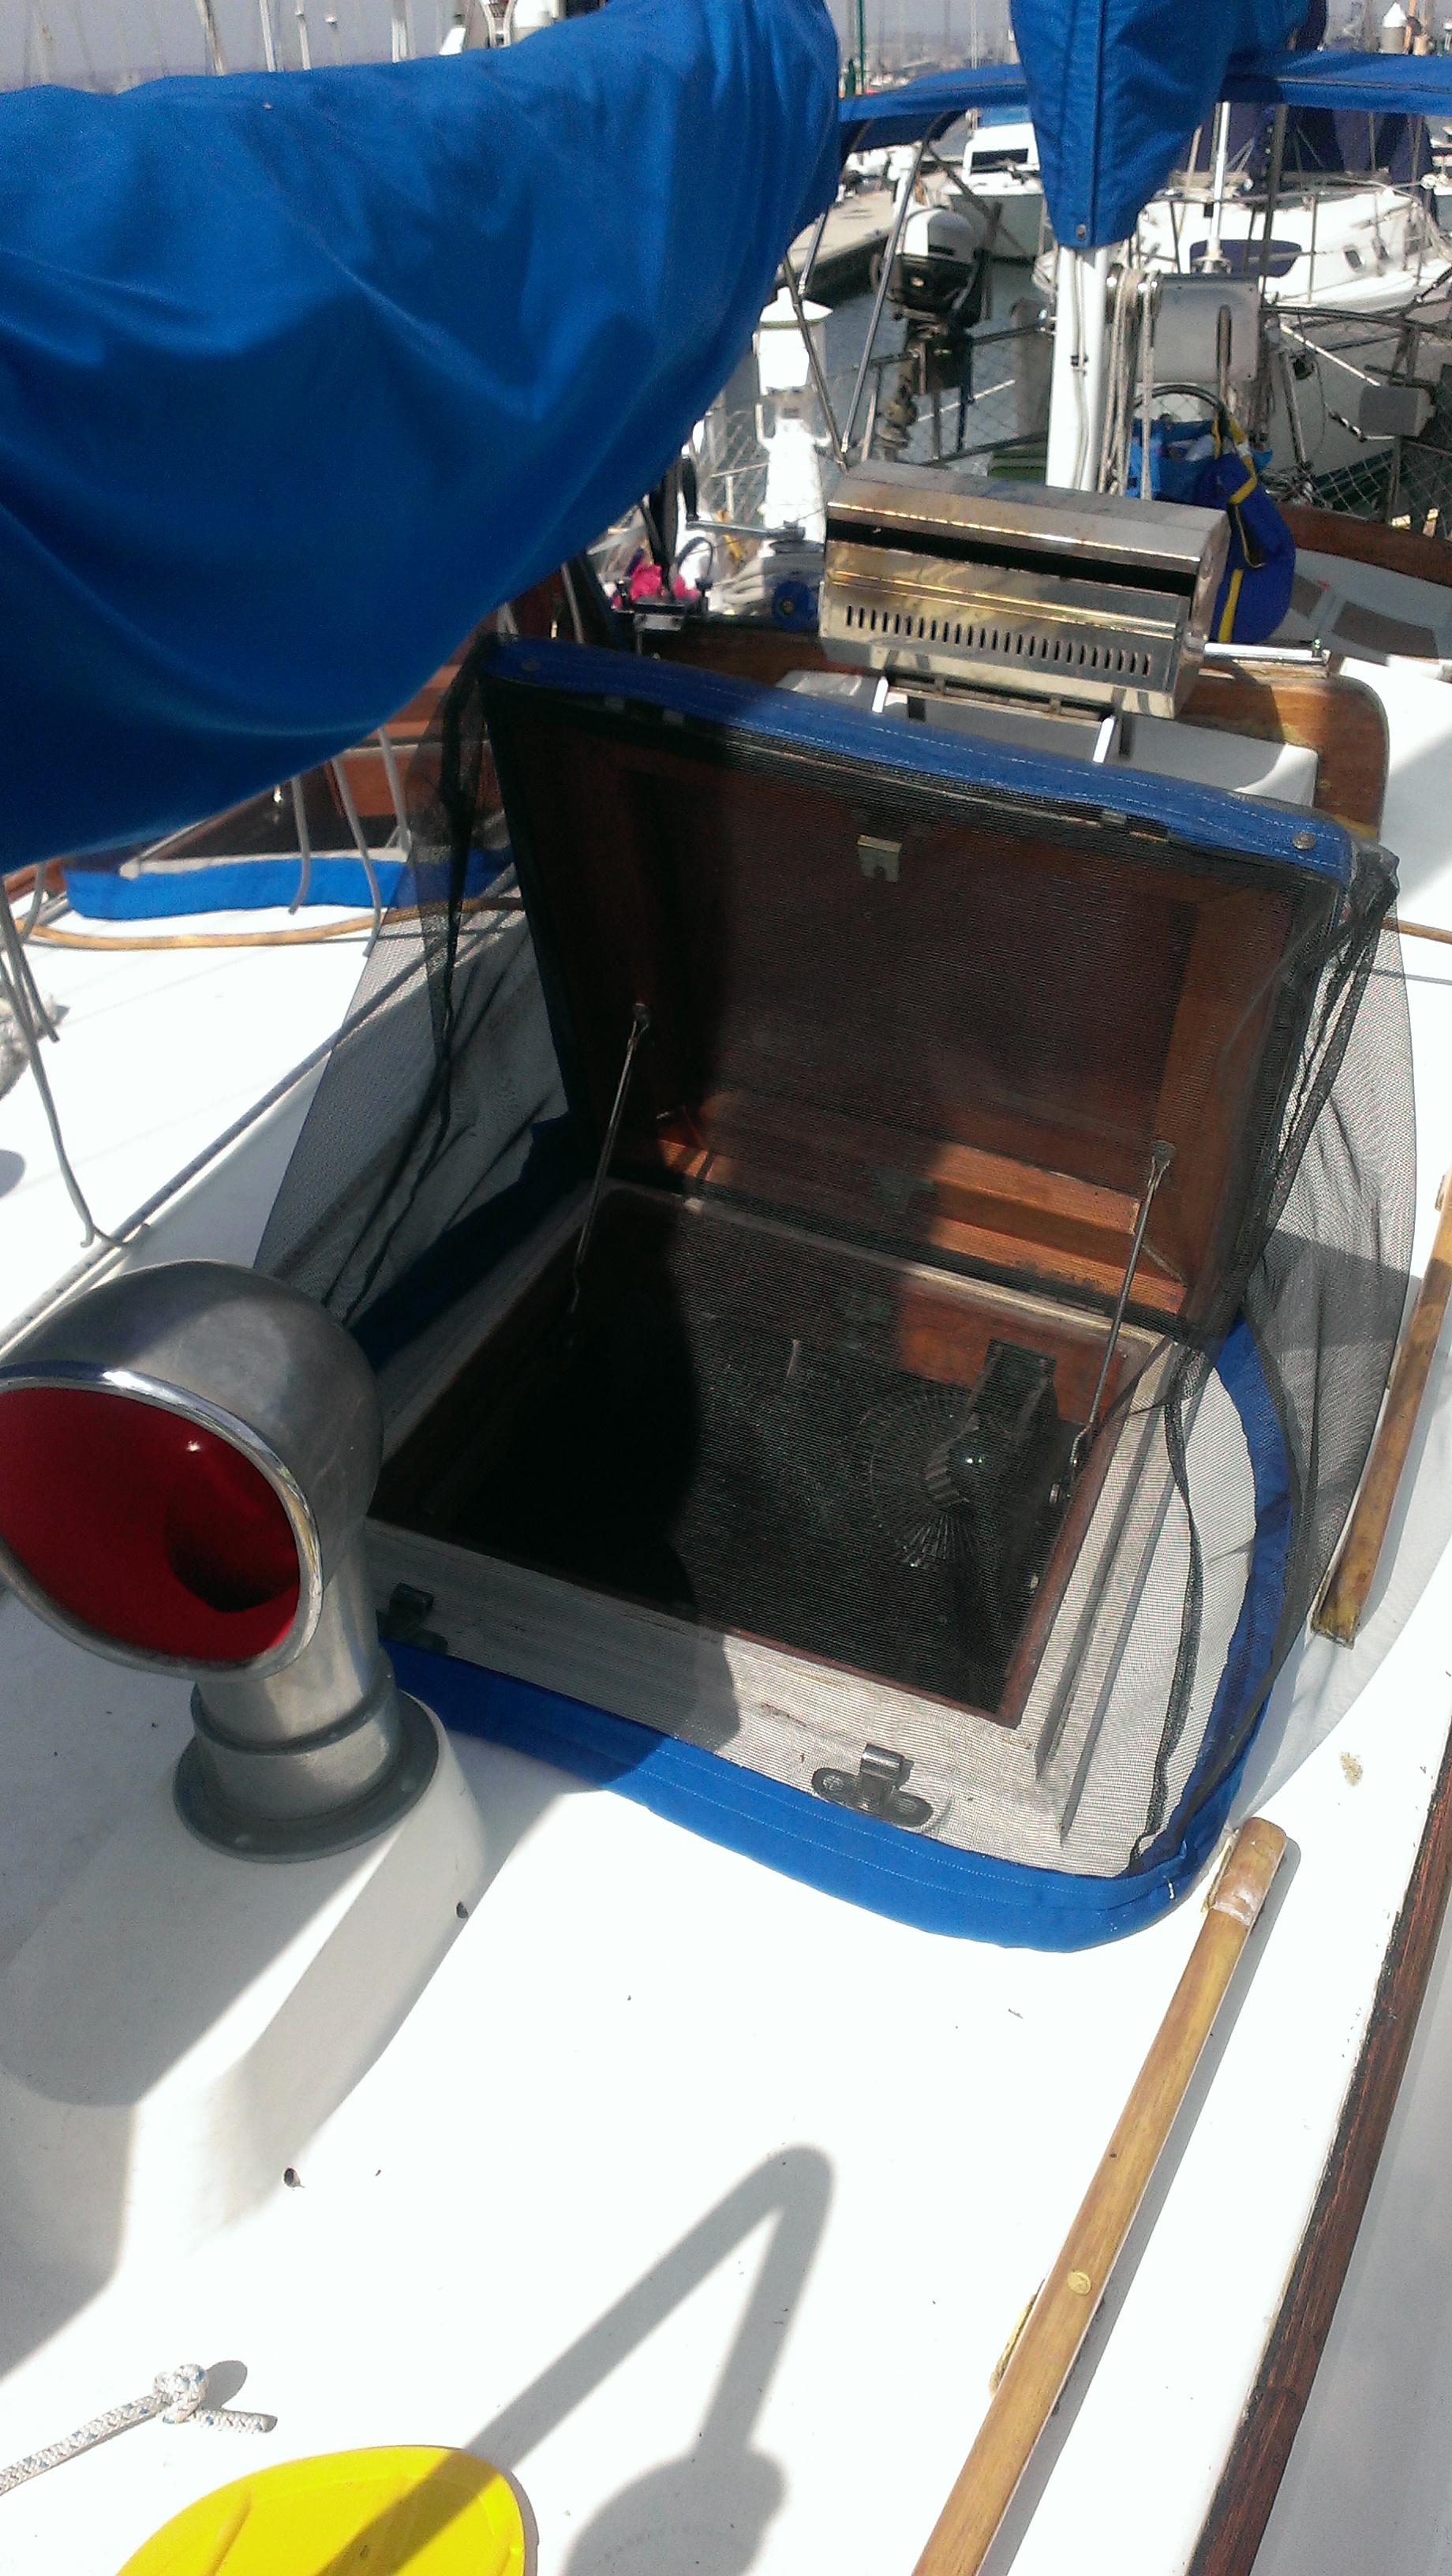
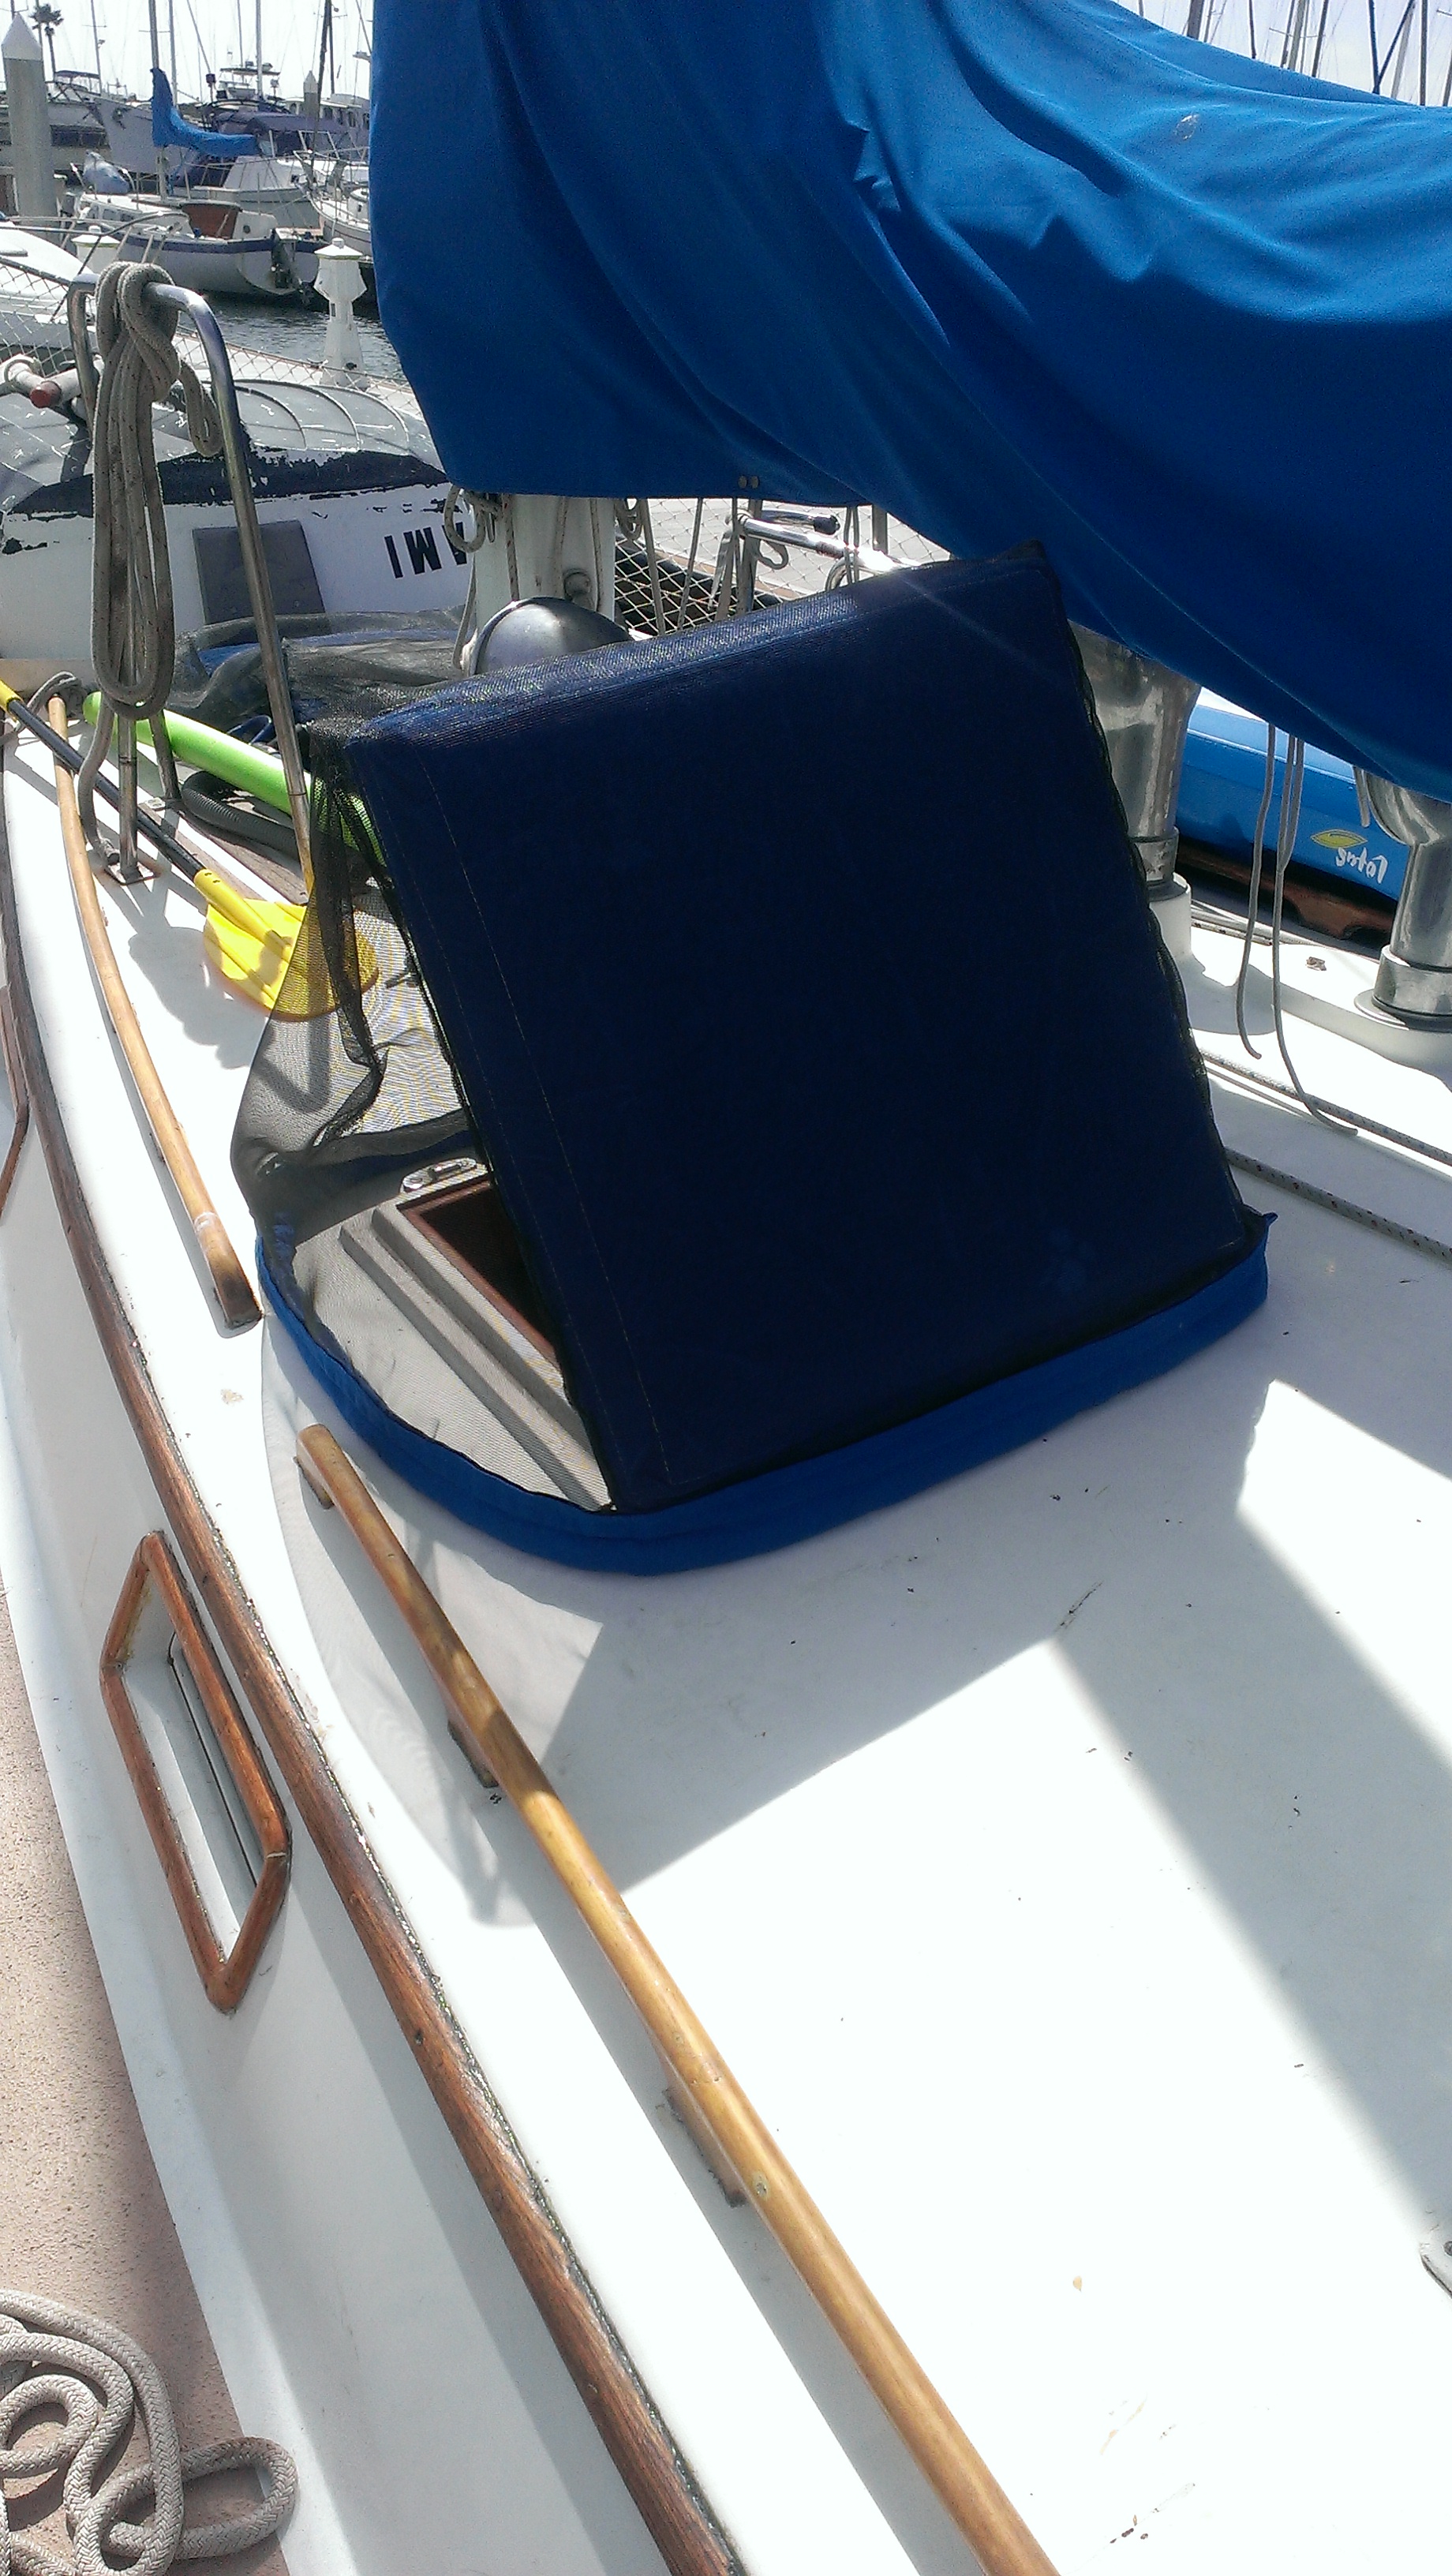
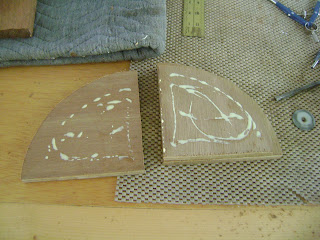
When we moved the boat to Fiddlers Cove Marina we had an instant fly problem. They came from nowhere. We’d been talking about gettting or making hatch covers before we moved and found them to be very expensive from West Marine so Natalie decided to make them herself.
We bought fiberglass screen material from Home Depot and had some leftover Sunbrella from when the sail covers were made. The pattern was pretty basic, just two triangles for the sides of the hatches and then a rectangle to cover the front and back. The bottom was made from Sunbrella and filled with rocks. We could have used lead shot, but decided against that because of toxicity.
After Natalie made 3 hatch cover screens a friend asked for a price for Natalie to make some for him so we searched online and found the old WestMarine hatch covers still cost almost $90, and that there’s a new competitor that only costs only $30-$40 for their largest size. Had we known that there was a lower priced offering we’d have just bought the $30 hatch covers.
Thursday, July 31, 2014
Homemade Hatch Cover Screens
Facing a fly problem, Nate and Natalie aboard s/v Astrea sewed up their own custom-fitted hatch screens:
Thursday, July 24, 2014
Another Pump Rebuild – Henderson Mk V Bilge/Diaphragm Pump
Rick on s/v Cay of Sea is on a pump rebuilding tear...
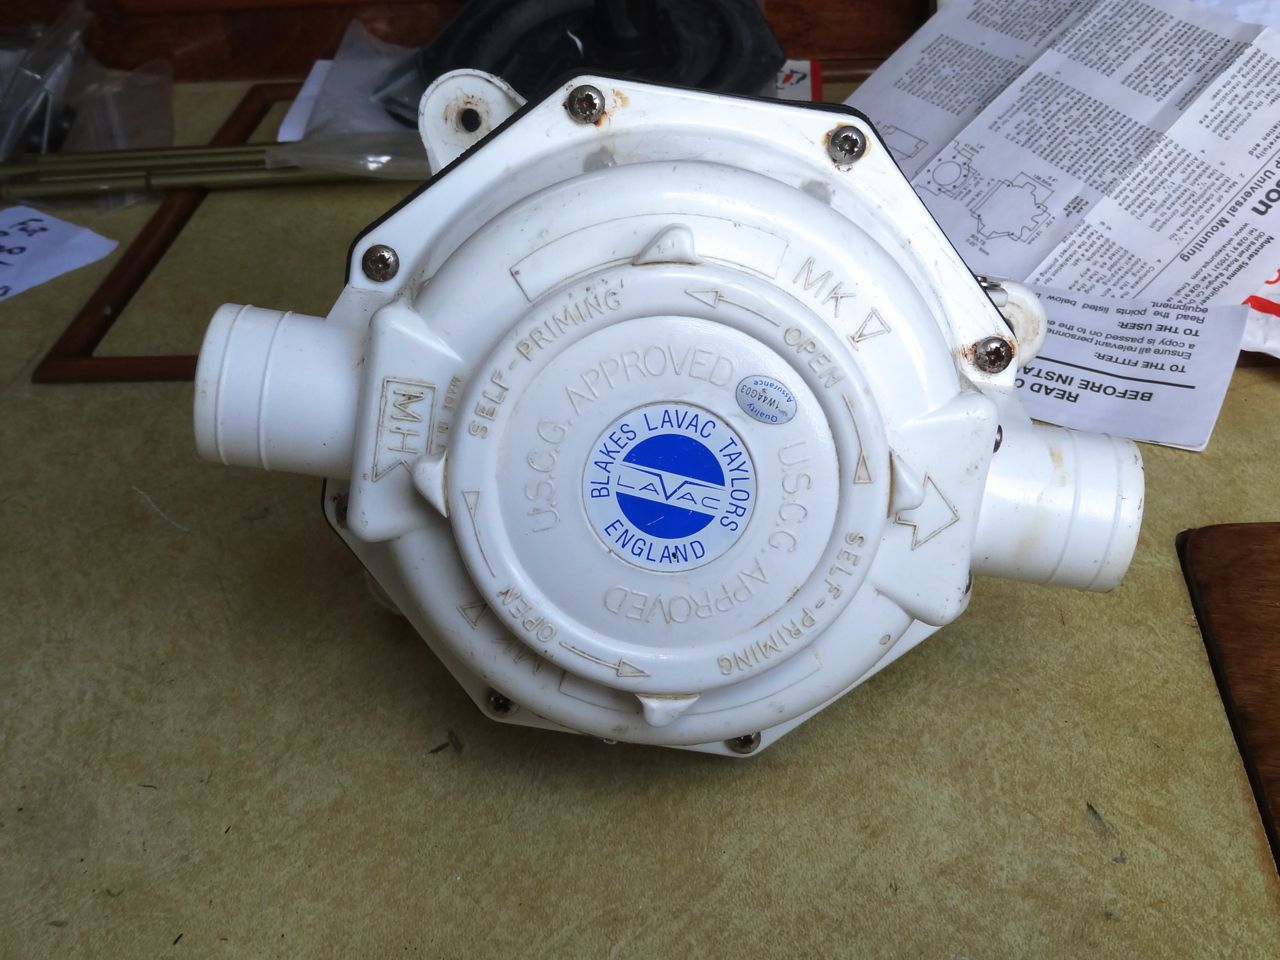
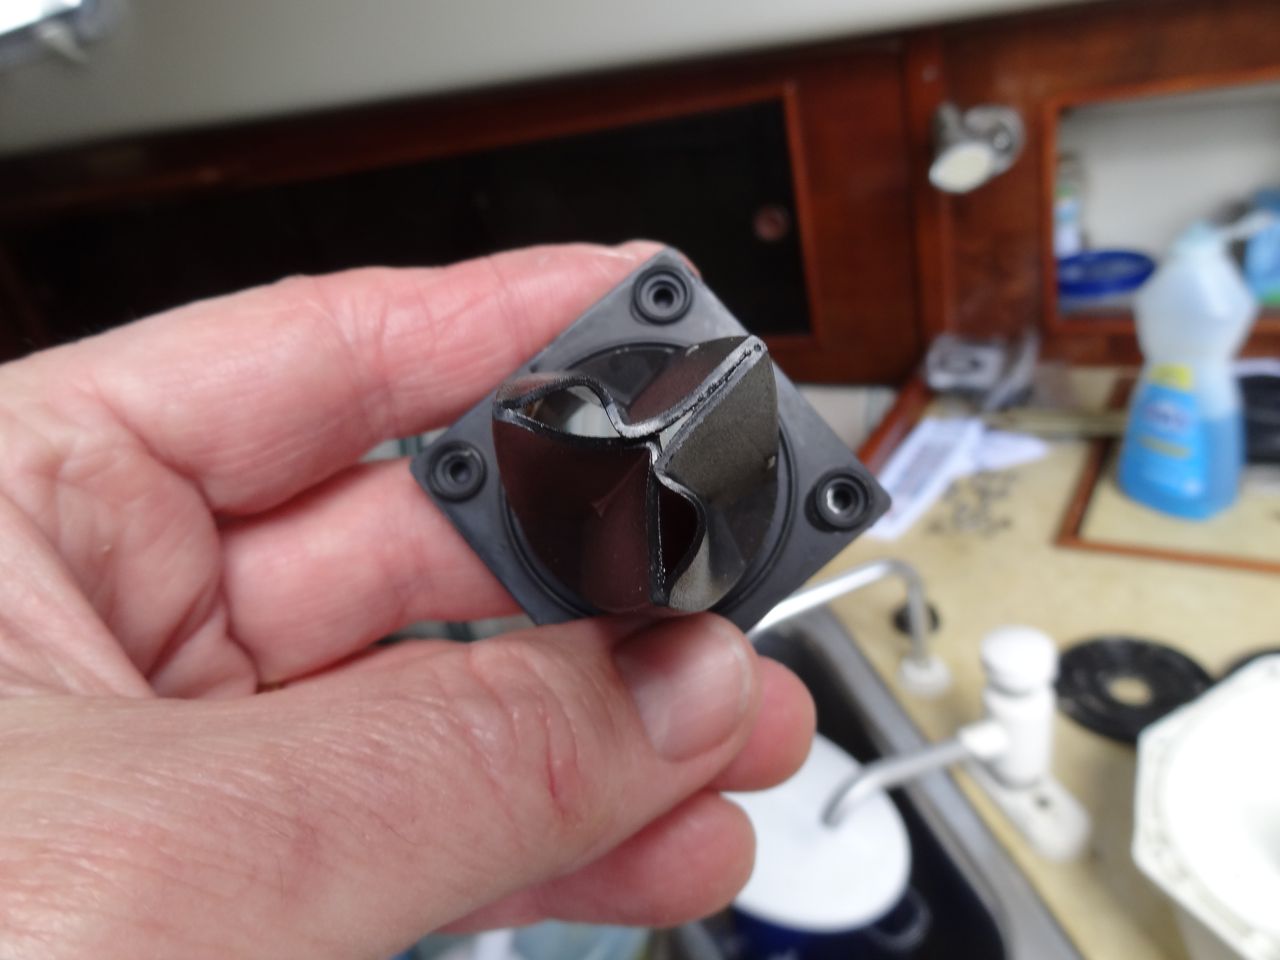
My service kit arrived today for this Henderson Mk V manual bilge pump, so I took some time this afternoon to rebuild it. This was the easiest rebuild of the four different type pumps that are on Cay of Sea.
The Henderson pump is actually destined for use as a holding tank evacuation pump. When we go off shore (eventually), I want to be able to empty the holding tank overboard. I discuss my refit of the sanitation system on board Cay of Sea here.


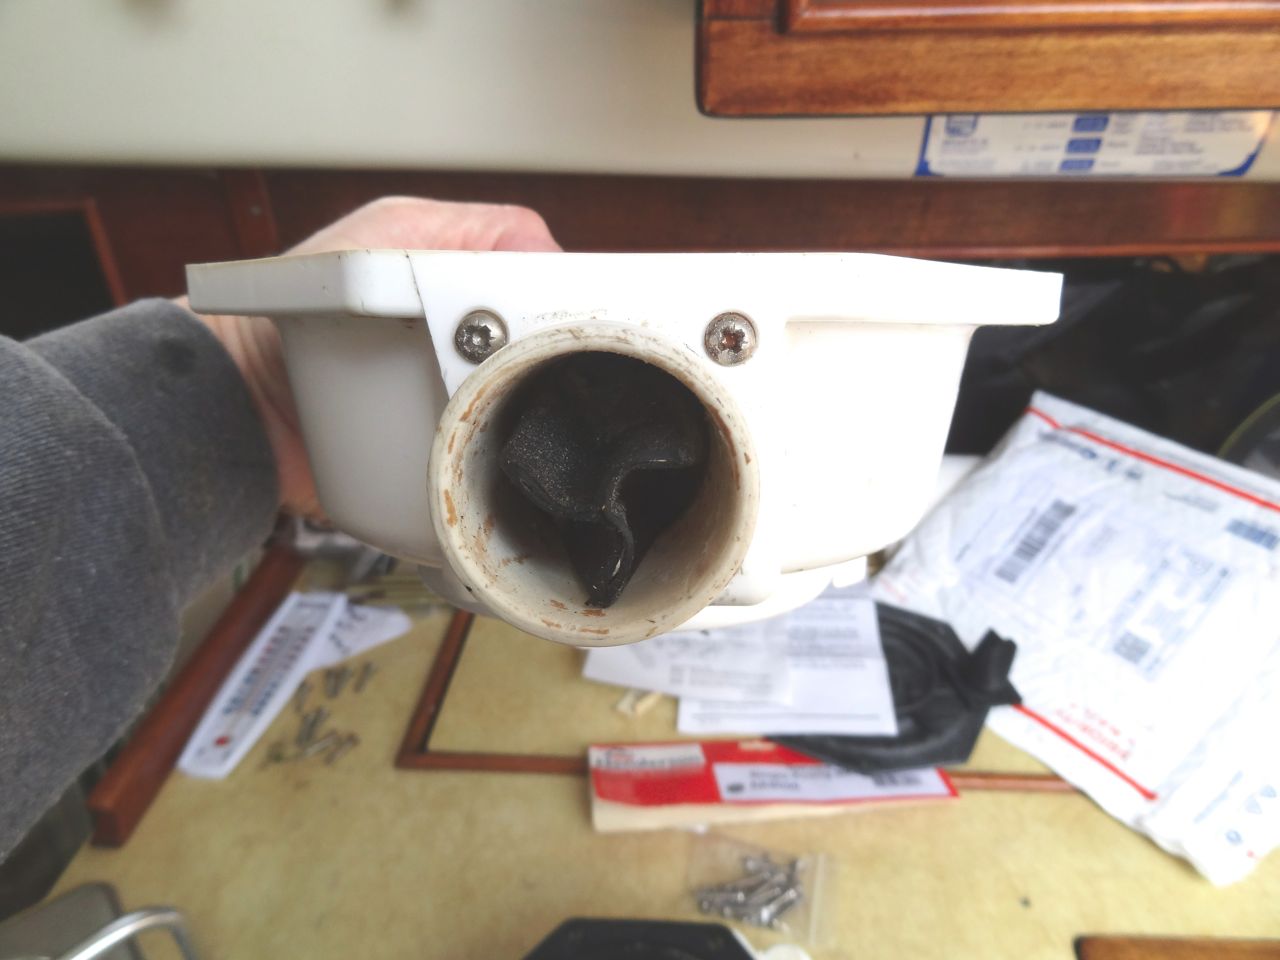
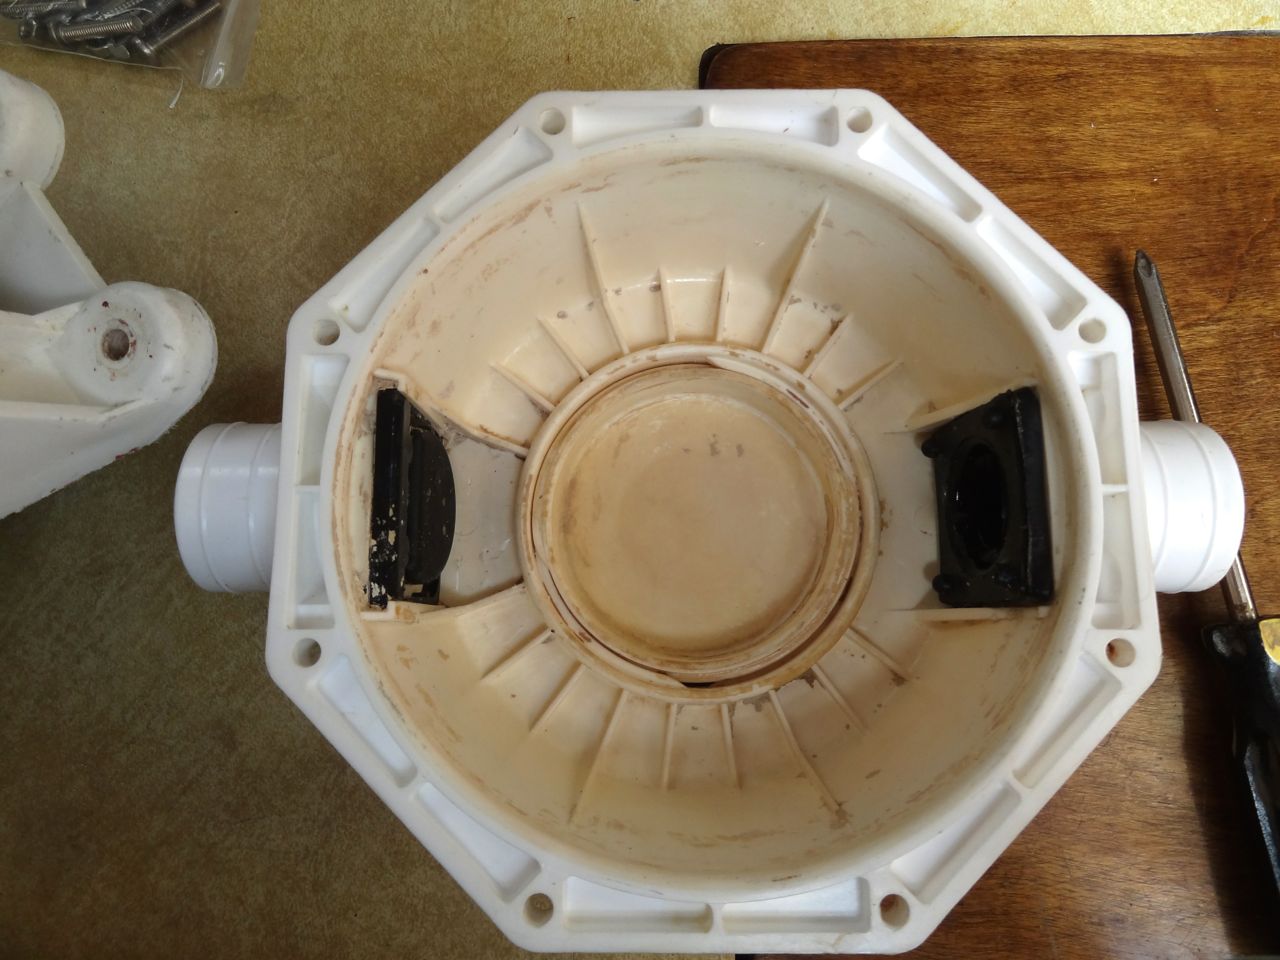
Above are images of the very large and bulky pump body. The bottom and top halves are fastened with 8 self-tapping screws, and the diaphragm also serves as a gasket between the halves. The casting and labeling seen above actually identify this pump as a “Blakes Lavac” pump, but it is a Henderson Mk V. It is supplied by Lavac (and labeled as made by them!) as their preferred pump for their vacuum-operated marine toilets.
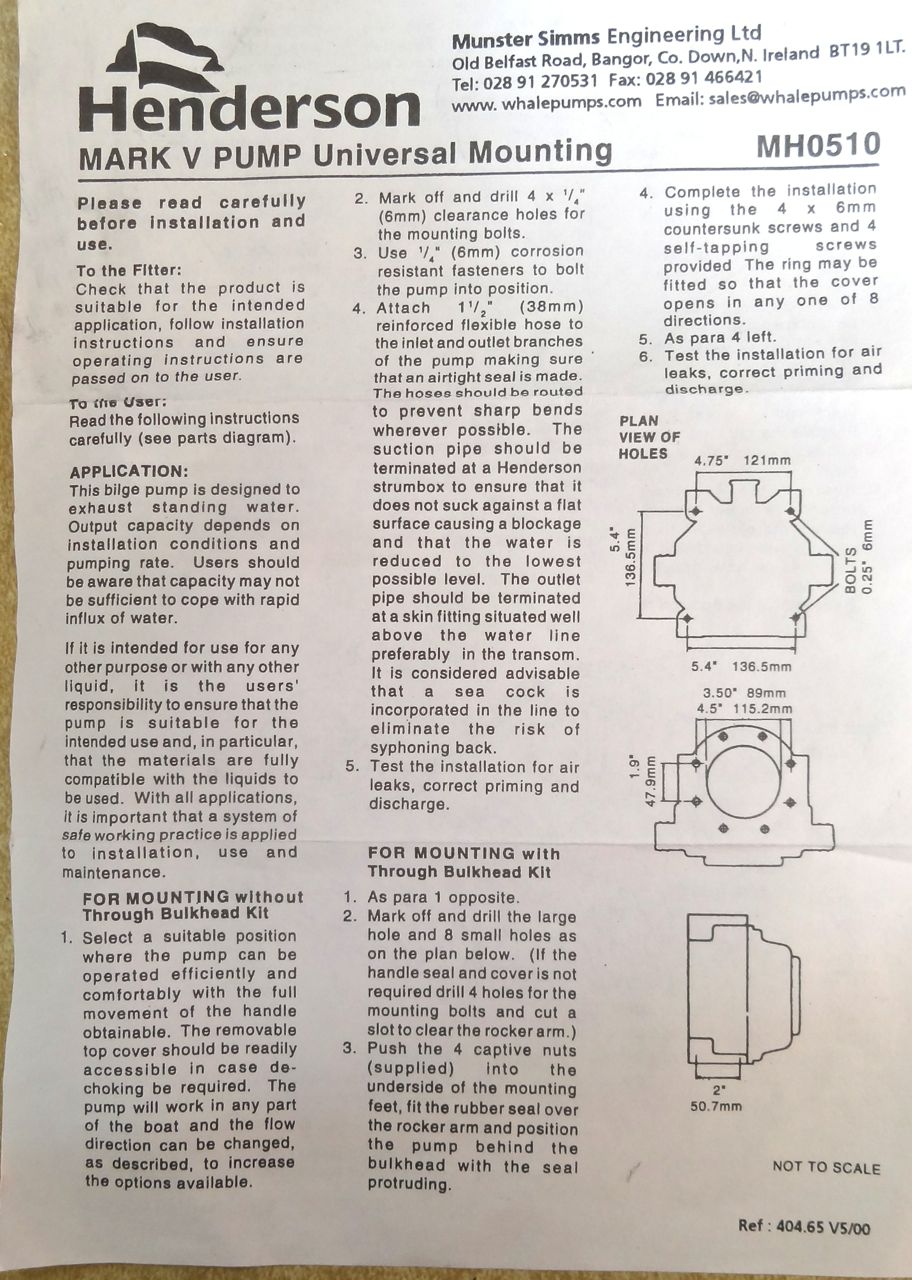
There are only a few parts in the service kit: Two valves, an O-ring gasket, and the big rubber diaphragm are the heart of the kit. It also comes with new stainless fasteners and snap retainers for pivot shafts.


The instructions are useful, including a complete parts inventory reference, plus the various options and requirements for installation. I was a bit dismayed by one of the parts supplied: the “joker” valve, or back flow preventer, was distorted and looked to be in worse shape than the joker valve I was replacing. While the rubber of the new one was slightly more supple, the distortions in shape made me doubt that it would close properly when pulling a vacuum. I cleaned the old one, lubricated it with dish soap, and reinstalled it. The joker valve is held in place with four stainless screws. It’s easy to remove and replace.


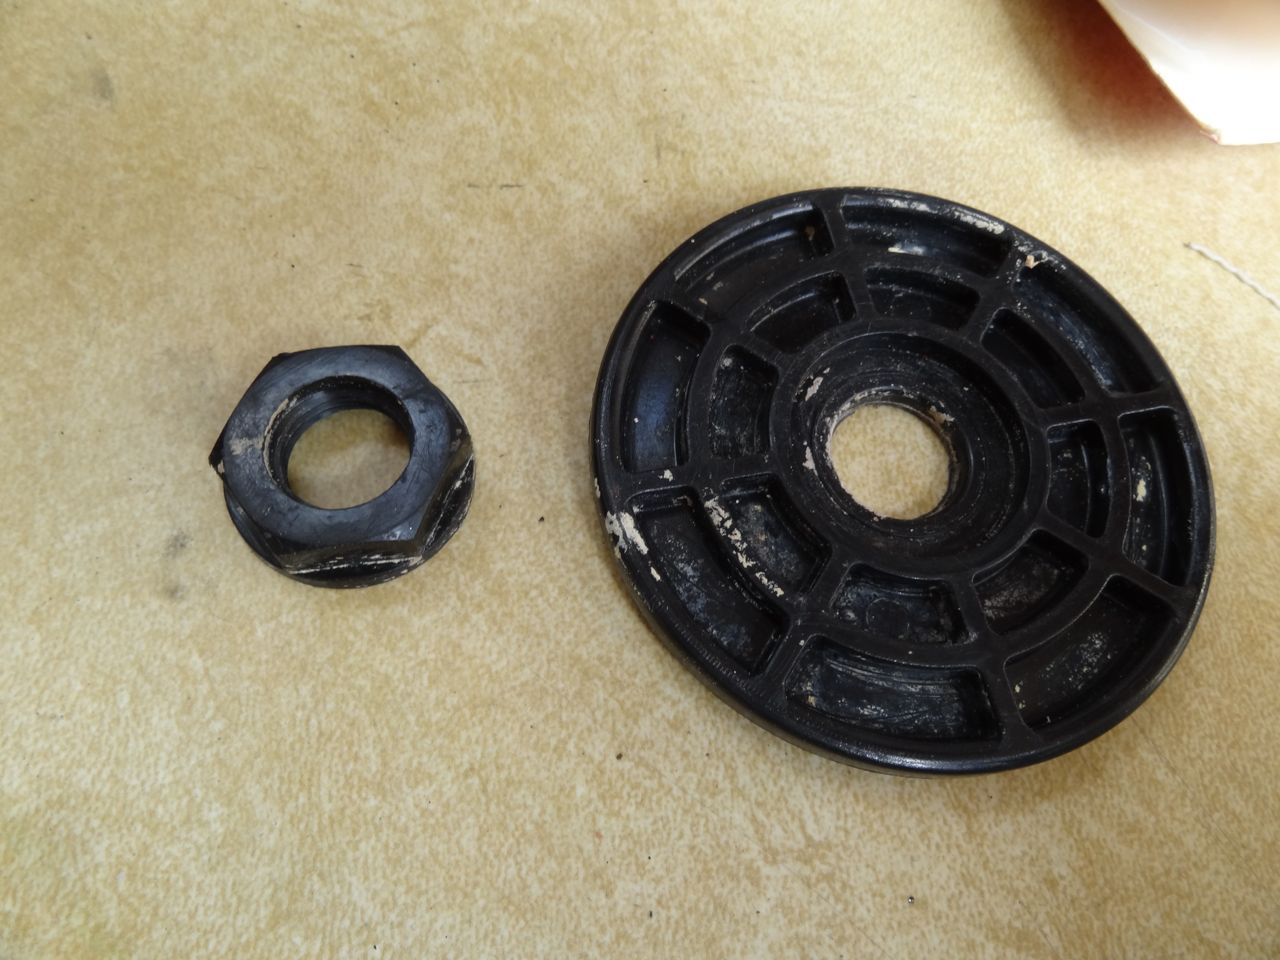
The diaphragm is moved by a lever which is attached to an actuator arm. The end of the arm is threaded to received a large diameter nylon nut. Two large plastic plates mount onto the actuator arm and are secured in place by the nut. Photos make this easier to understand than text.


I see now that I forgot to get a photo of the actuator arm without the diaphragm in place. Sorry, guess you’ll have to refer to the illustration (above) for that. I did not remove the actuator – there was no need to.
I also replaced the old flapper valve (think of a one-way door) with the new one from the kit.
I installed the new diaphragm, reassembled the pump halves, carefully tightened the screws all around as evenly as possible, and continuously checked the gasket contact area for fit and seal. After it was put back together, I checked the pump by inserting the handle into the socket and pumping it while checking for suction with my hand. It pulled well – unlike before. I’m not sure which component was the culprit – perhaps an accumulation of little leaks throughout – at any rate, it works now.
I’ll review its installation in the head in another post.


Tuesday, July 22, 2014
How to bend shower track
Mike of s/v Chalice takes us thru the process. With the right tools, jigs and with the secret ingredient, it is easy!
So just how do you do it with out it collapsing?
First I borrowed a Harbor Freight bender from a friend of mine to see if I could do it. Then I had to make a jig to work with the bender. Lastly, test on some scrap ( old piece).
The Jig build.
From update _10_1_2012
From update _10_1_2012
From update _10_1_2012
With me so far? The half inch ply was a perfect fit. But if not I would have glued spacers in if needed.
From update _10_1_2012
On the bender.
From update _10_1_2012
Ok, so what is the secret ingredient? I actually found it on an Chinese industrial website for industrial benders. Dead simple when you know. It is a spacer/filler. Made from a piece of scrap plastic/Delrin.
Insert it in the track. It MUST be a tight fit.
Add captionFrom update _10_1_2012
From update _10_1_2012
Now bend it.
From update _10_1_2012
First test on scrap. Then buy some track. I got mine here: http://www.curtain-tracks.com/ My problem was I had to match my current track. If you don't have to do this, then you may want to go a different route.
From update _10_1_2012
More bending.
From update _10_1_2012
Finished piece.
From update _10_1_2012
I hope this helps anyone who needs to bend some track. It's not hard and can be done fairly inexpensively. If you have friend with a bender. I should say that of course this is not the only way to do it. It's just the way I did it.


Tuesday, July 15, 2014
Tilley hats
Real customer service seems to be a rarity these days. When it is found, I like to highlight it.
Please welcome new contributor Adam, aboard nb Briar Rose!* Adam sings the praises of a company which I suspect has many customers among the readers of this blog:
Please welcome new contributor Adam, aboard nb Briar Rose!* Adam sings the praises of a company which I suspect has many customers among the readers of this blog:
My Tilley hat has become something of a trademark -- and I often get people saying they recognised me because of it. But lately it's been looking a bit worse for wear, and when it came out of the wash a week or so ago,the front was full of little holes. It's maybe not surprising, given how much I wear it, that it gets regularly soaked (as I like to have it on under the hood of my waterproof when it's raining), operates as a sun hat, and once had to be rescued from the canal when the wind took it (they're designed to float).* For those of you to whom it may be unfamiliar, the abbreviation "nb" stands for "narrow boat", a class of boats plying the canal network in England. The boats are constrained in size by the canals and locks they navigate, up to 70' LOA with a maximum beam of 7'.
So I emailed Tilley in Cornwall, who said the hat was covered under their lifetime guarantee never to wear out. After a few checks, they've sent a replacement. All I had to pay was a fiver for postage. It's only when you see the old and the new next to each other that you realise how battered and faded the old one is. Anyway, well done Tilley; a guarantee that really does mean something.

Thursday, July 10, 2014
Is Your Tether Quick Release Actually Quick Release?
With his typically engineering analysis, Drew over at Sail Delmarva asks some hard questions about tethers:
This tether was found by rescue workers at the Wing Nuts accident site; there were several fatalities.
Where do you clip the "spare" leg of a 2-leg tether? To the harness ring, or course, if there is no loop on the tether... and there is not. Pull the quick release and you are still attached by the spare leg. A potentially fatal design error.
This is dangerous even on deck--if the tether gets wrapped around a sheet or guy he has 2 clips to release to get free. Not good.
And this points a scary trend, where equipment companies design to standards but don't actually test the gear in the field. They give the gear to sailors to use, but that is hardly the same as structured testing where all likely use scenarios are systematically tested.
The solution? some brands are adding a ring or loop near the harness end. If you make your own, leaving the loop long enough will do. Or in my case, I simply clipped in a small biner to give myself a parking space.
The typical vendor response? You should have a knife. Please. Why not say I should fall off the boat?
(No, I don't used quick-release harness end clips. I single hand and can't imagine a senario where releasing will leave me better off. On the other hand, I can imaging the quick-release letting go or me clipping it incorrectly. My compromise. I still prefer to clip to the "parking space" and have only one clip on the harness.)


Tuesday, July 8, 2014
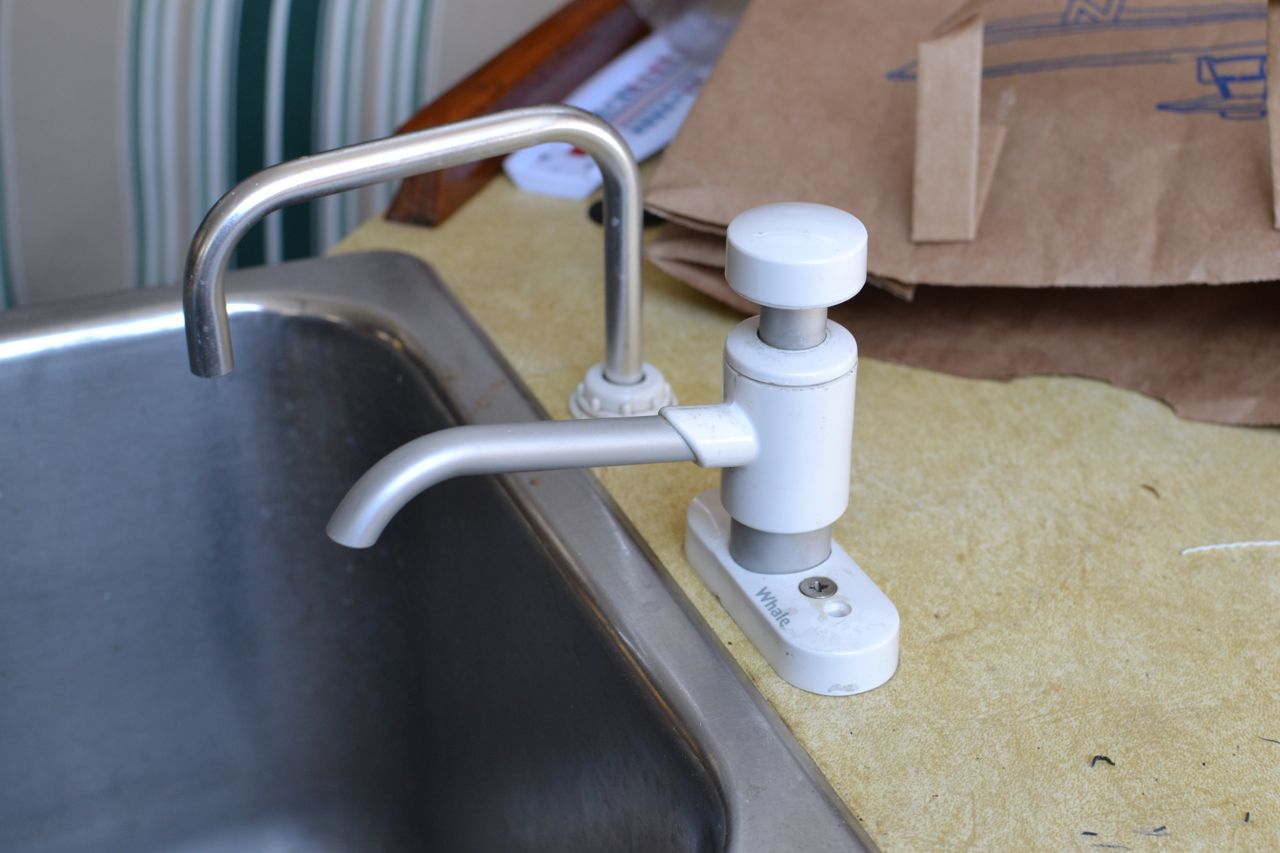
Rebuilding Whale V Vertical Lift Hand Pump
Aboard s/v Cay of Sea Rick continues his series detailing how to rebuild pumps; today it is a Whale hand pump:
My second pump rebuild is the Whale V. I have two of these on board – one for the drinking water system, and one for the head lavatory. They both needed rebuilding, and I completed one yesterday. Here are the photos and discussion of that process.
This rebuild was a little less straight-forward than the tiptoe pump described in the previous post. There are a few more parts, and they are very much sequentially assembled. My inevitable errors – both in disassembly and reassembly – made the process a bit more time-consuming. It is important to keep track of which parts are removed and replaced. Several of the replacement parts look very similar, so comparing the removed part with the replacement is essential. Here is a link to the exploded view and service kit. This kit costs about $15.
Unscrewing the hose fitting at the bottom of the pump provides access to the interior parts: piston, seals, o-ring gaskets, etc.
Although the instructions warn that the gasket inside the spout housing is the most difficult to replace (and recommended not doing unless absolutely necessary), I did not find that to be the case. I had to dig the old gasket out, which was slightly difficult. Then carefully compare parts to ensure I put the correct one back in place. More difficult by far was re-assembling the pump in the right order. I had to do it two or three times before I got the sequence right. It will be obvious if you get it wrong, because the piston will not go back in the cylinder if assembled out-of-order. There is a valve at the bottom of the piston that must be screwed on after the piston is back in the cylinder. It’s not complicated, really. Just takes a bit of trial-and-error.
The little gutter washers are the most problematic – these are circular rubber cups with channels in them, and there are several of them – slightly differently sized. They are easily unseated as the pump is reassembled, so you might feel like you need three hands at some point during the process. The whole process took about 30 minutes. I loosely seated the pump in its mounting location (see top photo), waiting to fasten it in place until I have re-plumbed the drinking water lines with new tubing. The hard water in our water source leaves deposits inside the lines after several years of use, then begins to flake off into the water. We filter all the water with a Brita pitcher, but the water doesn’t look very appetizing with little white floaty things drifting around in the top reservoir of the pitcher. Time to change out the lines. . .


Subscribe to:
Comments (Atom)


