Tuesday, August 4, 2015

Sewing Project: Shower Caddy

Livia and Carol cruising aboard s/v Estrellita 5.10b have a little project that any tropical cruiser is going to love...
P1060542
So, perhaps a bit of TMI, but we are cockpit shower-ers. In close quarters with other boats we wear swimsuits or wait for dark, and when not in close quarters with other boats, as we like to say “What you see with binoculars is your own damn fault”.

P1060543After years of dealing with shampoo and soap bottles jammed into the small opening where our cockpit shower exits the cockpit combing, with our new sewing machine I made a caddy for our stern pulpit using Sunbrella, a UV resistant mesh product like Phifertex and some 2” velcro. I measured the distance between bars, added the circumference of the bars (twice) and velcro width (four times) and seam allotment (twice) and that was the length of the sunbrella fabric to cut. For the width I measured between our dinghy engine hoist and dinghy engine bracket (plus seam allotment – twice). After that I was really free handing the mesh and the pockets look a little lumpy close up. Good enough for us!

Inside the caddy fit 4 reusable squeeze bottles I picked up at REI.

Sometimes it is the little boat improvements that are the most exciting. Our cockpit transformation is 2/3 of the way done: cockpit cushions (check), shower caddy (check) and now we need new mesh pockets near the dodger to replace our shredded ones.

Tuesday, July 28, 2015

Galley Work

This post originally appeared on Windborne in Puget Sound

Back in October, I re-designed the curtain tracks on two of our aft ports in order to allow them to open more completely.  The results were so nice and professional looking that the remaining six ports just begged to be upgraded too.  So I ordered more curtain track from Sailrite.

This last weekend I got around to making the installations.  But because there were six to do, a little manufacturing engineering came into play. 


First, at home I cut and trimmed the track with my trusty hacksaw and vice. Then I set up a work station at the galley sink for drilling - the sink traps the drill swarf and keeps it off the floor where it would damage the finish. Above, you can see that I have marked where the holes go on the tracks and am busy drilling them with a 5/32" bit.

After finishing the manufacture of the tracks, the work fell naturally (that is, unplanned...) into four workstations, each with its own dedicated tools:
  • Station 1:  At the current port.  Tools here were a #2 Phillips screwdriver, a 3/8" box wrench, a small flat blade screwdriver, and a small #1 Phillips screwdriver.
  • Station 2:  The galley sink. Tools here were the drill, water and a sponge
  • Station 3:  The saloon table.  Tools here were Meguires plastic cleaner, Meguires plastic polish, and some rags
  • Station 4:  The saloon settee.  Tools here were a #2 Phillips screwdriver and a 5/16" nut driver.
And so the work went like this...
  • At Station 1:
    • Remove the existing curtain track and curtains from the rusty spring clips and set aside
    • Using the #2 Phillips and the 3/8" wrench, remove the nuts and screws holding the port hinges together.
    • Remove the port lens.
  • At Station 2:
    • Carefully wash the port lens using water and the sponge.
    • Transfer the hole locations from the track to the port lens and mark with a Sharpie.
    • Drill two 5/32" holes.
  • At Station 3:
    • Apply polish to the inside of the lens and turn it over
    • Apply cleaner to the outside and rub vigorously to remove the oxidized lexan.
    • Remove the cleaner with a rag and apply polish to the outside of the lens
    • Buff the outside of the lens.
    • Buff the inside of the lens.
  • At Station 4:
    • Now that the lens is clean, it won't dirty the settee cushion, and it needs protection.  Working on the settee is perfect.  Install the track to the lens with two 6-32 screws and nylock nuts, using the #2 Phillips and the nut driver.
  • Back at Station 1:
    • Insert the lens hinge plates into the hinge plates on the port frame.  
    • Use the small Phillips screwdriver to align the holes.  It is perfect for this - the shaft is exactly the right diameter and the tapered tip allows easier alignment.  I struggled mightily with this step before I stumbled across the use of the screwdriver.
    • Insert the screws into the hinges and add the nuts.
    • Using the small flat blade screwdriver, remove the stop screws from the ends of the old track.
    • Remove the curtains from the old track.
    • Install the curtains into the new track.
    • Install the stop screws in the ends of the new track.

And then move on to the next port...

Tho having these four stations pretty much occupied the whole boat during the work, it completely eliminated all movement of tools except for the small handful used at Station 1.  For me this is a huge advantage, since otherwise I am always looking for one tool or another.

It took all afternoon, but only one beer.

Tuesday, July 21, 2015

Honey, They Shrunk the Captain!

Making a boat yours is important, if for no other reason than emotion. But making it fit is critical. Drew shares an example with us...
Touring the Annapolis Spring Boat Show and researching for an up-coming article on access for decrepit (bad knees, like me and my wife, and an increasing number of friends getting hip and knee replacements) sailors, we came across some good things and some unbelievable things. Honestly, how many folks get $500,000 together for their dream boat before their knees start to hurt? Not so many that the designers should ignore the reality. Or like me, the knees are fine when you buy the boat, and then a lifetime of vigorous activity starts to catch up with you.

And some things are just funny. This really belongs in Disney Land in the "Honey, Who Shrunk the Kids?" theme area. The seat is 8 inches too high and 8 inches too far back; as it is, the driver has no leverage on the wheel. At the very least, it needs a foot rest or fold-down runt board. And we saw this same problem on every single helm seat. Comically unsuitable for a long turn at the wheel.


Kinna reminds me of this, early in our ownership with a temporary runt box in place. It worked, giving her something to brace against.


On Shoal Survivor we eventually added a proper runt step, and it is still a little tall for my daughter (20 years old, but somewhat vertically challenged). Our feet now touch the floor, we have leverage, and an added storage spot to boot. And the wood was salvaged from the sole replacement on a Prout.


                                            https://blogger.googleusercontent.com/img/b/R29vZ2xl/AVvXsEiMV9kKOGFnNUUYFzzDtqf7ucVnDZeXcFzpBhhXddMrcDgw155ktS7bM6jEDcJVyt2BU2LIWks2cj_OM3Lzd2Za2T3gEJ86ZMZIBBHfw0NIj_9HXHBkTn-Gj7y7F20p56p4XHTsX3nKirCk/s1600/Up-graded+runt-step.jpg

Tuesday, June 30, 2015

Corners

This post originally appeared on Windborne in Puget Sound

Have you ever done fiberglass layup? If you have, then you know how difficult it is to get the wetted cloth to follow a sharp outside corner tightly, with "sharp" being a variable depending on how heavy the cloth is.  It tends to spring back, leaving a gap underneath.

Well, boat manufacturers have the same problem you do.  And on Eolian, there was a place where the cloth pulled away from the gelcoat-sprayed mold corner, leaving a gap between the gelcoat and the cloth.  This revealed itself over the years by the gelcoat cracking up in the bottom of what was now an inside corner, because it was unsupported.


The problem area was on the aft deck, where the coach house meets the deck.  Sadly, I did not take a "before" picture...  but this one shows the extent of the area to be repaired after I ground out all the loose gelcoat flakes with my trusty Dremel tool (the perfect tool for this job!).

Now, gelcoat is formulated for application by spraying.  That means that it is quite fluid, tho the thixotropic agents included mean that when you stop disturbing it, it stays put (unlike epoxy, which continues to run and drip, seemingly forever).  But that fluidity makes it quite difficult to control the application accurately.  I mixed the gelcoat in a small cup with a tongue depressor and then used that same tongue depressor as an applicator - the radius of the end was close to the radius of the inside corner of the repair area, if I tilted the stick at the right angle.

After the gelcoat had gone off I sanded it using 220 grit wet/dry sandpaper (wet), a small piece wrapped around the end of another tongue depressor, to knock down the areas that needed to be flat.  For the radius in the corner Jane donated an old Chap Stick container, which turned out to be a pretty close fit.  Sanding is tricky.  You want to knock down the high spots and get nearly level with the surrounding area, but you don't want to cut flush until you are working on the final coat.  The original gelcoat, tho much thicker than a paint layer would be, is quite thin and easily sanded thru.  So you only want to sand flush once.

Because of the fluidity of the gelcoat, it took several applications to get the surface brought up (oh, how I wish that there was a gelcoat formulation even as stiff as, say, Greek yogurt!).  In the beginning I applied a lot, but at the end just a dab here and there to fill the hollow spots.

For final finishing I went over the area with 400 grit wet/dry (wet), and then used some polishing compound.  It comes out as shiny as a factory finish.

And done.

Again, major kudos to Fiberlay for such an amazingly perfect color match.  If you can see any color difference at all in the picture, it is because in the area where I was working the oxidized gelcoat got cleaned off, brightening the color.

(And yes, replacing that fixed port is on the list.)

Tuesday, June 23, 2015

Roadmaps For Troubleshooting

Our boat, Eolian, came with a full set of factory prints covering wiring, plumbing, and rigging.  And tho there had been changes (mostly to wiring) since she was new, the prints helped enormously in figuring out the actual in-place wiring and correcting several mistakes.

But what if you don't have those prints?  Well if you've done any work on the boat, chances are that you have mapped out some portions of of the systems onboard.  But the best way would be to make a project out of the discovery, and record the results to be used by your future self as roadmaps.

Please welcome new contributor Will, onboard s/v Chaika, a Westsail 32, who has done just that!  And also please note that he has additionally documented the locations of all the thru hulls, perhaps the most important part of the exercise.  Do you know where all yours are?


Tuesday, June 16, 2015

Canvas Work – A Break From Dinghy Restoration

Over on s/v Cay of Sea, Rick takes a break from his dinghy refinishing and does a little canvas work:
Sanding fiberglass ranks low on my list of favorite things to do, and I had the “itch” to do something else for a day (pun intended). I had ordered twist button canvas fasteners from Sailrite.com after researching price. I bought six sets (eye, twist fastener, and backing plates) for $.94 each. They were far and away the least expensive place to get them, even with shipping added in (about $6). A set of four would have cost so much more at West Marine ($14 for two sets) and approximately $2.60 each at Defender Marine. If there is any way you can avoid buying anything at West Marine, you should. On average, West marks up their prices at 1/3 above any other place on the web, and often above any other chandlery in town. Their stock in trade is convenience – one-stop shopping (or so they hope). On other items, they simply fleece the customer. There is no reason on earth to charge the sort of prices they do for some products, except that – amazingly – people will buy it anyway to avoid having to plan ahead. Occasionally you can get an item on sale at West that is a reasonably good deal. That’s the only time I really consider buying at West.

Oh yeah. . . the project!  I purchased a used headsail deck bag with my “new” (to me) jib, but it was a bit worn in one area.  The aft closure of the bag depended on UV damaged hook-and-loop fasteners. The hook-and-loop tape and had lost most of its grip, and I planned to change the closure method with canvas twist-and-eye sets. I don’t really like snaps – they corrode, can be difficult to operate when they age, and can lose their grip. These twist fasteners are fool-proof, don’t hurt your arthritic hands because they don’t become difficult to operate, etc..

Image from sailrite.com. This is what you get in one set. As you can see, the eye is fitted into one side of the canvas, and the twist lock into the other.

I installed 4 sets right through the hook-and-loop tapes – and I managed to install both male and female pieces facing the right direction in the correct sides of the work piece! I’ve found that the most effective way to form the holes through acrylic canvas (like Sunbrella) for the eyes and the push-through points is to use a soldering iron. Just get the iron hot, set the piece  where it should go, and touch the iron to the fabric several times. It will melt the material while forming a hole, and seal the fabric threads at the same time. This probably will NOT work with regular cotton duck/canvas. You’ll have to some sort of cutting tool for that.

DSC_4418 (1)


DSC_4417 (1)

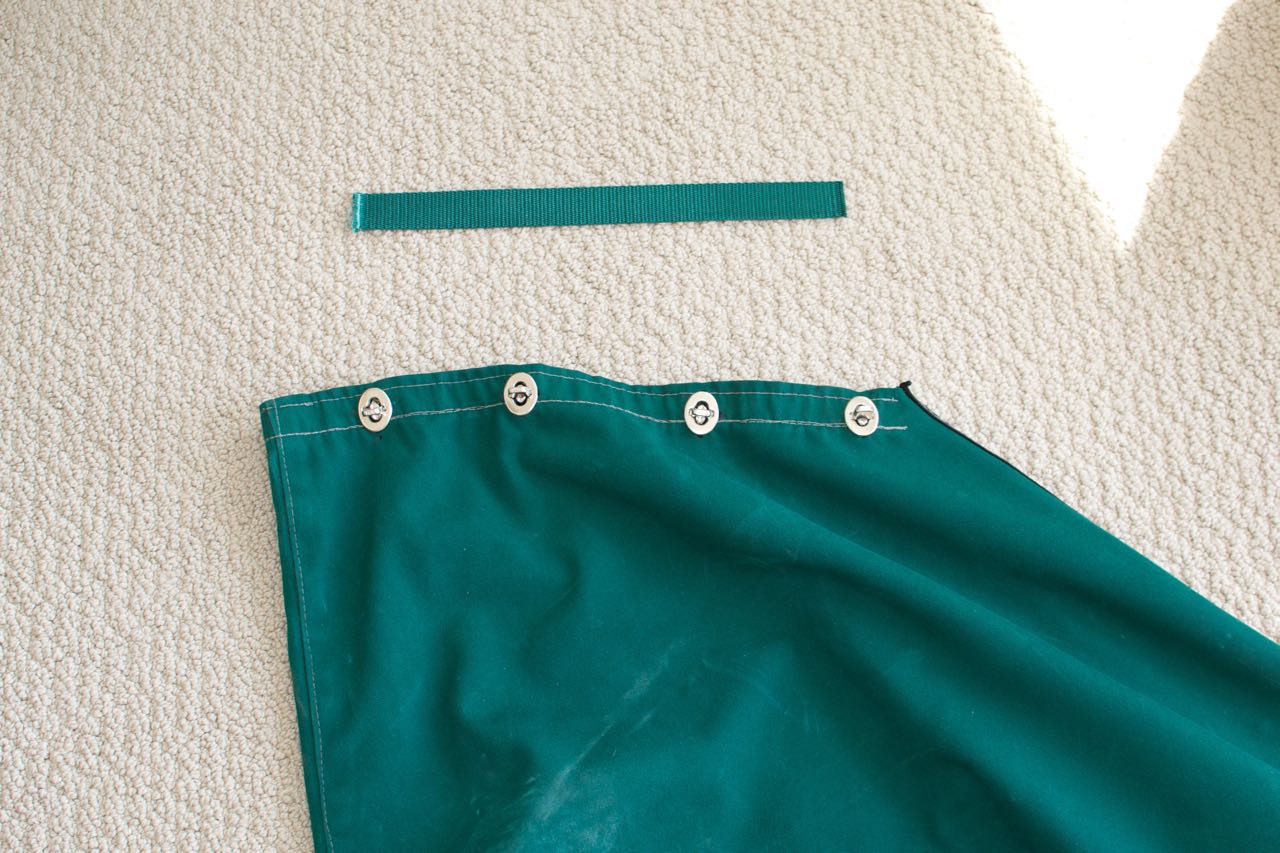
The piece of green webbing above was used to form a loop in the back of the bag for support off the deck.

Webbing sewn into one side of the bag - not one end on either side of the bag - that would have made stowing the sail very difficult.
Webbing sewn into one side of the bag (starboard side) – not one end on either side of the bag – that would have made stowing the sail very difficult.

I sewed down a preexisting length of hook-and-loop tape to form a loop on the forward top of the bag (it was originally intended to go around the forestay), and fashioned a harness from line. The line is temporarily knotted into the correct length and shape. Next week I’ll get a couple brass snap hooks from the hardware store and substitute them for knots. That will expedite stowing the sail and hoisting the bag when needed – I won’t be standing on the bow retiring knots each time.

Here's the harness, knotted to the right length.  The jib halyard lifts the whole off the deck when managing the ground tackle, and keeps it off the deck when at the slip or at anchor.
Here’s the harness knotted to the right length. The jib halyard lifts the bag off the deck when managing the ground tackle, and keeps it off the deck when at the slip or at anchor.

I used my Speedy Stitcher sewing awl to attach the loops. This is a great tool for a job like this. I’ve also used it to repair sails in place (on deck). It goes fast, and is practically the only way to sew a locking stitch by hand through the heavy materials we use as sailors. I’ve easily and quickly sewed heavy gauge leather chafe patches on canvas with it. An interesting price comparison is observable here:  This tool sells for $36.99 at West Marine, but you can order it through Amazon for $11.90.

Related Posts Plugin for WordPress, Blogger...