Saturday, June 12, 2010

Where am I?

This is not a project, so much as a product. But it is inexpensive and handy.

You have paper charts on board, covering the area you cruise.

And you have a GPS (well, most of you do). Often, that GPS is a chartplotter. So, those paper charts don't come out of the drawer too much, do they? You have them on board as a backup against the failure of the GPS, right? Are they current (probably not)? And have you checked the price of paper charts lately? Wow.

To get this straight right up front, I am not advocating abandoning the paper charts. They will work if the GPS dies, if you lose all electrical power on board, and even if the constellation of GPS satellites shuts down.

Another (I am a belt & suspenders kind of guy) navigation backup is available to you if you have an iPhone (and perhaps other smart phones too, but I haven't checked). For less than the price of a single paper chart, you can have all the charts for a huge region in the palm of your hand. The Navionics app for the iPhone cost me $9.99, and that price included all the charts for the West Coast of the US, Alaska (including the north slope) and Hawaii. 

These are excellent vector graphics charts, and include tides, currents, optional satellite overlays, and the ability to record tracks and store waypoints and routes.  Everything is on the iPhone (except the satellite overlays), so once you have downloaded the app, no internet connection is needed for use.

Where else are you going to get a chartplotter for $10?  And all the charts??

If you have an iPhone, you should have this one.  It really is a no brainer.

Thursday, June 10, 2010

Ventilation: Bad

Never thought you'd hear me say that?

When you are a liveaboard, and you live in Seattle, having your weather boards equipped with those ever-present teak slats is not a good thing - they let a lot of heat escape in the winter.

The Previous Owner addressed the problem by gluing a scrap of thin Plexiglas over the slats with (yes) silicone.  It was an ugly solution, but it did keep the heat in, and we had other priorities - it stayed like that for years.

Until, that is, the lower weather board (no slats - to the upper right in the picture) levitated itself in a seaway and dropped into the cabin.  Tho this did amazingly little damage to the cabin sole, it did break some joints in the weather board.  OK, so now there was a need to put the weather boards to the top of the list.

I repaired the broken joints with epoxy, and the loose joints in the larger, upper board as well.  I pulled off the Plexiglas, scraped off the silicone and removed the slats. 

The wood is 3/4" thick, so the plan was to use 1/4" on the inside and outside for flanges to trap 1/4" Plexiglas.  For safety, since pressure from a boarding sea will be from the outside, I decided that the solid flange should be on the inside.

I used a 1/4" rounding over bit in my router to make a finished edge on the inside of the opening.  And then a 1/4" rabbit bit to make a 1/2" deep 1/4" rabbit on the outside.  To make the outer molding, I used the 1/4" rounding over bit again on a teak scrap, and then sawed off the rounded edge, making a piece of 1/4" quarter round.  Bedding the Plexiglas in polysulphide, I installed the outer trim molding I had just made with small brass brads.

Six coats of polyurethane (what you see happening in the picture) finished the project.

Note: we have not made any changes to the weather board "stowage" (the boards just lay on a pad on the cabin top next to the sliding hatch) which caused this project to be bumped up in priority, so if anyone reading this has a good solution for storing weather boards under way, I really need to hear about it.  Add it as a comment, or submit it as a project, please.  Thanks.

Tuesday, June 8, 2010

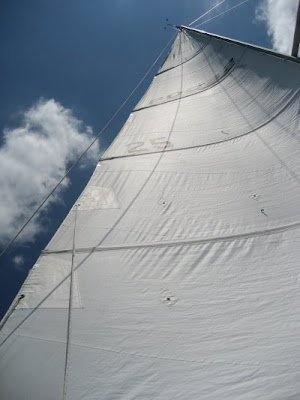
Carbon fiber, tapered battens, and a slack leach

This project is a copy of an article originally published at Sail Delmarva, reprinted here with permission. This is not a large project, but it is a large post...
Before: different boat, but same model, same sails, identical problem.


I admit it; I'm cheap. And I enjoy fixing anything I can, to prove I can. If I have to fix it though re-design, that's even better, and if the repair method is unusual... better still. I'm a tinkerer.

The main sail leach on my boat had been falling off to leeward in a terrible way, as much in light winds as stronger stuff. No just an inch or so - a regular S-shape as much 12" to leeward. Another PDQ sailor mentioned that thicker battens had been installed in his main by a sail maker and had worked for him. Being cheap and willing to make a simple thing more complicated, I decided that tapering the battens by stiffening the back 60% with carbon fiber TOW (tension oriented weave or unidirectional fiber) would do the trick and not thicken them so much that they would not fit the pockets. After all, most beach cat battens are tapered. The draft of a sail is tapered - more in the front, and less as you move aft. And it was also a fix and improvement I could finish for the next weekend!
Batten stiffness is rated by the weight required to deflect a 40" sample by 4". The original battens were 3 pounds for the upper 2, and 4 pounds for the lower 2. The lamination changed this to 8 pounds on uppers and 10 pounds on the lowers, exactly what my back-of-the-envelope calculations using internet carbon stiffness values predicted. Unidirectional carbon works for this project because it is that it is not just stronger than glass, but also much stiffer. If you were to substitute glass it would take many layers and the battens would get too thick to fit the existing pockets. Unidirectional fiber is required; more of the fibers are oriented in the correct direction and they are not deflected into a serpentine path by the cross weave.The forward part of the batten remains nicely flexible. It seems so obvious; the battens on my Prindle were tapered, and in proportion to the PDQ, much stiffer at the leach that the stock PDQ battens.
A simple job, really, easily accomplished:
  • Sand the batten.
  • Cut the TOWs to size.
  • Laminate one layer of 1" wide by 11 oz. graphite to each side. Taper fibers to avoid a hard spot. I did this by ending the fibers about 6" differently on opposing sides.
  • Sand lightly and add a second coat of epoxy.
  • Sand lightly again, by hand, 220 grit or finer, to get any sharp spots.
  • Epoxy again. Optional; I didn't.
The carbon tow came from West Marine, though it is not in the catalog. Defender Marine has a 3" x 50' roll (http://www.defender.com/product.jsp?path=-1|10918|16458|309345&id=12428), though I think I bought a `15' roll, and that was just enough. I split the 3" roll to long 1" strips with sharp scissors - delicate because it tries to fall apart, but not difficult. There were no tricks to the laminating, other than starting at the leach end of each batten, adding resin to only about 1-foot of each batten and letting that soak while I added resin to the first 1-foot of the others, and then going back to the first to finish the full length. Doing it this way keeps the fiber in place, rather than having it creep as you brush the resin toward the luff end.

I am still going to re-cut the sail. I believe I need to remove ~ 3/16" out of 2 seams, 50-70% of the way up. The "after" photo shows some residual sag. But the stiffer battens were a huge help on the sag and treated some vertical wrinkles as well. I will be happy until fall.
An easy project for any boat with full length, un-tapered battens. Like so many engineering projects, it is invisible when well done... but I appreciate it whenever I look up, I found myself able to walk away from a couple of well-sailed 45-footers (all sail boats heading the same way are racing), and my pocketbook appreciates receiving a few more miles from a good sail. The speed difference is appreciable.

After: not perfect, but much better!

A typically thorough engineering treatment from Drew.

Sunday, June 6, 2010

Easy tasks get done

This project from s/v Estrellita 5.10b, May, 2010. Livia's key observation below: "...easy tasks get done and annoying tasks are easy to push off" is soooo true.
You guessed it. It's HAUL OUT MONDAY!

I can tell that you are excited.

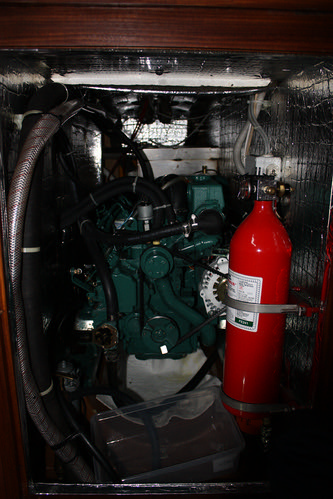
Underneath our cockpit is our 29HP diesel engine, a Volvo MD2030D.
Volvo MD2030D


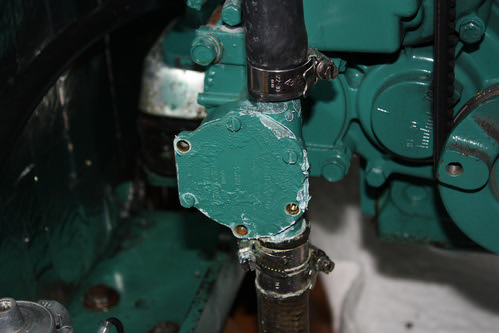
Our impeller is what moves sea water through our engine which passes around tubes of coolant and cools the coolant so it, in turn, can cool the engine. This is called a heat exchanger and works the same as your radiator in your car except your radiator uses air.

The impeller lives inside the raw water pump and should be checked regularly. The housing for it is not terrible to open but not exactly a "pre-sail" check. Plus, we generally would have to replace a paper gasket because it tears AND you have to shut off the sea water intake (raw water = sea water) so you don't flood your boat.
Raw water pump


The impeller itself looks like a black rubber asterisk. Ours had one blade torn in half and two others cracking. They can still move a fair amount of water when damaged but if they stop, you overheat and when they blow up into bits, those bits get into your heat exchanger and plug it and generally become a PITA. If you look closely you can see the torn blade (clicking on the photo might help if you want a larger size).
Cracked impeller and speed seal

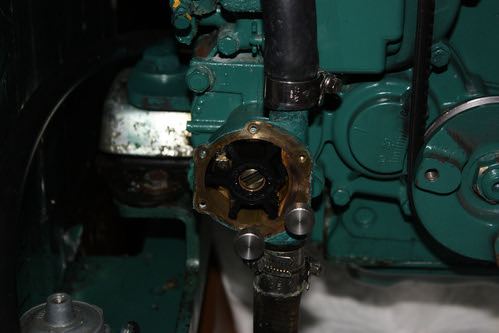
What you can also see in the photo above is a new pump cover with an o-ring instead of a paper gasket. After inserting a new impeller (or after checking an old one) there are two guide screws that are left inside the pump.
Impeller and guide screws


After sliding the cover onto the guide screws and hand tightening those, you insert two other screws, also hand tightened with etched sides that make them easy to handle even when wet.

Speed seal


We can now check our impeller as easily as we can reach the raw water shut off...which is still a wee pain, but much, much less of a pain now. And if I have learned anything about maintenance it is that easy tasks get done and annoying tasks are easy to push off.

Now, complete honesty. We are right on time with all of our other engine maintenance, but we have *never* checked our impeller before this haul out. And, after reading the detailed log kept by the previous owner, I don't know if he ever checked it either. This would mean that the impeller inside was original, from 2004 and had 730 engine hours...and it was cracking...and the gasket was completely decomposed.
Taking Livia's observation to heart, we are going to fit out Eolian with one of these too. Side benefit: you get a new impeller cover plate. It is the cover plate and the bottom of the well in which the impeller sits which form the side seals that keep pumped fluid from sneaking from the high pressure side back to the low pressure side, lowering pump efficiency. A new one is a good thing.

The device is a SpeedSeal impeller cover - it can be gotten direct from SpeedSeal, if not from your local chandler.

Friday, June 4, 2010

For horses, for sailboats

Originally published on Windborne In Puget Sound

I stopped in at our local farm supply store and bought these two fittings for a total of $5. They are solid bronze, and I plan to use them on one of our flag halyards. I priced the same (OK, similar) fittings in the West Marine catalog...
Want to guess?
$9.49.
Each.
A lot of horse tackle is either stainless or bronze, and is priced without the "marine multiplier" - next time you are nearby, check out a farm supply store.

If it is springtime, there will even be real, honest to gosh peeps!

Wednesday, June 2, 2010

The KoolAid boat on the dock

Some of you may be old enough to remember the Kool Aid commercials featuring the "Kool Aid Mom on the Block," an idealized mother wearing an apron and high heels who always served Kool Aid, and therefore always had all the kids on her block at her house (was she NUTS?). Well, I fear that having posted this on their blog, Livia will have all the boats on her dock coming over, corroded brass in hand, looking for some Kool Aid. (I'm pretty sure Livia will skip the apron and high heels)
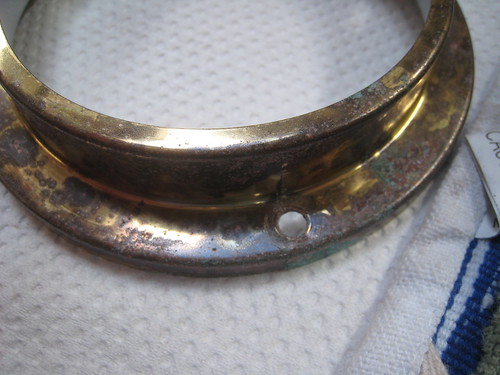
Two years ago, about a year after the purchase of our boat I decided to finally tackle our seriously gross cabin lights. This is a medium tarnished one, light fixtures near water sources (galley, head) were worse.

Before

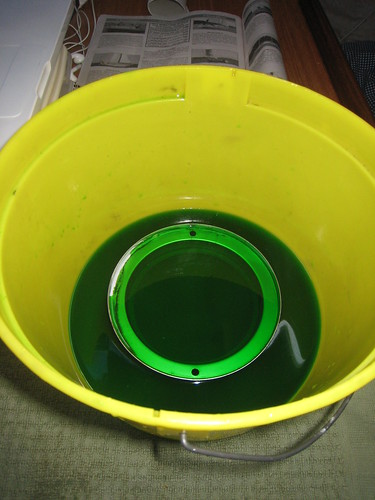
We polished a few by hand with Bright Boy and with Nevr-Dull both of which worked but were very labor intensive. I came across a tip online to soak your brass overnight in Kool Aid. I bought Kool Aid packets - the kind you still have to add sugar to. Then I added water but not sugar.

Hand Dye


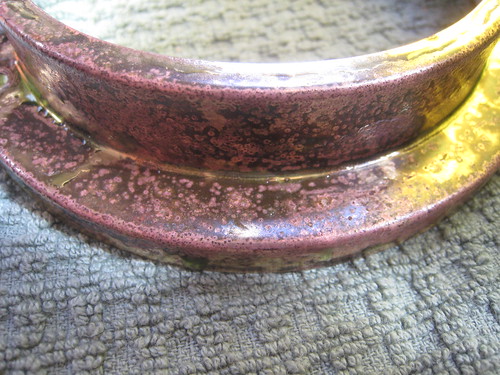
I soaked the first fixture for about 1.5 hours and it was a lot better. However, I soaked two more overnight (because I was running out of time) and the results were amazing.

After Kool Aid


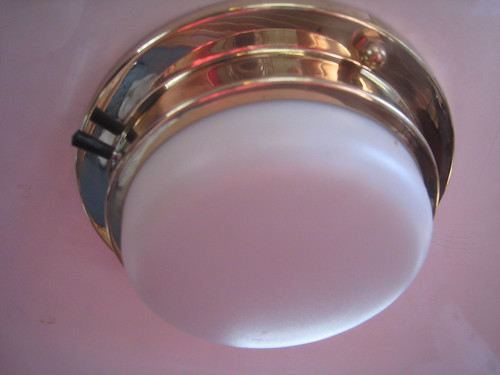
The Kool Aid cut the elbow grease down to about 10% of what it took without.
After polishing


Anything with citric acid as the first ingredient probably has the same effect.

Brass is a high maintenance item if you want it to look good. It has been 2 years since the Kool Aid project and the fixtures are dull again. No pitting, no grossness, just dull. My thought is that the longest I can get away with doing them is every 2-3 years. If I do them in the next year, it will be a quick and easy job - not painful at anchor. If we wait longer it starts getting back to the big job it was the first time.

That, right there, is the balance we are trying to find. Do enough maintenance, often enough, that painful jobs are avoided when possible but not trying to stay ahead of the curve any more than that.

- Livia

Warning: The Kool Aid *will* dye your hands. Mine were green although they are only lightly green after a shower ;)
Be sure to visit s/v Estrellita 5.10b as their days count down to cutting the docklines.
Related Posts Plugin for WordPress, Blogger...