I know it is a little late for this year; this is the result of my policy of not putting up anything here that is less than 30 days old - i want to drive traffic
to your site, not
take it away. But then for next year...
Rick over on
s/v Cay of Sea shows us how he decommissions his head for the winter. This process has the added benefit of making a thorough internal inspection a part of the process:
Warning: Graphic dirty pictures featured in this article
There is no way to eliminate the “disgusting” quotient when talking about toilet disassembly, and the only way to illustrate the process without bringing in yucky images is to use squeaky clean new parts. Well, I don’t have those on hand right now, but I do want to write a timely post, so please bear with me. If yucky toilet parts make you queasy, perhaps you should skip this article.
Last summer, returning from the annual Watkins Rendezvous, we had an unexpected marine head failure (it was practically new) which is chronicled here (about 2/3 through the article). After that experience, I determined that the way to avoid any subsequent failures was to disassemble and rebuild the head yearly, and not leaving propylene glycol (antifreeze) in it. I’ve also stopped using strong cleaning chemicals in it, as these often deteriorate the rubber parts. A mild dish soap solution cleans it fine, and since we flush with fresh drain water from the lavatory, it doesn’t develop the characteristic marine head smell.
Upon disassembly last winter, I determined that the rubber interior parts were nearly new and did not need replacing. As I inspected them this year, I decided to replace them, as they are looking a little worse for wear. I think they are still serviceable and I’ll keep them as spares, but will replace the large flapper valve and the joker with new parts. Similarly, I’ll disassemble the pump and replace the valves and seals.
Today, I simply dismounted the pump assembly, drained the system, and plastic-bagged the old joker and flapper valve. As a bonus to do this in 35-degree weather, the screws that hold the assembly together were easy to remove – surrounding material (plastic) is slightly smaller in the cold, therefore the tension on the fasteners is less. First, I donned latex gloves, then soaked up any remaining water in the toilet with wads of paper towels, dropping them directly into a lined waste basket. Used nearly a roll of paper towels.
I removed the flush water outlet hose first, then disconnected the joker valve housing and removed the joker. Following that, I removed the four screws retaining the pump on the assembly, then drained any remaining water. Finally, I used my heat gun to warm and soften the white sanitation hose for the flush water inlet. This was probably the hardest part, as it was cold and took 5+ minutes to get it pliable enough to work off of the fitting. Here are few photos:
 |
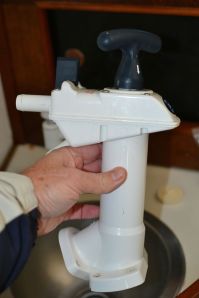
Pump assembly removed and drained
|
 |
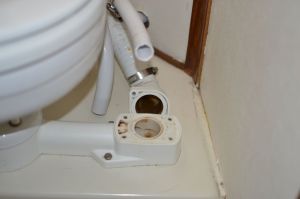
This is the pump stand. The large diameter hose in back is where the joker valve resides, inside the collar fitting.
|
 |
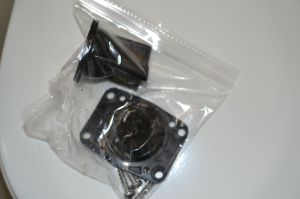
The bagged joker and flapper
|
The whole process, including preparation (need to have your supplies and receptacles ready to minimize the mess you make) was about 45 minutes.
Reassembly will take slightly longer.


Ethylene glycol does not have the same negative affect on the neoprene parts used in Jabsco pumps (I tested this on Jabsco parts, and have used EG for years).
ReplyDeleteThat's you, isn't it Drew?
ReplyDeleteI probably should have referenced your test work Published in Practical Sailor - I'll correct that here
bob