Pages

Thursday, September 27, 2012

Fender Boards

Here in the Pacific Northwest, with our large tidal ranges, virtually all marinas have floating docks.  Consequently it is highly unlikely that you would ever have to tie up to a piling.

Why do I bring that up? Well, because fenders are designed to protect a boat from a horizontal object, like a dock.  No fender, by itself, will be able to protect your boat from a vertically-oriented object, like a piling.  But our situation here is not everyone's.  Not even everyone here, since pilings are frequently found in docking situations on our lakes.  So what to do?

The fender board is the answer.  Drew at Sail Delmarva shows us what a fender board is and how to make yourself one which is considerably evolved from what I have seen in the past.  His board is well-constrained so that it will stay in position on the fenders.  Read on...
Do you need em'? Yup, if there is a lot of tide, strong storms or wakes, yup.

Example. In Chincoteague, as much as we like the town dock, there are few "no wake" signs, no posted speed limit, and you get rocked now and then by small but speedy boats. There is also a good tide range. and a 3 knot tidal velocity. The picture was taken only a few hours into their first use and we've  already worn a noticeable grove. There was always a small pile of saw dust resting on the board.

Example. We got hit beam-on by a powerful storm while in Rockhall, tied to a bulkhead. Fortunately, we had a spring line and good breast lines, and our fender board. I've had fenders pop out in these circumstances, and the pounding on the pilings is scary. All we felt this time was some gentle swaying, even as the hail blew horizontally.

Note the grove in the middle, only a few hours old on a calm day. Yes, it should be centered up on the rub rail; we moved it up later. It seems fenders are always placed when dead tired from a long run, in this case about 85 miles. Lucky we got it out at all.

Very simple to make from a scrap of 2x6 treated lumber. Any thinner and it will wear through rather quickly. Forget paint.
  • Pick a length. Ours is ~ 4 1/2 feet and I'm happy with it.
  • Drill holes for the line that restrains the fenders horizontally. Our are 5/16-inch polyester line, though some suggest bungee cord. I trust line more. Counter bore the holes so that the stop knots are recessed (reduce wear and reduce snags).
  • Drill vertically through the board (3/8-inch to take a 5/16-inch line) to take the time that suspends the board (loop on one end, stop-knot on the other). This takes a long bit, which I was lucky to have.
Deploying the board is sort of a 2-person job and we don't use it at every marina, but if you suspect storms or wakes, it is very nice. Don't know why I waited so long.

Friday, September 21, 2012

Mast wiring – Connecting With the Boat Wiring Harness

Over at s/v Cay of Sea Rick has an improved method for handling his deck-stepped mast wiring. Using deck-mounted connectors for this is a weak solution - Rick's is much better.
This topic arose recently on the Watkins Owners’ Group in Yahoo groups, and it is a particular subject of interest to me.  After several difficult experiences with mast wiring and unstepping/stepping, I researched and found a fix which I implemented several years ago.

What We Need

Let’s define the requirement.  The mast wiring connection with the wiring harness must be:
  • completely water-proof and leak-proof
  • corrosion-proof
  • Very UV resistant
  • fast and simple, because…
    • you don’t want to have to figure out “how it goes” each time
    • Your mast is suspended over your deck by the crane, waiting for you to complete your wiring hook-up (I have experience with this problem), or
    • The yard crew is doing it, and if you aren’t there to supervise, they may not get it right, because they don’t understand how it’s supposed to work (I have experience with this problem too)
But what do we usually deal with?  What is the operative word for most boat builders?  Cheap.  I hate to say it, but for most of us, that is what we have.  A cheap fitting that was used by the builder because it didn’t take long to install and it didn’t cost much.  They leak, corrode, and become brittle, and constantly introduce electrical problems with the wires up your mast.  Your lights stop working, the radio will receive but not send, etc.

But even if you spend a lot of money on the fitting and it meets the above criteria, eventually UV will destroy it and the wires that attach, and you will have a problem.  Sooner or later.  When you begin to research through-deck connectors, or water-proof connectors, etc., you discover literally hundreds of products that are supposed to be weather-proof.  Most of them are some variation of plastic connector with rubber or silicon seals that the sun will cook in about 2 years.  If you are a boat owner who unsteps his/her rig each year, you will get failures sooner, just because you have to manipulate the fussy little connector more often.

Solution

My research led me to Tim Lackey’s web site and construction logs.  Specifically, his solution for his Pearson Triton Glissando.  This was so common-sense, so fool-proof, that as soon as I saw it I knew this was what I would do for Cay of Sea, and that it would always work perfectly.

My Implementation of Tim’s Concept

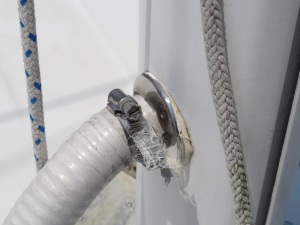
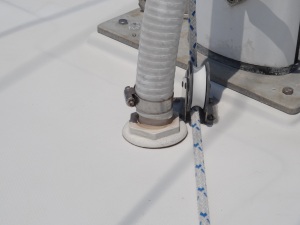
The basic idea, as you saw in Tim’s photos, was to pass the wires through the deck via a conduit.  That means the wires exit the mast and pass through the deck by some means.  Tim used (and I copied him) a one-inch stanchion base for the mast and a one-inch plastic/marelon through-hull for the deck. White sanitation hose is the conduit, connecting to the “flange” on the stanchion base, and the nipple on the through-hull.

That means a hole in the side of your mast (I have envisioned this for deck-stepped masts, but it should work for keel-stepped as well).  10-12 inches above the deck should be fine.  If you don’t have a hole there, you have to cut or drill one large enough to allow the wires to pass through easily.  I cut a one-inch hole.  This matched perfectly with the stanchion base.

Stanchion base with white sanitation hose. The stringy bits are the remnants of duct tape I used to cover the sharp edges of the hose clamp end. Yeah, I need to renew the tape.

The base was screwed on (need tapped holes for this, of course, to accept the screws) and sealed with polysulfide.

View from the opposite side. Unless your mast is perfectly flat on the side, you will need the sealant to fill the area where there will be a gap.

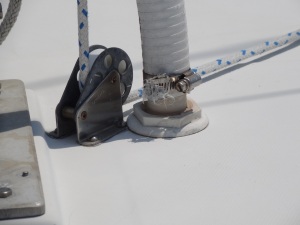
The through-hull is installed in the deck just like you would install it anywhere else.  Use plenty of sealant.

It’s tricky getting the fitting to come through in the right place down below. Think it through carefully.

The foot of this block interfered with the collar, but I used plenty of sealant so there is no leak. I should have trimmed the foot of the block, but it turned out okay. See what I mean about thinking it through?

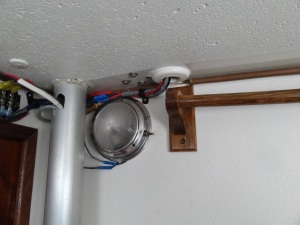
You can see the wires exiting the through-hull.  You can also see the window I cut in the compression post.  I filed the edges smooth.  You can begin to see the terminal block on the left.

Wires exit the through-hull and the compression post, meeting at the terminal block to the left (outside the photo frame)

The wires meet and connect. You can connect them at your leisure after the mast is stepped.

The grey wire exiting the compression post and leading around to the bottom and left is the VHF coax.  You can just see the gold-colored connector on the right, behind the compression post.  This connector cost $10 a couple of years ago.  It’s gold-plated and is reported to be the best connector on the market.  I’ve never had trouble with this connection.

This final photo shows you the entire on-deck assembly. The white hose and through-hull lets it blend into the white deck.

And there you have it.  Neither the wiring nor the connections are ever exposed to the weather.  The conduit doesn’t leak.  Connections are easy and secure, and your wires can be attached with standard marine-grade crimp connectors.  I use the wiring block because it is absolutely transparent: no confusion about which wire attached to which.

Tuesday, September 18, 2012

Folding draining

Isn't this a cool idea?  If your galley is arranged such that it would work, how about a folding dish draining station?  Mike and Rebecca on s/v Zero to Cruising bring us this neat product:

We have continued to play our version of space invaders, which basically involves us trying to find space where there was none. Our most recent conquest took place in the galley where we replaced the dish-drying rack with a cool folding one from IKEA. I got the idea from a former PDQ owner who posted earlier on our blog. Thanks Cindy. It works great!

Tuesday, September 11, 2012

What to do with a retired sail? Part I

Jeff over at s/v C'est la Vie answers that question admirably in Part I of this project:
In the past our friends at Ella Vickers have received C'est la Vie's retired sails.  Ella will give you credit towards purchases for your retired sails - Ella Vickers Sail Exchange.

With a new paddle board, a retired mainsail, a sailrite LZ1 machine, and time on my hands.  I've elected to fabricate a storage bag for the paddle board.  Images from the project are available - Paddle Board Bag Project - Summer 2012


Earlier this summer we purchased our first paddle board.  We found the used Surftech 11'6" Laird board in Atlantic Beach via Craigs List.


The rocker (curvature) of the board prohibited me from simply tracing out the dimensions of the board on the cloth. So I measured cross section of the board every 12" and then drew this  pattern out on the sail cloth.
Once the pattern for the top of the bag was cut out, I draped it over the board for a quick test fit.

A couple hours of measuring, drawing, and cutting produced the three basic pieces of the project.

Thursday, September 6, 2012

V-berth drama

Please welcome new contributors Paul and Amber on s/v Kingsley!  For their first project on Small Boat Projects, we are featuring their repair to the hull covering in their v-berth. This is a novel solution, and even allows for changing decor in the future!

When you get done reading the post here, please go to their site and read it again there - there were some fun polls interspersed in the post that sadly I cannot reproduce here.
Picture
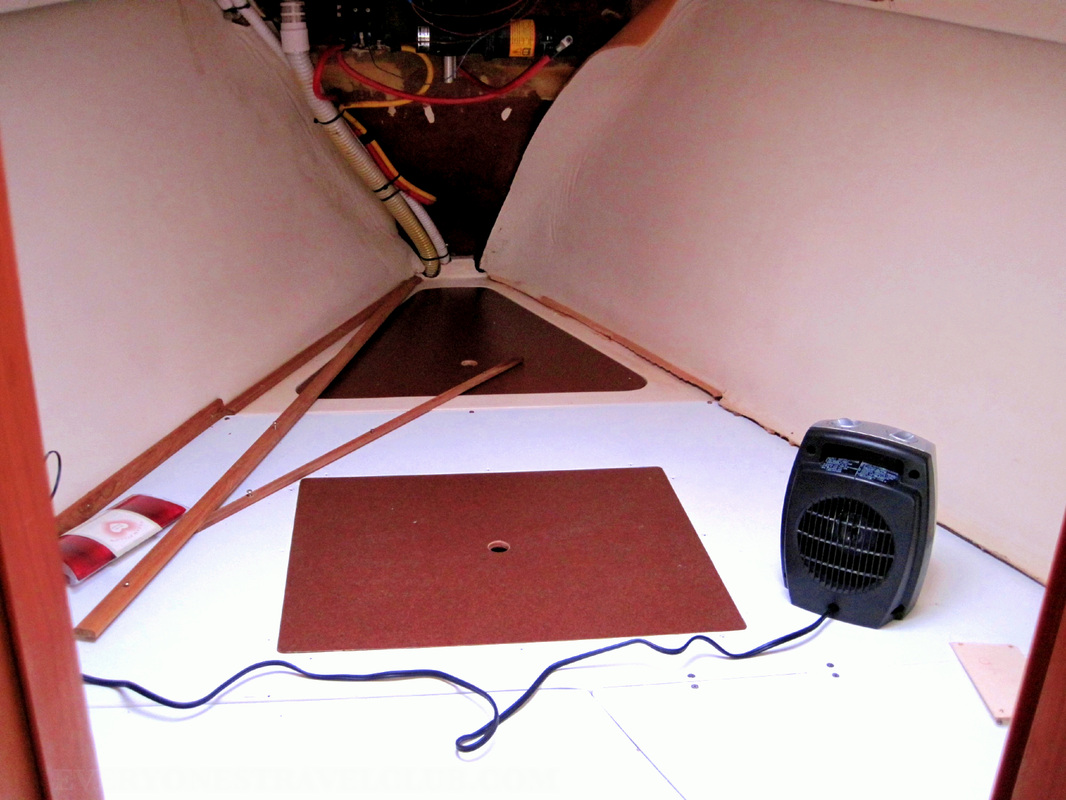
Our v-berth with the forward cover removed

We'd like to introduce you to our v-berth. You know, it's the front pointy part of the boat, it usually has a pretty cozy bed (ours does) and when you lay down on a clear night you can see out the hatch to the moon and stars. Problem is, our v-berth had a leak.

Long-leaky-v-berth-story short - we fixed it. Unfortunately, our previous owner hadn't fixed it, for I don't know, years before we bought the boat so it caused a good amount of damage to the white boards in the picture above. Long-warped-rotting-replace-wood story short - we fixed that too.

So, this brings us to today's post. The v-berth walls. The vinyl/foam insulation on the walls needed removed and replaced. That seemed easy enough. Well, it wasn't (drama!). We invite you to share in our story and become a part of it! Periodically throughout the story we'll have an anonymous quiz that asks you the reader if you would keep going on the project yourselves or throw in the towel and hire some pros. Put yourself in our shoes for a few minutes. How handy are you? Marine vinyl masters? Or newbies like us trying to save a few bucks and risk it by doing the project ourselves!?!?!

Picture
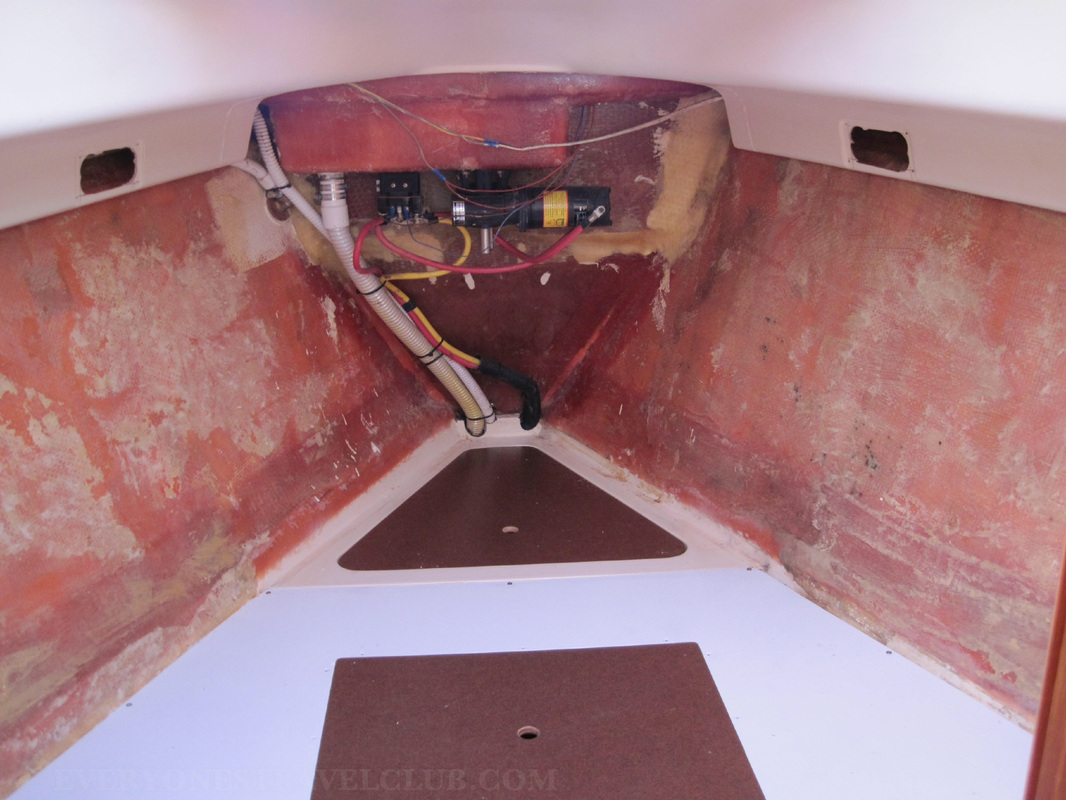
Our v-berth with the old vinyl/insulation walls removed

First, we had to remove the old vinyl/insulation from the v-berth walls. A little sweat, pulling, and scraping and we were down to fiberglass (pic above).

Now, we could of just purchased some new insulation and vinyl, cut and glued, and we'd have been good to go. Where's the drama in that? Who needs the pros, we got this. Time for your first vote!

[poll removed. :( ]


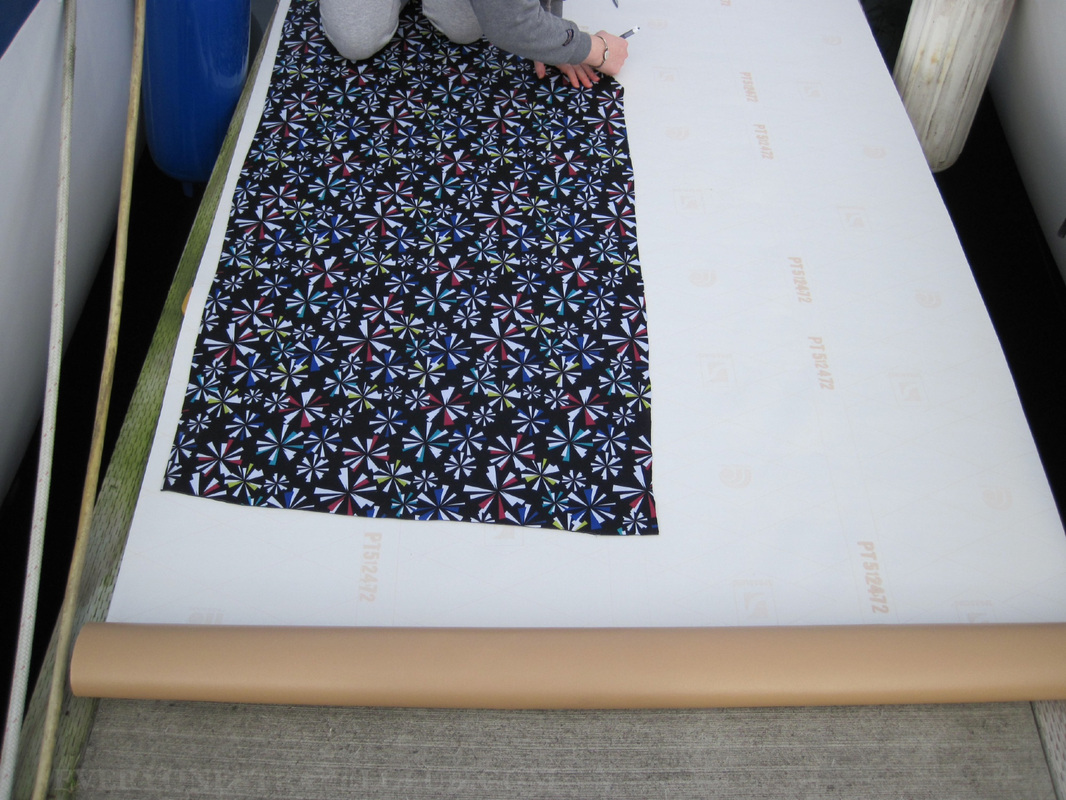
We then purchased some tan marine vinyl on sale with a coupon from Jo-Ann Fabrics and also some crazy looking insulation-type neoprene fabric to take the place of the old foam. We saved tons of money, especially with the coupons (P.S. stuff at Jo-Ann's is always on sale at some point - like 50-70% so be patient, hunt some online coupons, and get a great deal). The cutting was no problem. Then we started looking into glues...and adhesives...and more glues...and more adhesives.

Picture

After much research and glue price checking (it turns out glue is expensive... depending on the glue) we decided to go with some water-based contact cement (from Lowe's). Was this the best choice? Probably not. Was it somewhat affordable? Yes. Does water-based contact cement cause a few less cancers than normal contact cement? We think so.

Here's the thing about glue. It really boils down to nasty, cancer causing ingredients. The more of that stuff, the more flammable perhaps, the better it will stick. We aren't gluing something in the garage here. This is our bedroom...in our house (boat) where we live. Whatever we decided to glue we'd be living where we glued it...while it dries. Something I've learned about myself during boat living over the past year was that I love living on the water, I love sailing, I love my boat, but giving myself cancer just to attach some new walls to my v-berth isn't really worth it.

Price was a factor as well. Great glue often seemed to come in tiny bottles and we were talking about gluing quite a bit of vinyl. Time to vote!
[poll removed. :( ]

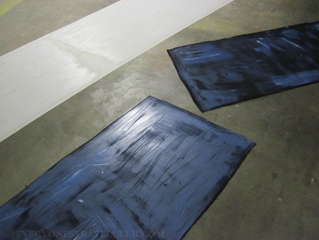
Now for some drama. The contact cement didn't stick. After days of drying, it didn't stick. We had 4 pieces (2 walls with 2 pieces of insulation) of giant fabric with glue on them that didn't stick. The money for the glue - wasted. Time spent - wasted. Now, time to call the pros?

[poll removed. :( ]

We called the pros. They gave us an estimate. Drum roll please. It would cost us roughly $3,000 +. We hung up with the pros and never called them back. For that kinda cash we could afford to screw up multiple times! Next up - us screwing up multiple times...with glue...again.

Despite my best friend's hatred for Gorilla Glue, we purchased some (it's at least affordable) and tested it on a small piece of our each of our fabrics. It worked great. We knew that it expanded upon drying, but that didn't seem to bother the situation. Let's do this!

We added the glue to the fabric pieces in lines - it looked like long strings of spaghetti, winding their way all over the pieces. We set books on top and left it for a day. Well, guess what? The glue expanded. Quite a bit. It stuck great, but when we put the walls up in the v-berth we could see the spaghetti lines all over the place. Grrrrrr!!!

[poll removed. :( ]

We took a little break from the drama. We rolled up the warped vinyl and let the project sit for awhile. Then a little lightbulb turned on in my brain. This type of thing is one of the reasons I like the combination of owning a boat and not being rich - you get creative.

We trashed the vinyl/insulation. We took the unopened can of the water-based contact cement back to Lowe's to get a little money back. We hit up Jo-Ann's again, but this time it wasn't for more vinyl...it was for fabric.


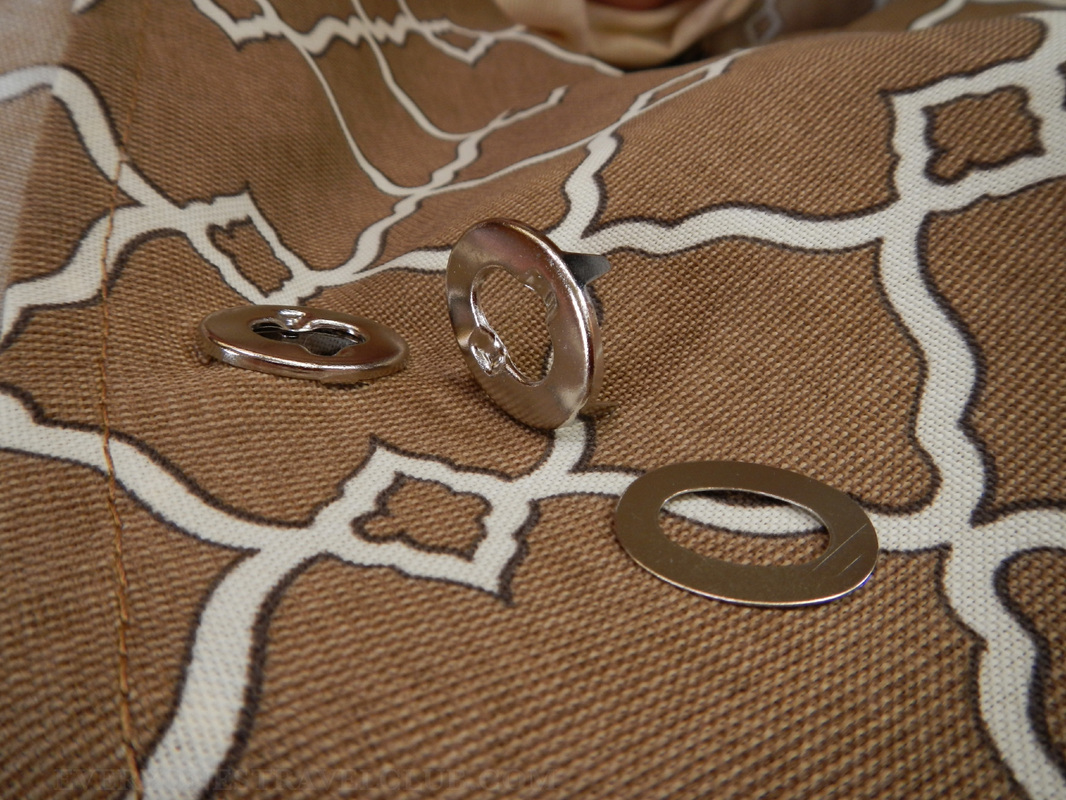
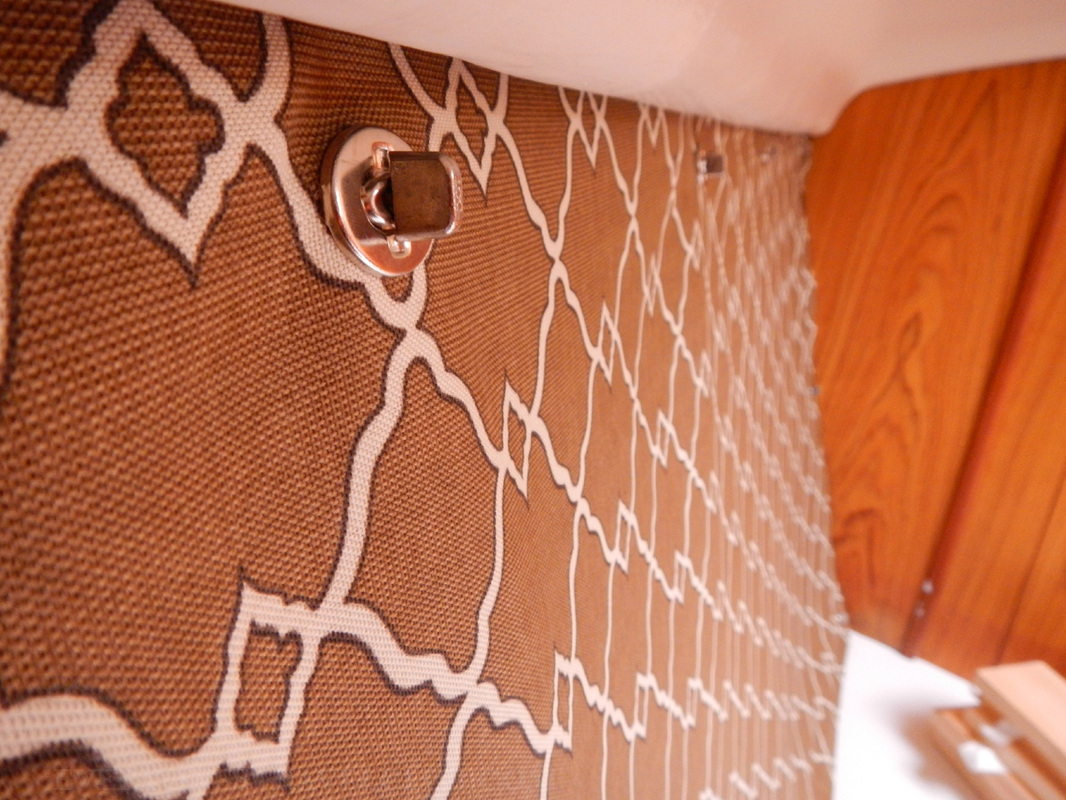
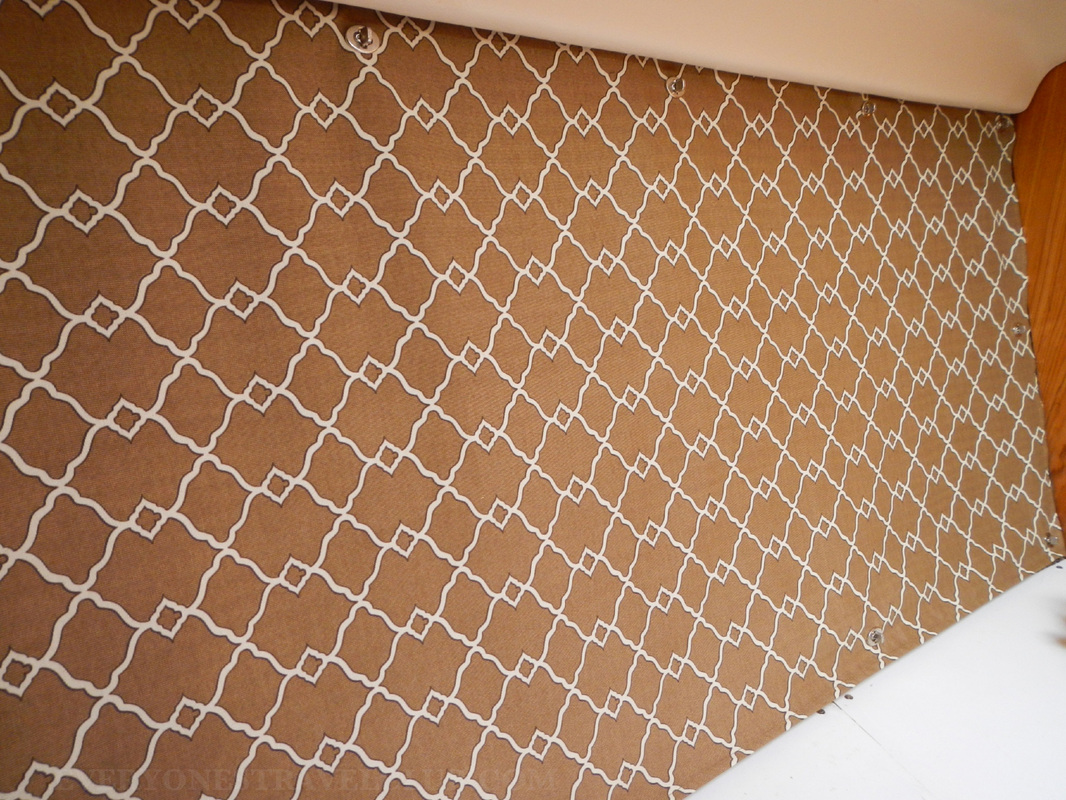
We just so happened to hit a 50% outdoor fabric sale...perfect. We bought some Sunbrella-type fabric and ordered some nautical-sailcover-like fasteners online (they're way cheaper here online). Captain wifey does have a sewing machine aboard, and she worked the seams, edges, (I'm just making up sewing words here) & fasteners. I used a little dab of 4200 epoxy to hold the other side of the fasteners on the v-berth walls ...and...


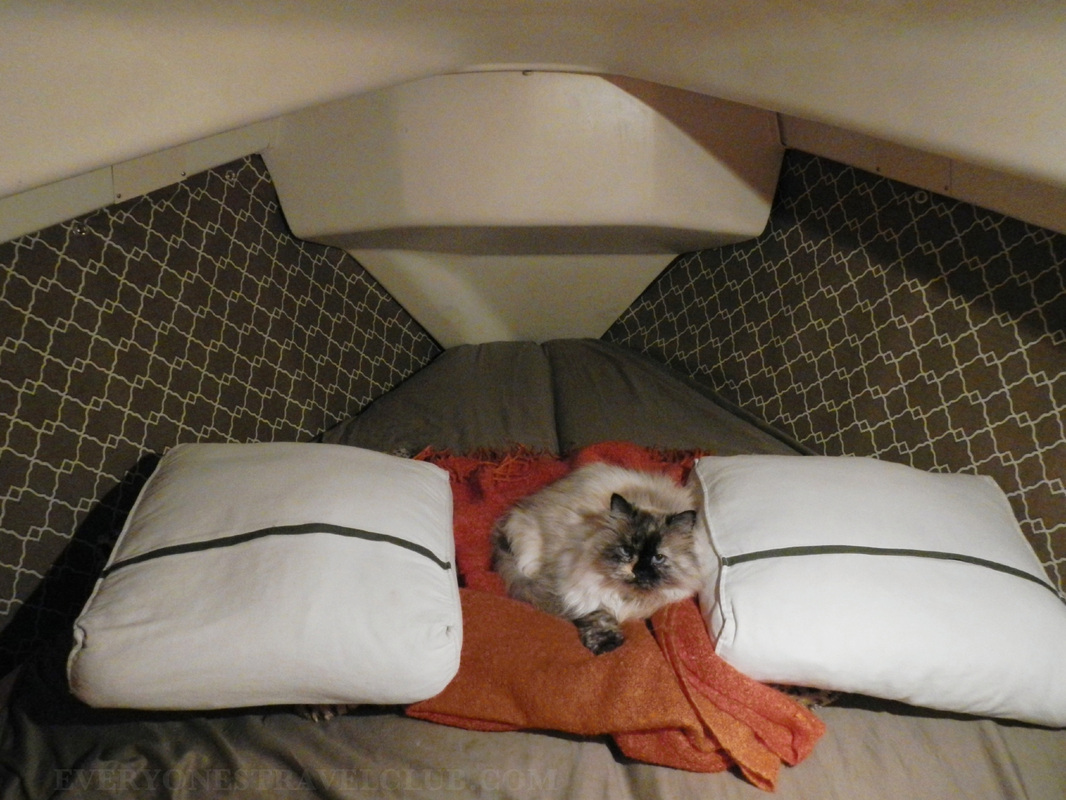
…complete! We're pretty happy with our final product and, despite how your votes end up, happy that we finished the project ourselves. We think the heavy outdoor fabric will hold up nicely. Since the fabric walls are not actually attached to the boat, we can easily remove them if we need to or if we got really bored - change the fabric to suit our interior design needs (I don't see that happening anytime soon…er…ever).

Looking back on the project, we think the Gorilla Glue might have actually worked fine if we would have used a little less and really spread it out. We also decided not to add insulation - we had lived most of the winter without it so it didn't really bother us. I hope you enjoyed our tale, and thanks for voting! Final project (with cat) below.
   ~Paul  & Amber (& Kali below)

Tuesday, September 4, 2012

De-cluttering

Nobody likes clutter - it saps strength from the soul.  And in the small spaces on a boat, clutter is especially telling.  Rick on s/v Cay of Sea uses his carpentry skills to right some galley wrongs:
This has been on the list for a long time.  The cause of “cruising domestic tranquility” made this project rise to the top of the list.  My wife’s frustrations with our single galley drawer finally prevailed, and I set about to make a solution.  The problem with the drawer is that the oddly shaped utensils often jam under the upper edge of the drawer facing, preventing its opening.  With such an easy fix as a utensil holder, this jamming drawer syndrome shouldn’t be tolerated.  So doubtless, you’re already picked up on the word “easy” and skepticism is growing steadily in your minds. You are right, of course, to be skeptical, and this little project was not without its challenge.  If the accommodation is to be “elegant” or “just right” in some way, there will be a challenge to surmount.

Galley Disaster Area


Since bulkhead space is limited, I wanted to use the space next to my galley cabinet adjacent to the bulkhead.  This is the perfect place.

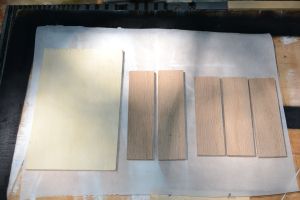
Just not enough bulkhead space for everything, so I wanted to mount the utensil holder on the cabinet across from the bulkhead. That uses that little dead area to the right of the cabinet. Obviously, the holder has to be slender enough to fit.  Accordingly, I used 1/4 inch oak and clear ply stock for materials, cut to length, as shown below.

Sorry about the shadows…

I also used Gorilla glue – which, by the way, is over-kill and messy to boot.  I’m going to stop using it for these little interior projects.  Gorilla glue makes a very strong joint, but it expands and must be scrapped/sanded to get the waste off, and it is difficult to clean up when wet.  There is other waterproof glue that is plenty strong and not nearly so messy.

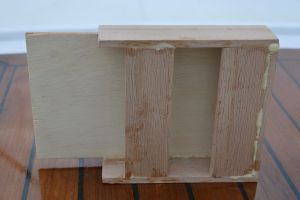
After clamping and gluing, but before cleaning up and varnishing.

 Yes, I see the joint gap top right.  It’s still strong, and won’t be seen when installed.  None of my cuts are ever perfect.

Just a different angle

Varnished and ready to install

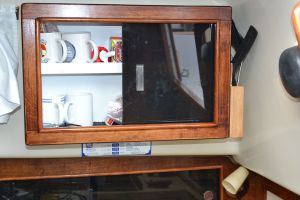
Here it is installed:


Just as I had hoped, it fills the space, and still allows easy access to the utensils


The challenge was the installation.  Of course, it was not possible to drill holes from the outside of the cabinet, so the holes had to be made from inside.  The drill didn’t fit inside very well.  Side to side was okay, but the handle of the drill hit the top shelf of the cabinet.  Then I had to operate the trigger with my thumb, and somehow apply enough pressure to make the holes.  Challenges notwithstanding, I managed to drill three holes where only two were needed.

This is the way all my projects go. . .

Here’s a photo of the draw withOUT all the utensils.  Better, huh?  Hopefully Ruth will think so too. Hopefully, she won’t ask me why we have three can openers.


It’s because all 3 work badly. You might need the extras when the other two won’t finish opening the can. I need to buy one of those OXO openers. They always work, but I don’t think it will fit in the drawer . . .