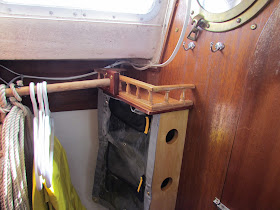
Our hanging locker is the most under-utilized space on the boat. No shelves, just a rod makes it's functionality limited....Indeed!
... I wanted to improve the utility of this lost space, so I built a hanging shelf and added an organizer. Remember the pin rail I built last month? This is where it was put to use. Now there is a place for stuff that doesn't fit anywhere else.
It was HOT work. The weather has been unusually and enjoyably warm, but with both doors closed allowing my overfed self access to the locker, it made for a stifling environment. Time to go sailing.
Life aboard is living large, in a small space. Every boat owner has found ways to make life in that small space easier, more comfortable, more convenient. The idea behind this site is to provide a place where these ideas can be shared amongst the boating community. To participate, send your contribution to SmallBoatProjects at gmail dot com.
Pages
▼
Tuesday, June 26, 2012
Closet augmentation
Over at Dock Six Brian continues to use his carpentry skills to fine-tune the interior of s/v Whiskeyjack:
Thursday, June 21, 2012
Dinghy Build (Part three)
It's not often that we get a retrospective on a project. But Kyle of Of Winds and Water breaks that mold with this post, showing how his stitch 'n glue dinghy has fared, some 3000 miles later:
Back in January, Kyle and I told you all about how we built a dinghy out of plywood, epoxy and bright paint. Here's how it worked out:
After putting a couple thousand miles under the keel, our homemade dinghy has definitely seen some sights. And better days, I might add. I would like to point out that just Sunday afternoon some grown women were screaming in admiration of my paint job, and they didn't even see it in its full magenta glory.(Part I of the series is here, and Part II is here.)
Home again - 7.20.2010 Despite the strength of the epoxy, in rougher waves the docks still took quite a toll on "Dinghalicious" (I swear, Kyle came up with that. To this day, we still refer to her affectionately as 'Liscious). One thing that we considered when building the dinghy is adding a second sheet of plywood to the bow. As you can see, it would have been extremely beneficial. While we were in Oriental, the dinghy could just slip under the dock, then a few waves sent the brunt of the force to the middle of the bow.
Maiden voyage - 1.20.2010
We had even put some pool noodles on 'Liscious to combat the brutal dinghy dock in Oriental, but by the time we left, you can see the bow was still looking a little sad. Right now all we have left is the stern noodle, and it disintegrates on whoever leans against it (usually me. It took me quite a while to figure out why I had blue stuff all over my back and shorts whenever we were walking around town).
These are all pretty cosmetic, nothing substantially structure-related. Our worst problem, by far and above, was oar locks. If you are going with a rowboat, shell out the extra cash and get some good oarlocks. If you have to row a half mile, crossing a busy channel at night, you don't want to risk shearing off an oarlock and having to row canoe-style the rest of the way to the boat. We started out with clamp-on oarlocks. Those twisted, which made rowing nearly impossible. Next we tried U-style oarlocks, and those both sheared off right below the U (and this always happens where you're about halfway between the dock and the boat).
The original oarlock sockets were on the brink of failure by the end of the trip, but they were still holding. On one oar, we have half of each original clamp-on oarlock (almost too twisted to row with), and on the other we have a combination of hose clamps through which we put a ratchet extension. We've been through a couple hose clamps on that too.
Oh, and also, we managed to accrue a few barnacles whilst sitting in Titusville for a couple weeks.
The dinghy is alive!
Finally, we've made some serious decisions about "next time." Next time, we are building a sailing dinghy - too much fun, and only a little more work. We actually saw the sailing version of our dinghy while we were in Titusville, FL. It would be a lot of work to modify our current dinghy, plus she's a little beat up already so we would just build a new one. And next time, we're bringing an outboard. Maybe it will just be a little electric trolling motor, but dangit, we're going to have one. Some of those anchorages are just too far from the dock to row.
And to top all this off, Kyle went to a job interview today, and he starts work at 8am tomorrow! That is extremely good news, plus he'll be working at a marine electronics company so he still gets to work on boats every day. I've had one interview already that I'm waiting to hear back on, and I am keeping on top of the job listings. If anyone needs a mechanical engineer, I need a job - maybe we can work something out :P
Tuesday, June 19, 2012
Making new fiberglass parts
Ever damage a fiberglass part and wonder how you were going to find a replacement? No worries; Mike of s/v Chalice shows us how to make that part:
So, you want to enter the world on making parts out of fiberglass or FRP.
Easy right? Maybe, maybe not. The easy part is making the finished part. The hardest part is making the plug. Plug? Whats a plug? The plug is a representation of the actual part you wish to make. It may be complicated or simple. Either way, it will involve a lot of work. In order of hardest to easiest to do: plug-mold-part.
First you need to Either draw up the part or build it. Then you have to allow for shrinkage based on the resin you will use and thickness of part. These formulas can be found on the internet.Then you have to allow for a way to make the part removable from the plug and mold. So relief has to be planed in or a take apart mold must be made.
Take a look at some part on your boat to get an idea of what I mean. By the way you might want a shiny part, so there will be a lot of polishing. A little secret to get this shiny is cover it in several coats of resin so you have something to shine/polish. Do this after all tooling work and sanding is done.
So, here I am going to show an example of a part I needed. I need to make a ring for the bronze ports in my aft cabin. I could not find bronze rings that would fit, so I made some in FRP. Here is a pictorial of the process.
Make a plug.
From Update 4-3-2012 You will notice that only the place that is shiny is the actual ring, the rest of the plug is just to hold the ring and provide a flange.
From Update 4-3-2012
Then make the mold the part will come from. Provide some support for it as it will be used a lot if you your going to make multiple parts, which is the beauty of this process. This will be a time consuming project.
From Update 4-3-2012 What looks like something peeling from the inside of the mold is just mold release. It washes off. Next we trim it up and check it. The red/orange gelcoat is a tooling gelcoat. It is a little tougher, made for repeated usage. Remember you may at some point need to repair your mold. If it becomes really bad then make a new one from your plug. ALWAYS save your plug and use care when storing it. Then apply several coats of wax to it and mold release (PVA). This was also done to the plug.
From Update 4-3-2012
Pick your gelcoat color then add your cloth and resin and make a part. Note: your part will have a much nicer finish if you spray your gelcoat. Buy a cheap gun from Harbor Freight.
From Update 4-3-2012
From Update 4-3-2012
The white ring at the bottom is the finished part. Later I will show them installed.

From Update 4-3-2012
Thursday, June 14, 2012
To the rescue!
Steve and Lulu on s/v Siempre Sabado explain why we all should have a roll of Rescue Tape on board:
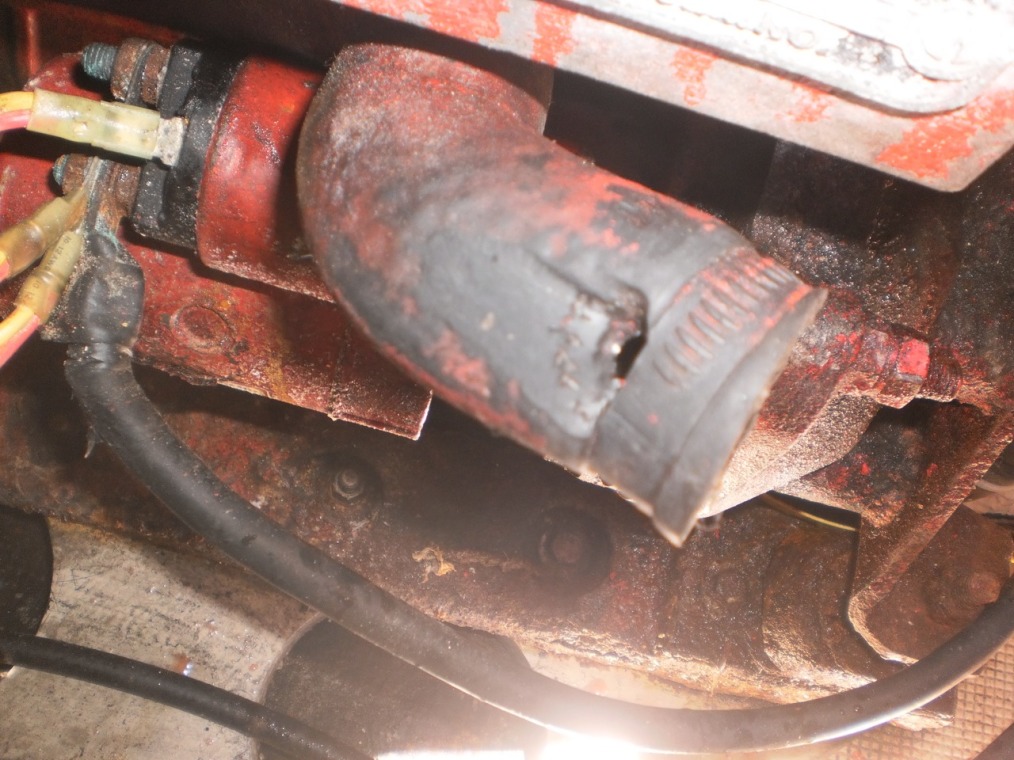
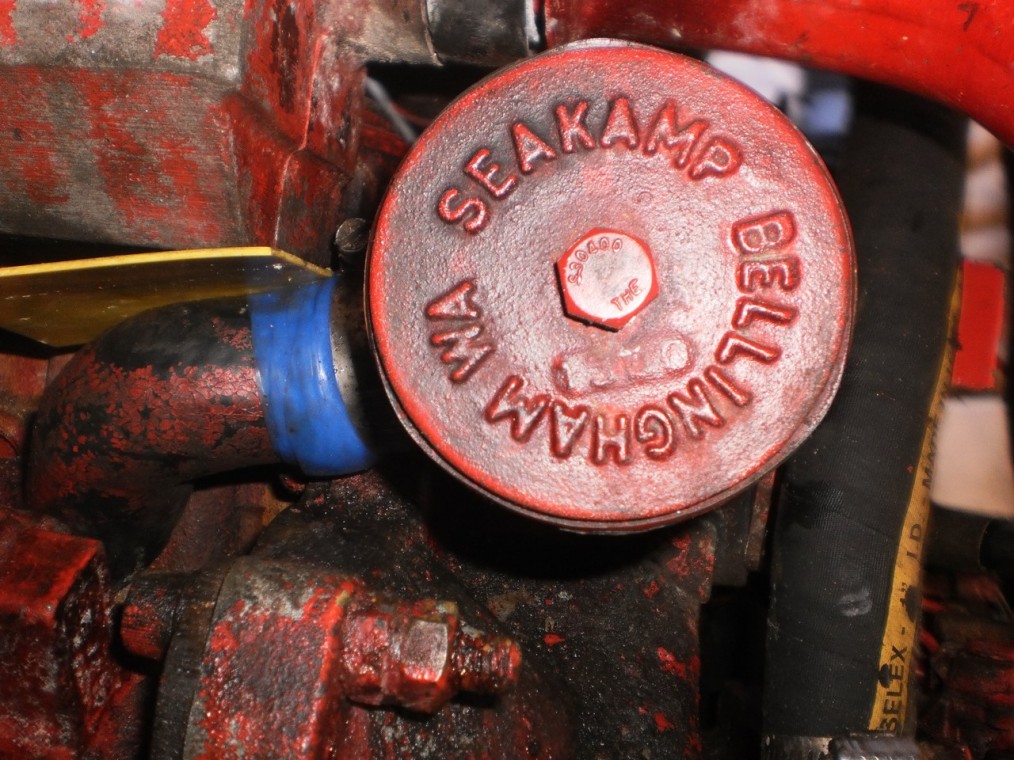
We’ve been losing antifreeze every time we run the engine for some time now. The engine has never overheated as a result but this was obviously something that needed attention. Since we have some time here in the marina, today seemed like the day to tackle the problem.Do you have a roll in your toolbox?
I was a little concerned that maybe there were holes in my heat exchanger that were pumping antifreeze out to sea and then cooling the engine with sea water. But, after what I found today, I think my heat exchanger is just fine. However, all the coolant hoses weren’t.
There are more damn places on this engine for a hose to rub and develop a hole. In this case, the hose was rubbing on the lower corner of the coolant reservoir. And what a nice leaky hole it was.
This hose runs from the heat exchanger back to the water pump on the front of the engine. It’s a very specialized shape and I had my doubts about finding a replacement here in Puerto Peñasco. So, what to do? I KNOW! Rescue Tape to the rescue! Again! I wrapped the end of the hose, including the hole in about 5 layers of Rescue Tape which forms a solid piece of heat and pressure resistant rubber when it cures. Then, for good measure, I inserted a piece of a plastic “keep off the grass” sign I bought some time ago as a barrier between the corner of the reservoir and the hose.
I have now added a full complement of coolant hoses to our “get-it-while-in-the-States” list.
Tuesday, June 12, 2012
Fun with Sharp Pointy Objects
This is one of those old, simple tools from 50 years ago that are still being made right here in the US of A. Brian down at Dock Six introduces us to the Speedy Stitcher. I have just bought one of these tools and had planned to do a write up about it but Brian beat me to it (and he did a better job than I would have anyway). Here's Brian:
I wonder why Brian keeps repeating, "KEEP YOUR FINGERS OUT OF THE WAY!"
Note: You'll probably want a few of the fine (#4) needles too... get 'em at the same time and save on shipping.
Boats have lots of soft stuff that can be hard to fix, and often when the bimini canvas tears or the seams split or the stitching disintegrates it needs to be fixed sooner rather than later. But it can be tough to find room on a small boat for a sewing machine and even tougher to find room to use it. Our old friends at Lee Valley Tools have the answer for quick and dirty on-the-water mending: The Speedy Stitcher Sewing Awl
Made in the USA, the Speedy Stitcher is a self-contained heavy sewing kit. The polished wooden handle contains a curved #8 needle, a straight # 8 needle and a bobbin loaded with waxed synthetic thread.
It is dead simple to use. Unscrew the chuck, select the desired needle, install it and pull some thread around ...oh, hell, here's the instructions .
Our low-buck sunshade's stitching was stitched no longer, so it was a good candidate to demonstrate the Speedy Stitcher at work.
Step 1-To start, push the loaded awl through the work. pull through enough thread to span the offending mending, with an extra 3" or so. KEEP YOUR FINGERS OUT OF THE WAY!
Step 2. Pull the awl back through,keeping the free end of line on the other side of the work, then punch it through again, remembering to KEEP YOUR FINGERS OUT OF THE WAY!
...pulling it back slightly so there is a loop. Push the free end from step 1 through the loop.
...like this...
Then pull the awl back through, and snug the loop down tight, creating a lock stitch.
Move the awl over slightly, and repeat the three steps. Keep repeating until you run out of room.Keep remembering to KEEP YOUR FINGERS OUT OF THE WAY! Practice makes perfect, and even novice Speedy Stitchers like me can produce work that, while not real pretty, is at least sturdy. And it IS Speedy- even including set-up time the mending job seen below took less than 10 minutes. It would take at least three times that long to take it to the canvas shop up the river, although the result would be five times (or more) as pretty.
The Speedy Stitcher also comes in handy whipping the ends of lines. It's less than $15- you may not need it often, but when you need it you may really need it. It's well built, durable, and does exactly what it is supposed to do. The included instructions are clear and easy to follow. I have had mine four four years and it has paid for itself numerous times over.
I wonder why Brian keeps repeating, "KEEP YOUR FINGERS OUT OF THE WAY!"
Note: You'll probably want a few of the fine (#4) needles too... get 'em at the same time and save on shipping.
Thursday, June 7, 2012
Companionway Seat/Table
I can't show this one to my kids, because they heard me too often enjoining them to not sit on the top step in the companionway because they blocked access to the cabin. Scott on s/v Valkier has made a clever addition to his companionway which solves the problem:
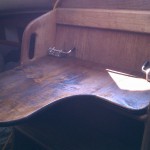
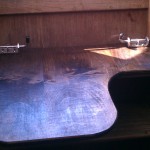
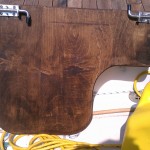
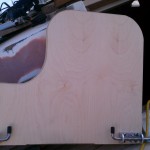
I first saw this table/seat in a newsletter I get from Steve Roberts of the Nomadnes report (his http://nomadness.com ) I modified it slightly to fit how we wanted to use it,by doing a cutout on the right side as you face it in the companionway. This allows for someone to climb up or down the companionway with the table installed. Our companionway is fairly wide so it still left plenty of space for a usable table surface. In mounting it we drilled holes at every step from bottom to top so that the table could be used for multiple tasks at different levels.
So far we have used it for several things
The materials used cost about 30 dollars. We purchased the stainless trailer latches that Steve used in his table from etrailer.com and I had purchased a 3/4 inch sheet of birch plywood to repair the companionway hatch and just made the table with a small piece of the left over birch plywood. The latches were about 15 dollars each including shipping and the plywood was extra that was laying around. I could have purchased a small section 2×2 ft at home depot for 20 dollars or so for the nice birch hardwood ply,or used something a bit cheaper.
- It has freed up the space over the fridge that normally holds utensils,mixing bowls of ingredients etc.. and has given me much better access to the fridge when working in the galley. Mostly I use it in the top step of the companionway for this. For me it is at chest height. My wife who is shorter might use it in the step below that to be more comfortable for her. I intend to install some removable fiddle boards for when at sea eventually so that we will be able to use it then also.
- It works as an extra seat in the second from the bottom step. We haven’t created a cushion for it yet but intend to create one that has flaps that fold down and under the table to attach to some velcro or snaps on the bottom of the table. This way the attachment won’t affect the work surface on top when the cushion isn’t in place.
- I had to replace a filter under the galley sink that faces the companionway. At 6’2″it has always been a very difficult process for me to try and kneel in the small floor area there and reach under the sink to work. I found that with the seat/table on the lowest step that I could comfortably sit on it and lean forward and access that area with ease.
- Though our pilot berth is for now mostly a repository of parts and tools,at some point we will reclaim it as usable living space. I can envision having the table/seat in place on the step that is at the same level as the pilot berth and being used as a table for someone laying there reading. Maybe to hold a plate or cup.
- Our 14 month old daughter has developed significant climbing ability.
Our companion way is approx. 5ft tall and very steep and ladder like yet she can now climb it in less time than it takes to read this. In looking at the table my wife realized that if we drilled mounting holes at the front of the step we could flip the table up vertically so that it covers the bottom step and that it would extend high enough to limit our daughters ability to step up on the first step and climb the companionway. I’m sure it won’t work long as she grows but it turned out to be a elegant solution with something we had already built.
only two more holes to be drilled

Tools used were a jig saw,router and sander to cut out wood and shape the edges. Painted with stain to make it as close as I could to the companionway color and then sealing it with penetrating epoxy. I plan on painting it again with a clear polyurethane at some point when I have some out for another project. I cut the board about 1/2 inch less in width than the inside dimensions of the companionway steps so that it would easily slide into the steps. With the board all the way in after I had mounted the latches I took and used a pencil to trace where the shafts on the latches touched the side rails of the companionway. Then used a 1 inch drill bit if I remember correctly to drill holes right and left on each step so that I could use the table at any level. Double check the drill size if doing this to the shaft size. There is very little to no slop in my installation so that there isn’t much if any movement of the table.
Scott Carle
s/v Valkyr
Downeaster 38
http://www.downeasteryachts.com
http://scottcarle.com/wordpress
A few pictures of the finished product in use
Tuesday, June 5, 2012
We'll table this
Over at Dock Six, Brian continues to add improvements to s/v Whiskeyjack:
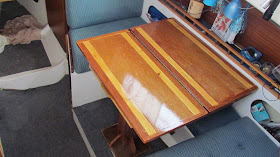
Our dinette layout was great for playing chess, but not conducive for watching a movie, or entertaining more than, er, us.
Remember the Crap/Stuff Extravaganza ?
Measure up some (s)crap, cut, glue, screw, staple, curse, swear, bleed, recut, rescrew, and...
... A little bit of work creates a lot more accommodation flexibility. The vestigial horseshoe settee and small table makes more seating possible, while a quick fold makes the big table appear for more eating/workspace.

