Pages

Friday, October 31, 2014

On The Opening Of Ports

This post originally appeared on Windborne in Puget Sound

One of Eolian's two Previous Owners outfitted her opening ports with curtains.  In order to hang them, he used an extruded aluminum curtain track that was available at the time - the same track, as a matter of fact, that the factory used to hang the shower curtains in the heads.  But on two of the aft cabin ports, the installed track interfered with an overhead beam, preventing the complete opening of the ports.  (These are not the original curtains; they are the curtains that Jane made back in 1989, one of her "make the boat mine" projects.)

Original setup only opens part way
Unfortunately, the only fittings available at the time for attaching the curtain extrusions were these (now rusty) steel spring clips, which he installed by wiring them to the port hinges.

Rusty steel attachment clip, wired on
While making a recent Sailrite order (I must do a post on this wonderful company sometime soon!), I found that they carried three forms of the curtain track:
  • one like the ones used on Eolian,
  • one designed for mounting to a vertical surface,
  • and one designed for mounting to a horizontal surface.
It was the last one of these that caught my eye.  With a little modification, a piece of this track could be used to mount the curtain track to the port in a much lower position...  that would allow the ports to open quite a bit further!  So I included a piece of this track in that order.

A little work with a hacksaw cut two pieces of tracks to length, and then removed the mounting flange from their ends so that they could be mounted to the port lens:

Hacksaw hack
Then I drilled holes in the track flange and matching holes in the port lens.  Using a couple of 3/4" 6-32 SS screws and nylock nuts, I attached the track to the under side of the top flange of the port lens:

Better than a wired-on rusty steel clip
The port now opens almost completely!

Open wide!
Look Ma!  No wires!
And yes, it looks a lot better.  Eolian has six more ports for which this treatment should be done, tho none of them have overhead interferences... doing the work would only serve to improve the professionalism of the interior finish.  So, yeah, that means that I will do them, but not as a high priority task.  There will be another piece of track in the next Sailrite order.

Wednesday, October 29, 2014

Fresh Water Flush--a Miniature Water Closet?

Over at Sail Delmarva Drew has had a wonderful idea! Why not flush with fresh water - if only while at the dock (and let's be realistic here - most boats are at the dock the majority of the time):
Seawater contains bacteria and sulfate. Flush with seawater, deprive the bacteria of oxygen for long, and facilitative (those that can go aerobic or anaerobic) start using sulfate (SO4-) as an electron source. The result is H2S (rotten eggs) and the head stinks. The cure? Either use the head every 8 hours (thus, smell is not a problem when living aboard or actively cruising) or flush with fresh water.

But you can just plug the freshwater pipe into a manual head; water will blow through, flooding the compartment, and bugs can swim up-stream. The water closet, introduced a century ago, prevents both by employing a float valve and creating an air gap (bacteria can't fly, as a rule).

What about a miniature water closet? $38 from McMaster Carr


Made for commercial ice machines, this unit holds enough to flush 3' of 1.5 inch line--not enough for most manual heads--and refills at 0.33 gpm, or about 1:20 seconds per full flush (12 strokes or so). Clearly, a larger size, holding about 60 cubic inches, is what is needed. It could also be expanded by mounting a 1-3' length of 3" pipe under it to serve as a reservoir (4' of hose can be flushed for every 1' of 3" pipe). Mount it to a bulkhead somewhere handy and you should be good to go. A pair of valves would allow switching from seawater and isolation.

But I haven't tried it. I'm happy enough with sea flush and a rinse with potable using the shower head before going home.

Thursday, October 23, 2014

Making Space

When you live aboard, storage is a premium.  Aboard s/v Painkiller, Ken & Vicky discovered some hidden space that they converted to storage:
Ever since moving aboard PAINKILLER we've been seeking out additional storage that can be utilized without too much difficulty. Not that we're collecting more and more stuff to fill up these places but to actually have more room to stockpile needed supplies while travelling.

We're actually planning one more trip to the storage unit with a huge hunk of stuff not really needed, too many fenders, an extra holding tank, jugs and quite a large pile of left over stuff from the previous owner that we thought, maybe we'll want it later. Nah! we'll be fine without it.


Having a shower in itself is a huge storage area of things that can be easily removed for shower use, but this space that was buried behind the outboard wall is too good to waste. It really is huge as it follows the hull all the way down.


A jig saw easily cut through the fiberglass after drawing from the template then a simple gasketed deck hatch gave us another huge dry storage area. A simple job yielding many cubic feet of storage.

Tuesday, October 21, 2014

Low-Buck Projectapalooza

Over at Dock 6, Brian has experienced those two best days of boat ownership:
  • The day he sold his boat
  • The day he bought his new boat
And of course, with a new boat, there are lots of, erm..., opportunities.  Read along with Brian as he makes NextBoat his own:

  "Yes, I'm workin' all the time..."
                                        -Rush


The stages of New/Old Boat ownership:

       Stage 1. Admiration stage- admire how much roomier (or prettier or shinier or faster or just plain better your New/Old Boat is than your Old/Old Boat.)

                Stage 2. Installation stage- Start installing stuff.  Begins approximately 7 minutes after the onset of Stage 1.
Stage 2 never, ever stops.

If you have bought the right boat, the first stage never stops, either.

Having lived with and aboard NextBoat for almost 3 months, much Low-Buckness, and some Mid-Buckness, has ensued.

For those of you still following along, (thanks!) you know the story.  For those who just stumbled into this meandering morass of a blog, here’s the short version: 
We owned a boat, wanted a slightly bigger boat, found a bigger boat, bought a bigger boat, sold the slightly smaller boat…

Now we are pouring money and time and effort into the slightly bigger boat. 

And enjoying every minute of it.

The upside of NextBoat is that she had been well maintained by two previous owners.  The downside is that there were few upgrades, and some gear that we consider necessities  was missing entirely.  Like, oh….

A compass.

Didn’t have one. 

Apparently, never had one since new- the binnacle was as smooth and unblemished as a baby’s transom.

We'll come back to that later.

So, after peering into the purse  and seeing the present paucity of pennies, (prolonging our  perpetual pondering of whether we are presently poverty stricken or penurious,)  providence presently allowed us to press the button on a plenitude of purchases, provided by the profits of this profligate’s penmanship.

In other words, I got paid for some scribbles.  Cool. 

So, with cash in hand, we got all Bugs Bunny and Road Runner on the boat.
(Okay, come on, I can’t be the only one who remembers the theme to the “Bugs Bunny and Road Runner Hour”?  Come on, sing it with me, “….On with the show, this is it…”)
er...
*turns the Obscure Weirdness dial down to 7*

A flurry of mouseclicks and credit card approvals and straight-up hand-to- hand cash transfers later, we had a whole bunch of new stuff to stuff aboard our new ride.
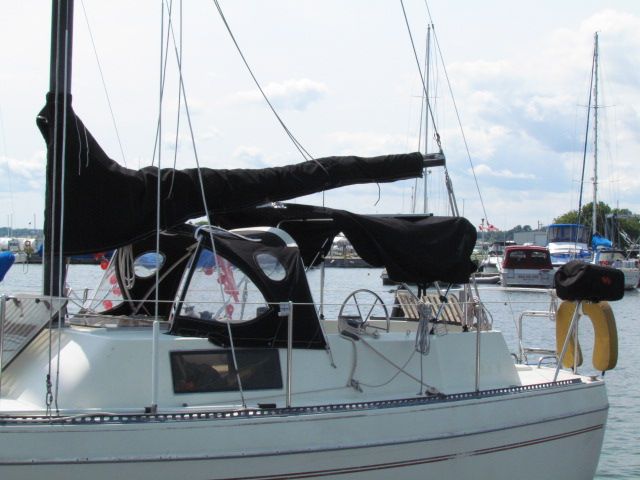
SWMBO is a ginger, and with a redhead’s propensity to burst into flames upon exposure to sunlight, she immediately noted that NextBoat lacked cockpit canvas of any sort.  A shadeless boat with a redhead aboard is an unhappy boat for all aboard.  Luckily, a beaten and battered and unused-by-the-previous-owners dodger was included in the purchase.

It needed help. 

Canadian Canvas Works underpromised and overdelivered,  restitching the entire top in less than 48 hours. 

The skipper of Cyclone sold us a languishing bimini from his currently-for-sale S2 8.0A, and with a little cutting and sweating we soon had a comfortable cockpit.


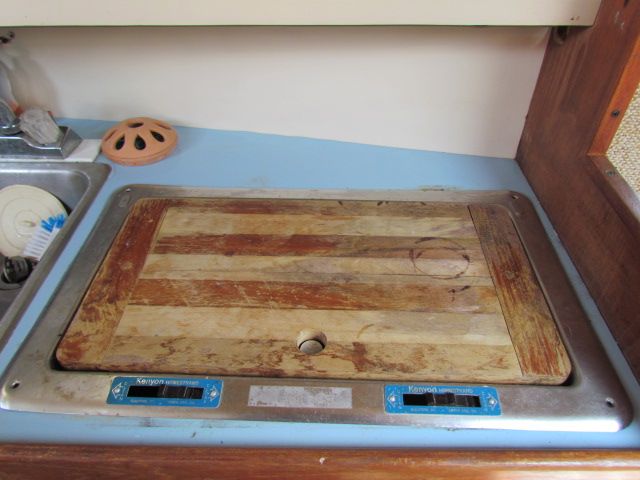
The stove that came with the boat had to go.  Kenyon Homestrand pressurized alcohol stoves may have worked just fine when new, but 30+ years later….

…  not so much.

The scary quotient, however,  had increased considerably.

After following the less-than-simple lighting instructions, ( Pump tank of flammable fuel, tunr burner valve to introduce flammmable fuel to burner, close burner valve, light flammable fuel,  let it burn out, then reopen valve and relight ) we inevitably faced a *WOOF* of ignition, resulting in burners with flames that had only one setting- Total Conflagration.


Seriously, the few attempts at using this DeathBlaster stove to create Two Burner Tastiness resulted in singed entrees trailing the faint odor of burnt eyebrows.

A quick click to Binnacle.com got us a great deal on a Cookmate non-pressurized alcohol stove.  Under $250, including shipping.


  Installation took less than a half hour, and the result is incredibly satisfactory.


 Great temperature control, easy to light,  and the  burner capacity is measured in weeks, not hours. 6 weeks of regular use have borne out the value of this investment.

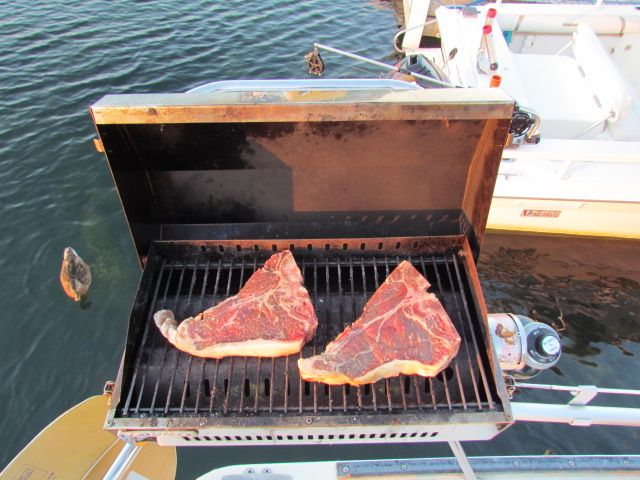
Further, we have upped the culinary ante by permanently installing the Kuuma Stow-n Go propane grille we bought during our first season aboard Whiskeyjack, but rarely used.


We have used this grille more this season than in the past 6 seasons combined.

Which means we are using more propane.

Which presents another challenge:  Storage.

The one drawback to this center cockpit layout is that it eliminates all cockpit storage- no lockers, or lazarettes or cubbies on deck at all.  I had no desire to store 1 lb.  propane cylinders in the cabin, so a solution was required.

A quick trip to Home Hardware  netted  2 feet of 6" PVC pipe, an end cap, a cleanout, and a couple of hose clamps.  Less than $25 later, we were able to store 3 propane bottles on deck safely.

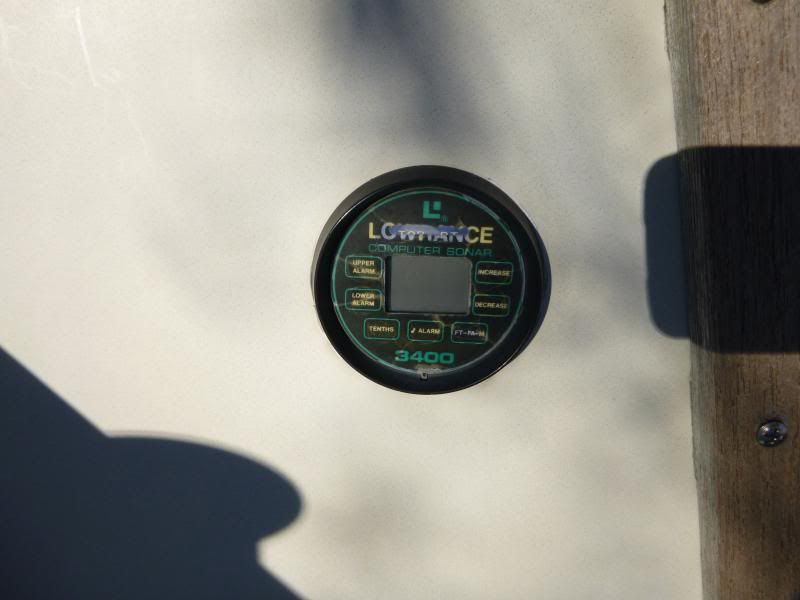
   So, back to that no-compass thing:  The existing cockpit instrumentation on NextBoat consisted of an inoperable Lowrance depth gauge.


That’s it.


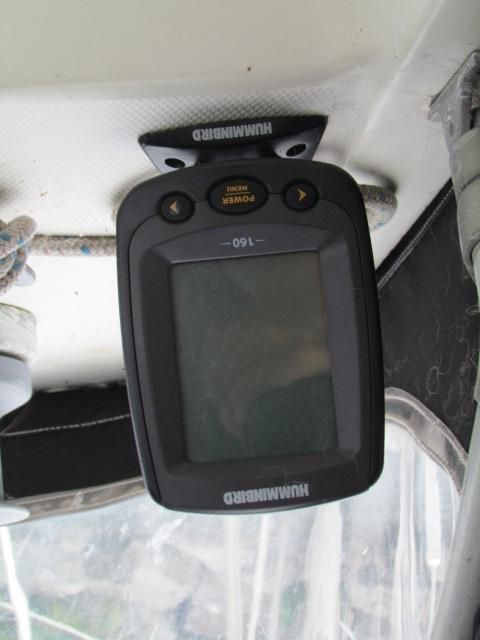
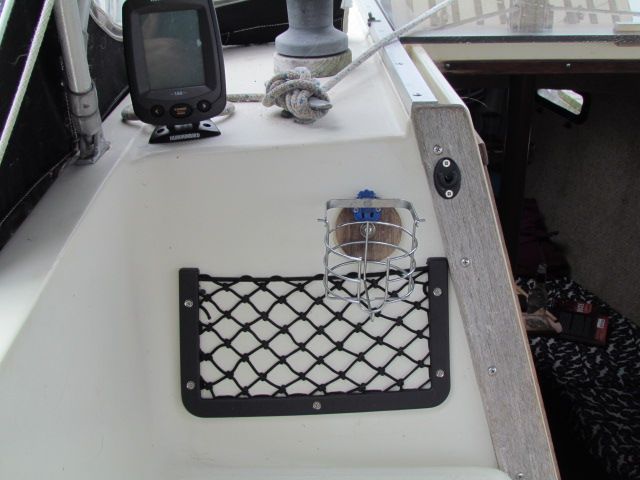
A  quick trip to Dovercraft Marine  netted us a Humminbird 160 fishfinder  for $80.  Some headscratching on where to locate the transducer and how to route the cables  and roughly an hour or so of sweating and drilling and and wiring later, we not only had depth display, but water temperature as well.


Back to that absence- of -cockpit- storage issue:
 I picked up a couple of these mesh map pockets a half decade ago, and finally got around to using one!  Very handy for books, sunscreen, sunglasses, all the stuff that would otherwise end up in the way.


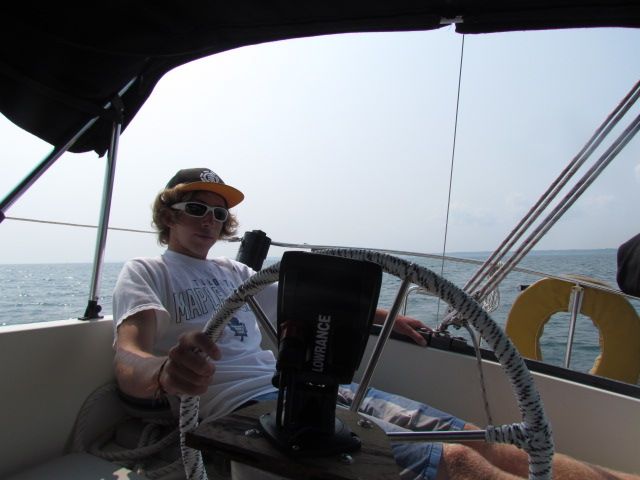
With depth out of the way, time to deal with the compass issue.  I opted to go with a small handheld compass as a backup to a small Lowrance chartplotter at the helm, from Radioworld.

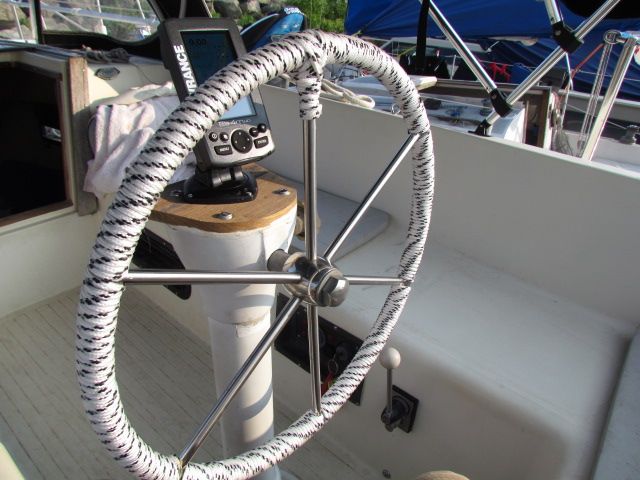
   I LOVE these things.  Lowrance "Gold" plotters include a 2 gig Navionics chart card,  and the plotter we had on Whiskeyjack never let us down.  The seated helm position on NextBoat makes the 4"ish screen size practical,  and, though small,  the screen is easy to read, the controls are intuitive and the menus easy to understand. The included mount swivels and tilts, making it viewable from anywhere in the cockpit....

...even if you are a slacker teenager, as Jordan demonstrates:


  $250 well spent.

  $3 worth of 1/4" line and an hour or so of time dressed up the wheel...


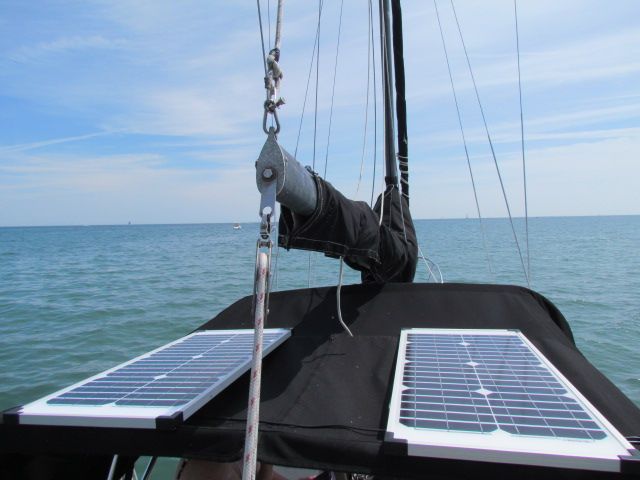
All of this new electrical gear requires improved electrical charging management-  Two $99 40 watt solar panel/ 7 amp charge controller kits from Canadian Tire were installed to charge the battery bank.  When docked, or flat water motoring, the panels live on the bimini-


 When the wind picks up, they migrate to the aft deck.  An upcoming project is to sew pockets into the bimini to secure these lightweight panels up there full time.

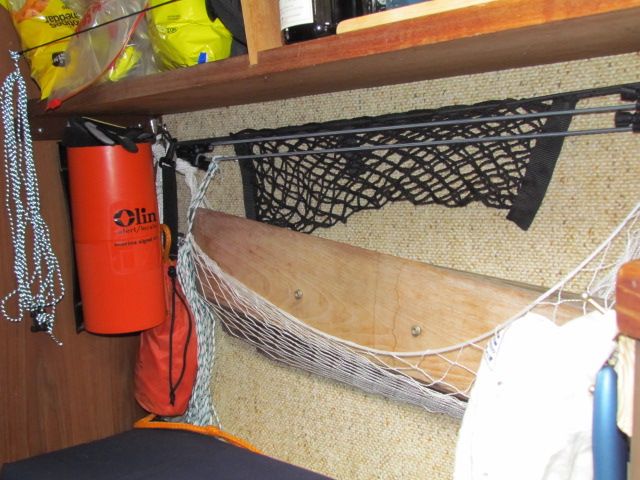
   Down below, hammocks were hung and bungies were strung and non-skid mats were laid to keep everything that has a place, in it's place.


The settee-berth did not have a table, although there was one installed at some point in the past:


A while back some of the stuff that James was clearing out of his boat shed ended up in my boat shed.  Among the assortment of stuff was a table base and post.  a little  plywood and edgebanding later, we now have a salon table:


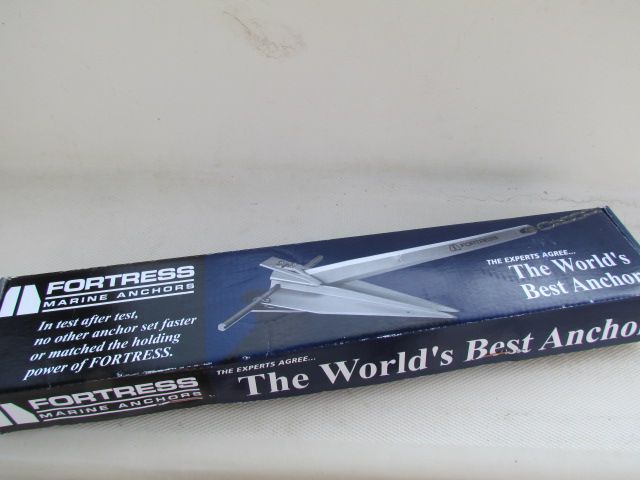
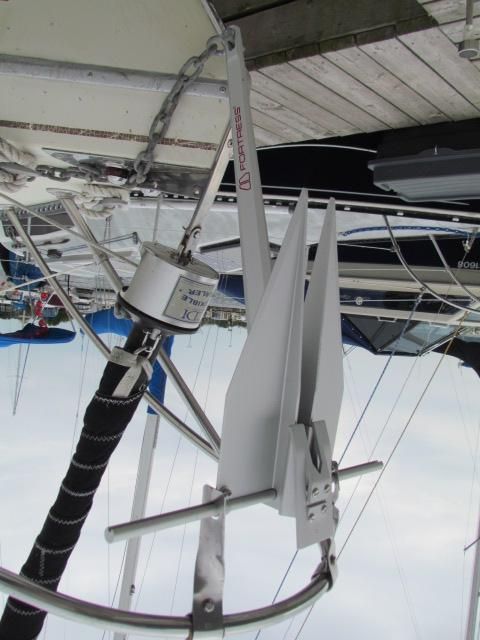
   We managed to bend the shank on the anchor that came with NextBoat, and decided this was an opportunity to reduce weight on the bow and make anchoring a less strenuous task for the crew on the foredeck, by replacing the current steel anchor with an aluminum Fortress anchor....


...which requires assembly.


slightly larger flukes, slightly longer shank, half the weight of the previous anchor should make anchor launching and retrieving easier.

  We'll let you know how it goes.

Last but not least, a quick little project with a big "why didn't they do this from the factory?"  factor:
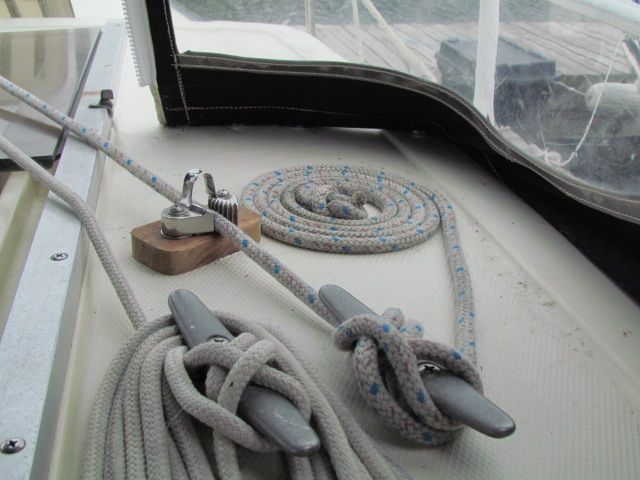
There are no clutches on the cabin top, and the only cleats are horn cleats...

 which leave much to be desired when it comes to tying off halyards.  You get a couple of wraps on the winch to get a full pull on the mainsail halyard, only to lose tension when you try to secure the halyard around the cleat, leaving you with a baggy sail.

  We installed a cam cleat ahead of the horn cleat. No more baggy sails for us!

We also ran the mainsail reefing line to the coachroof, enabling us to reef the main without having to leave the cockpit.

Finally, we made life easier for the mutts.  We carpeted the companionway ladder, to make it easier for them to climb/descend.


Ellie demonstrates that she now has ample room to run around.
Lots more projects ahead, lots more work to do, but, she's getting there.
 She is becoming a home.

"Talk the Dock!"


Thursday, October 16, 2014

Flat Stowage With Canvas

Large-format chart books frequently pose a storage problem.  Aboard s/v Cay of Sea Ruth has found a solution:
My wife the sewing wizard addressed another stowage and convenience need aboard Cay of Sea.

We have a large-format chart book of Chesapeake Bay that doesn’t stow anywhere conveniently.  I also have several project books and a cruising log to stow.  We had been stashing the chart book underneath a settee cushion, and that works okay, but doesn’t seem very sailorly.  When the stowage of other workbooks was considered, we were in danger of endorsing clutter – something that is intolerable aboard a sailboat.  Since one of my persistent goals is to provide a place for everything and reduce clutter aboard, a dedicated stowage for flat things made sense.  At my request, it was Ruth to the Rescue.  This is what she came up with:

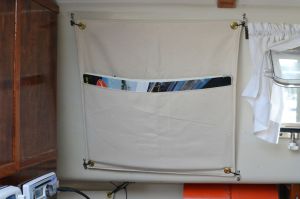
Basically, this is a canvas square (24 inches), hemmed all around, with a pocket rising from the bottom 2/3 of the way to the top.  It looks like this:
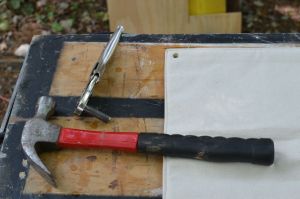
I added grommets to the corners – learning from past experienced with smashed thumbs, I used locking pliers to hold both the fabric cutter and grommet setting tool as I drove them with a hammer.
Locking pliers are essential safety equipment

I designated another portion of unused bulkhead for mounting the pocket, first carefully evaluating if it would interfere with any other operation near that location.
Blank, unencumbered bulkhead region
Blank, unencumbered bulkhead region for mounting

Then using strap eyes for attachment points, I attached the pocket to the space with zip ties.
DSC_3454
Hmmm. . . the black zip ties don’t look so good here. Maybe I’ll switch to white or clear for less contrast.

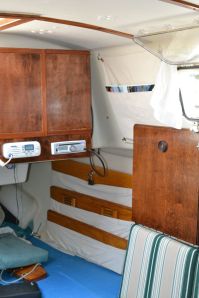
The fold-down chart table/stove support interferes a small bit.  If I put anything else in this pocket, I’ll have to shim the hook which holds the table in the stowed position.  This is an easy fix, though.
Chart table/stove support in the stowed position.  The retaining hook is a little tight with the pocket in place, but otherwise works fine.
Chart table/stove support in the stowed position. The retaining hook is a little tight with the pocket in place, but otherwise works fine.

All done. Flat stowage: check.  Thanks Ruth!

Tuesday, October 14, 2014

Navigation Station Redesign

John continues spiffing up his Catalina 30, s/v Dulcinea.  Today, his project is a complete redesign and rebuild of the nav station.  This project may be pushing the limits of what a "small" boat project is, but it is so chock full of goodies that I knew you'd want to see it!
There were a few things I didn't like about the Navigation Station..    First, the angled desktop kept everything on it sliding down, and sometimes to the floor.


there was also no place to mount the VHF radio except to the aft side, vertically.

the VHF radio mounted on the aft side of the station... this pic is taken looking down

Also, I want to eventually move all of the electrical panels to the Navigation Station, a more logical and safer location in my opinion, than the current location on the aft bulk head, where the backs of the panels are exposed to the Lazerette, albeit under the line locker, but I think it is possible that things could shift in there and come in contact with the panels, possibly shorting things out, or worse.  currently there is no place to put the panels at the nav station.

Not a great place for electrical panels... the back side is open to the Lazerette, and is near the sinks.... oh, and see the round instruments on the far right?  that is the engine hours and fuel tank indicators.... REALLY inconvenient, have to bend over the stove to read them!  What genius thought that would be a good place?

Sooooooo, A redesign of the station is in order.  First step. some boat Yoga to yank it out!

This is the downward-jam-yourself-into-small-spaces Boat Yoga position

My Brother-in-law removes the retaining board.

Halfway out!

Gone! Yuk!  37 years of dirt and grime under there!

When I dismantled the station, I discovered that the shelf that separates the top and bottom compartments was made out of Teak ply!  Bonus!  I will need this later to extend the vertical "Ears" to the bottom the deck! So I replaced this with a piece of Exterior Plywood.


Next, in my original design, I need to cut a Isosceles triangle out of the sides, but they had to be identical on each side... hmmm... ah!  I stacked them (flush in the front), and then clamped them together.  I will cut both sides at the same time! (Note I say the ORIGINAL design.... keep this in mind....)


Cut along the line with my trusty Jig saw....


here is a little trick when cutting out pieces like this... cut the first side, then put a clamp on top of that first cut, then cut out the second side.... this keeps the piece from flopping and binding the blade, not to mention from dropping to the floor after cutting the second side.


I was so happy with the way it turned out that rather than taking it back to the boat for a dry fit, I just sanded, patched, reassembled and refinished it!  This was gonna be GREAT!  I didn't even have to modify the desk top.... I thought I was going to have to cut some of it off!  (ominous music plays here)

Doesn't this look great?  Gosh I'm good!

So, being the happy camper I was, I put 6 coats of Varnish on the whole thing!


By the way, I agree with my friend Robert Salnick at WindBorne in Puget Sound on the subject of Painter's Points.... Get 'em and use 'em!


Then it was time to install it in the boat!! THIS is when I found out the FLAW in my design.... you see,  I didn't account for the shelf on the right side of the Nav station.... see the fiddle on the desktop below?  it is supposed to be an inch or so to the right, overhanging the edge of the nav station.....


Whoops!  The desktop is supposed to be an inch further to the right....  the shelf blocks it!

see how the left side has a Big over hang and the right doesn't?  This isn't gonna work....

Soooooo..... time for a redesign of the redesign.  The first step was to remove the "ears" that weren't wide enough....


removing the ears using my Dremel Multi-tool

the ear is cut off....  now for the other side....
Then I created some cardboard templates that went from the bottom of the deck to the top of the nav station... Notice there is a channel that I had to work around on the bottom of the deck. Also notice these are MUCH wider than the original "ears"

The template laid out... remember the teak ply shelf I replaced?  this is where I needed it!
Then I added a shelf to separate it into two sections, and to add some stability.  I mounted blocks so I could attach the face plate.  And what is that thing in the middle?  Stay tuned!


Building the top part of the Nav station.  the area above the shelf is for the radios..
Now to address that weird black spray painted thing in the middle.... Notice the location, just under the stereo.  You see, my stereo connects via blue-tooth to my phone or Ipod, but I needed a place to put these when underway.  So I made this little cubby hole.  Put a little bit of anti-slip material in the bottom and Voila!  It also is a great place to put pencils and pens too!


The Cubby hole for my Ipod and Phone (Ipod is in the cubby right now)
Now to take the newly fabricated top to the boat!  This time I measured Many times, so all pretty much fit like a glove. 


I needed a way to connect the upper and lower parts of the nav station, and not wanting to waste anything, I figured this was a good place to use the old ears!


YEA!  Now the desk top fits like it is supposed to!  WOO HOO..... no,  wait a minute... Uh oh....


Looks great from the front!
Darn it!  I guess I am going to somehow modify the desktop..... It sticks out WAY too far.... More measurements, and take the desktop back home...


Now I wanted to cut this desk top down, but I did NOT want to remove the fiddle rail, and I didn't want to chip the Formica top.  So, I used some tricks I learned when renovating  houses I have owned in the past...

First step is to put down painters tape so the cut line is in the middle of the tape.


Now, Normally you want to cut the counter top with the Formica side down, to virtually eliminate the chipping that will happen when it is cut.  I could not do that in this case because of the Fiddle rails, so I had to cut it the other way..... MAKE SURE you use a Plywood blade on your saw (many 32 teeth per inch or better) AND have the blade just BARELY CLEAR the top.  Then go SLOWLY. 

Blade JUST clears the counter top

the Cut is complete

Since the blade didn't cut through the Fiddle rails, I finished it off with a hand saw...


Then it was time to hold my breath and remove the tape, to see how badly it chipped......


And, amazingly, not one single chip!  Nice!


Finally I had to ease off the top corners so the desktop will open without binding.  I used my trusty belt-sander for this.  It made quick work of it! 


and now I have a finished desk top..... back to the boat for the third time!!!!! while I was doing all this, I also made a door for the top part of the Nav Station, so now it was time to install them both!


The inside of the station, under the desk top


And so this Project draws to a close.... FINALLY!   I have to find a way to make these posts a bit shorter, but this project was a big one.... I will cover the installation of the Radios and the associated wiring in a later post... this one has been long enough!  But I am really happy with the results!


LOTS of storage in here... for now. 


What'cha think?
Coming up.... Installing the radios (it will be a shorter post!  LOL)

Till next time!

JEM