Normally, one would consider replacing the standing rigging on a boat to be a
NOT small boat project. Yet, Steve and Lulu living aboard
s/v Siempre Sabado show us that, tackled one stay at a time, it is not all that difficult. If you get nothing else from this post, look at the cracked eyes on the shrouds... and then go inspect yours.
My main big job on the to-do list for La Paz was to replace all the standing rigging on Siempre Sabado. For those not in the know, “standing rigging” is the array of wire cables and fittings that hold the mast upright. You may remember that when we were in Santa Rosalia last January, I was a bit taken aback when I found, not just one, but two stainless steel eyes on my shrouds with breaks all the way through them.
Well, since it’s usually recommended that standing rigging be changed out every 10-15 years and, since I suspect the standing rigging on Siempre Sabado is original, making it 37 years old, and since there are probably other cracks just waiting to be discovered, now seemed like a fine time to change out the standing rigging.
Toward that end, I pulled out my factory drawings of the Westsail 28 to get lengths and wire sizes. Following the advice of Shannon (s/v Tink), a clever and thrifty sailor, I ordered all my wires a few feet longer than needed, with an eye machine-swaged to the upper end. Then I ordered swageless fittings for the lower end. I was lucky enough to be able to team up with Rick on s/v Calypso who was also ordering new standing rigging. Seems Rick did a solid for a fellow cruiser in La Cruz last year. The cruiser, Brook, owns a rigging shop in Portland, Oregon and offered Rick a discount on any rigging he needed. Brook let me in on the deal and so, I got a discount in return for transporting Rick’s rigging back down to La Paz from Portland.
I bought 7 lengths of 1/4″ 1×19 wire for the upper and lower shrouds and the backstay (I had already replaced the forestay and inner forestay in Newport when I installed the roller furler), 2 lengths of 3/16″ 1×19 wire for the whisker stays, 2 lengths of 1/8″ wire to hold the spreaders up when you stand on them, and one length of 3/8″ 1×19 wire for the bobstay. Each of these had an eye machine-swaged on one end. This turned out to be a mistake but only because the whisker stays and the spreader-holder-uppers should have had a fork swaged on instead. I also bought swageless studs for the turnbuckle end of the wires, new turnbuckles, swageless backstay insulators, and a few other odds and ends. For the pieces that I mis-ordered, I went ahead and ordered new swageless forks from Rigging Only and had them ship it to La Paz. There’s a story in itself. Four pieces that fit in a 5×7 padded envelope. A $155.66 (US) value. It would have cost about $27.00 to ship them down via the postoffice. But the Mexican postal service has a very bad reputation for getting things to people in a timely manner, if at all. So I opted for UPS. This was a good idea as the parts got here in about a week. Here’s the cost breakdown:
- Shipping: $68.11 (US)
- Import Fee: $425(MX) (~$34.00US)
- Handling (UPS): $35(MX) (~$2.80US)
- plus 16% IVA tax on the handling charge: $5.60(MX) (~$0.45US)
Total: $105.36(US) or 68% of the cost of the items ordered
Anyway, back to the rigging.
I started with the lower shrouds since I could reach their upper ends from the ratlines without climbing the mast. On the first one, after loosening the turnbuckle, I went up, removed the old shroud, brought it down, laid it out on the dock as a gauge for the length of the new one, cut the new one, put the swageless stud on the lower end, climbed back up and attached the new shroud to the mast, climbed back down, installed the turnbuckle on the stud, attached the other end of the turnbuckle to the chainplate, and tightened the turnbuckle up to about what I thought it should be.
Then I got smart.
On all the subsequent shrouds, I climbed up the ratlines with the new shroud in hand. Removed the old one, attached the new one, and then climbed back down. Then I attached the new turnbuckle to the chainplate, held it upright with the new wire alongside, marked the place to cut it with a Sharpie, then cut it and put the swageless fitting on the end. Much faster this way and I wouldn’t need to be tied to the dock to do it.
I used Hi-Mod swageless fittings but could just as easily have used Sta-Lock or Norseman. I really like the Hi-Mods though. Also, after I got everything cut and the fittings in place, I applied a light coat of Lewmar grease to the threaded fittings on the turnbuckles, ran the studs all the way in and then all the way out to distribute the grease and then wiped off the excess. Hopefully this will help keep them from seizing up as some of my old ones had.
I learned that bolt cutters, or at least my bolt cutters, did a terrible job of trying to cut the cable. I had much better luck with a thin cutting blade on my angle grinder. It cut it fast and straight.
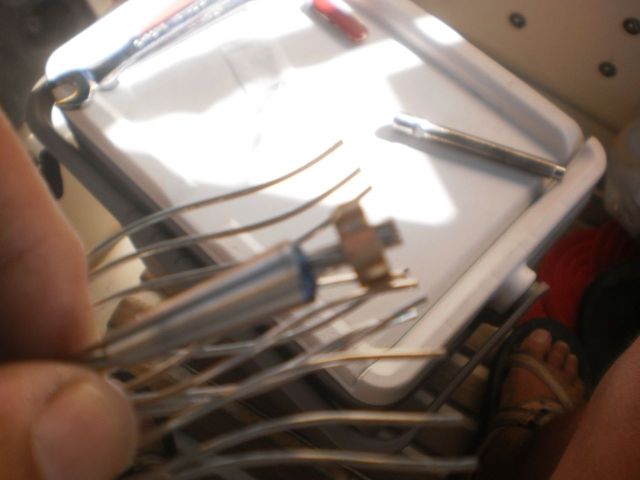
Here’s how the Hi-Mod swageless fittings are installed:
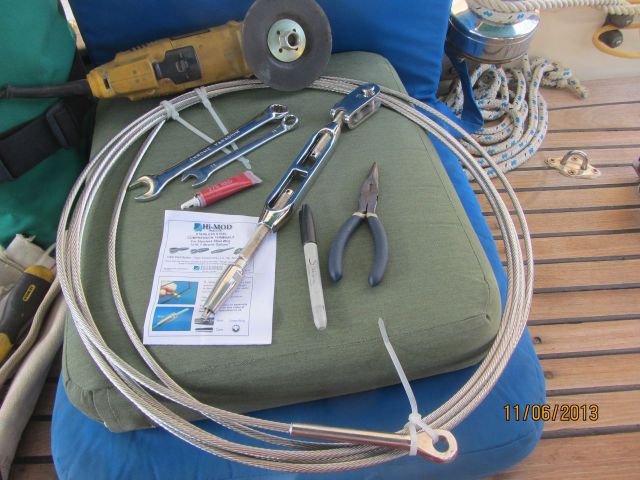 |
Assemble your tools. Don’t forget the instruction sheet, at least for the first one.
|
 |
After cutting the cable to the right length, slip the ferrule over the cable.
|
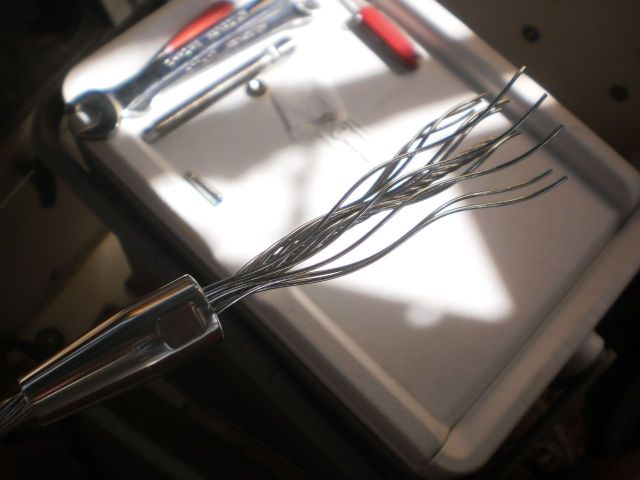 |
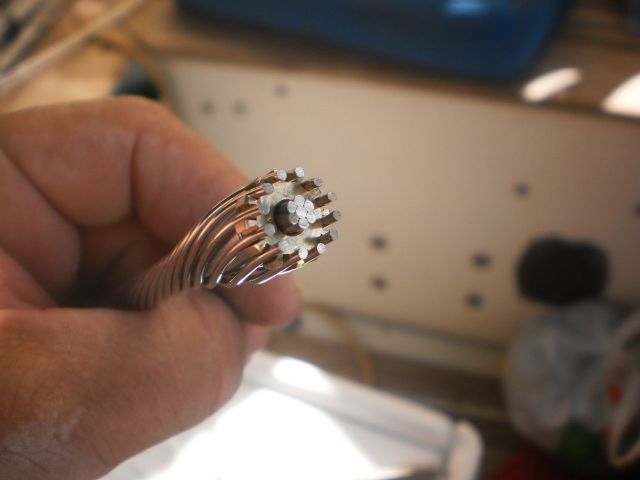
Unlay the outer wires, leaving the twisted core intact.
|
 |
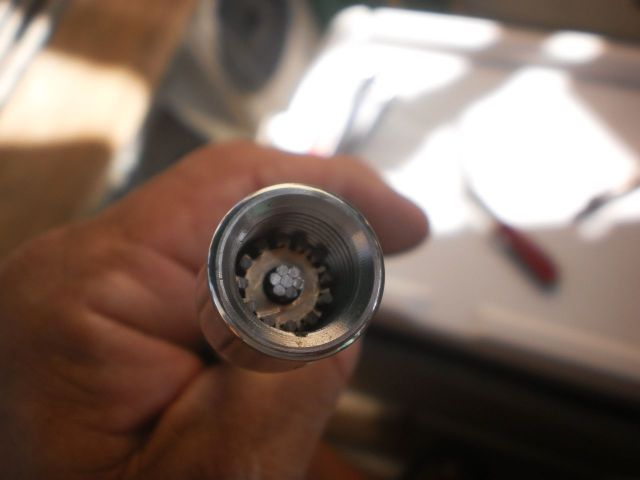
| Then put the cone, followed by the crown over the inner core. The crown in particular is a tight fit. You use the piece that’s going to screw into the ferrule as a pusher. The indent in the end assures that the crown is installed exactly as far down the wire as it’s supposed to be. Sorry about the focus, or lack thereof. |
 |
| Wrap the outside wires back around the core and the cone. One wire should end up in each groove in the crown. This is probably the hardest part and it’s not particularly hard at all. |
 |
Slide the ferrule back up to make sure things look copasetic.
|
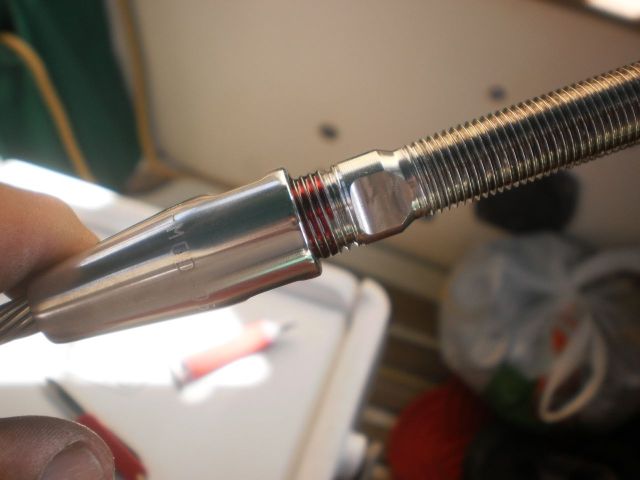 |
| Add a little bit of red thread-locking compound to the threads of whatever end piece you’re using (this is a stud), and screw it into the ferrule. |
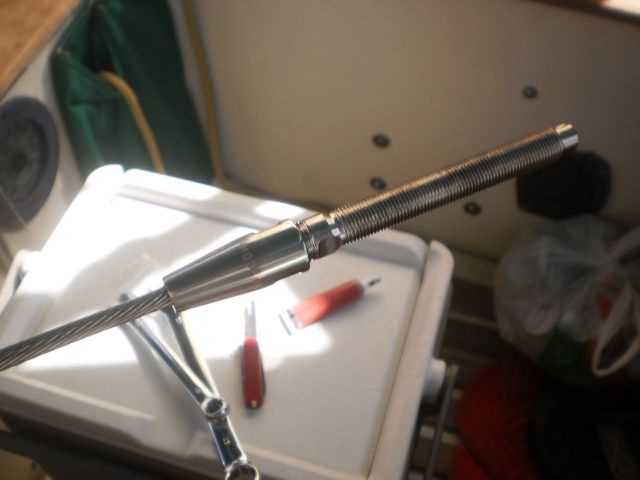 |
| Hi-Mod stresses that the most likely cause of failure of one of these fittings is overtightening. I used the end wrenches shown and tightened the fitting until it was “just up against” and then a skosh more. Hopefully that was exactly the right amount. |
By the way, when I did the upper shrouds and the backstay, I rigged a halyard to act as a temporary stay to replace the one I was removing.
I still have to do the bobstay but that requires launching the dink so I’m waiting for the northers to die down first. The next step will be to properly tension the wires. I’ve ordered a Loos tension gauge and will pick it up when we go up to Oregon for the holidays. I’m sure our friend Jay on s/v Wind Raven would have loaned me his but I want to have one on board so I can periodically check and adjust the tension as-needed.
The one thing that bothers me a little bit about this rerigging job is that so many people seem to be so impressed that I would tackle it, having never done it before. Unless I’m really missing something, I just don’t see what the big deal is, other than having to go up the mast a bunch of times. If someone knows, please tell me before I put this rig to the test and find out the hard way.
Oh, by the way, almost every wire I removed had either a very obvious problem or an impending problem with the swaged fitting on at least one end.
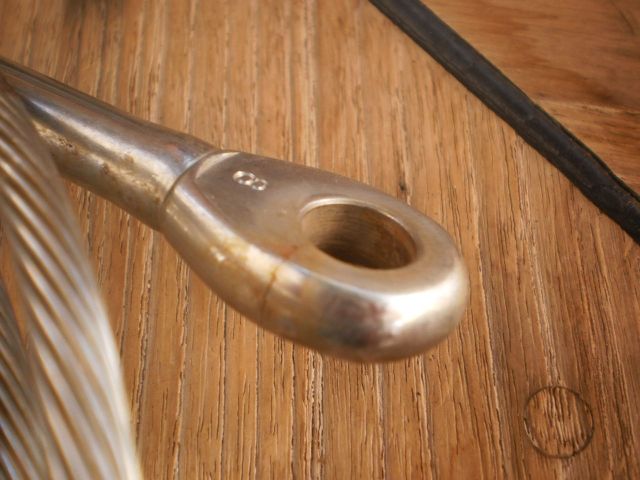 |
| One of the old fittings. When under tension, this crack was open. |
There you have it. I probably should have changed the chainplates and mast tangs as well. I did inspect them and found no apparent problems. Let’s hope things stay that way.